
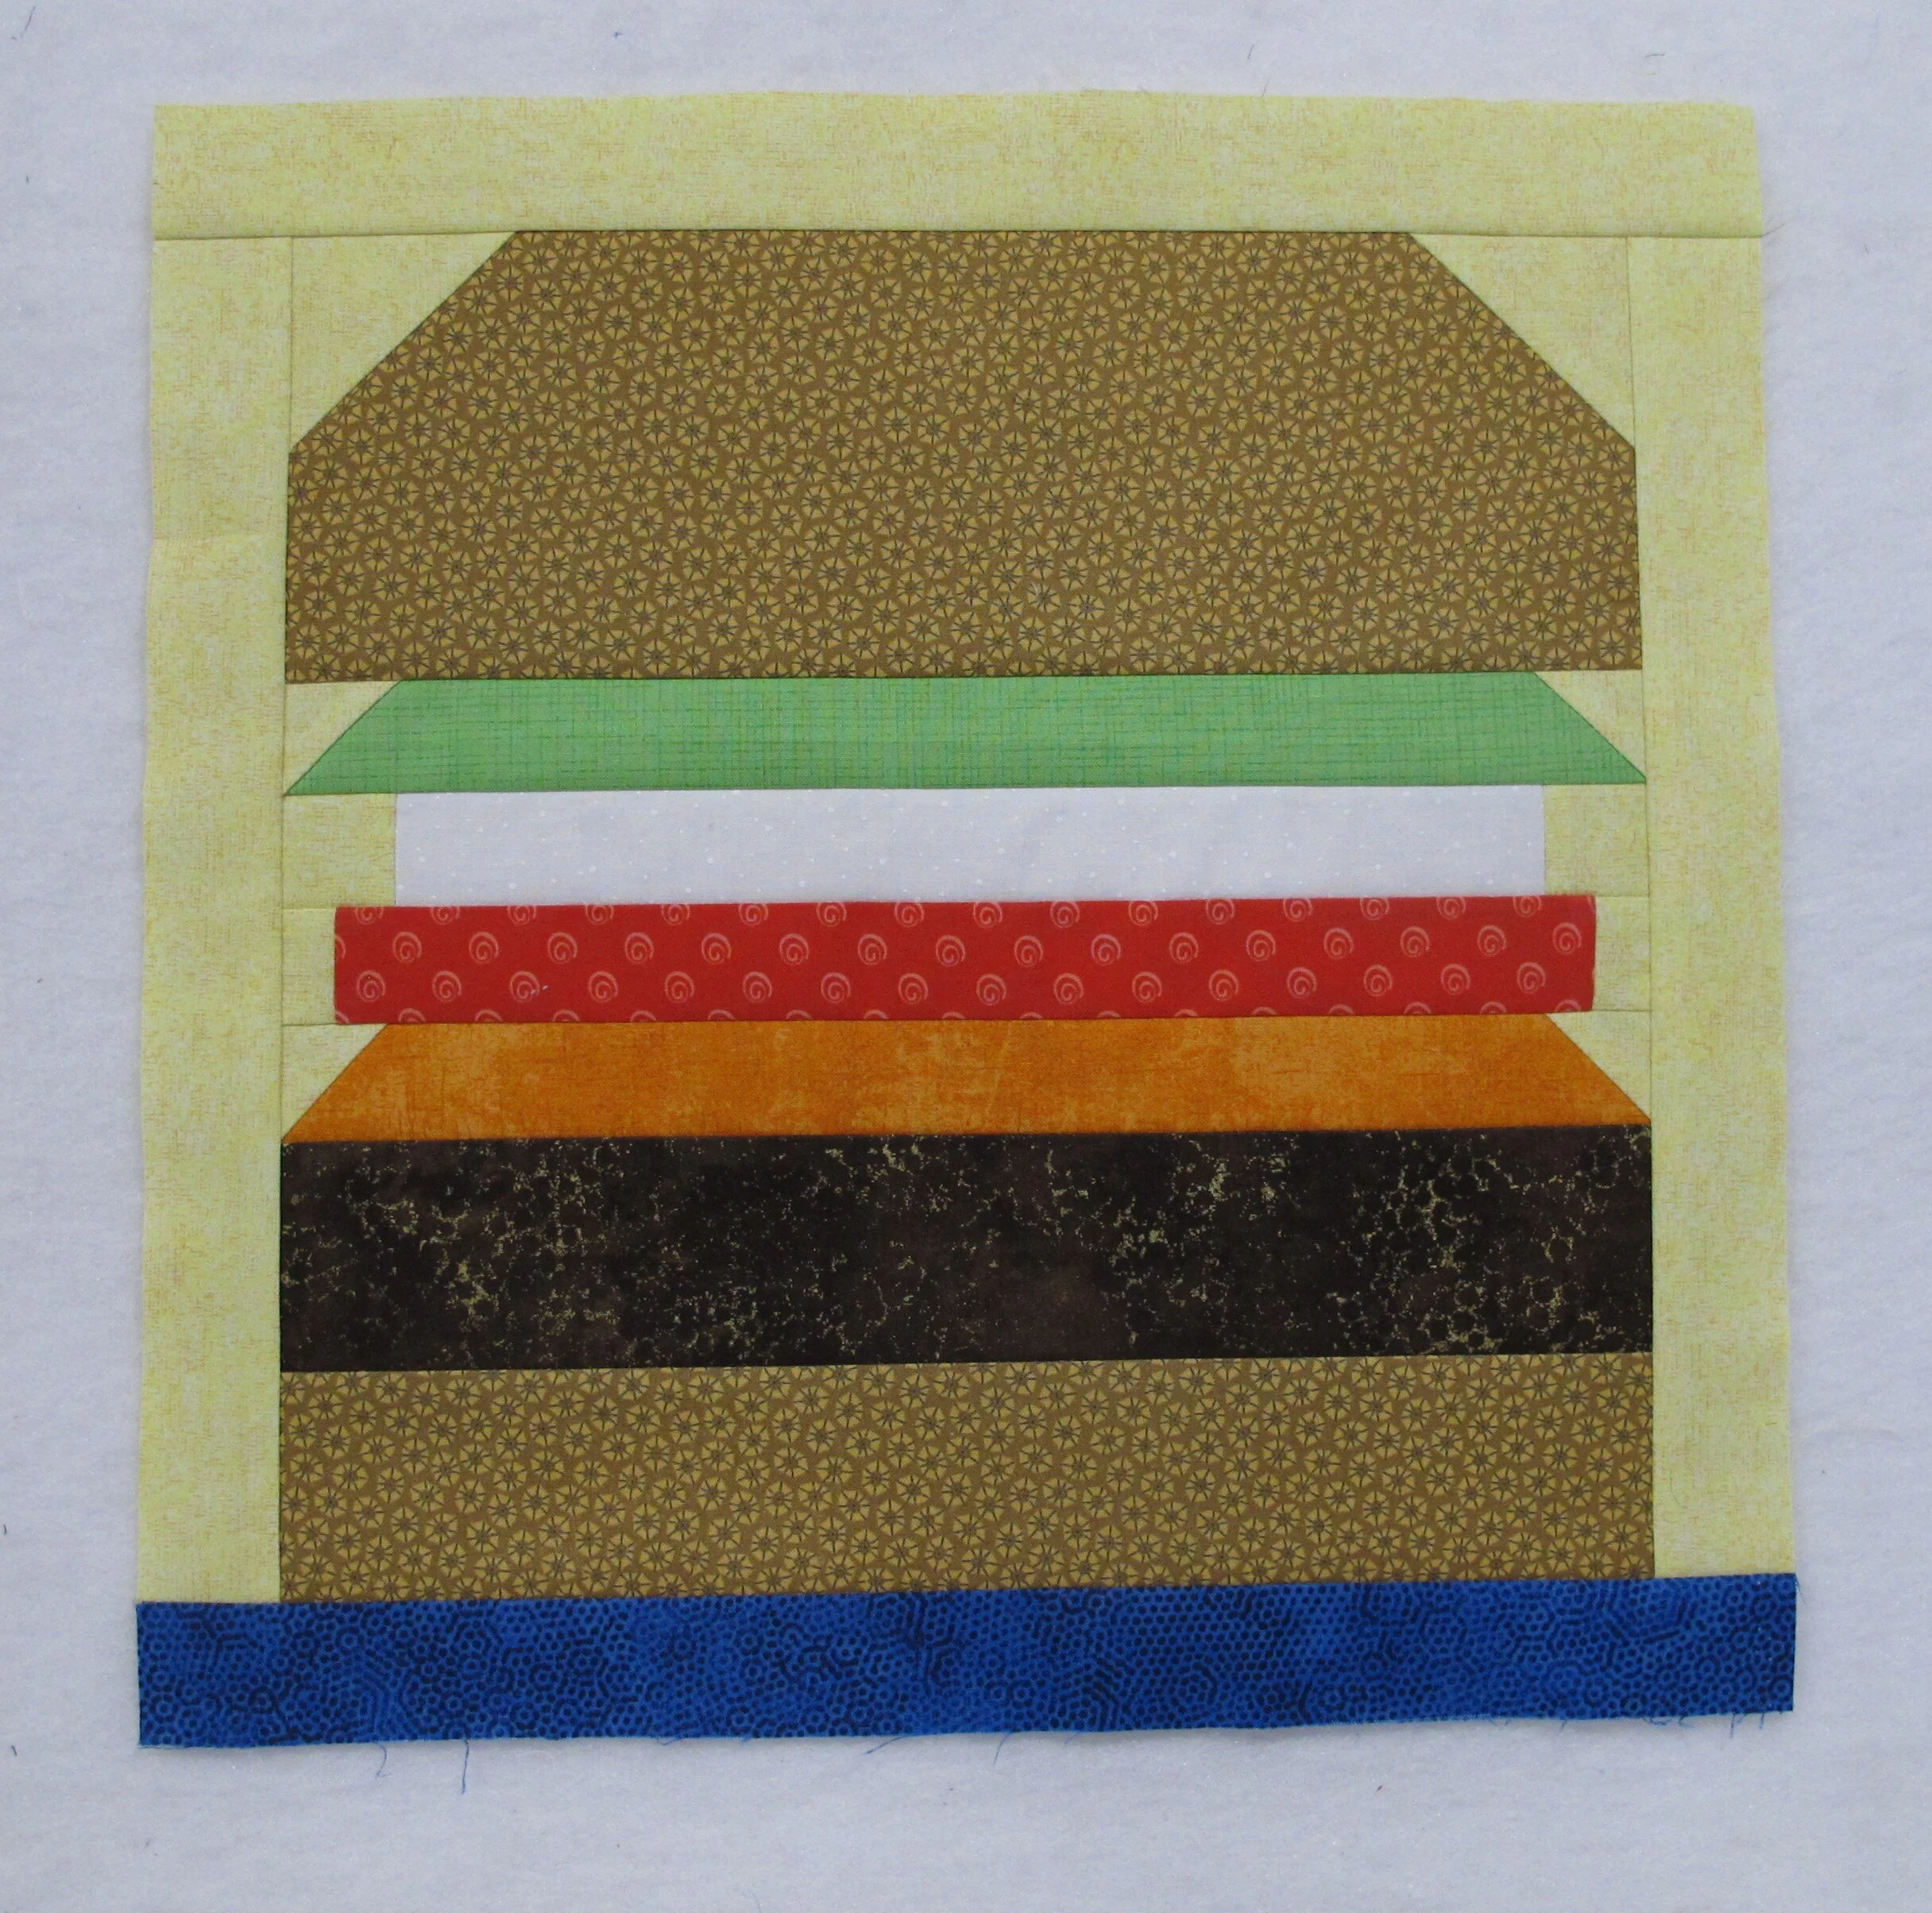
July Block-Cheeseburger
The smell of burgers cooking on the barbeque always remind me of family get-togethers on hot summer days. Throw in a cold brewski and you’ve met the criteria for all the food groups…right?!
(***scroll to the bottom of the page for a printable PDF version of this pattern)
Cutting Instructions (for one 12” finished block):
From the background fabric (yellow on sample):
cut 2 strips 1 ½” x 12 ½”
cut 1 strip 1 ½” x 14 ½”
cut two 2 ½” squares (draw a diagonal line on the back of both of them)
cut six 1 ½” squares (draw a diagonal line on the back of four of them)
cut two 1” x 1 ½” rectangles
From the following fabrics:
dark brown (burger)- cut one 2 ½” x 12 ½” strip
orange (cheese)- cut one 1 ½” x 12 ½” strip
red (tomato)- cut one 1 ½” x 11 ½” strip
white (onion)- cut one 1 ½” x 10 ½” strip
green (lettuce)- cut one 1 ½” x 12 ½” strip
light brown (bun)- cut one strip 2 ½” x 12 ½”, cut one strip 4 ½” x 12 ½”
blue (plate)- cut 1 strip 1 ½” x 14 ½”
Outer border fabric (.25 m / ¼ yd): *** you might not want to cut the outer border lengths until your block is completed with narrow background borders in case seam allowances are not consistent
cut two 3 ½” WOF (width of fabric) strips (cut one 14 ½” and one 20 ½” length from each strip)
Binding: three 2 ½” strips (.25 m / ¼ yd)
Backing: one piece 23” square
Batting: one piece 23” square
Hanging sleeve: one piece 5” x 20 ½”
Sewing instructions:
*** ¼” seam allowances are used throughout. Refer to my Scant Quarter Inch tutorial for your own perfect ¼” seam.
Tomato (figure 1):
stitch a 1” x 1 ½” background rectangle to each end of the 1 ½” x 11 ½” red strip
Onion (figure 1):
stitch a 1 ½” background square to each end of the 1 ½” x 10 ½” white strip
Top bun section (figure 2):
with right sides together place a 2 ½” background square on the top left and top right of the 4 ½” x 12 ½” light brown strip as shown and stitch along the drawn line. Trim the seam allowance to ¼” and press to the triangle.
Cheese (figure 2):
with right sides together place a 1 ½” background square on each end of the 1 ½” x 12 ½” orange strip as shown and stitch along the drawn line. Trim the seam allowance to ¼” and press to the triangle.
with right sides together place a 2 ½” background square on the top left and top right of the 4 ½” x 12 ½” light brown strip as shown and stitch along the drawn line. Trim the seam allowance to ¼” and press to the triangle.
Lettuce (figure 2):
with right sides together place a 1 ½” background square on each end of the 1 ½” x 12 ½” green strip as shown and stitch along the drawn line. Trim the seam allowance to ¼” and press to the triangle.
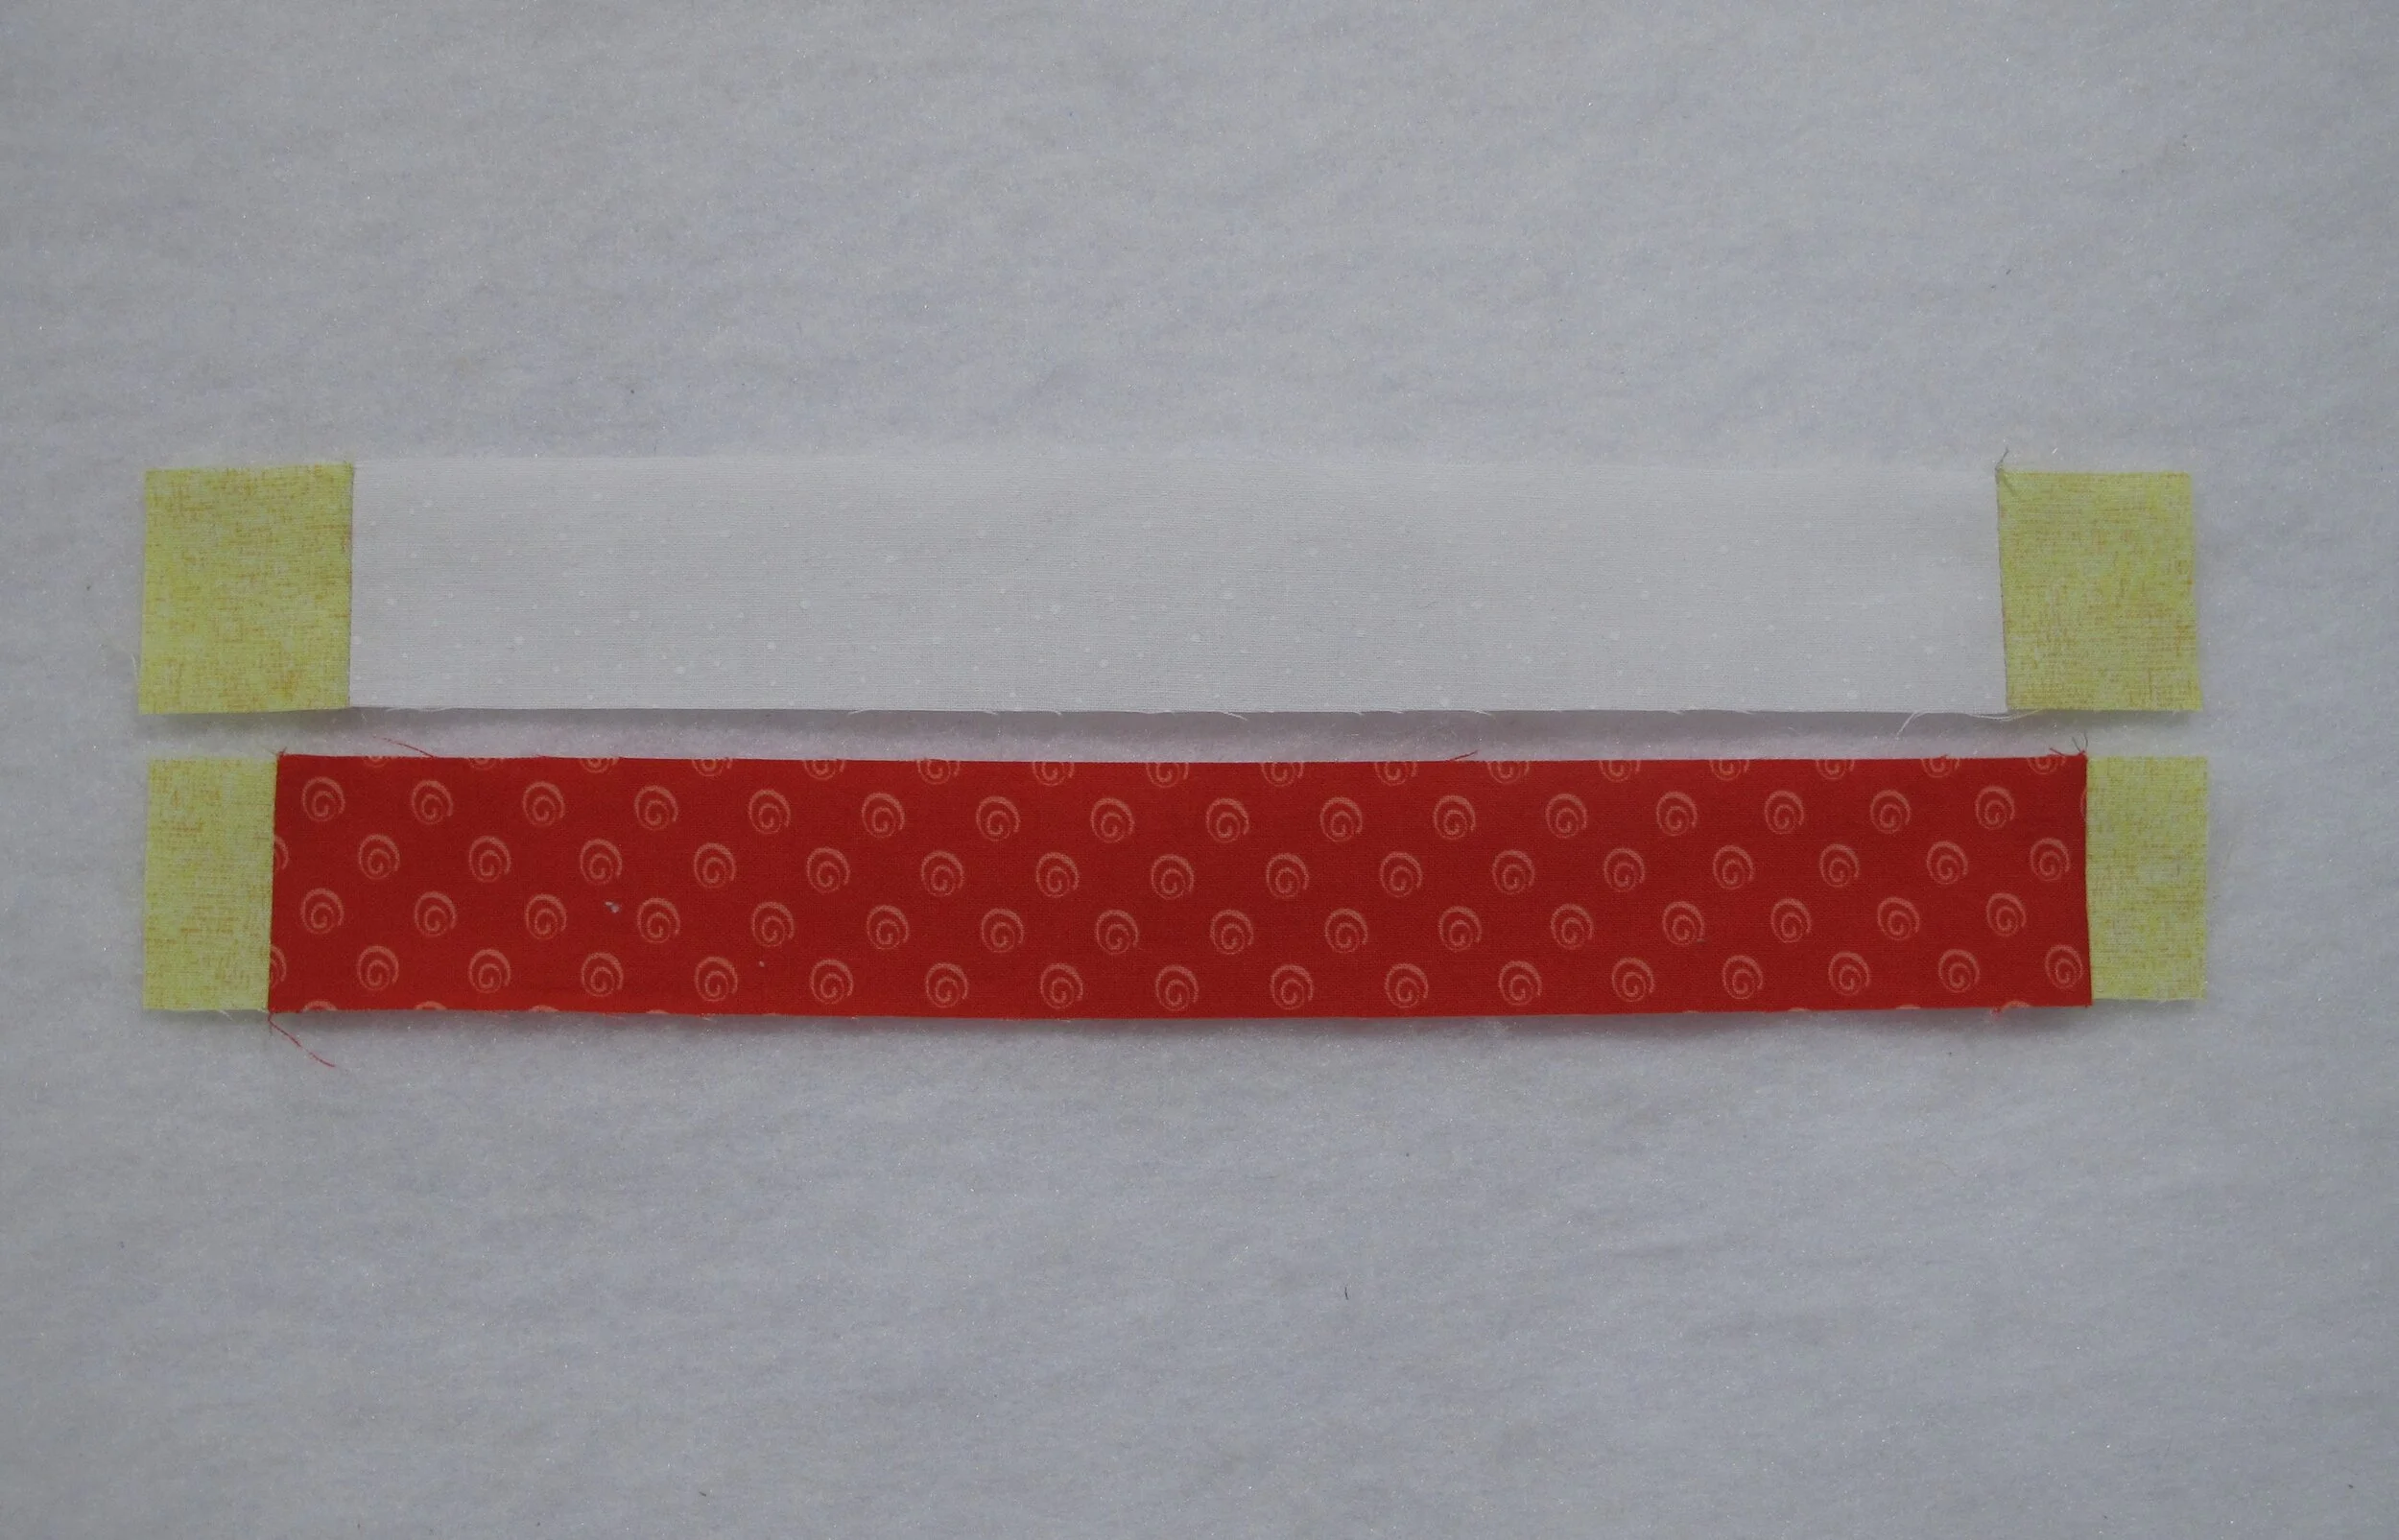
figure 1
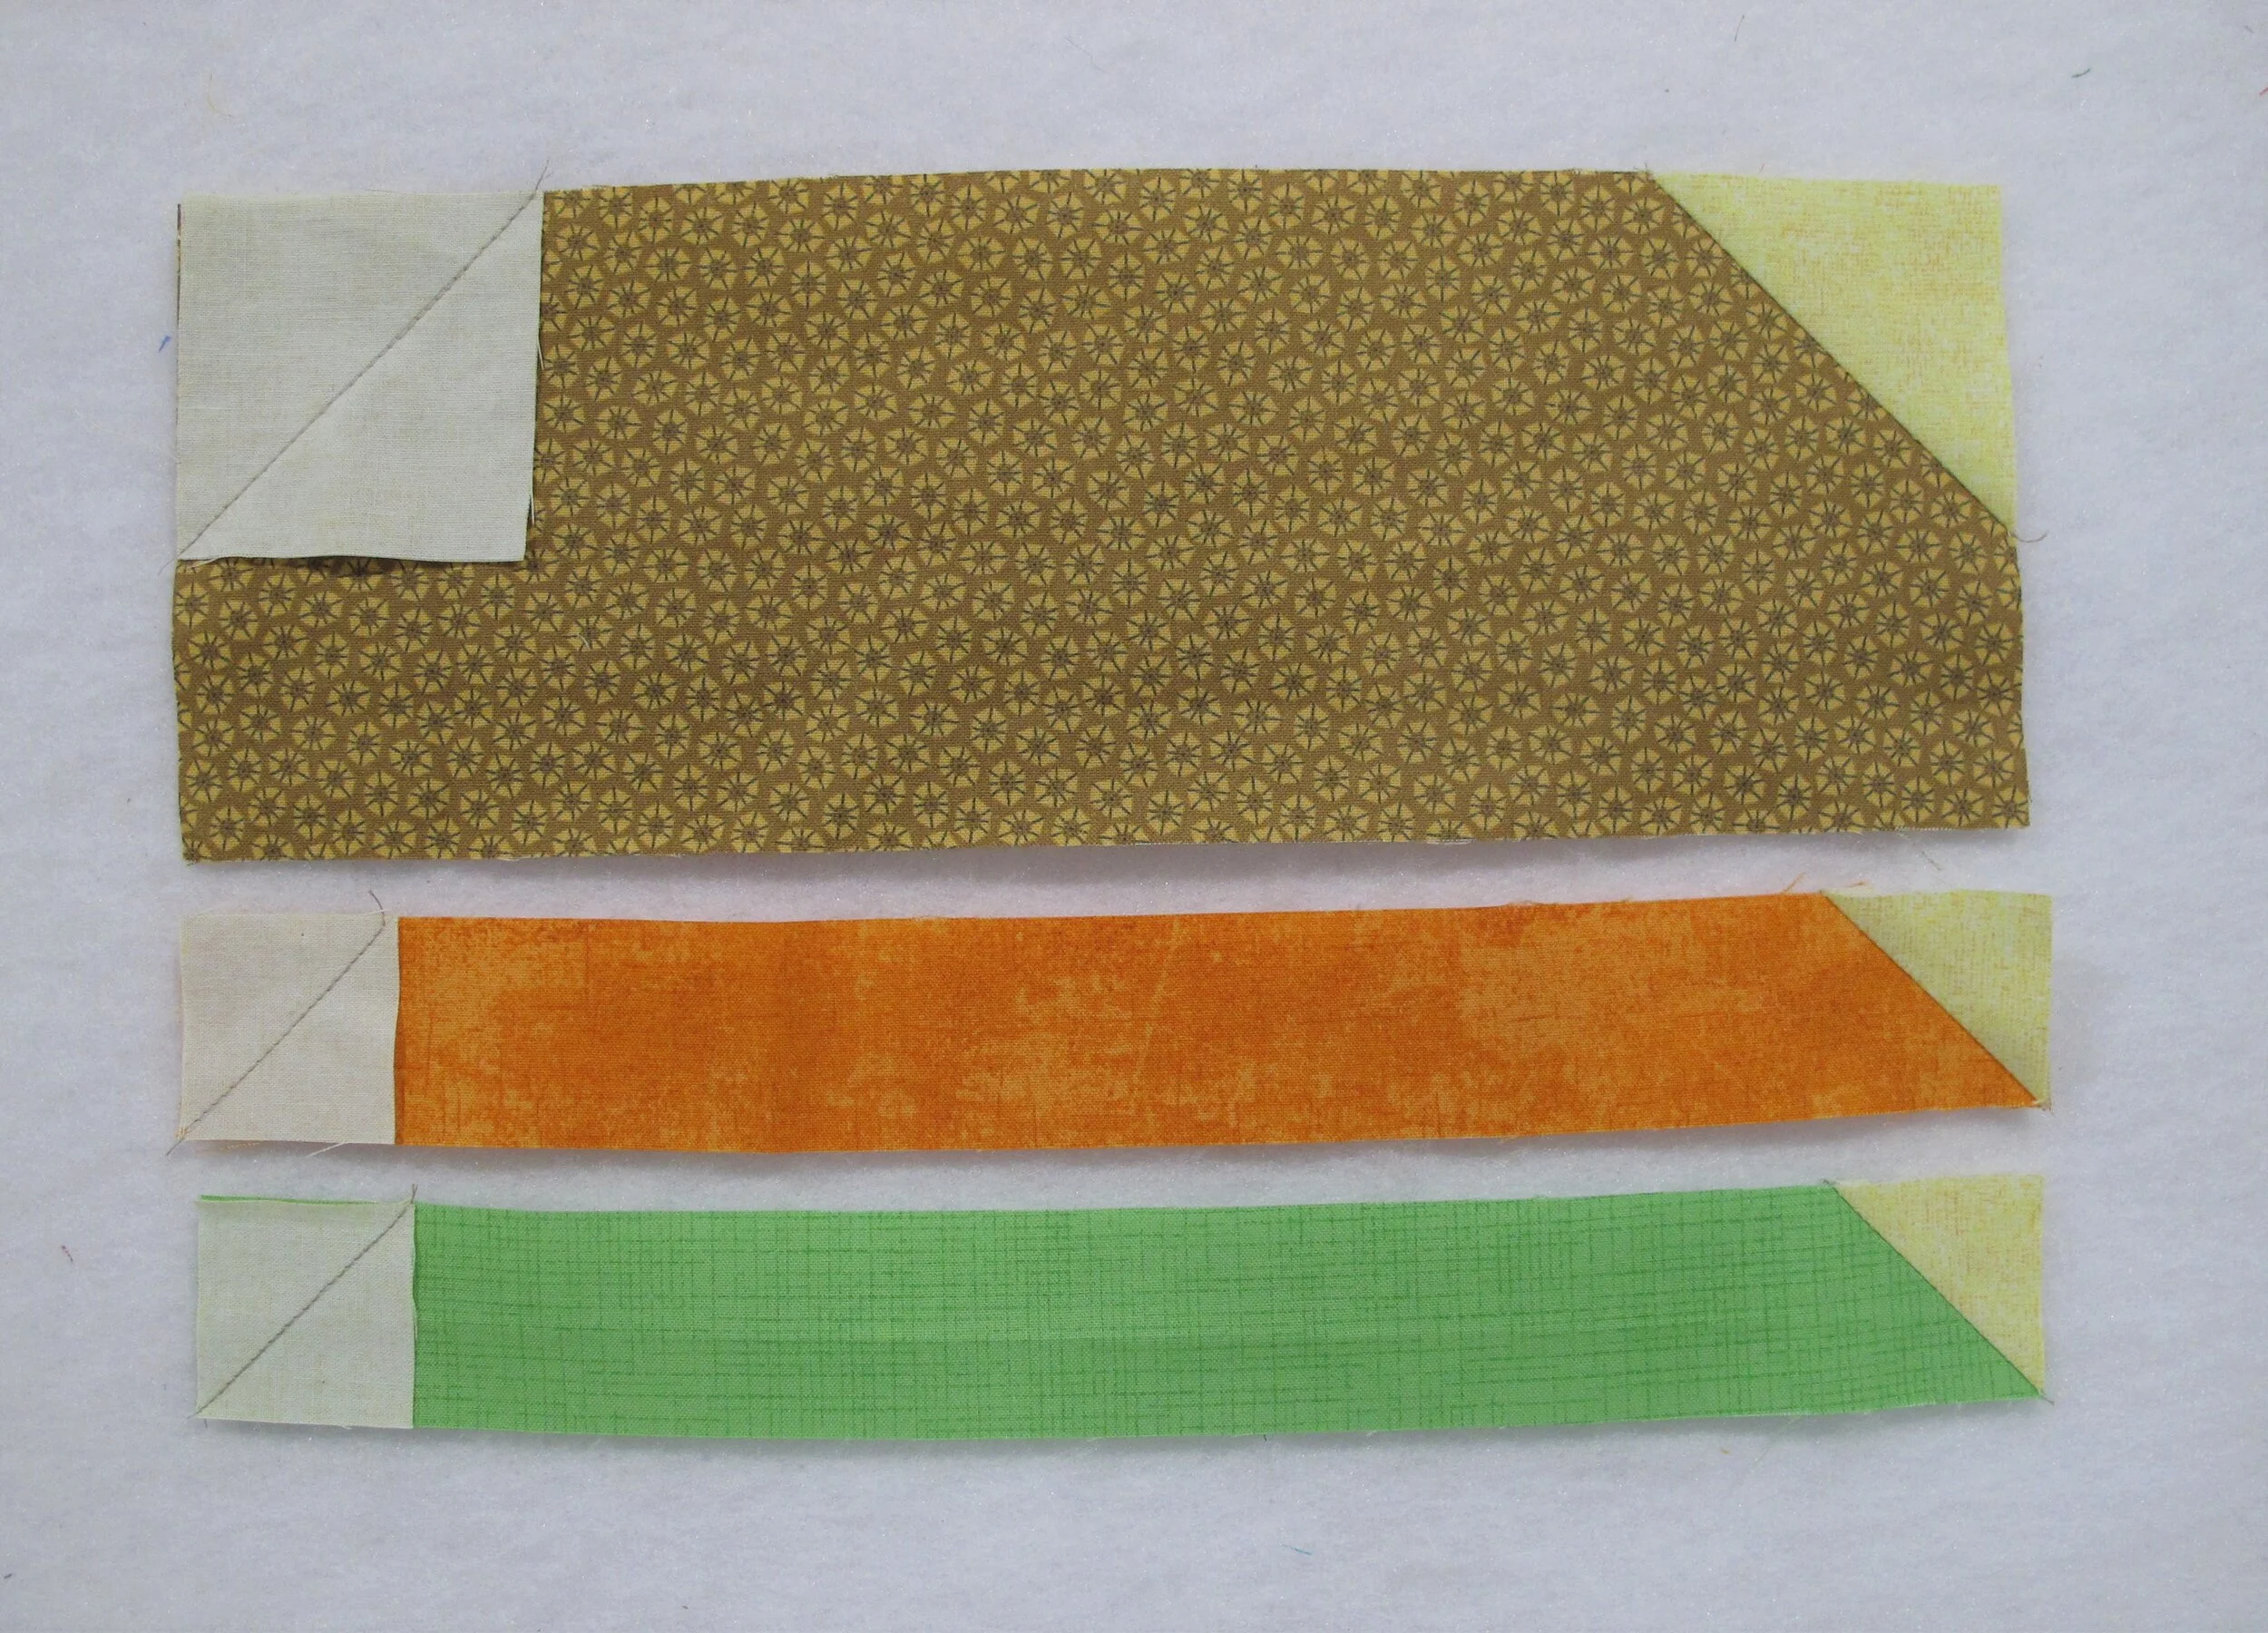
figure 2
Block layout:
lay out the different “burger” segments by following the photograph below for placement (figure 3)
stitch all rows together (figure 4)
press seams in any direction that works best...the only one I was careful with was pressing away from the onion so there wouldn't be shadowing of other colours on the white
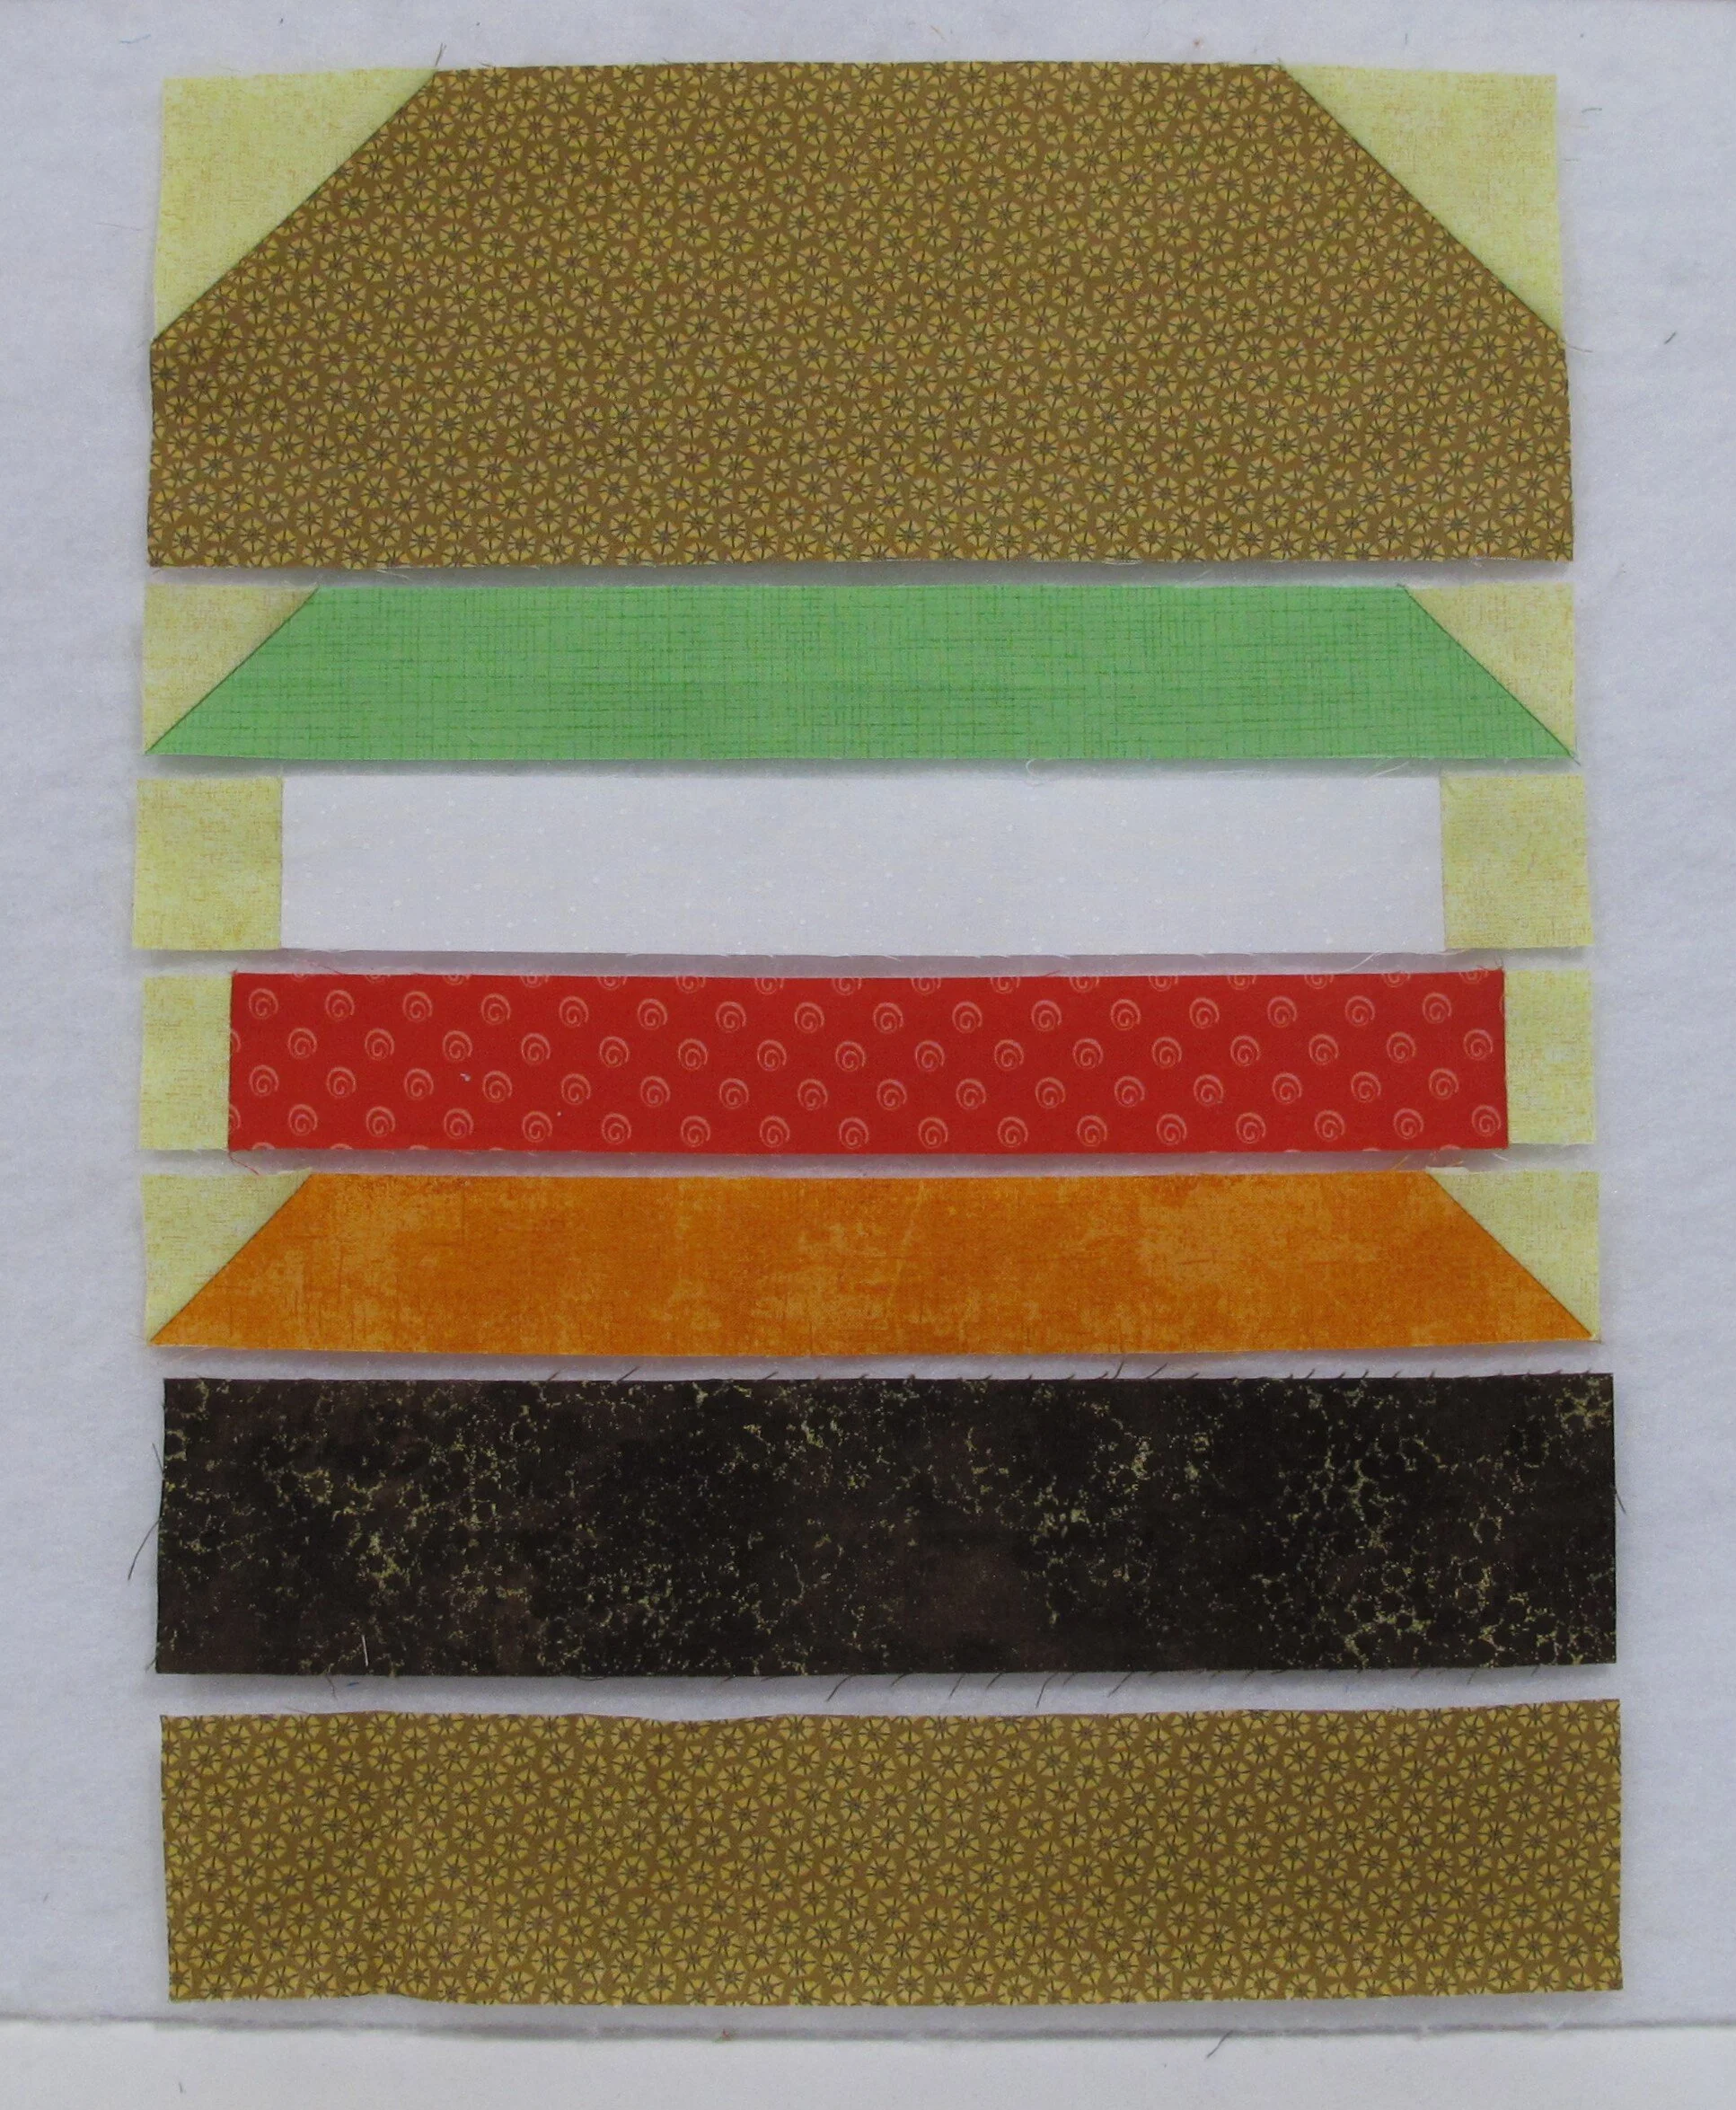
figure 3
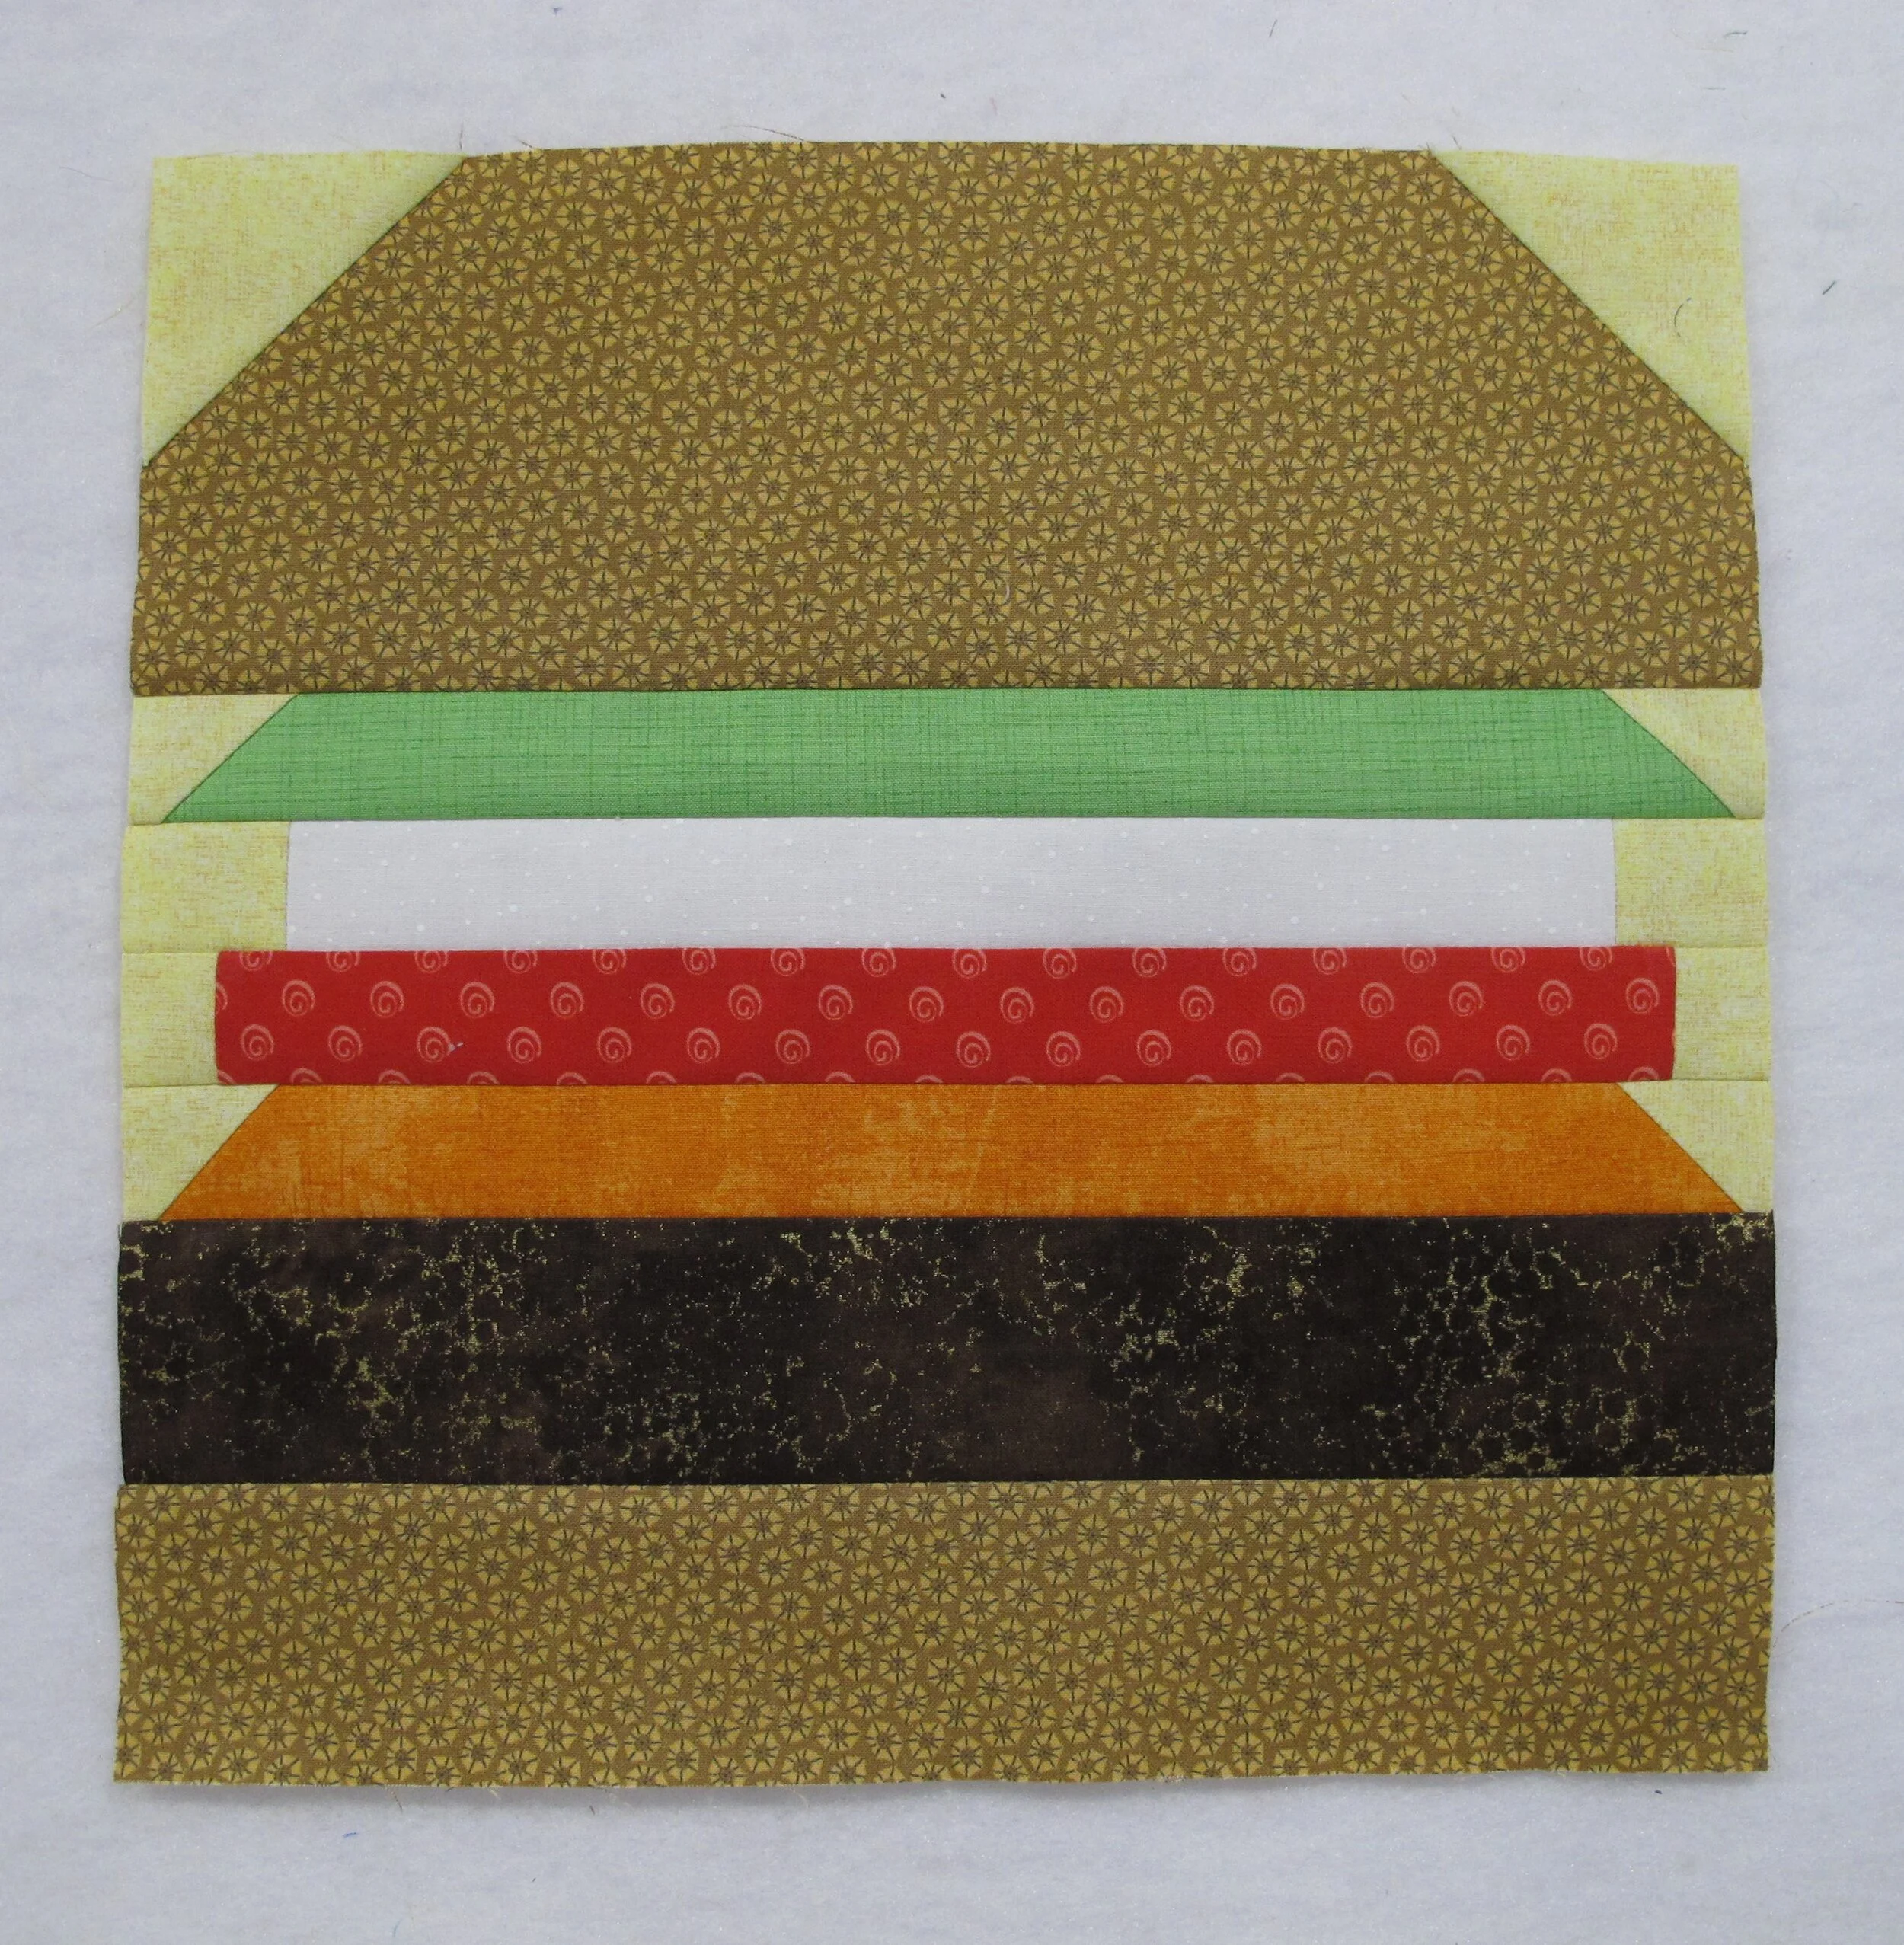
figure 4

Narrow borders (figure 5):
stitch the 1 ½” x 12 ½” yellow background strips to the sides of the block and press seams toward the strips
stitch the 1 ½” x 14 ½” yellow background strip to the top of the block and press seam toward the strip
stitch the 1 ½” x 14 ½” blue strip to the bottom of the block and press seam toward the strip
*** If you plan on making a calendar quilt, just stop with this completed block. If you want to make a wallhanging follow the instructions below.
Outer border:
stitch 3 ½” x 14 ½” outer borders to the sides of the block and press seams towards the borders
stitch 3 ½” x 20 ½” outer borders to the top and bottom of the block and press seams towards the borders
Finishing:
layer the backing, batting and top together and either spray-baste or pin-baste the layers together
quilt as desired, also run a straight stitch within the seam allowance all around the outer edge...this stabilizes the edge for applying the binding
trim backing and batting even with the quilt top
follow my Hanging Sleeve tutorial
centre the hanging sleeve on the top edge of the back of the wallhanging and either machine baste (using extra long stitches) or pin it in place
apply the binding using your preferred method (the hanging sleeve will be stitched in place as the binding is sewn on) or follow my Best Ever Binding tutorial