
Best Ever Binding!
This particular binding tutorial is for a binding sewn completely by machine. I highly recommend using a walking foot so the layers don't shift as the binding is attached.
***scroll to the bottom of the page for a printable PDF
***Please note...this method works best for bindings that are put on a quilt with borders or extra background around blocks...if you have blocks that come to the edge of the quilt this method will knock off star points, etc.
Cutting/prepping the binding:
The binding cut for this sample is 2 ½” wide because I use a slightly larger than ¼” seam allowance for mine. Many people, especially if they stitch the binding down on the back by hand, use 2” or 2 ¼”. The only way to find out what your personal favourite technique is is to try a few different methods.
Once binding strips are cut from the width of the fabric (selvedge to selvedge) the selvedge ends need to be trimmed off at a 90º angle to get a perfectly squared off end. (*** I personally never use bias binding on my quilts unless I'm making a quilt with scalloped or curved edges.)
Sewing the strips together:
Stitch the binding ends together with a diagonal seam. The diagonal seam allows the bulk of the seam allowance to be distributed evenly across a few inches rather than in one big lump. I usually just “eyeball” the diagonal seam lining up the binding edges together without drawing a line (figure 1), but if you're a newbie I recommend off-setting the binding edges so you can see the bottom binding strip and drawing a line to stitch on (figure 2).

Figure 1

Figure 2
Chain piece the binding strips together (figure 3). Trim seam allowances to ¼” and press open.
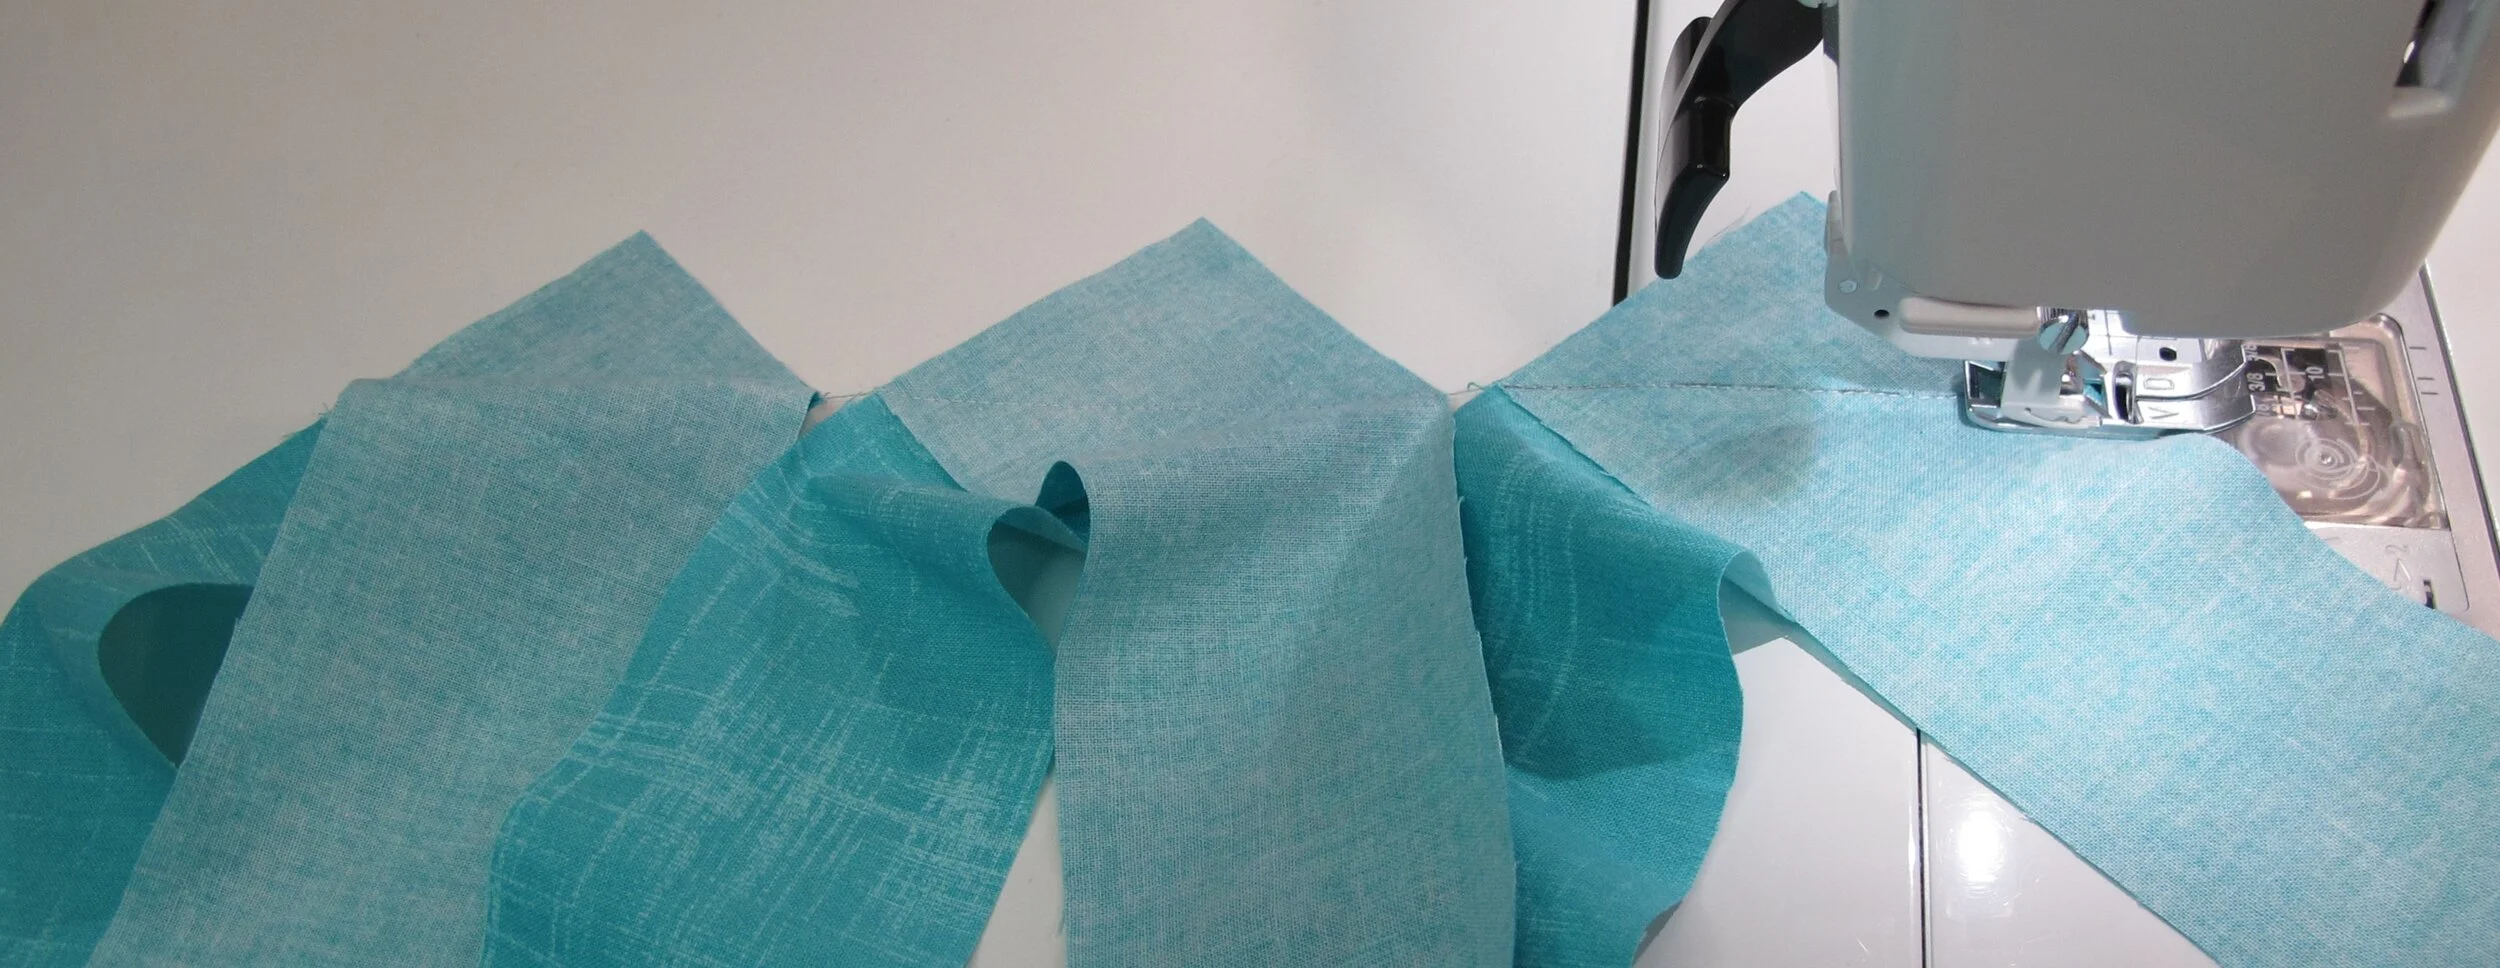
Figure 3
Press the full length of binding in half with wrong sides together (figure 4).
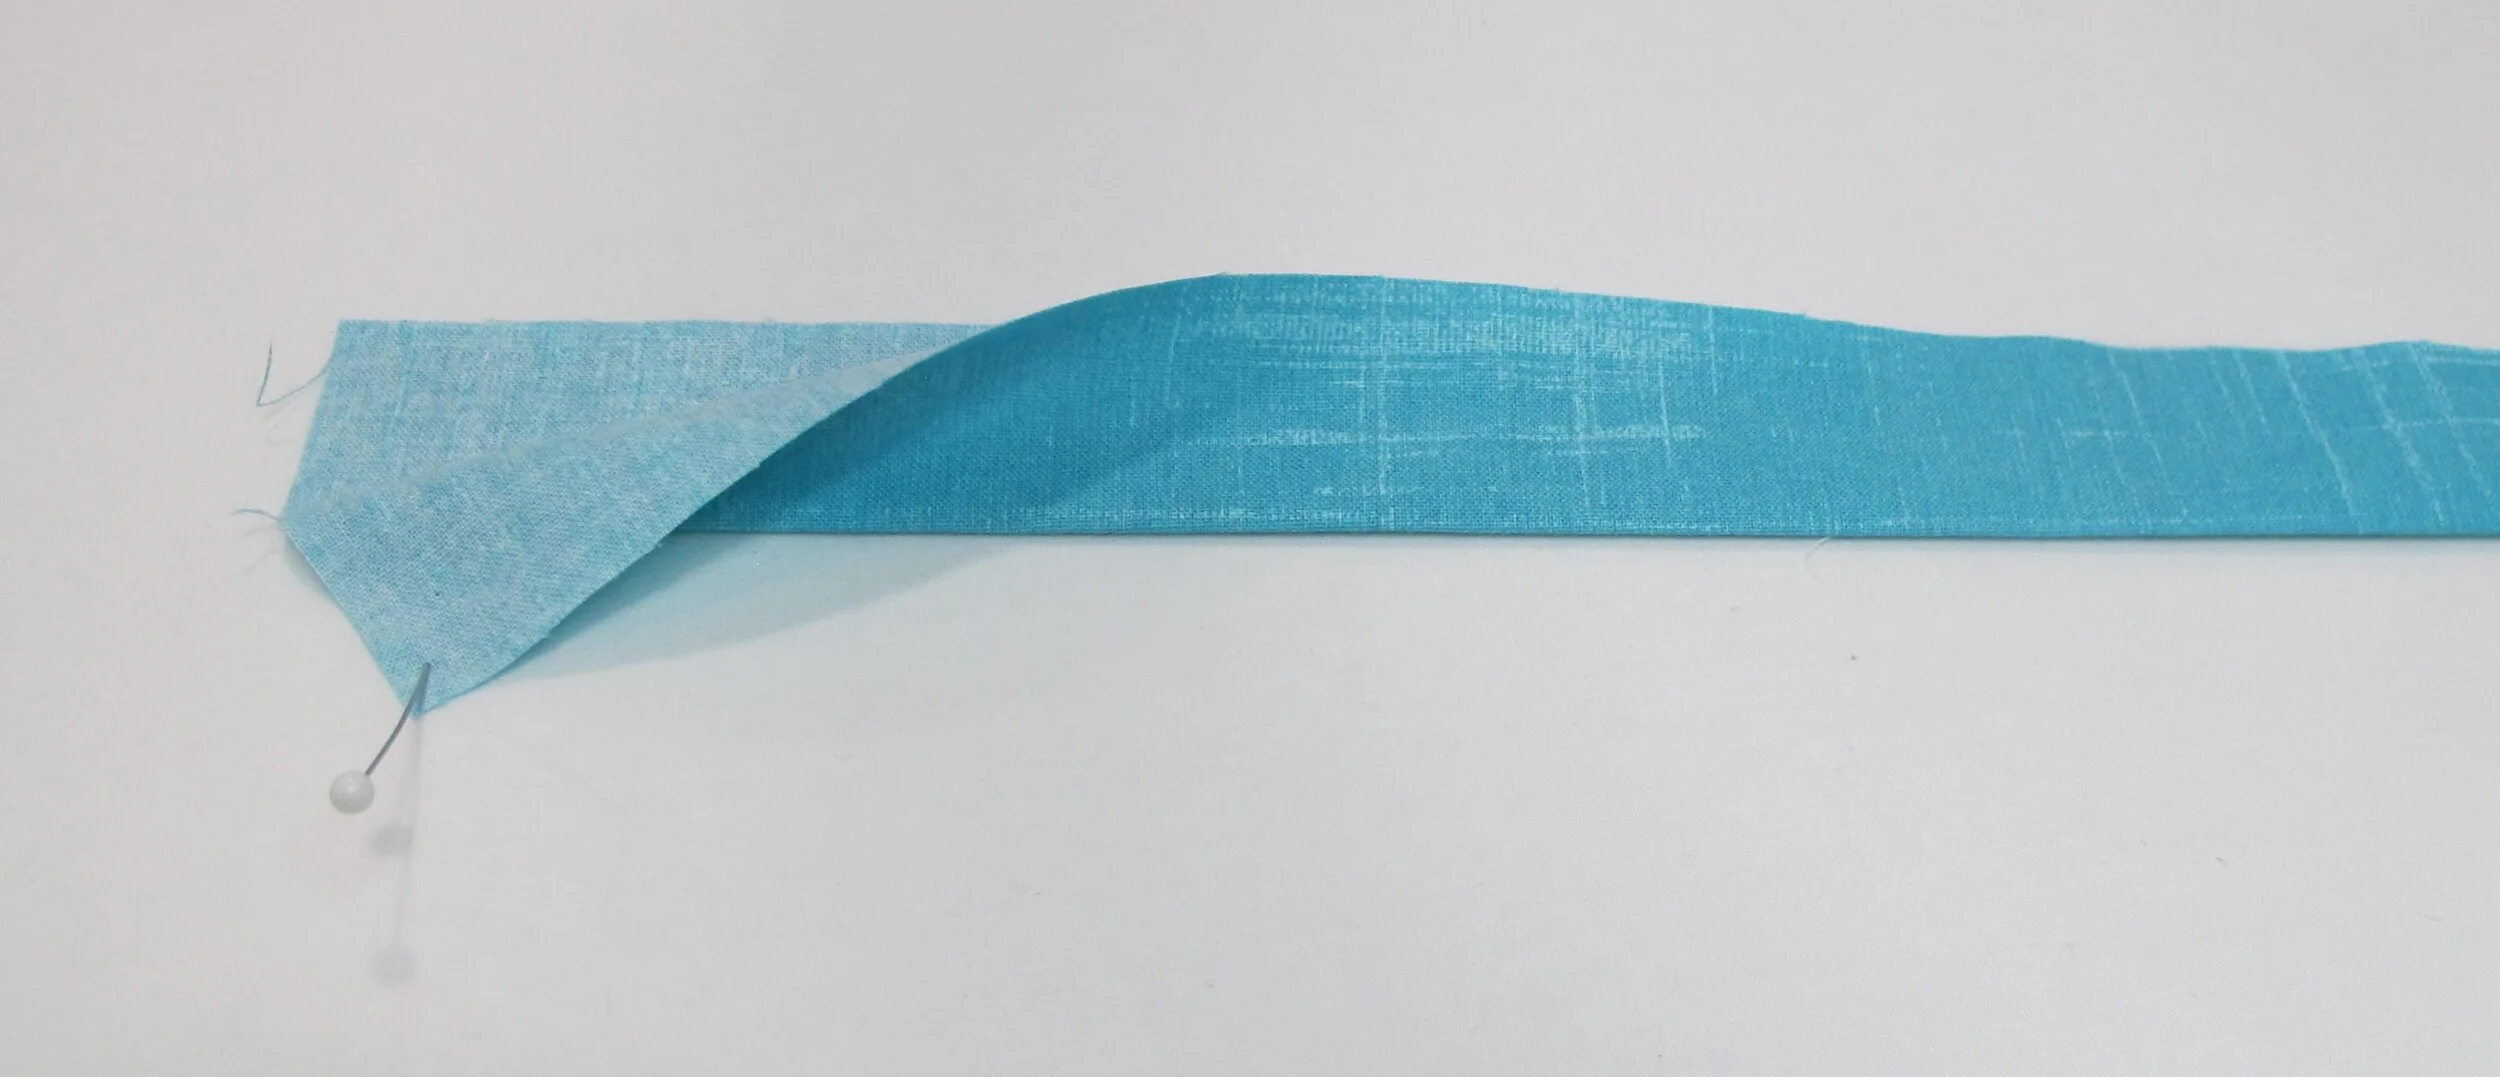
Figure 4
Note: #12 Topstitch needle was used for stitching on the binding
This particular method has the binding attached to the back and then brought around to the front for finishing. Starting somewhere in the middle of one of the long sides of the quilt leave a “tail” of about 8” (shown in figure 5) before you start stitching the binding on. This makes it so much easier to stitch the binding strips together when they meet at the other end.
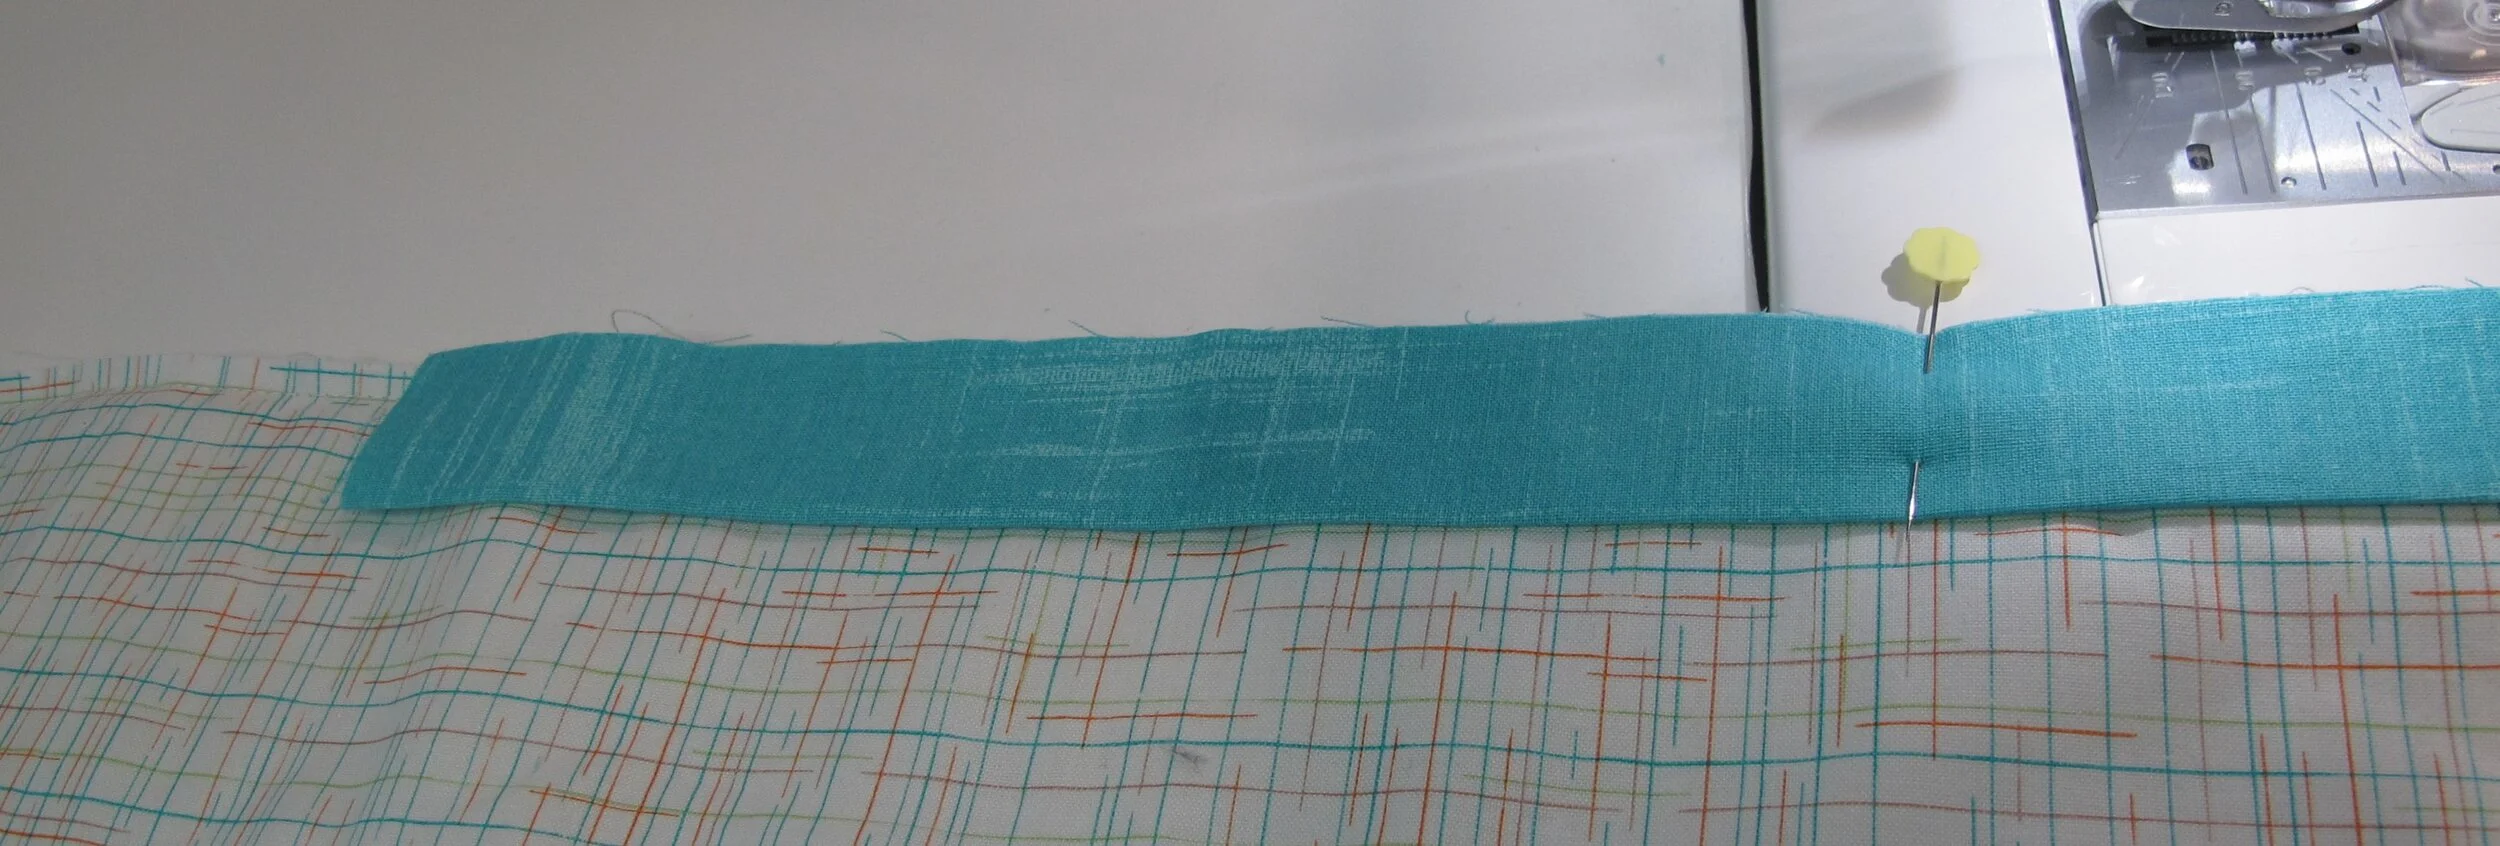
Figure 5
Use this opportunity to “test” what size of seam allowance you'll need to use for your own binding to be successful. It also depends on the walking foot that you own...there might be a spot on the foot that you can line up against the edge of the quilt. Follow the steps below that I took to get my perfect seam allowance for binding my quilts.
I know from putting on countless bindings what my personal set-up is. My seam allowance is right is the middle between ¼” and ⅜”. There is an opening on my walking foot on the right hand side and I line up the edge of my quilt with the right hand edge of that opening.

Figure 6
With this seam allowance (figure 7) I know that when I bring the binding around to the front it will cover the seam with a little extra space for the actual stitching line (figure 8). Try this method with your own walking foot until you get the one setting that works for you. Then be sure to write it down so you’ll remember for next time.
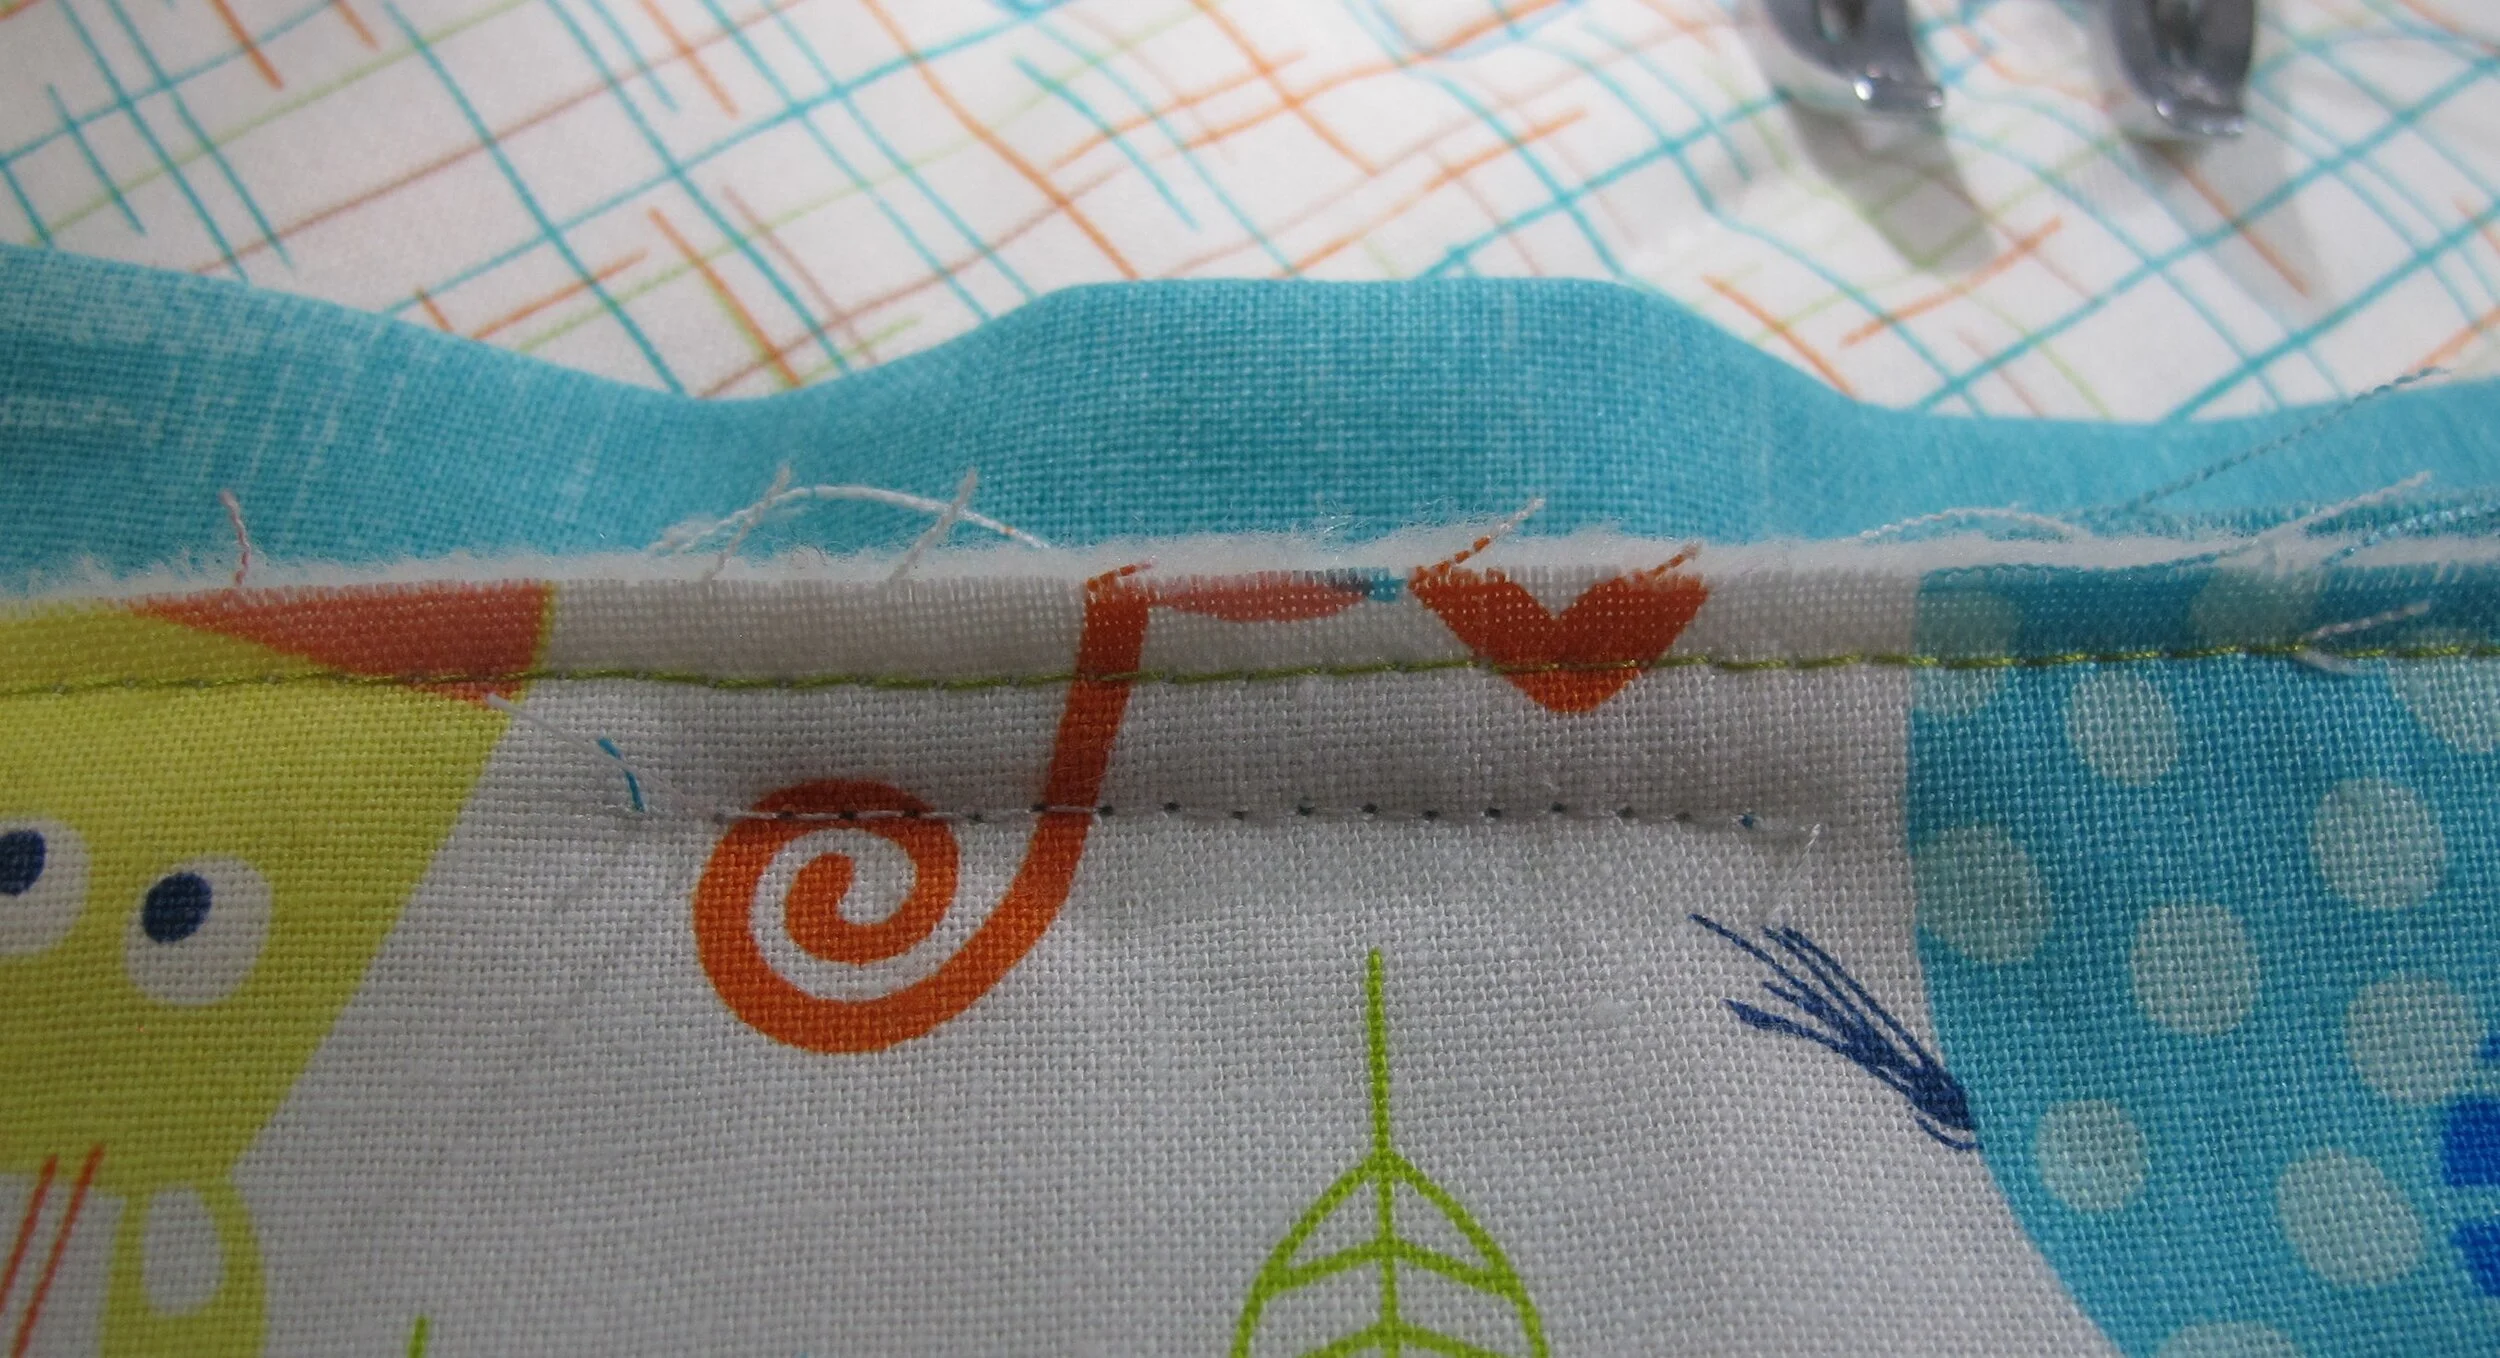
Figure 7

Figure 8
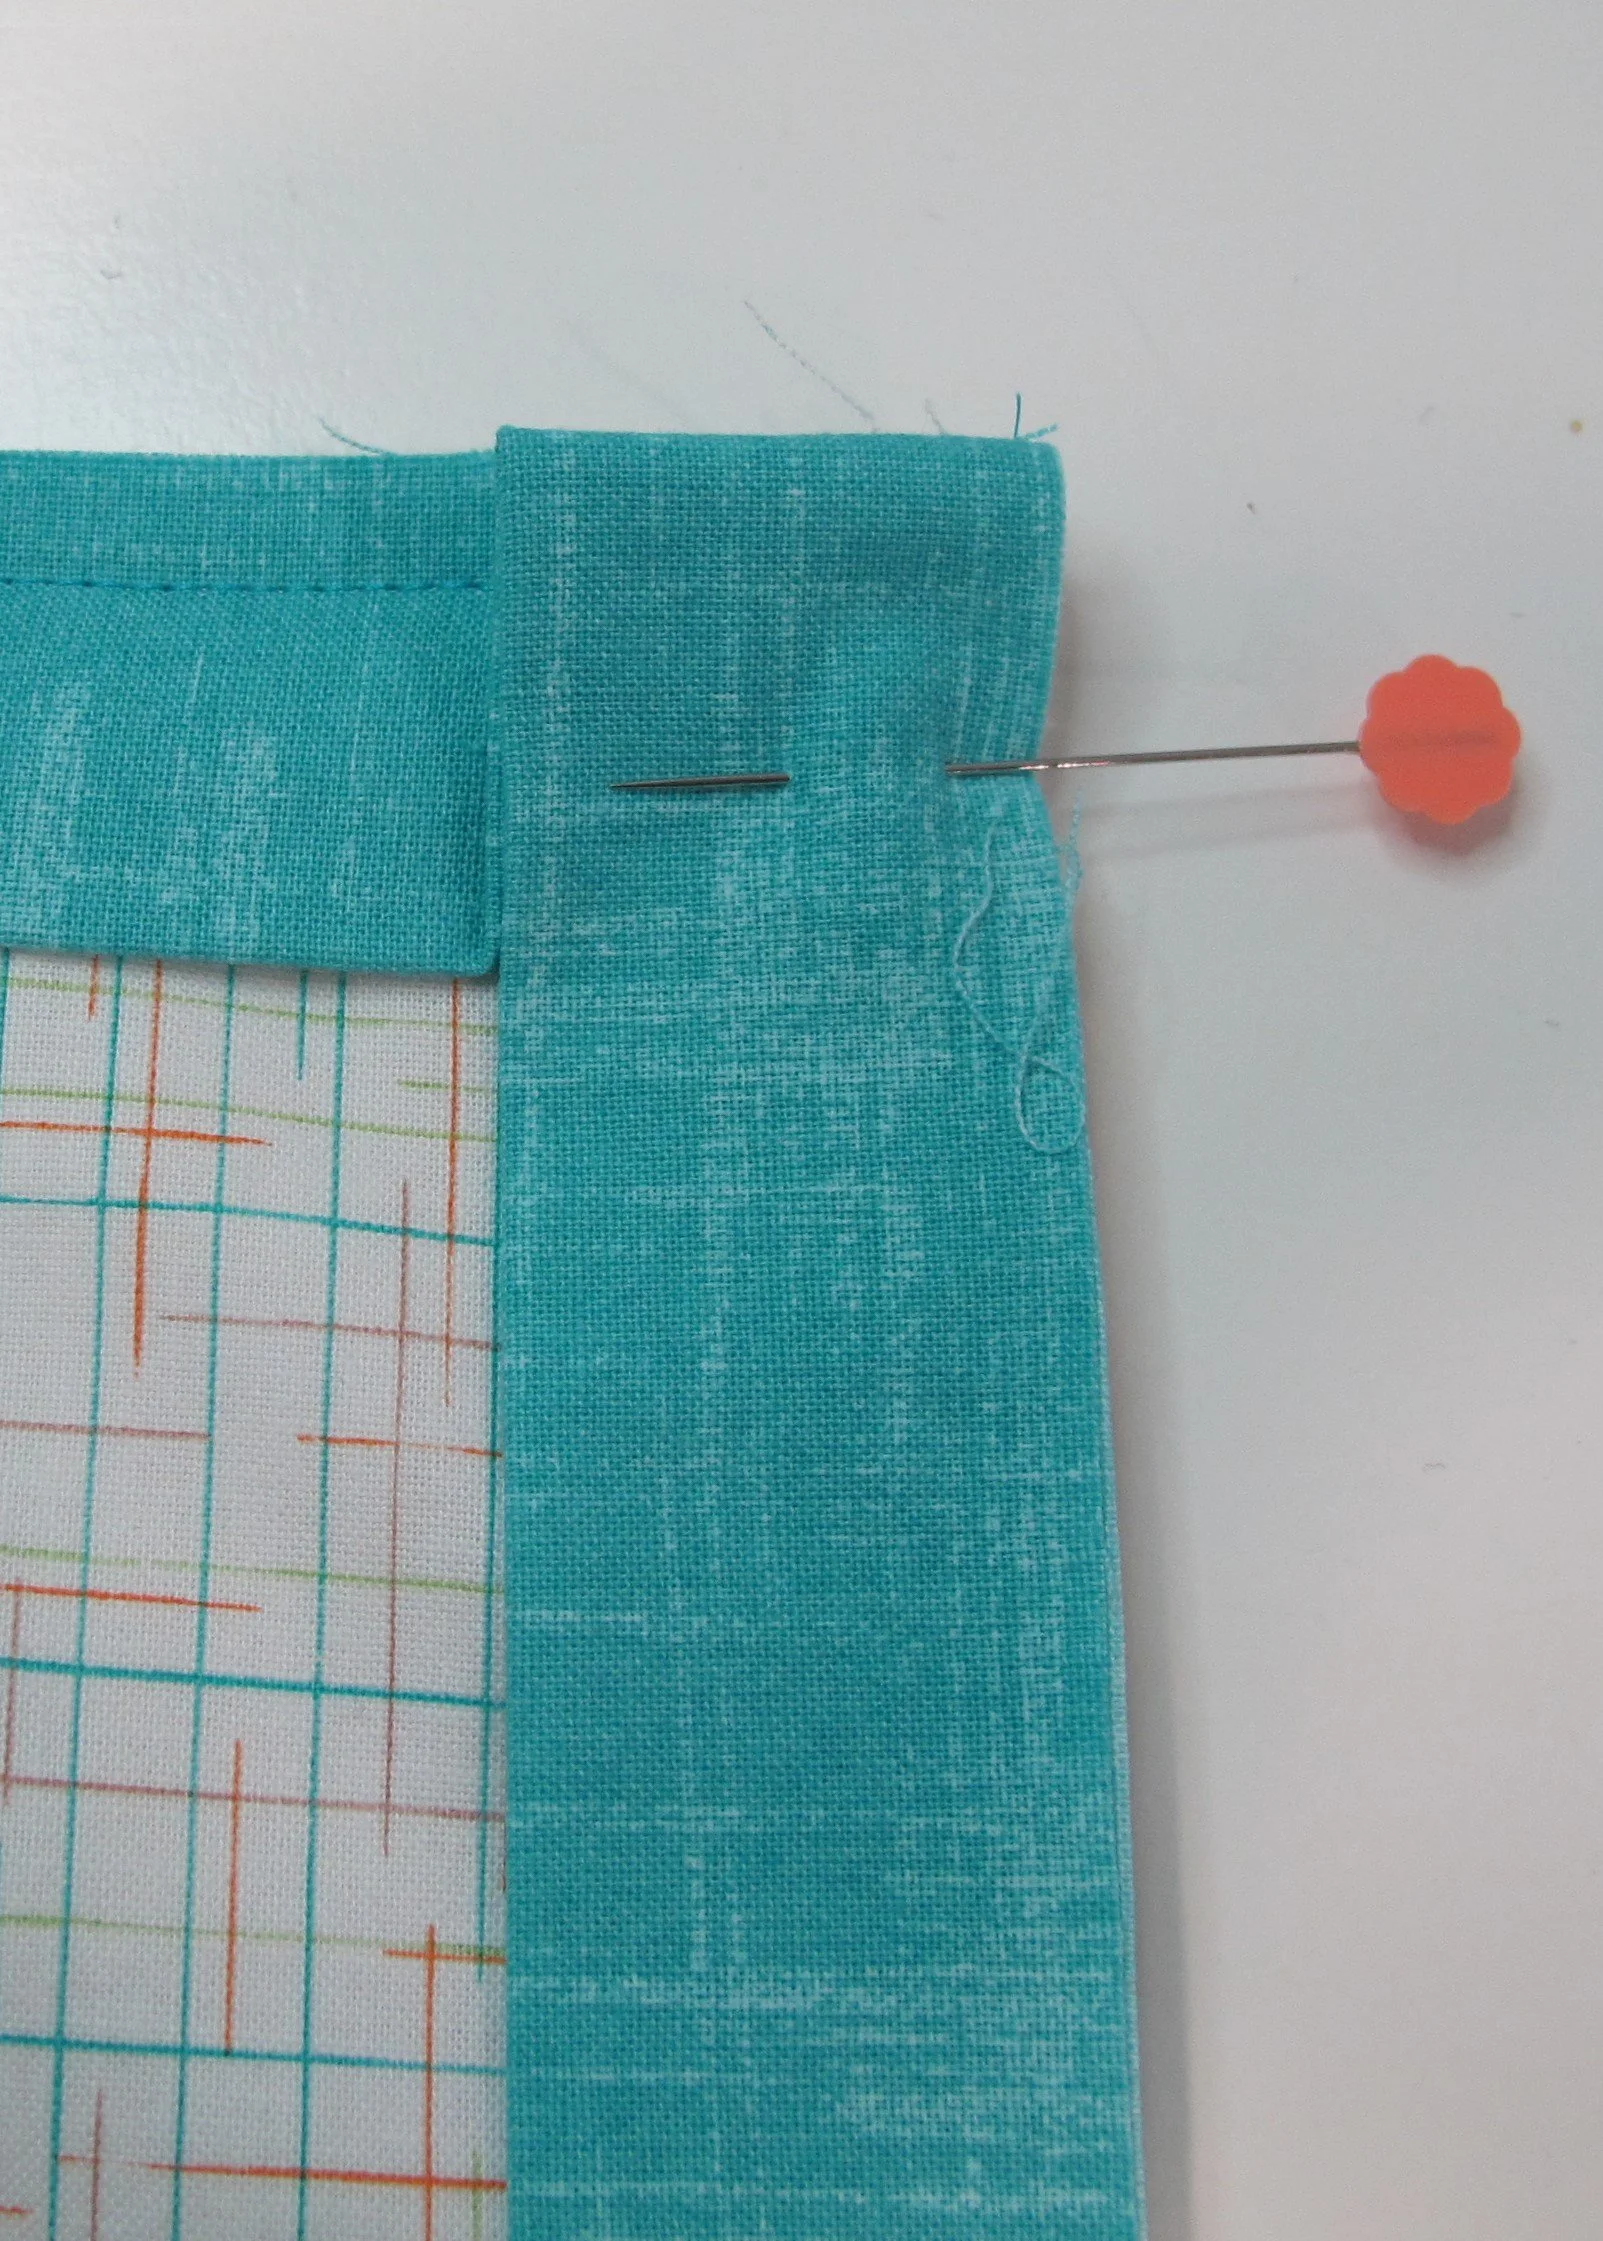
Now that you've determined your personal seam allowance start sewing the binding on (remembering to leave the 8” “tail” at the beginning). When you get to the first corner stop at the same seam allowance point with the needle in the fabric (I mark my spot with a pin, but don't hit the pin with the machine needle!), lift the presser foot, pivot, and diagonally sew off the corner (figure 9). This gives you an automatic mitred angle.

Figure 9
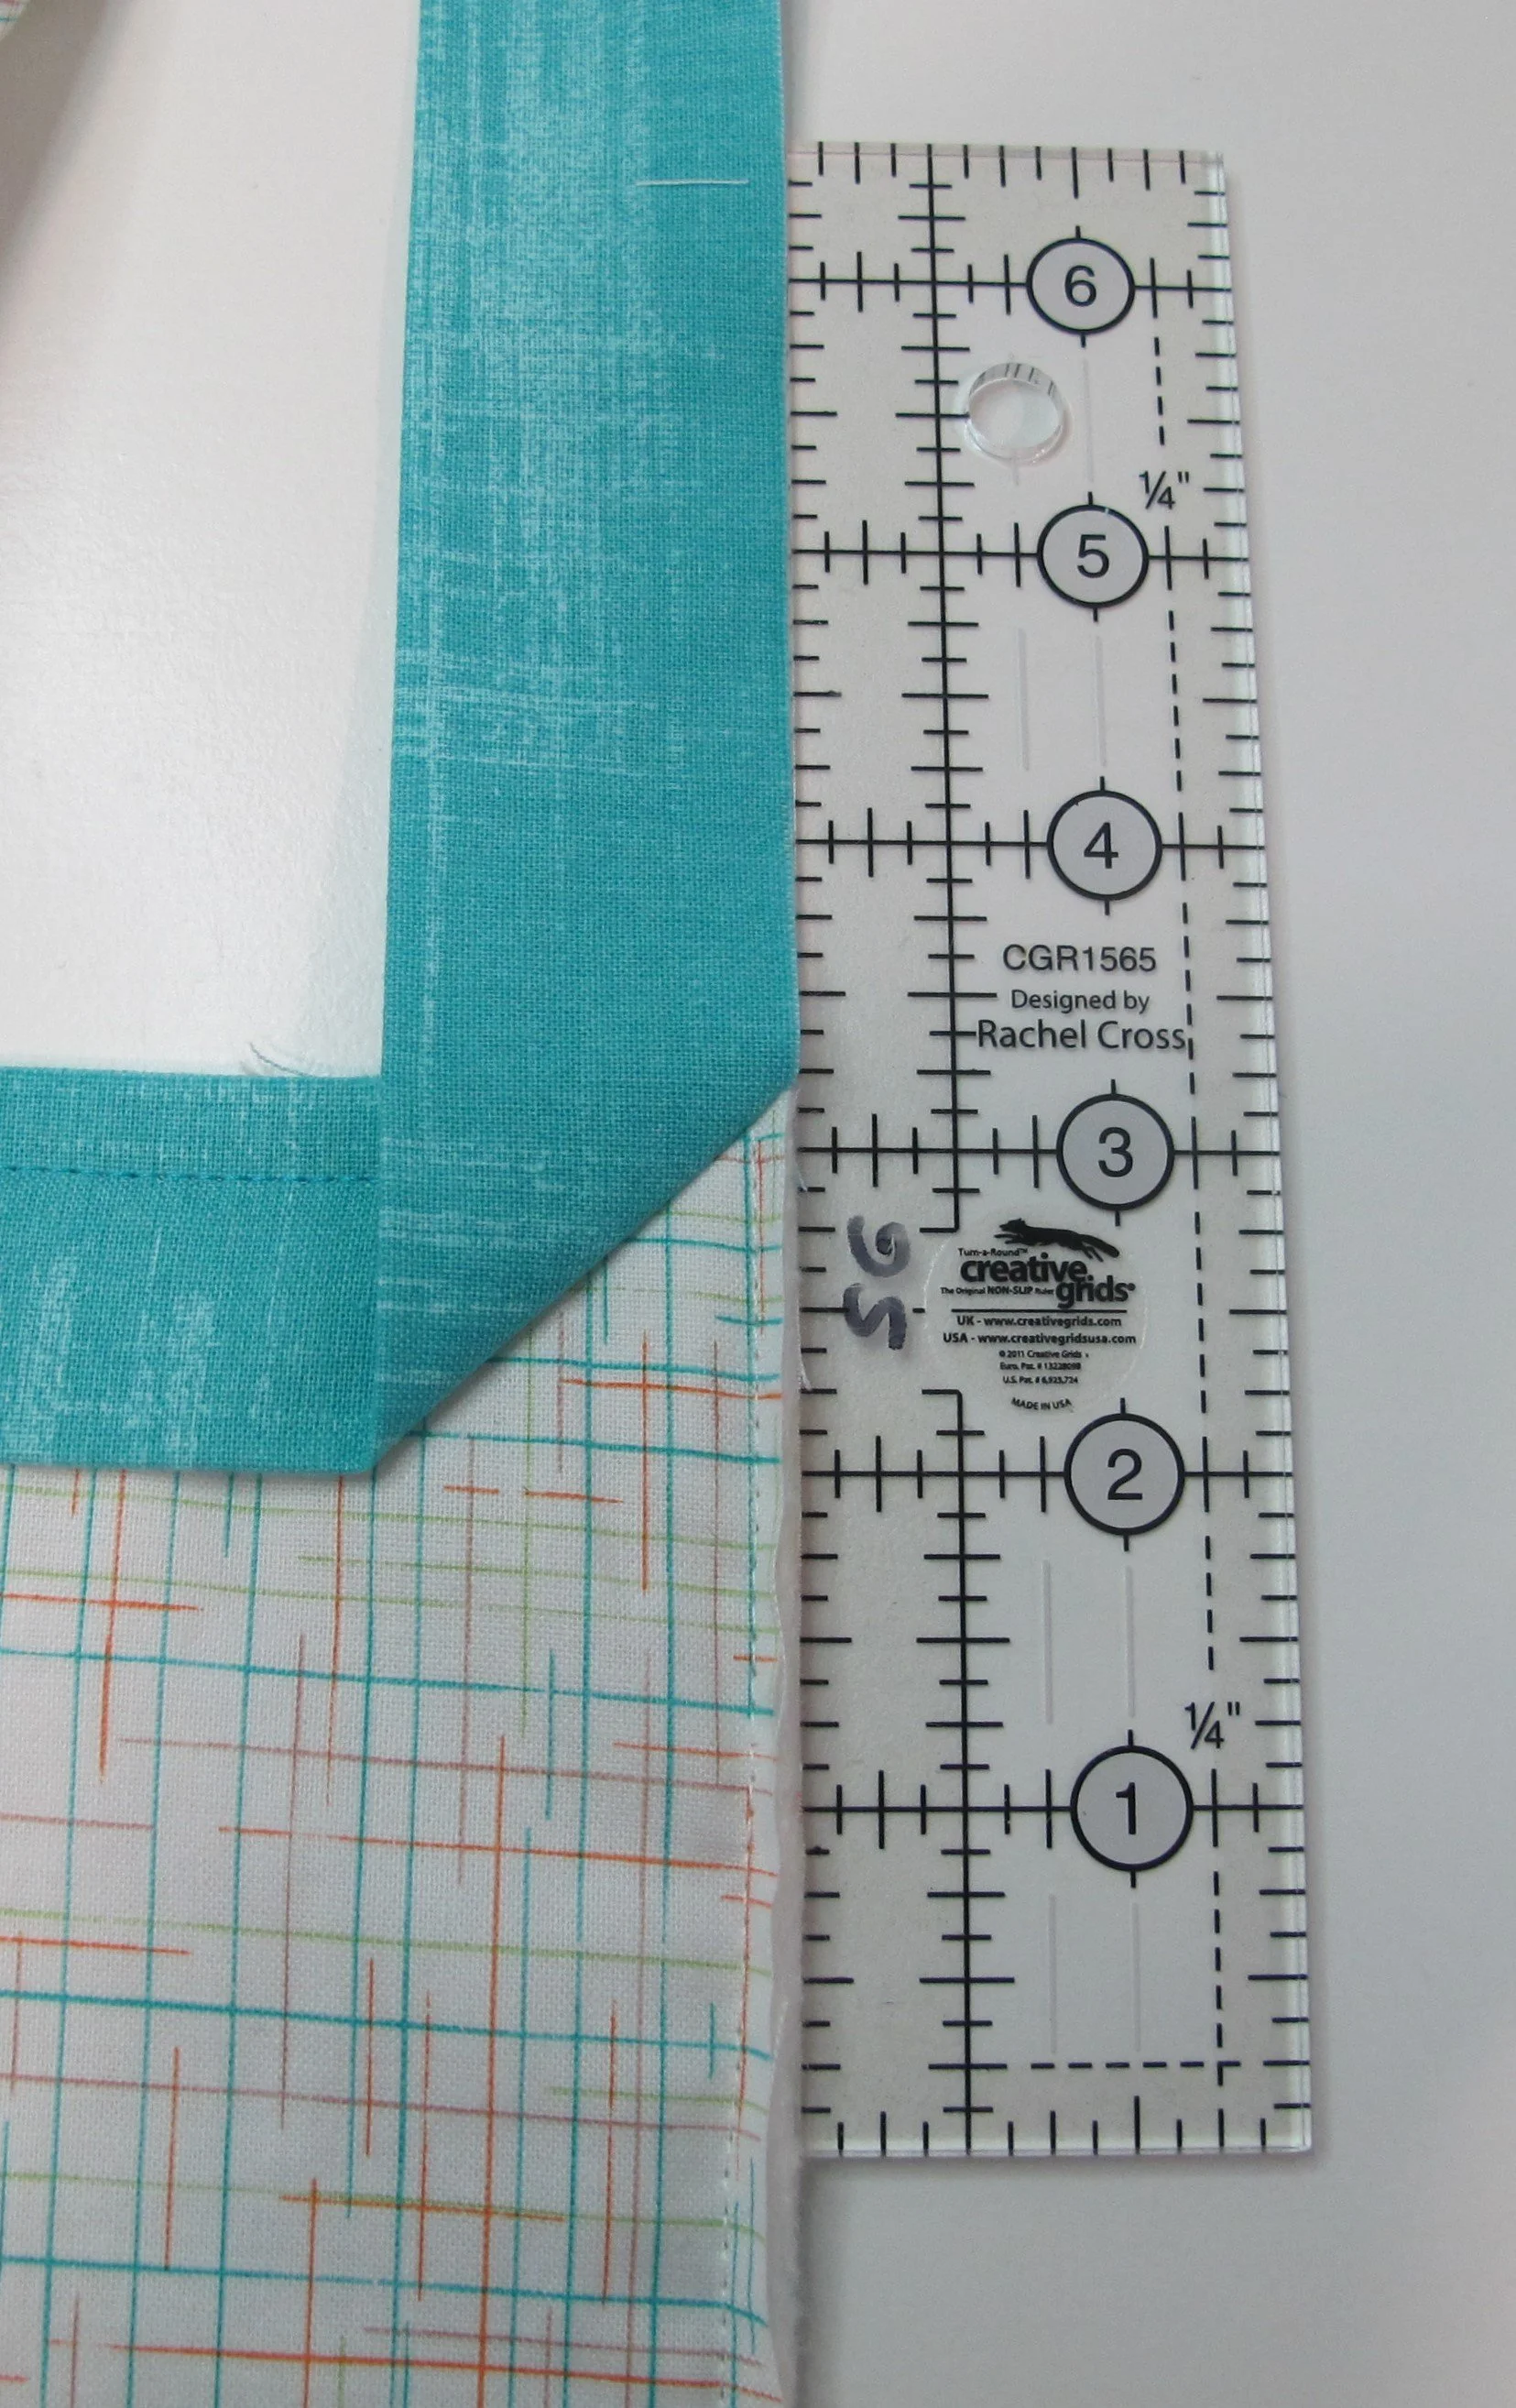
Fold the binding straight up...the ruler is there only to show you that it follows the edge of the quilt (figure 10) and then fold it back down on itself with the fold even with the edge of the quilt (figure 11). *** It's really important that the fold doesn't extend past the edge of the quilt or the binding won't turn to the front properly. You will also notice that the folds on the left side are lined up one on top of the other. Backstitch at the corner and continue stitching around the quilt repeating this process for the other 3 corners. Leave another 8” “tail” at the other end (for a total of approximately 16” open).
When I first started quilting I used the binding method I saw in a magazine where the end of the binding was inserted into the fold created at the beginning of the binding. I never liked that method because I found it way too bulky. A gazillion years ago, a fellow guild member, Anya, told me to “just overlap the ends by the width of the binding and sew them together”. Bam! It's like the lightbulb went on over my head and I was hit by a two-by-four all at the same time! (Thanks, Anya, for the inspiration.)
I tried her method a couple of times, but I found that the binding was still too “wavy” along the edges and didn't sit as flat as I would have liked it to. After a couple of experiments I came up with my go-to method that I've used ever since.
I overlap the end of the binding (on the top) over the beginning of the binding (at the bottom) by the width of the binding which in this case is 2 ½” (figure 12). Now I skooch the ruler over by ⅛” to the right (where the awl is pointing), draw the line on the fabric on the left side of the ruler (where the marker is pointing) and cut the extra off (figure 13). *** No matter what size binding you prefer, remember to overlap by the width of the binding minus ⅛”. Moving the ruler by just that ⅛” takes away ¼” of fabric so the binding snugs up against the edge of the quilt...and no wavy binding.
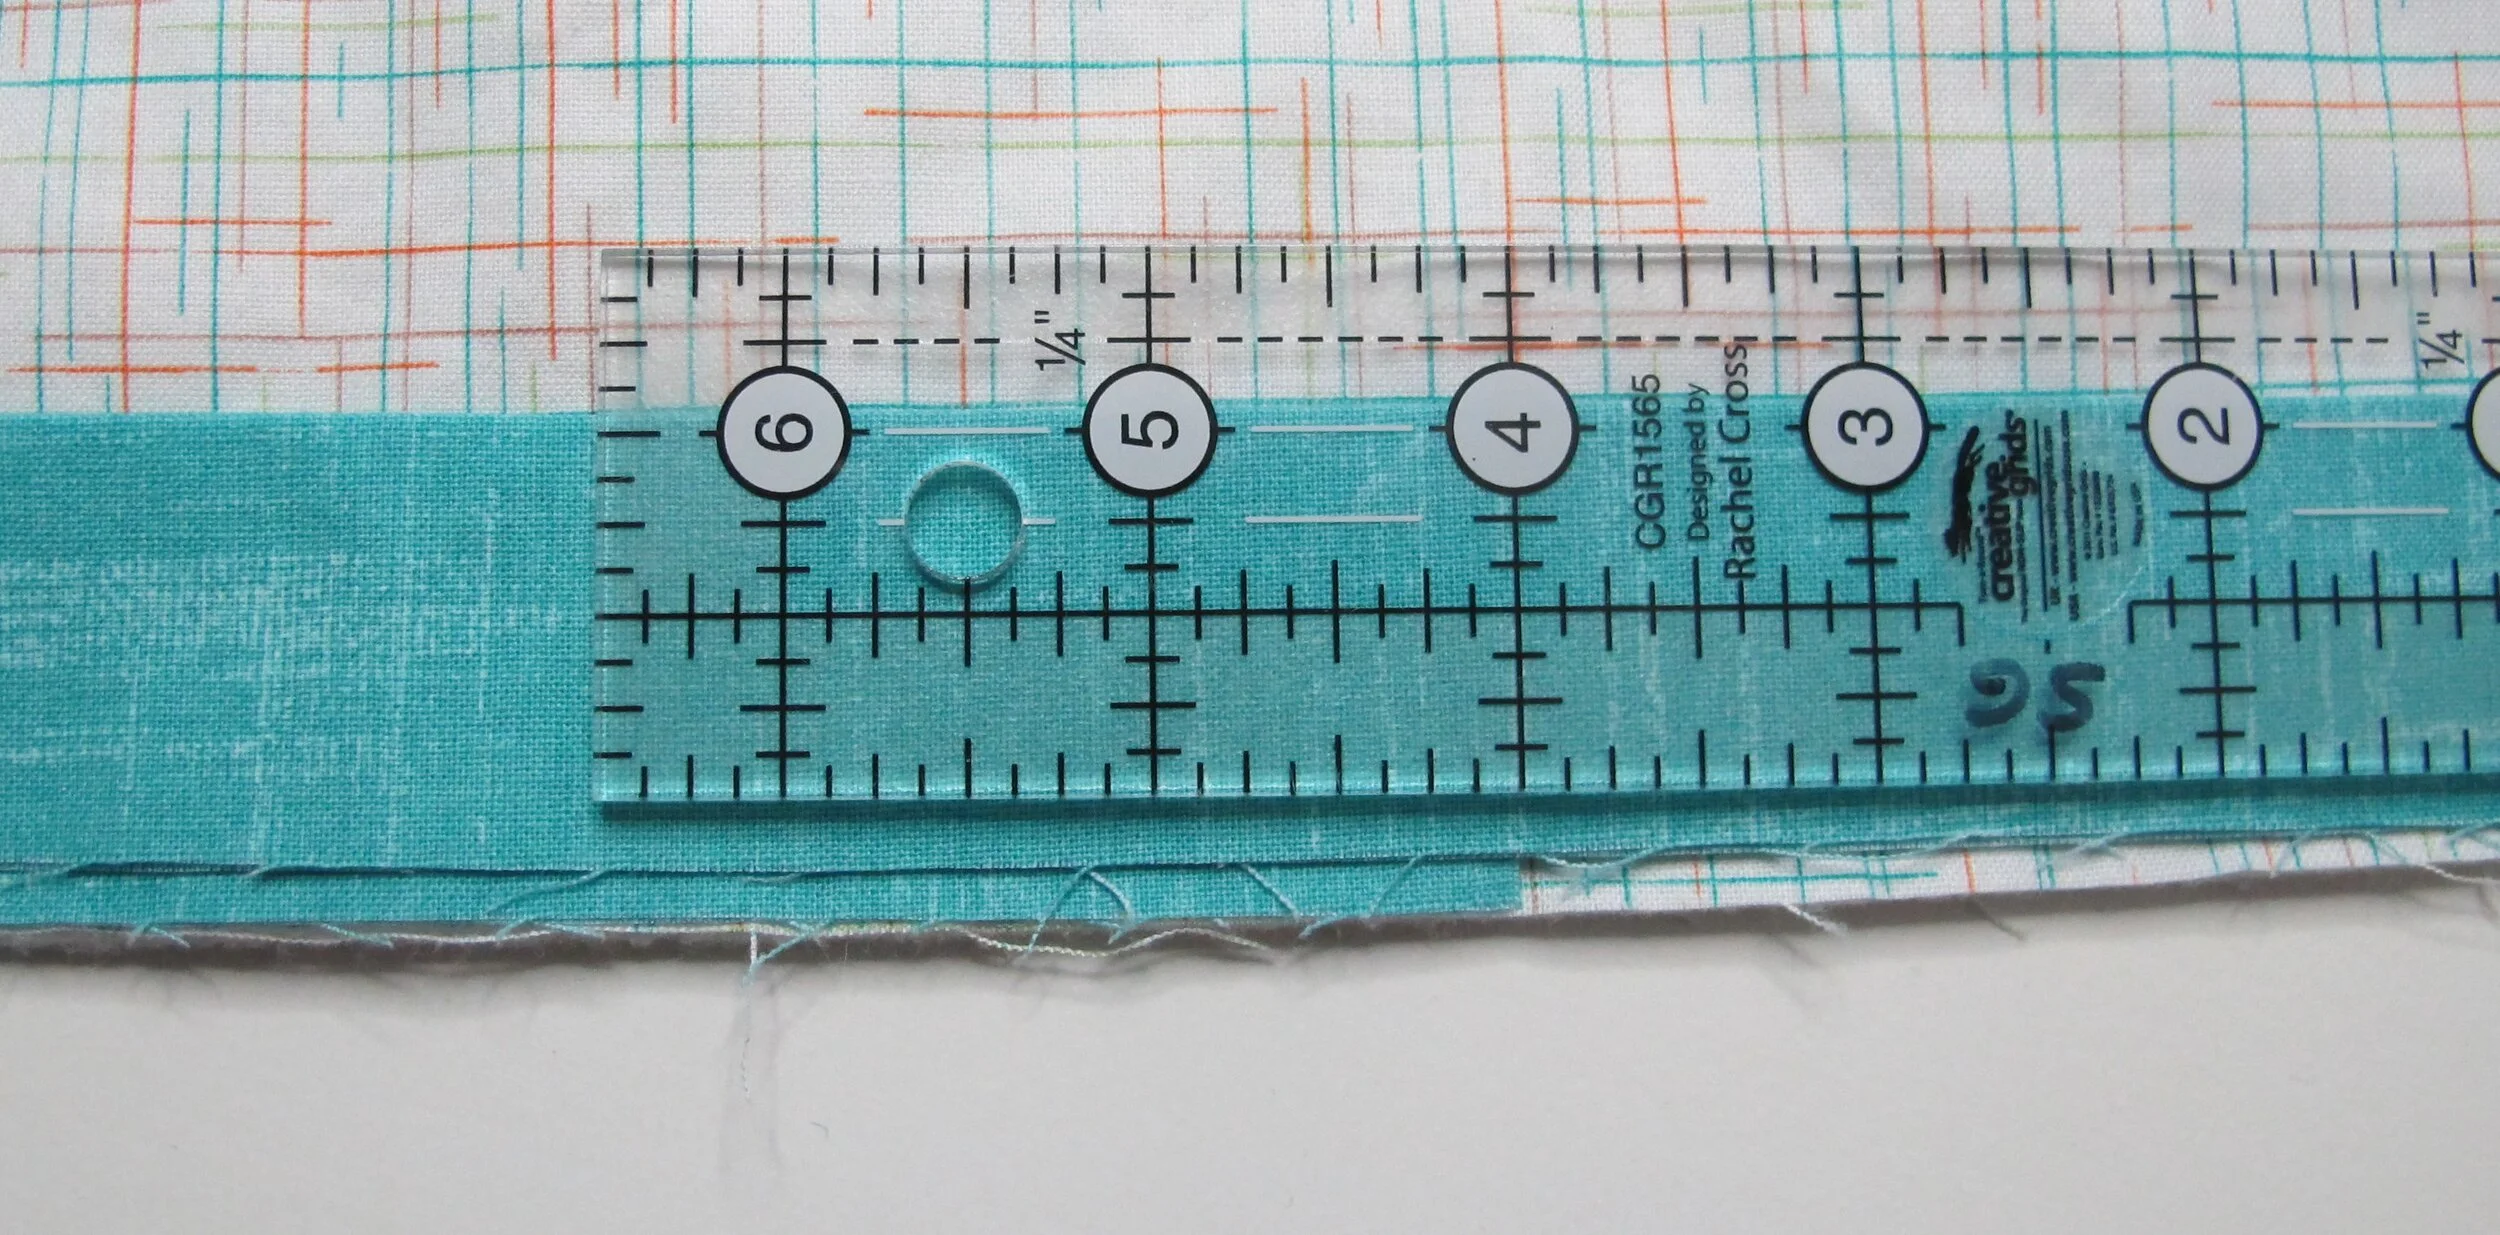
Figure 12

Figure 13
Now to stitch the ends together...open up both binding ends and flip the left side one up so the front side of the fabric is heading “north” (figure 14). Now overlap the right side onto the left with right sides together and draw the stitching line (figure 15).

Figure 14
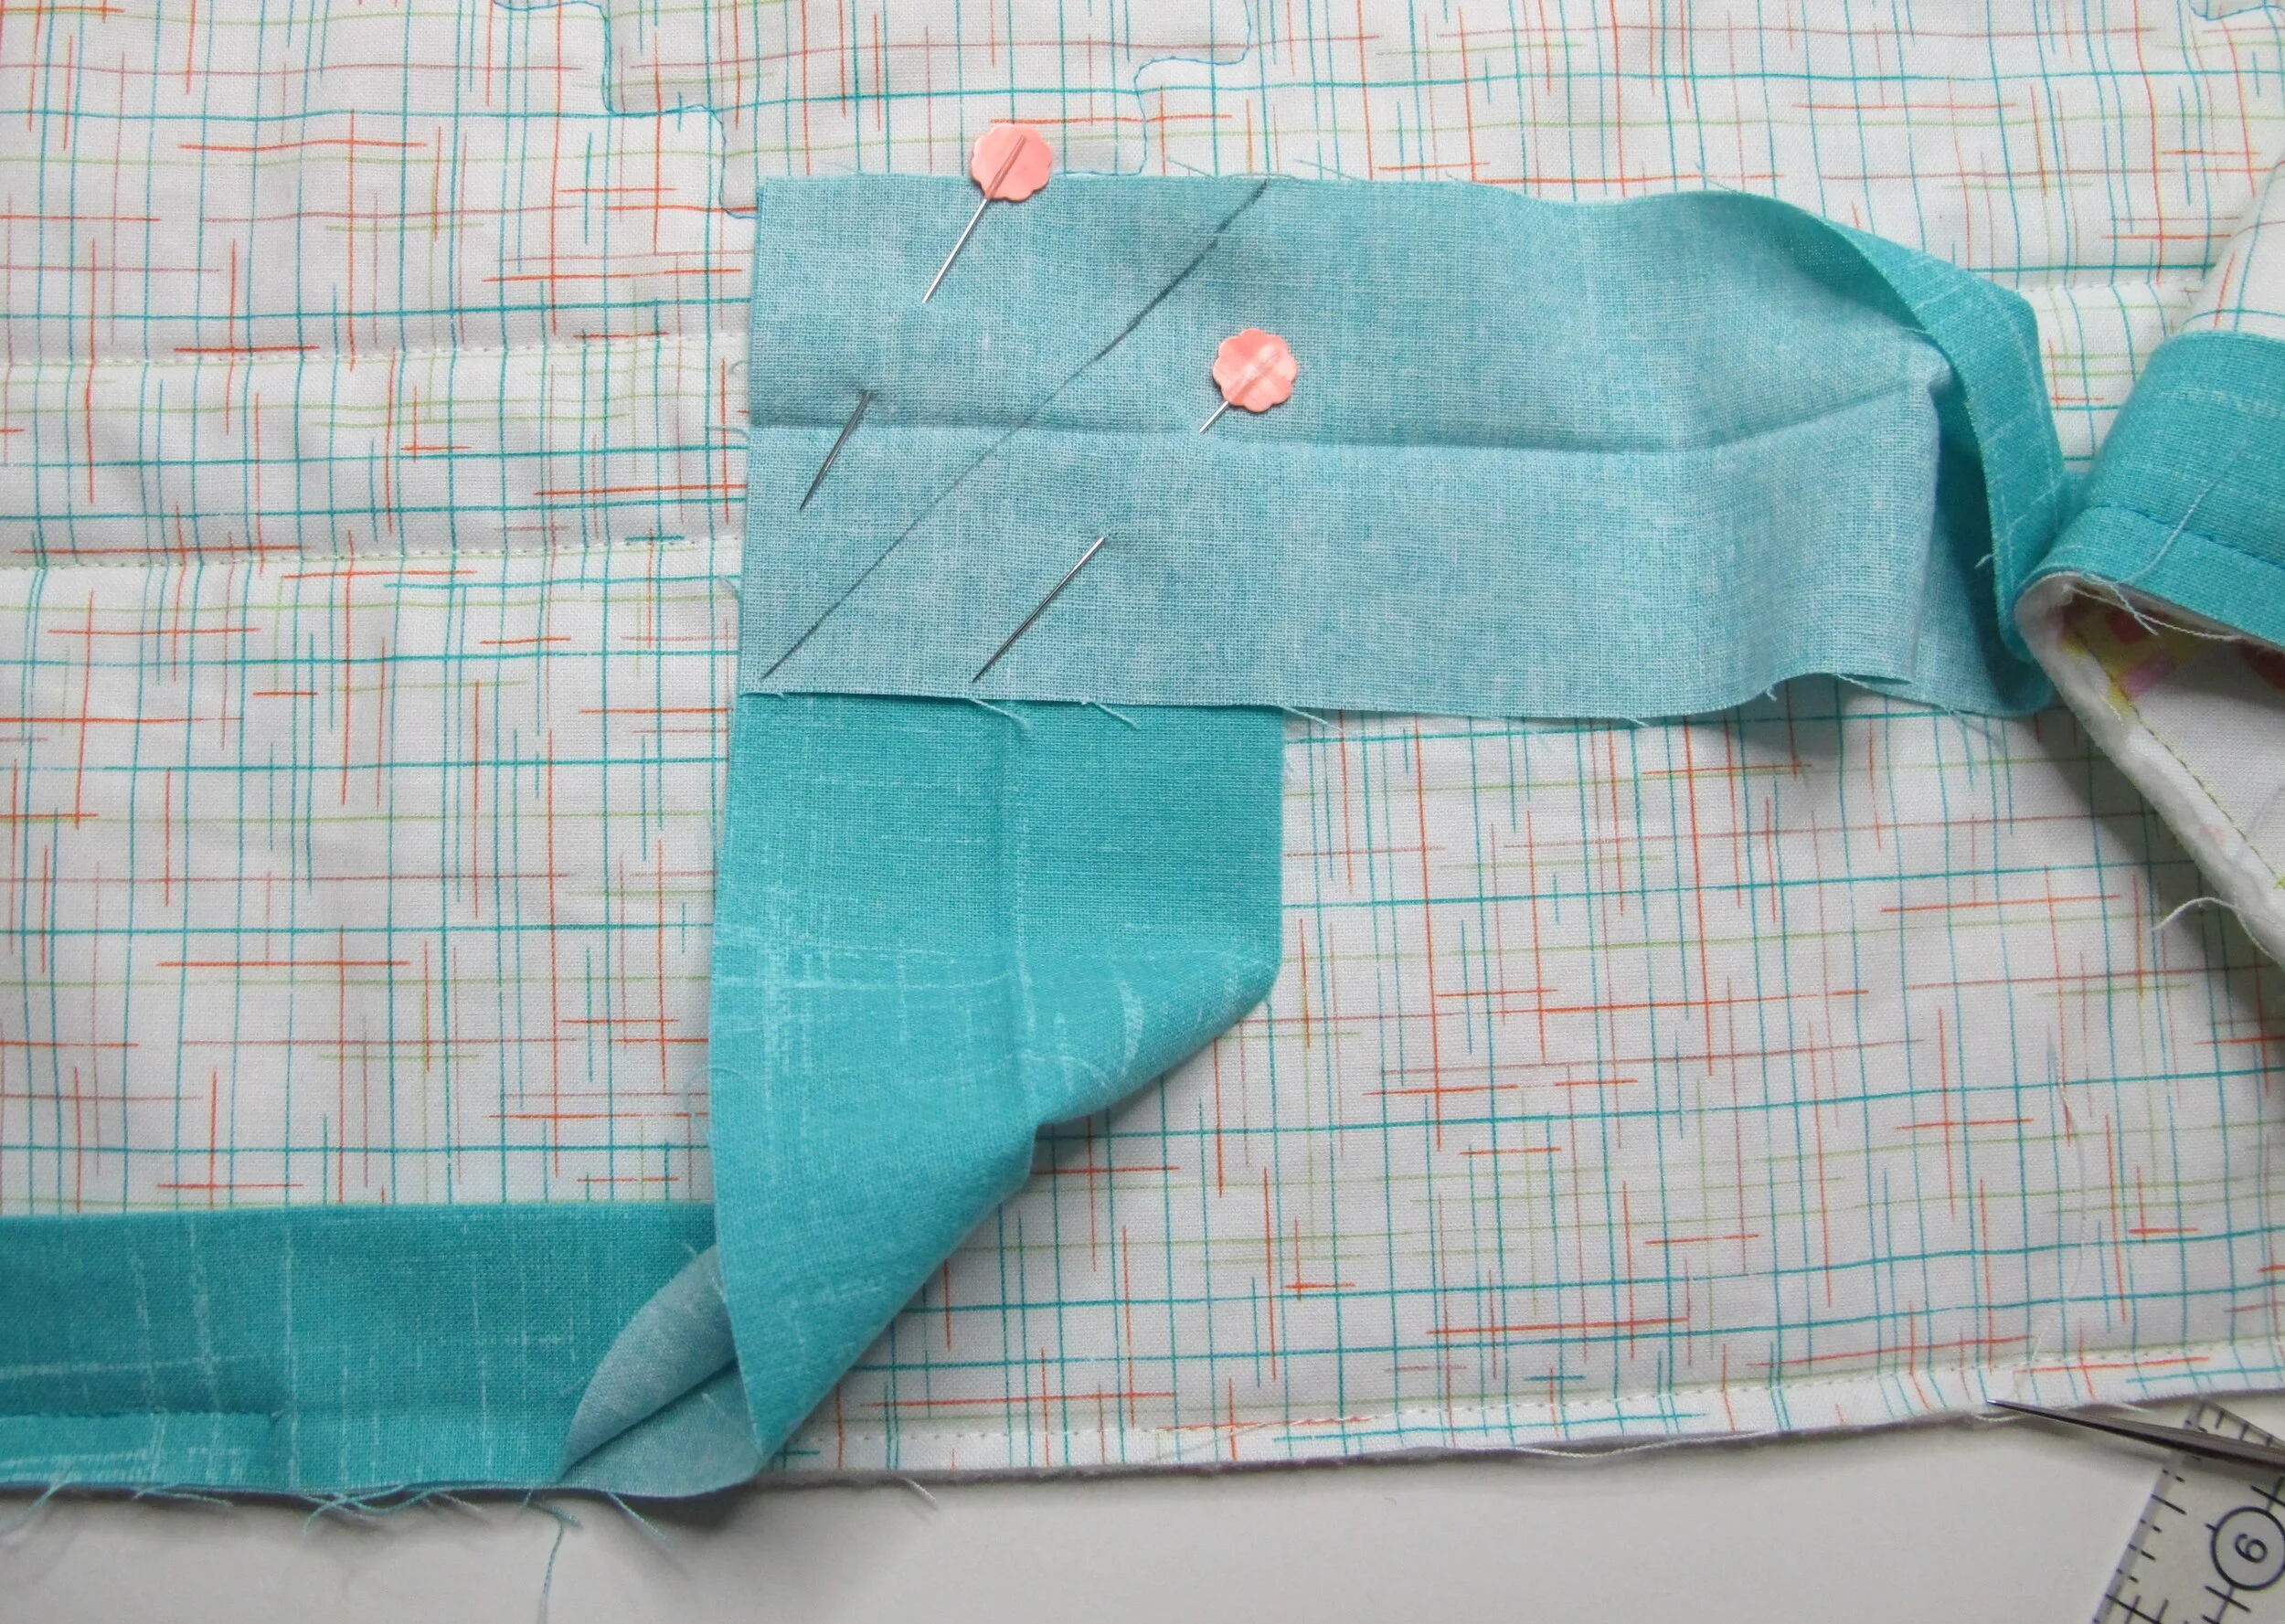
Figure 15
You will now understand why the opening needed to be so large...you won't have to fight with the bulk of the quilt. Stitch along the drawn line and before you trim the seam be sure that it's sewn properly by placing it along the quilt edge. Once you're happy with it trim the seam allowance and finger press it open. Close up the gap by overlapping the stitches at the beginning and end (figure 16).

Figure 16
This isn't really necessary, but I press the binding away from the backing (figure 17)...I find it allows the binding to turn to the front more easily.

Figure 17
When putting on binding I match the top thread to the binding and the bobbin thread to the backing, but it's not necessary. Pull the binding over to the front of the quilt and start stitching it down. Usually a stitch length of 2.4-2.8 works well. When you get within 3” of the first corner stop with the needle in the fabric, fold the bottom binding up and place a pin diagonally so it's easily removed later (figure 18). Use another pin to score a crease in the right side, fold the binding over and pin in place (figure 19).

Figure 18
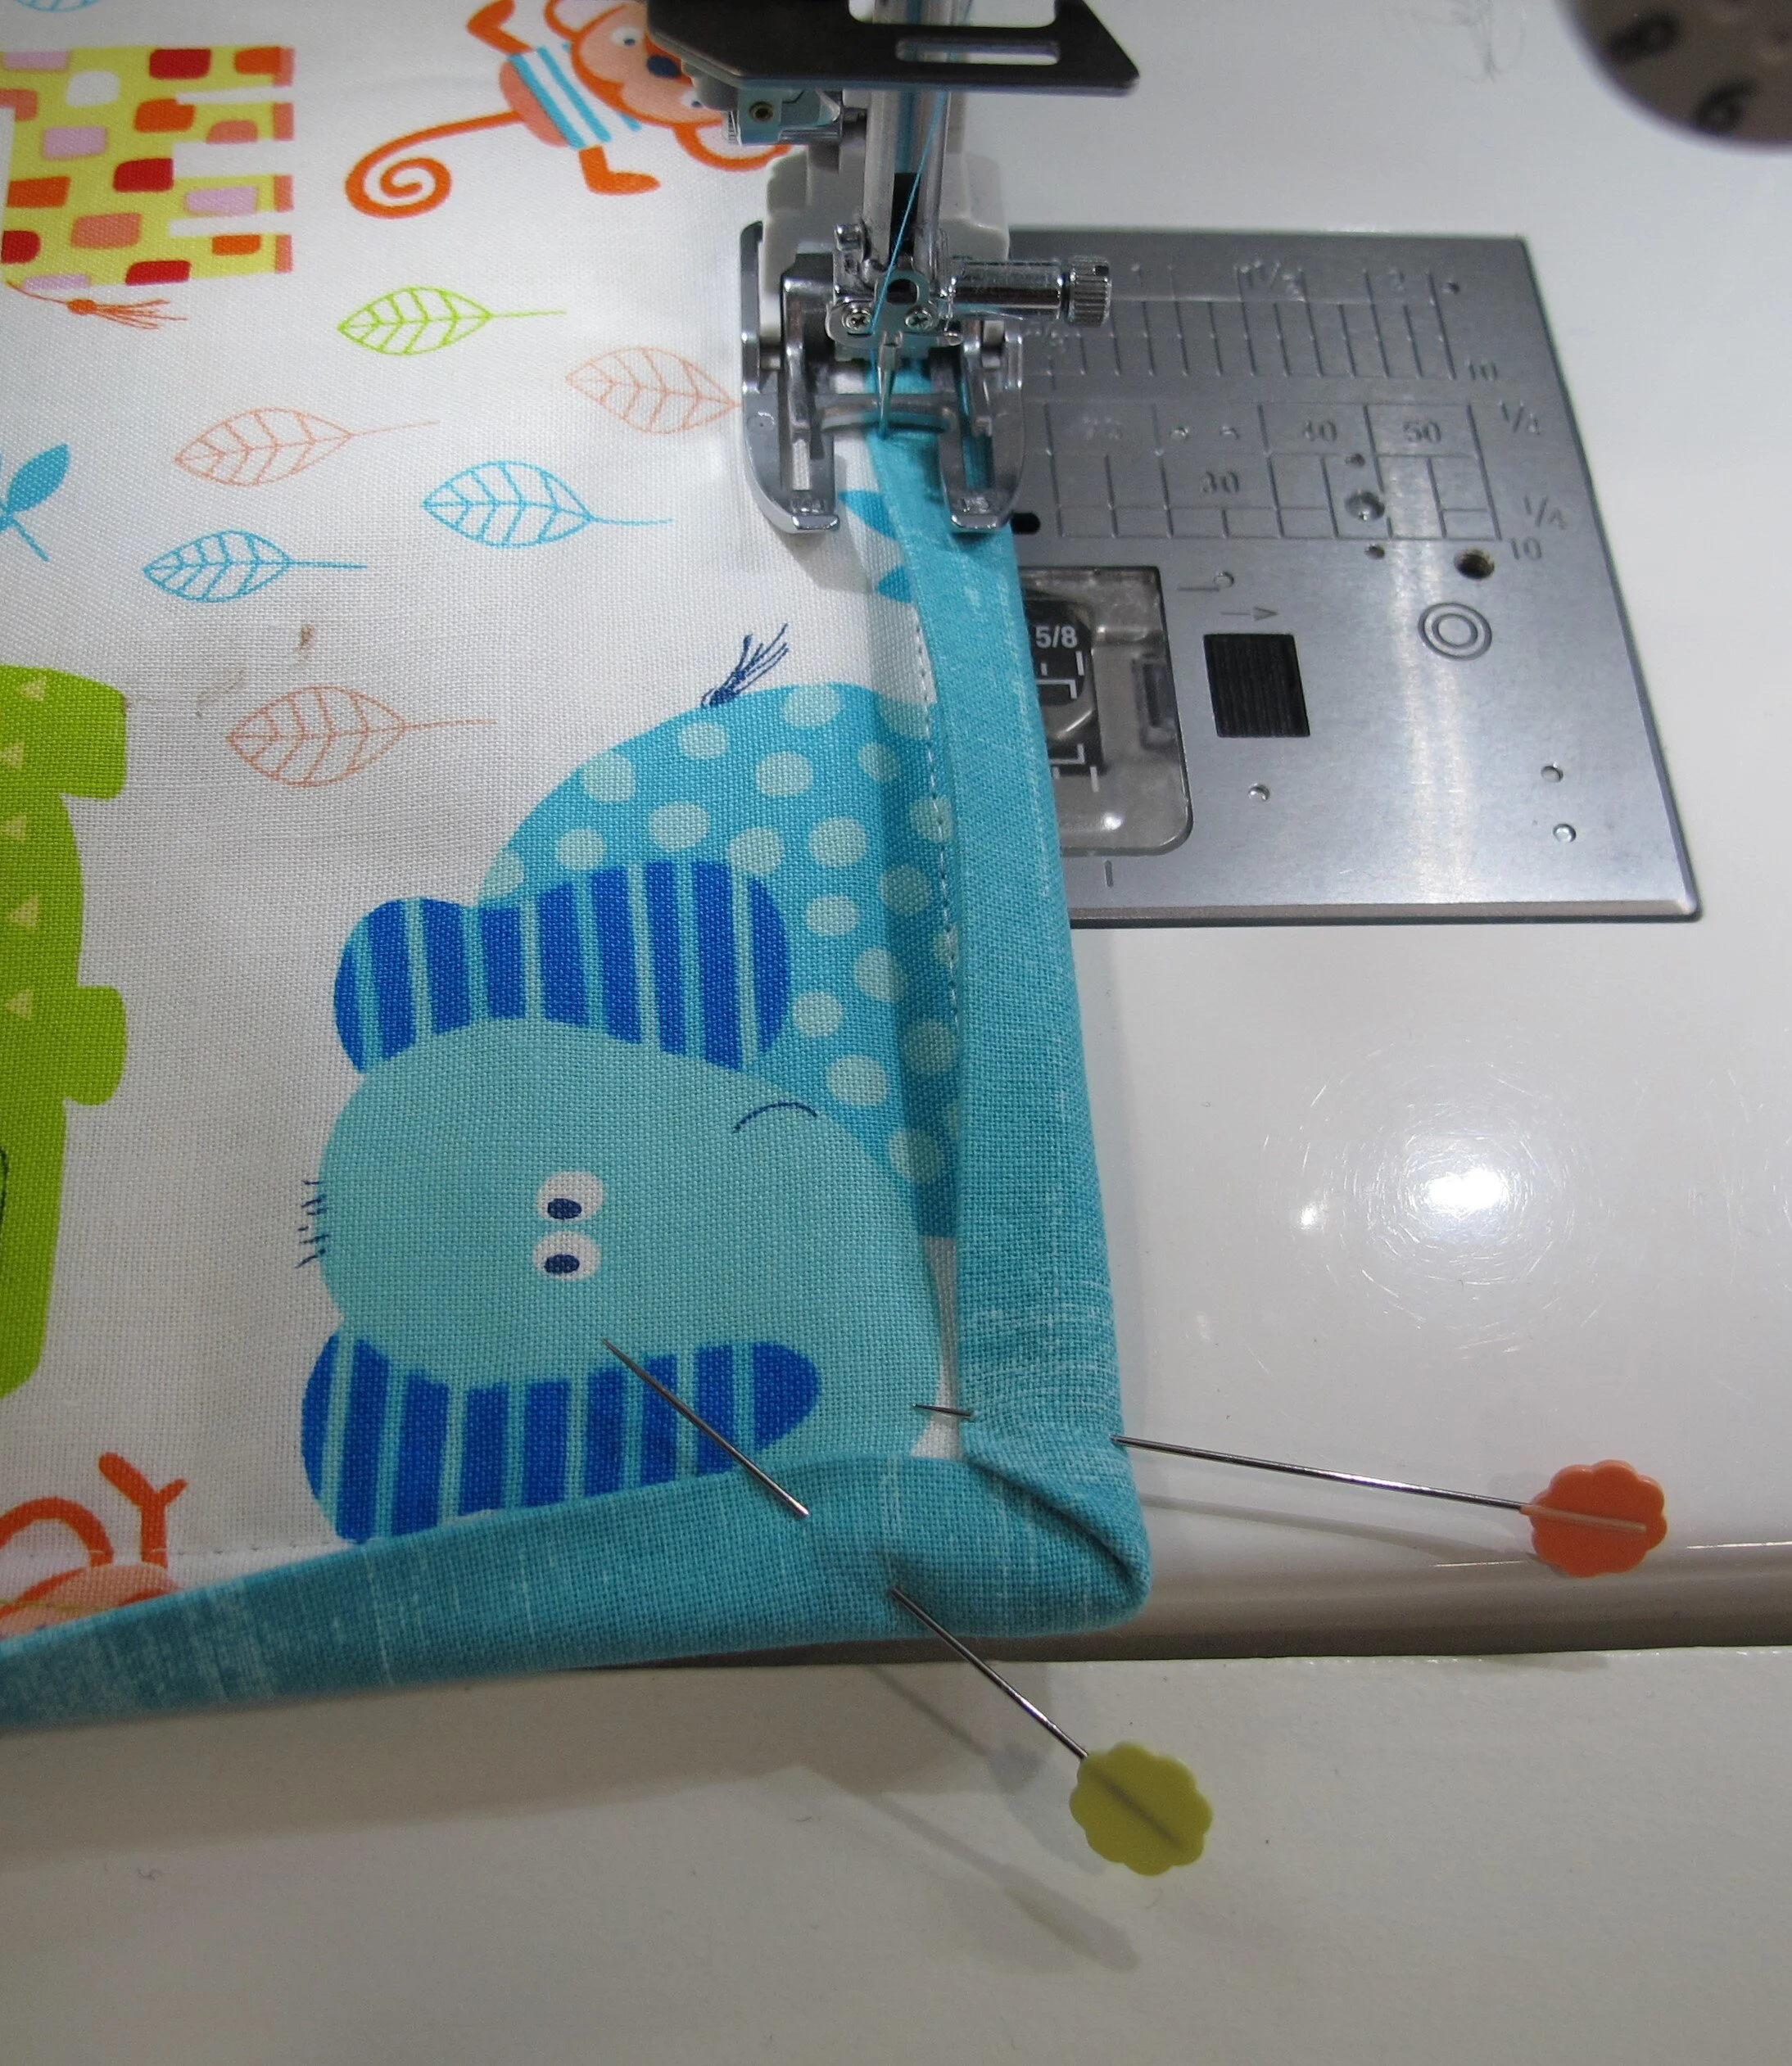
Figure 19
Take your time, try to get a stitch right at the corner, pivot, and carry on around the whole quilt repeating the process with the other 3 corners. Remember to remove pins as you come to them. Don't sew over them...it's not good for your machine...I don't care if your grade 7 home economics teacher told you you could! (Now I'm really showing my age.) The front (figure 20) and the back (figure 21) of the quilt will be beautifully finished.

Figure 20

Figure 21
I hope you've found this method helpful and will now have no problems finishing your UFO's. Let me know if this technique works for you.