
What is a Scant Quarter Inch???

Have you ever sewn a quilt block together and found that while some pieces go together perfectly others are out by about an 1/8th of an inch? That's because even though you may be using a 1/4” foot it may not be an actual 1/4”, and you may have noticed that many patterns recommend a scant quarter inch. Let me explain what that is...
The first thing we'll do is see what a 1/4” foot actually looks like. Since I sew with Janome machines mine look like this, but other brands of machines have similar feet:
You will notice that one foot has a metal flange on the right hand side allowing the edge of the fabric to snug up against it. The other foot is clear (Janome Clearview Quilting Foot & Guide set) and it can be used with or without the metal flange. I personally prefer it without the flange and have removed the screw that holds the metal edges because I find it tips the foot backwards due to the weight of it being there. The first one comes standard with most machines geared towards quilters, but the Clearview foot must be bought separately.
You can see that I have 2 sets of these feet...the top ones are for my Janome Canada 150 machine which has a 7 mm opening and the bottom ones are for my Janome 6700 which has a 9 mm opening. That's the opening in the needle plate that accommodates the side to side swing of the needle when doing zig-zag or decorative stitches.
Now, how to get a scant 1/4”...
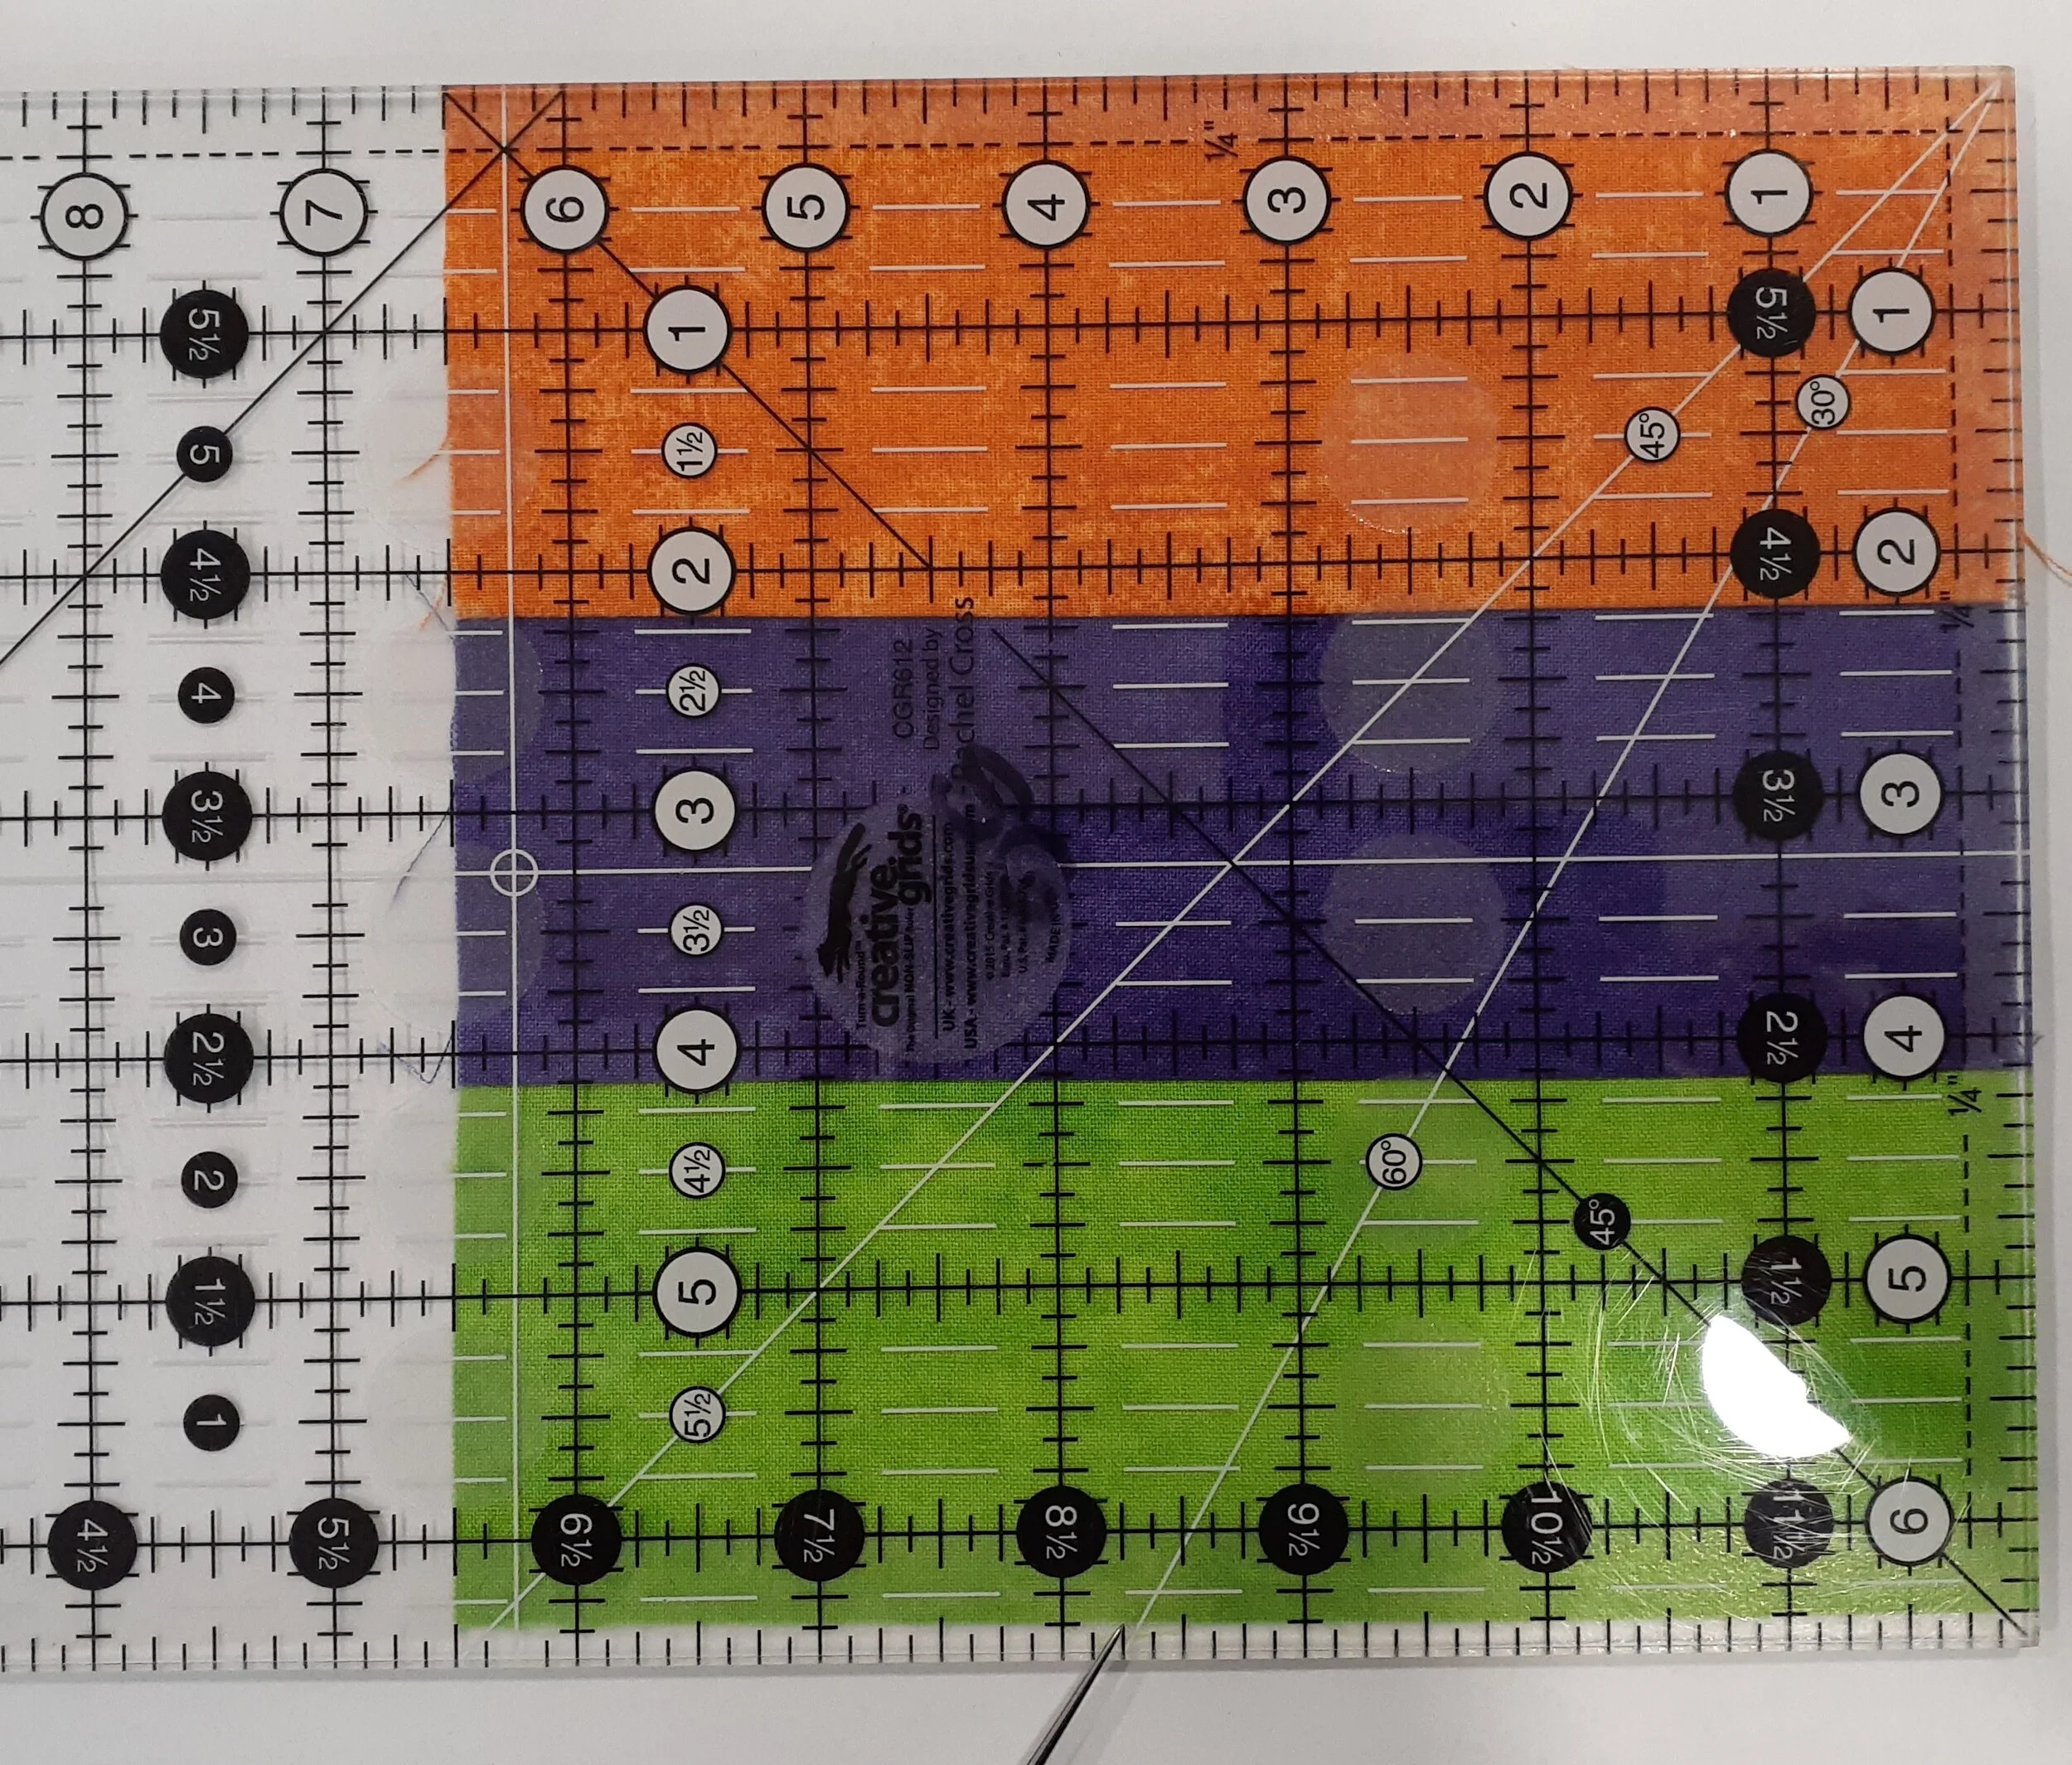
If you place the edge of a ruler under your 1/4” foot and gently lower the needle down with the hand wheel (barely touching the ruler with the needle) you will see, in fact, that it is 1/4”. The only problem with that is that the thread and the needle penetrating the fabric takes up room in that seam and the 1/4” you'd planned on is actually larger once the seam is sewn and pressed.
I want you to follow along with my photos and do an experiment with your own personal machine after you see what I've done. You'll need to cut six 2 1/2” x 6 1/2” rectangles of fabric from your scraps to create two 6 1/2” squares. Let's get started...
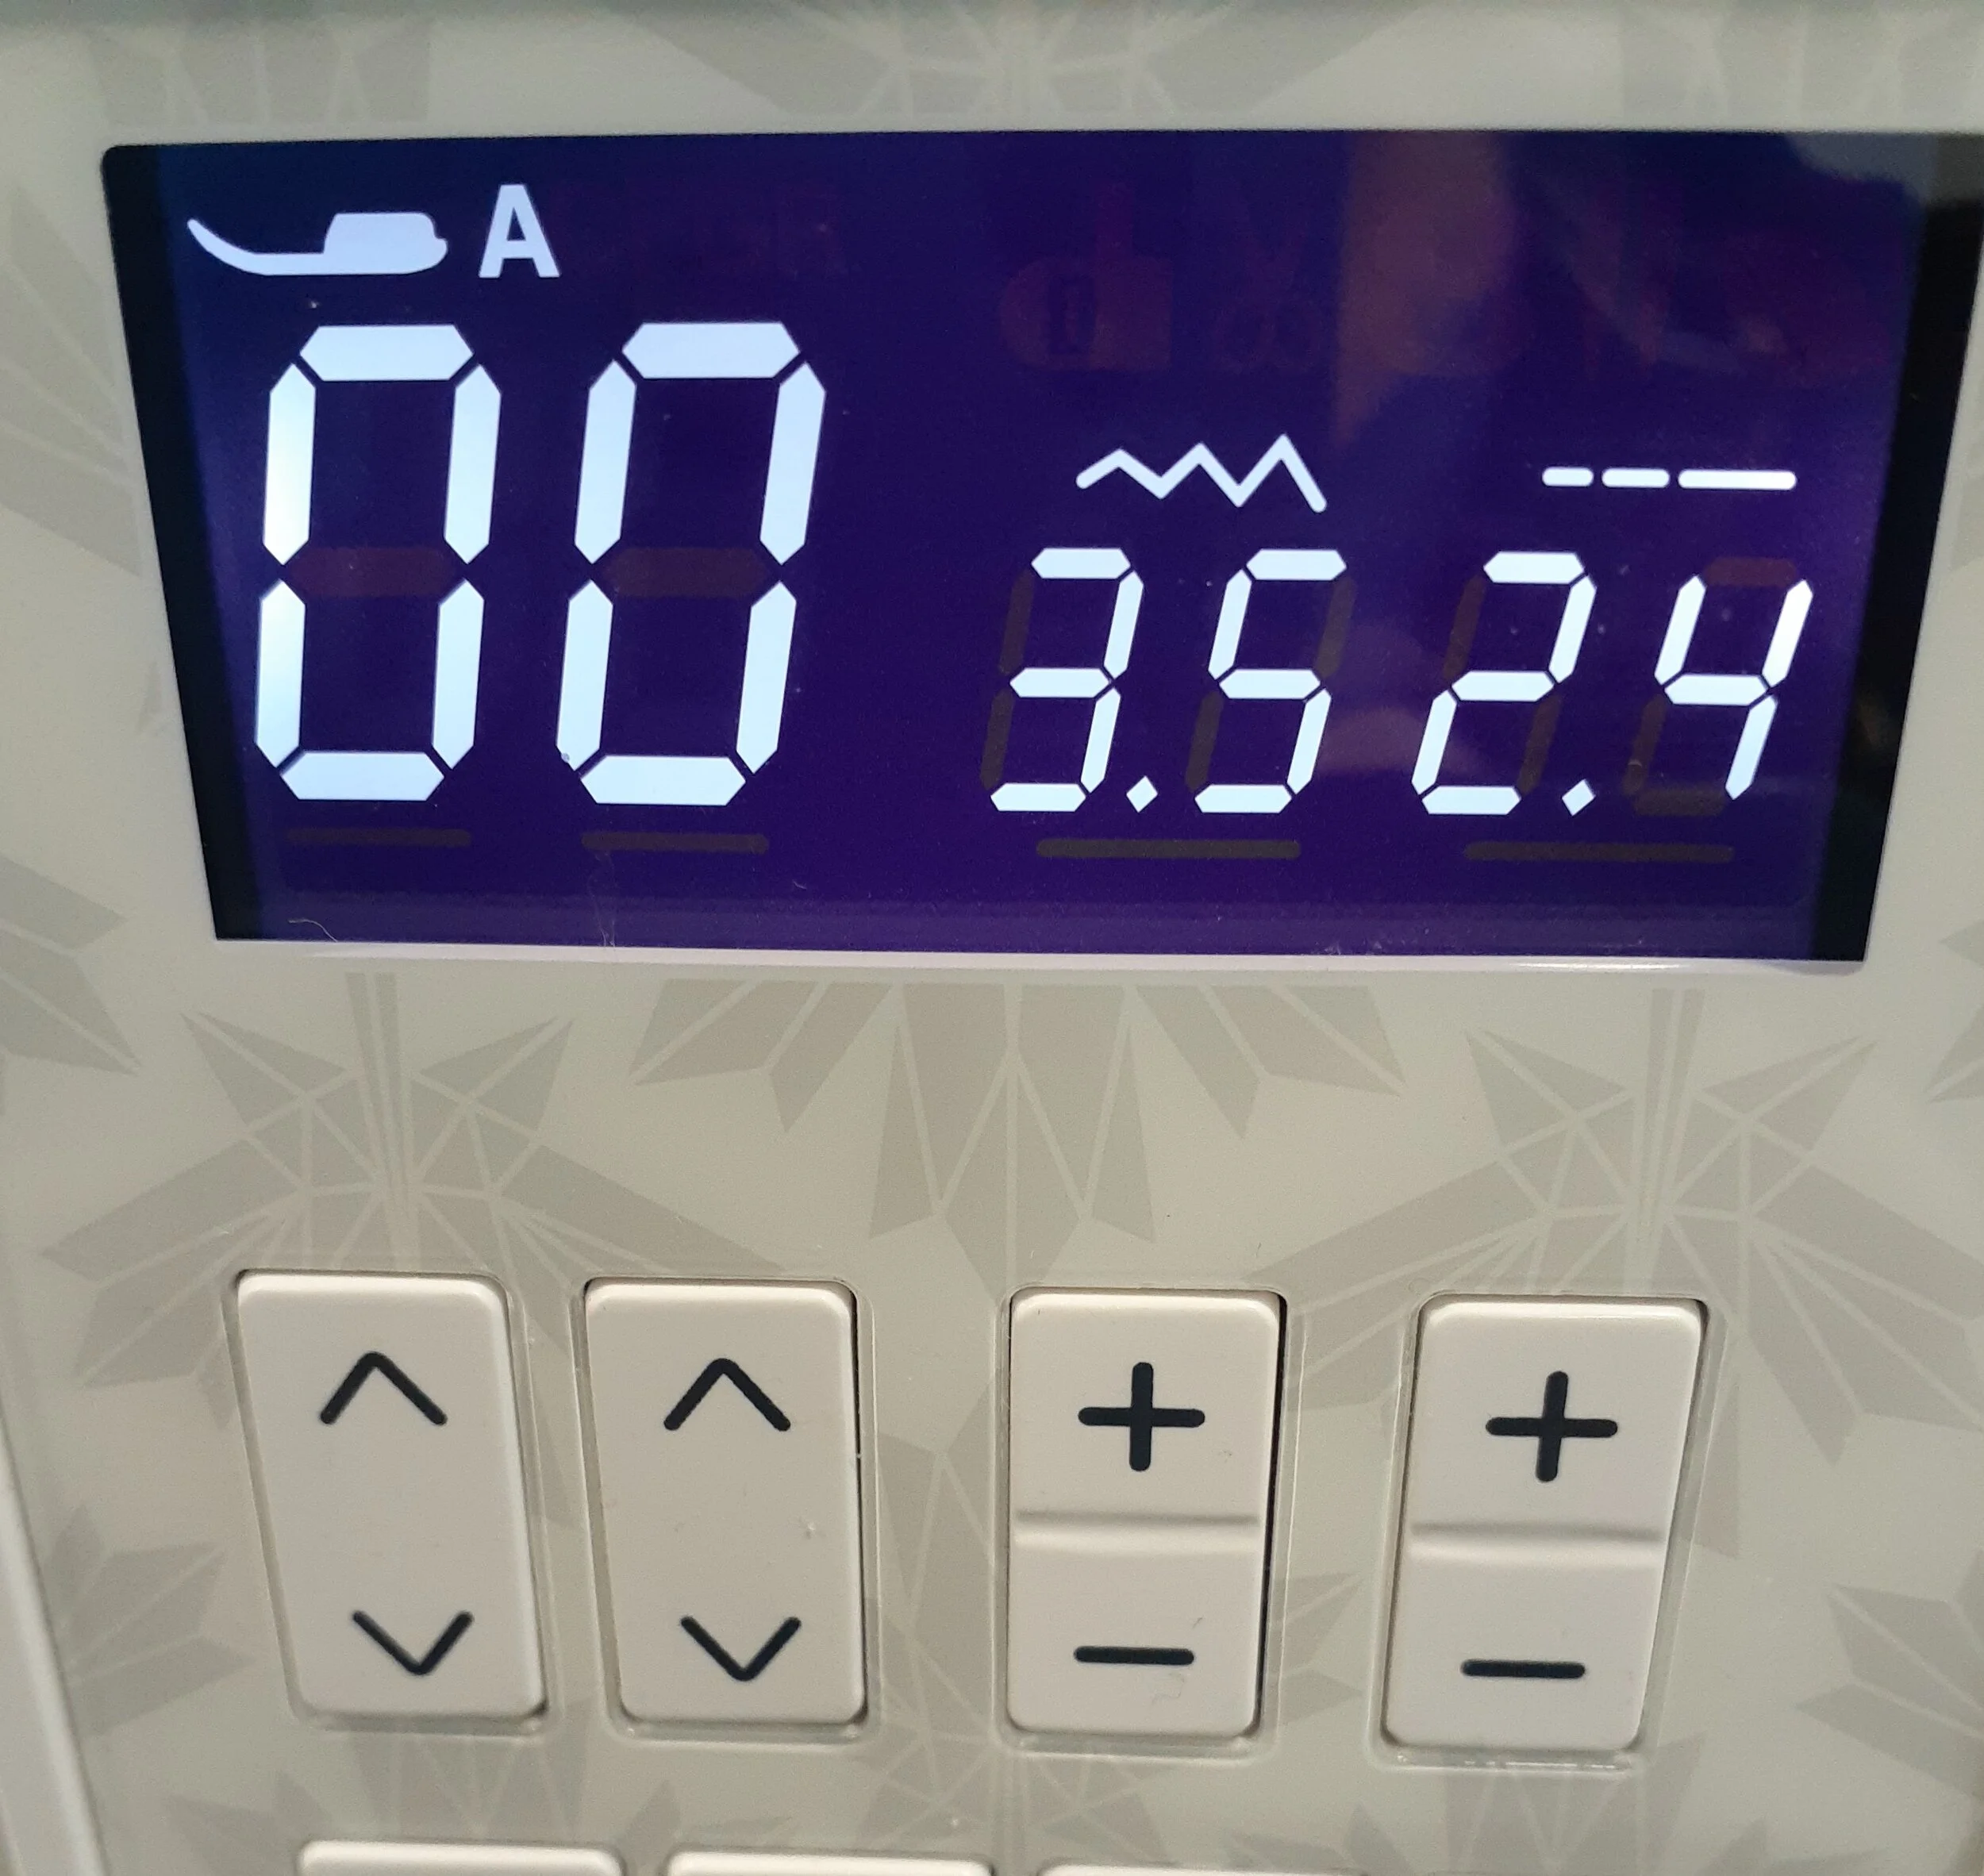
First, the default setting for my Janome Canada 150 machine is 3.5 (width) and 2.4 (length).
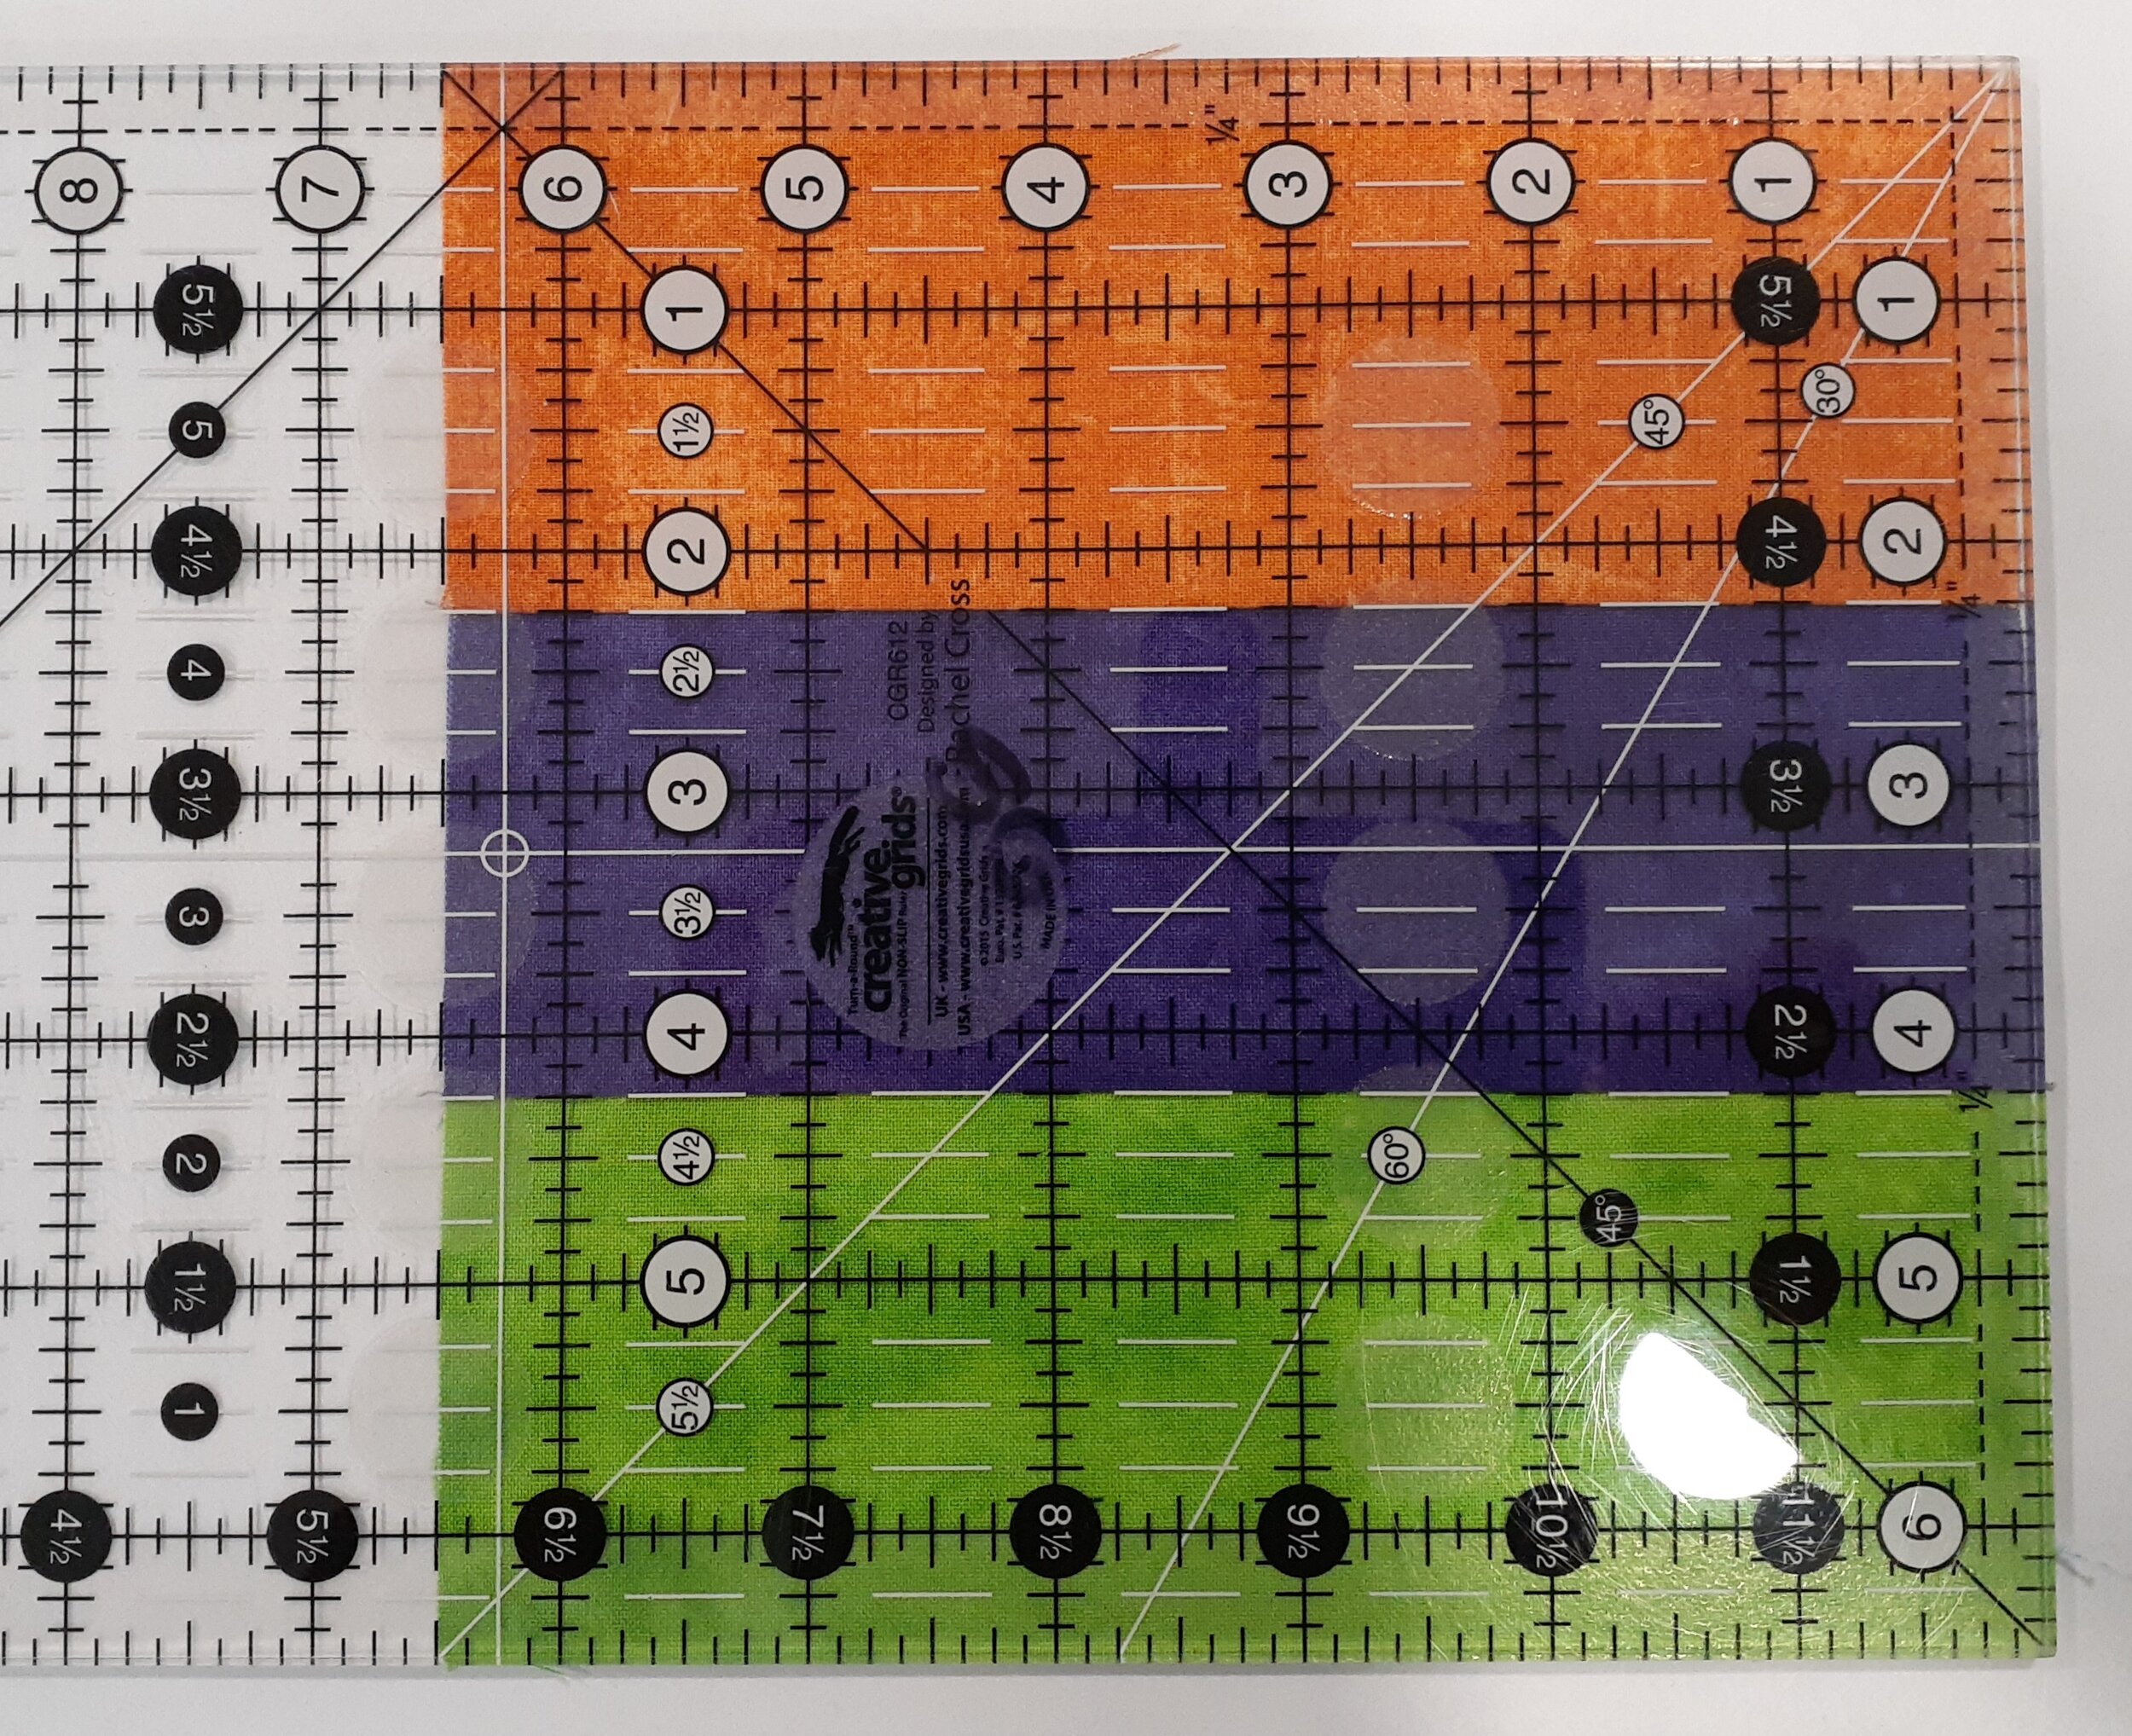
When the 3 pieces of fabric are stitched together and seams are pressed to one side my block looks like this.
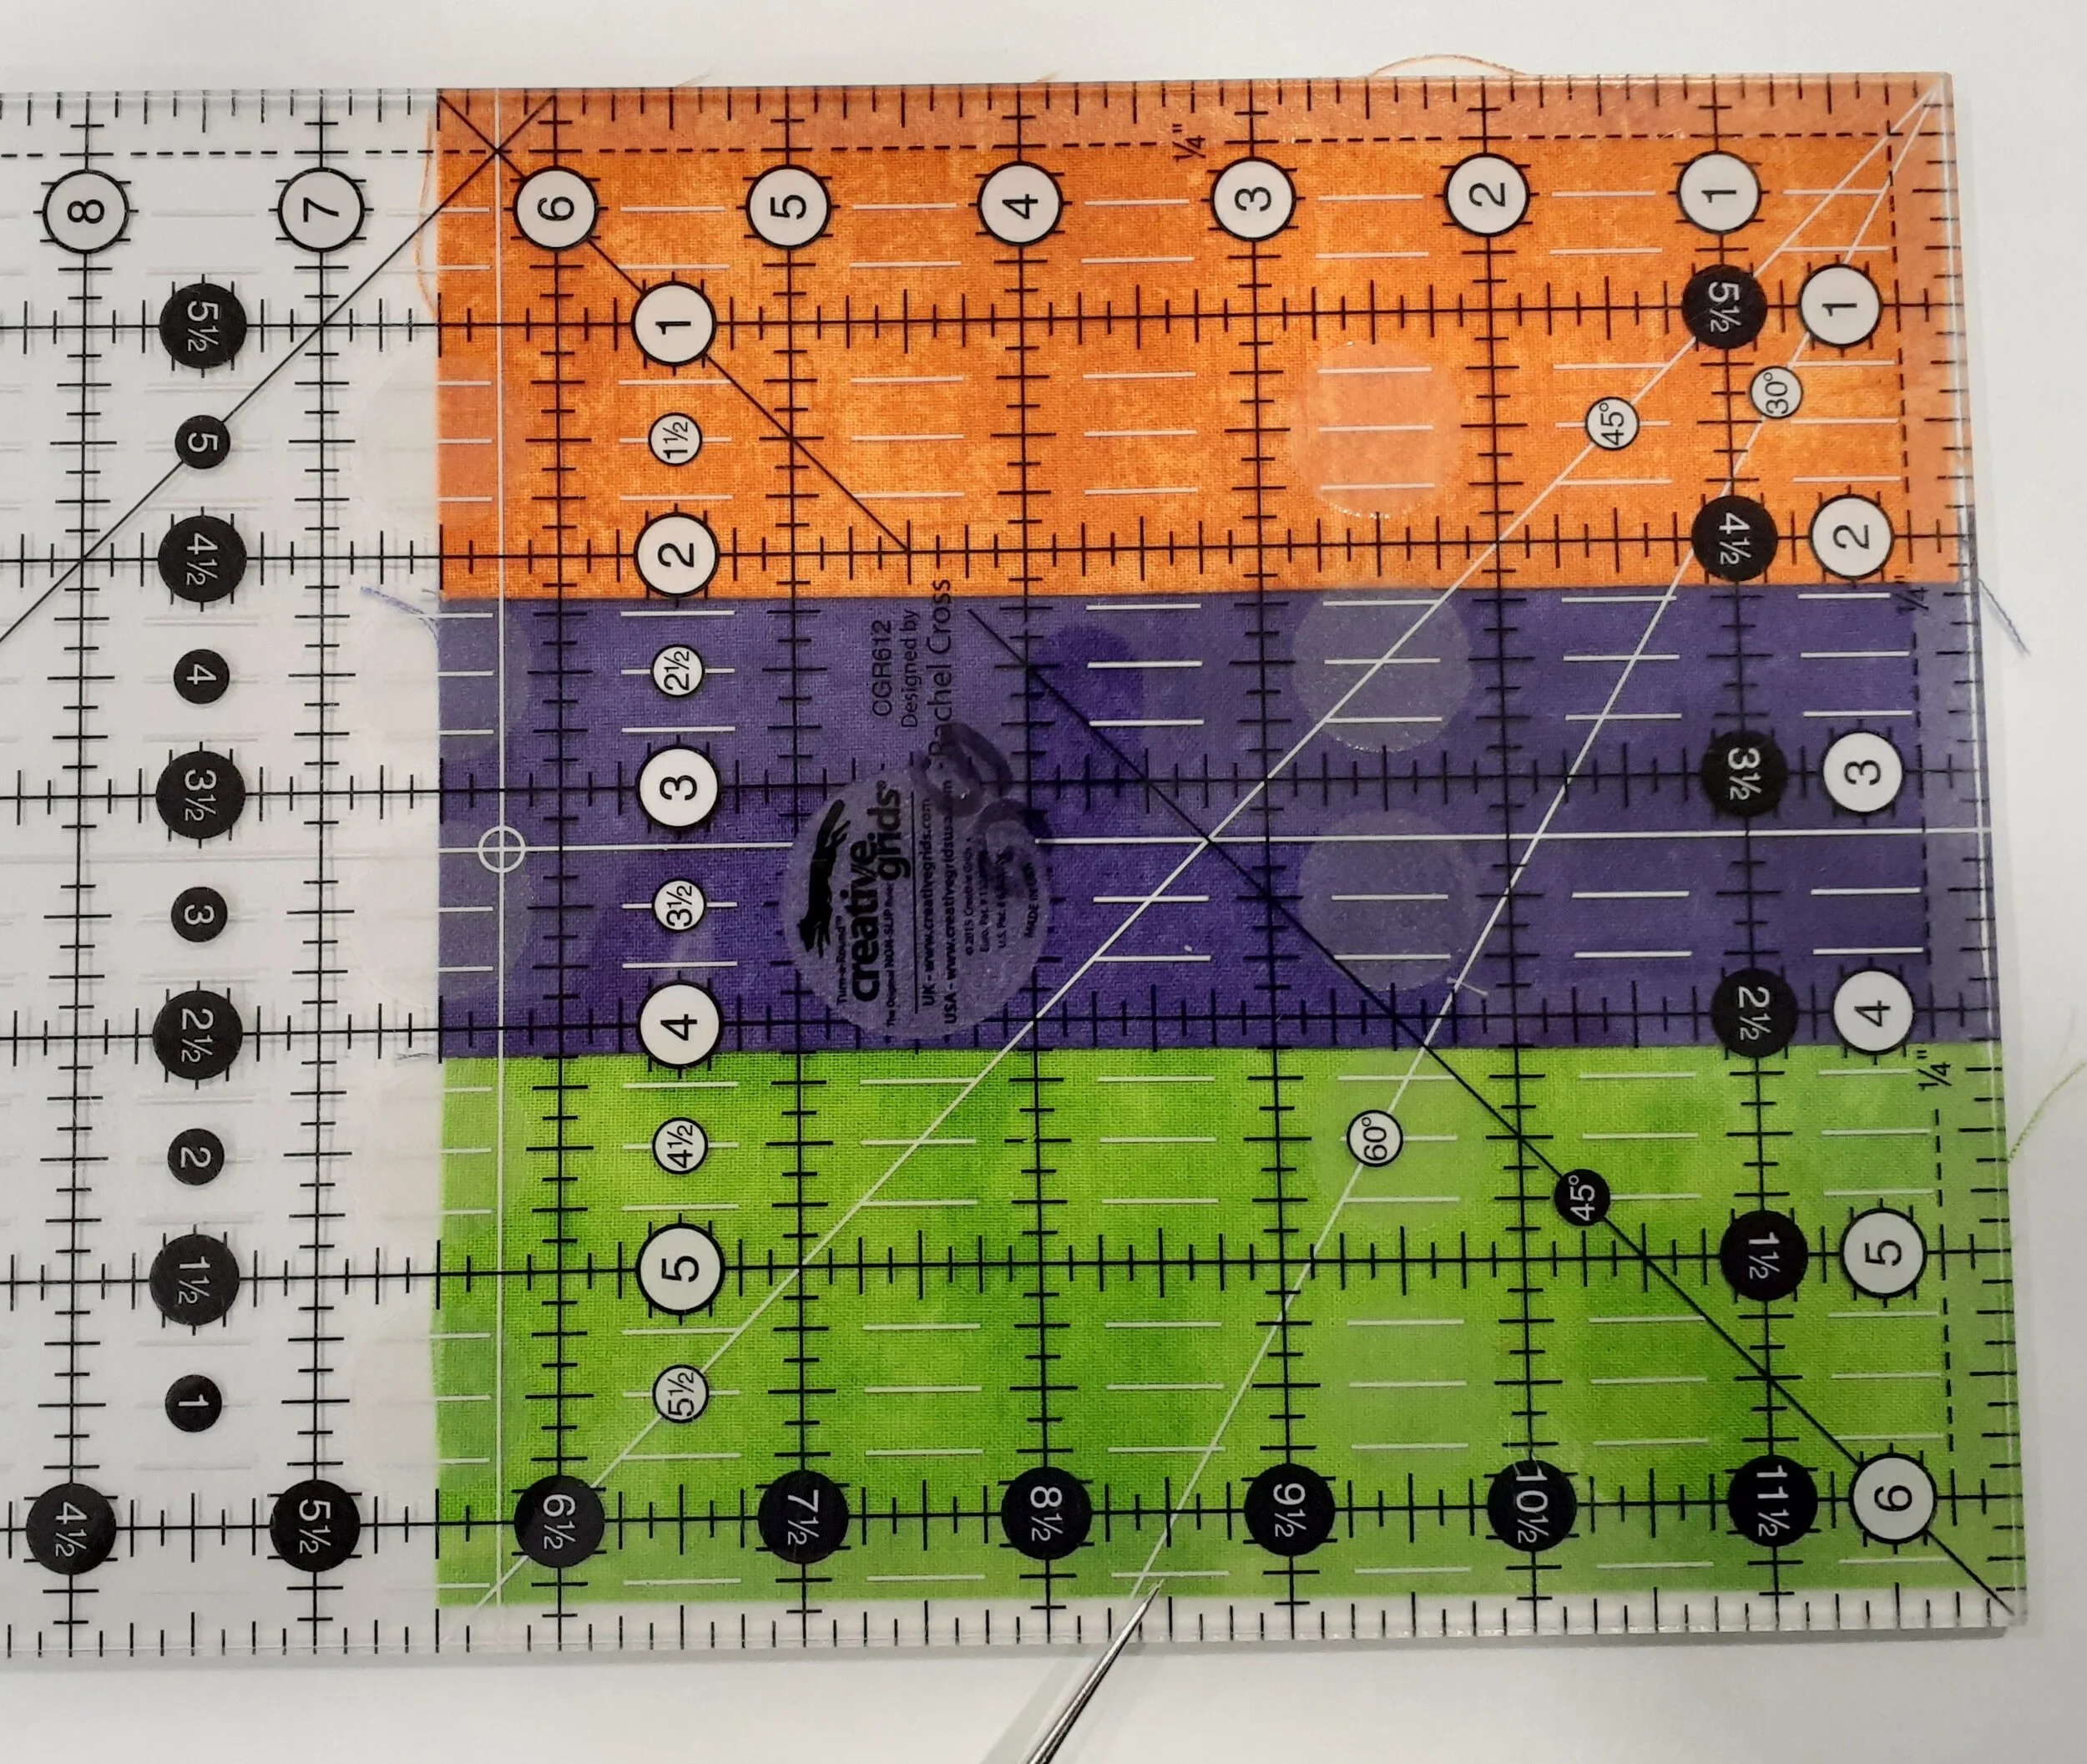
You will notice at the bottom of the photo (where my awl is pointing) that it doesn't create an actual square because it's 1/8” smaller in that direction. Also look at the other lines of the ruler on the block...they aren't touching the lines that they're supposed to...the top seam should be at the 2 1/4” line and the bottom seam should be at the 4 1/4” line.
You can imagine that if you were working on a complex block and then putting the blocks together your quilt width might end up 3-5” smaller than what you had planned...and only 1/8” at a time. How do we fix this problem??? There is a solution...
Many sewers don't realize that while they have the machine set to straight stitch they can press the plus or minus sign (which is technically the stitch width control for the zig-zag stitch) to change the needle position. Pressing the plus sign moves the needle to the right and pressing the minus sign sends the needle to the left. Give it a try on your own machine.
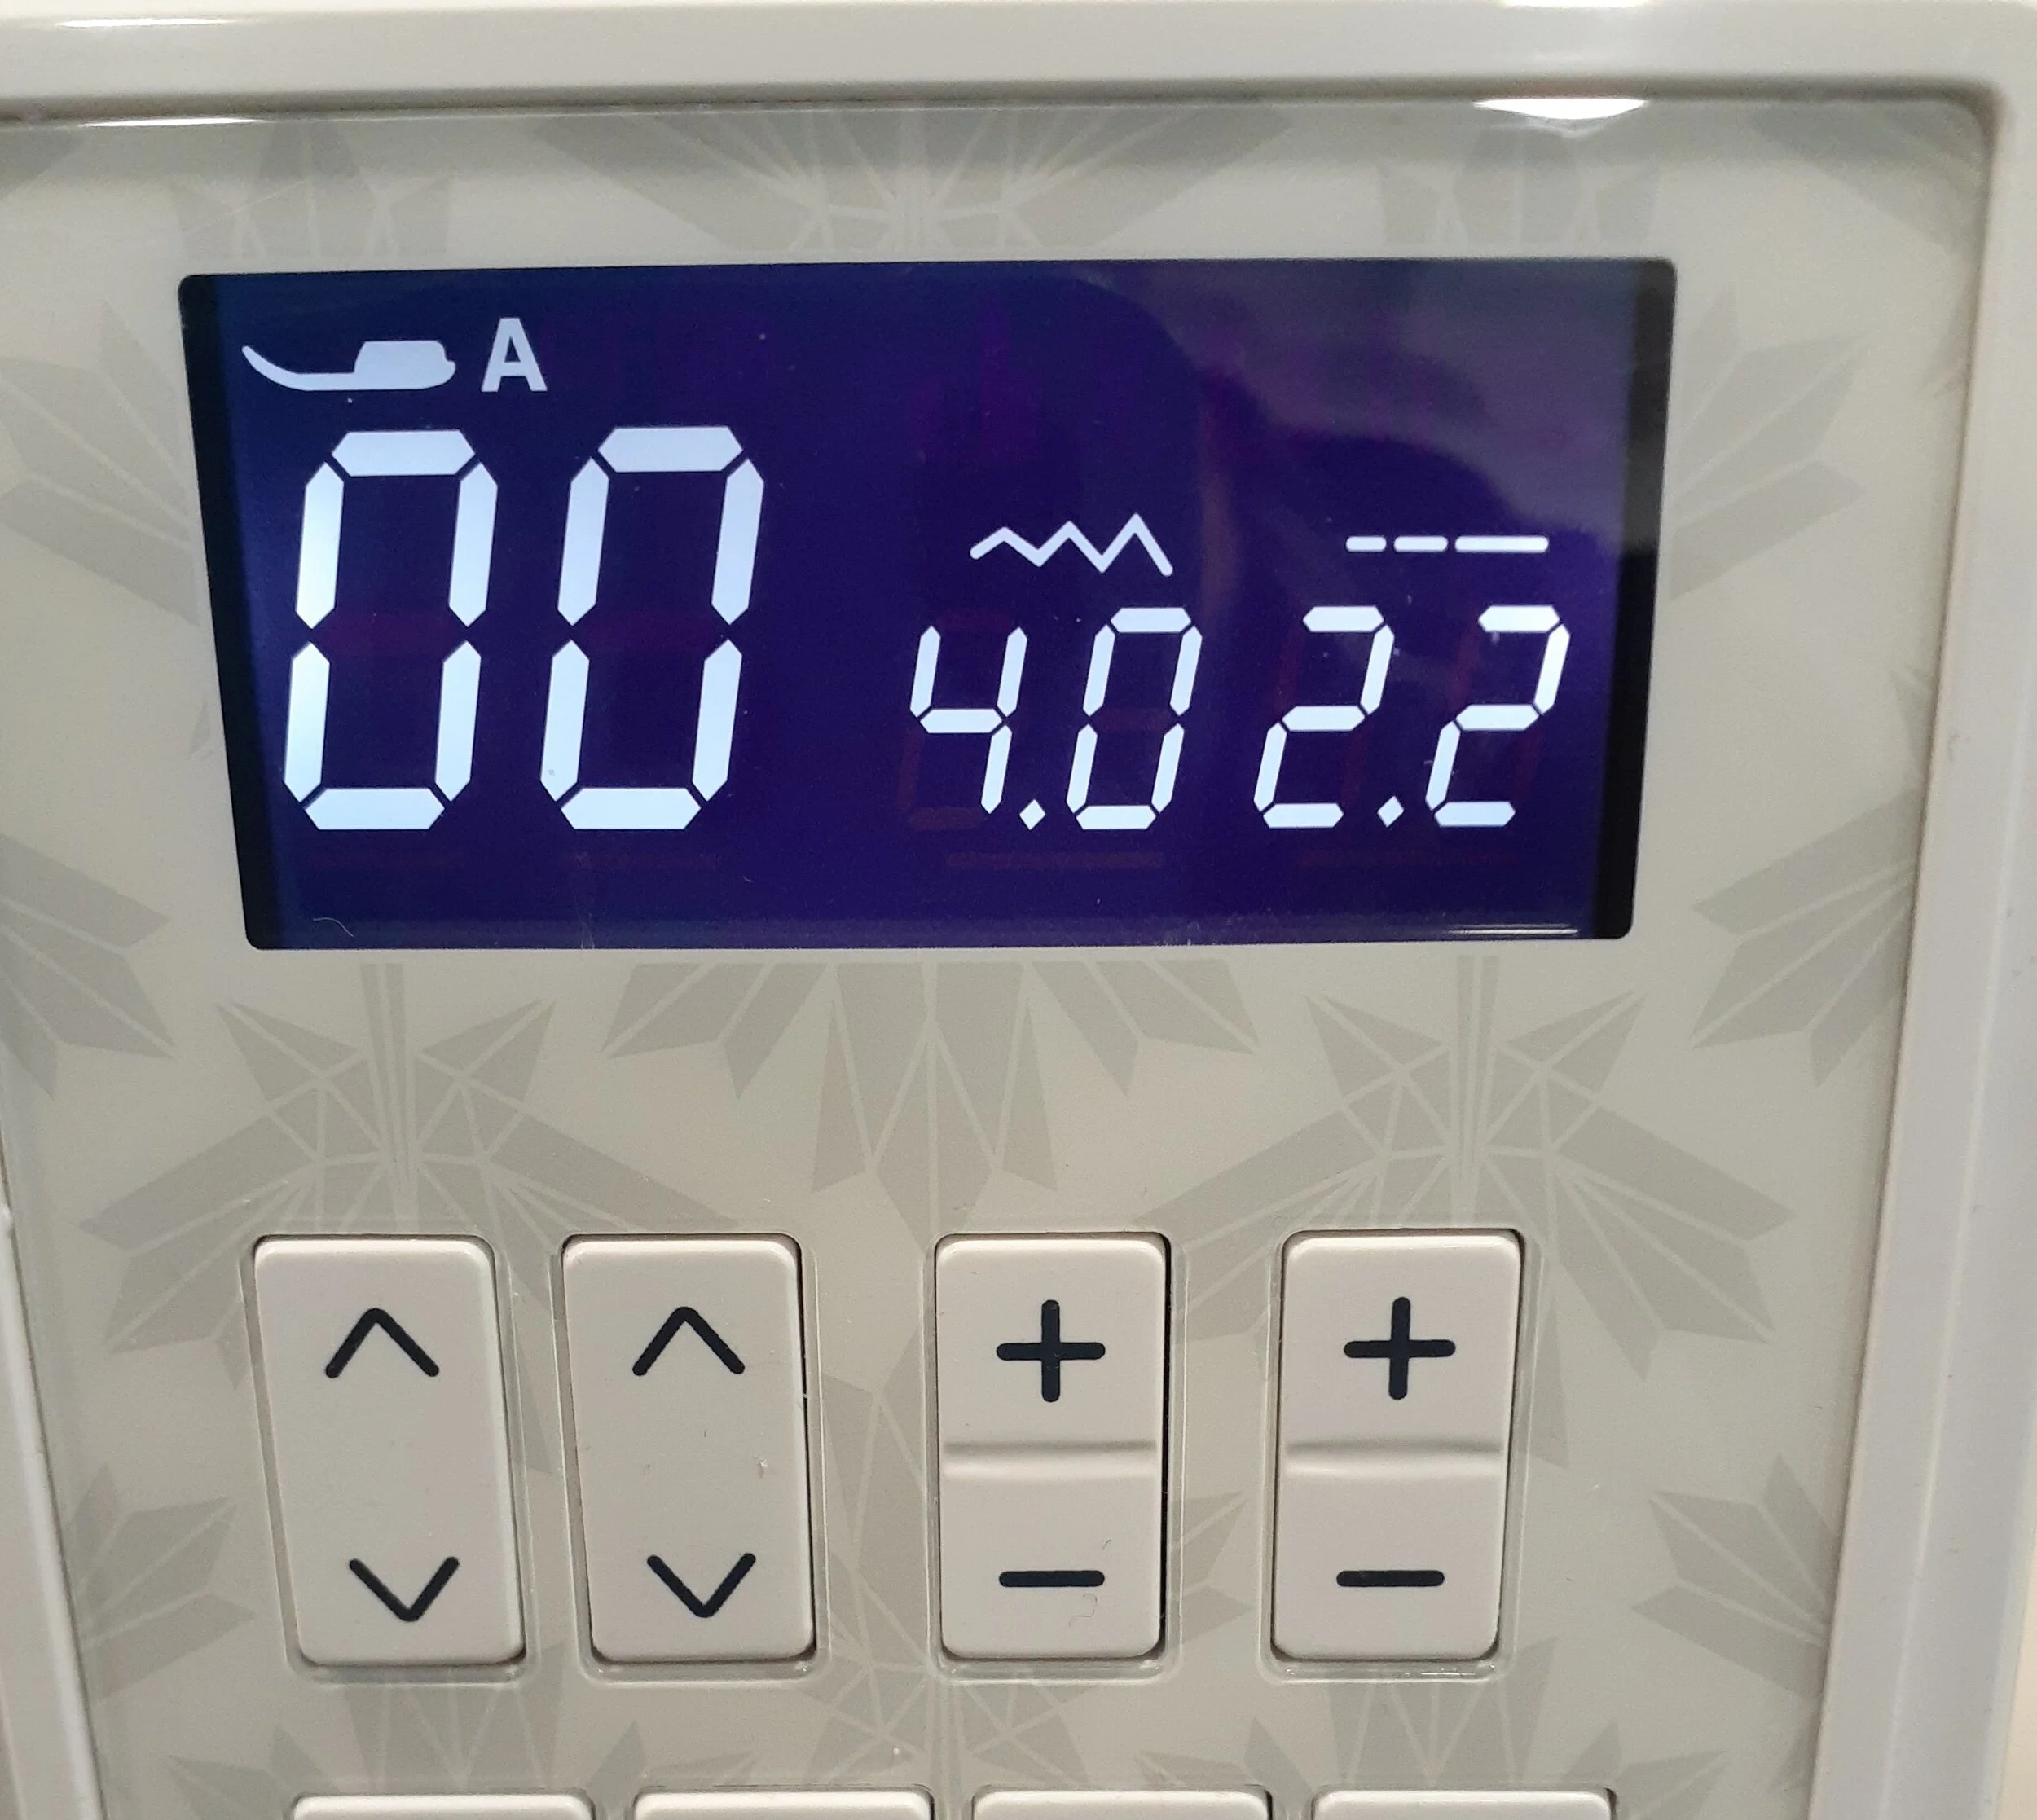
With the machine still set on straight stitch, I moved the needle position to the right by pressing the plus sign until I got to 4 (you can see the little zig-zag icon above the number 4) and I pressed the minus sign under the stitch length icon (just above the number 2.2) to make my stitch length shorter.
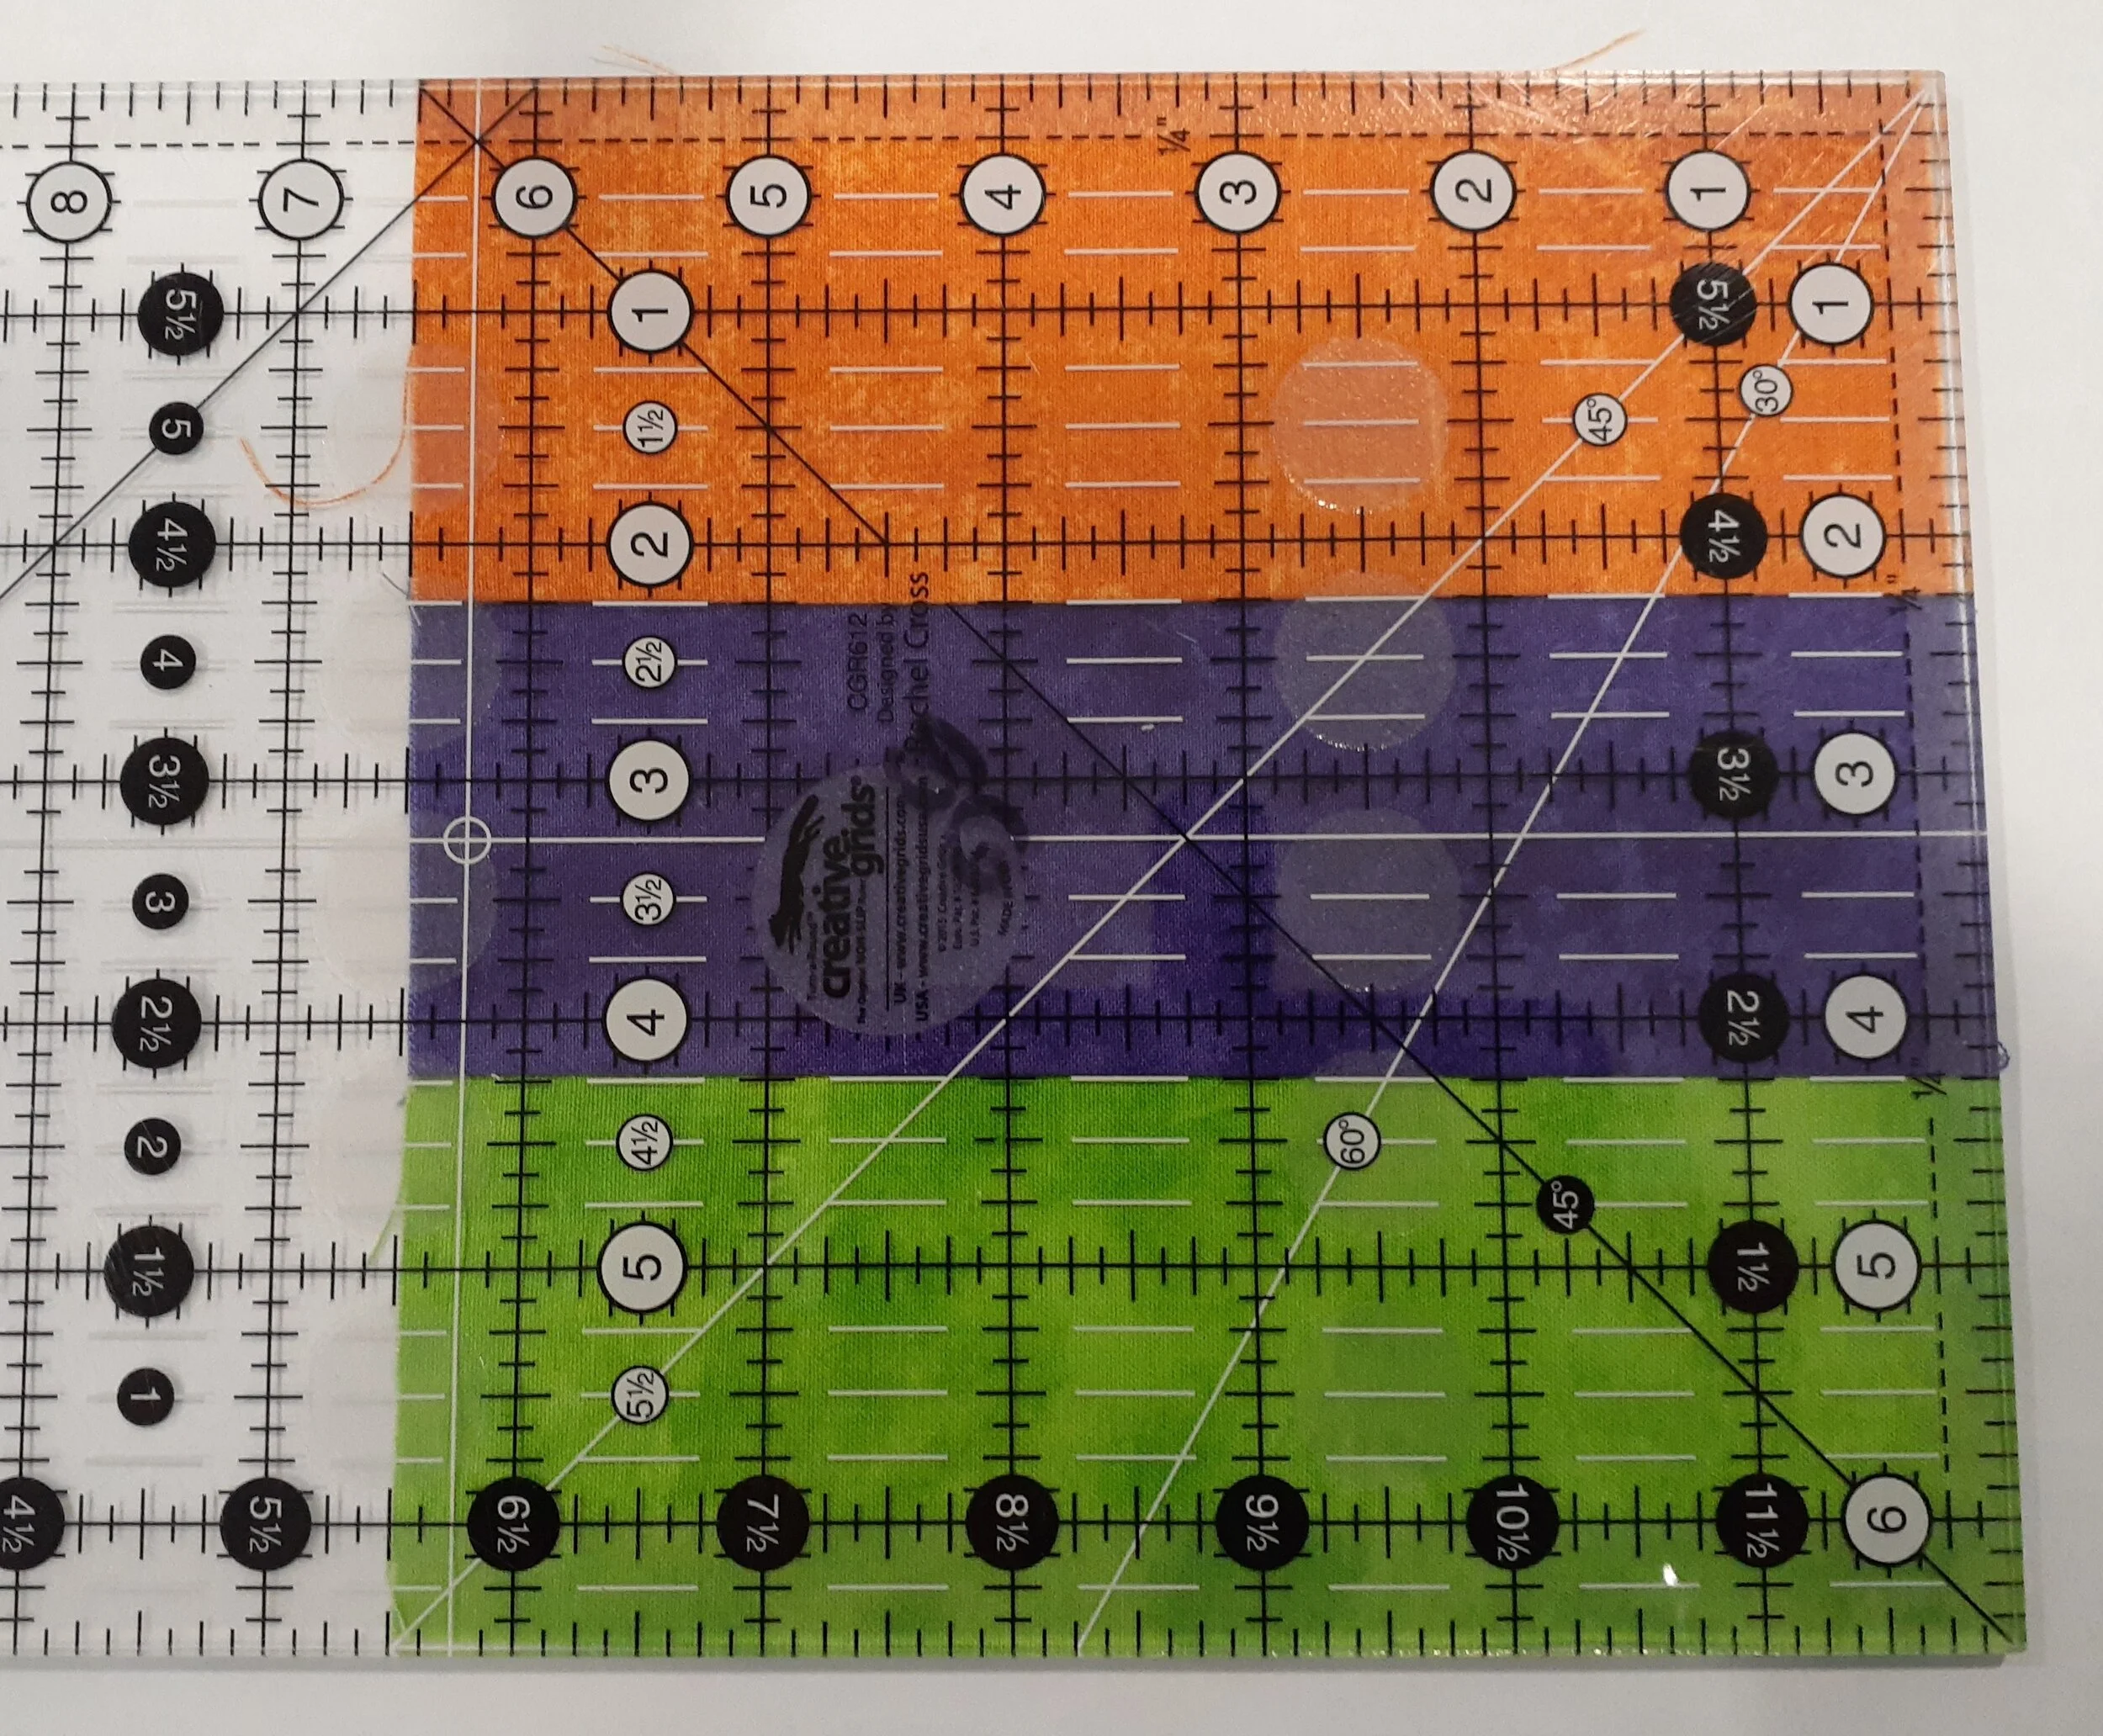
Stitch the other three strips together, press seams in one direction and the result? Bam!...a perfect 6 1/2” square.
Now you'll have to attach a Post-it note to the front of your machine to remind yourself of your new, perfect scant 1/4”.
On my Janome 6700 the 1/4” stitch has its own setting, not just a regular centred straight stitch (Mode 1, stitch # 4).

Many top of the line machines have this feature so check your manual. I'm going to do the same experiment using this machine, first with the default setting of 8.3 (width) and 1.80 (length).
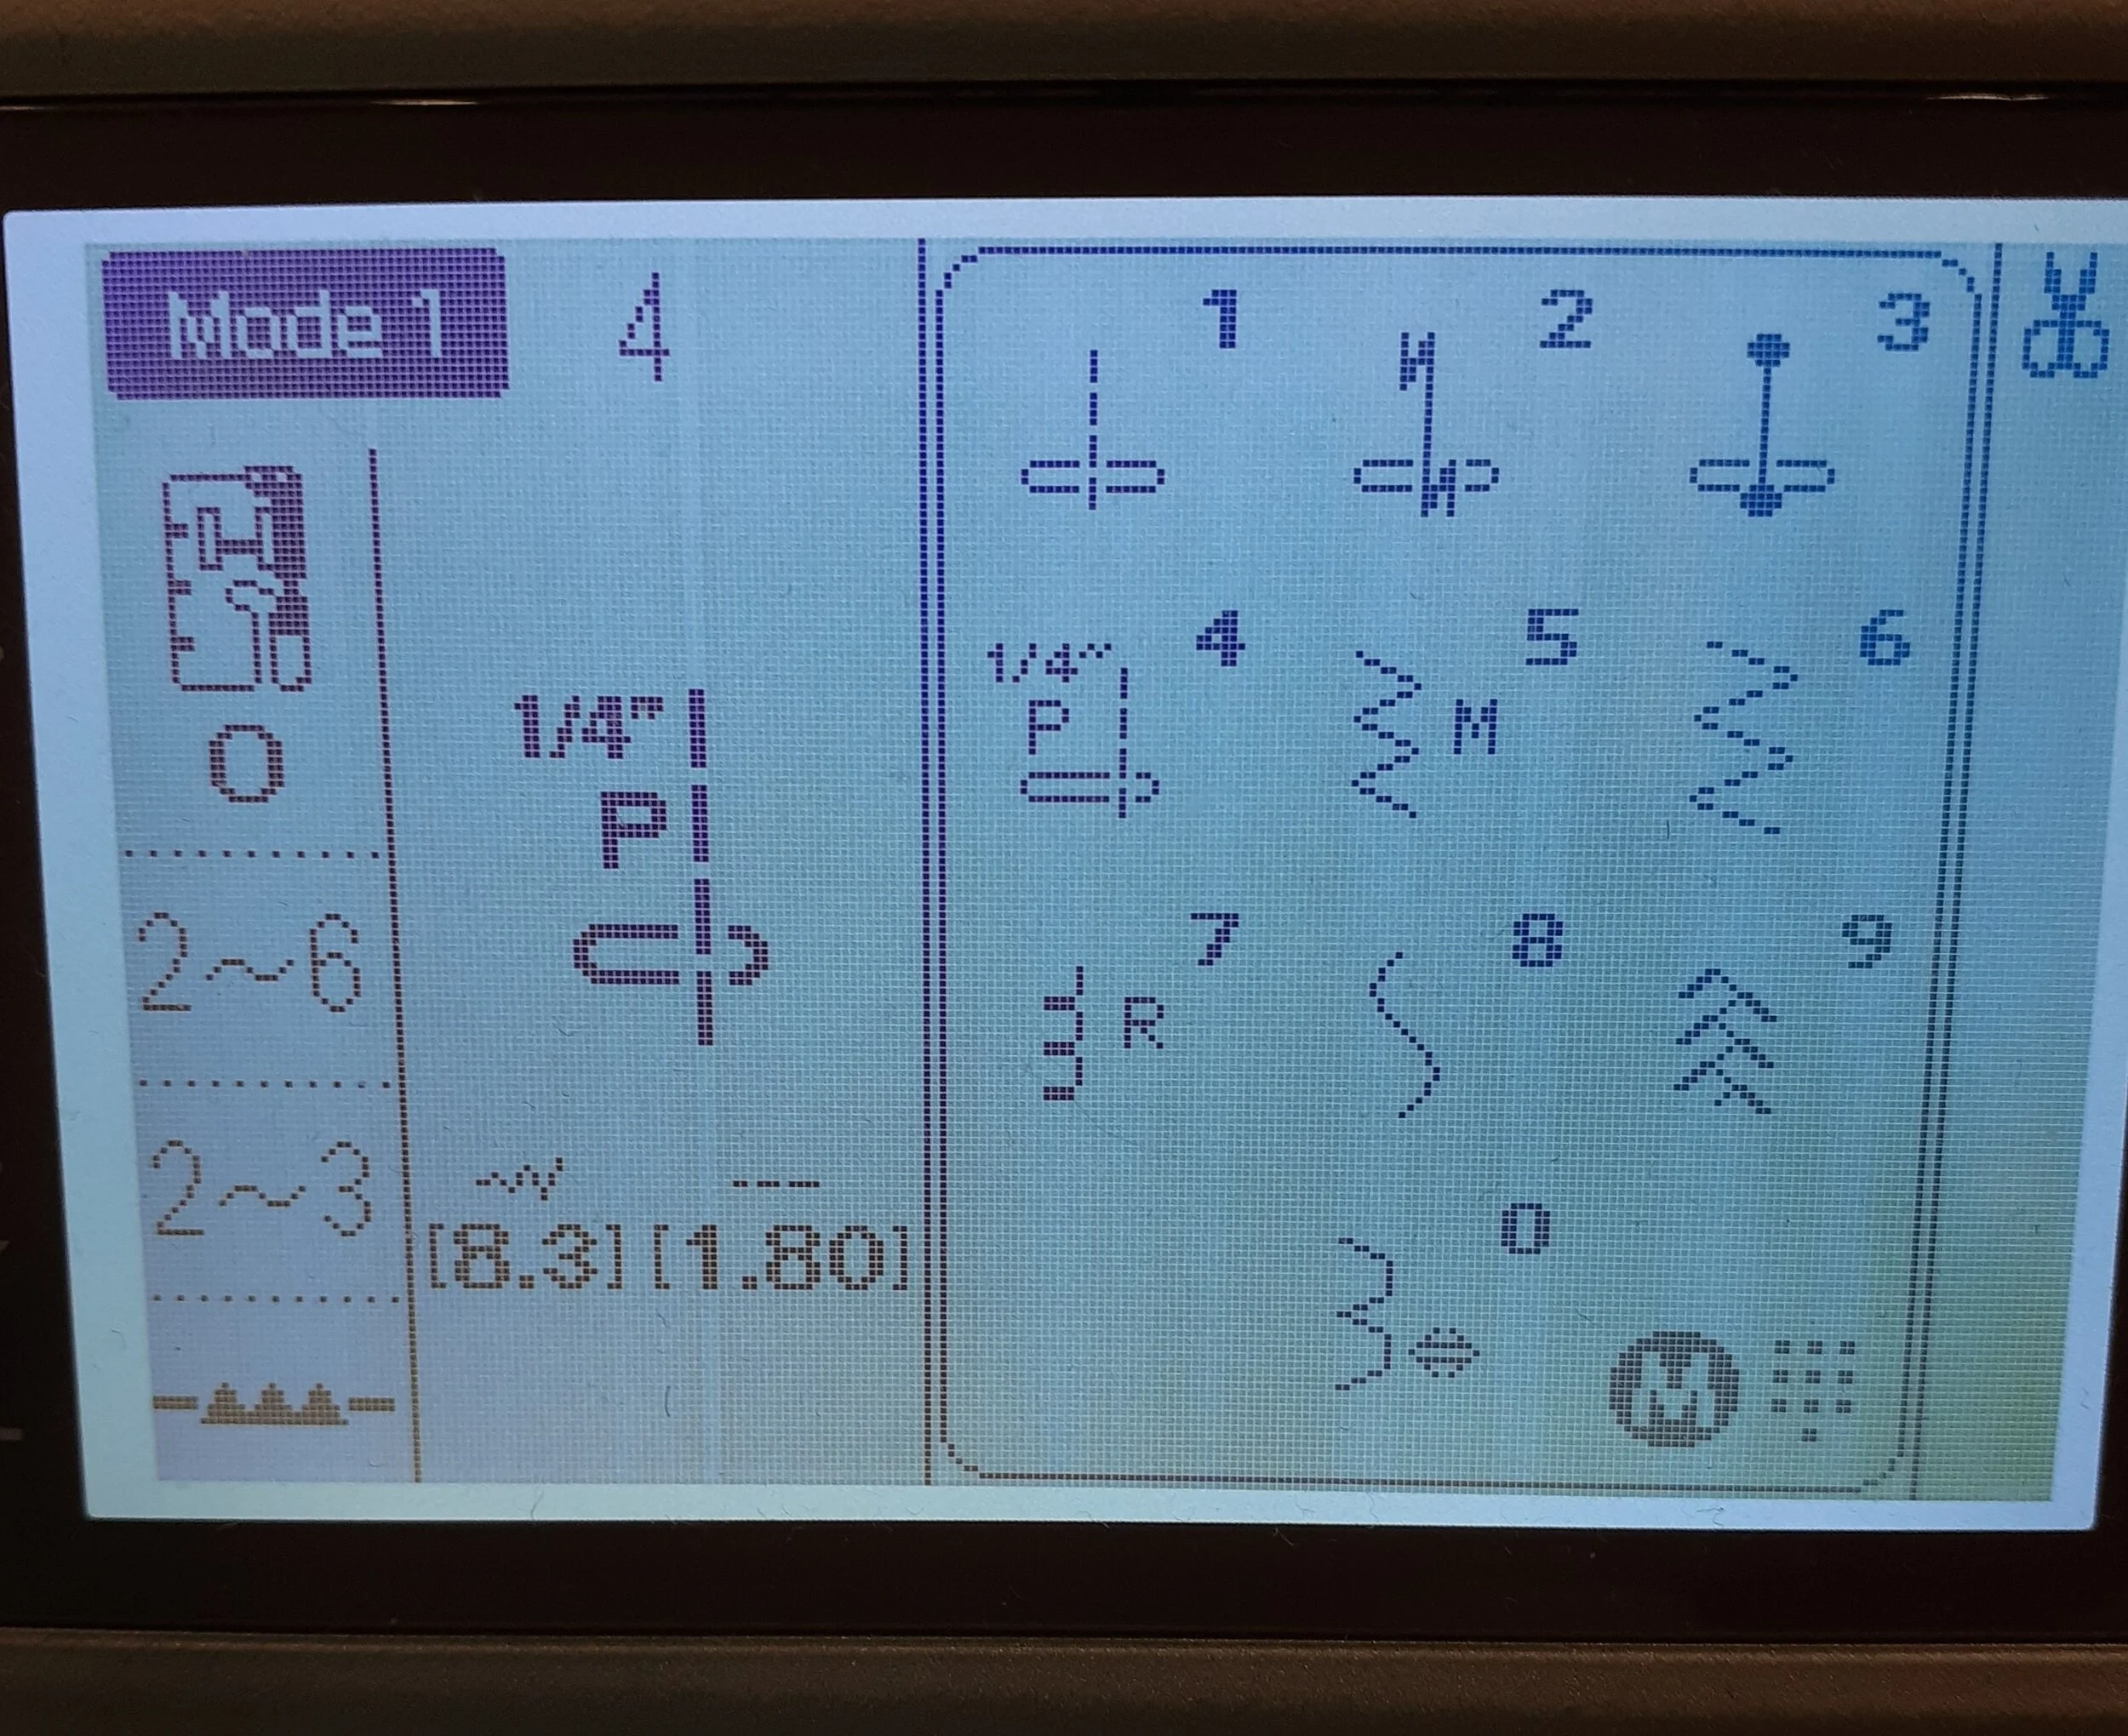
The result is the same as with my Canada 150 machine...it's 1/8” smaller than it should be.
I did my experimenting a long time ago so I know what my settings are for my scant 1/4” on this machine, 9.0 (width) and 2.0 (length).
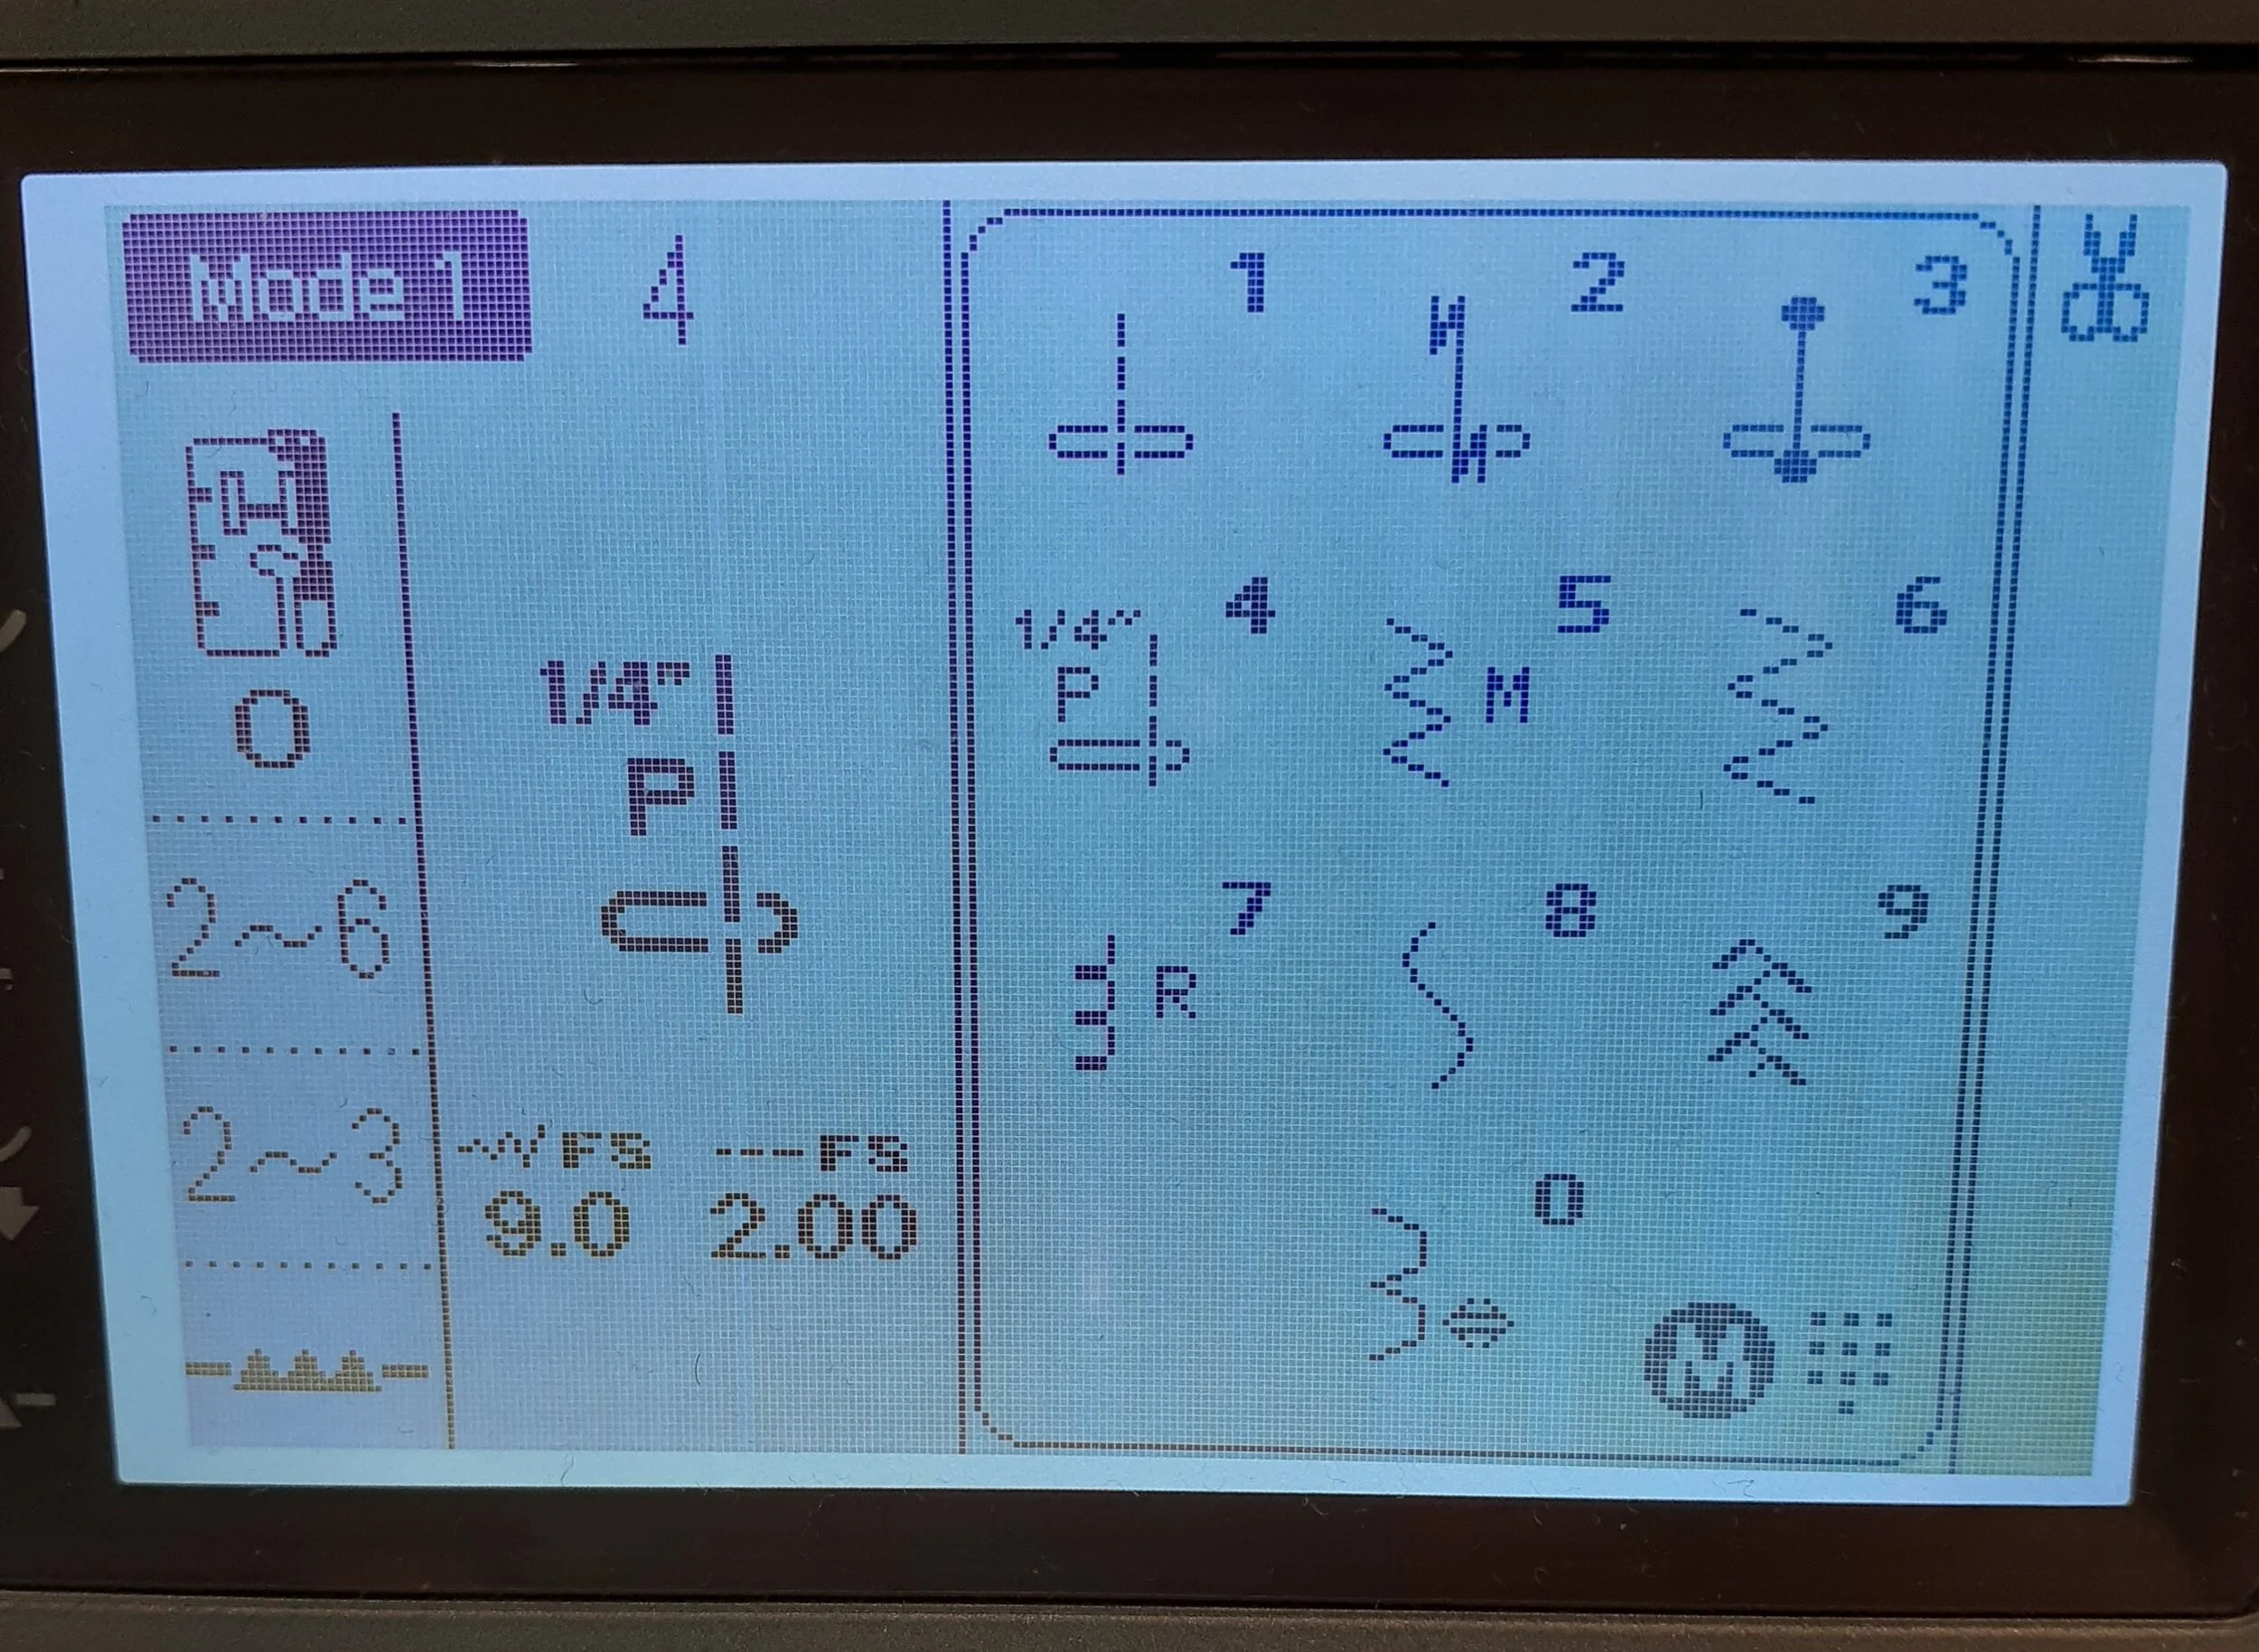
My 6700 has dials instead of push buttons for changing stitch width and length. But check out the little letters above my settings...FS means “favourite stitch”. My machine has the capability to enter my favourite stitch settings so every time I turn my machine on it shows my perfect quarter inch right there ready to go! Isn't that awesome?! Now, take a gander at that perfect 6 1/2” square.
You can use my numbers as a guideline, but just remember that each machine's settings for a scant 1/4” might be different, even within the same brand, so be sure to test yours until you get YOUR perfect scant 1/4”.
Clearly these instructions are for computerized machines, but you can still get a perfect quarter inch with an older mechanical machine...you'll just have to go about it a bit differently. Some older machines may or may not have a 1/4” foot available for them and you'll have to check the manual for changing needle position or just experiment if there isn't one to refer to. Or you can use the regular presser foot and a piece of masking tape on the throat of the machine...we quilters are known for our problem solving!
Now that you know how to get your own perfect scant 1/4” you will be amazed at how much more precise your work is. Let me know the results of your own experiment.