
July Block- Canada Day

Celebrate Canada Day (July 1st) with the maple leaf, a well-loved symbol of Canada. Bright red scraps are striking against a crisp white background. Happy Canada Day everyone!
(***scroll to the bottom of the page for a printable PDF version of this pattern)
Cutting Instructions (for one 12” finished block- it will be 12 ½” before sewing on 1 ½” strips):
From a variety of red scraps:
cut eight 2 ⅞” squares
cut three 3 ½” squares
cut one 5 ¼” square
one 1” x 8” strip
From a variety of white scraps:
cut four 2 ⅞” squares
cut three 3 ½” squares
cut one 5 ¼” square
cut two 3” x 6 ½” strips
cut 2 strips 1 ¼” x 12 ½”
cut 2 strips 1 ¼” x 14 ½”
Outer border fabric (.25 m / ¼ yd): *** you might not want to cut the outer border lengths until your block is completed with narrow background borders in case seam allowances are not consistent
cut two 3 ½” WOF (width of fabric) strips (cut one 14 ½” and one 20 ½” length from each strip)
Binding: three 2 ½” strips (.25 m / ¼ yd)
Backing: one piece 23” square
Batting: one piece 23” square
Hanging sleeve: one piece 5” x 20 ½”
Sewing instructions:
*** ¼” seam allowances are used throughout. Refer to my Scant Quarter Inch tutorial for your own perfect ¼” seam.
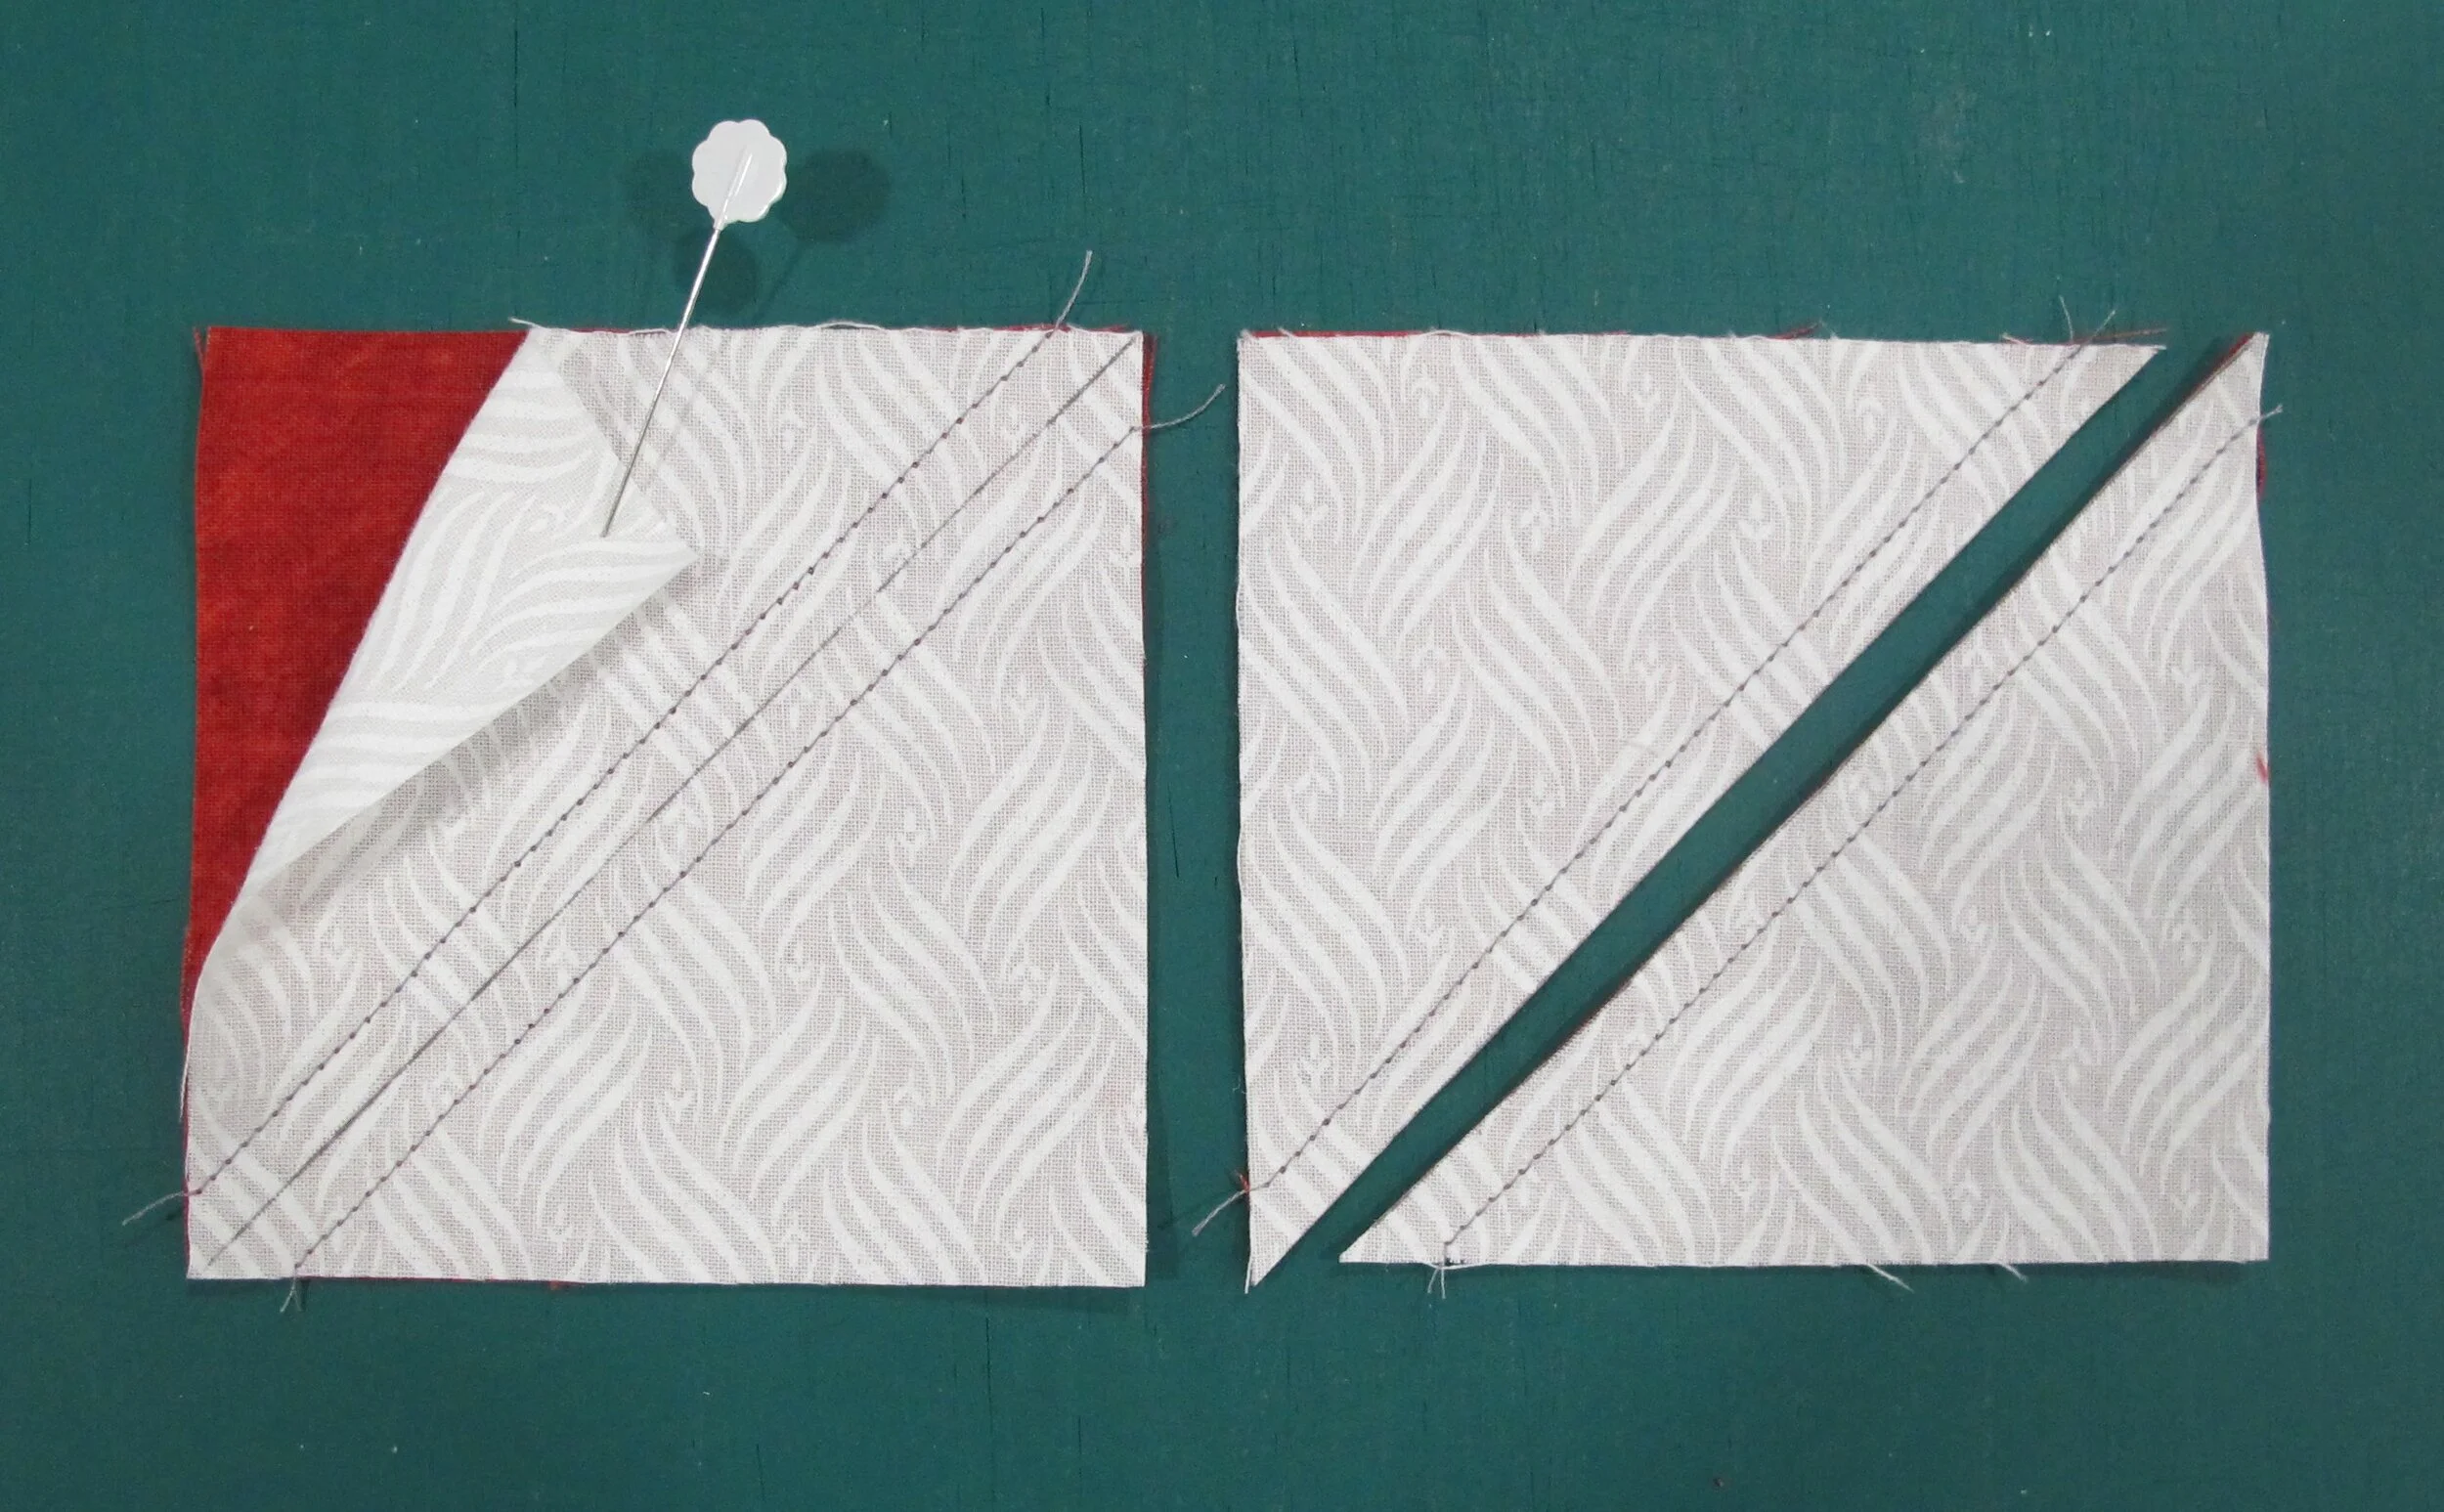
figure 1
Half Square Triangles (HST's): three 3 ½” red squares and three 3 ½” white squares
draw a diagonal line on the back of all the 3 ½” white squares
with right sides together place a red square with a white square and stitch ¼” from both sides of the drawn line (repeat for all sets)
cut them apart along the drawn line and press towards the red (figure 1)
Trimming HST's:
line up the diagonal line from the ruler on top of the seam line making sure that the entire 2 ⅞” area of the ruler is on top of the HST and trim the excess from the right and top of the square (figures 2 & 3)
turn the HST around and place the 2 ⅞” markings from the ruler on the already trimmed corner and trim the final 2 sides...the awl is pointing to the 2 ⅞” mark on the ruler in case you're not sure of that measurement (figures 4 & 5)...repeat with all HST's

figure 2

figure 3
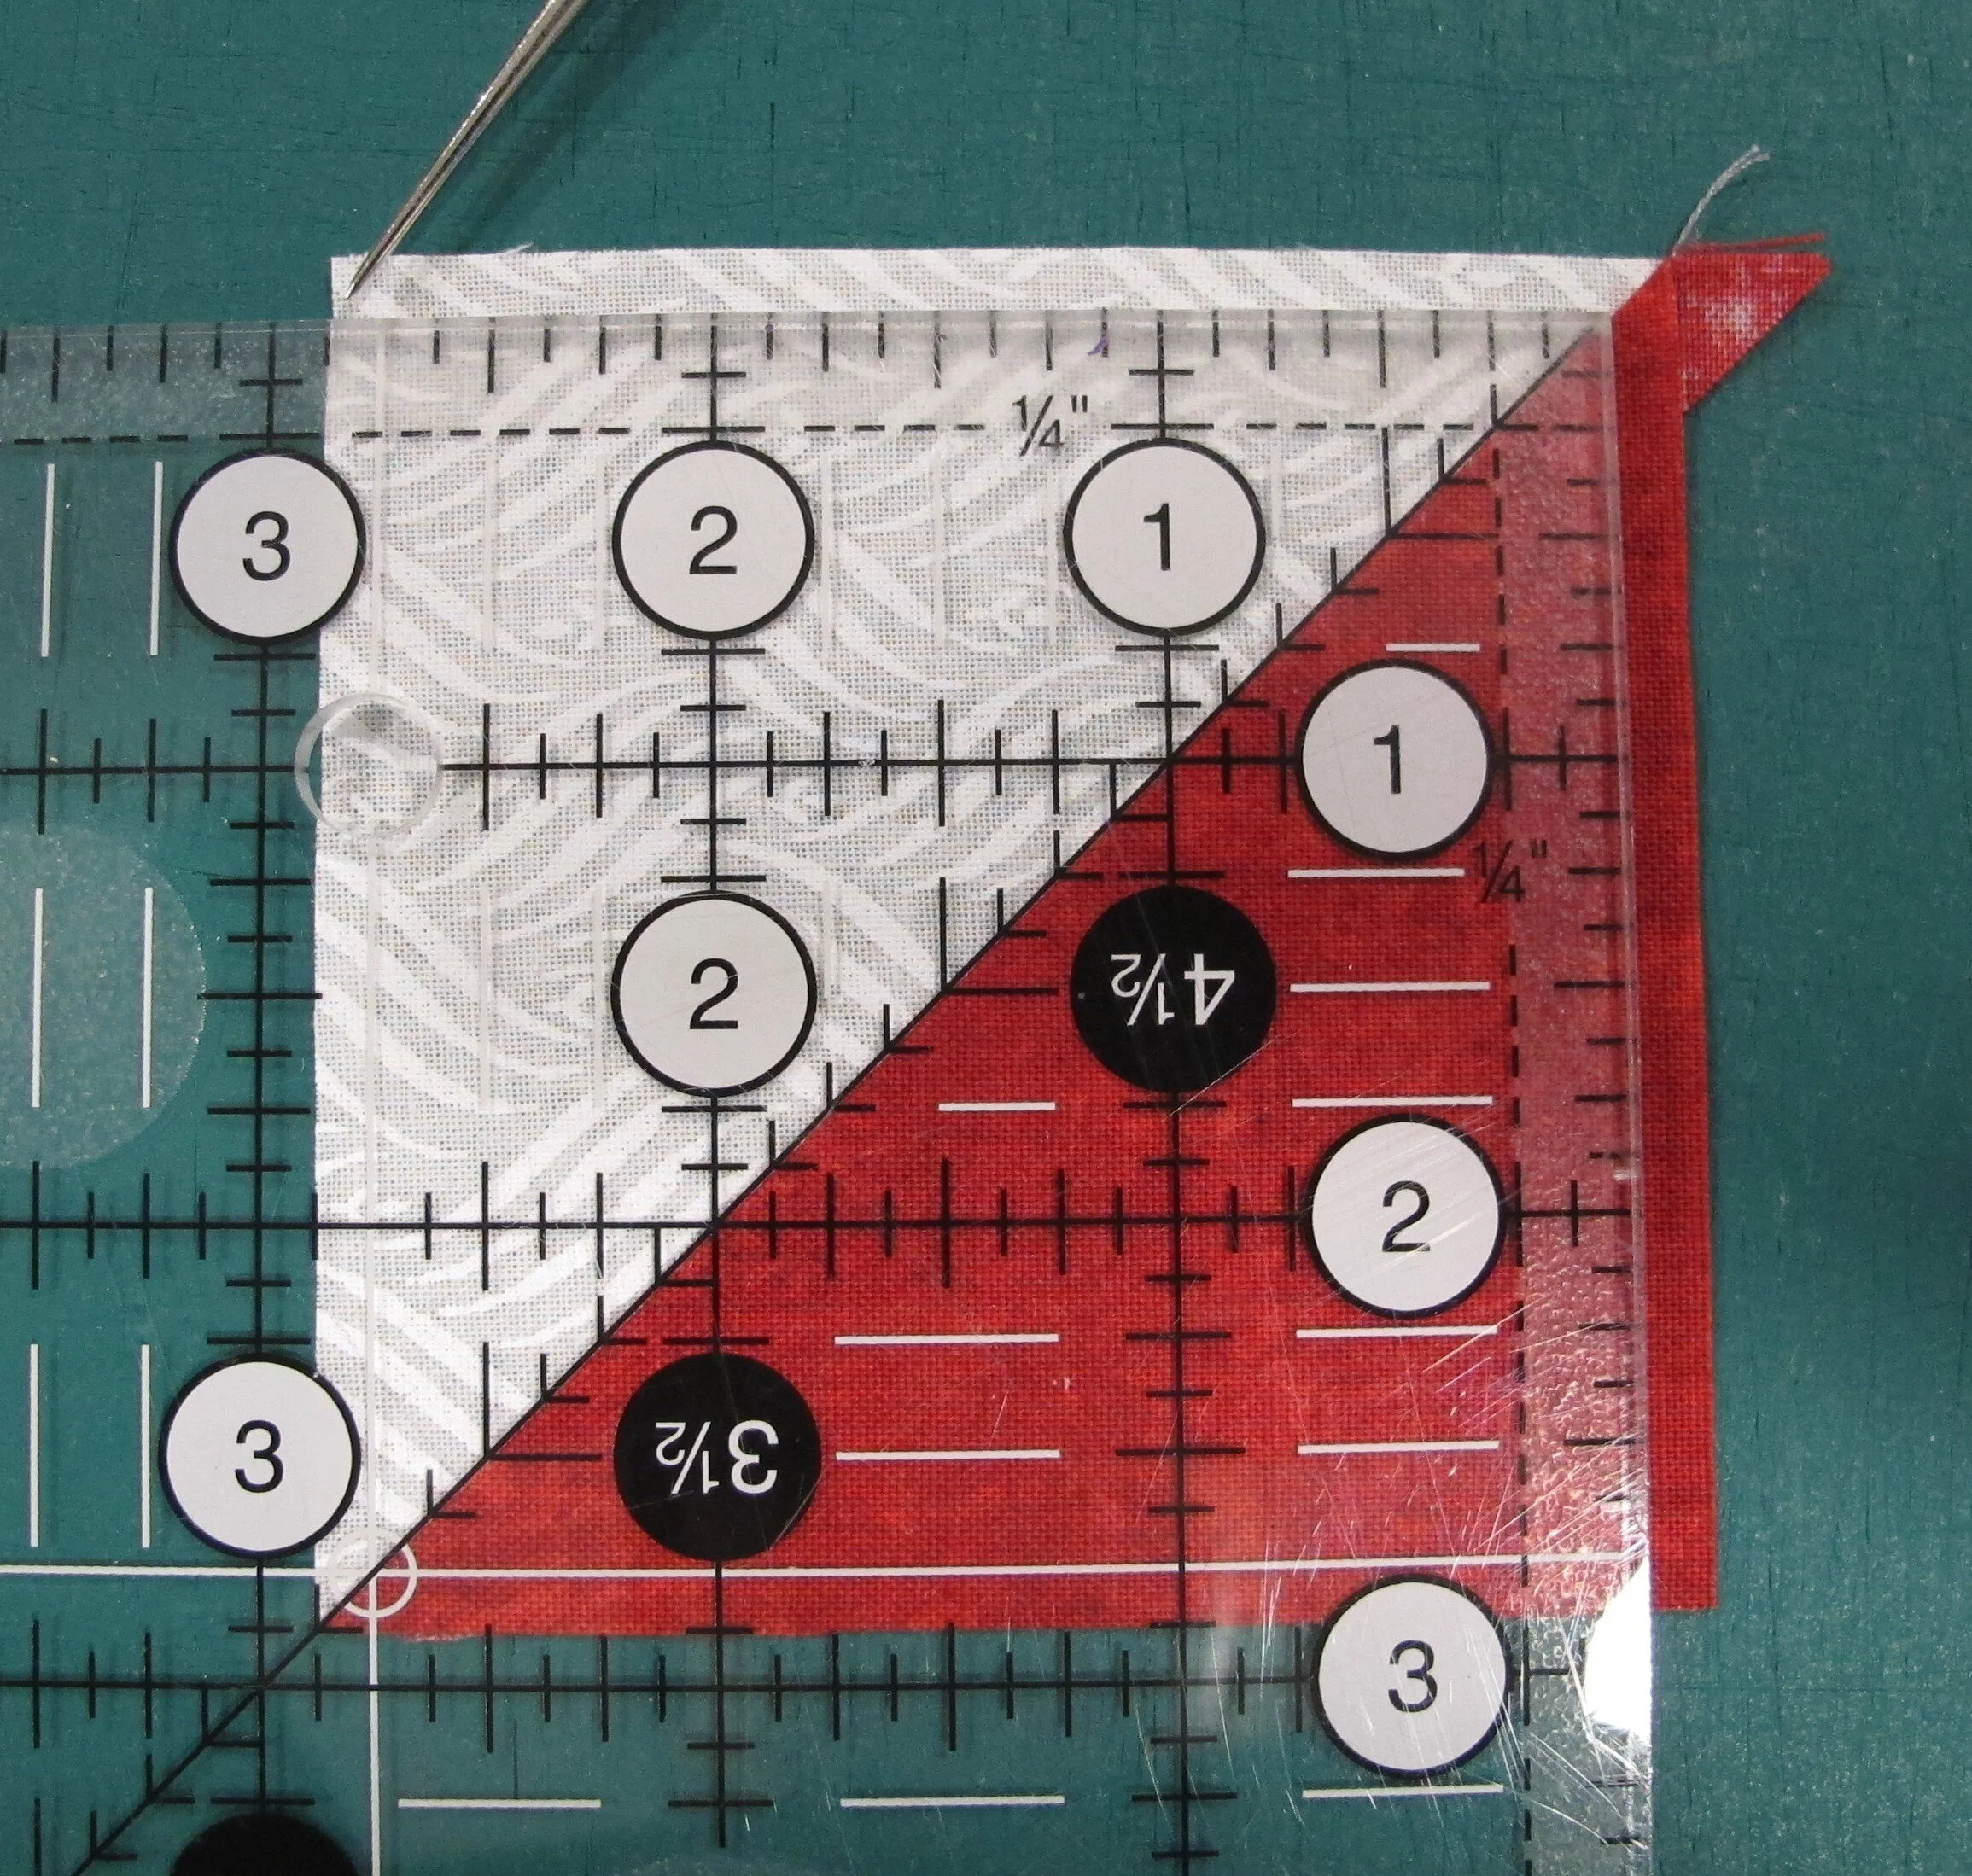
figure 4
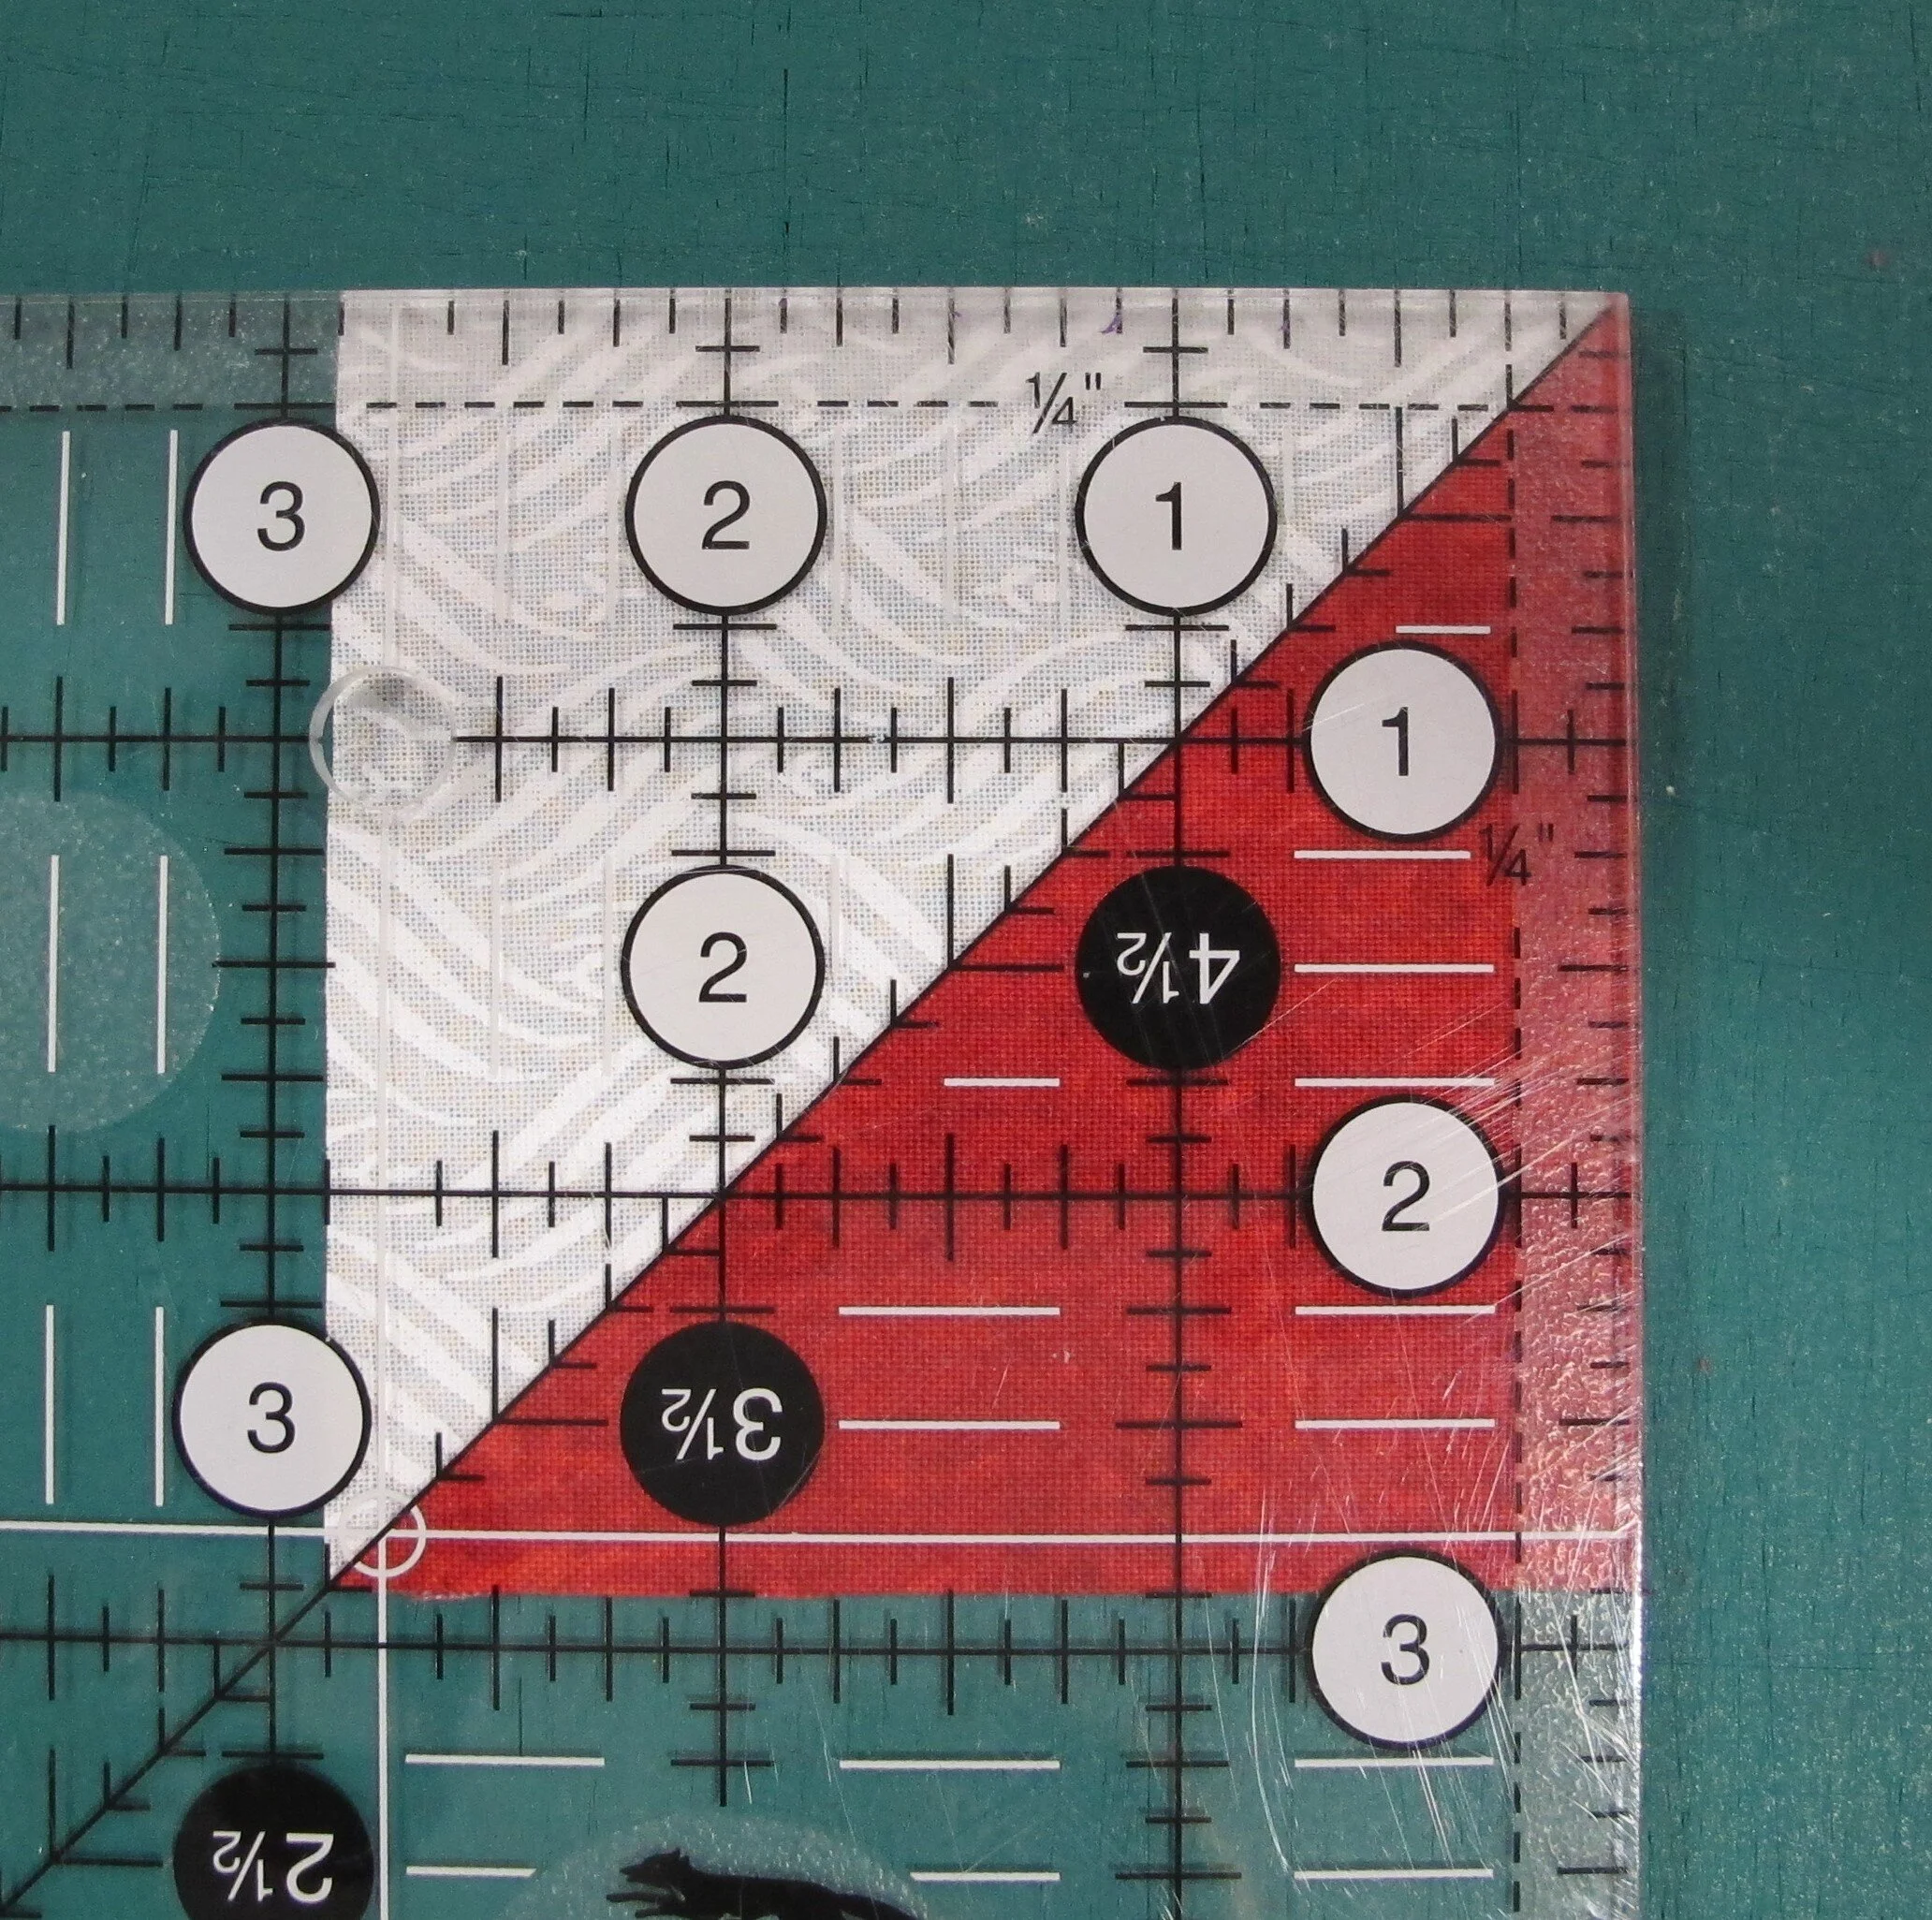
figure 5
Stem: one 5 ¼” white square, one 2 ⅞” red square and the 1” x 8” red strip
press each long edge of the red strip to the back by ¼”
centre the red strip diagonally on top of the 5 ¼” white square and edgestitch along each fold (figure 6)
draw a diagonal line on the back of the red square, place it on one corner of the white square (where an end of stem is) and stitch along the drawn line (figure 7)
trim the seam allowance to ¼” and press to the corner (figure 8)
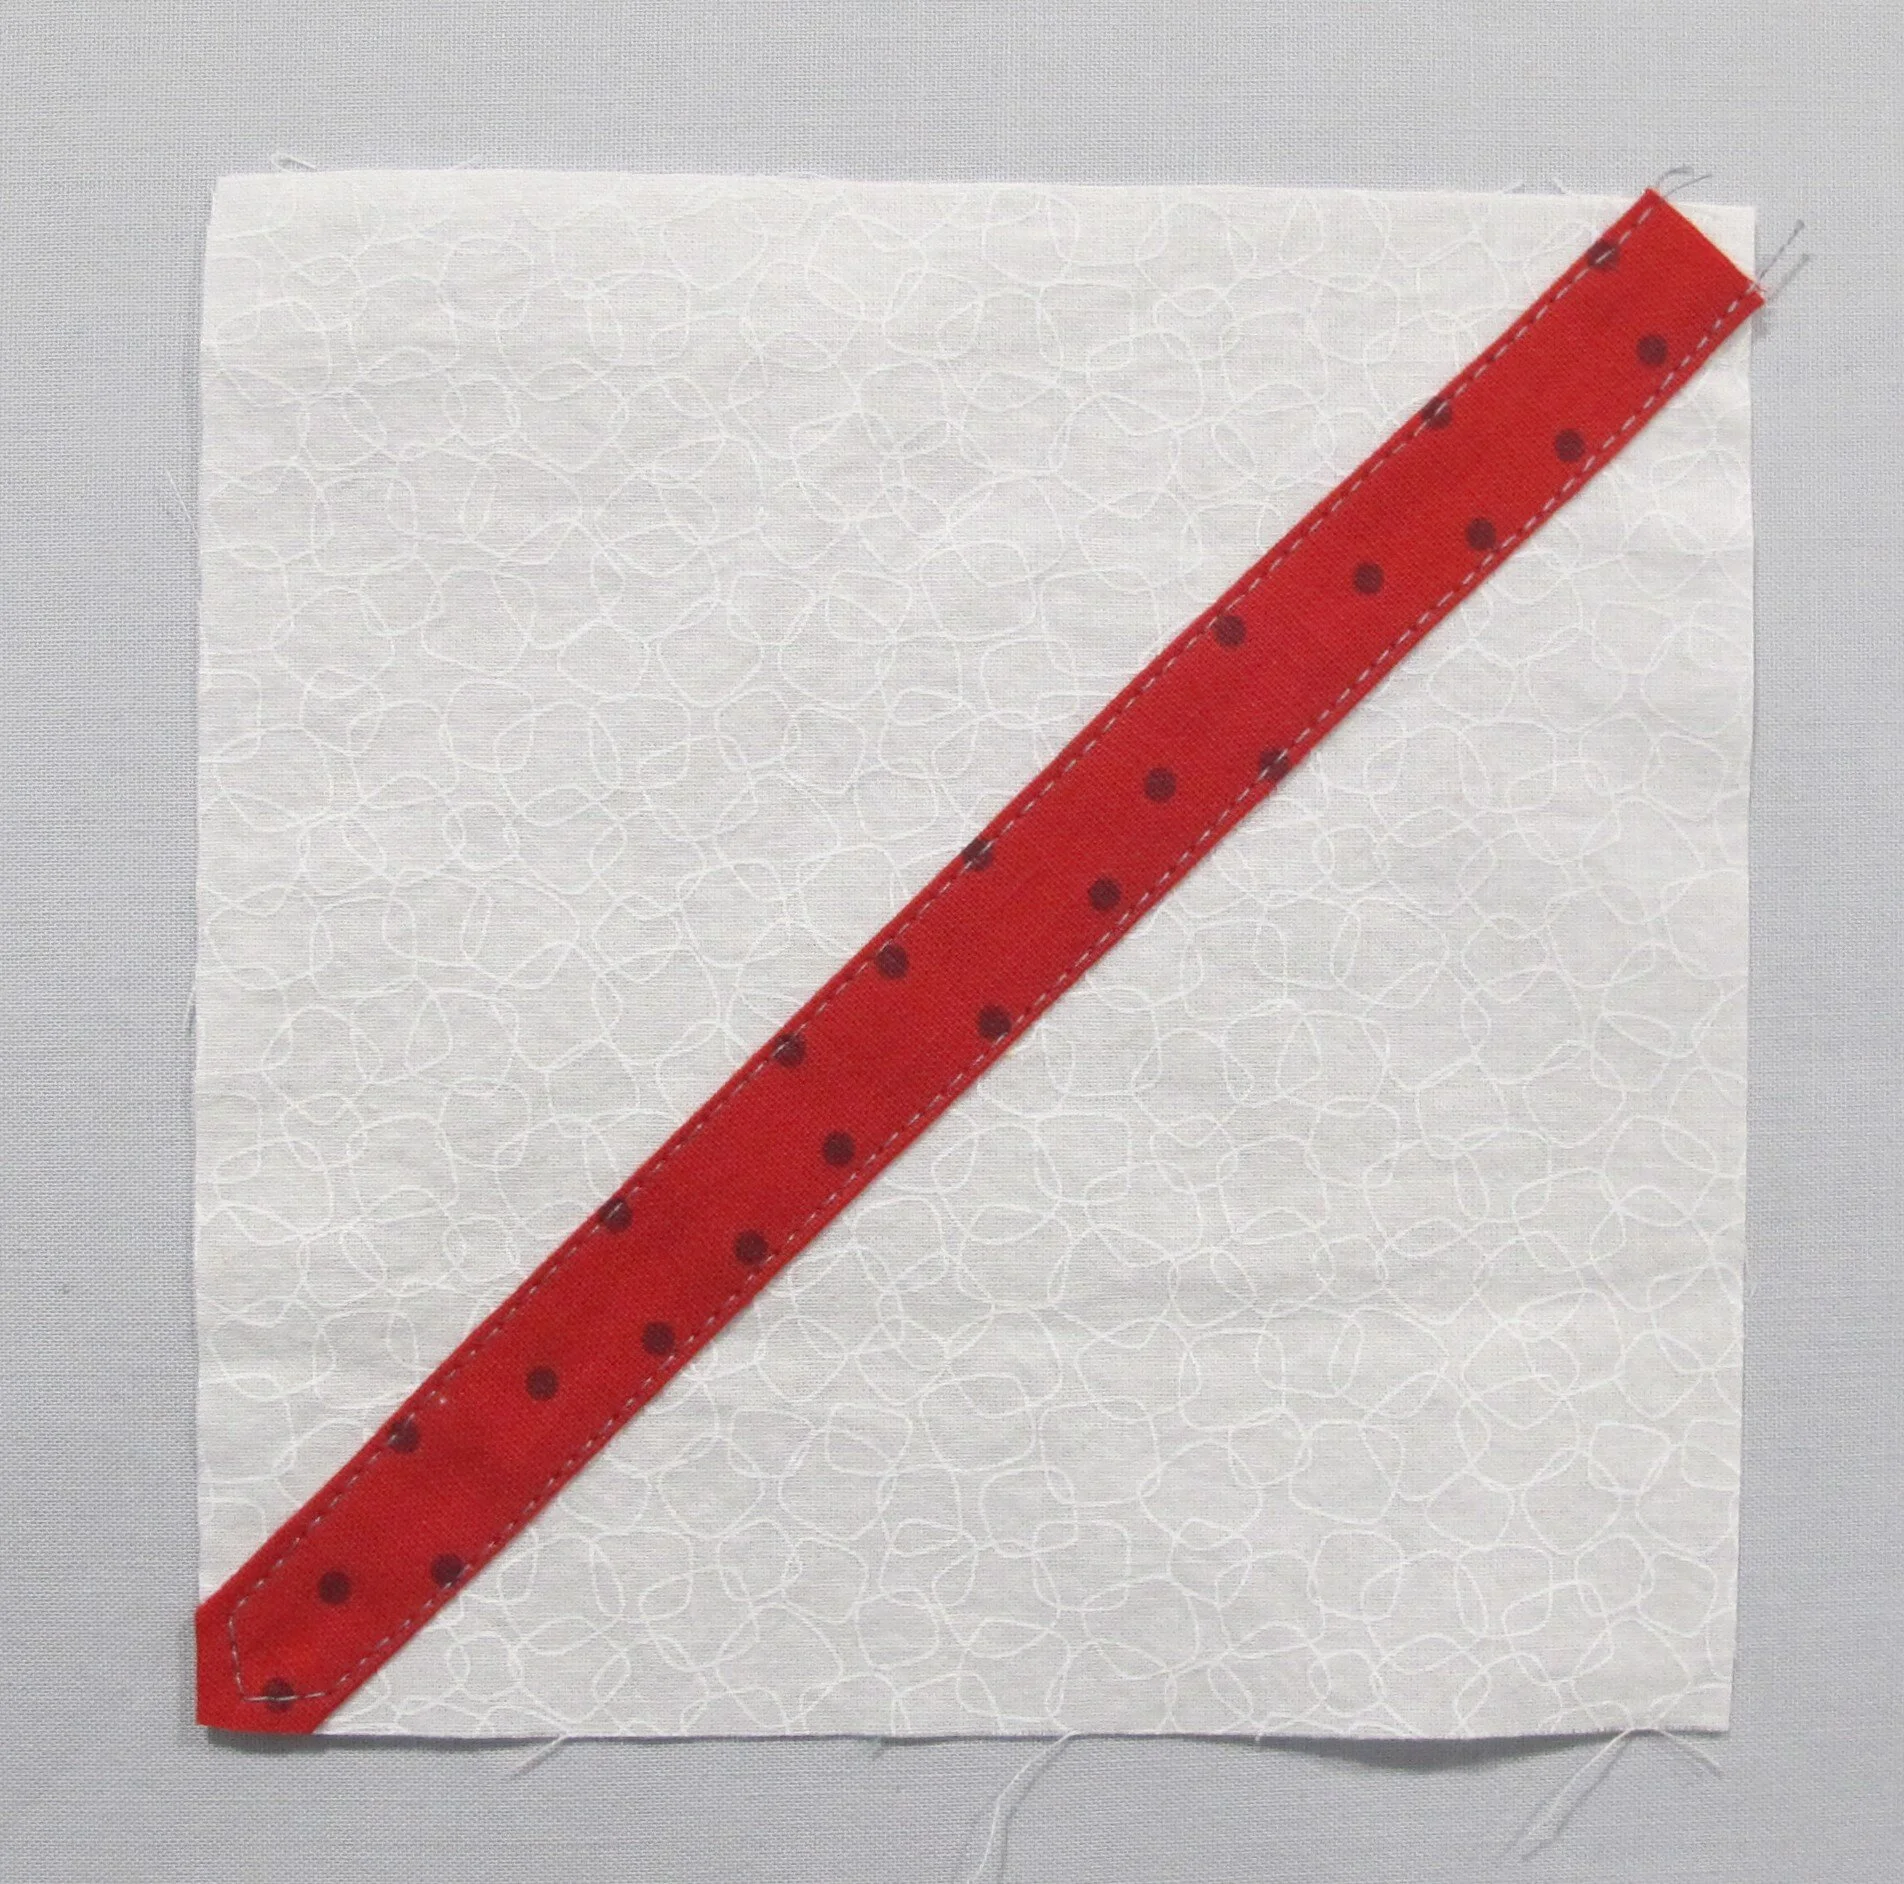
figure 6
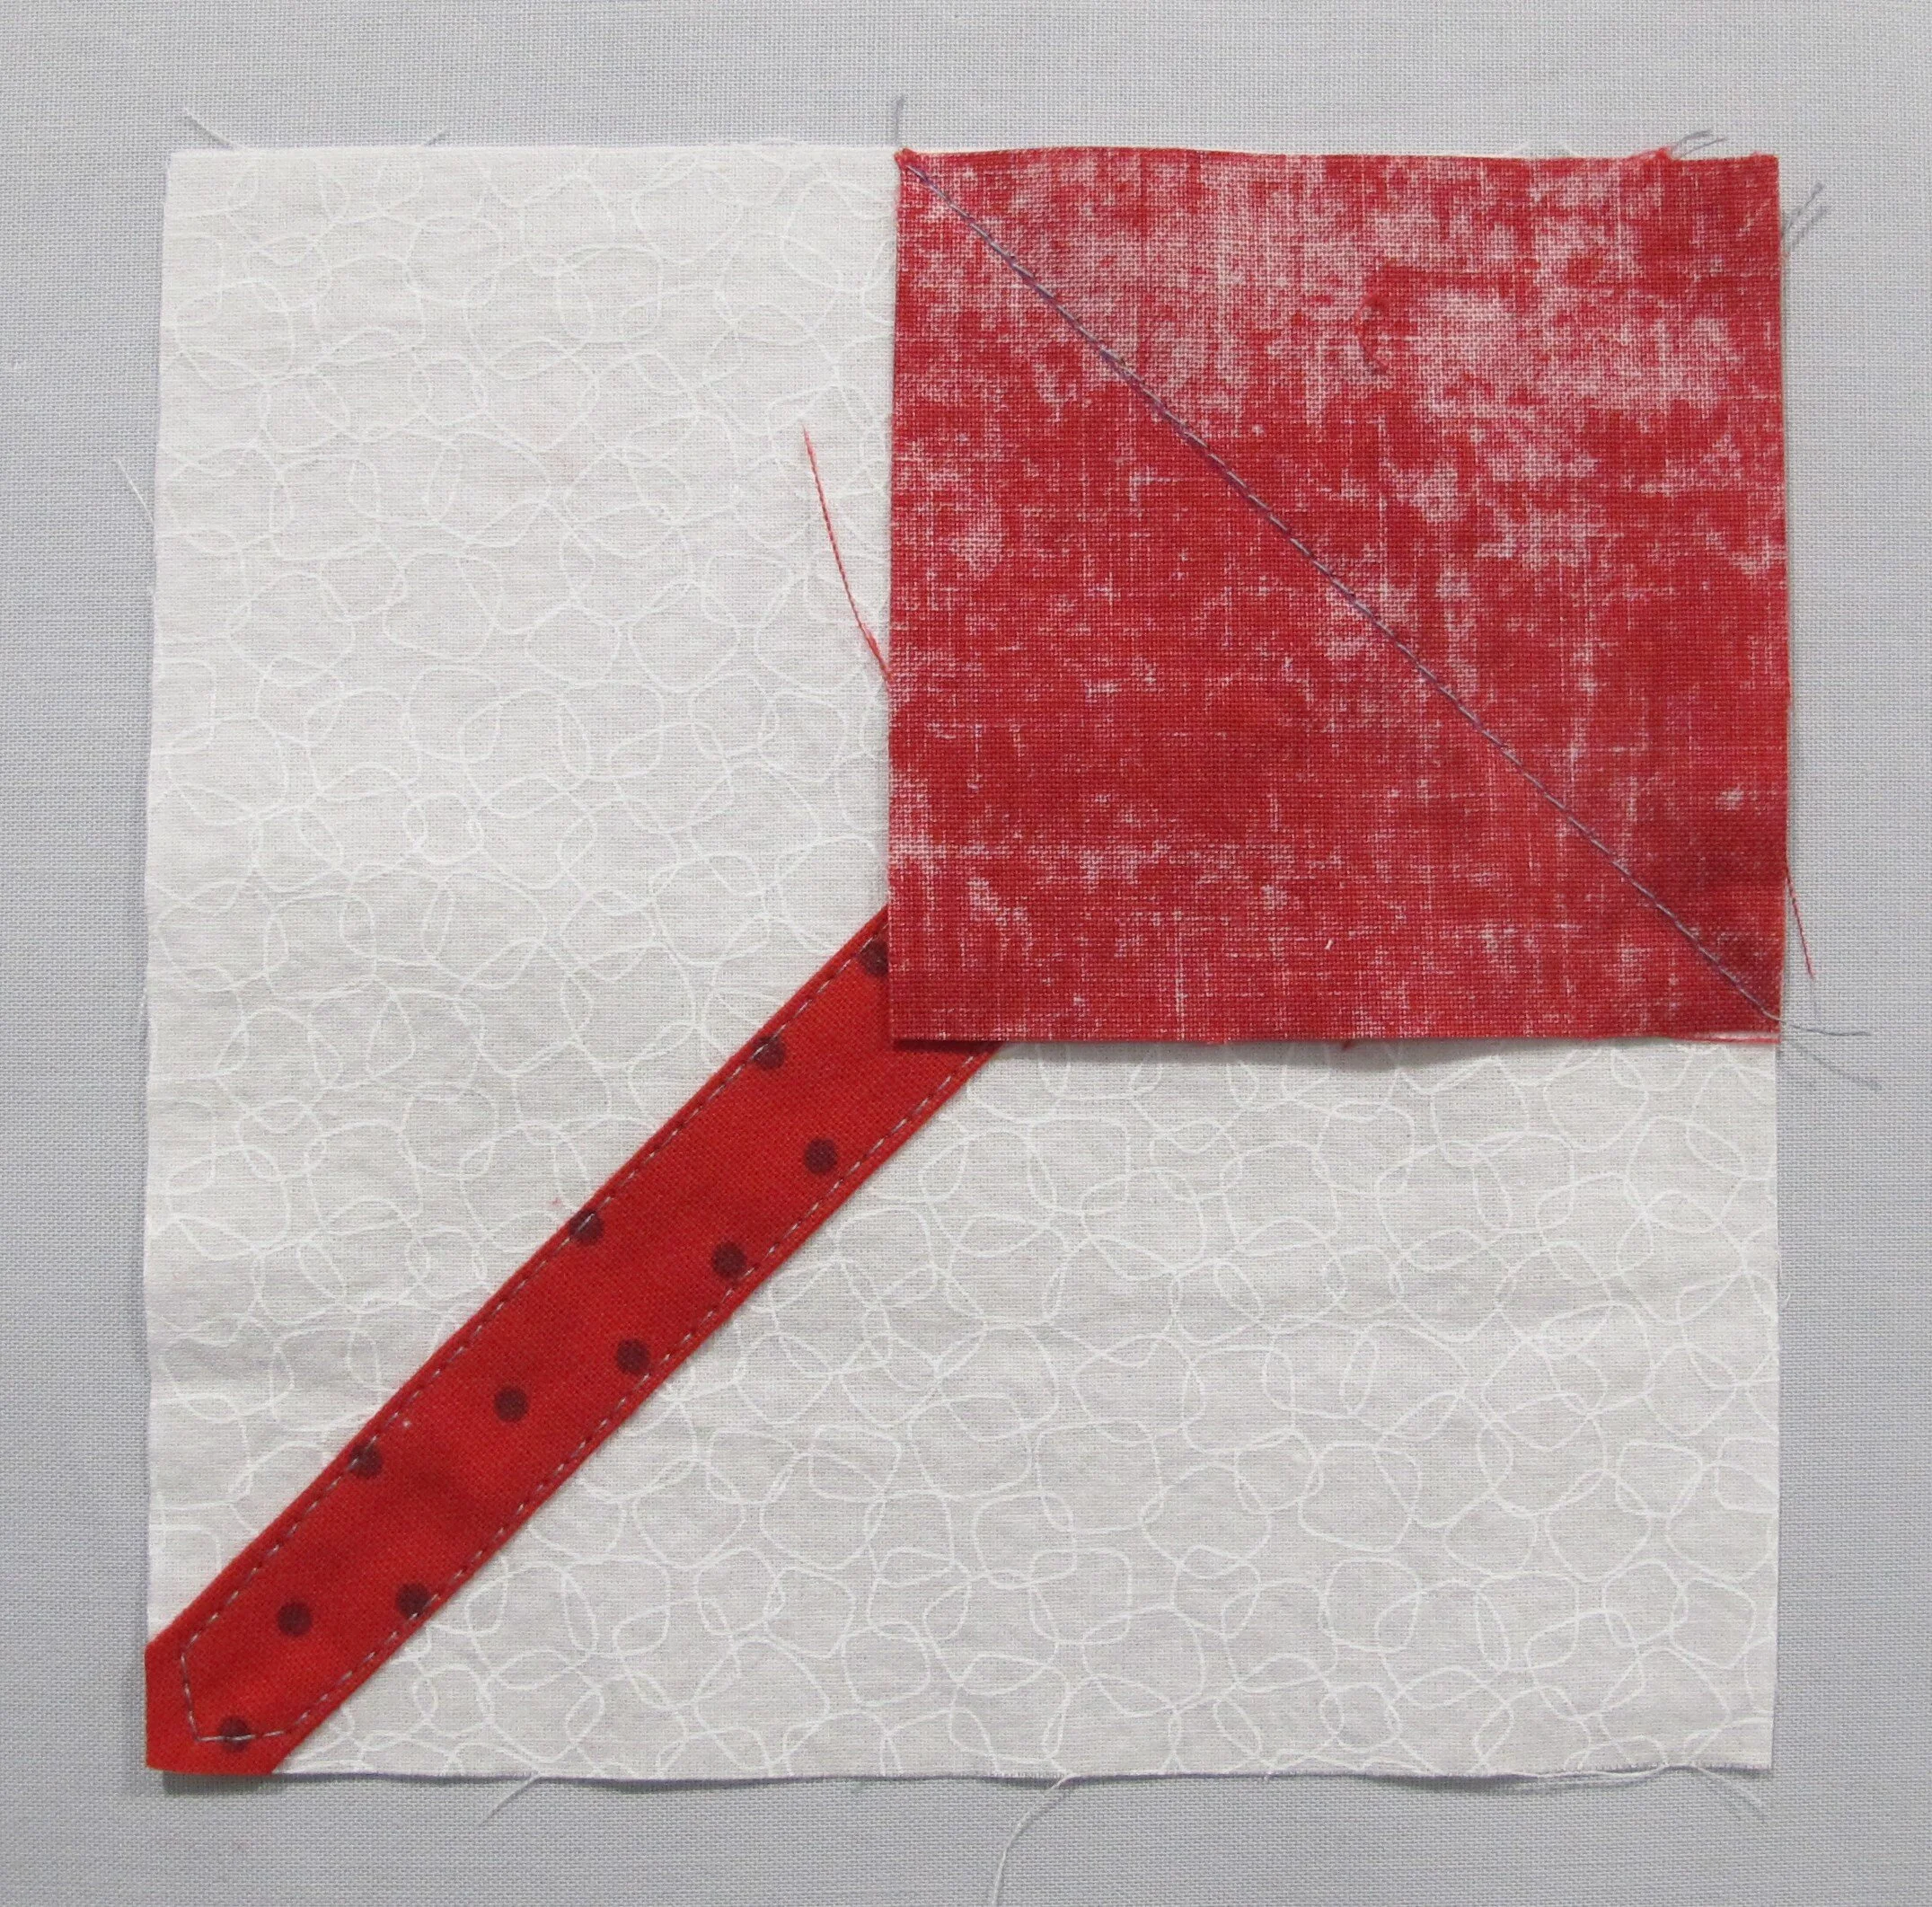
figure 7
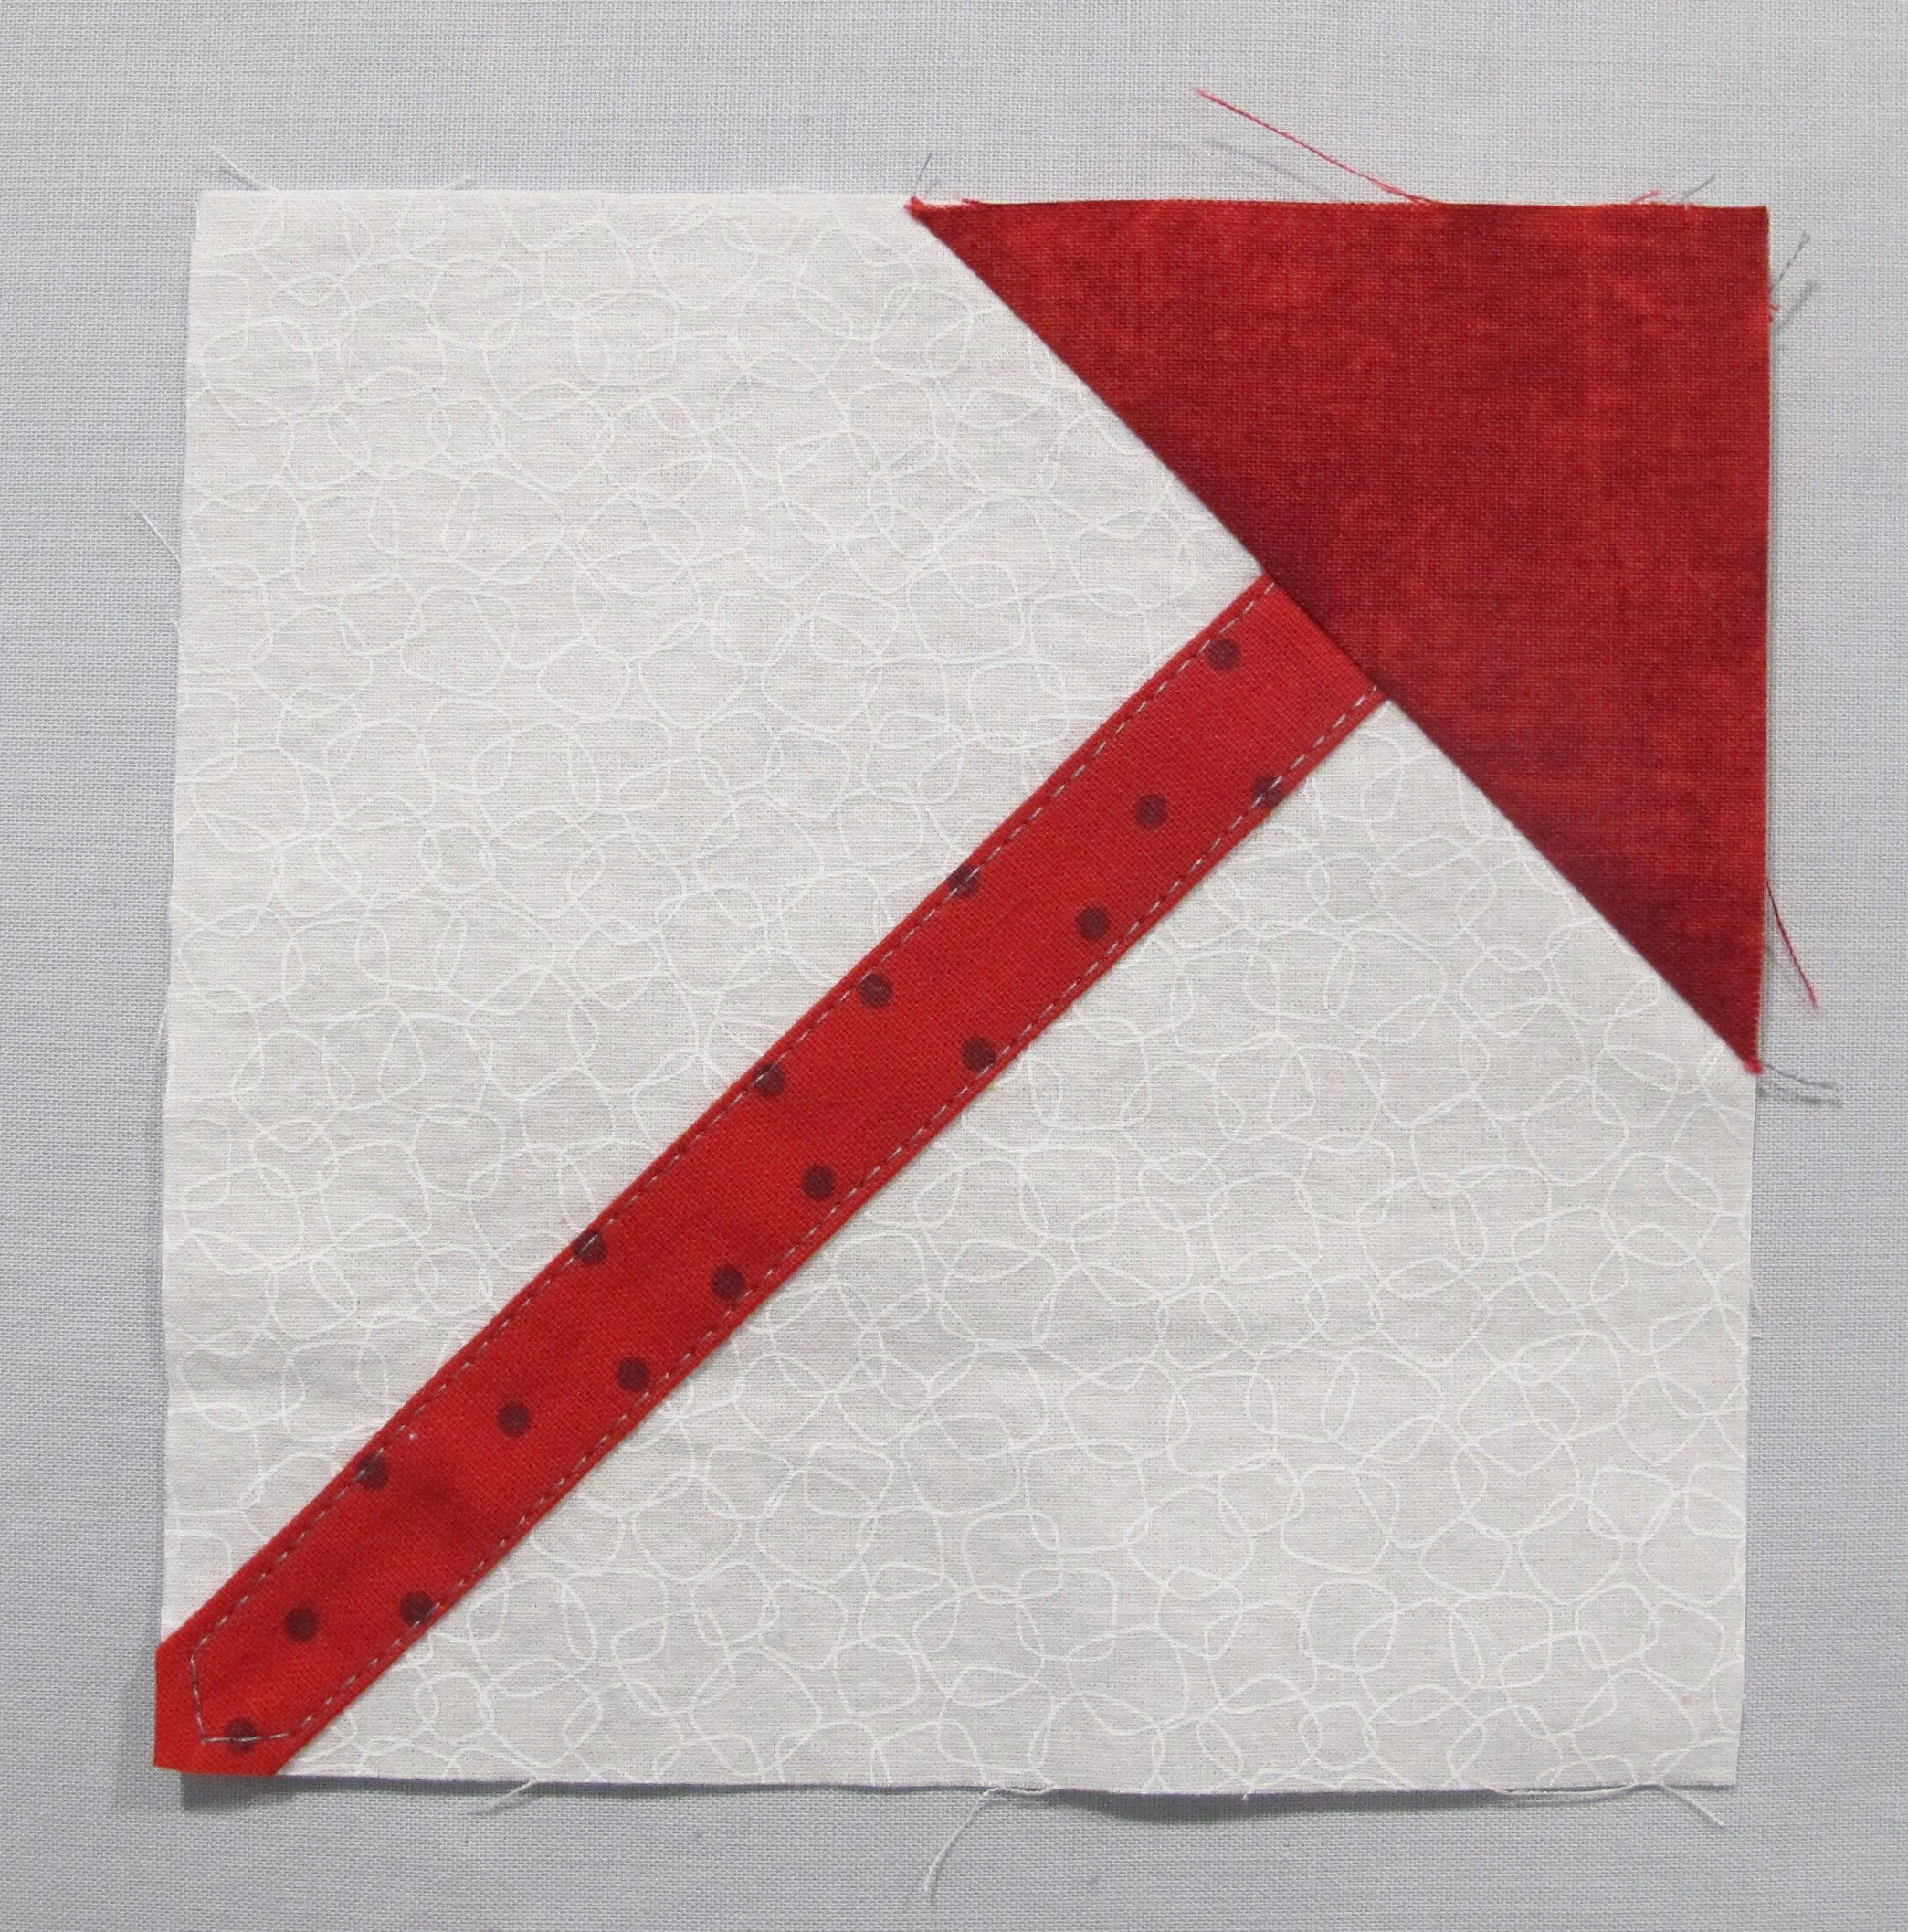
figure 8
Top corner section of leaf: one 5 ¼” red square, two 3” x 6 ½” white strips
on the wrong side of the fabric measure 2 ⅝” in on both sides from the bottom left corner of the red square and draw the ¼” intersecting marks, also mark the ¼” intersecting point at the top right corner (figure 9)
using the ¼” line on the ruler (the dotted line on this particular ruler) connect the top corner intersecting point and the intersecting point on the bottom and cut the small section on the right off (figure 10)
using the ¼” line on the ruler (again, the dotted line) connect the top corner intersecting point and the intersecting point on the remaining side and cut that section off (figure 11)
the remaining piece looks like an upside down kite (figure 12)
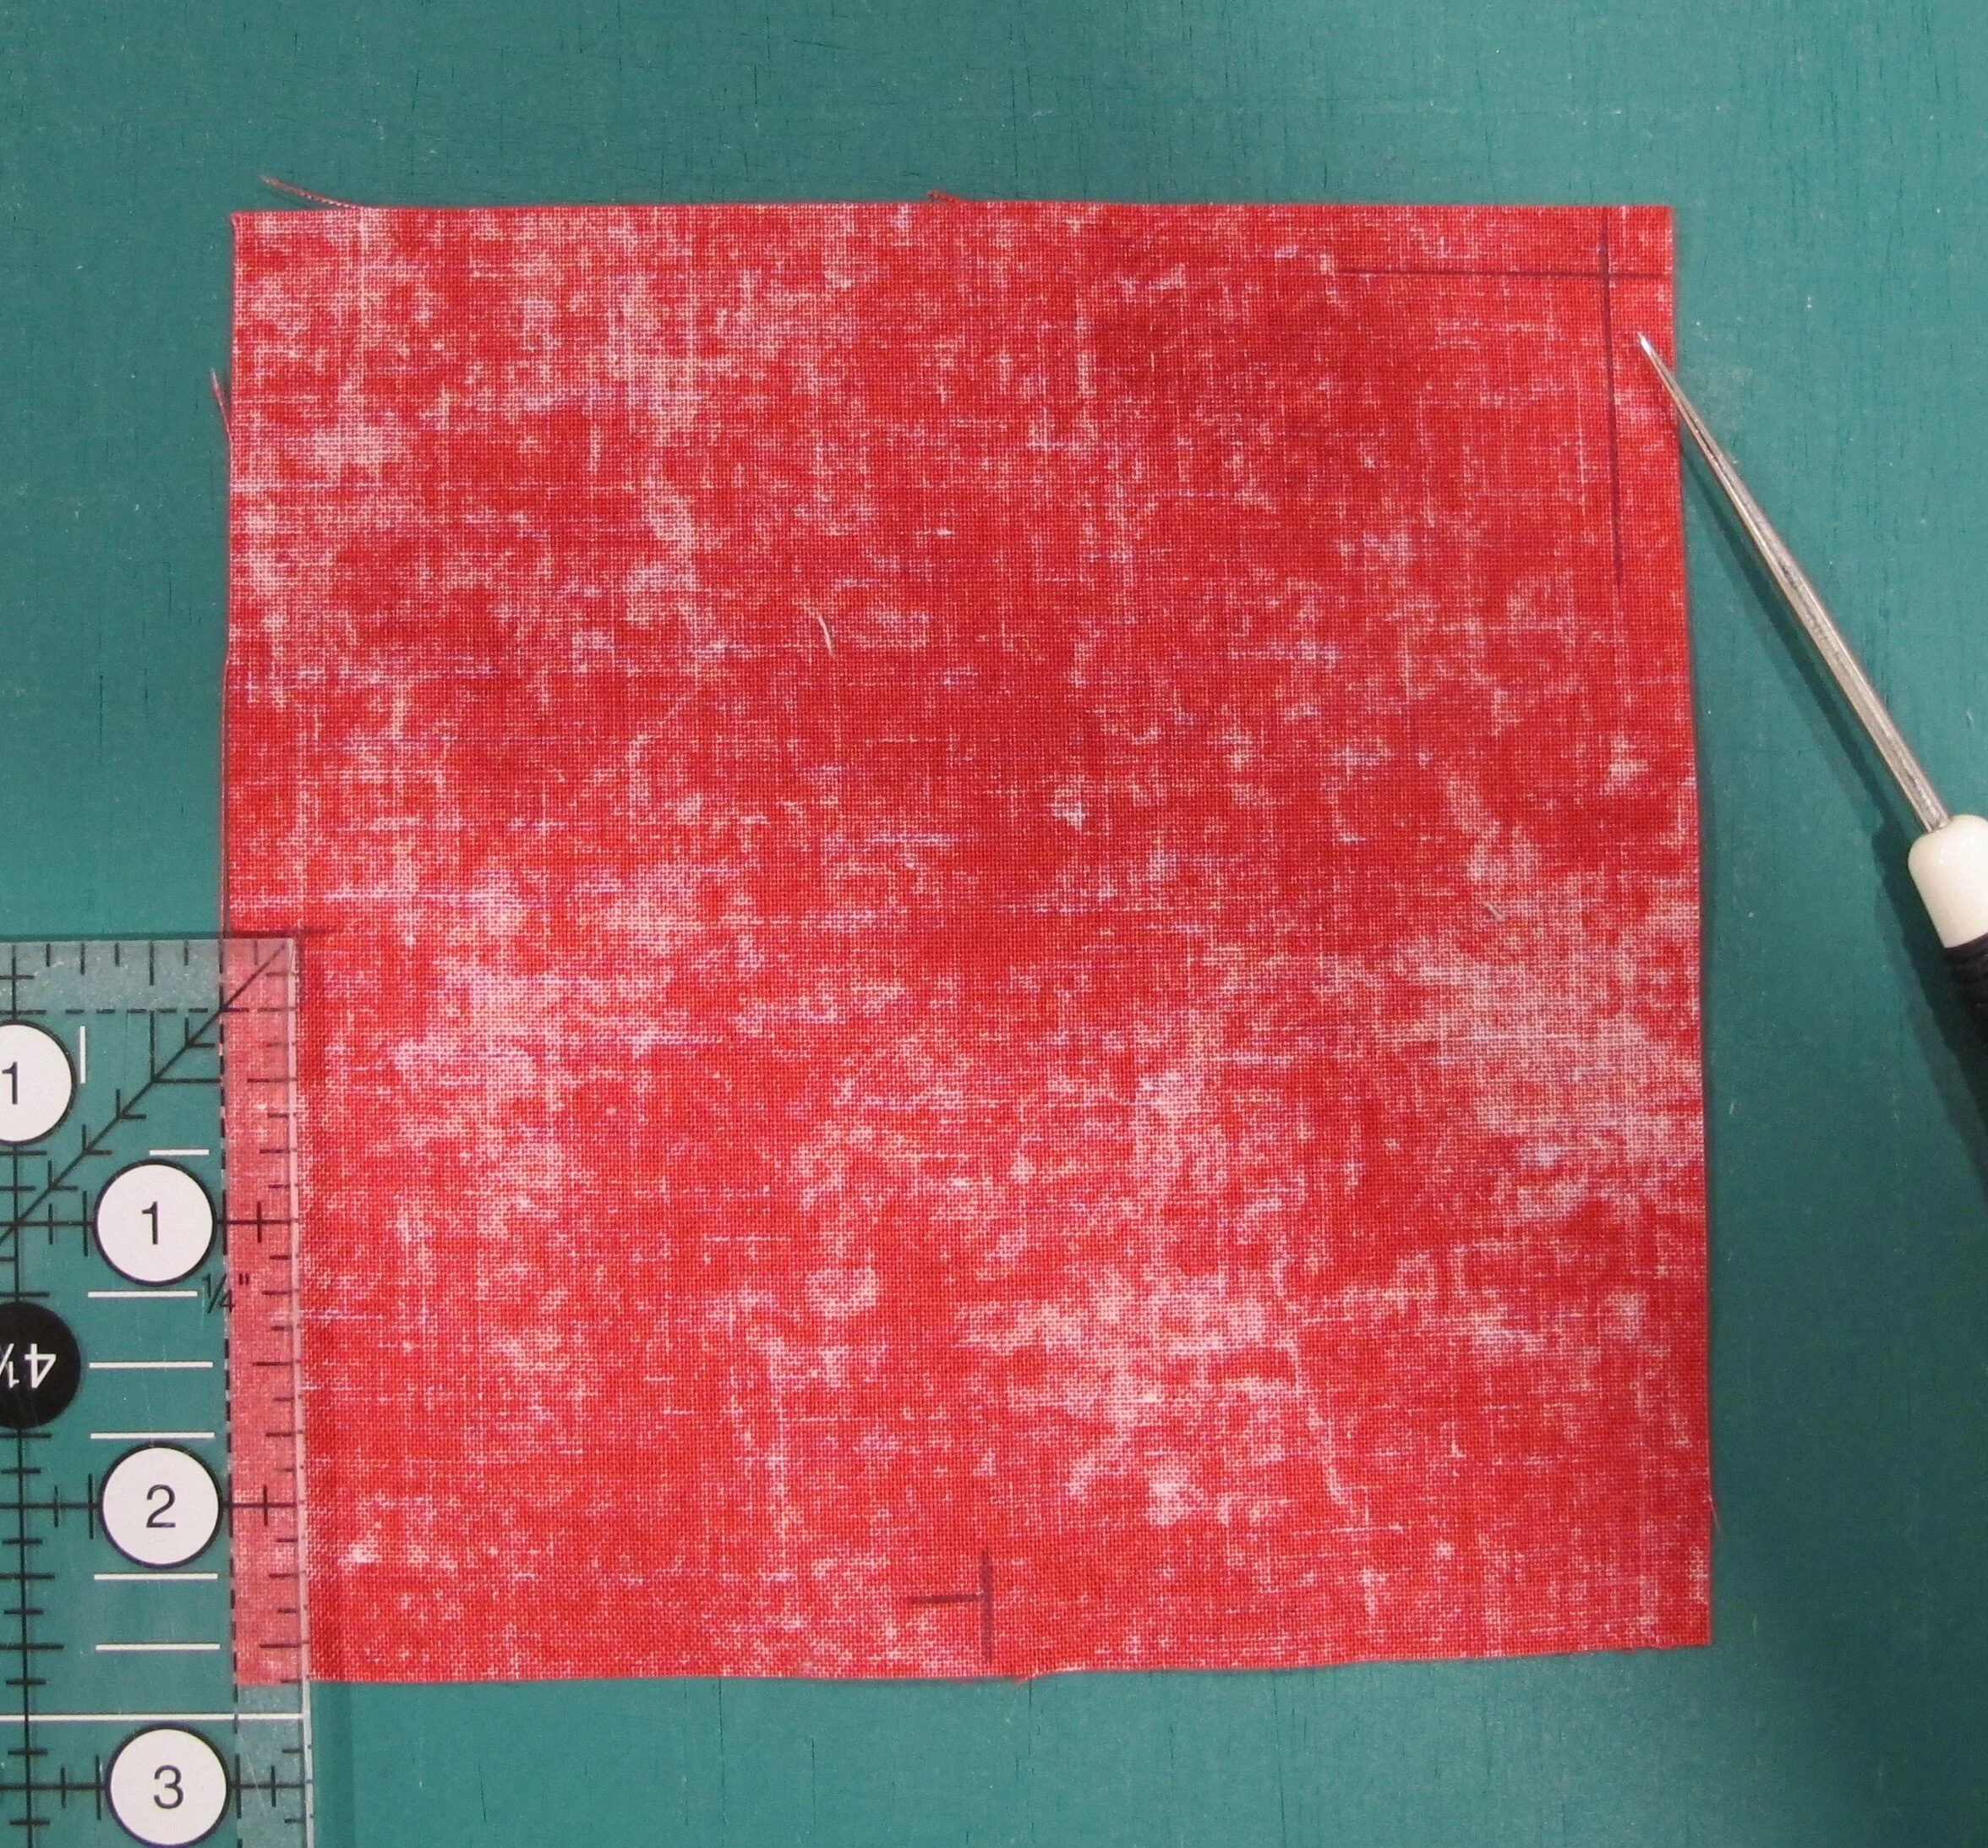
figure 9
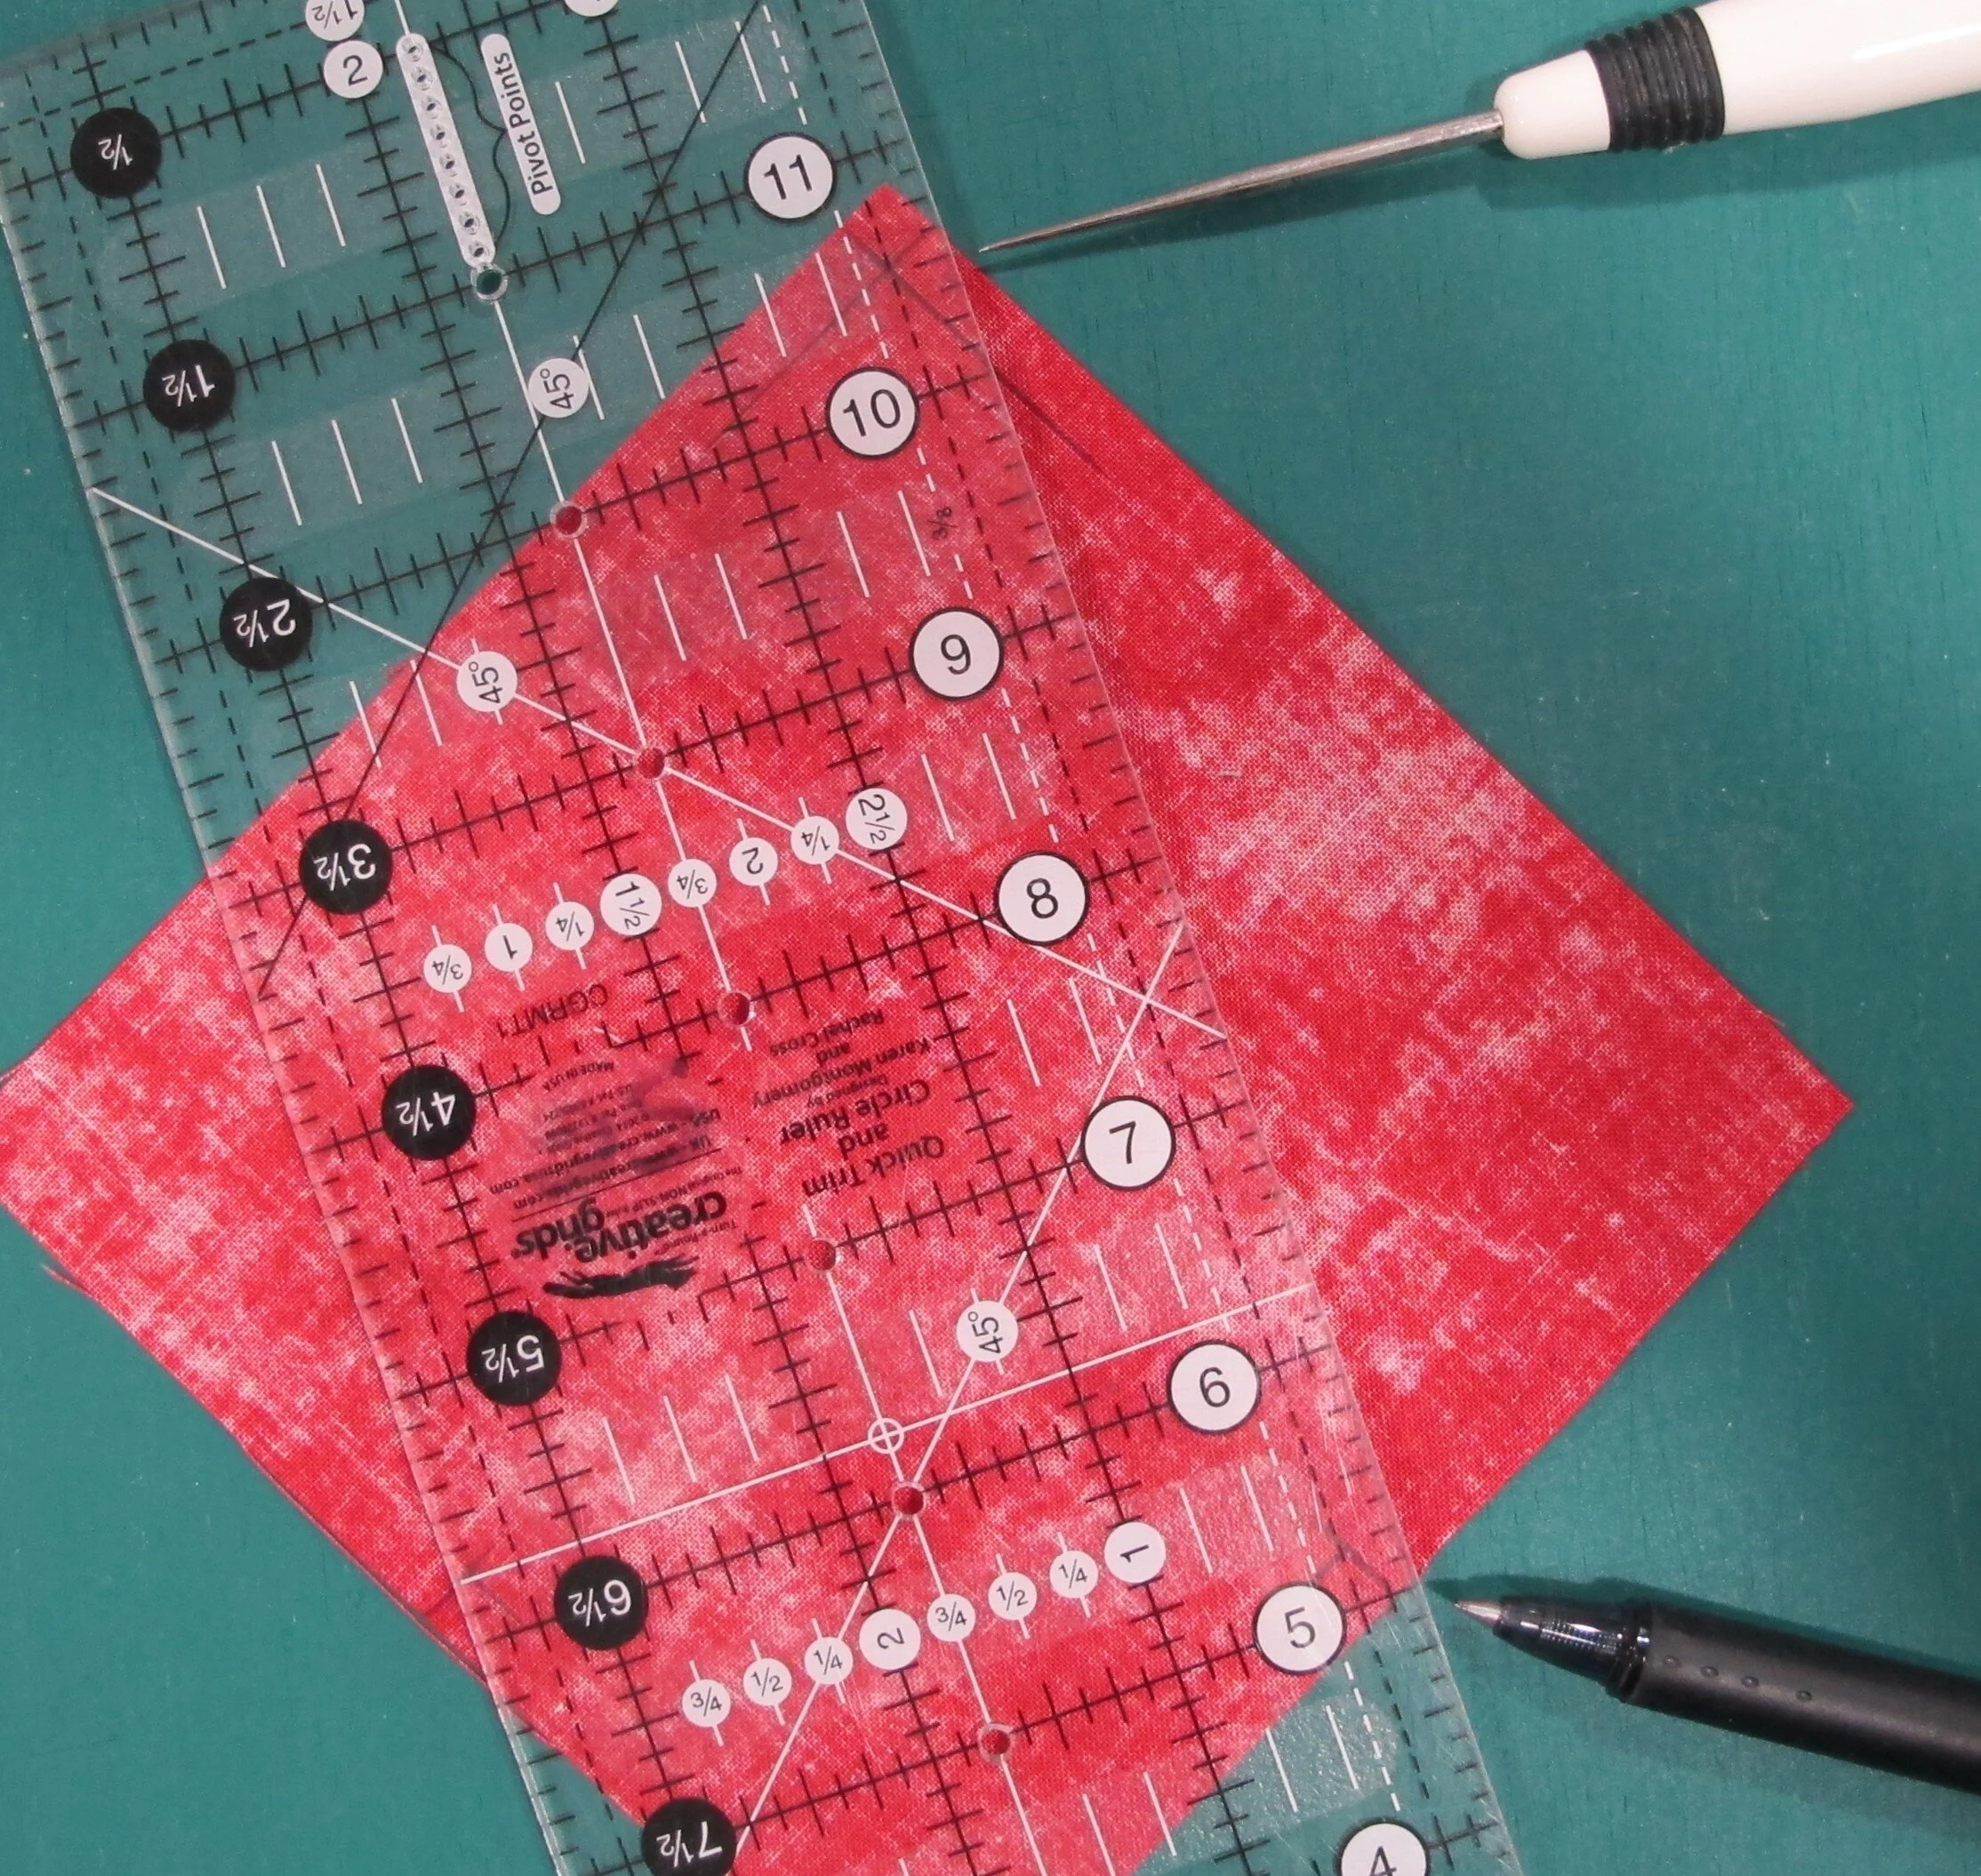
figure 10

figure 11
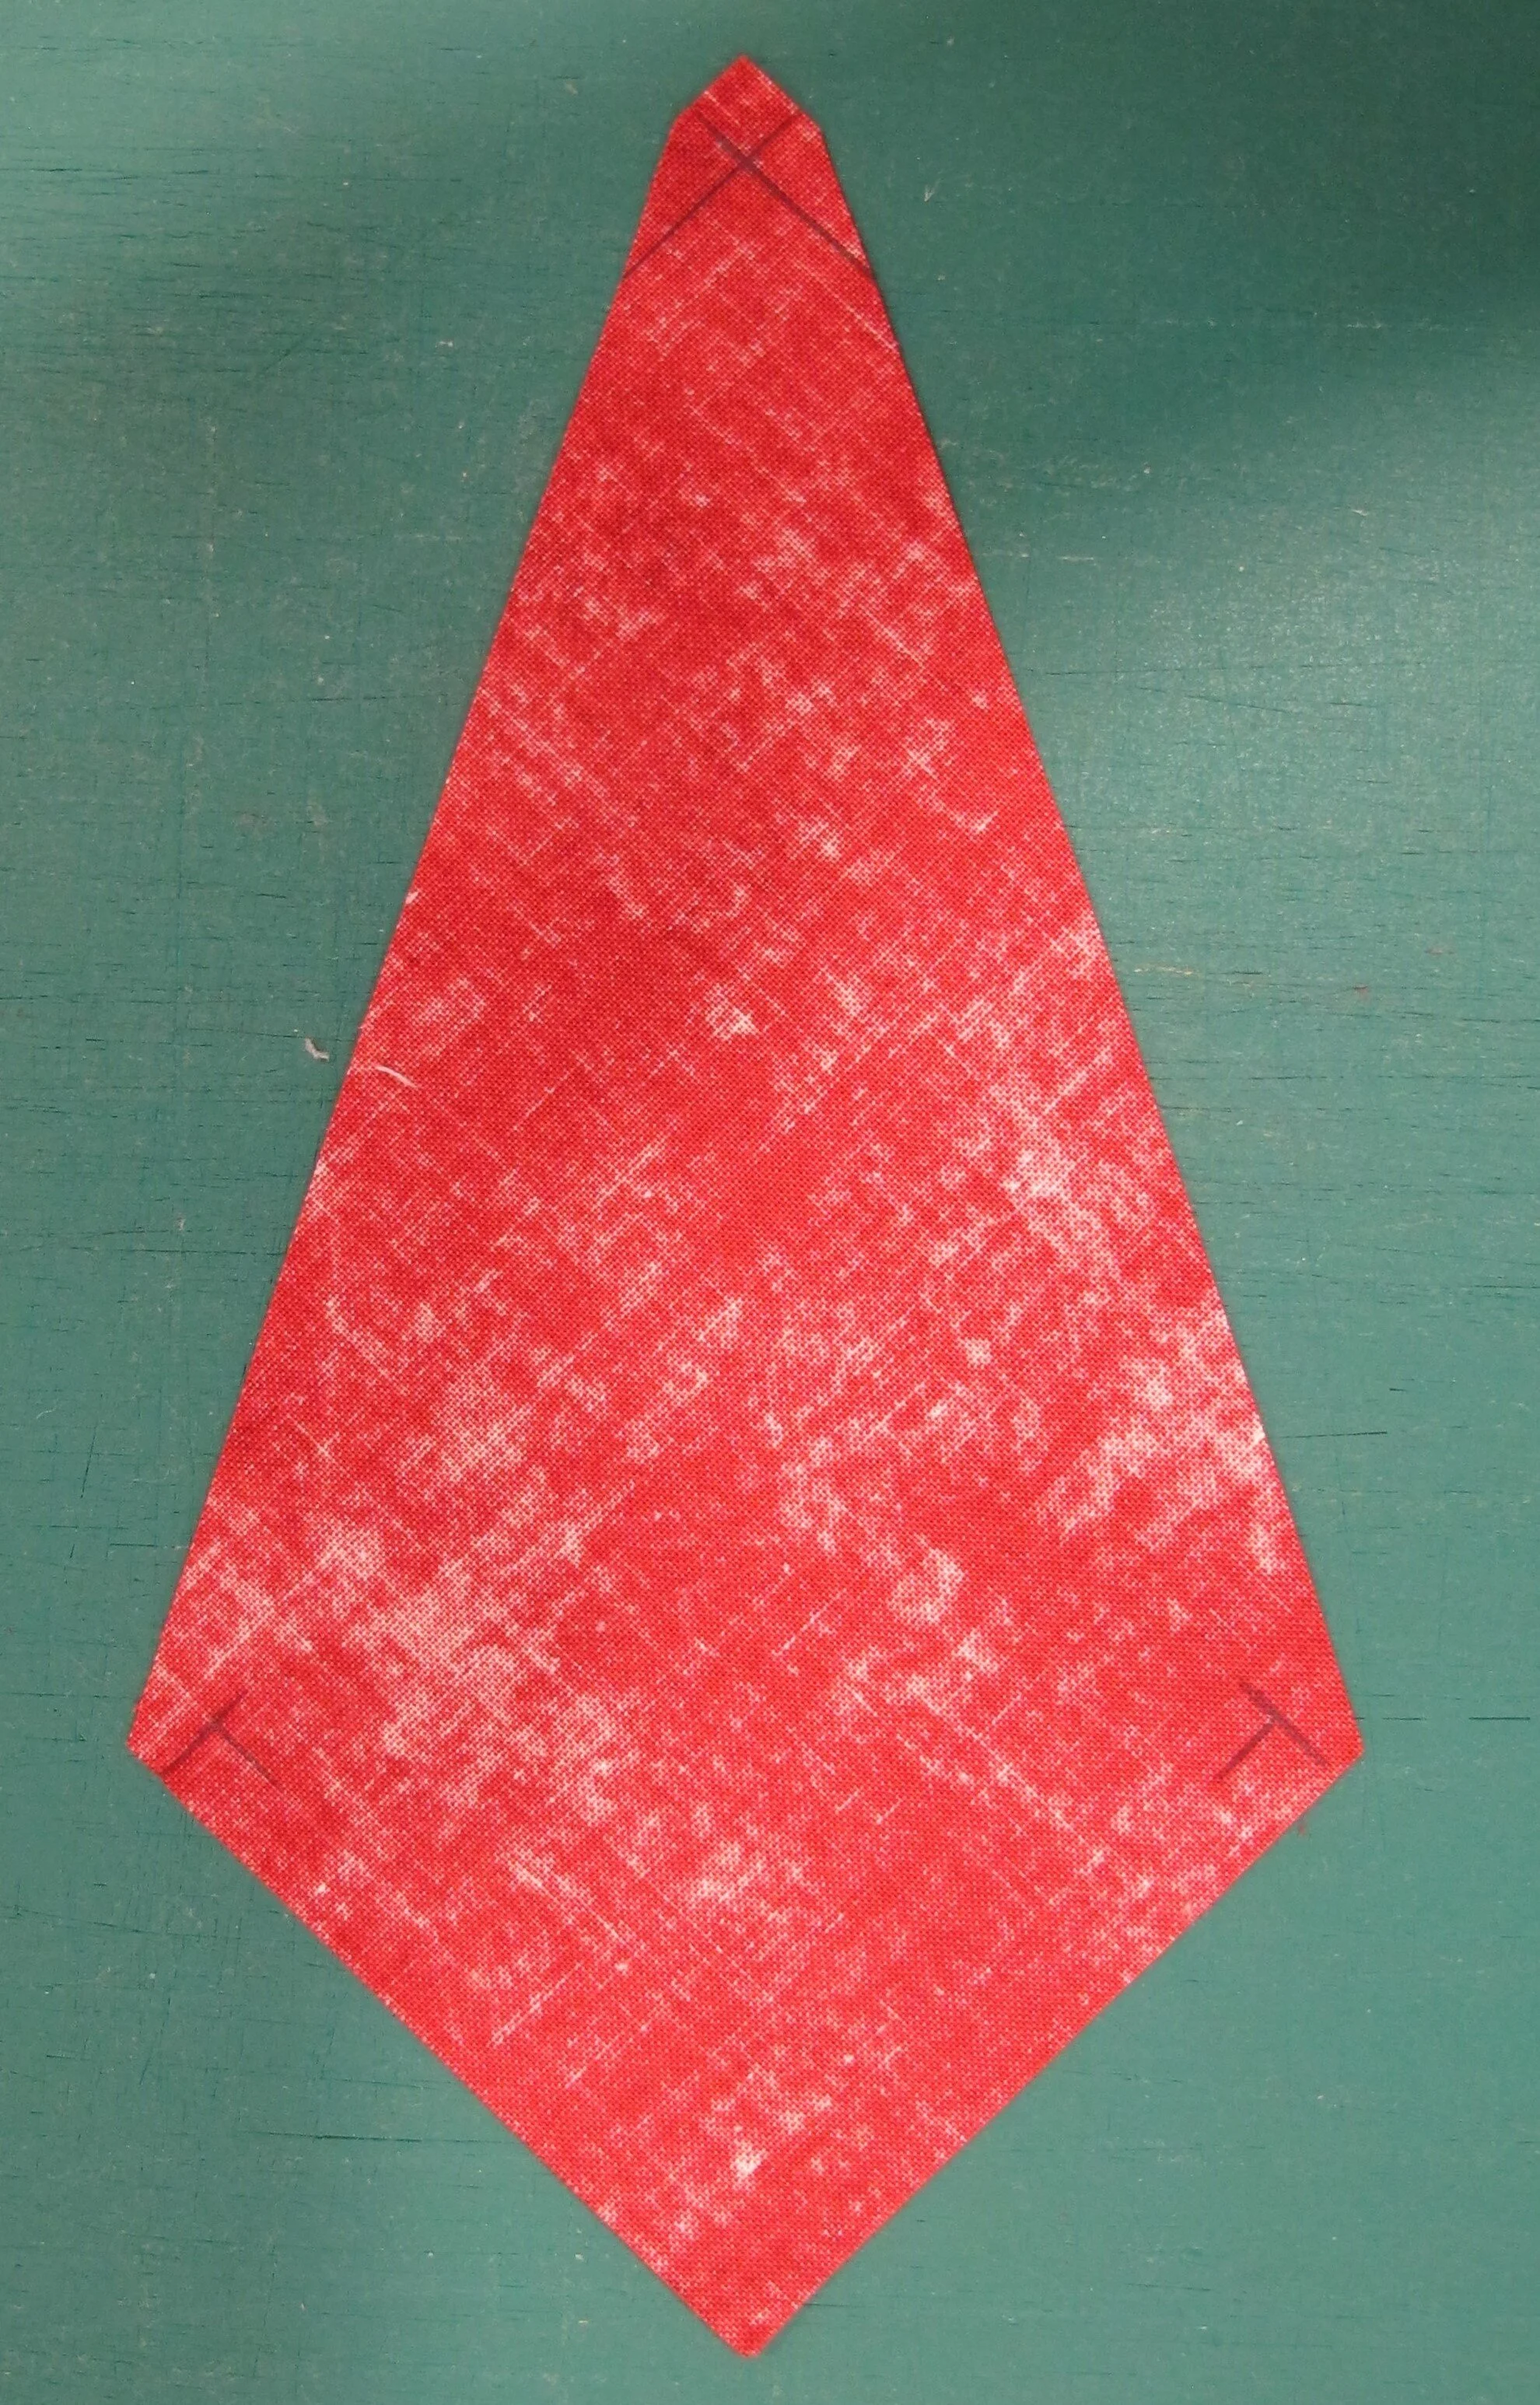
figure 12
with right sides together stitch a 3” x 6 ½” strip to one side of the “kite” and press to the red (figures 13 & 14)
with right sides together stitch the other 3” x 6 ½” strip to the opposite side and press to the red (figures 15 & 16)
there is a small “tail” hanging off the seam allowance on the back that can be trimmed off to reduce bulk
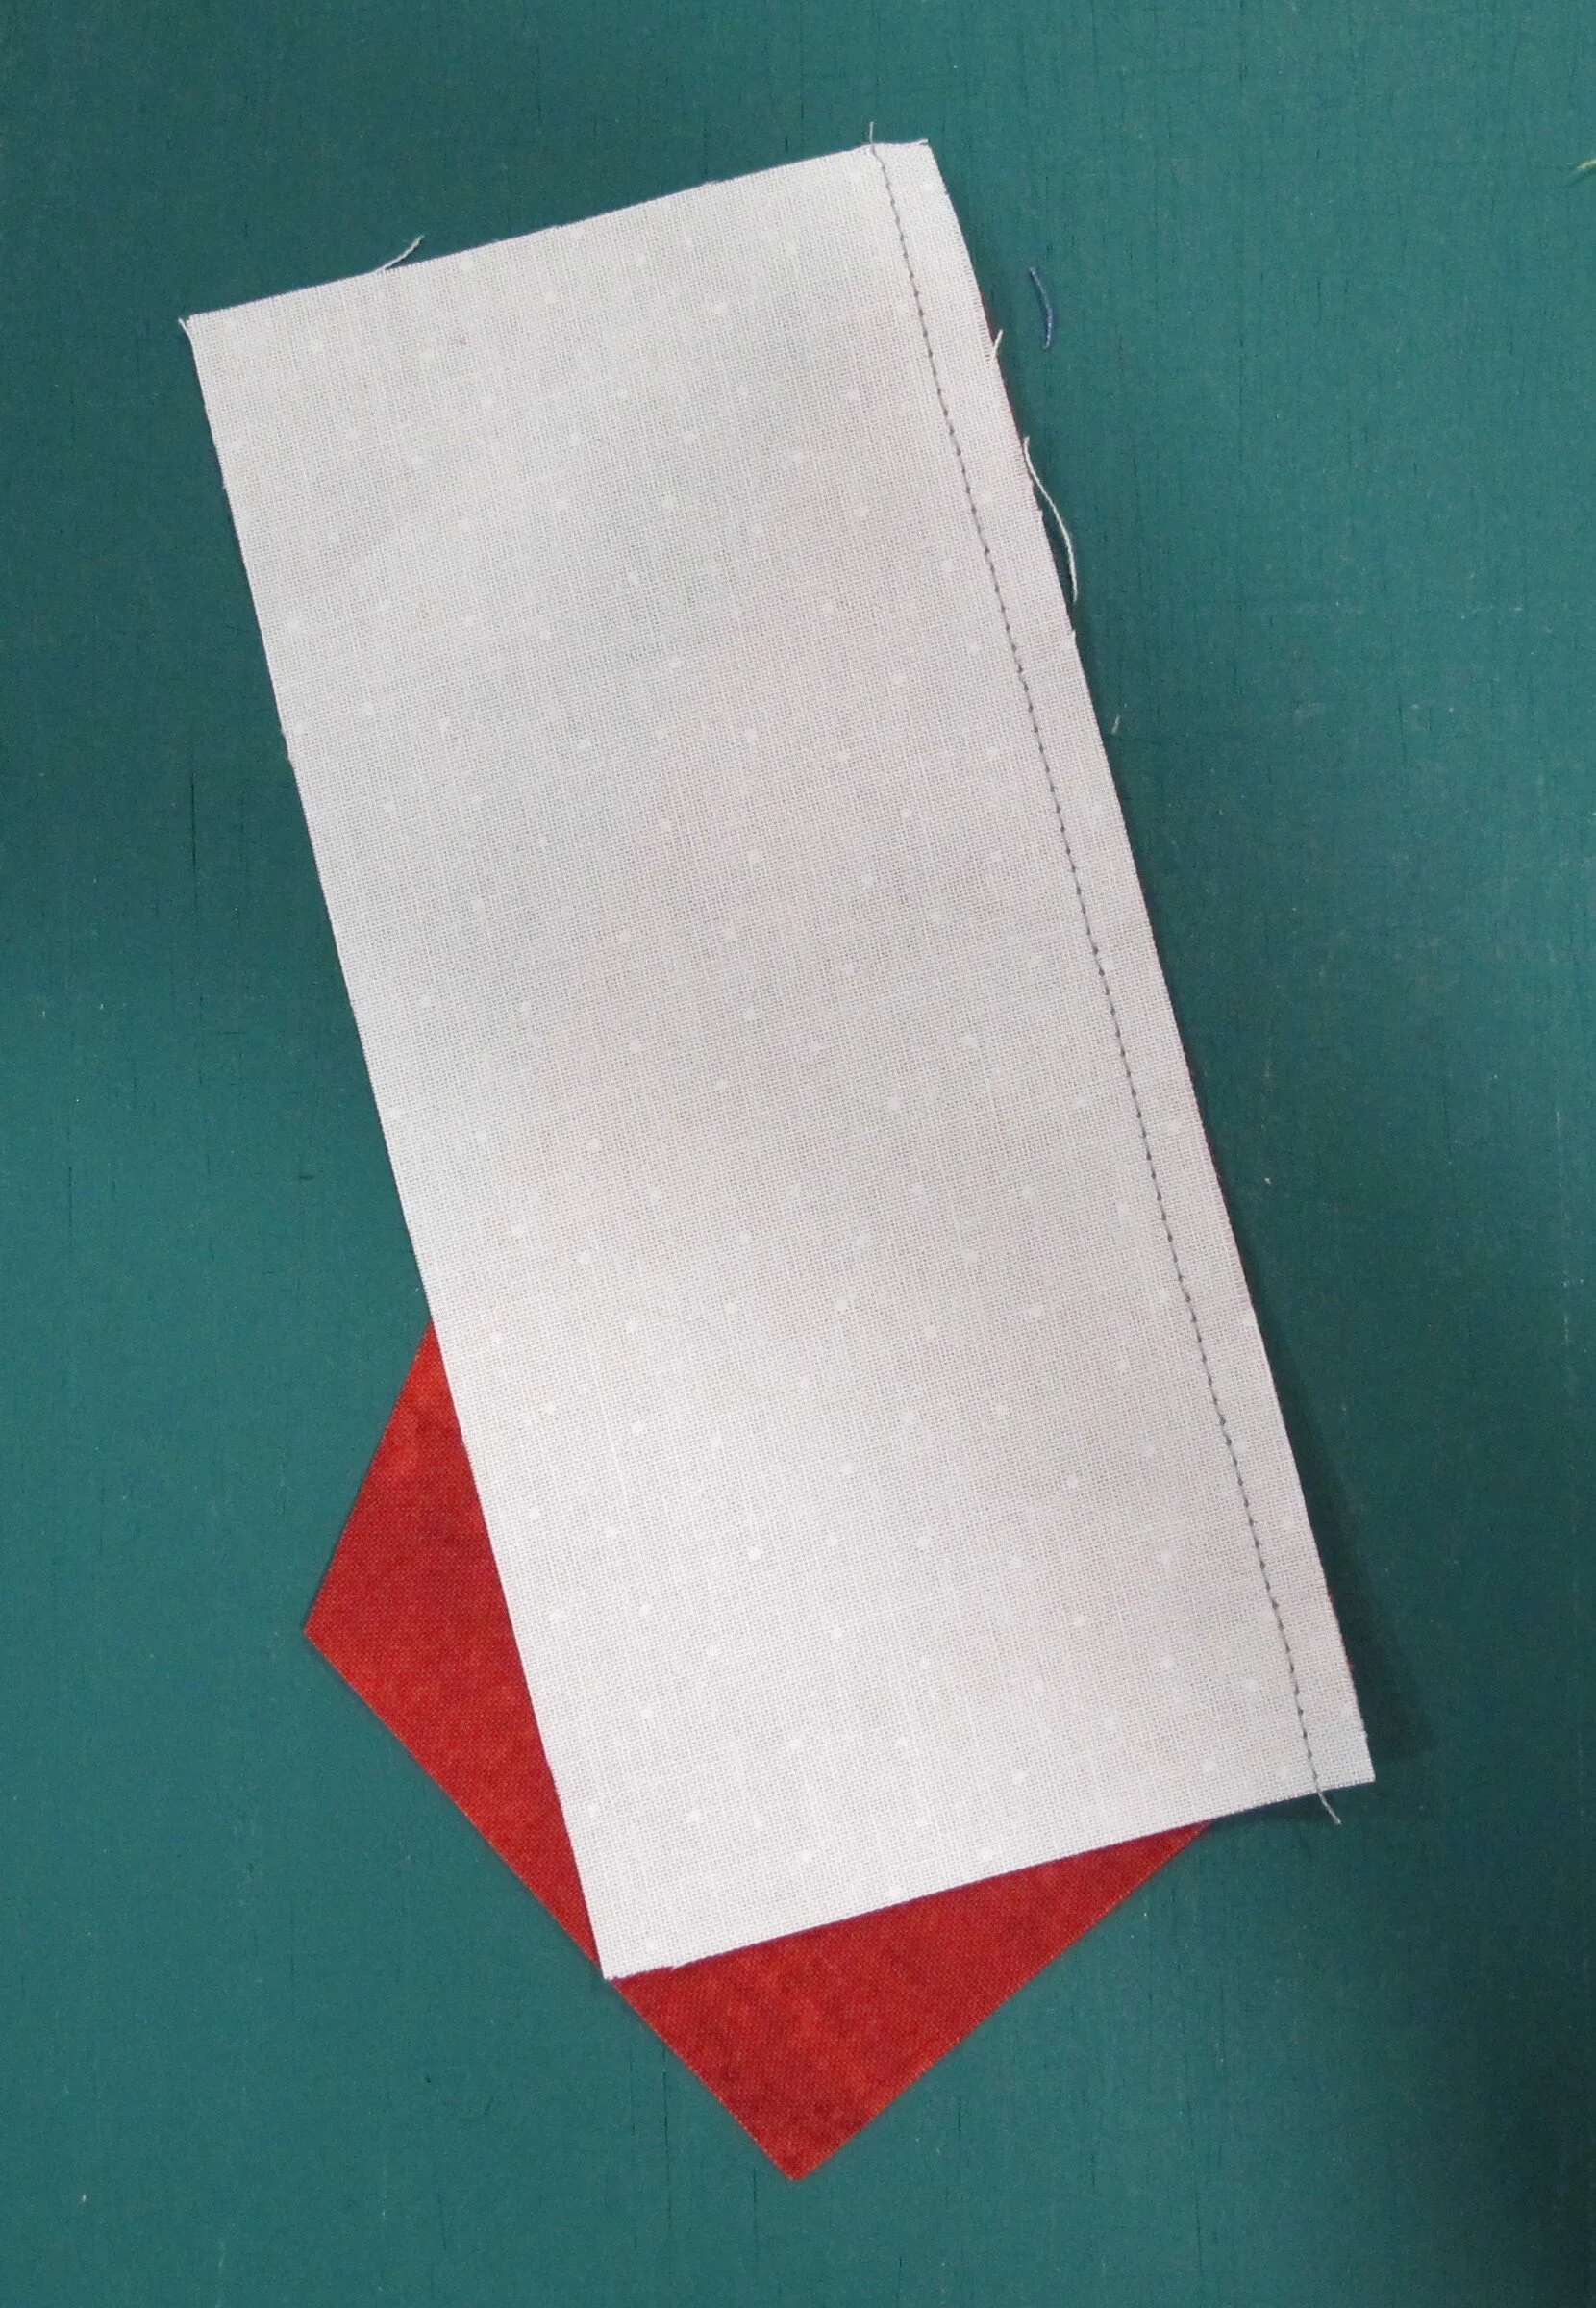
figure 13
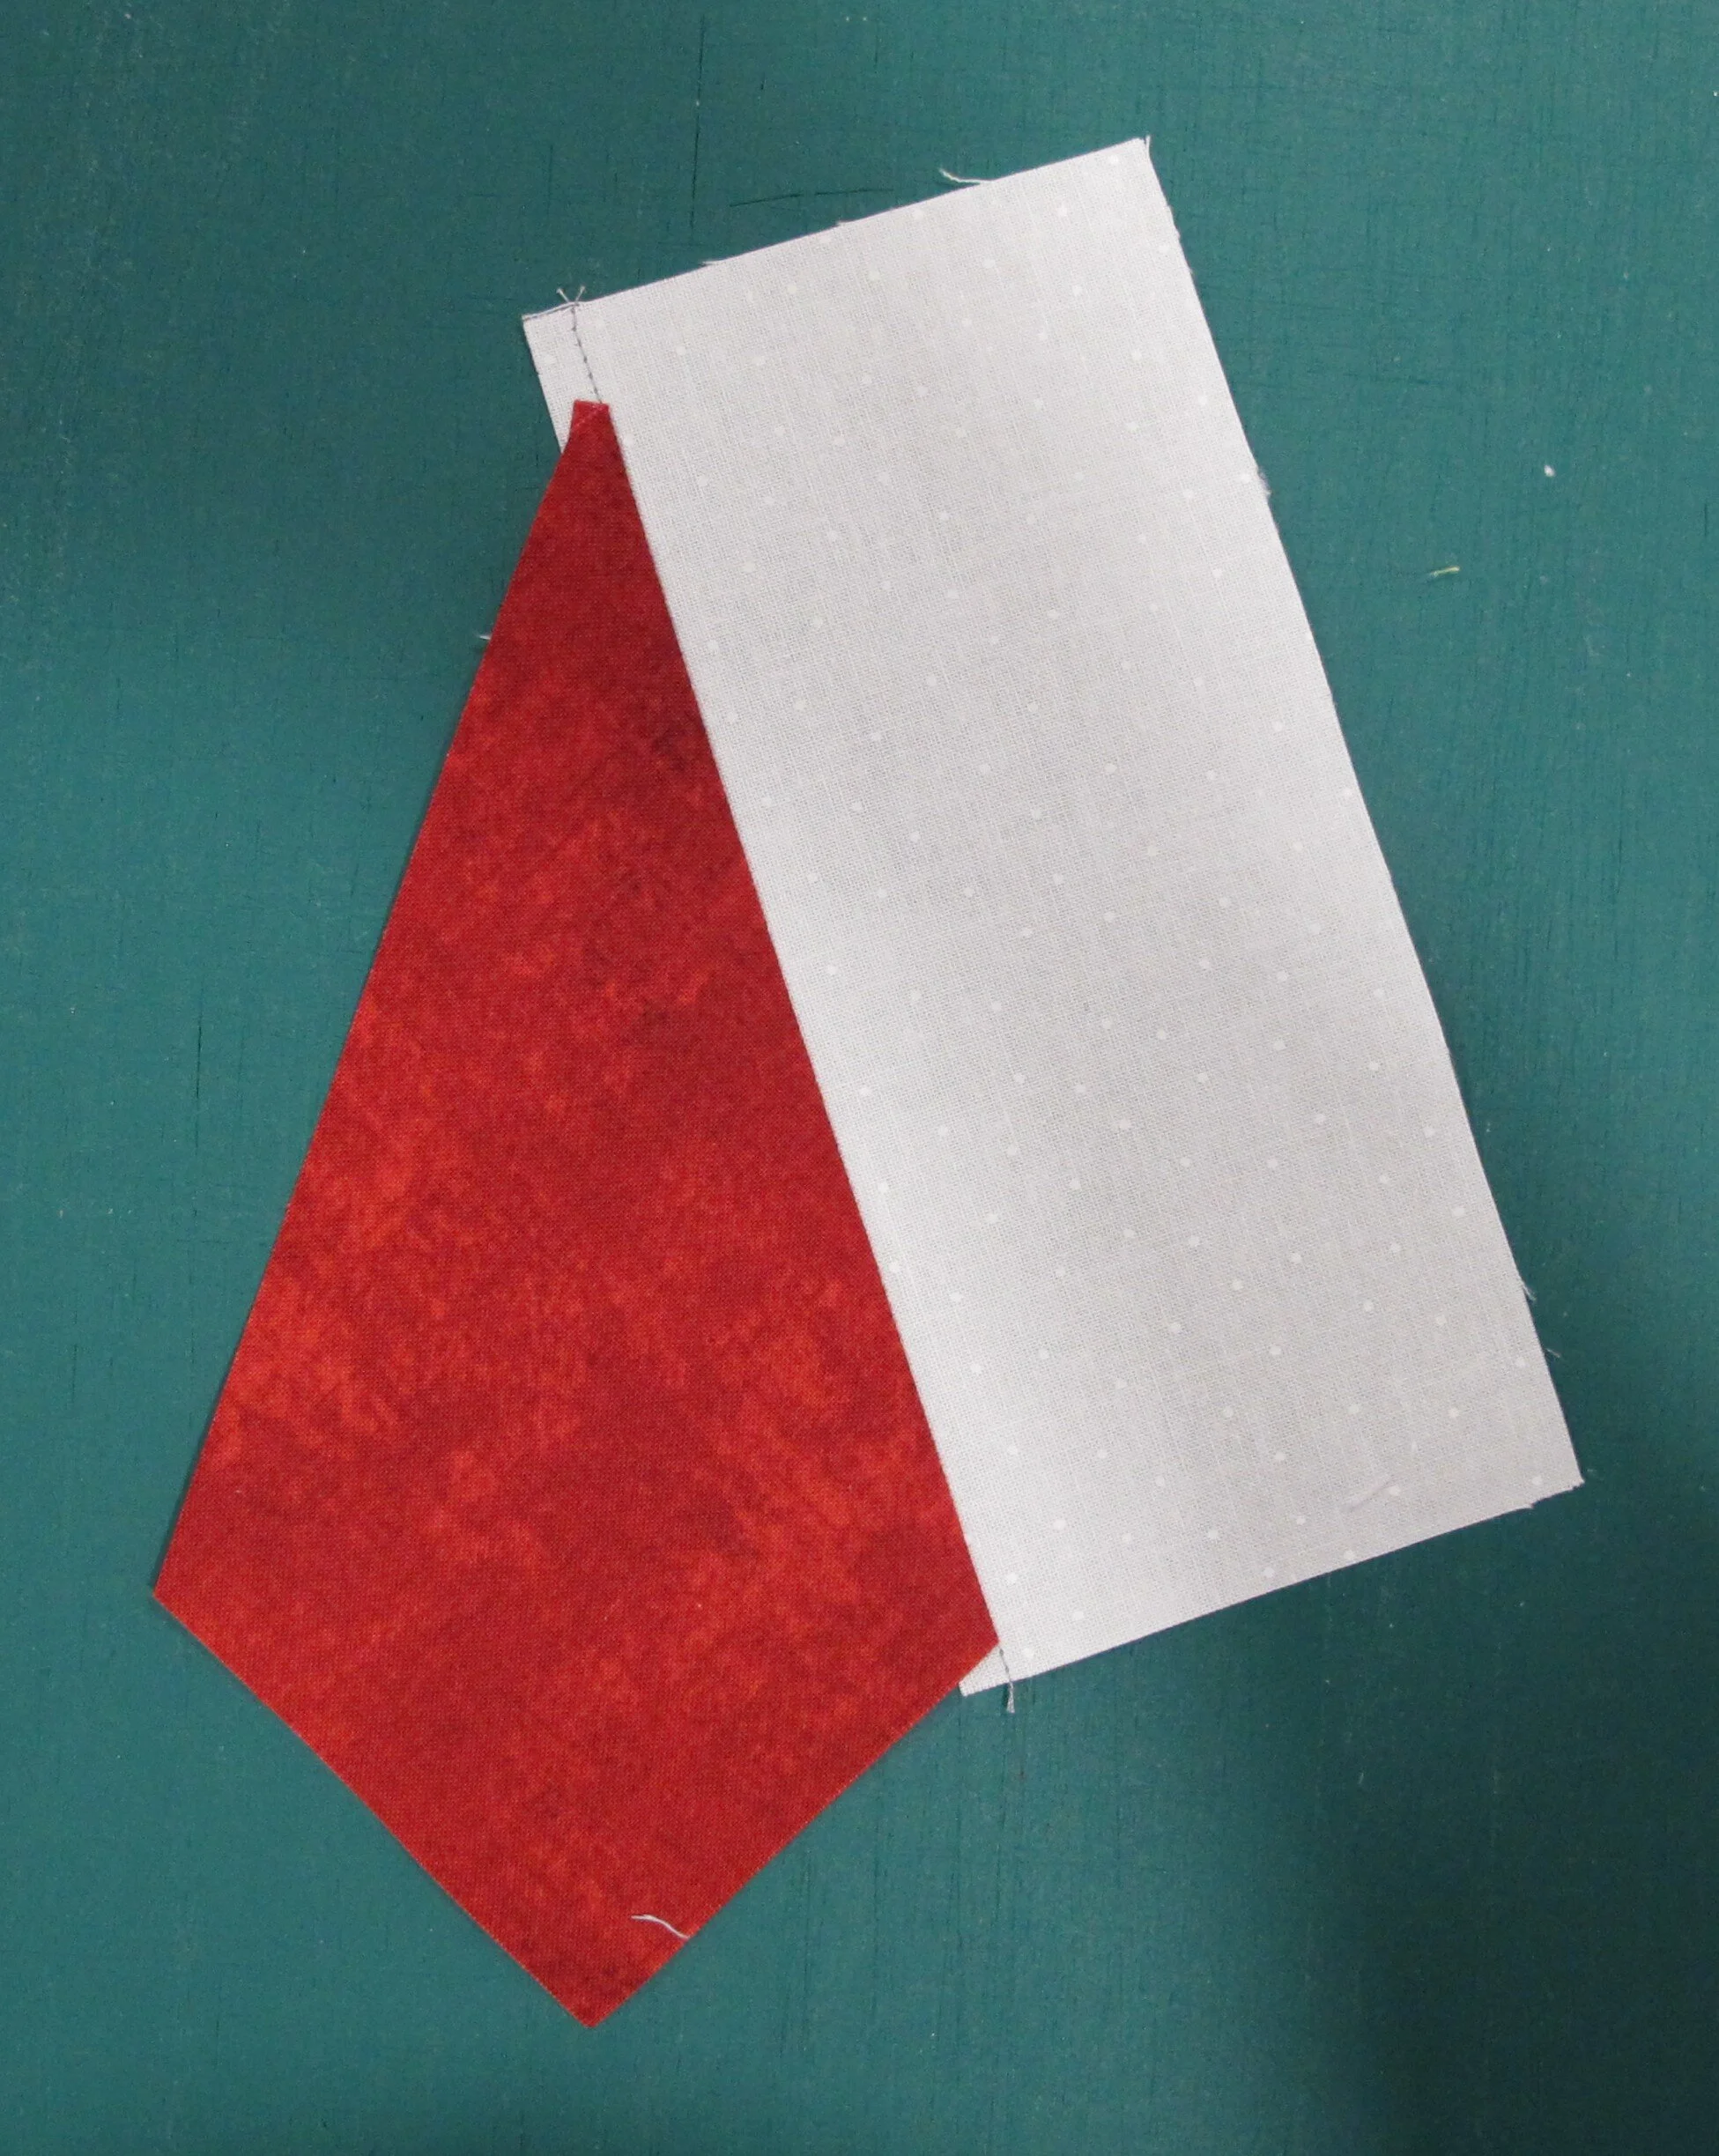
figure 14
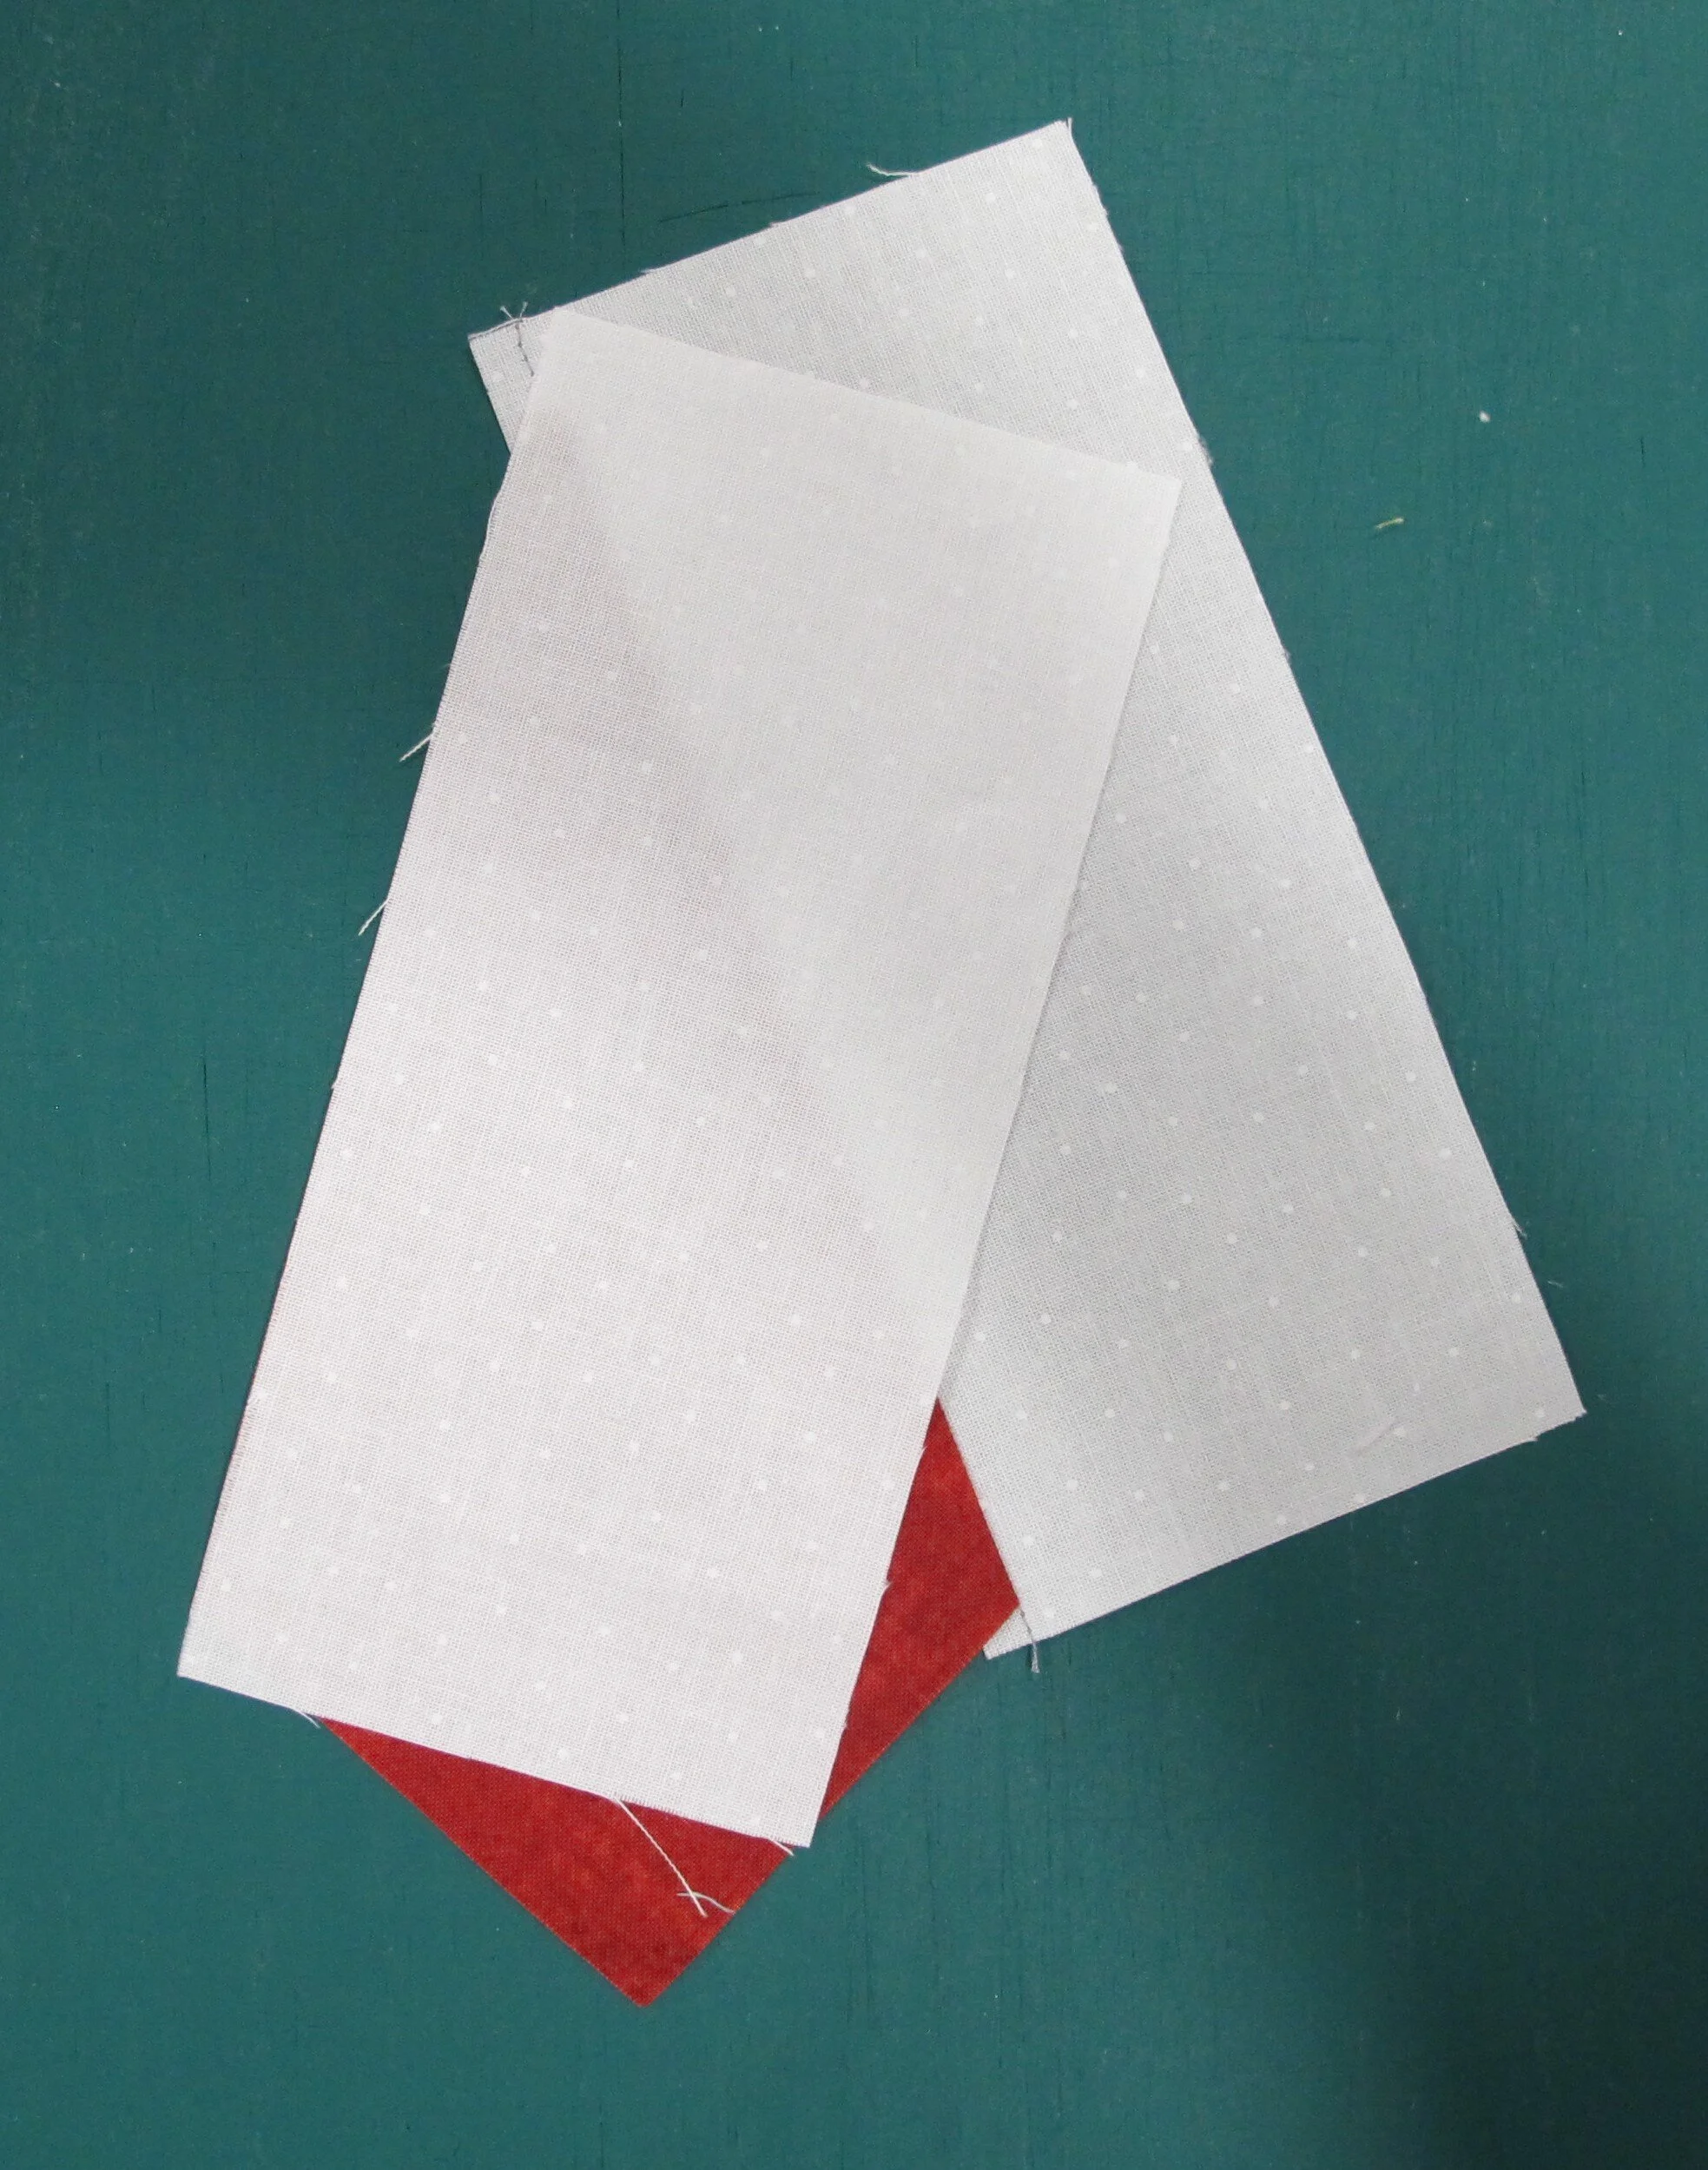
figure 15
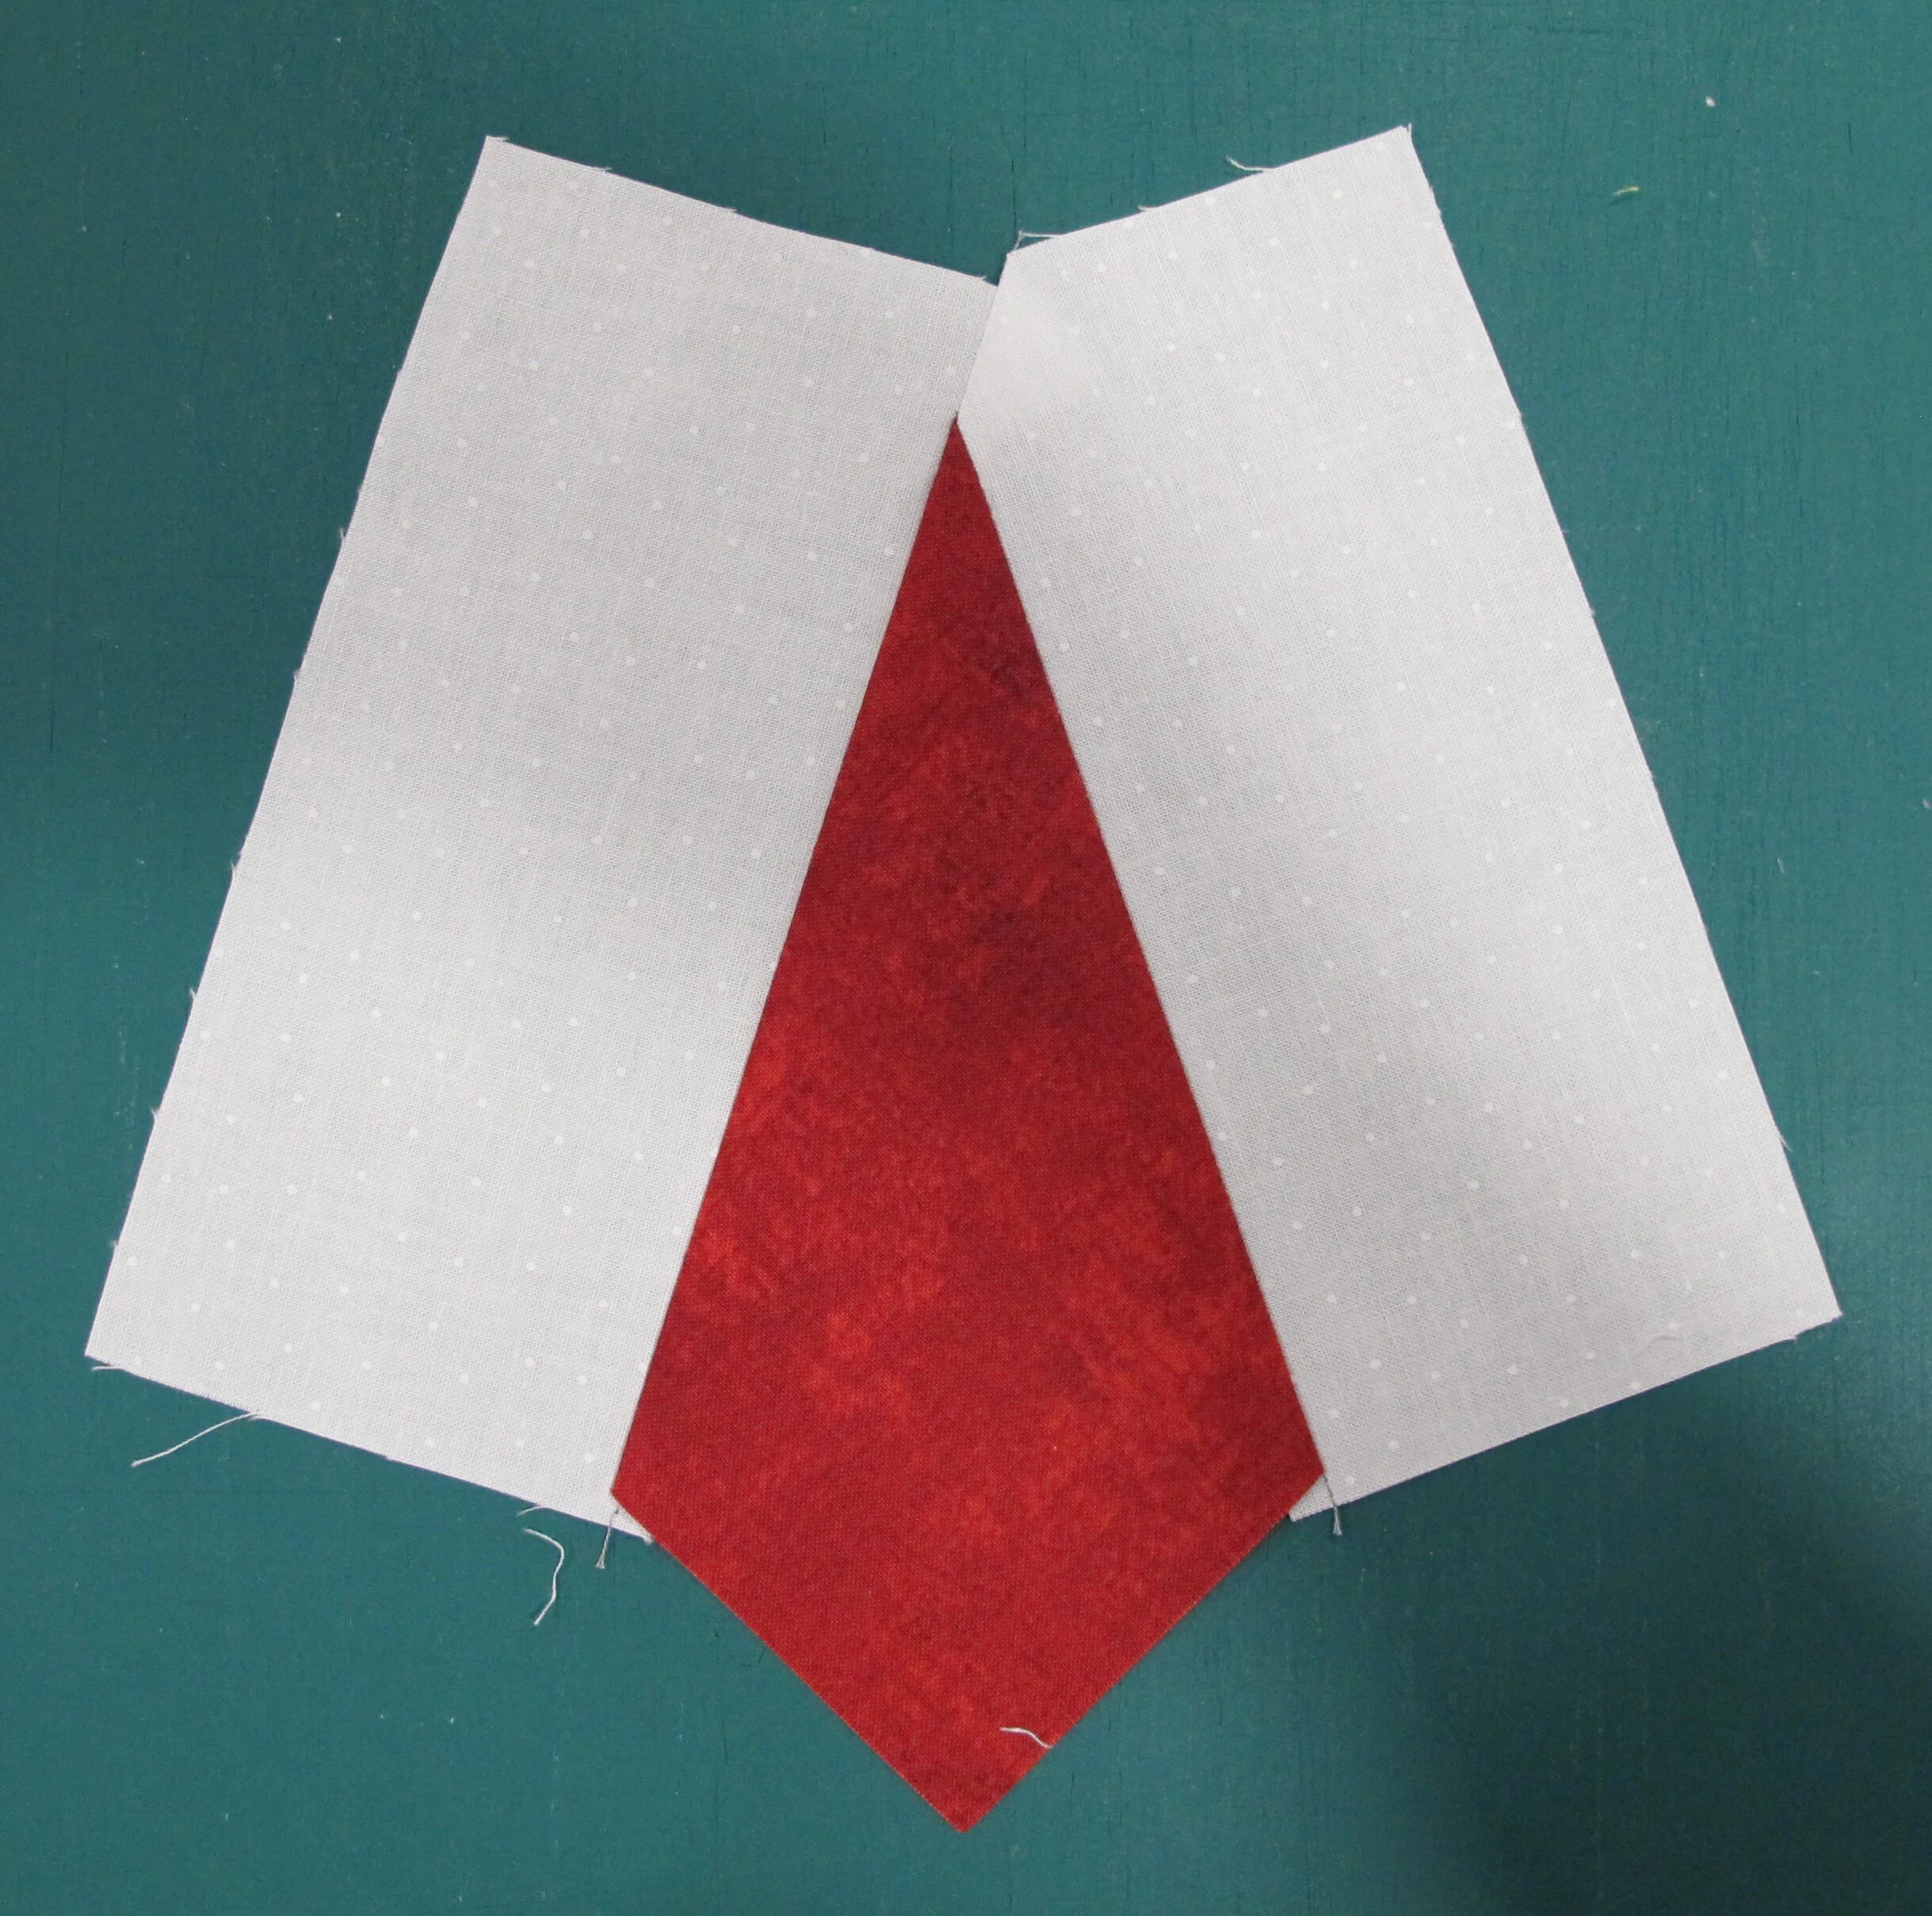
figure 16
Squaring up the top corner section:
place the square corner of the “kite” on the bottom left, line up the 5 ¼” lines from the ruler on that corner (where the marker is pointing) and be sure that the diagonal line from the ruler is passing through the top right corner (where the awl is pointing) (figure 17), trim the right side and across the top (figure 18)
turn the section around, place the 5 ¼” lines from the ruler on the trimmed corner (figure 19) and trim the remaining two sides (figure 20)
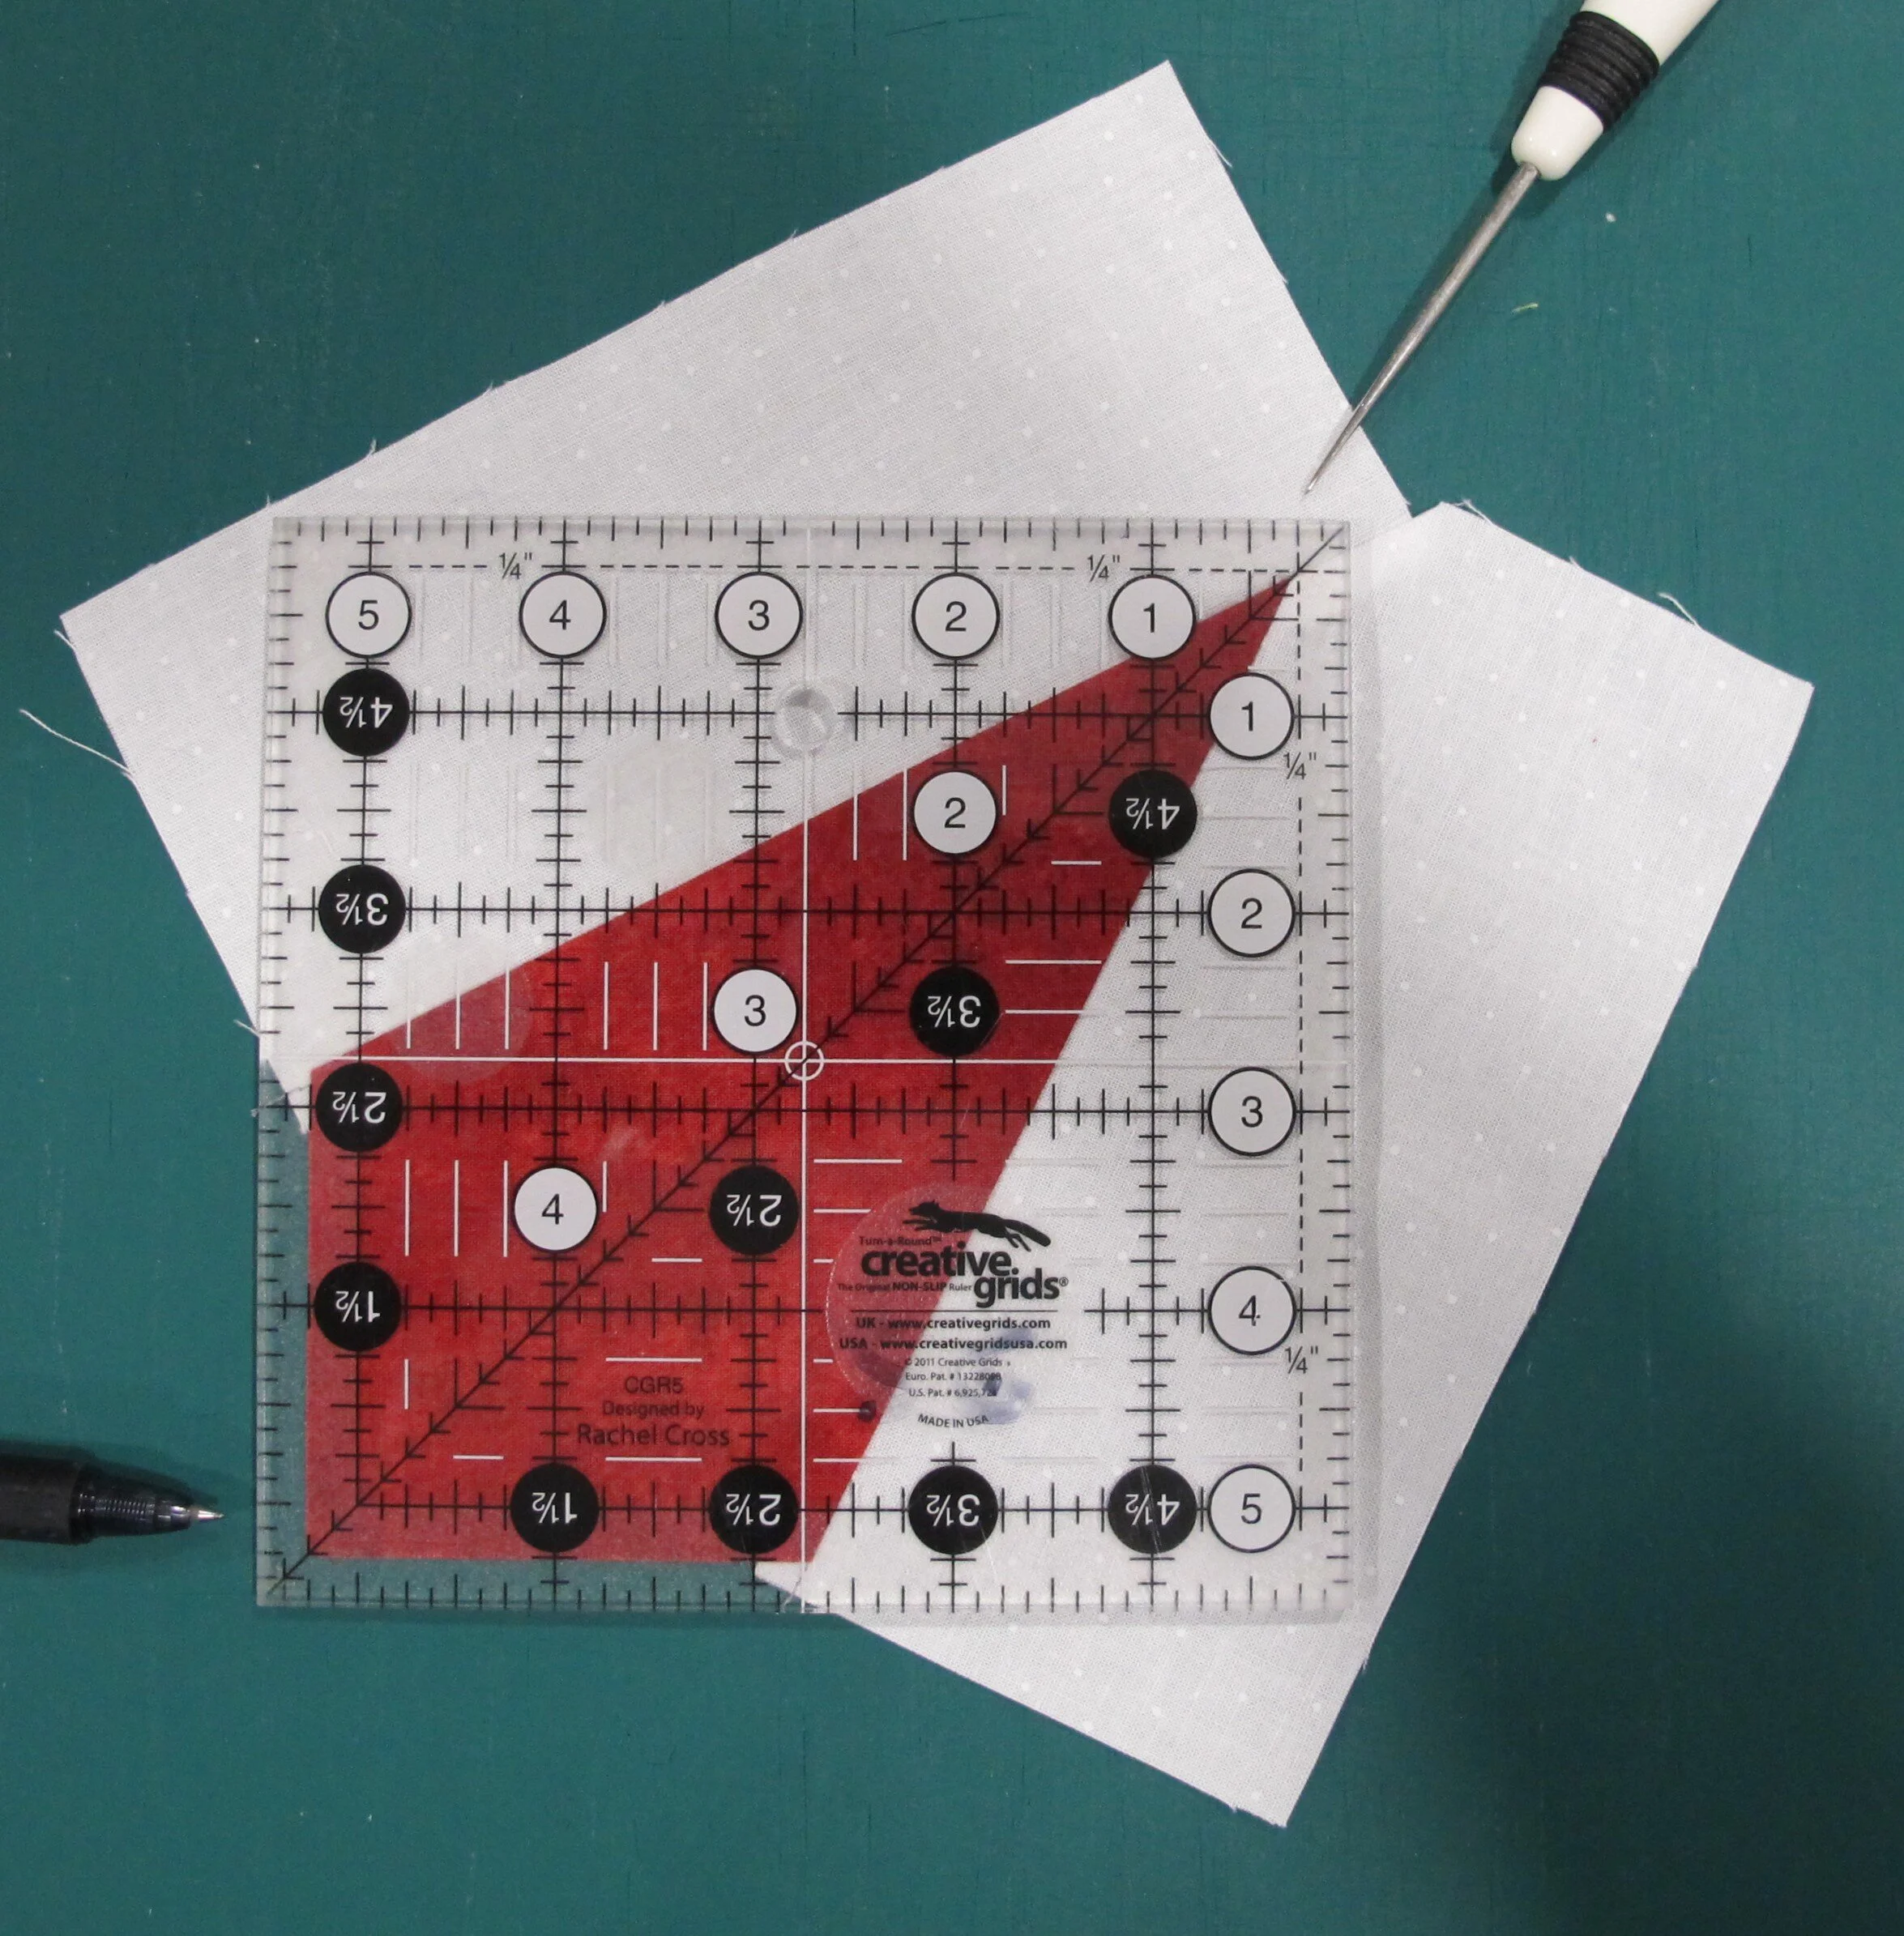
figure 17
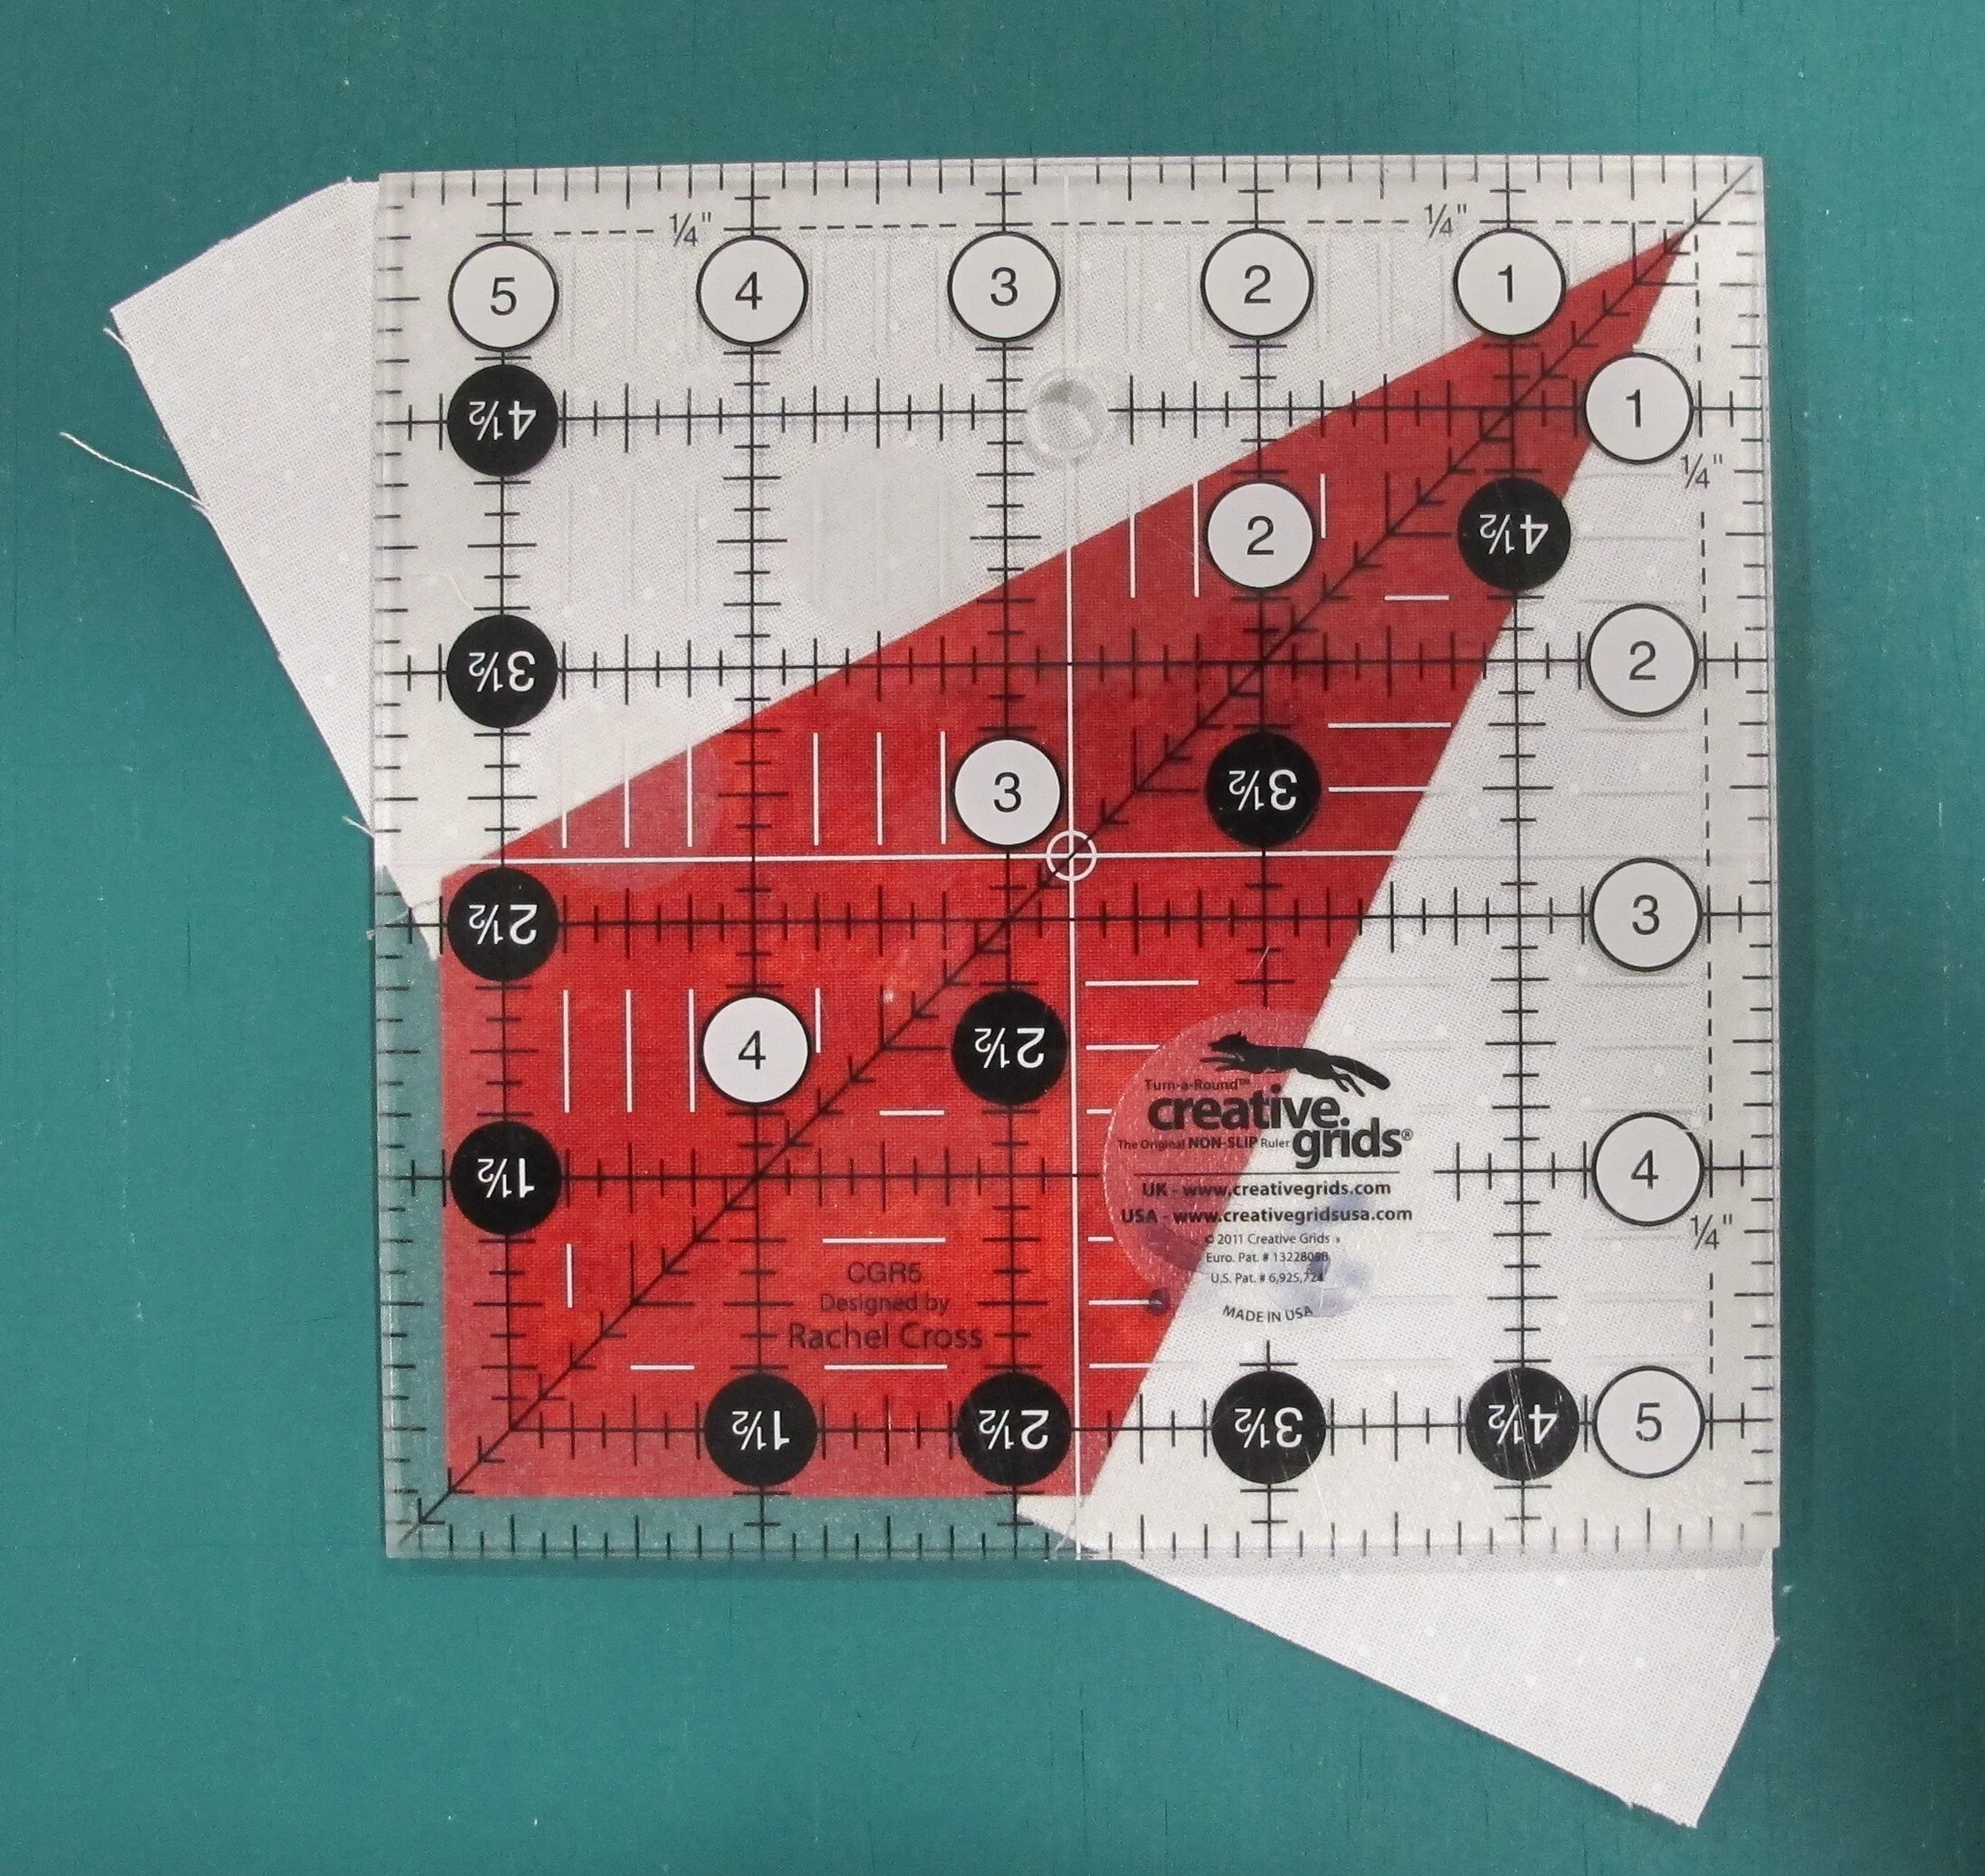
figure 18

figure 19
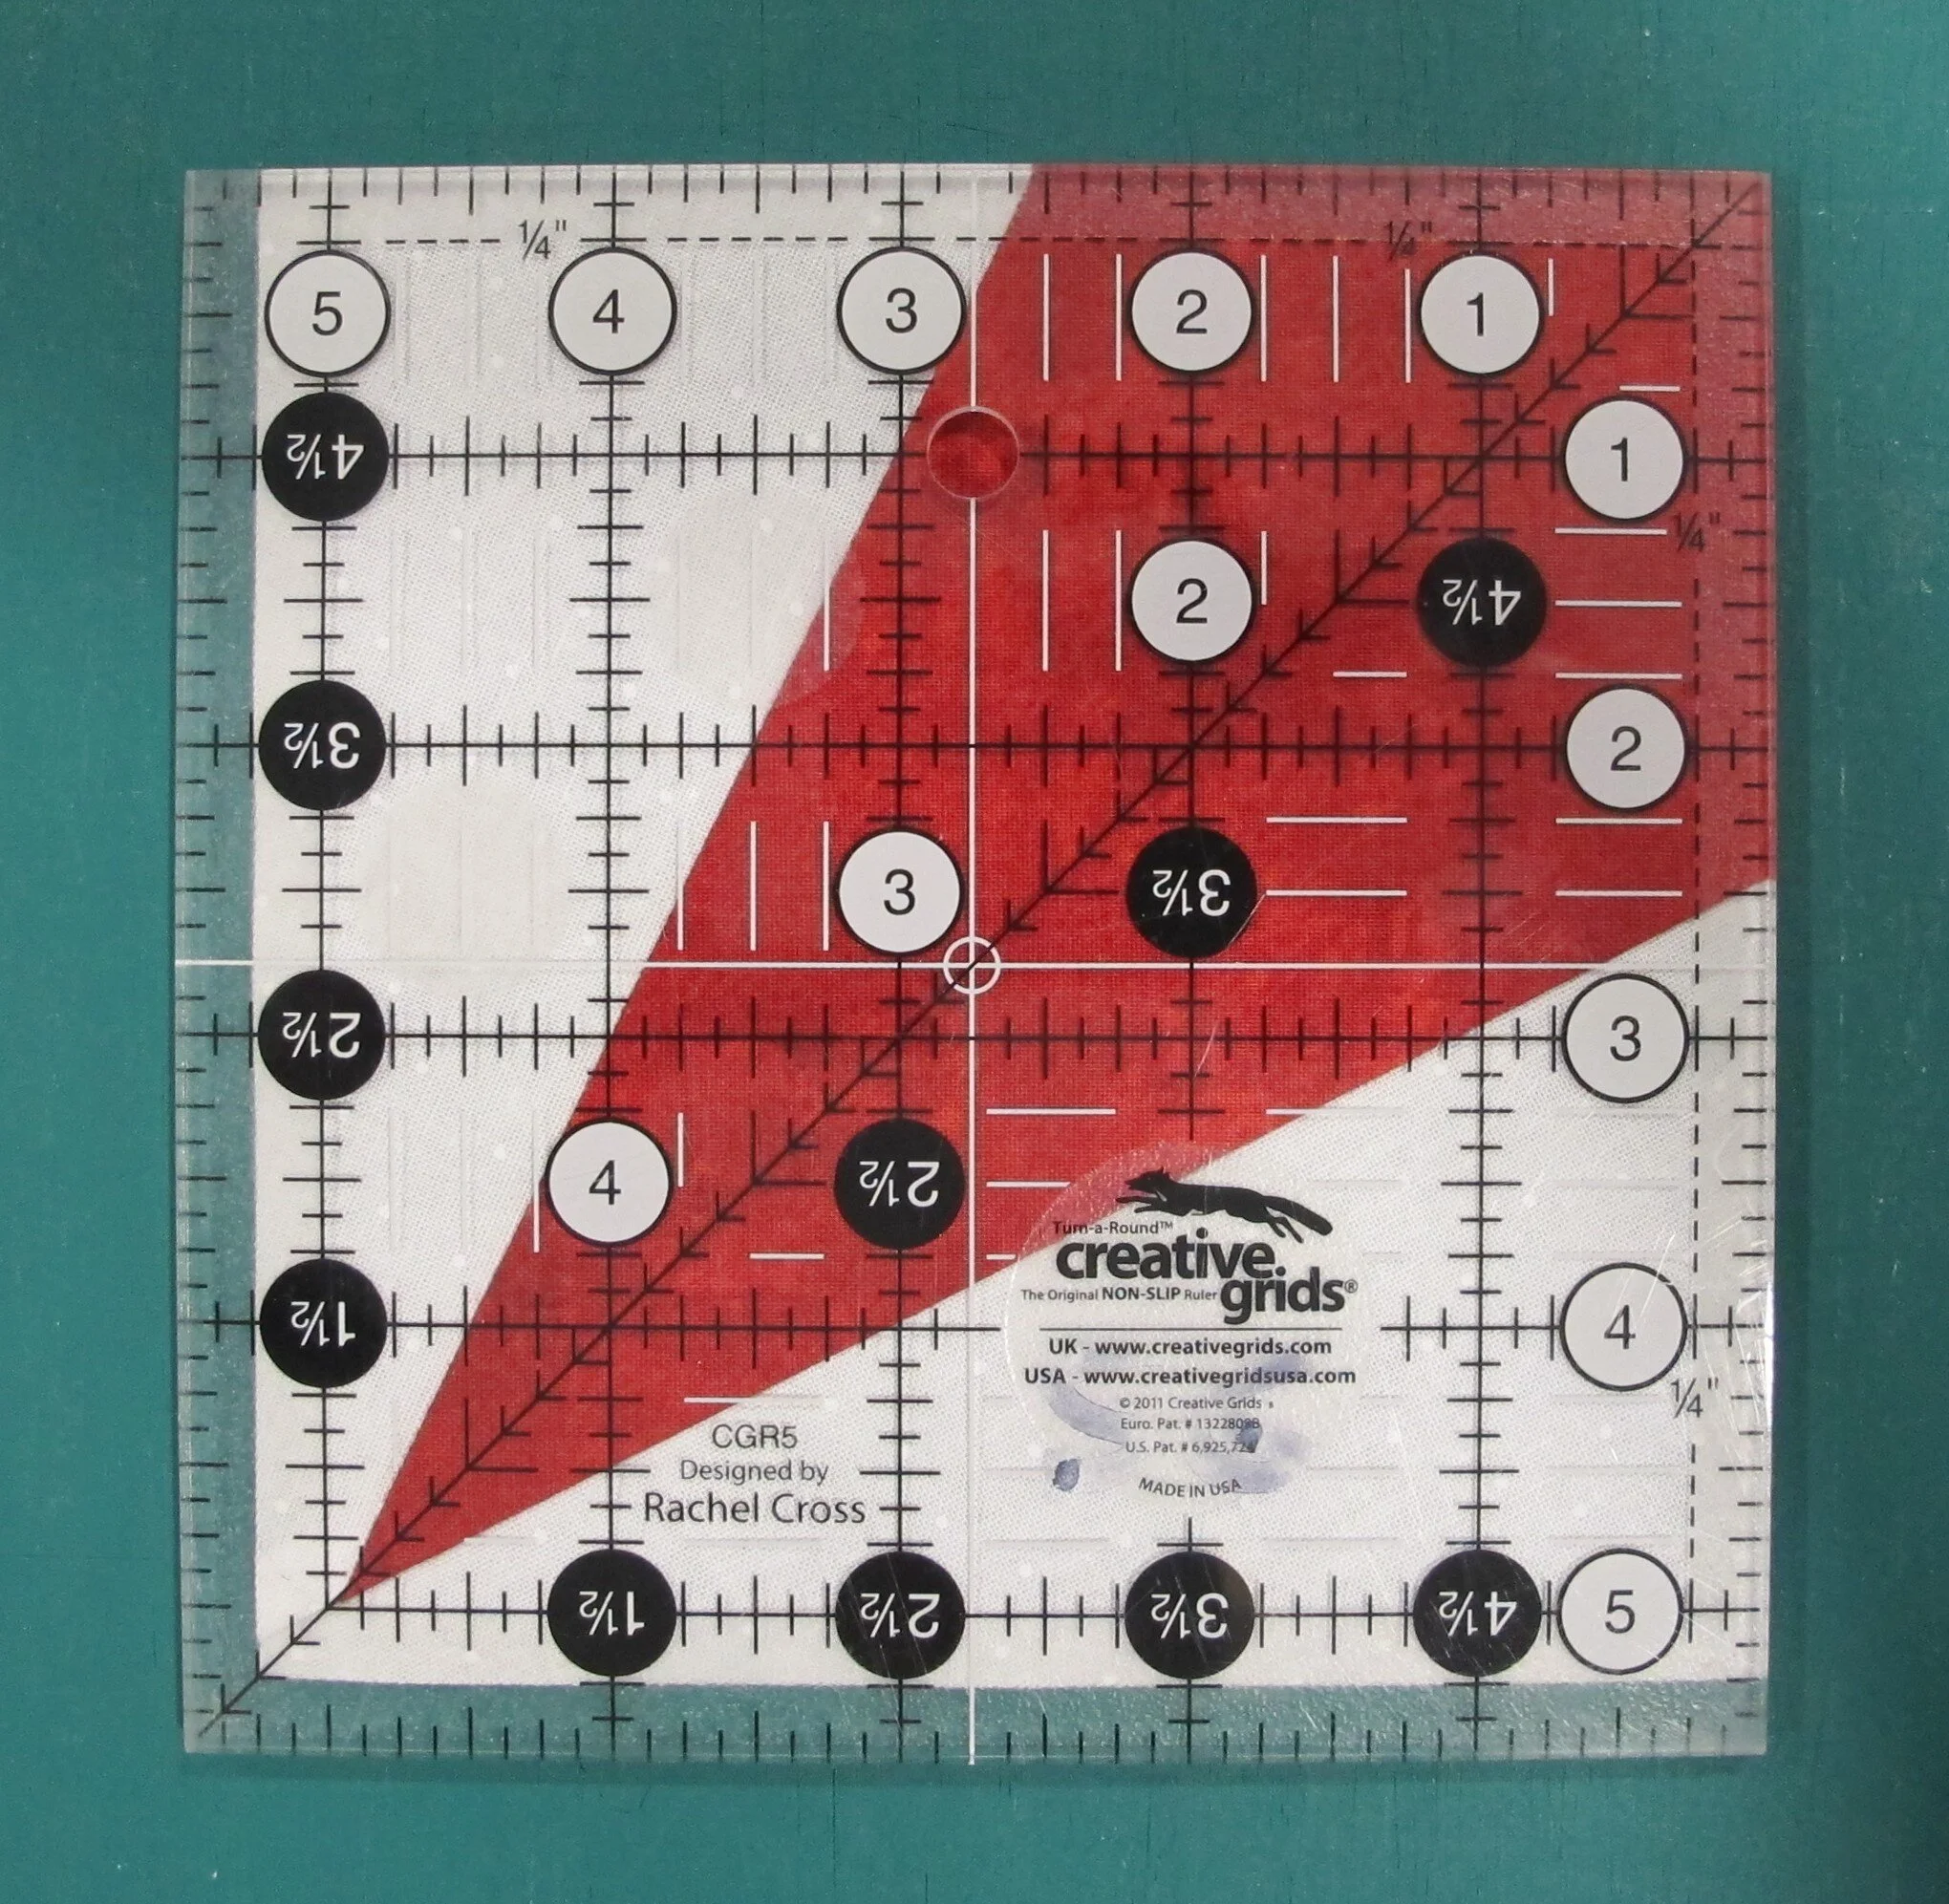
figure 20
Block layout:
lay out the squares, HST's, stem section and top corner section by following the photograph below for placement (figure 21)
stitch squares in centre row together and press seams to the right, stitch other squares and HST's together in their rows and press seams in each row in the opposite direction to the adjacent rows (figure 22)
stitch top left section to top corner section and press seam away from top corner section, stitch bottom right section to stem section and press seam towards stem
stitch all rows together lining up seam lines (figure 23)
press seams in one direction
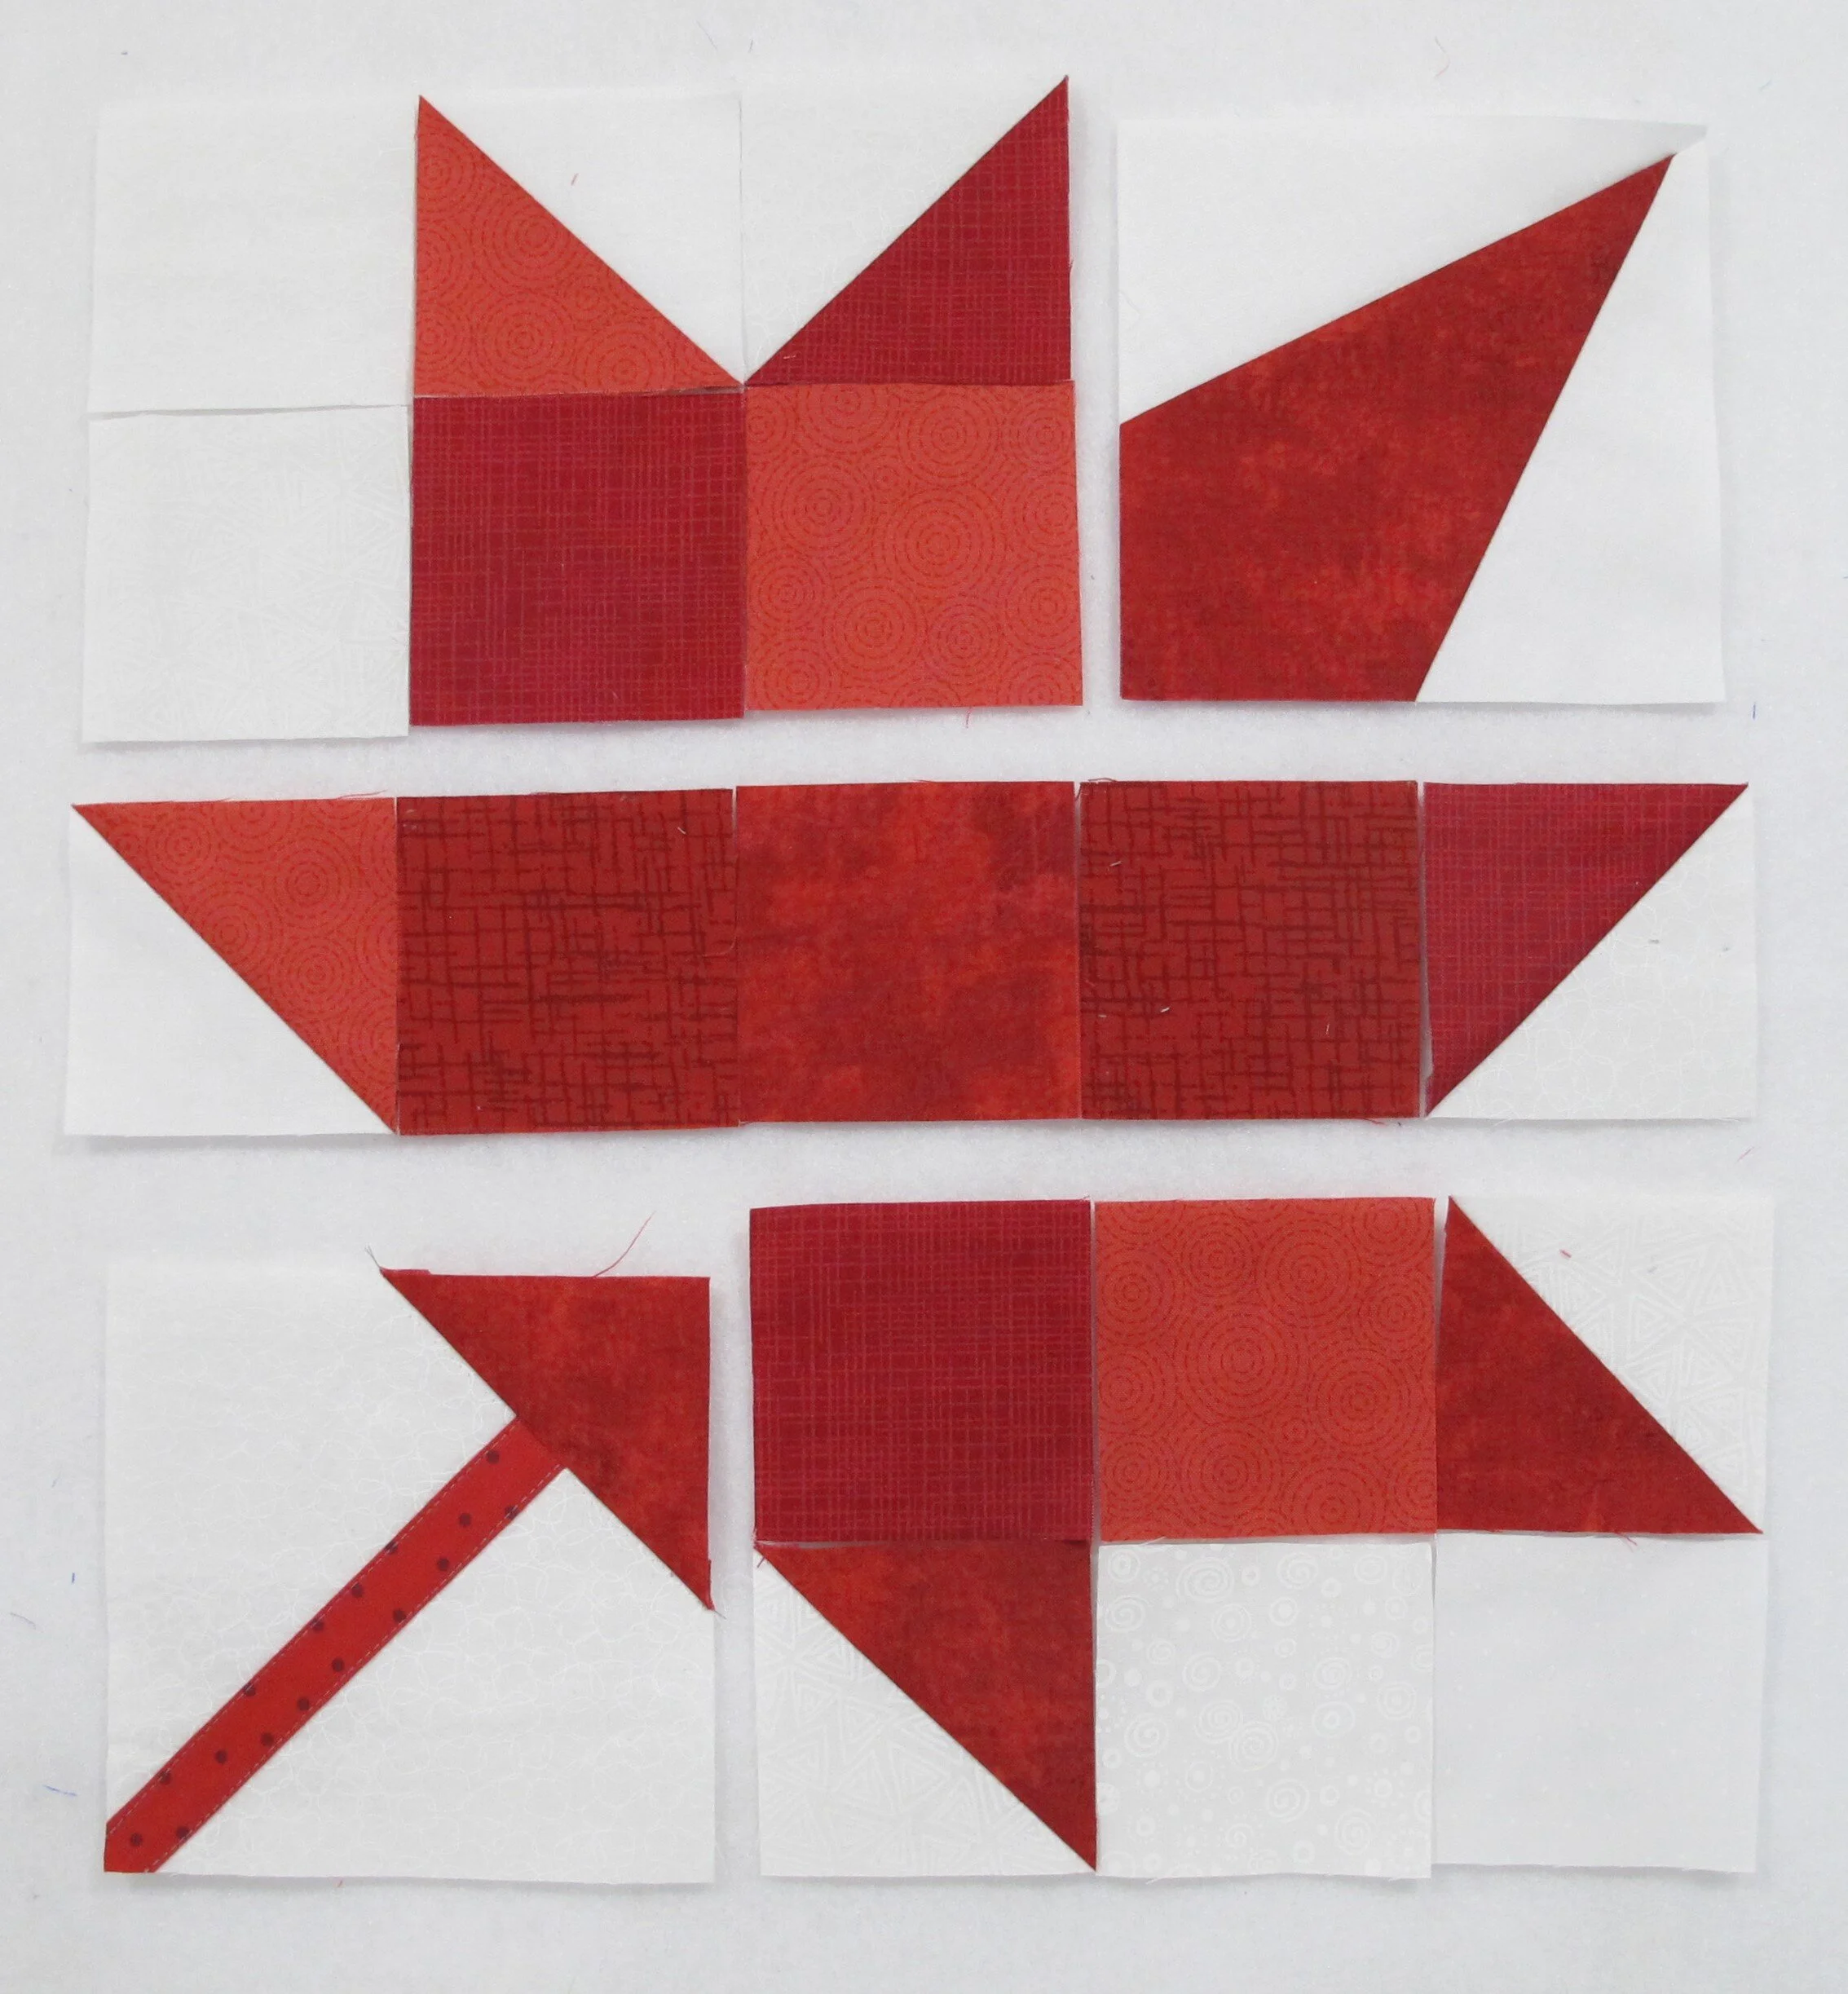
figure 21
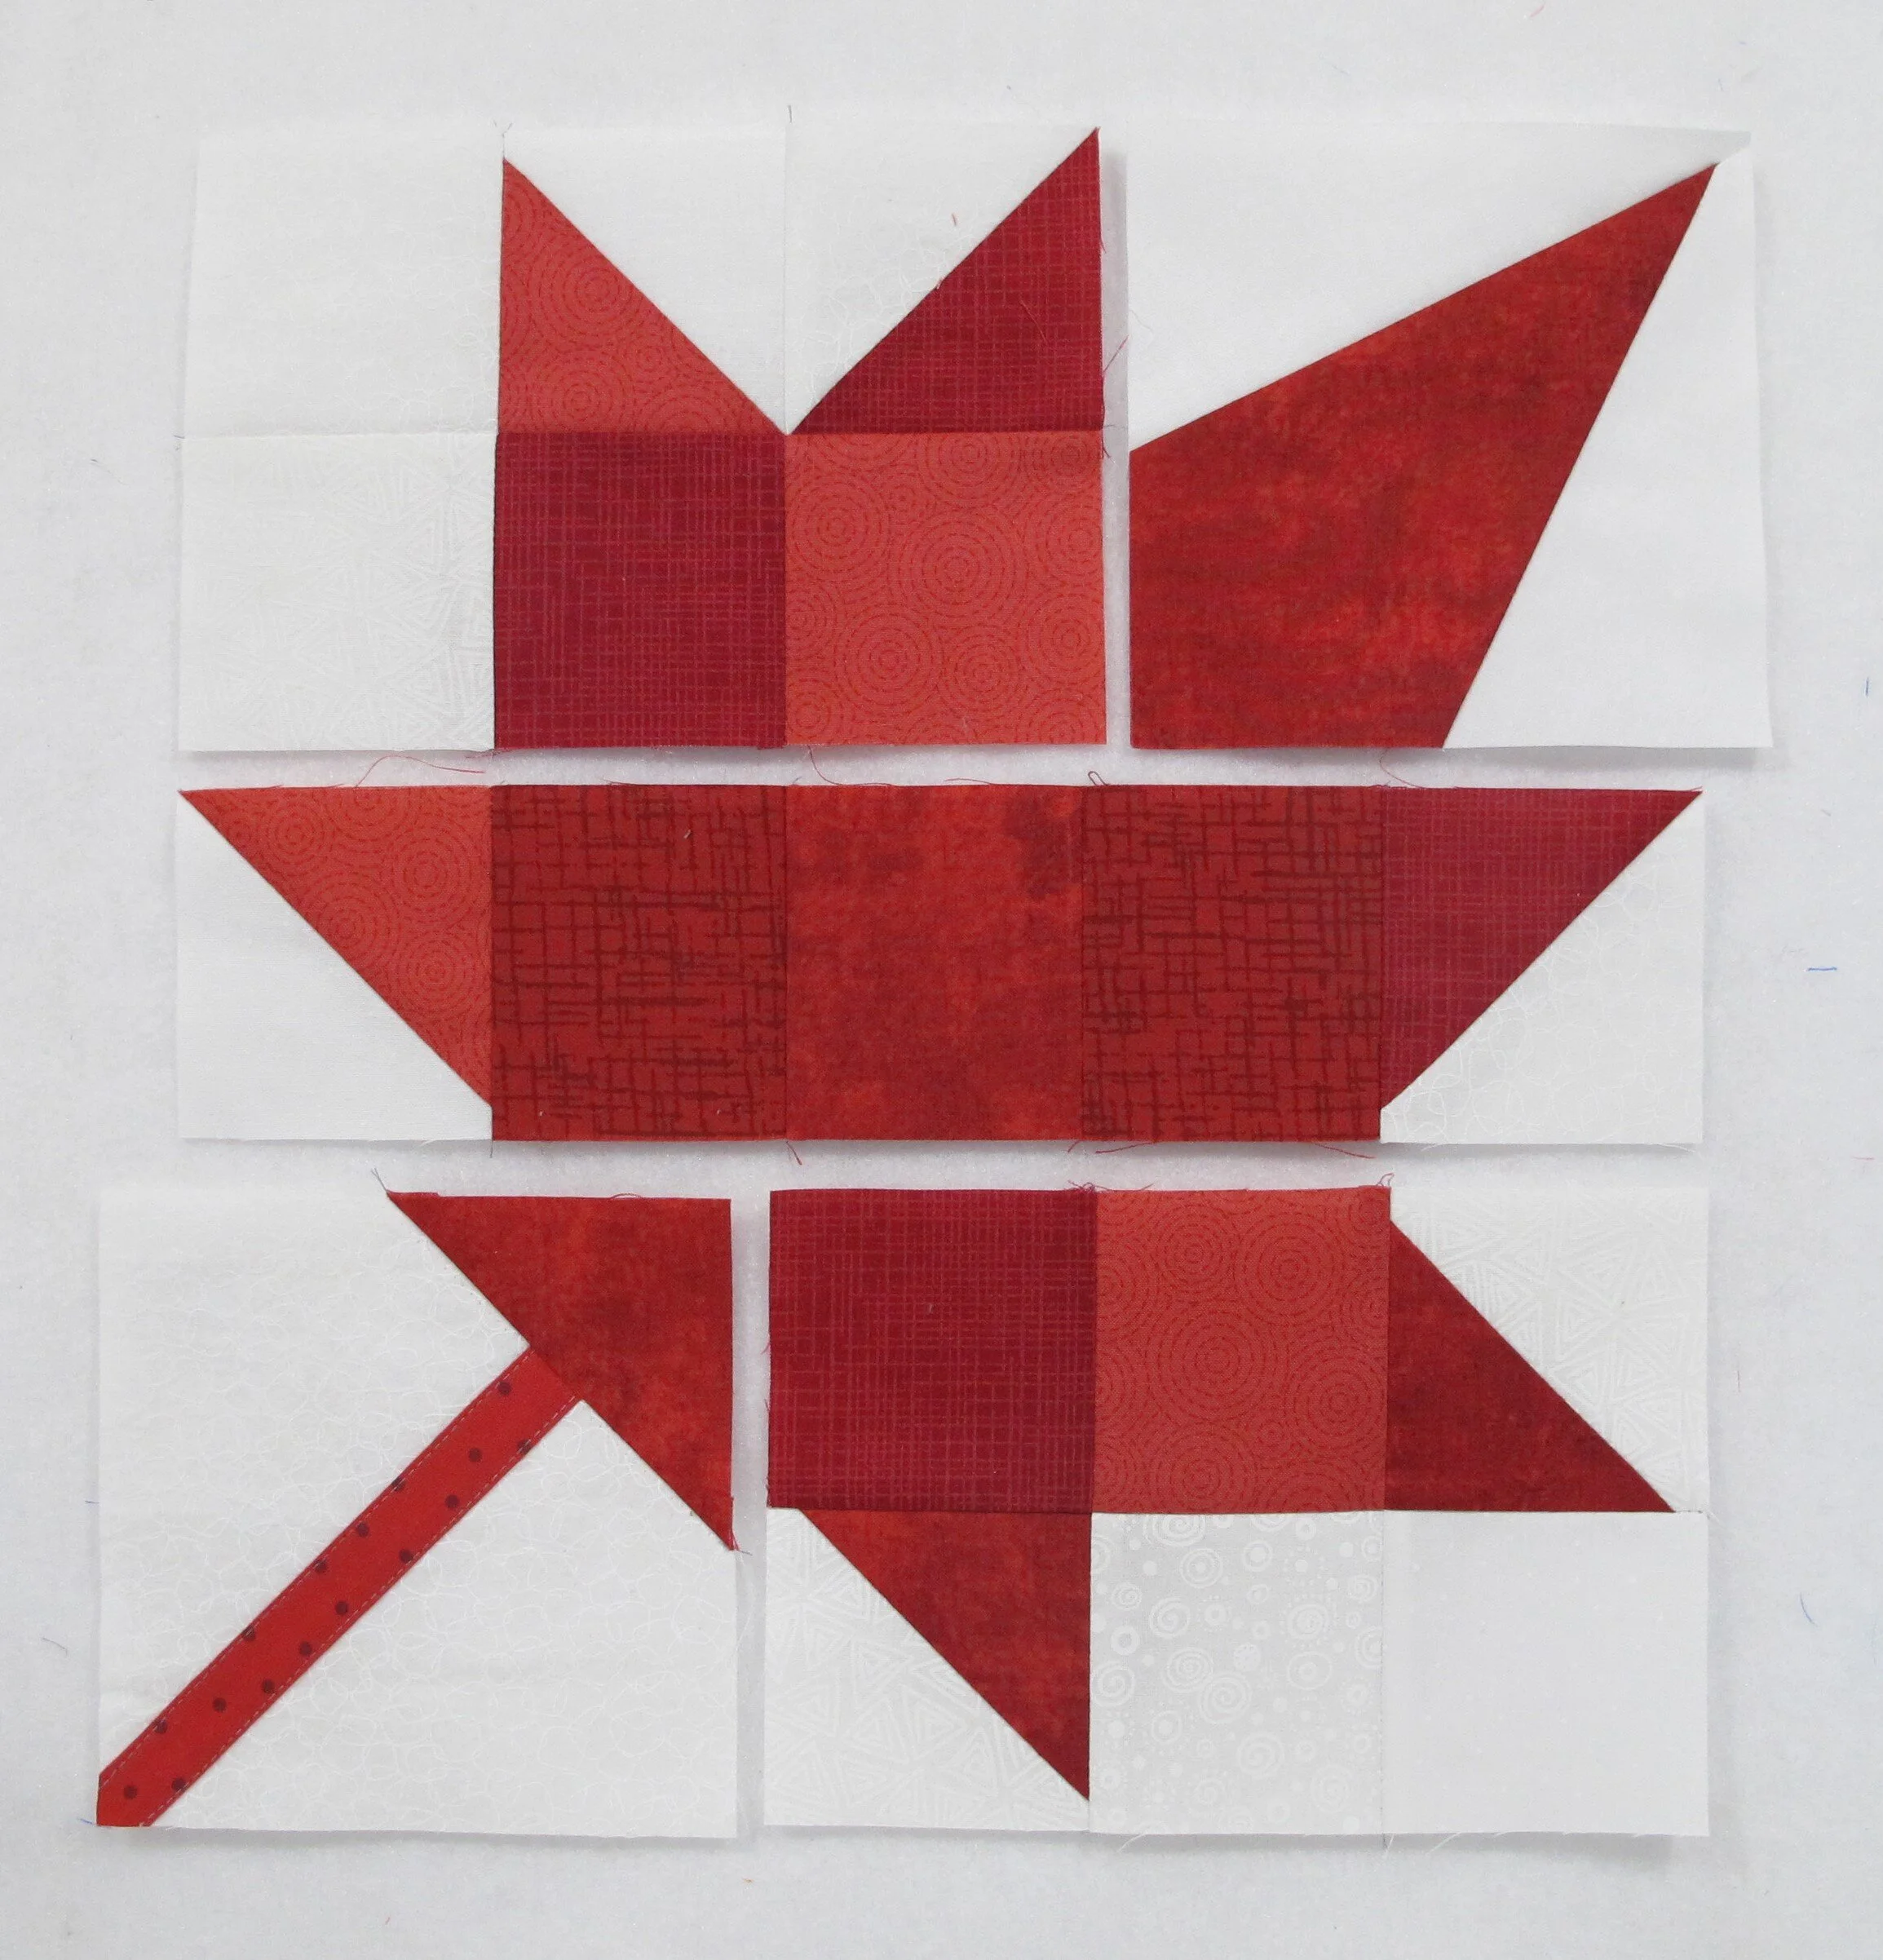
figure 22
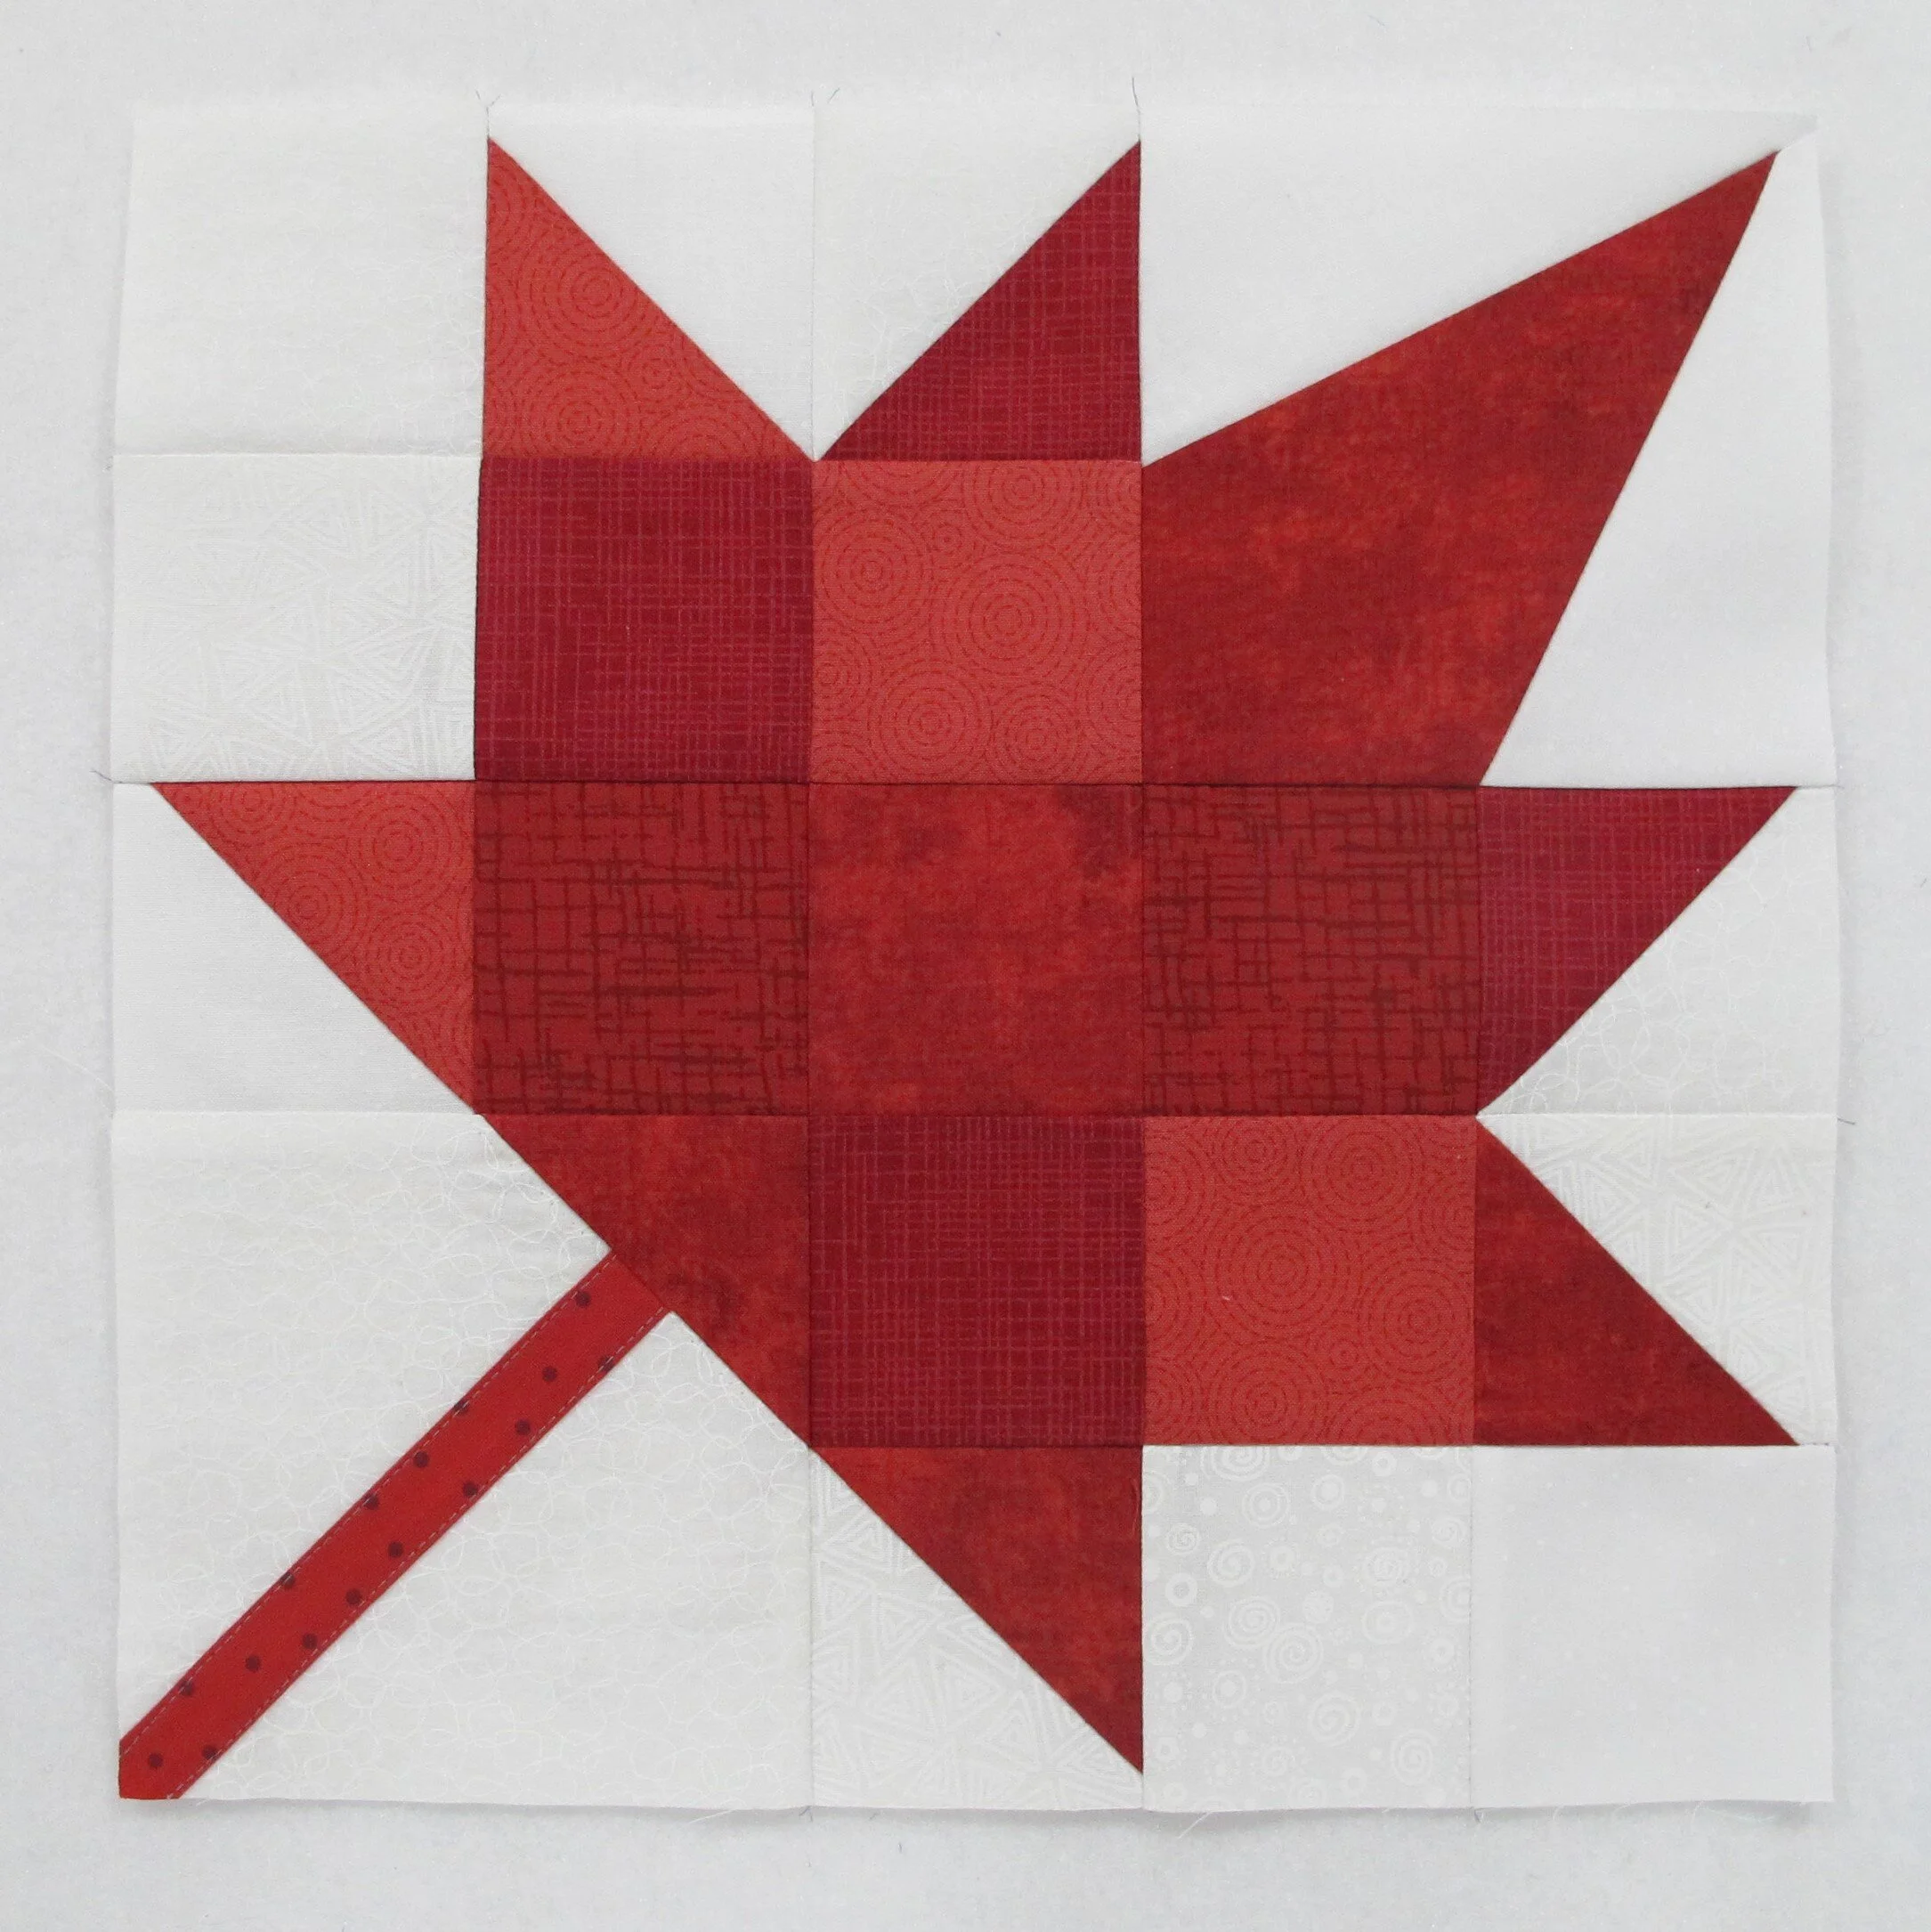
figure 23
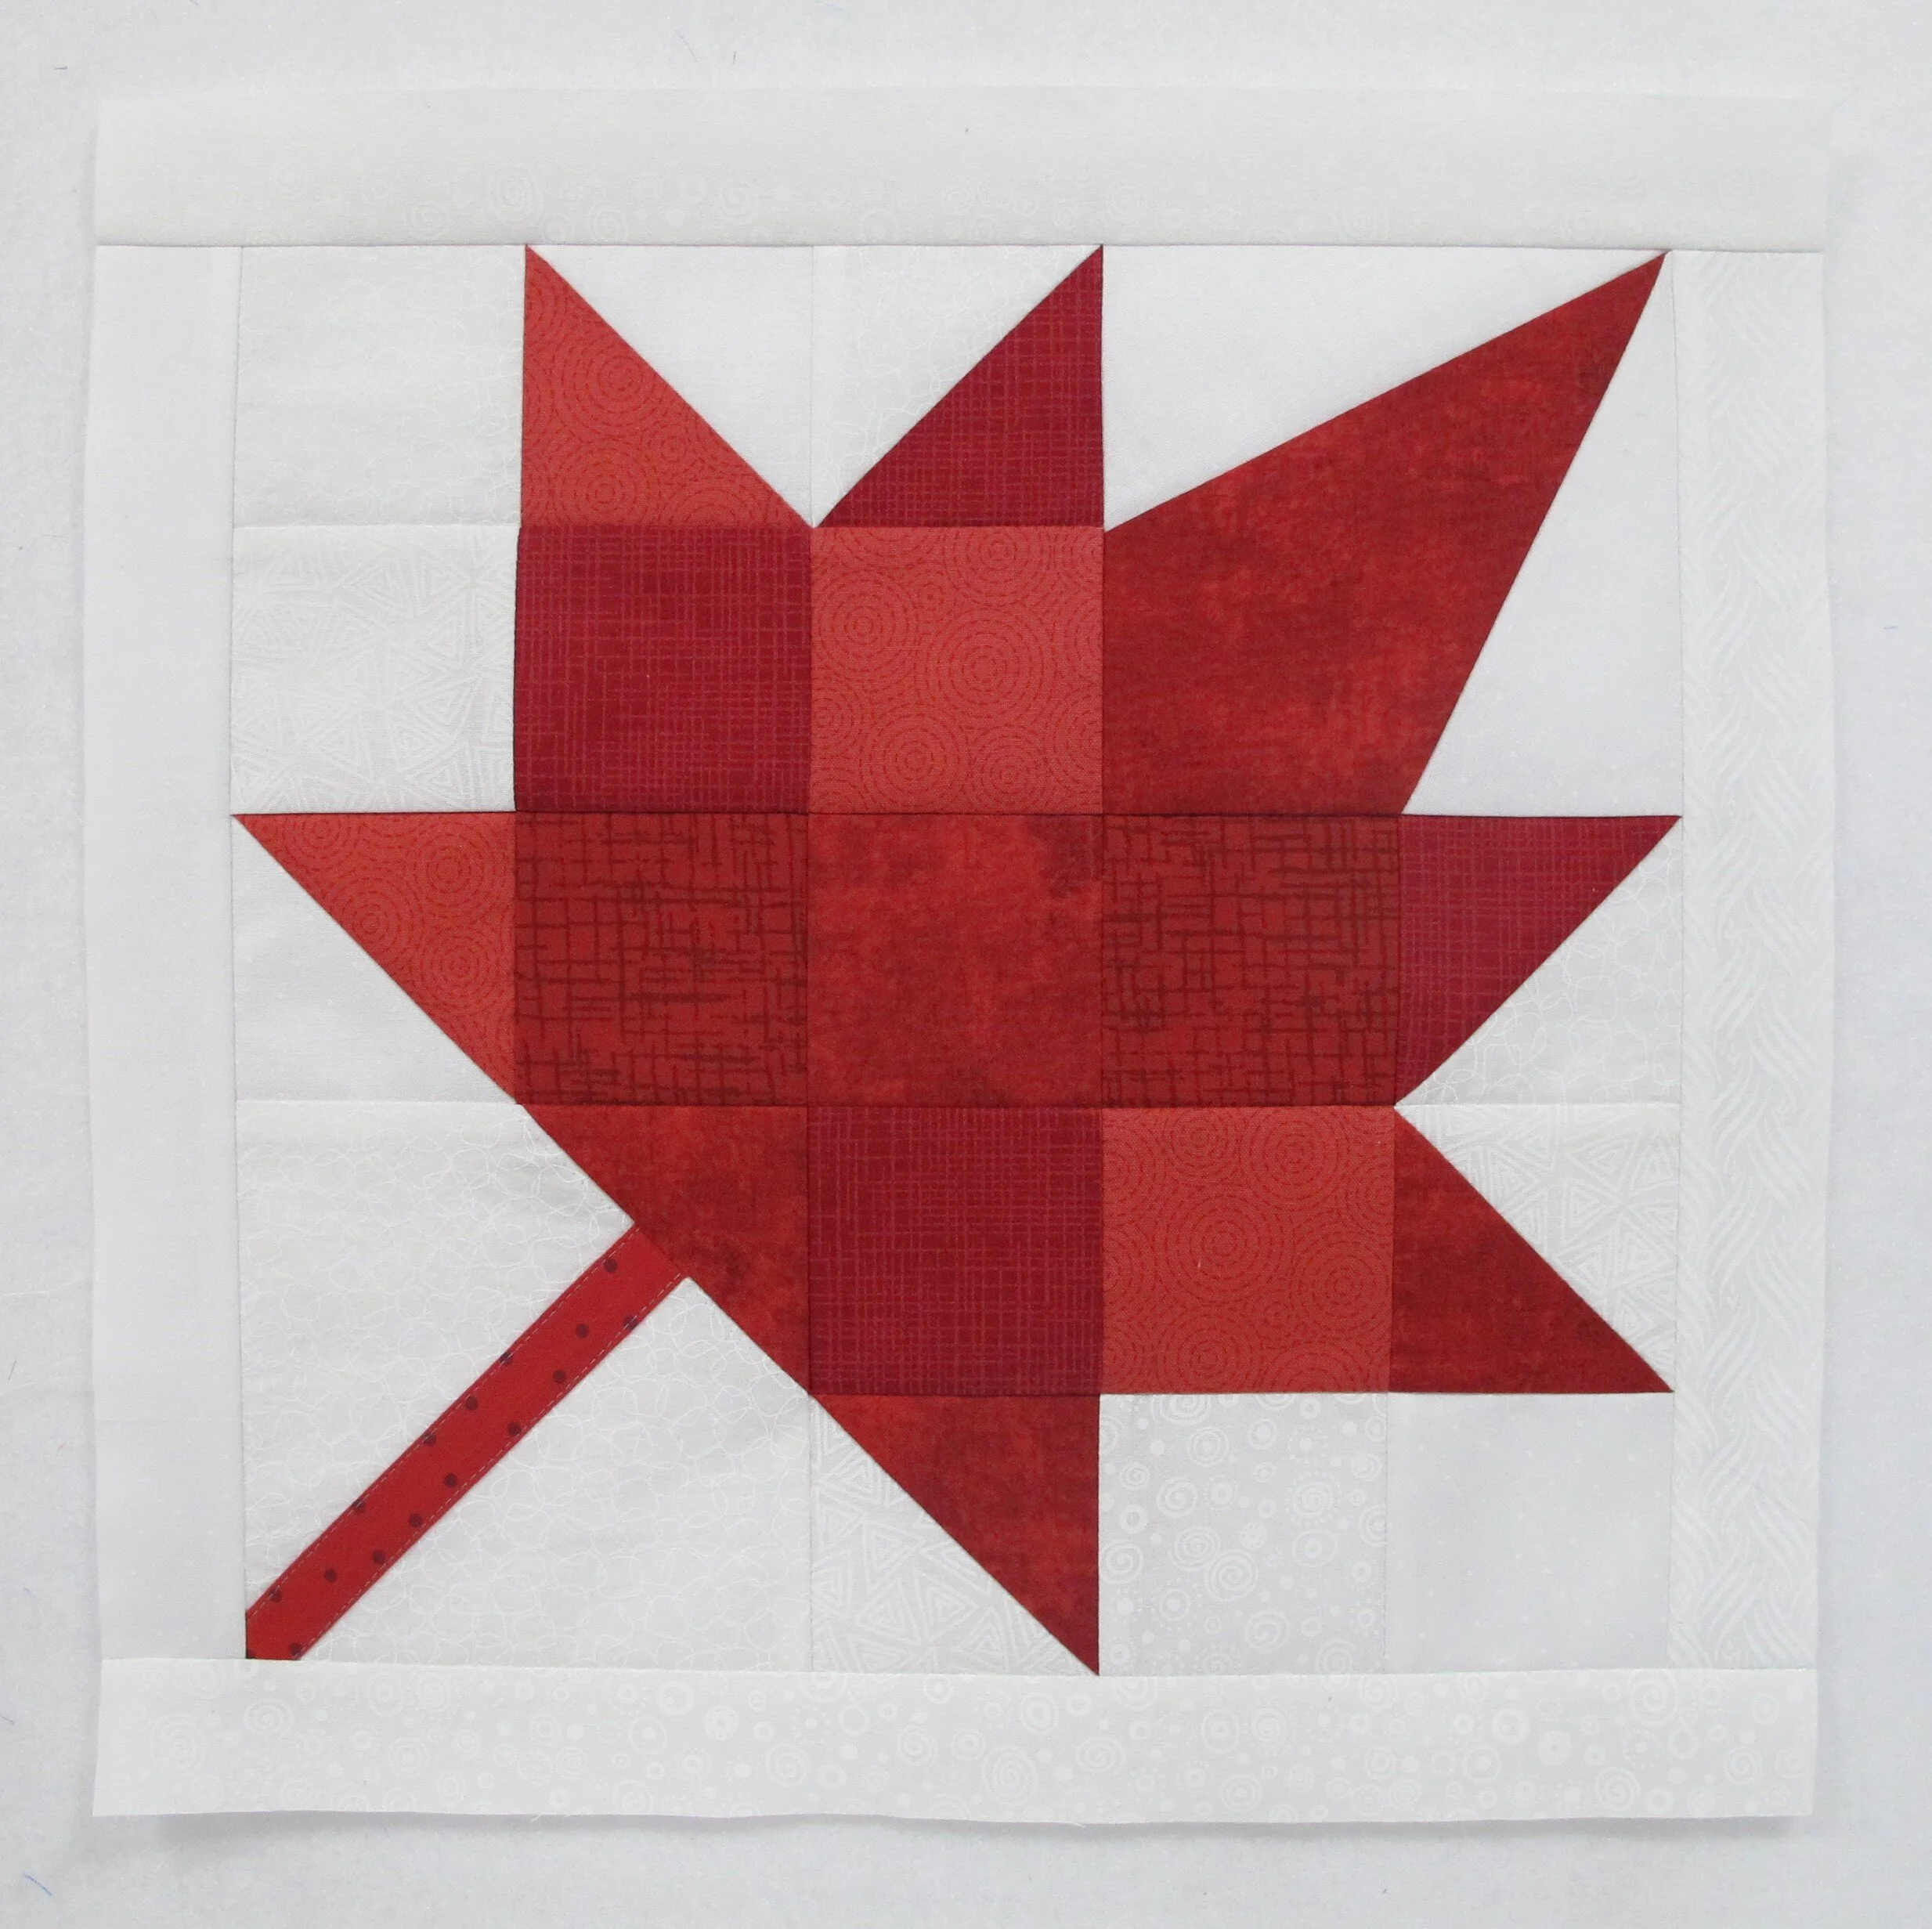
figure 24
Narrow borders (figure 24):
stitch 1 ½” x 12 ½” white strips to the sides of the block and press seams toward the strips
stitch 1 ½” x 14 ½” white strips to the top and bottom of the block and press seams toward the strips
*** If you plan on making a calendar quilt, just stop with this completed block. If you want to make a wallhanging follow the instructions below.
Outer border:
stitch 3 ½” x 14 ½” outer borders to the sides of the block and press seams toward the borders (figure 25)
stitch 3 ½” x 20 ½” outer borders to the top and bottom of the block and press seams toward the borders (figure 26)
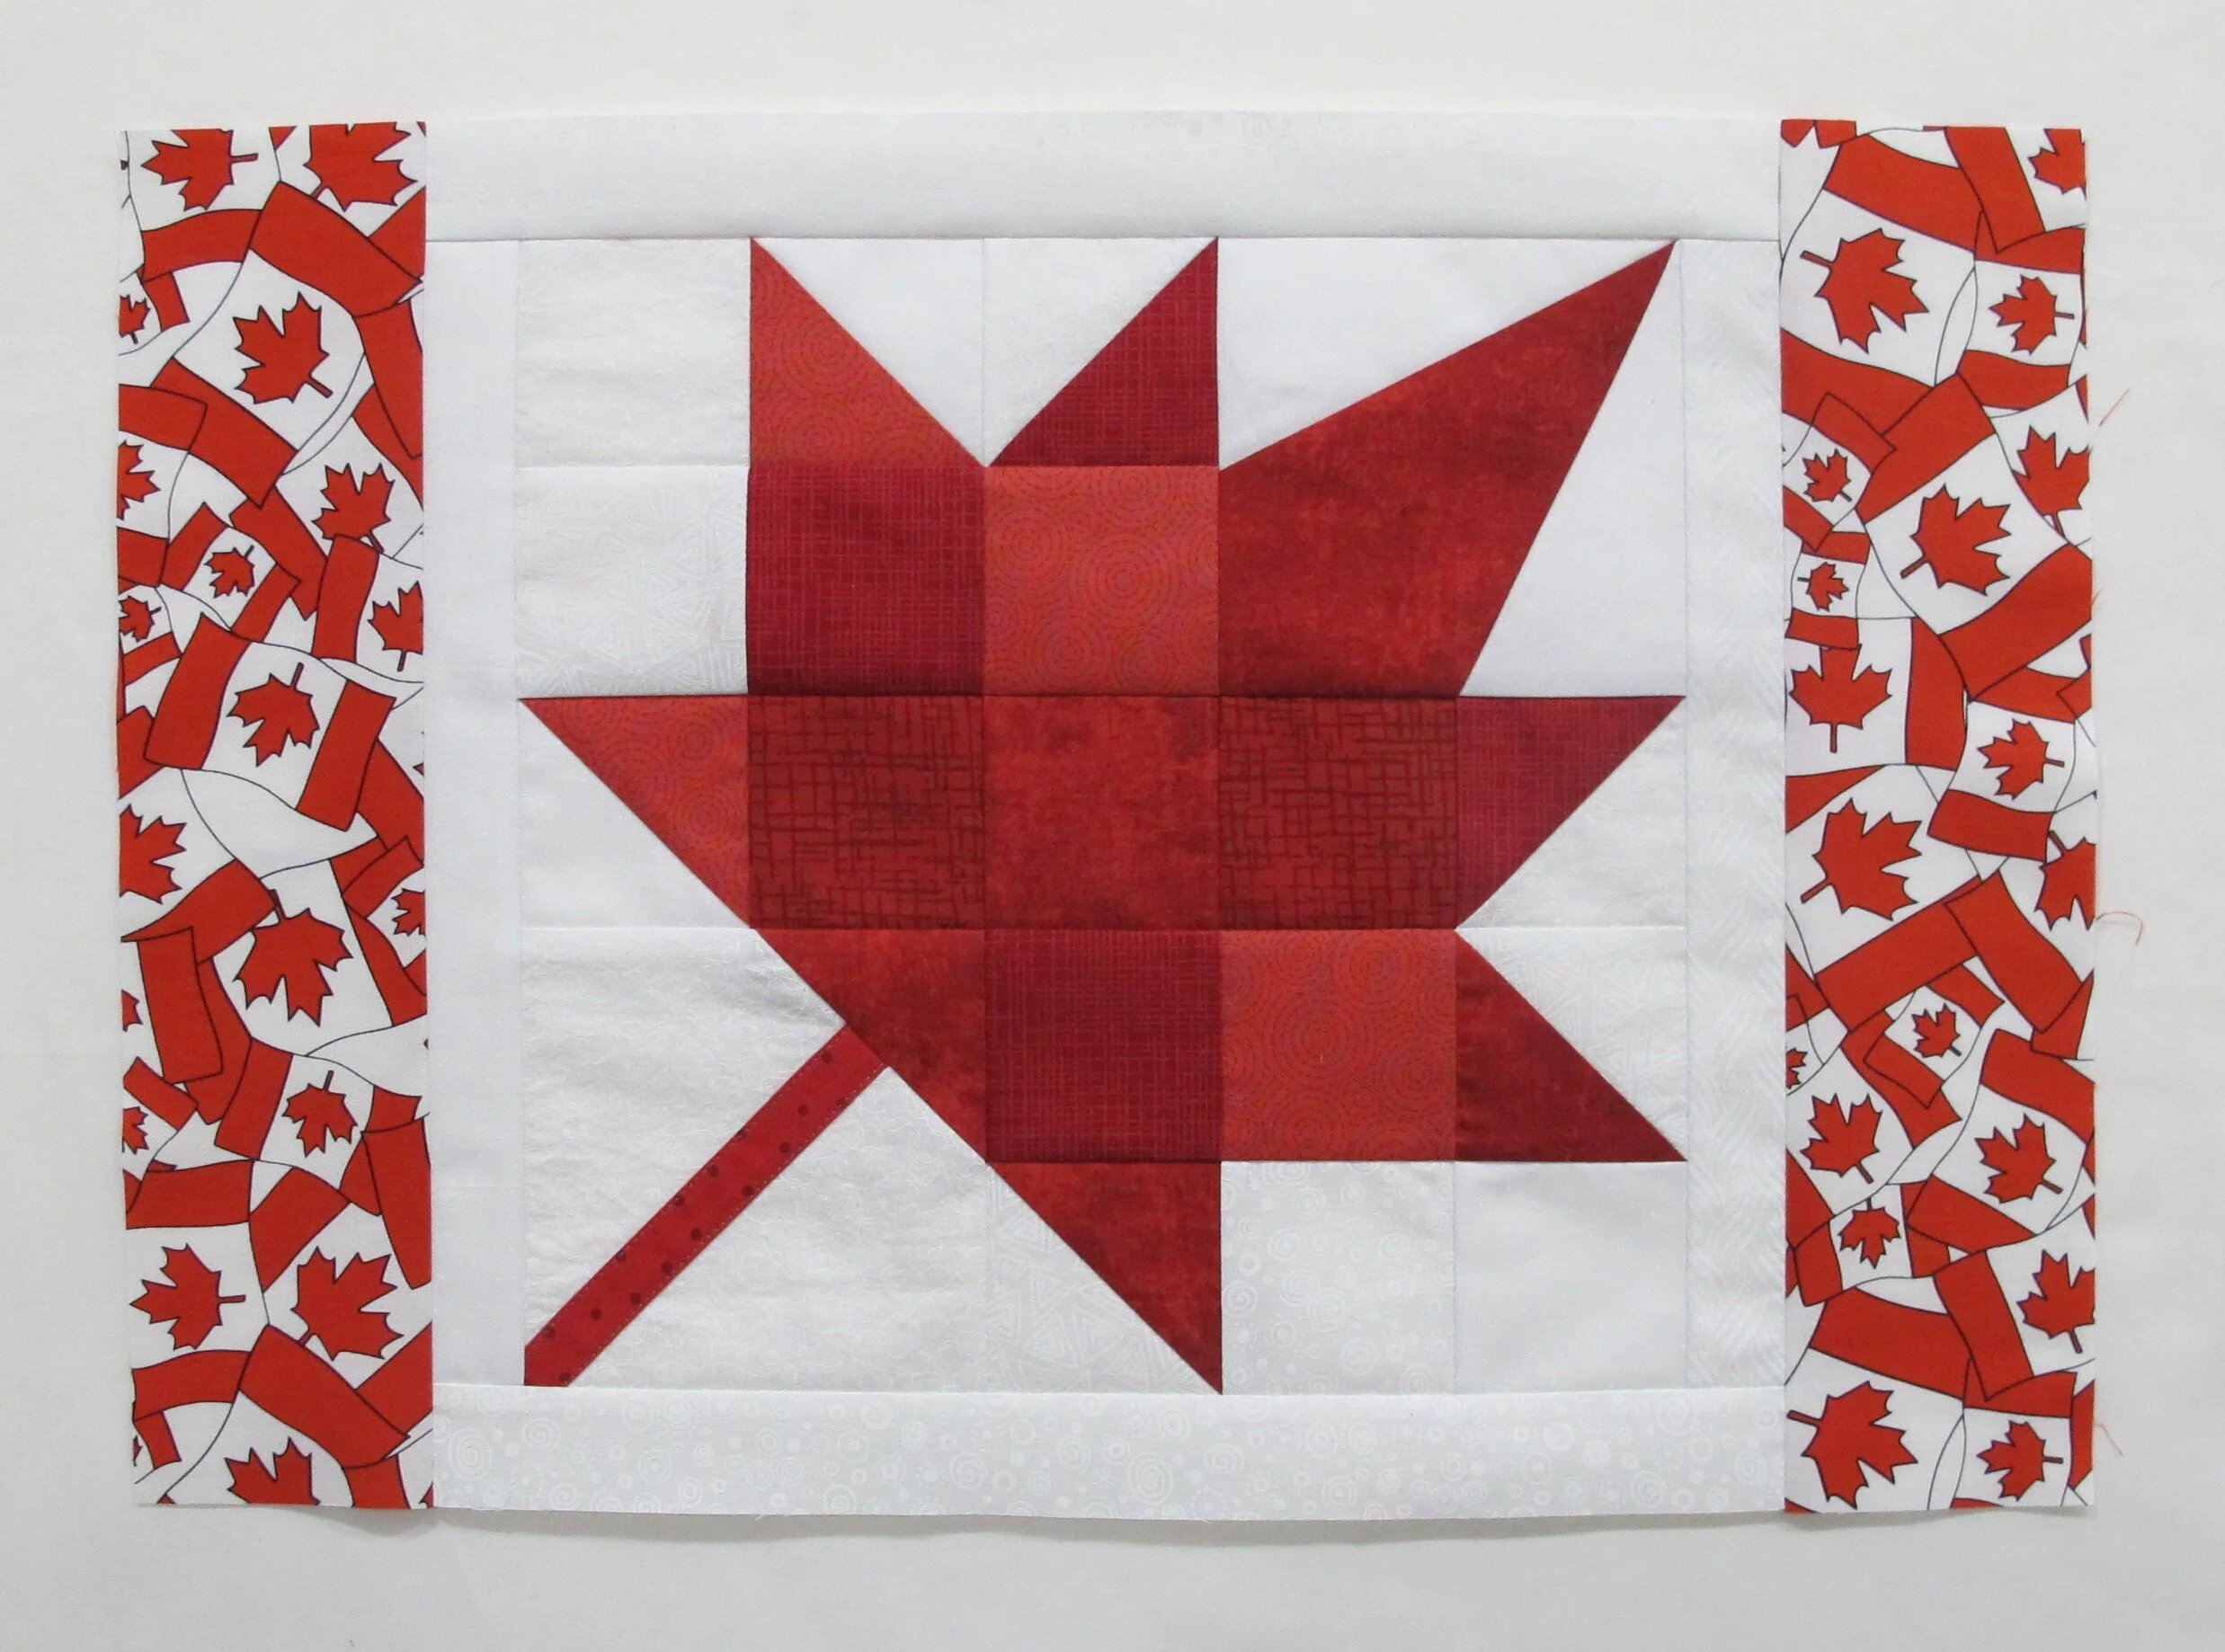
figure 25
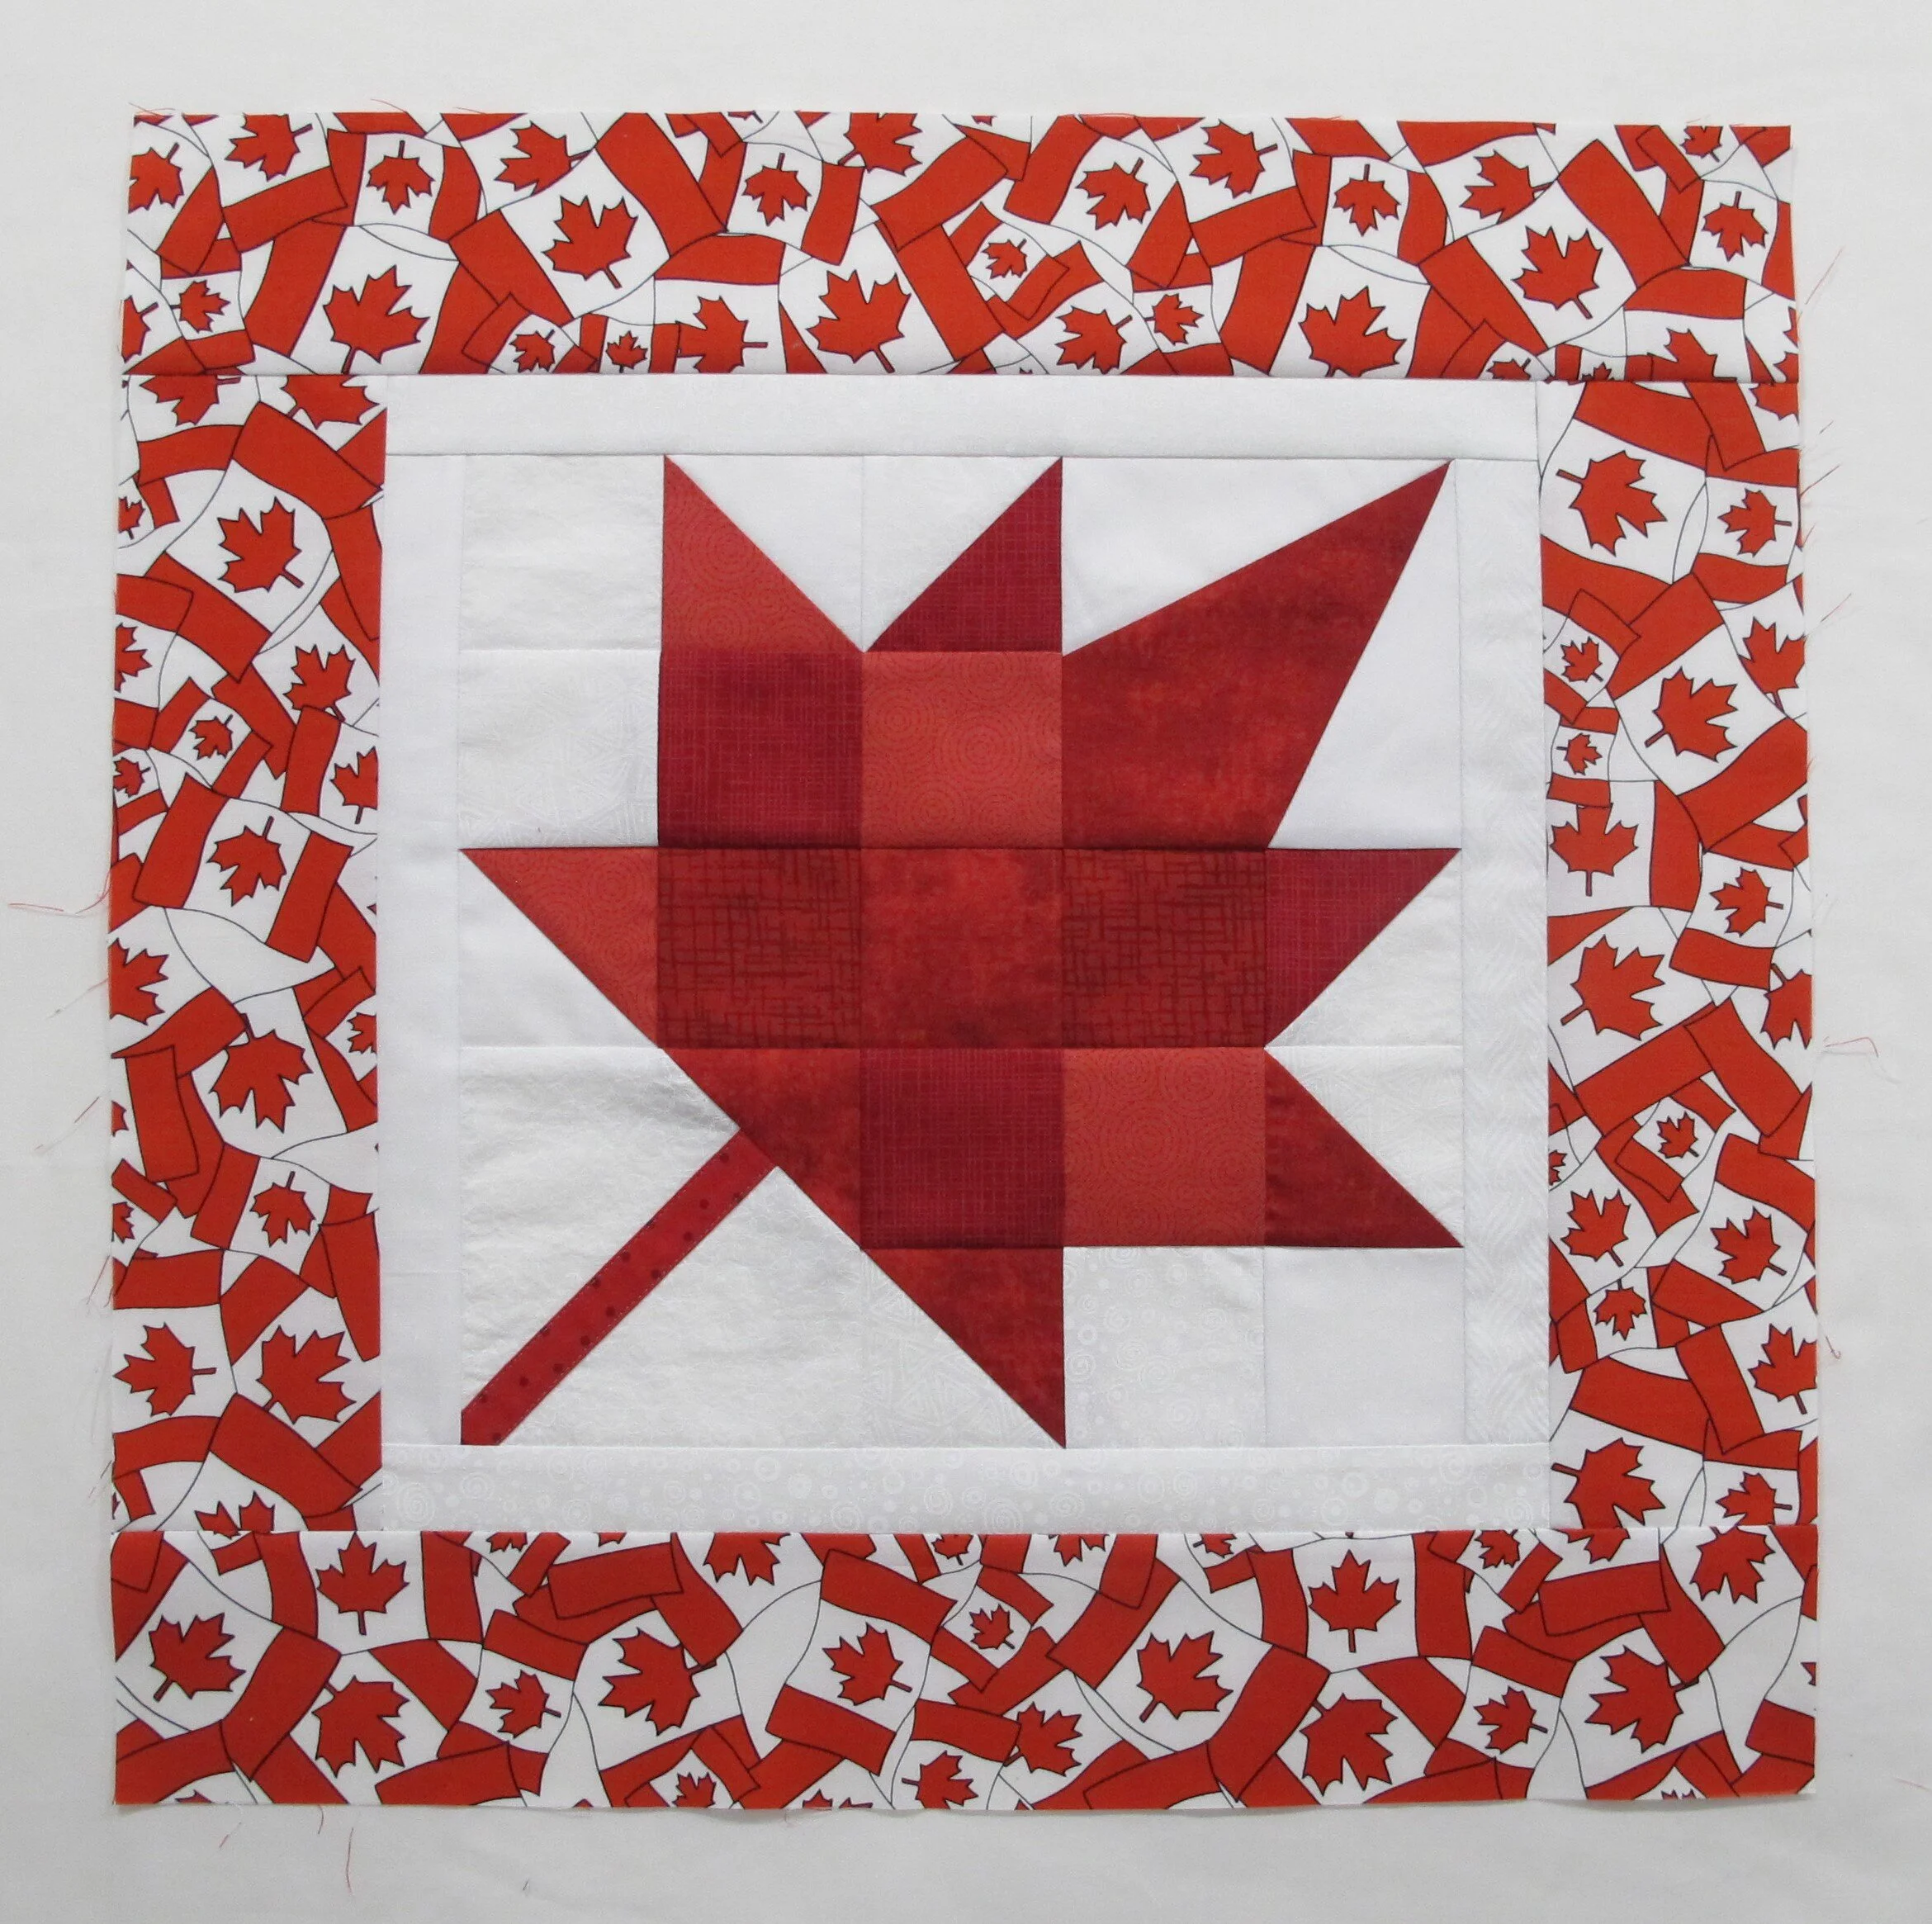
figure 26
Finishing:
layer the backing, batting and top together and either spray-baste or pin-baste the layers together
quilt as desired, also run a straight stitch within the seam allowance all around the outer edge...this stabilizes the edge for applying the binding
trim backing and batting even with the quilt top
follow my Hanging Sleeve tutorial
apply the binding using your preferred method (the hanging sleeve will be stitched in place as the binding is sewn on) or follow my Best Ever Binding tutorial