
The Versatile Log Cabin Design
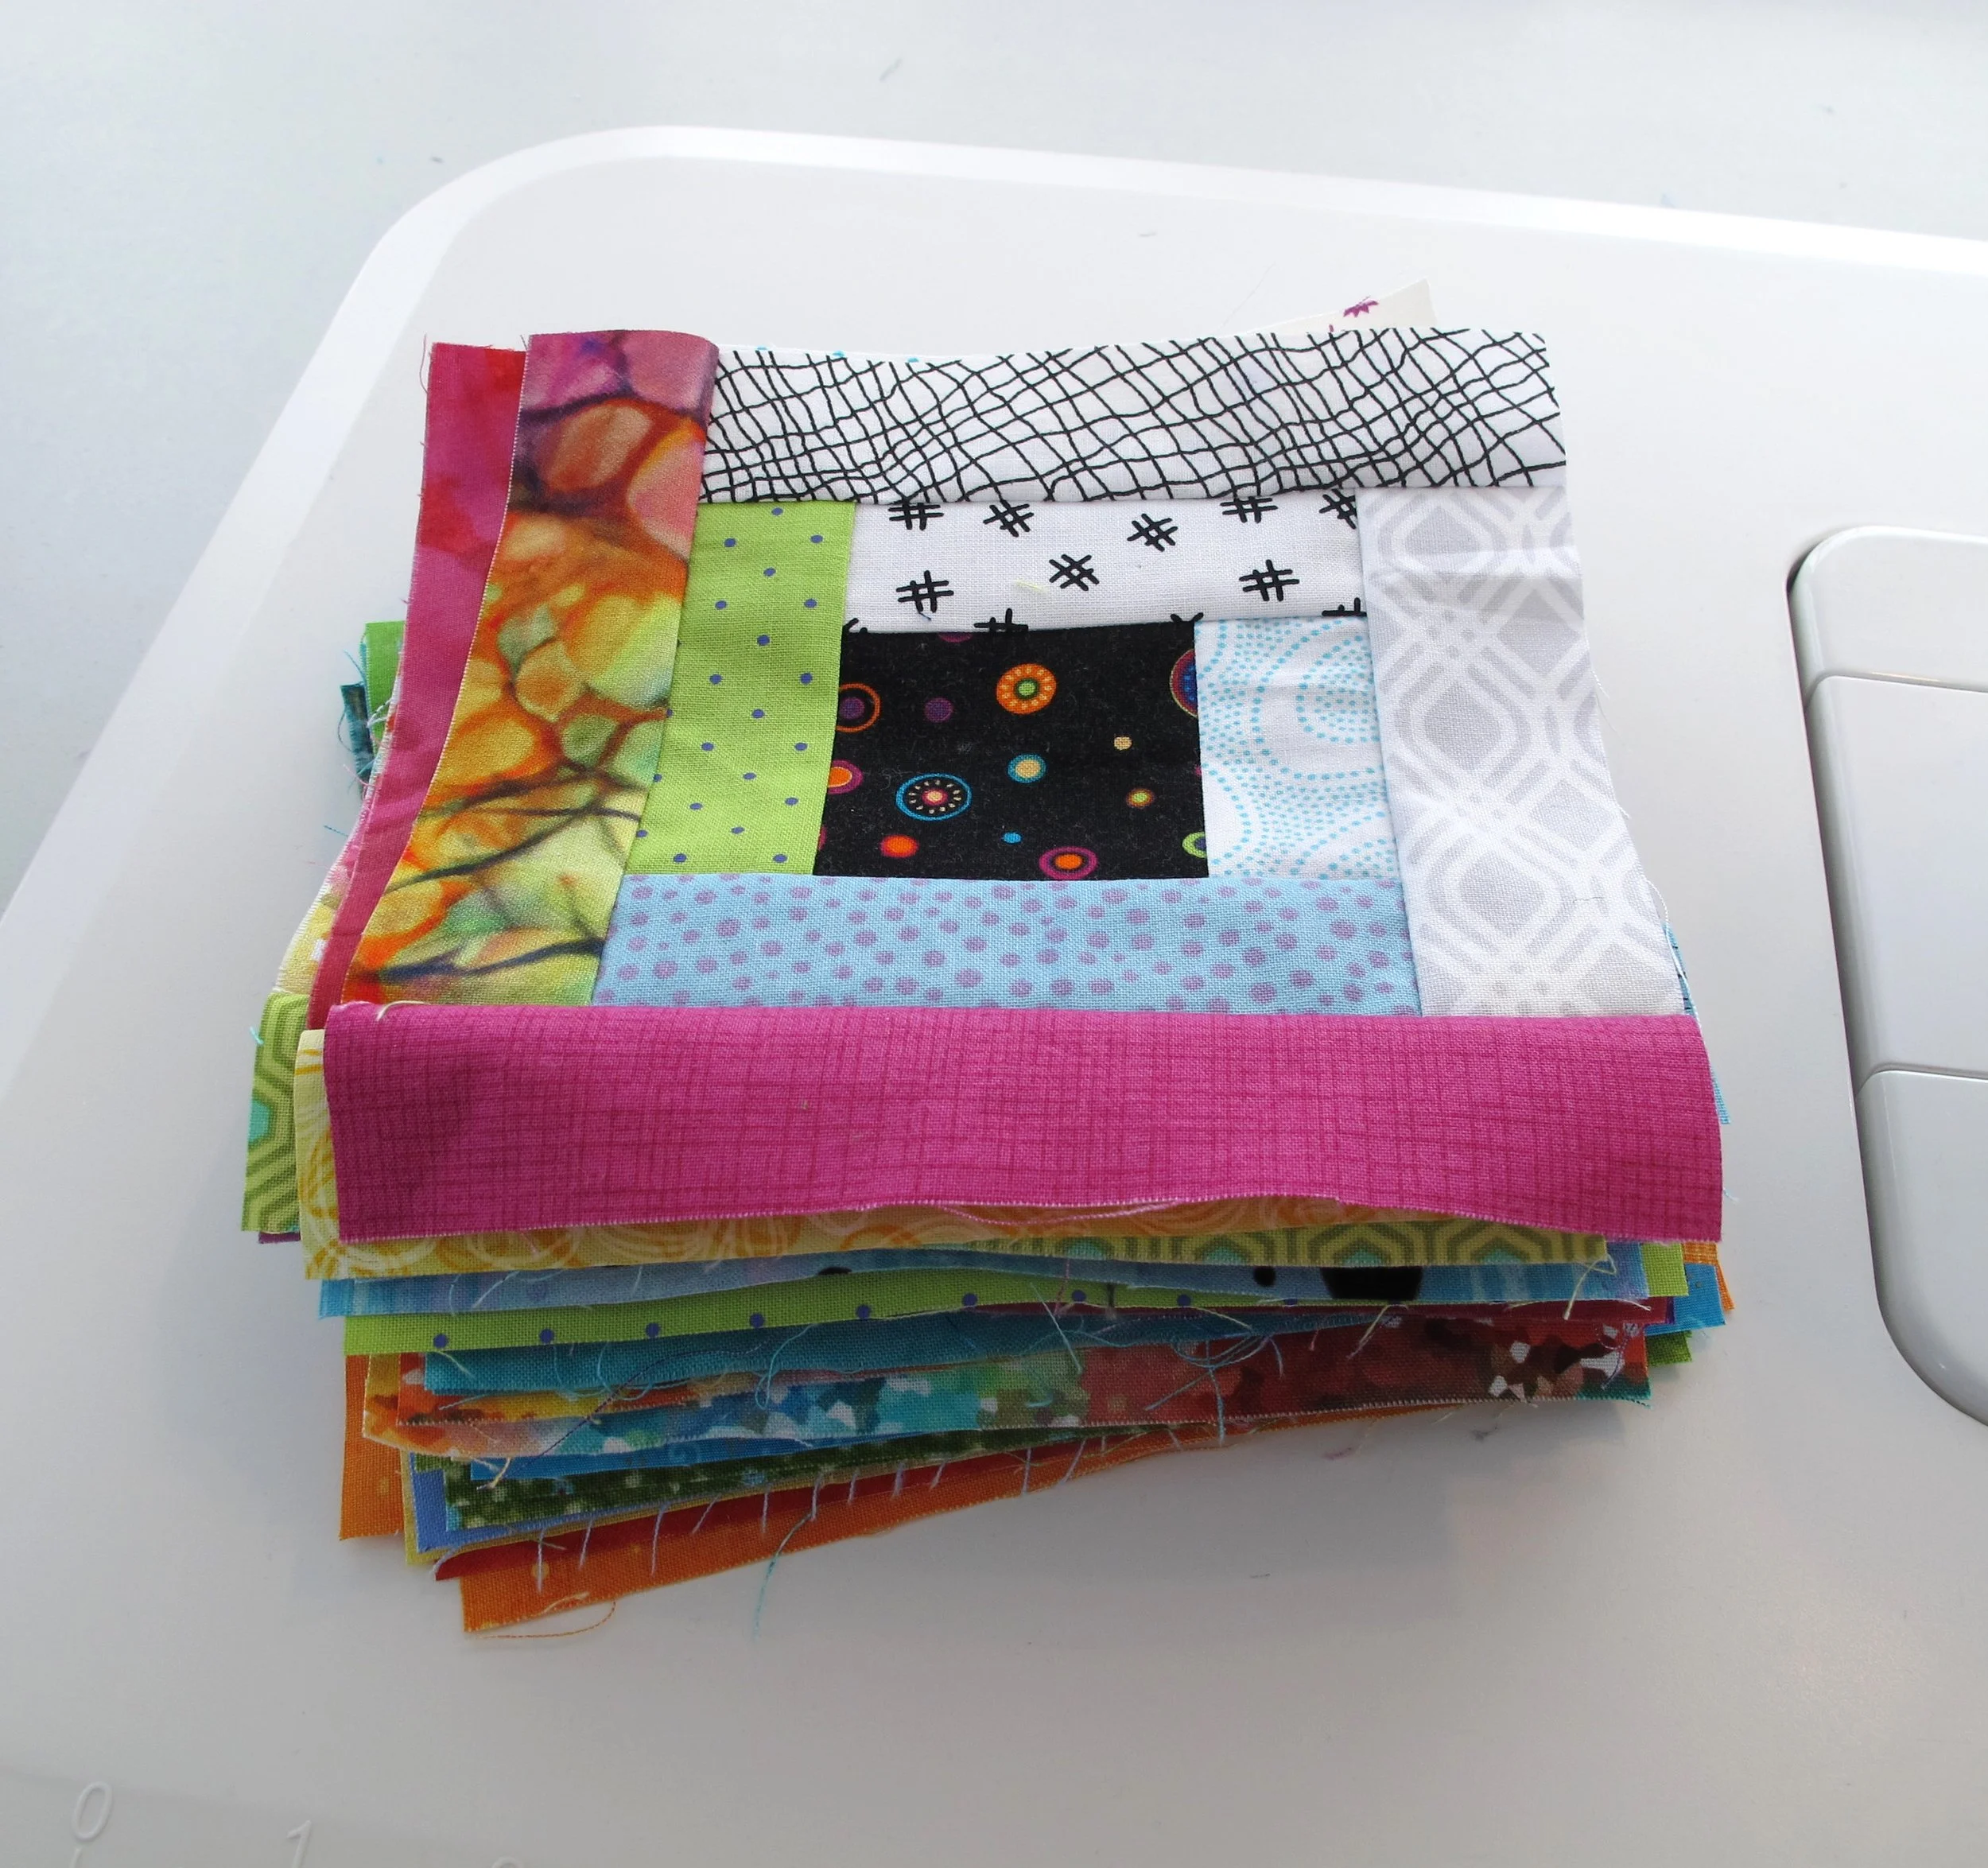
partially completed blocks
My all time favourite traditional quilt block is the Log Cabin. This particular pattern has, believe it or not, been around for centuries, although it is best known in the quilt world as a North American design by early settlers. The block itself has a square at the centre, representing the hearth (fireplace) of the cabin and strips going around the centre square to represent the logs of the log cabin. If the centre square is red it signifies the fire in the hearth, and if it is yellow it signifies the candlelight in the window. One side of the block (diagonally) is usually light and the other side is usually dark. The contrast between the two sides is what makes this design so graphic and versatile.
*** scroll to the bottom of the page for a printable PDF
Its own history is somewhat questionable when it comes to a particular time in American history that is not technically proven and prone to a lot of interpretation. Where the block comes into question has to do with the Underground Railroad, where enslaved people were escaping to the north, and following clues in the cloth along the way. The story goes that if a log cabin quilt was hung on the fence, porch railing or laundry line, and had black (or yellow) centre squares, that it was a safe haven for these enslaved people and that they could trust the people living there to hide them and help them on the way. This article and this article have a little more information about the folklore behind this if you want to read more. There are other blocks aside from the Log Cabin that are spoken about regarding the Underground Railroad, but the Log Cabin is the most well known.
When my kids were much younger we took a trip into Toronto to go to the Royal Ontario Museum. My son asked to go there strictly for the dinosaur exhibit, but I love to see Egyptian antiquities so I dragged the kids to that exhibit too. Imagine my surprise when I saw what looked like the Log Cabin block, stitched in linen, wrapped around a couple of mummified cats. I had no idea that this design was so old. Here is another example from the British Museum that is even better.
There are so many tutorials online about the Log Cabin block that you will have no problem finding more about it. Some have planned colour schemes where each log of the same colour is in the same position within the block. This is a great way for beginners to get a taste for making the block since each block is identical. One of the best books for beginners that uses this method is an absolute staple in the quilt world: Eleanor Burns’ book, Quilt in a Day: Log Cabin. This is in its 6th printing with the first one coming out way back in 1978!
My personal favourite book about the Log Cabin quilt is Judy Martin’s Log Cabin Quilt Book. It is a more challenging take on this traditional, versatile design, and one of the best things about this book is that it shows about 100 different settings for this quilt. What that means is, depending on the position of each block within the quilt, different design variations are possible. My two favourites are Barn Raising and Straight Furrows, but there are sooooo many more. There are also a few variations that make the pattern even more challenging for experienced quilters. Even the positioning of the lights and darks within the block can make different designs, like the Pineapple and Courthouse Steps.
scrappy strips
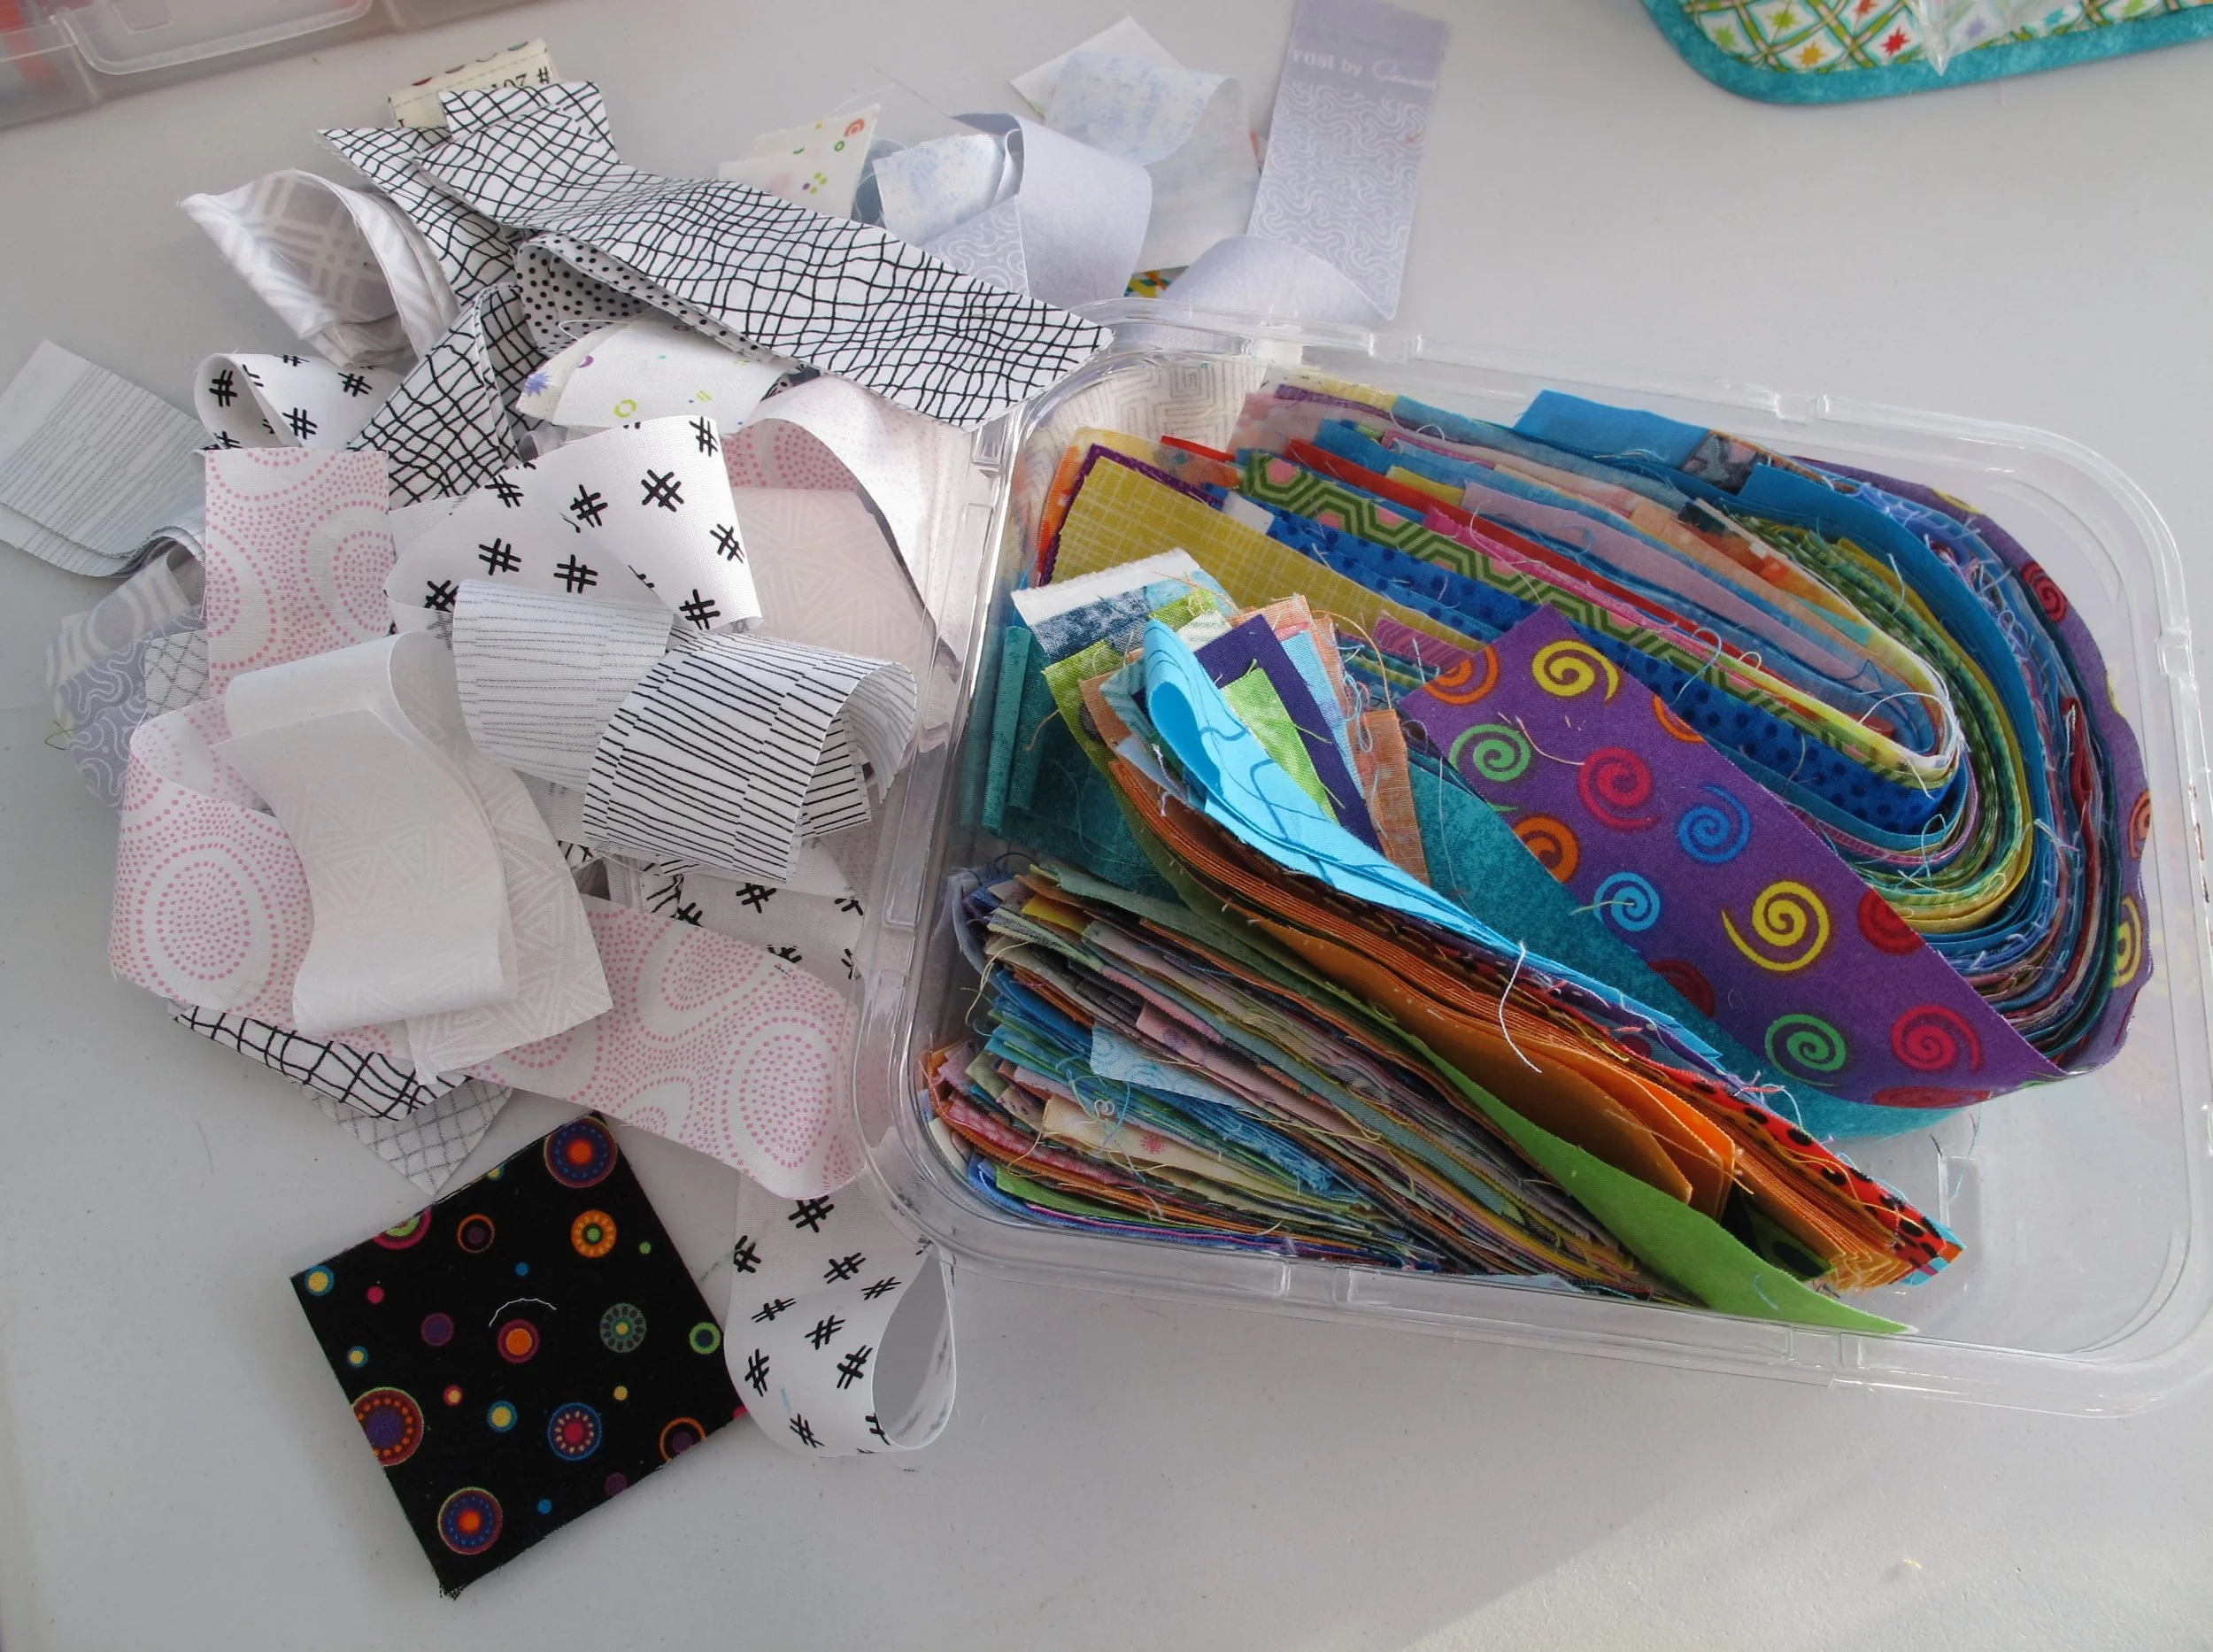
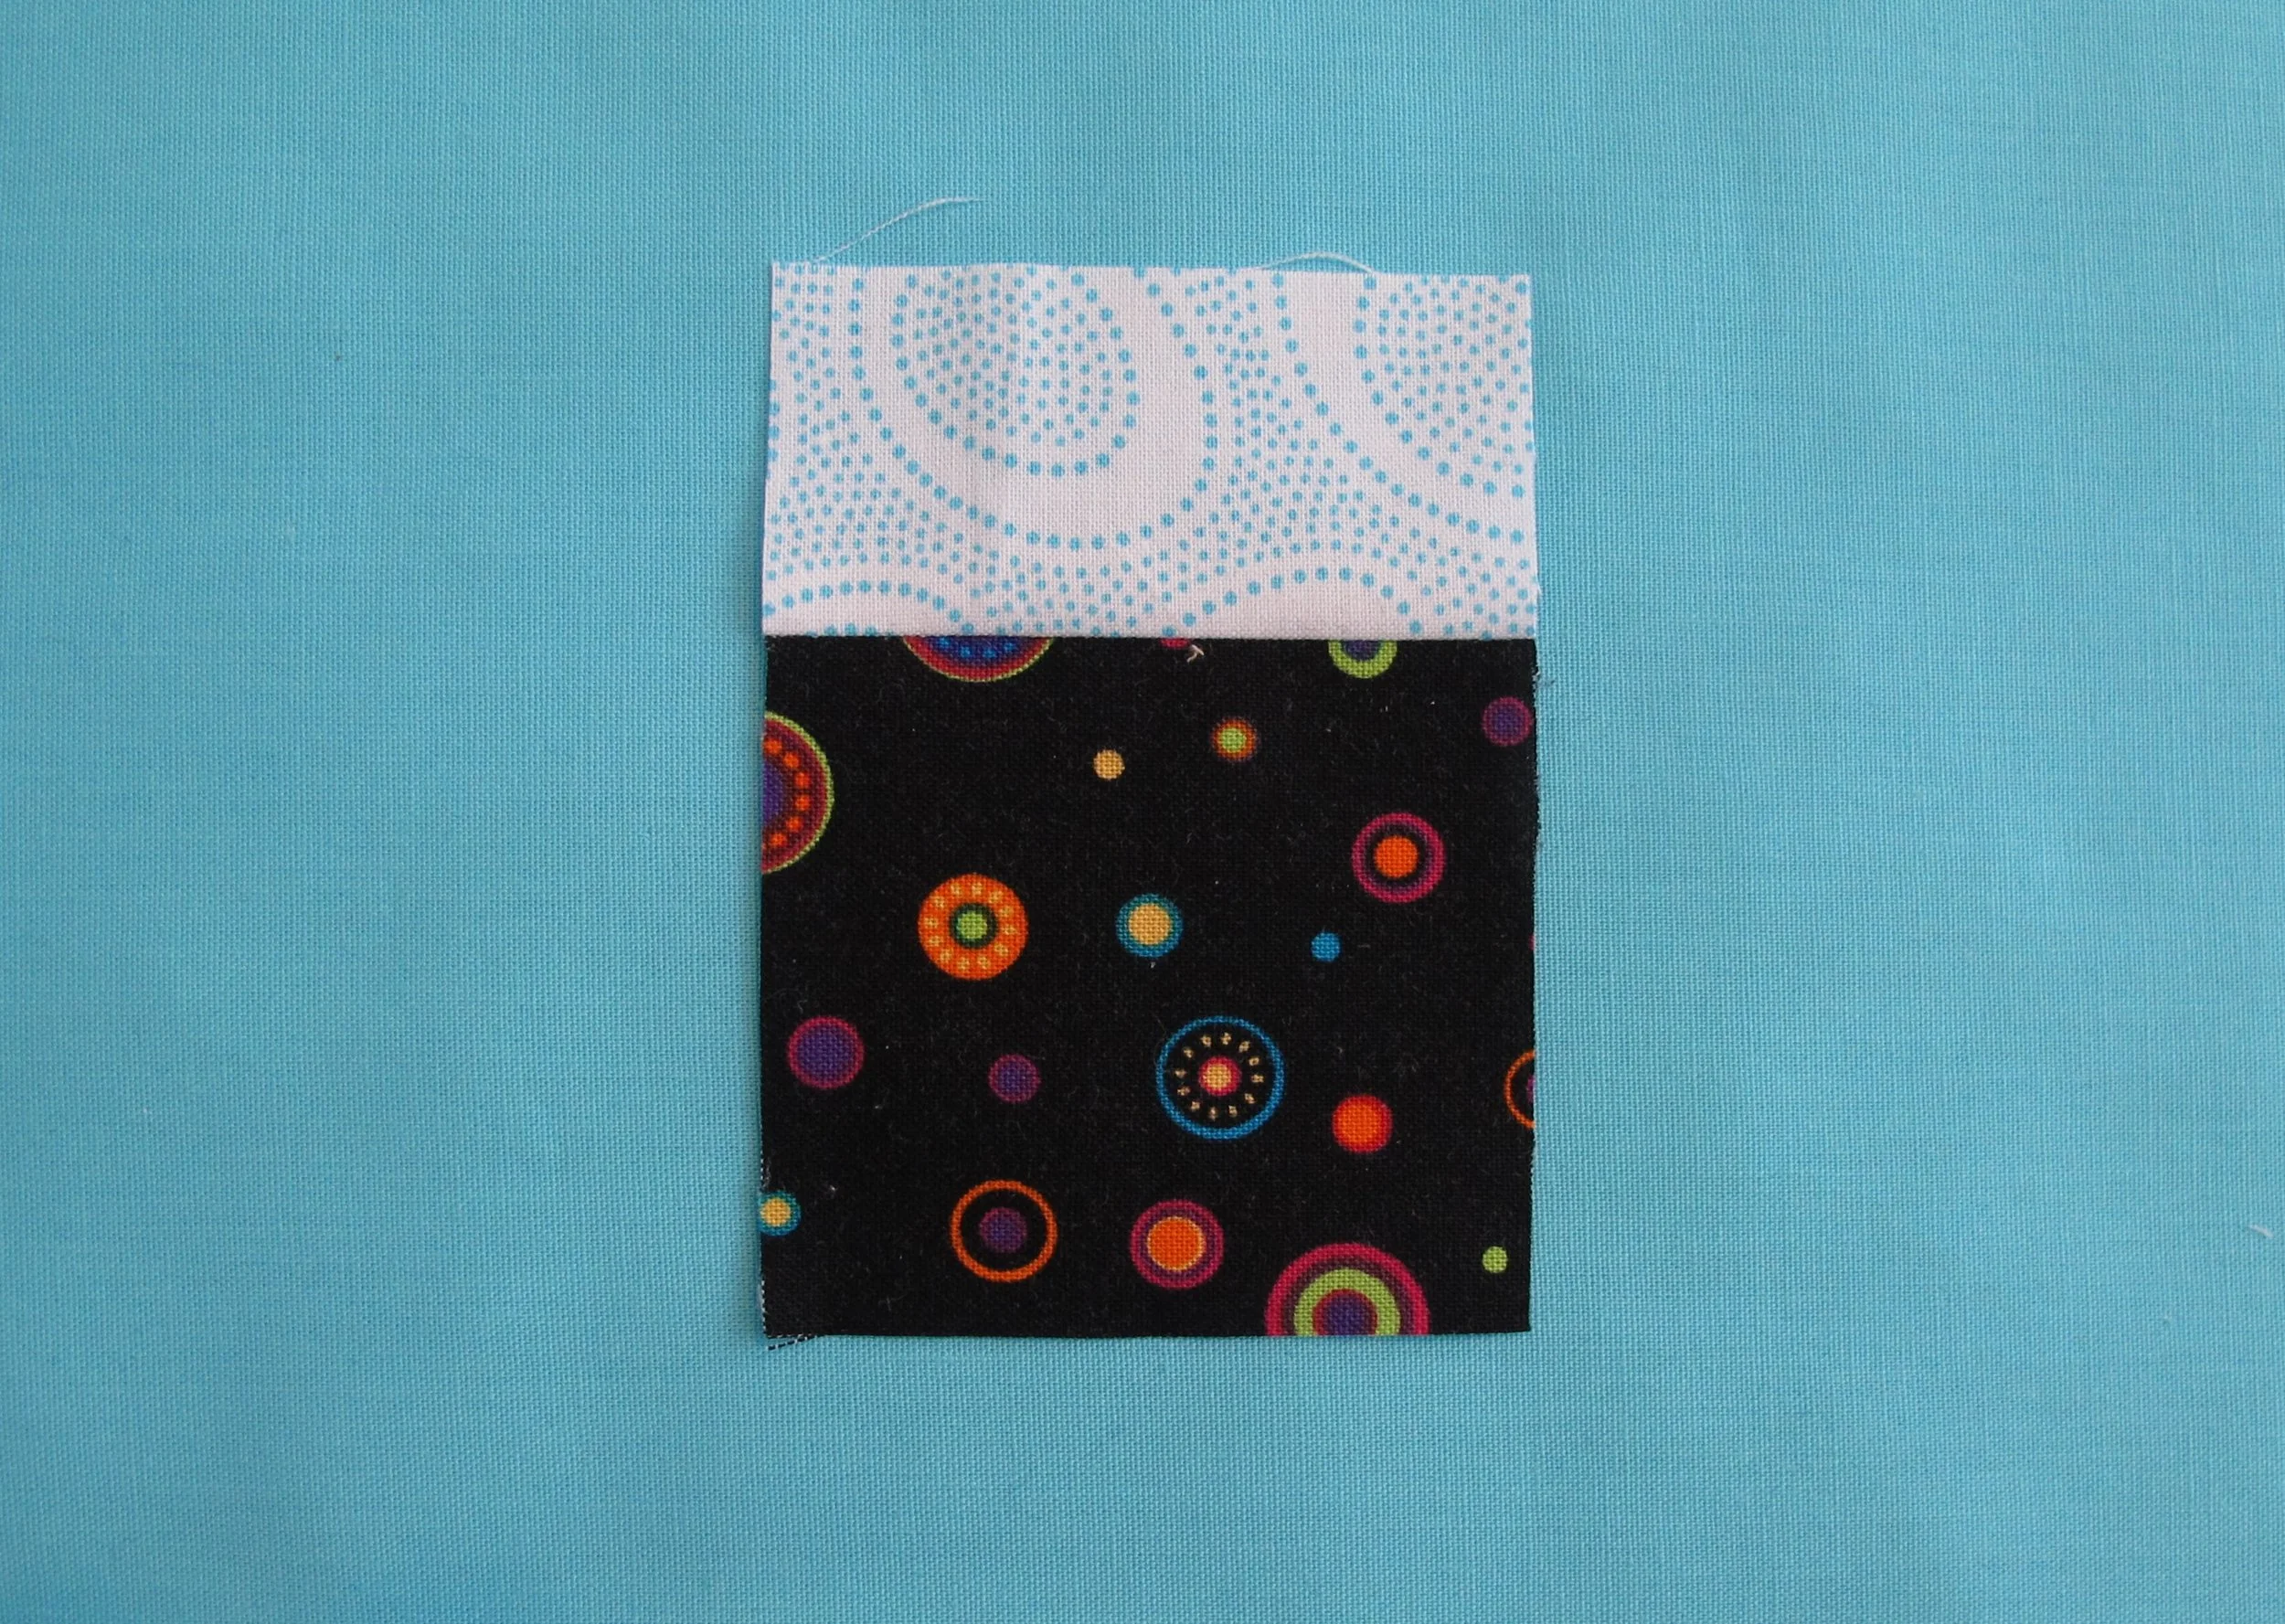
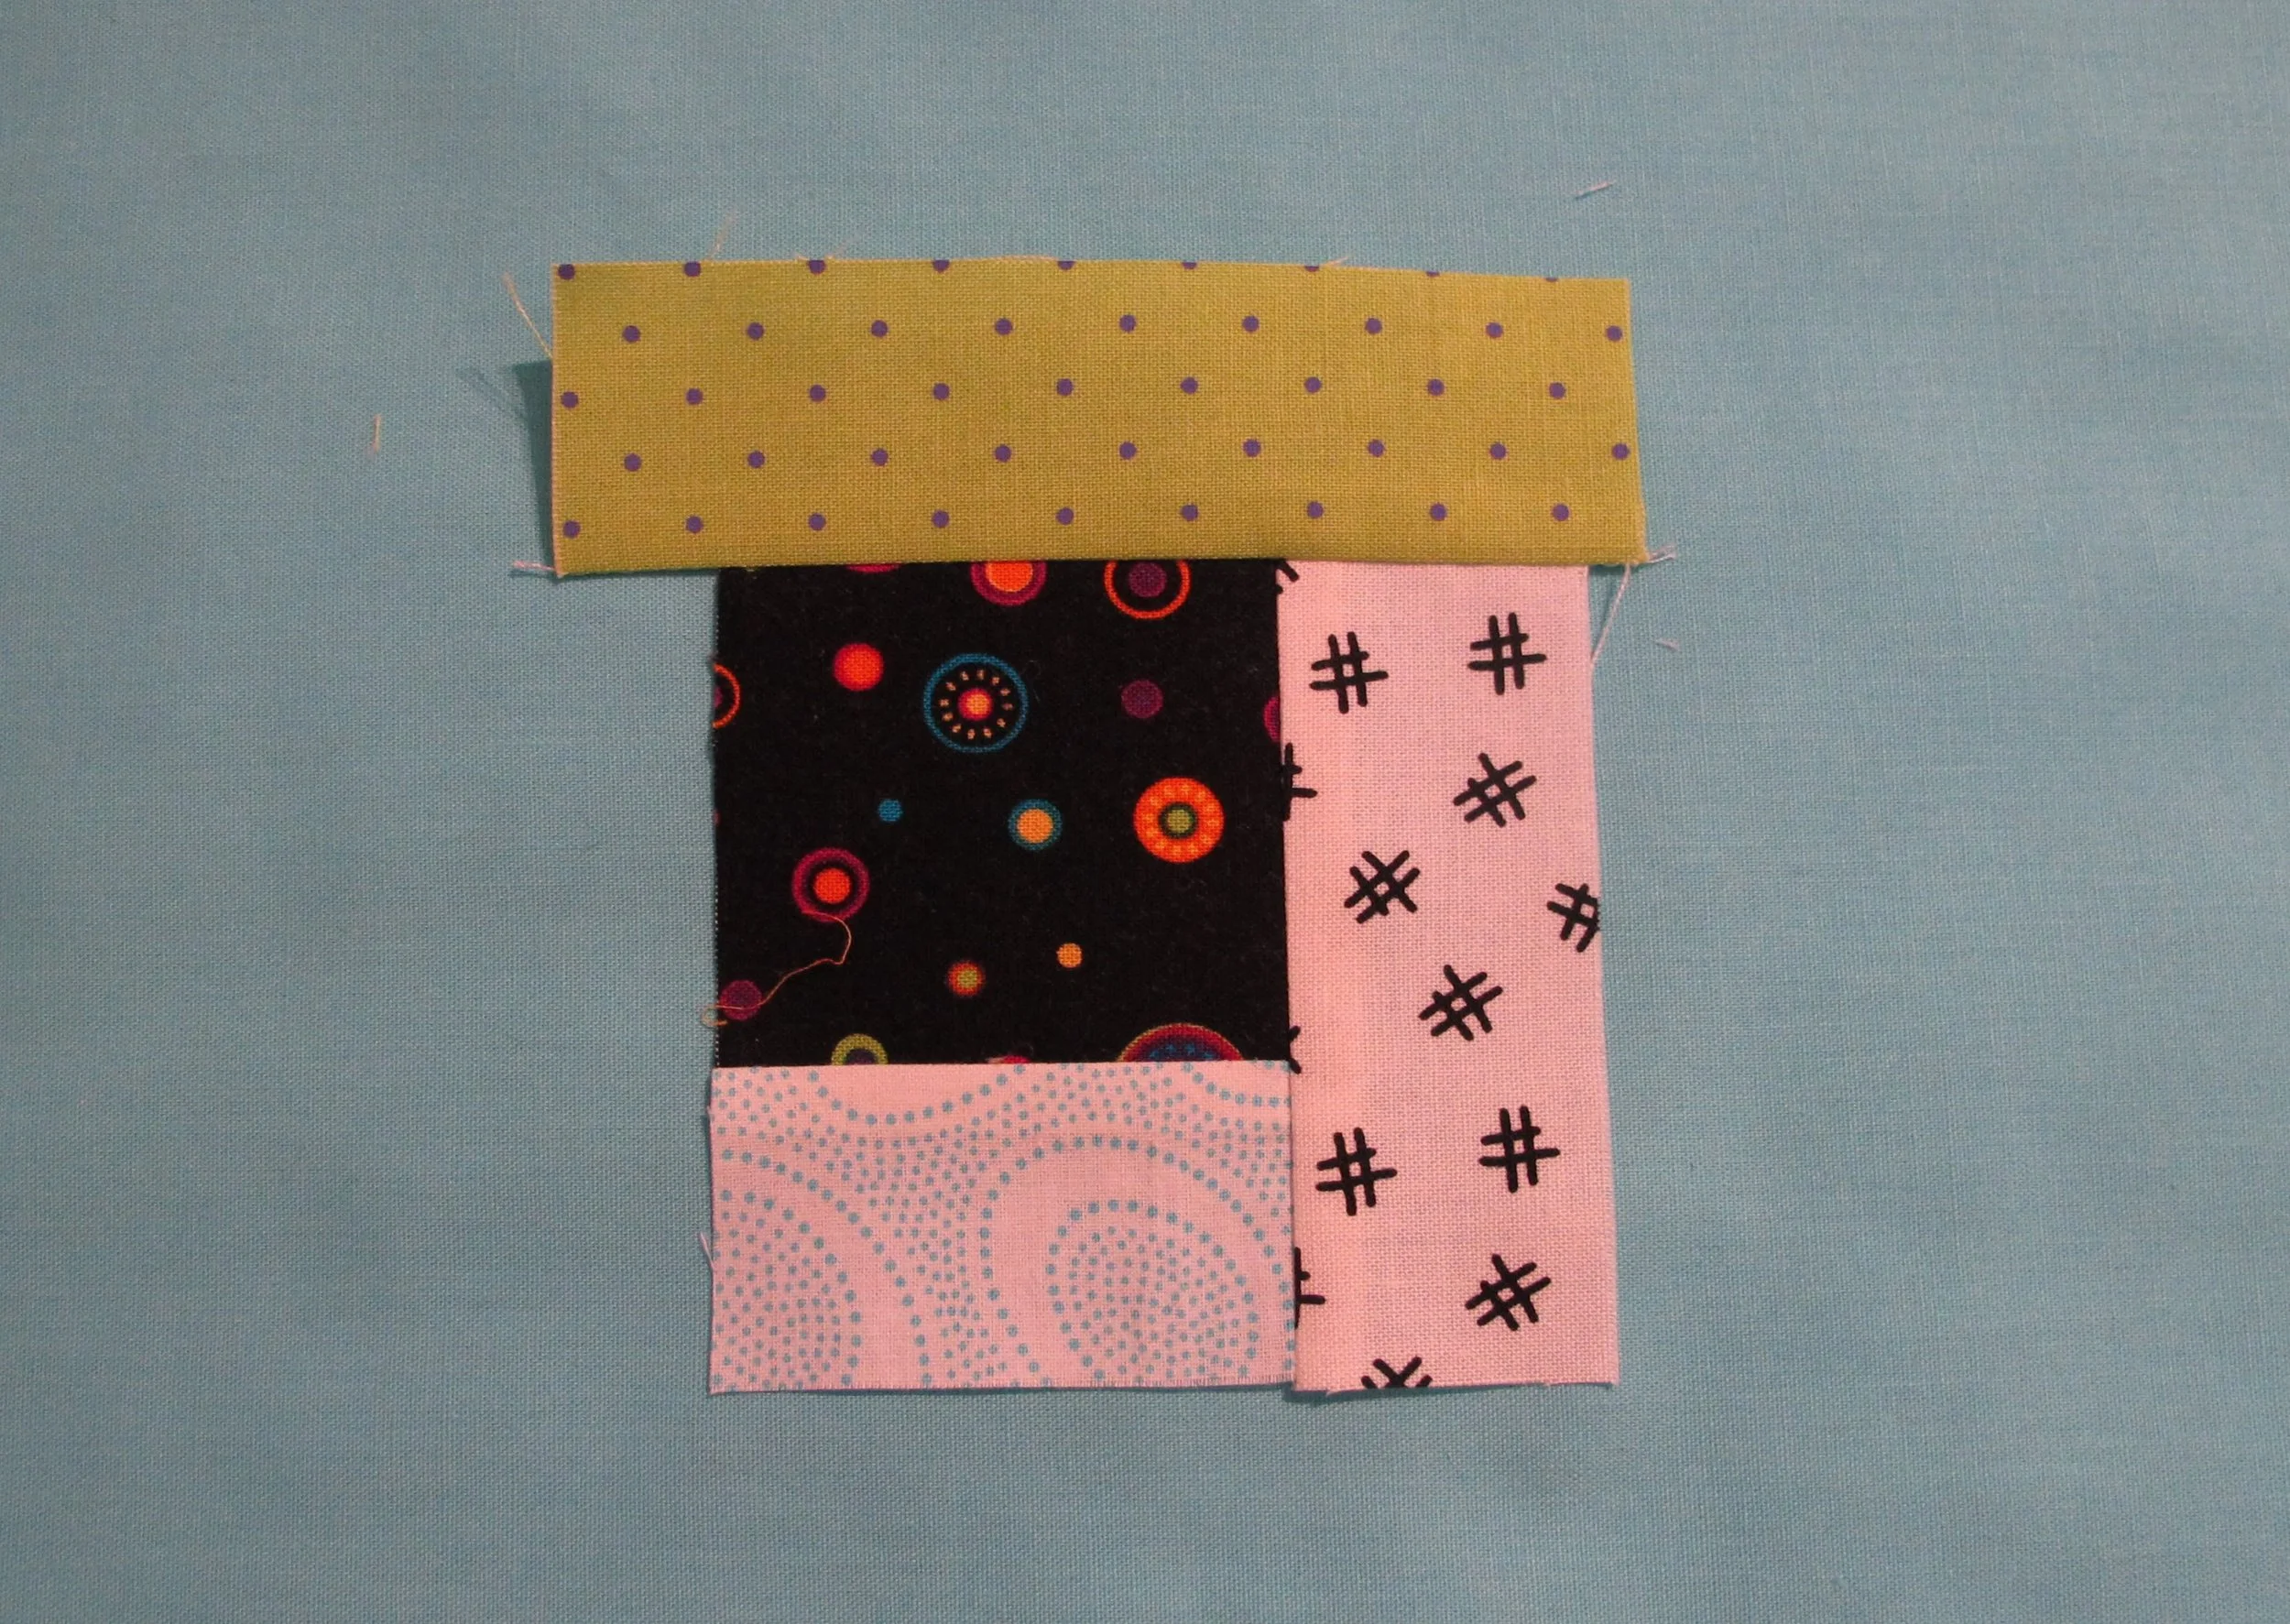
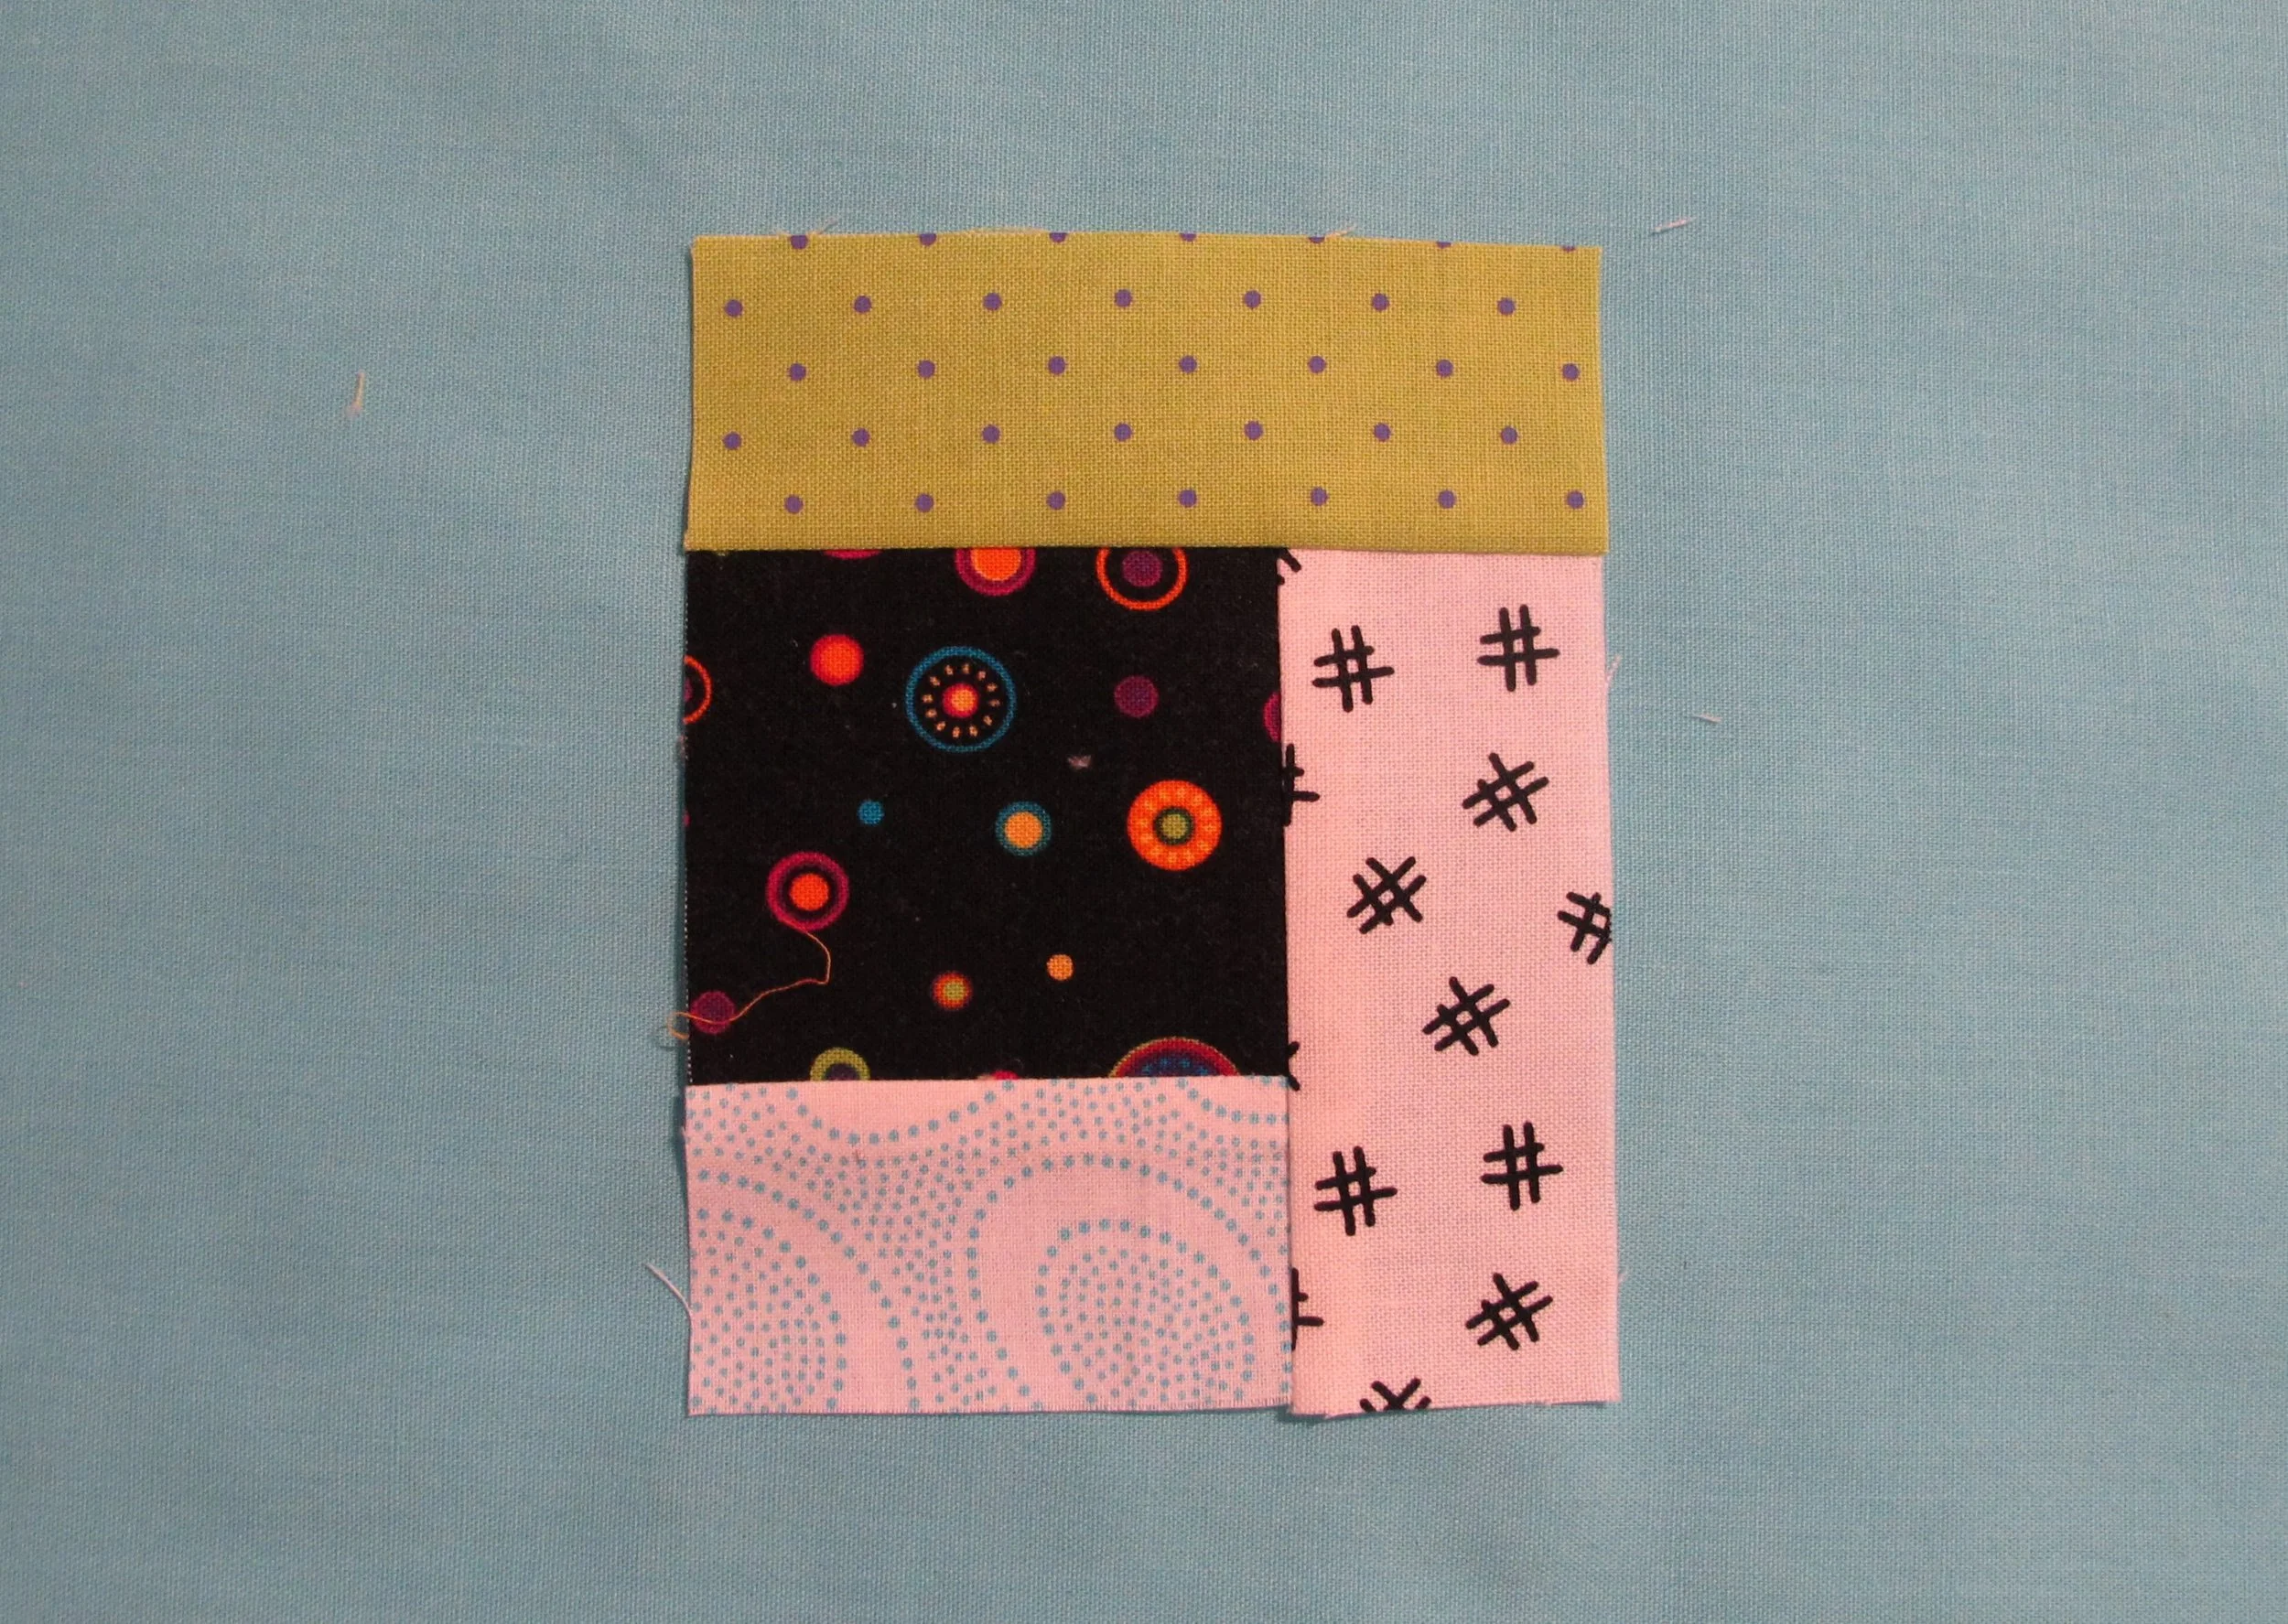
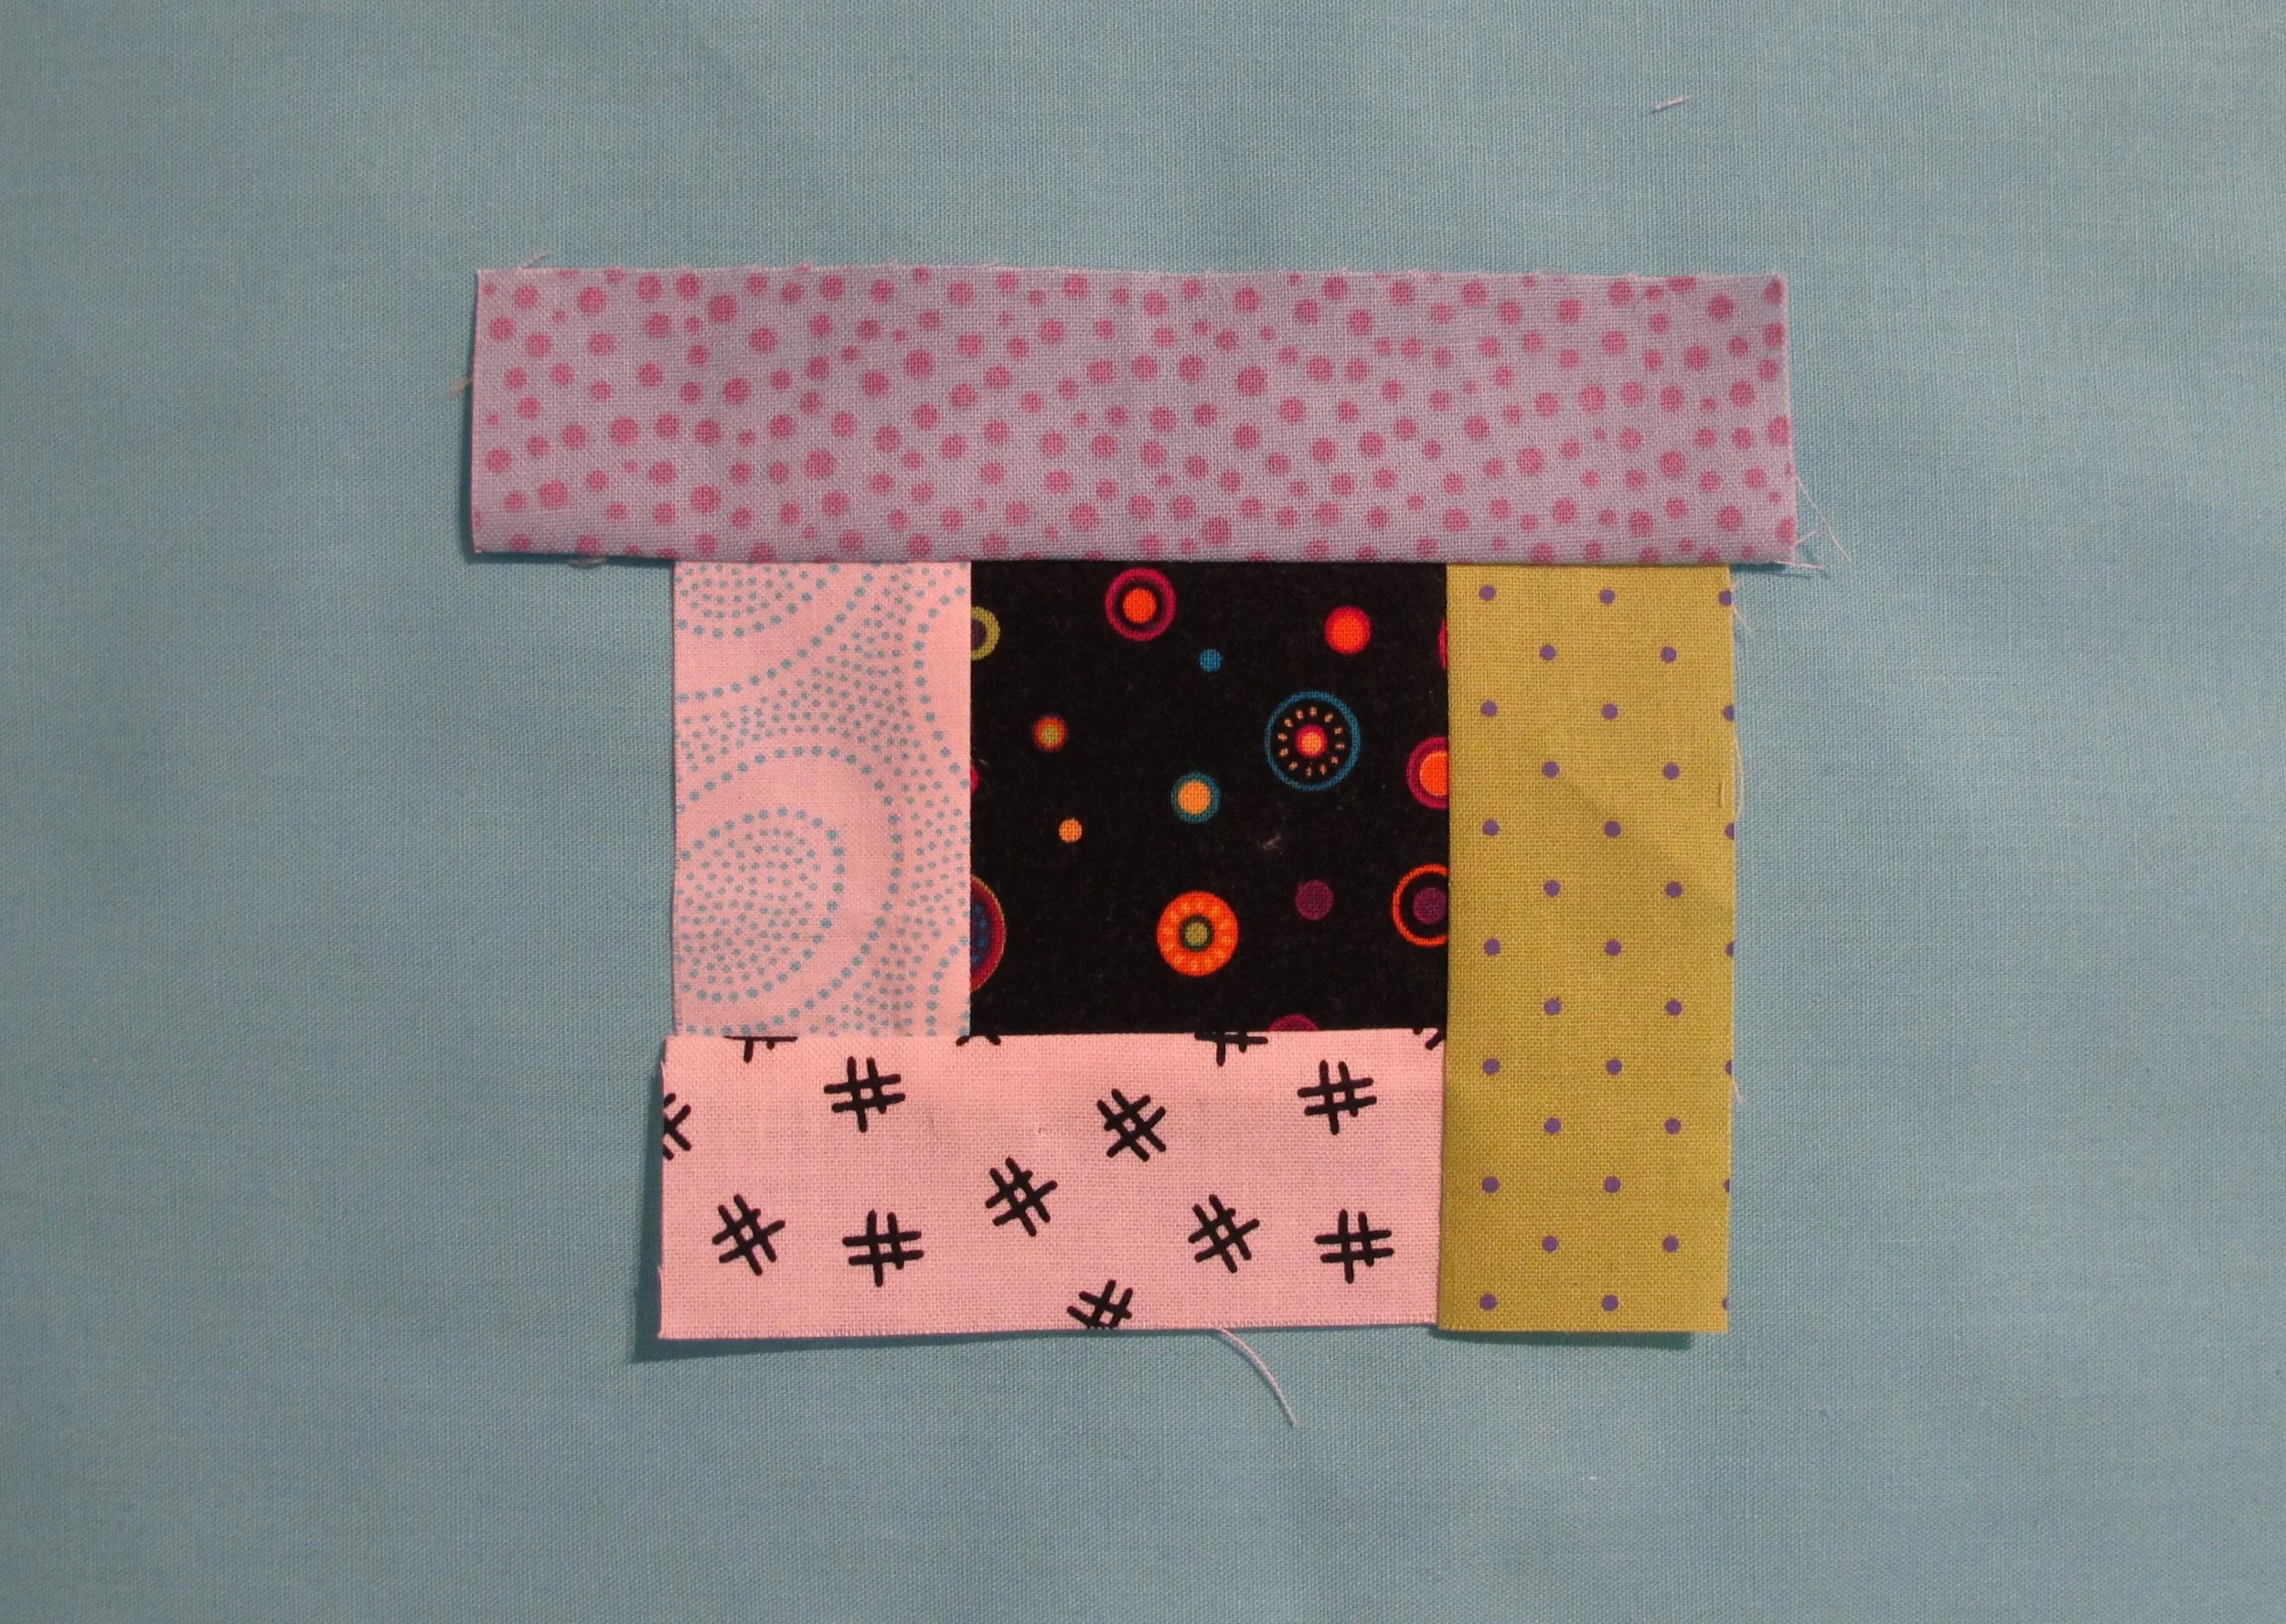
I absolutely love scrappy quilts so I’ll be showing you how to make a basic Log Cabin block from 1 1/2” strips (1” finish) that I cut from a variety of scraps. One side of the block will be comprised of low-volume prints (lights) and the other side will be in my usual brights, with a black print centre cut at 2 1/2” (2” finish). *** Of course, depending on the width of strips and the size of the centre square, blocks can be made in a variety of different sizes. That means you might have to do a bit of math or find a pattern that already has the sizing done for you. The block I have done here is an 8” finished square, so 8 1/2” with seam allowances.
The way that I stitch my block together is in a counter-clockwise fashion, because the way my brain works I have to have a rule. My rule is: the last log added should be at the top when I sew. That means that I have to see that last log to make sure that I am building my block properly. Your brain may work differently and you might want yours to run clockwise. For this particular quilt block, from the centre square out it means 2 lights, 2 darks, 2 lights, 2 darks, 2 lights and 2 darks, for a total of 3 strips on each side of the centre square. This will become more apparent when you study the photos. *** 1/4” seams are used throughout.
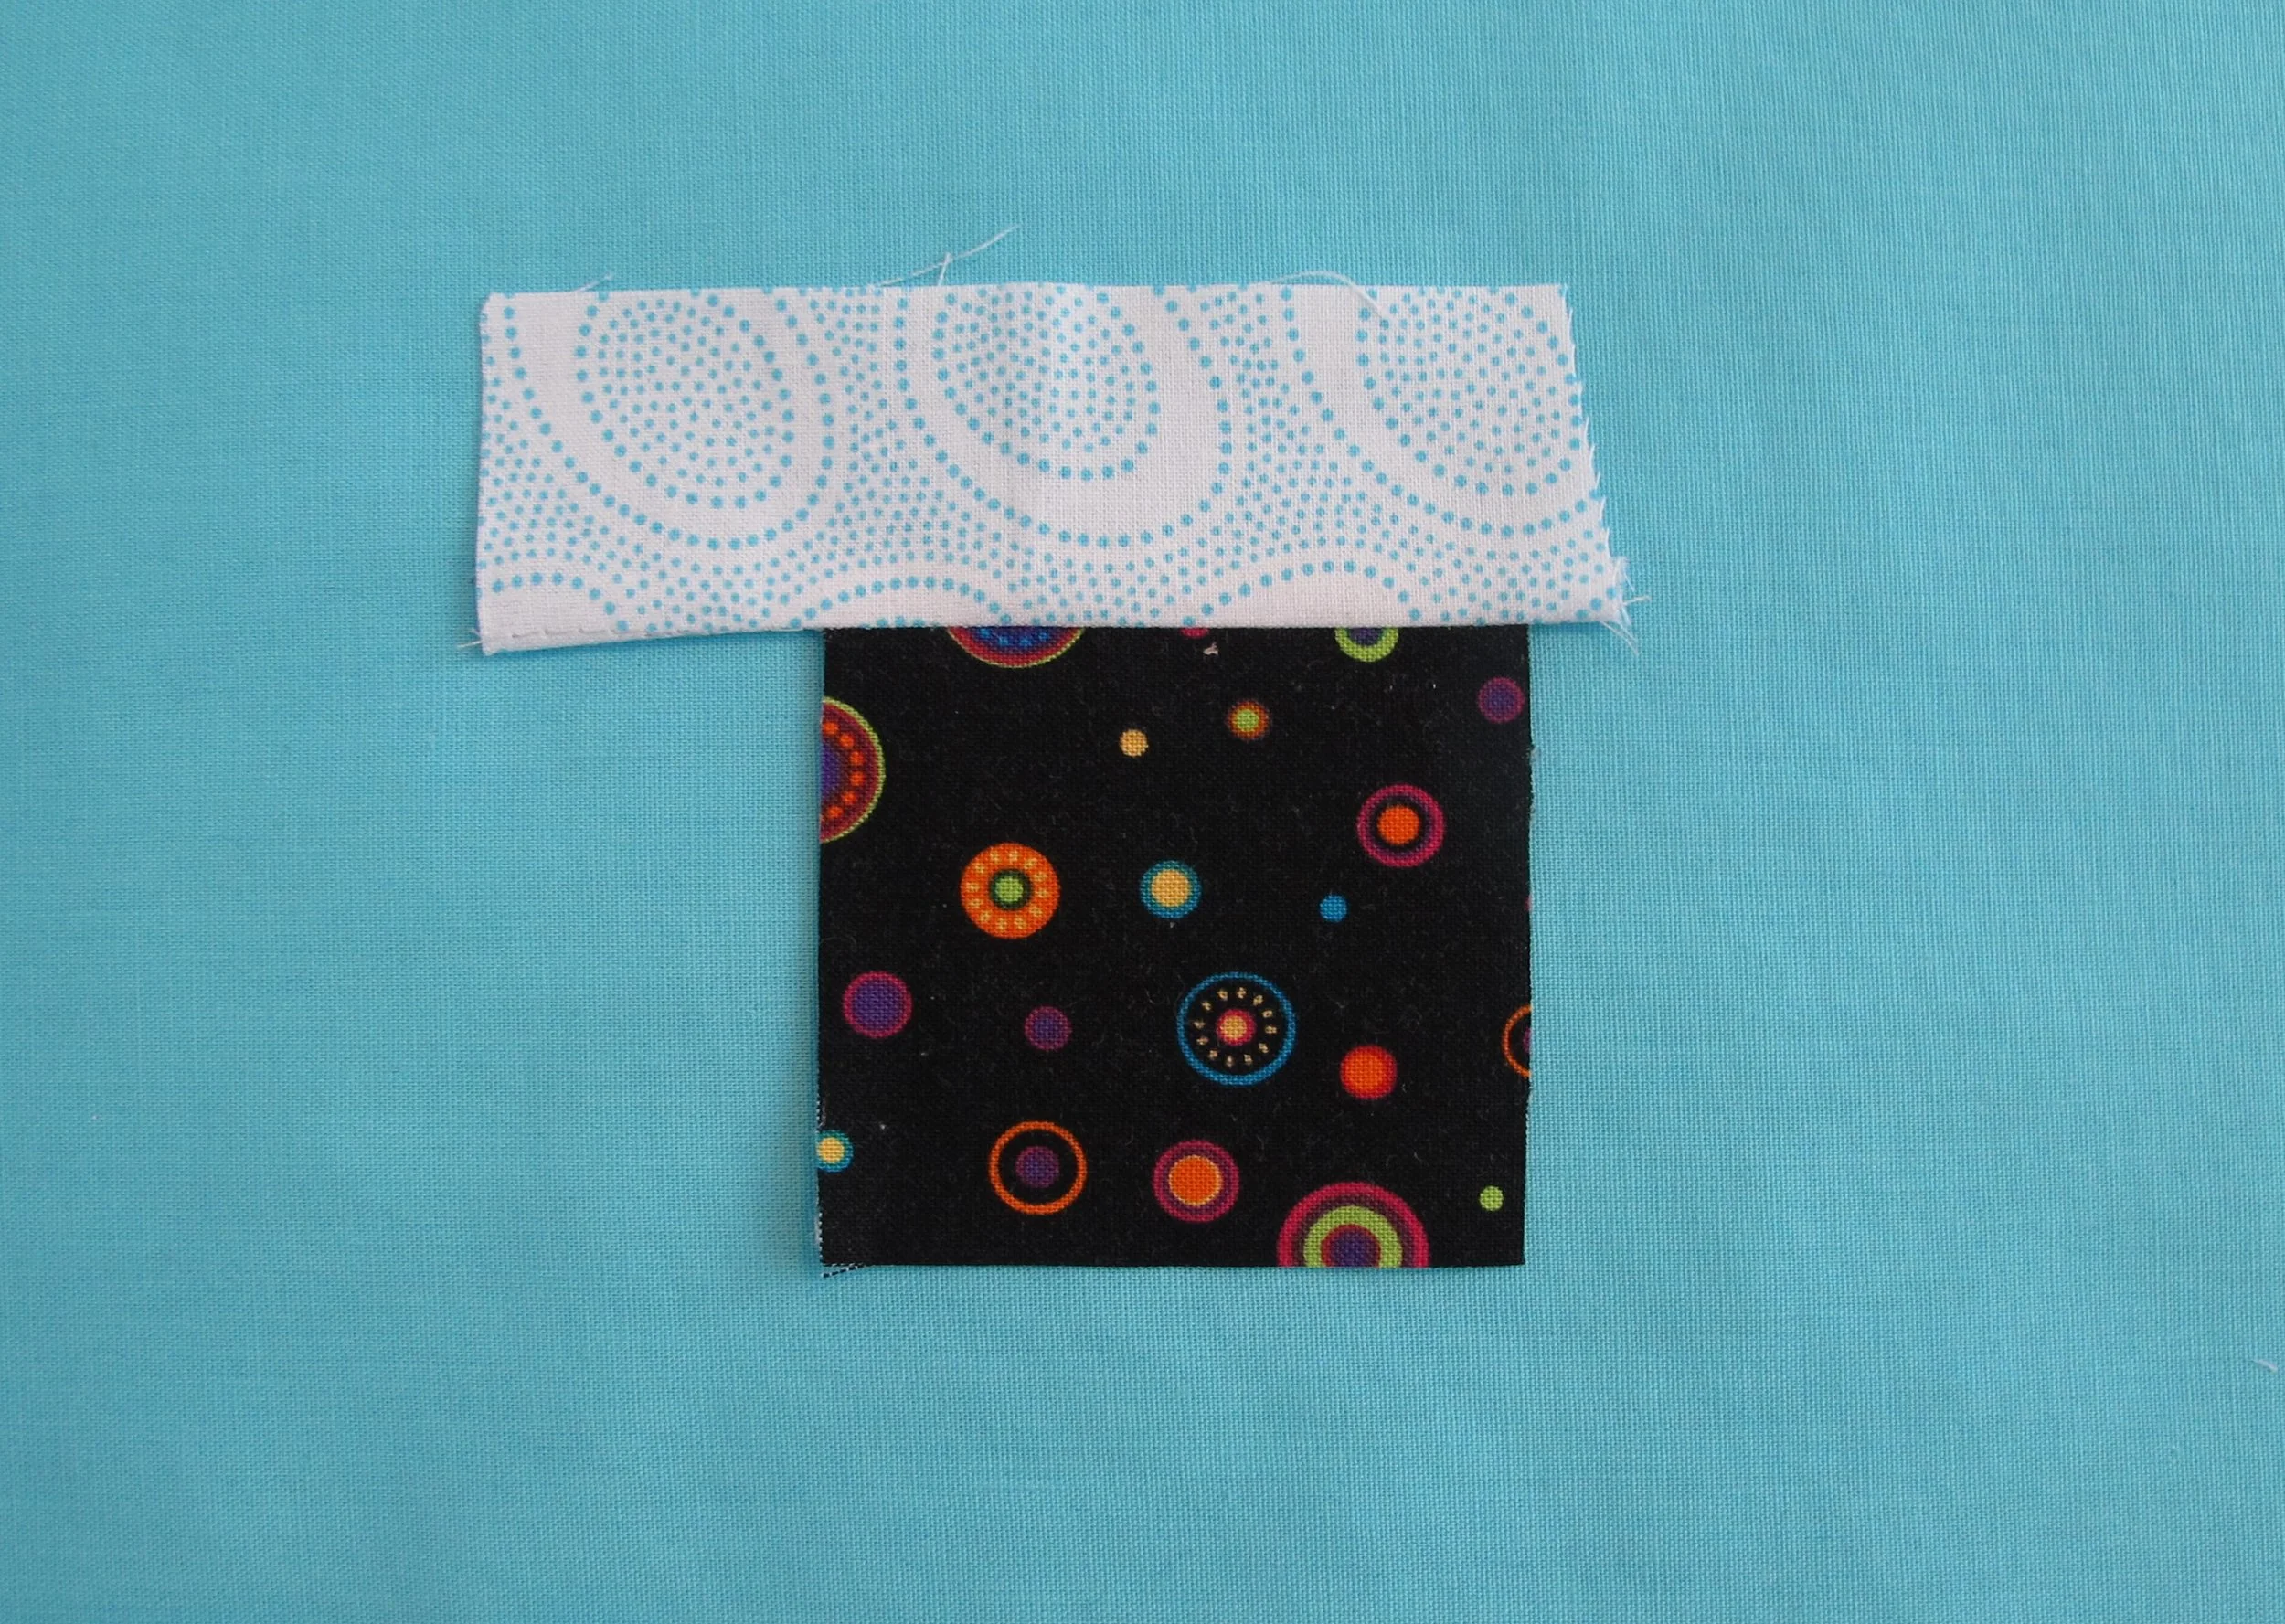
Start with the centre square and the first light strip with right sides together as in the photo below. Stitch the seam, press the seam allowance toward the strip, away from the centre square, and trim the strip even with the square. Of course, you can cut the strips the exact sizes that are required for each round, but it can be a lot more work and if your seam allowance isn’t spot on, the strips may end up being too short or too long. I personally prefer to trim as I go.
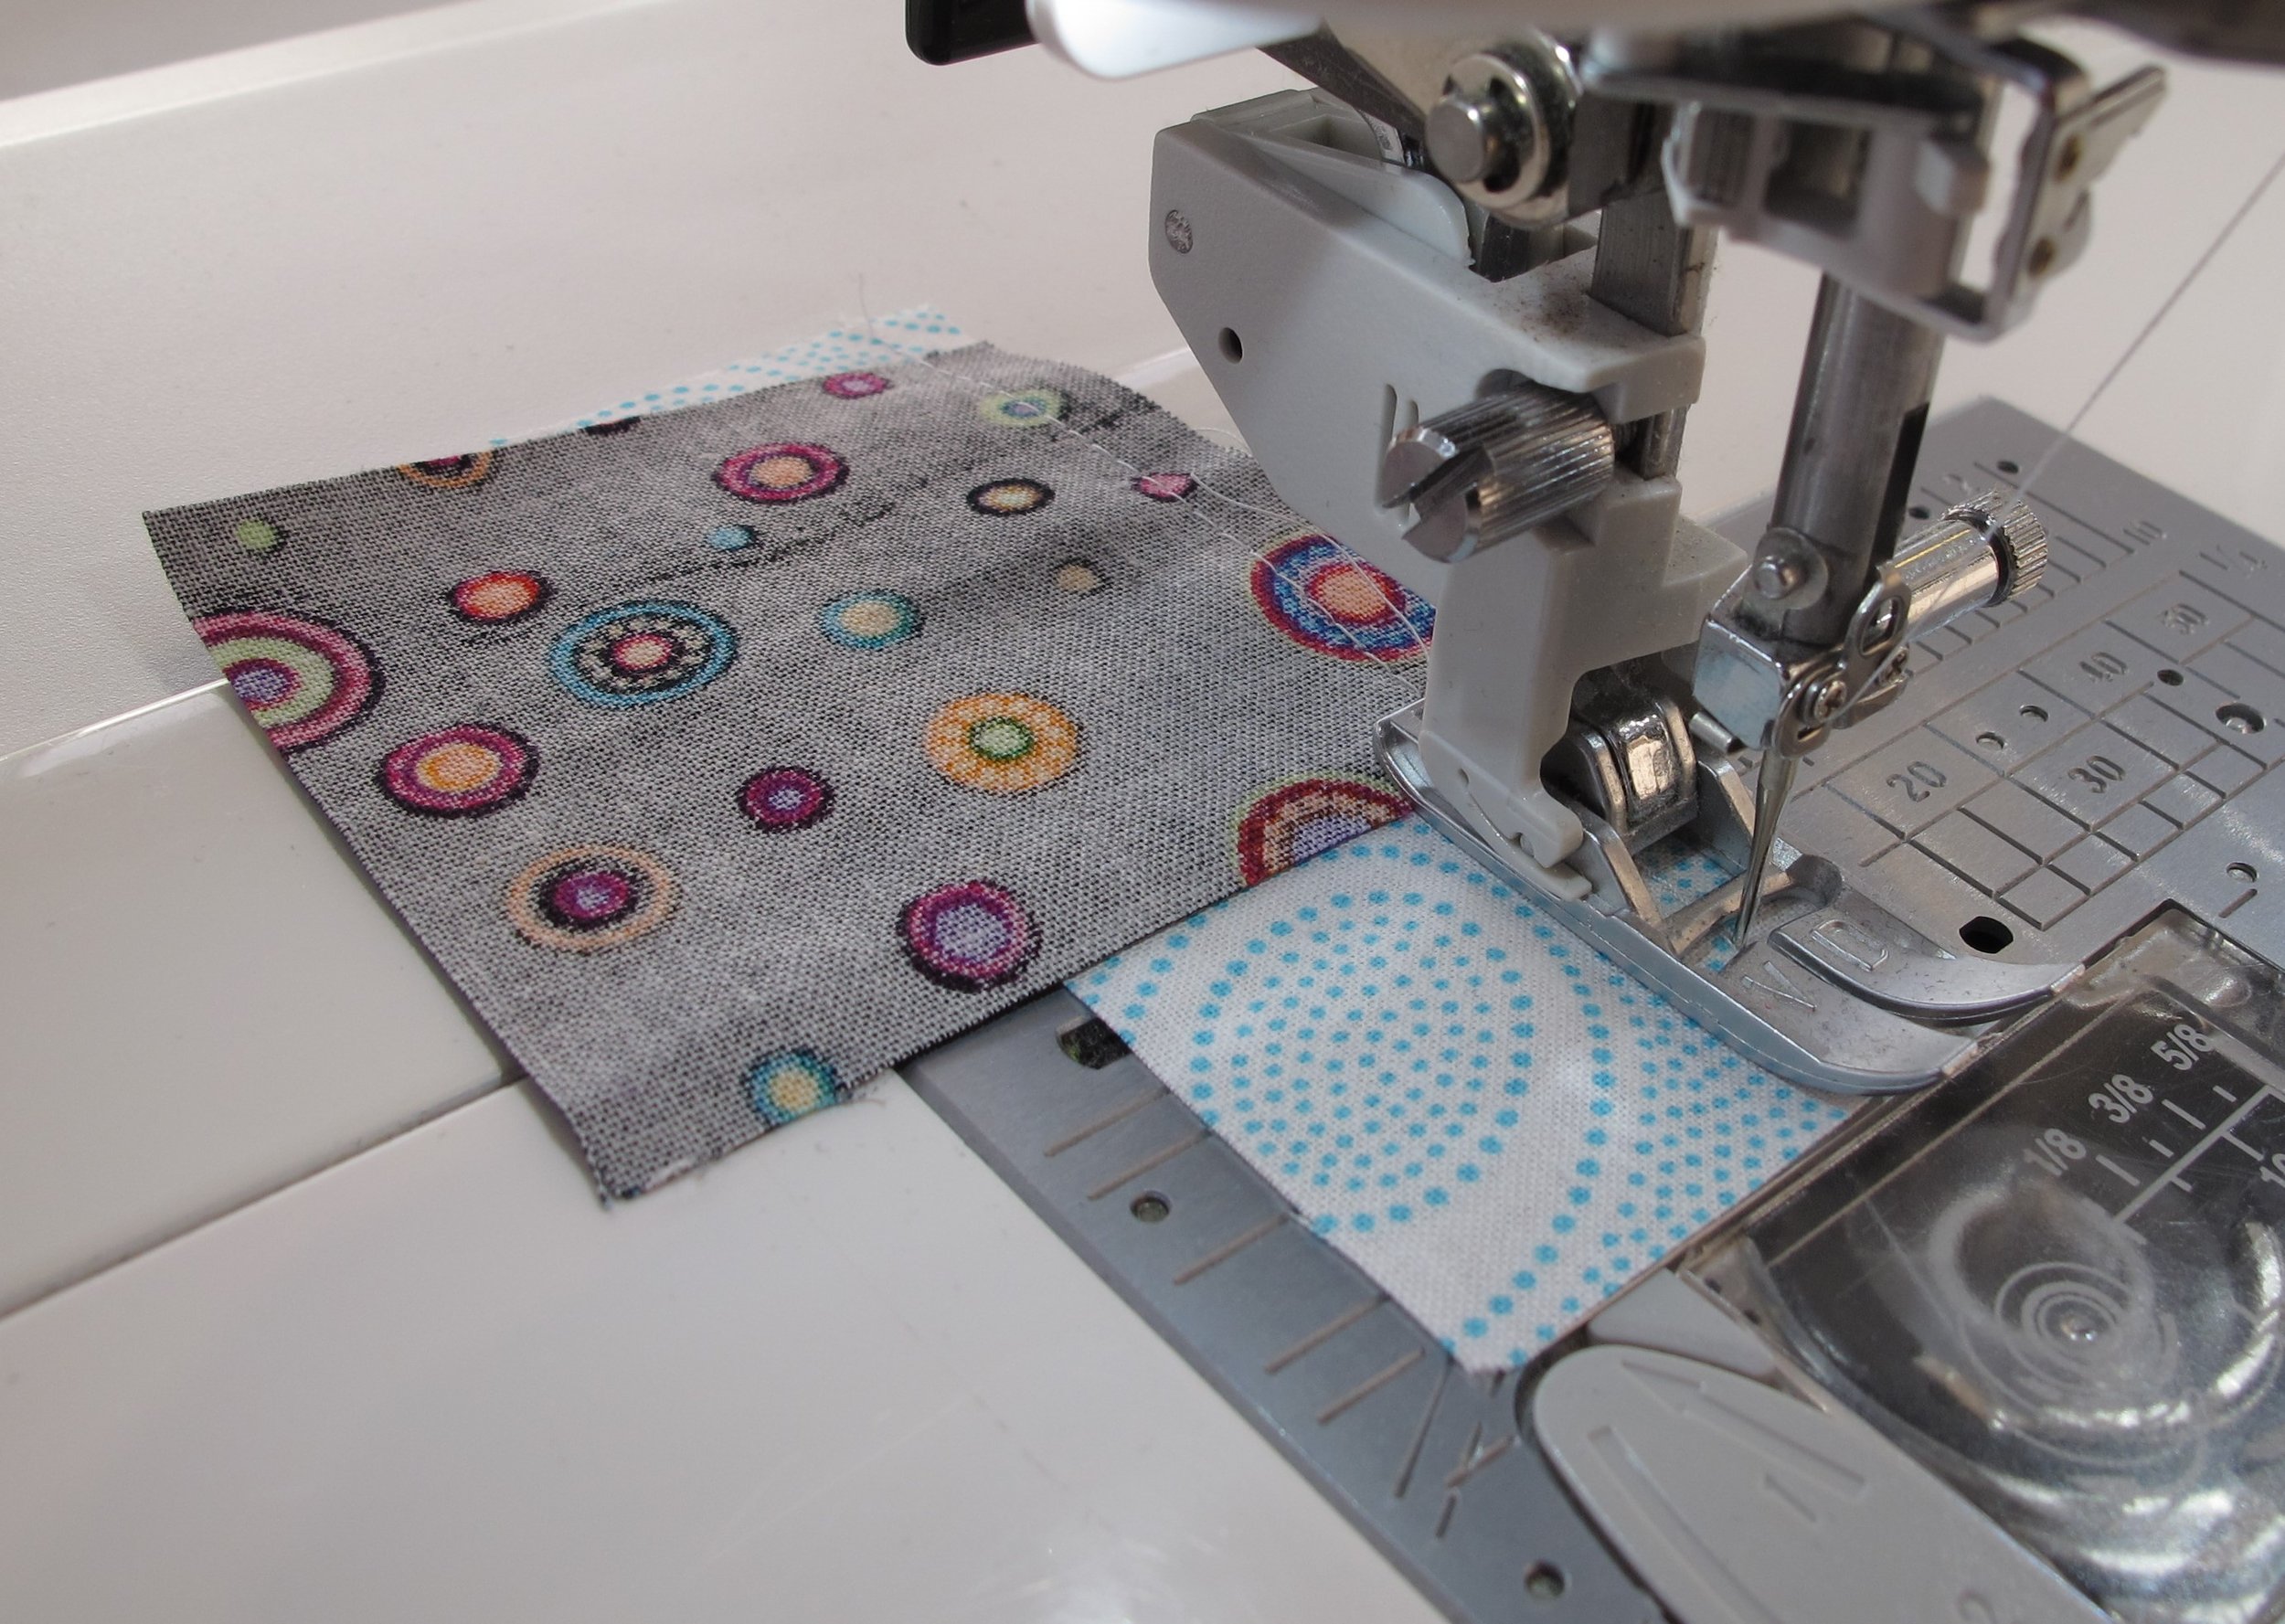
The next strip is another light one. Again with right sides together and following my rule, place the first unit on top of the strip with the last log added at the top…in other words, it’s the first piece under the needle. Press the seam away from the centre and trim the strip even with the unit. If you have longer strips feel free to add multiple units to one strip leaving about 1/4” in between pieces for trimming as shown in the photo below left. I have pinned the square back so you can see that they are right sides together.
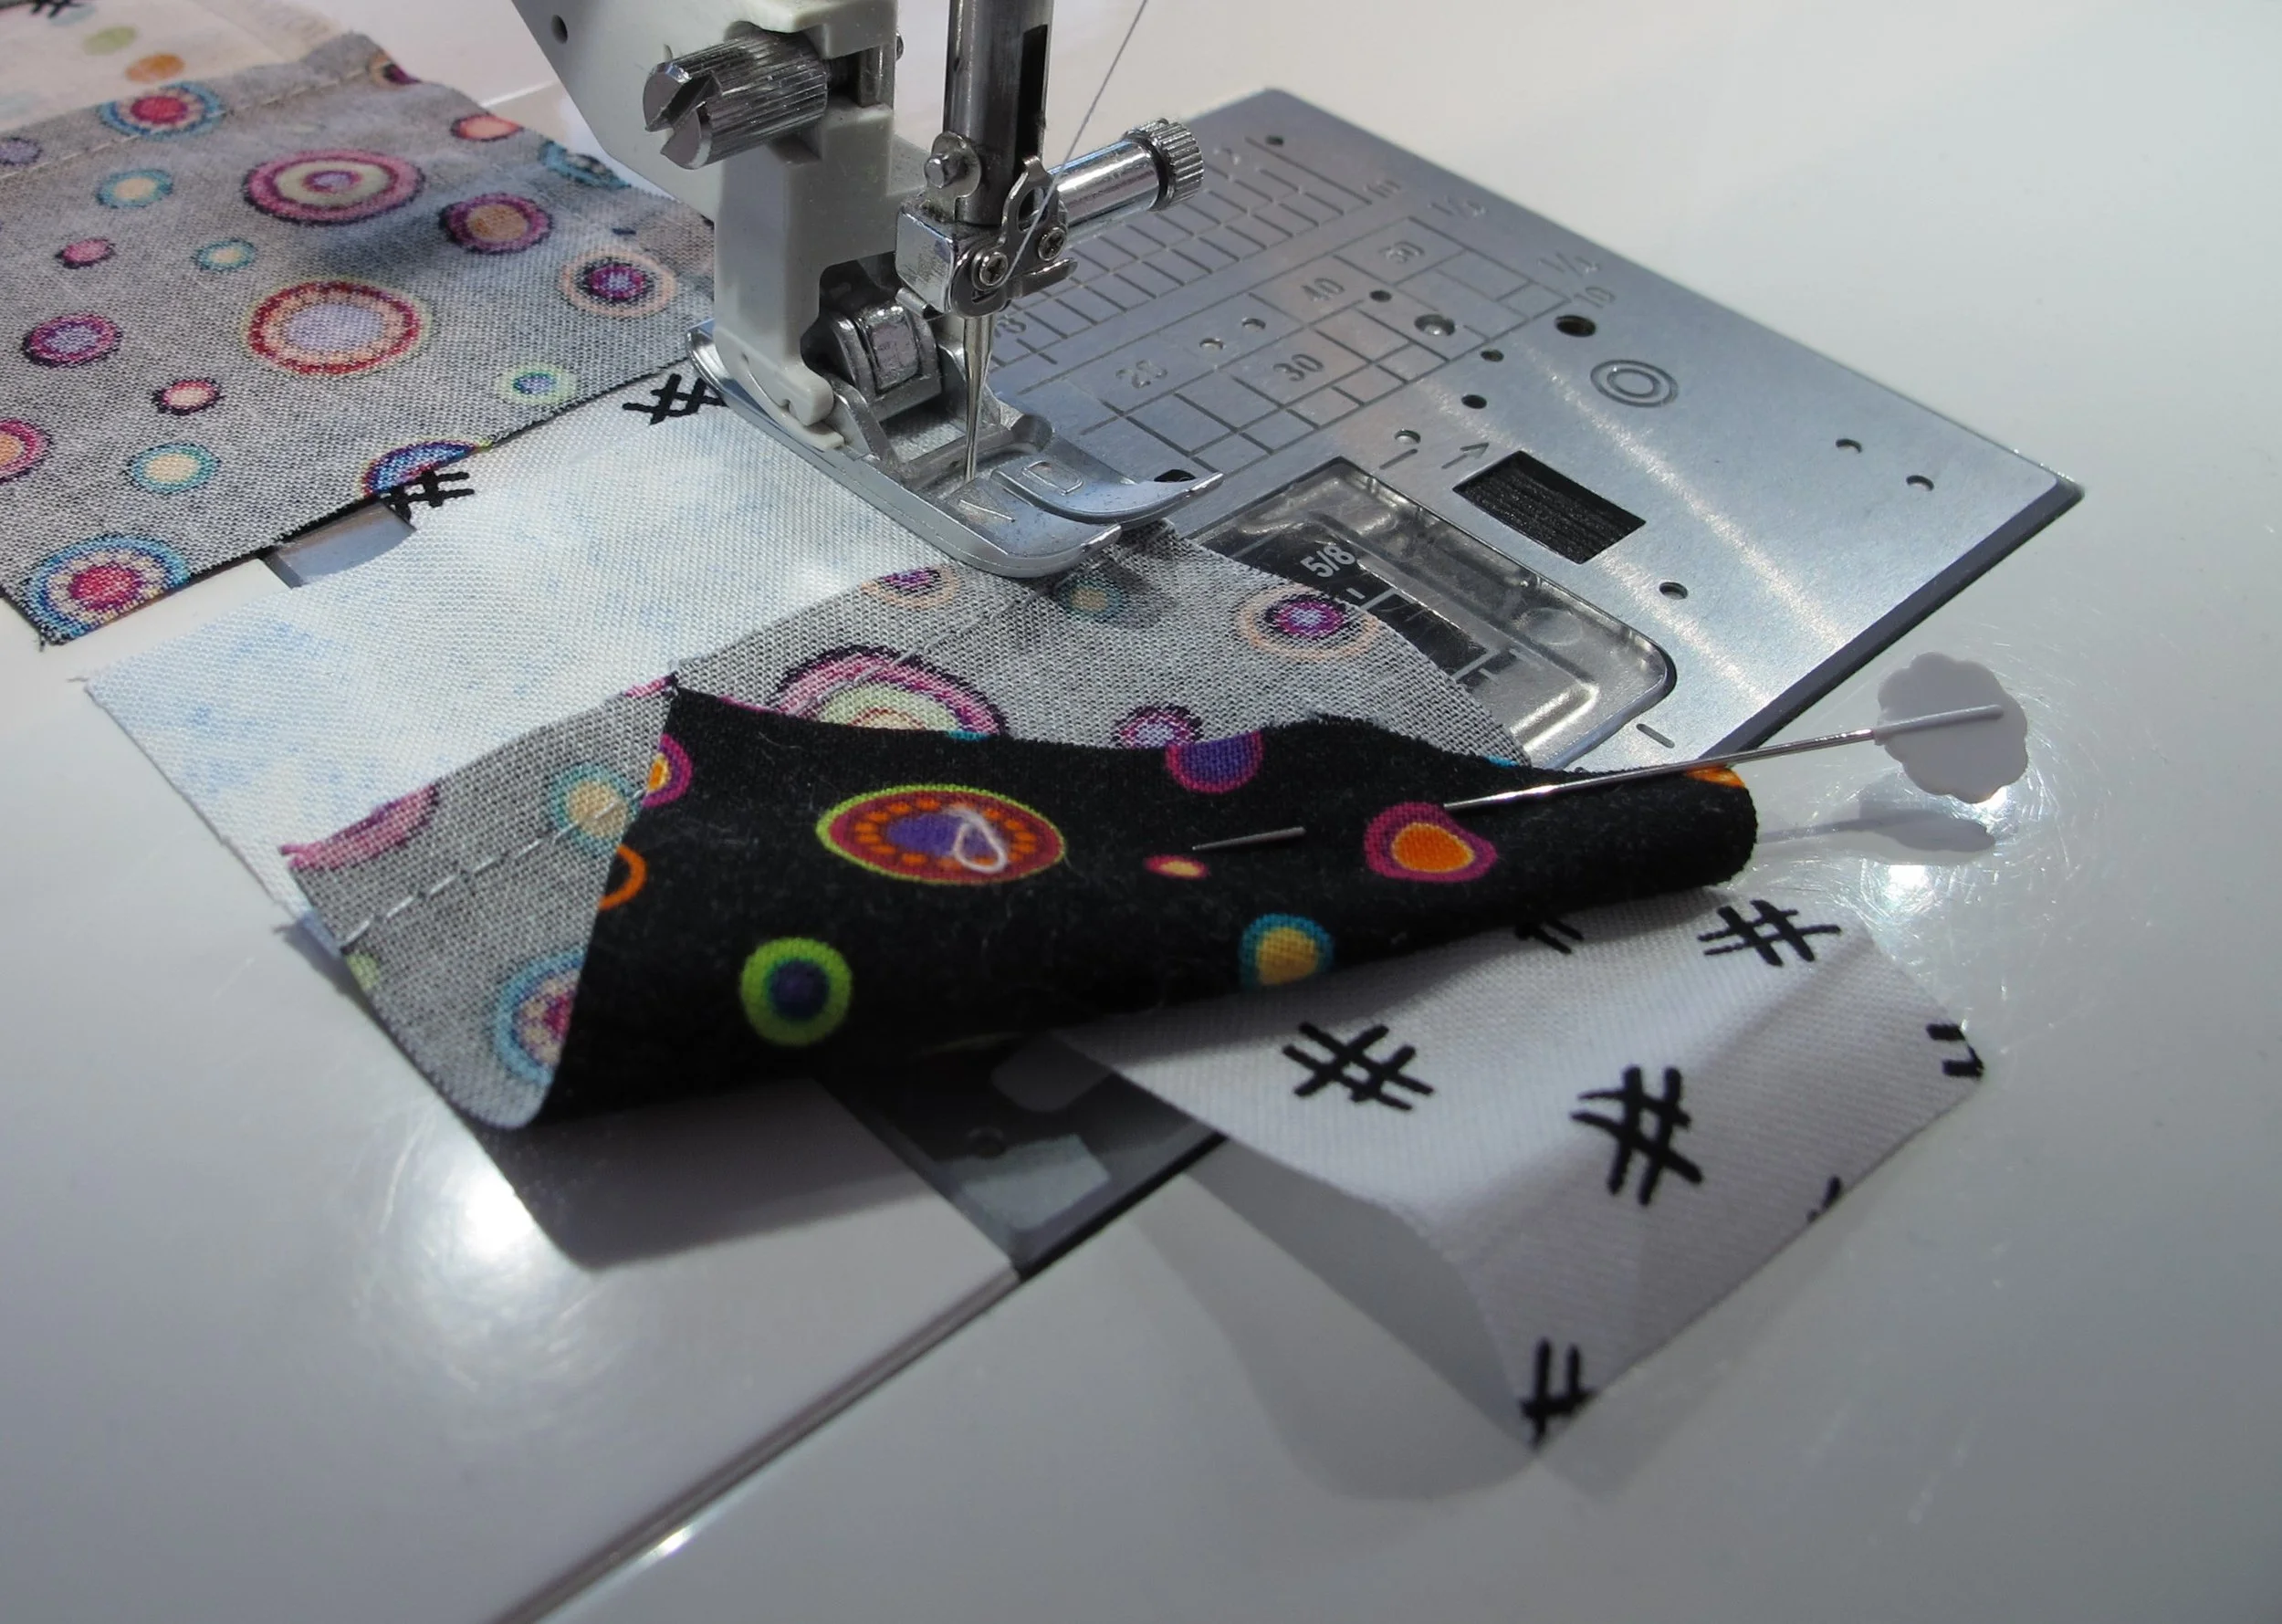
Next is the first bright strip (or dark depending on your colour scheme). With right sides together and the last log added at the top, stitch the seam, press seam allowance away from the centre square, and trim the strip even with the unit.
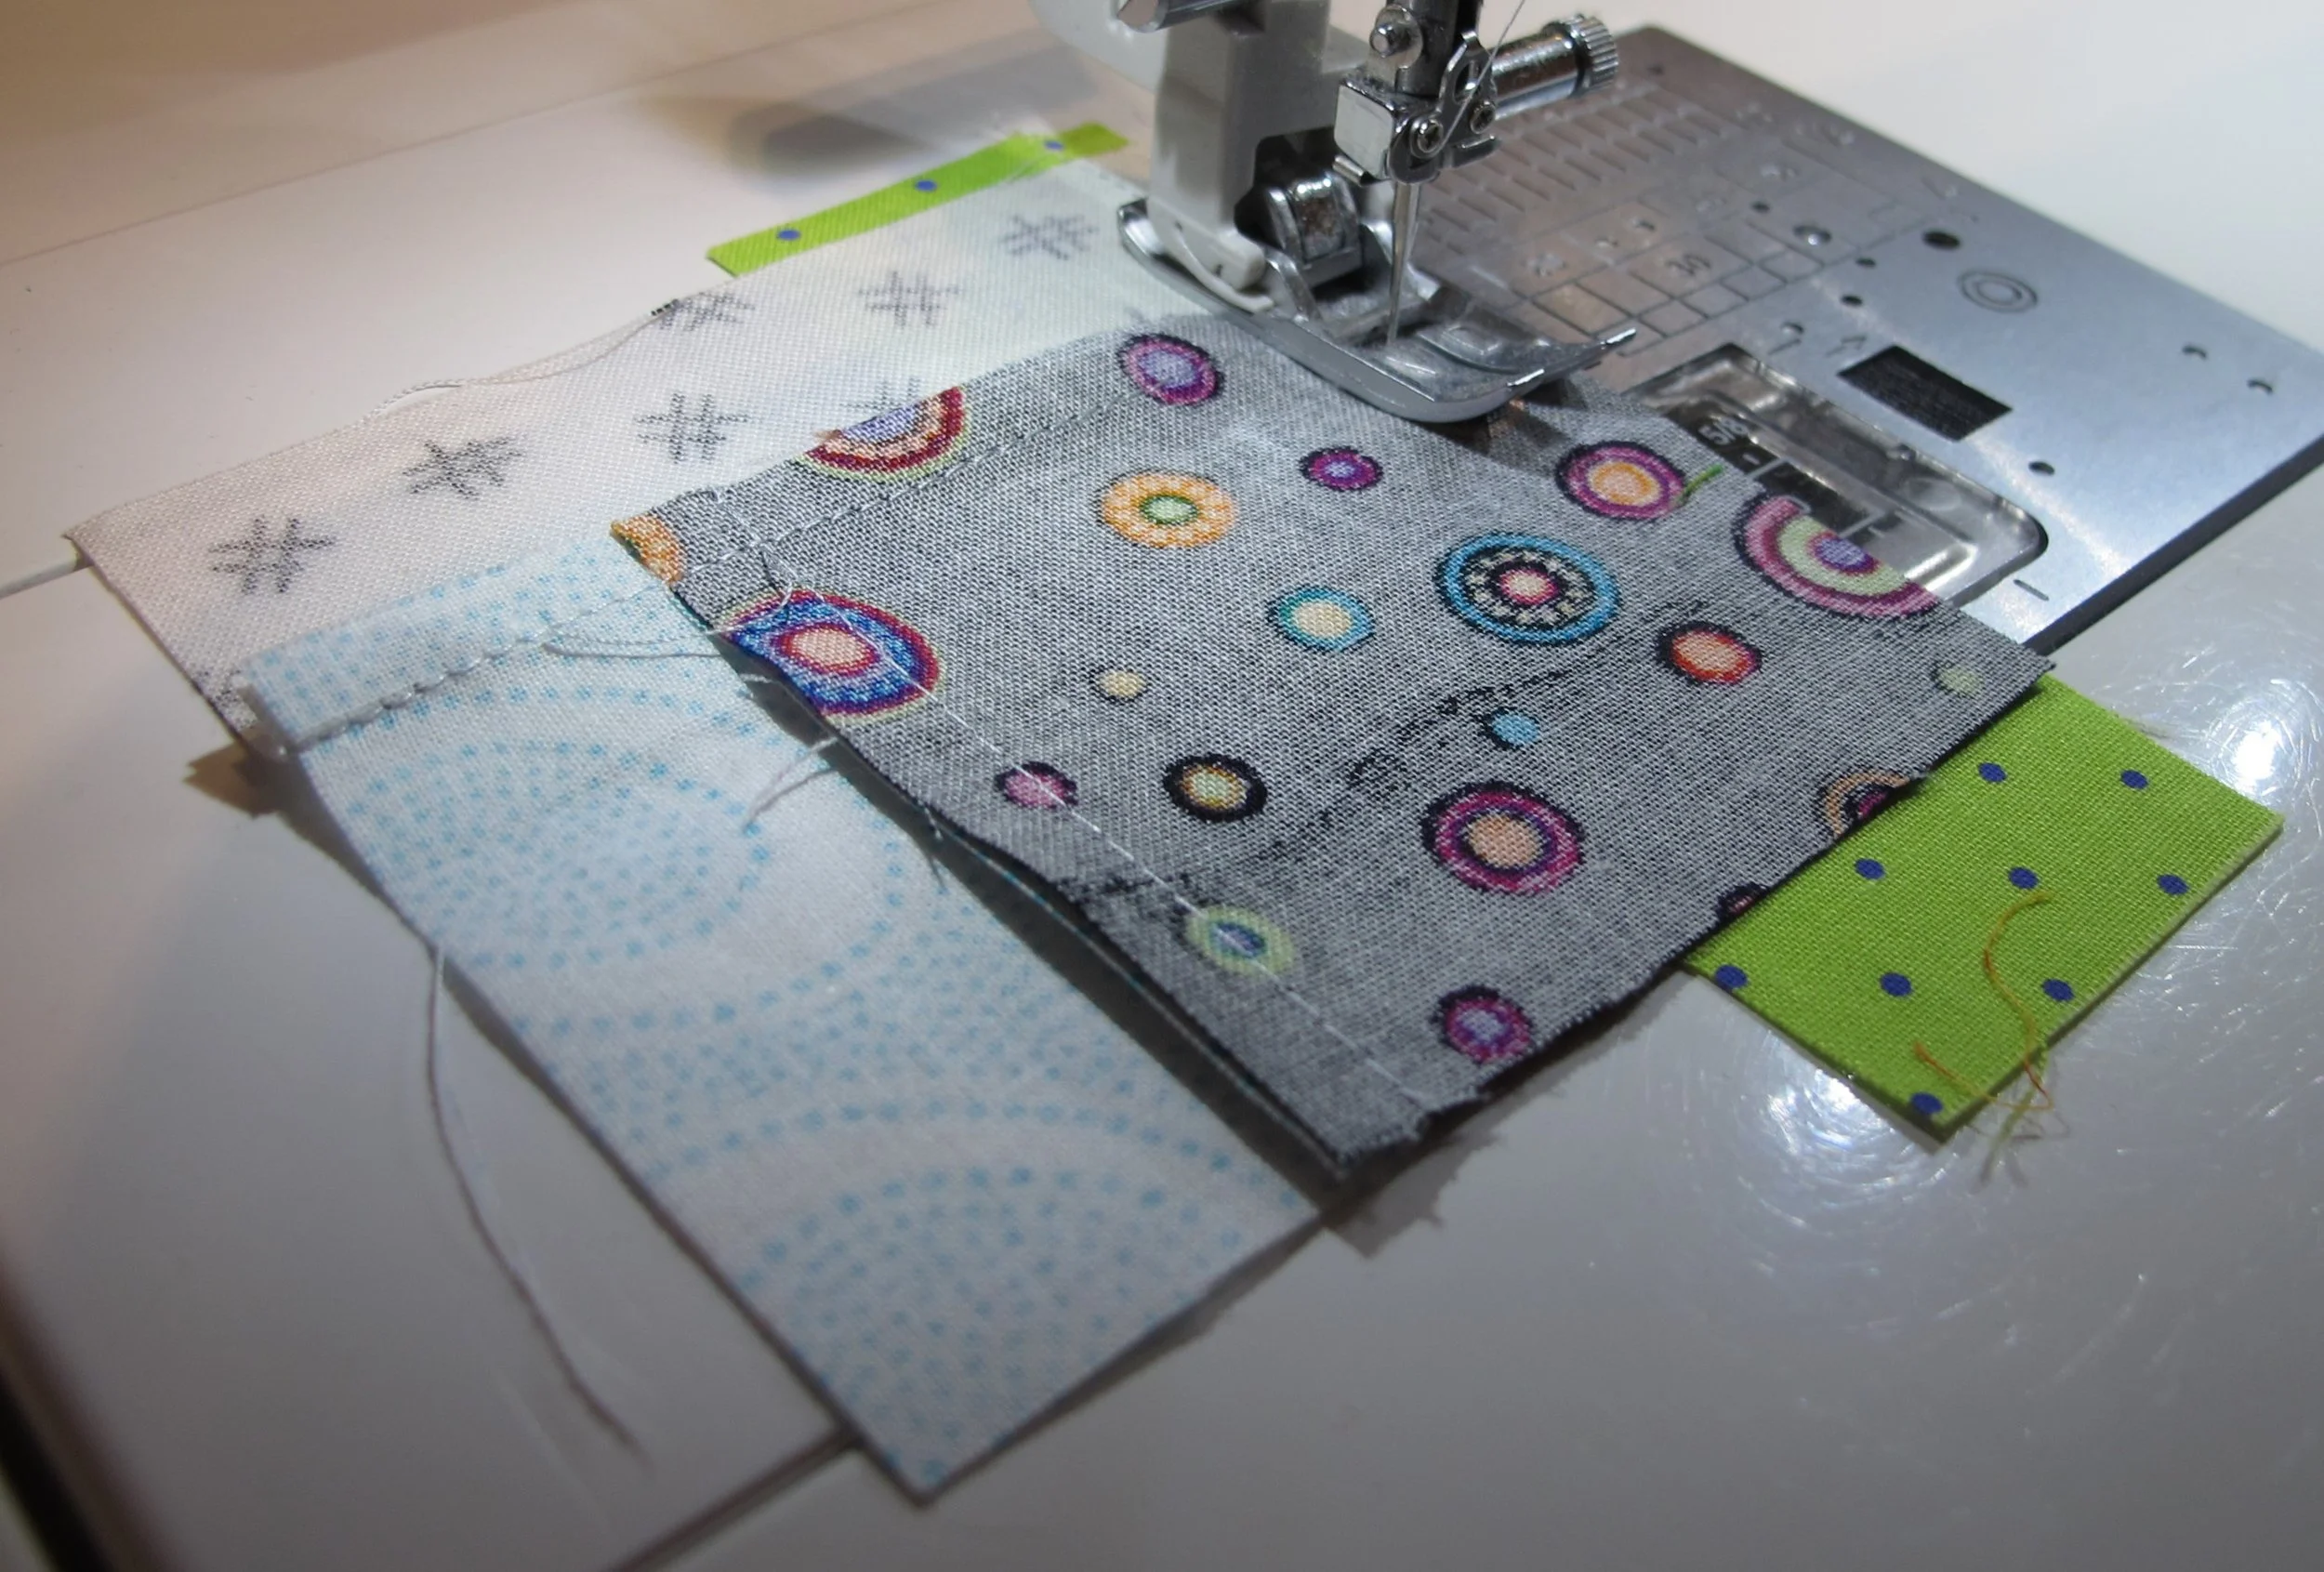
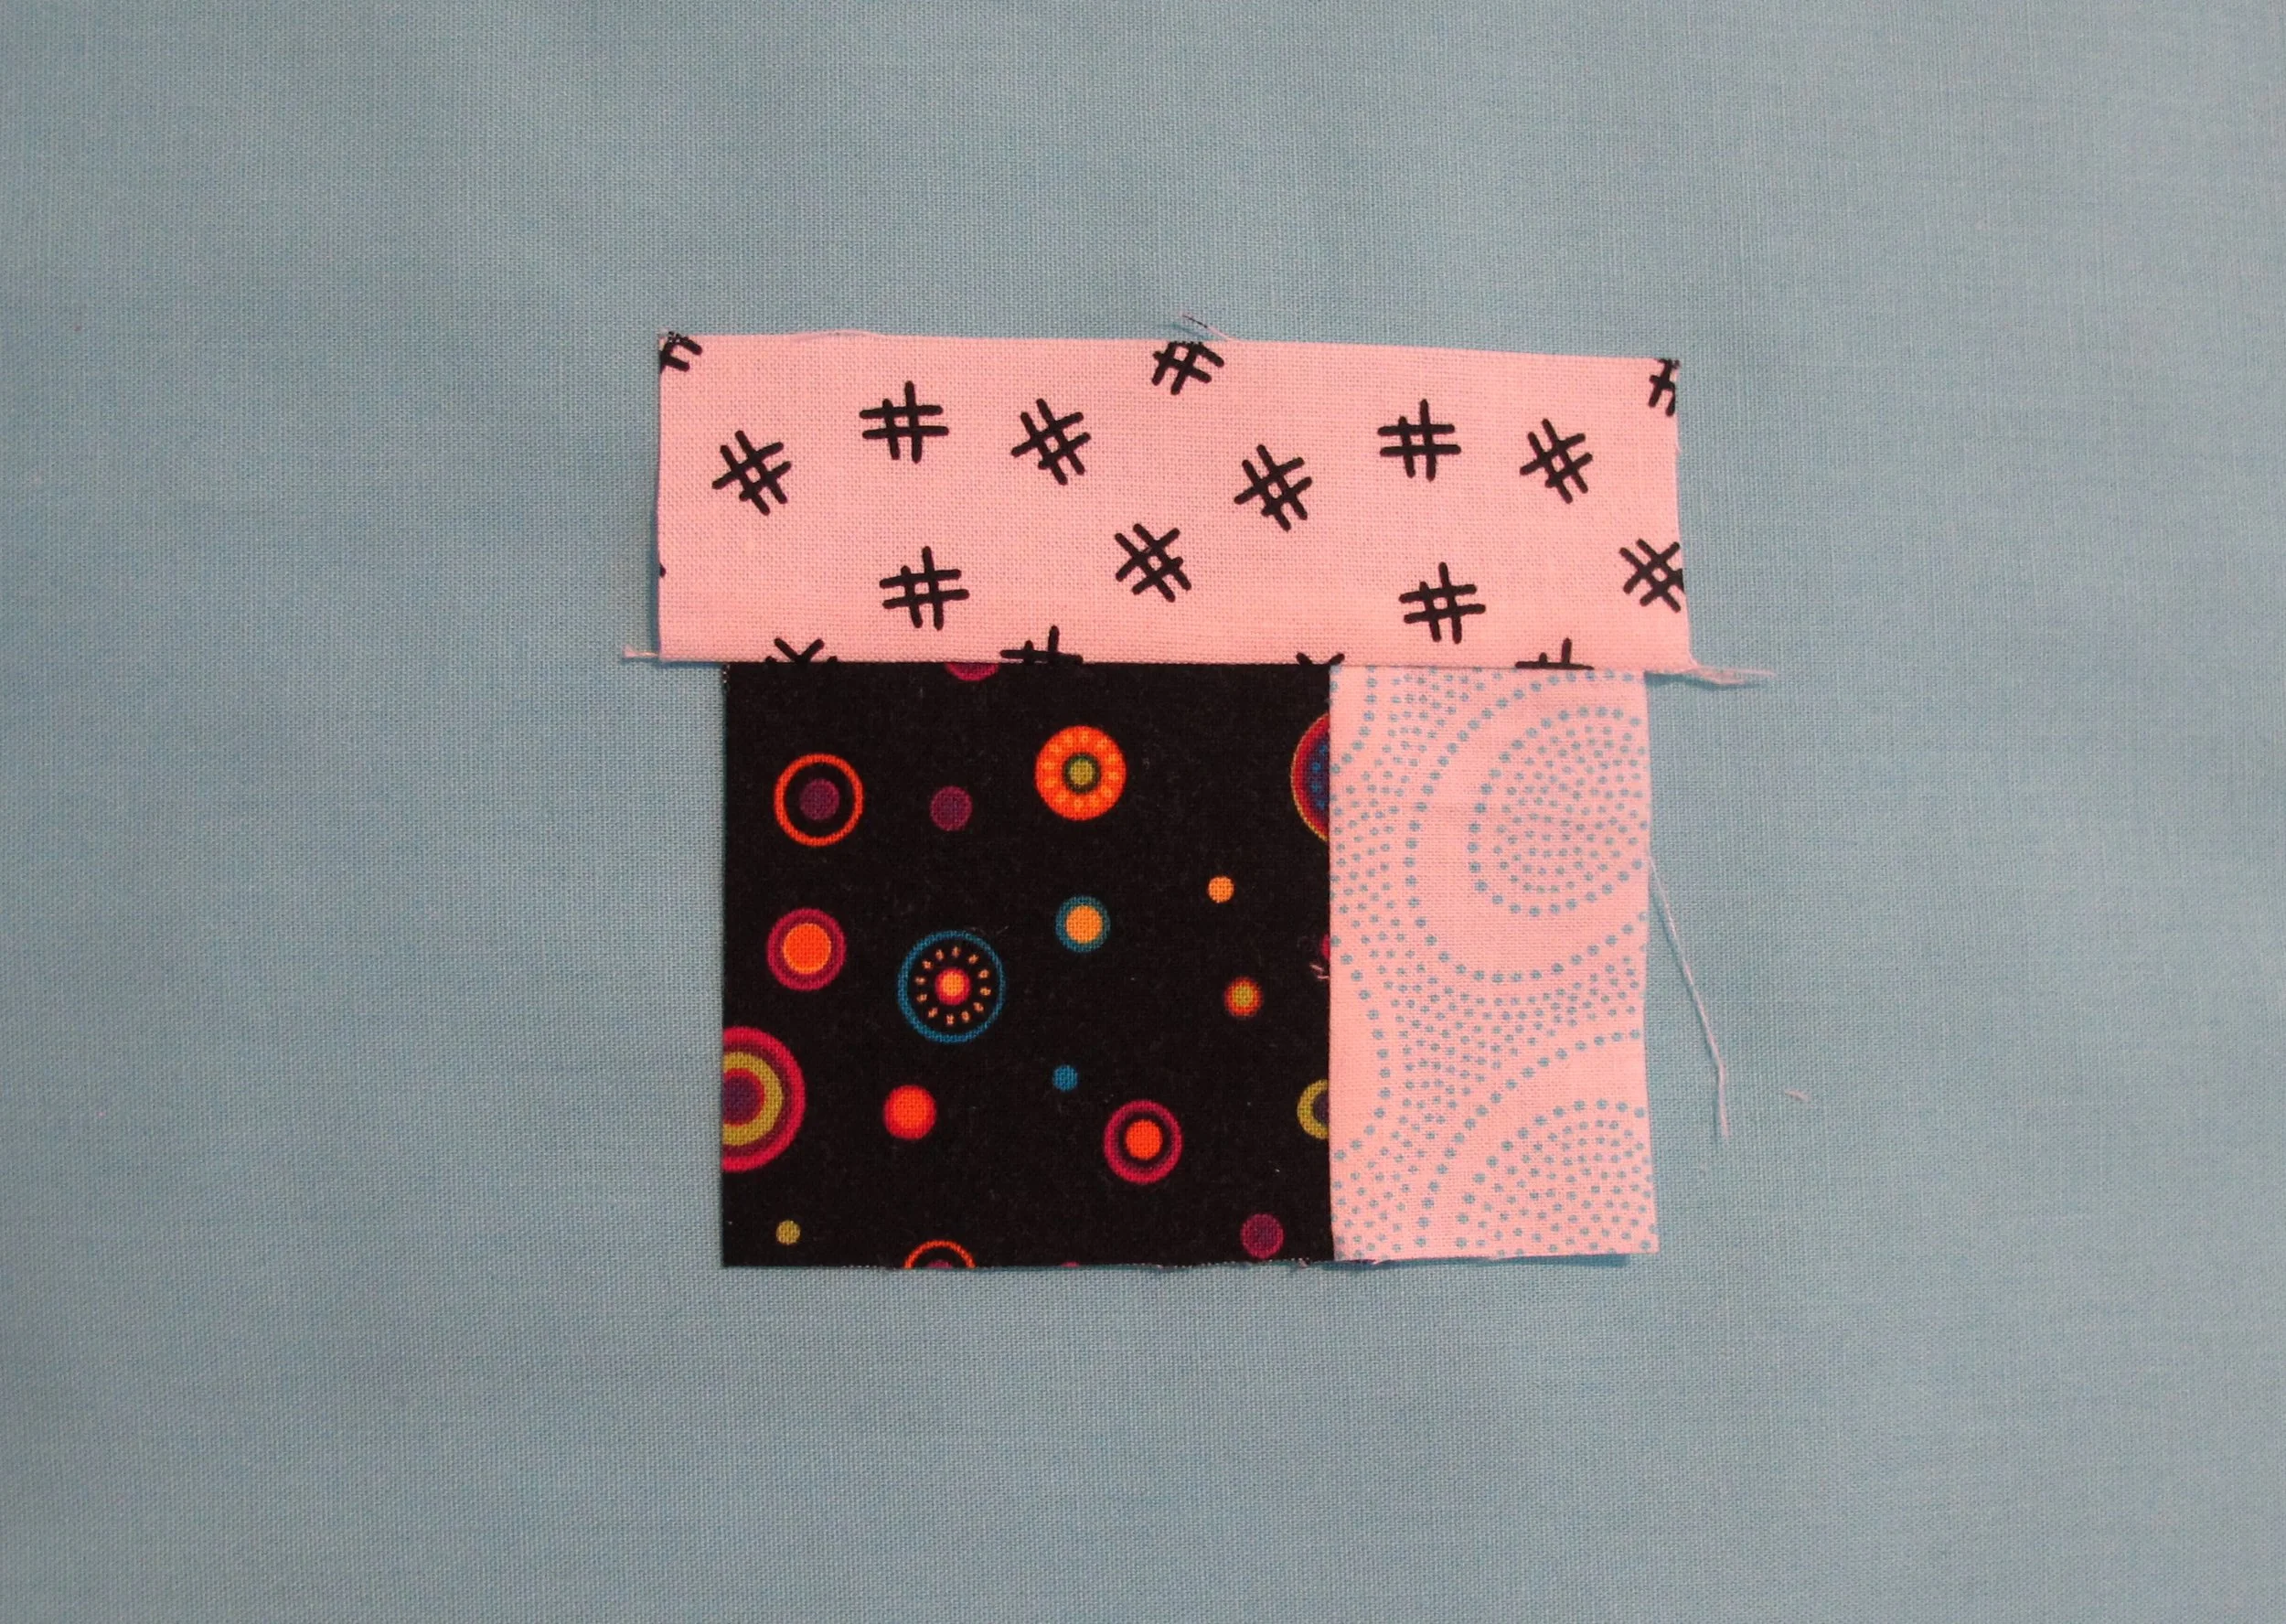
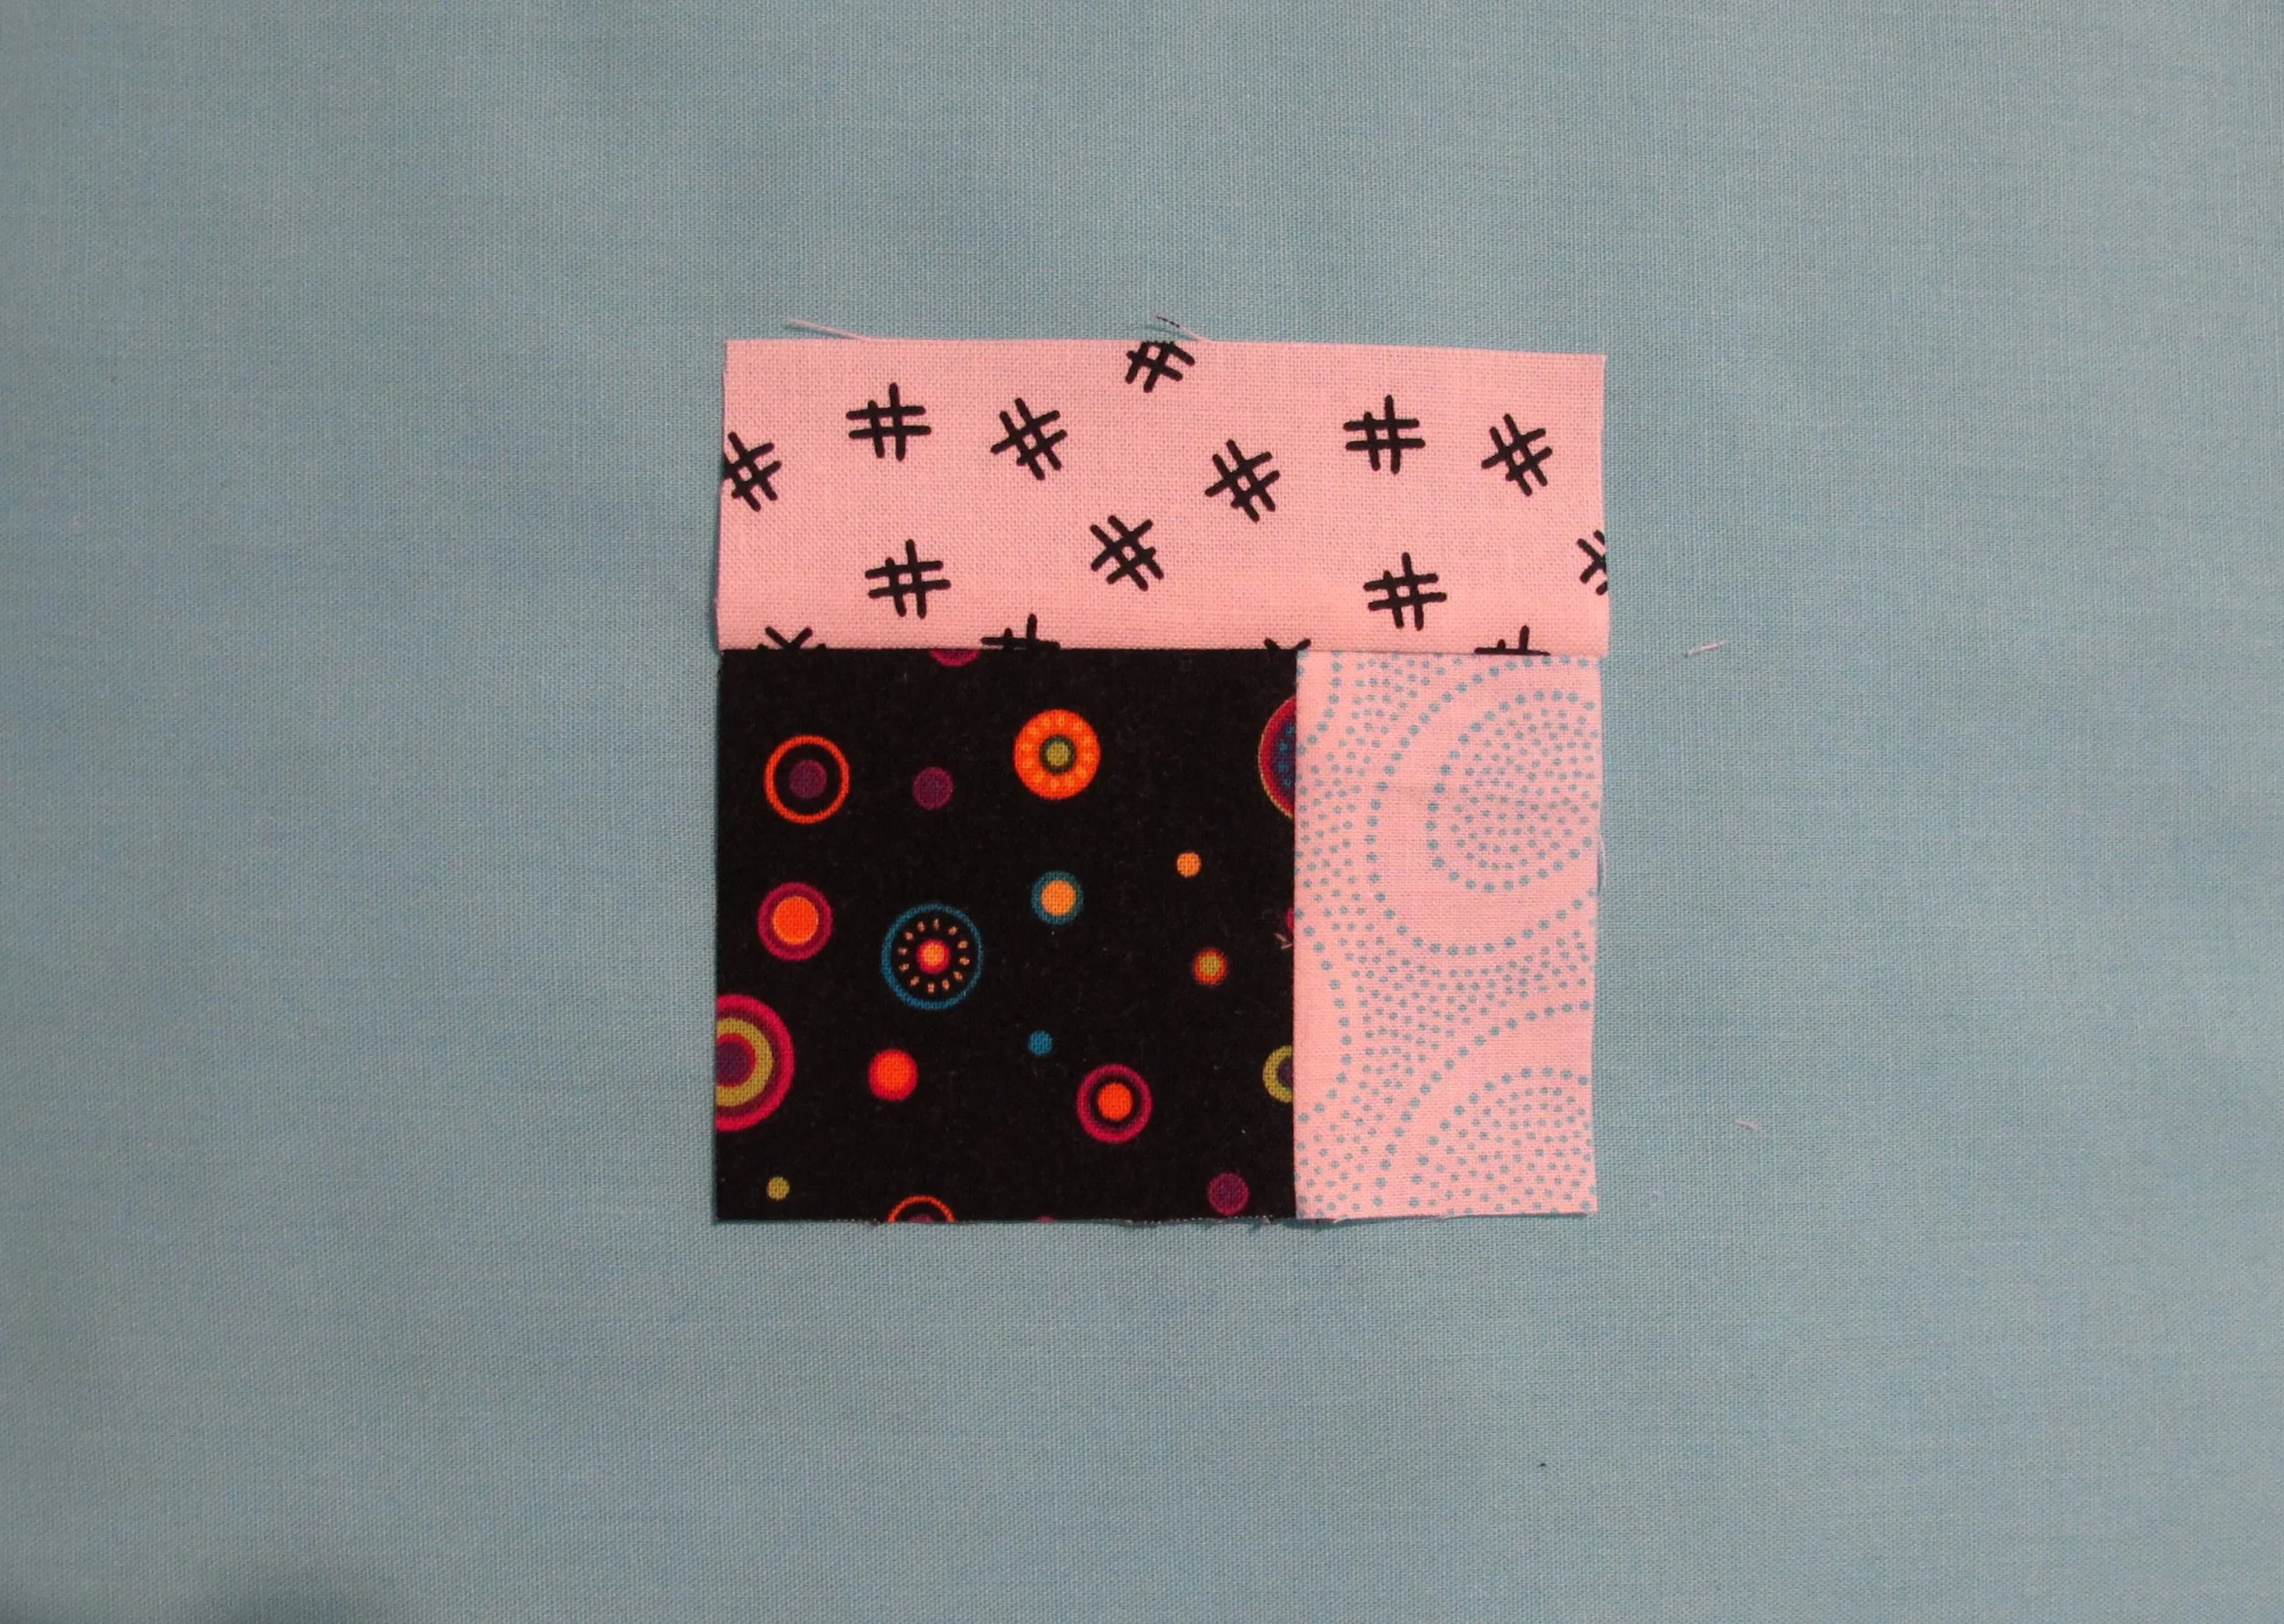
The second bright (or dark) strip is next. With right sides together and the last log added at the top, stitch the seam, press seam allowance away from the centre square, and trim the strip even with the unit. Repeat the process for two more rounds, 2 lights, 2 darks, 2 lights, 2 darks. I think now you can understand how my “rule” can really help keep you on track.
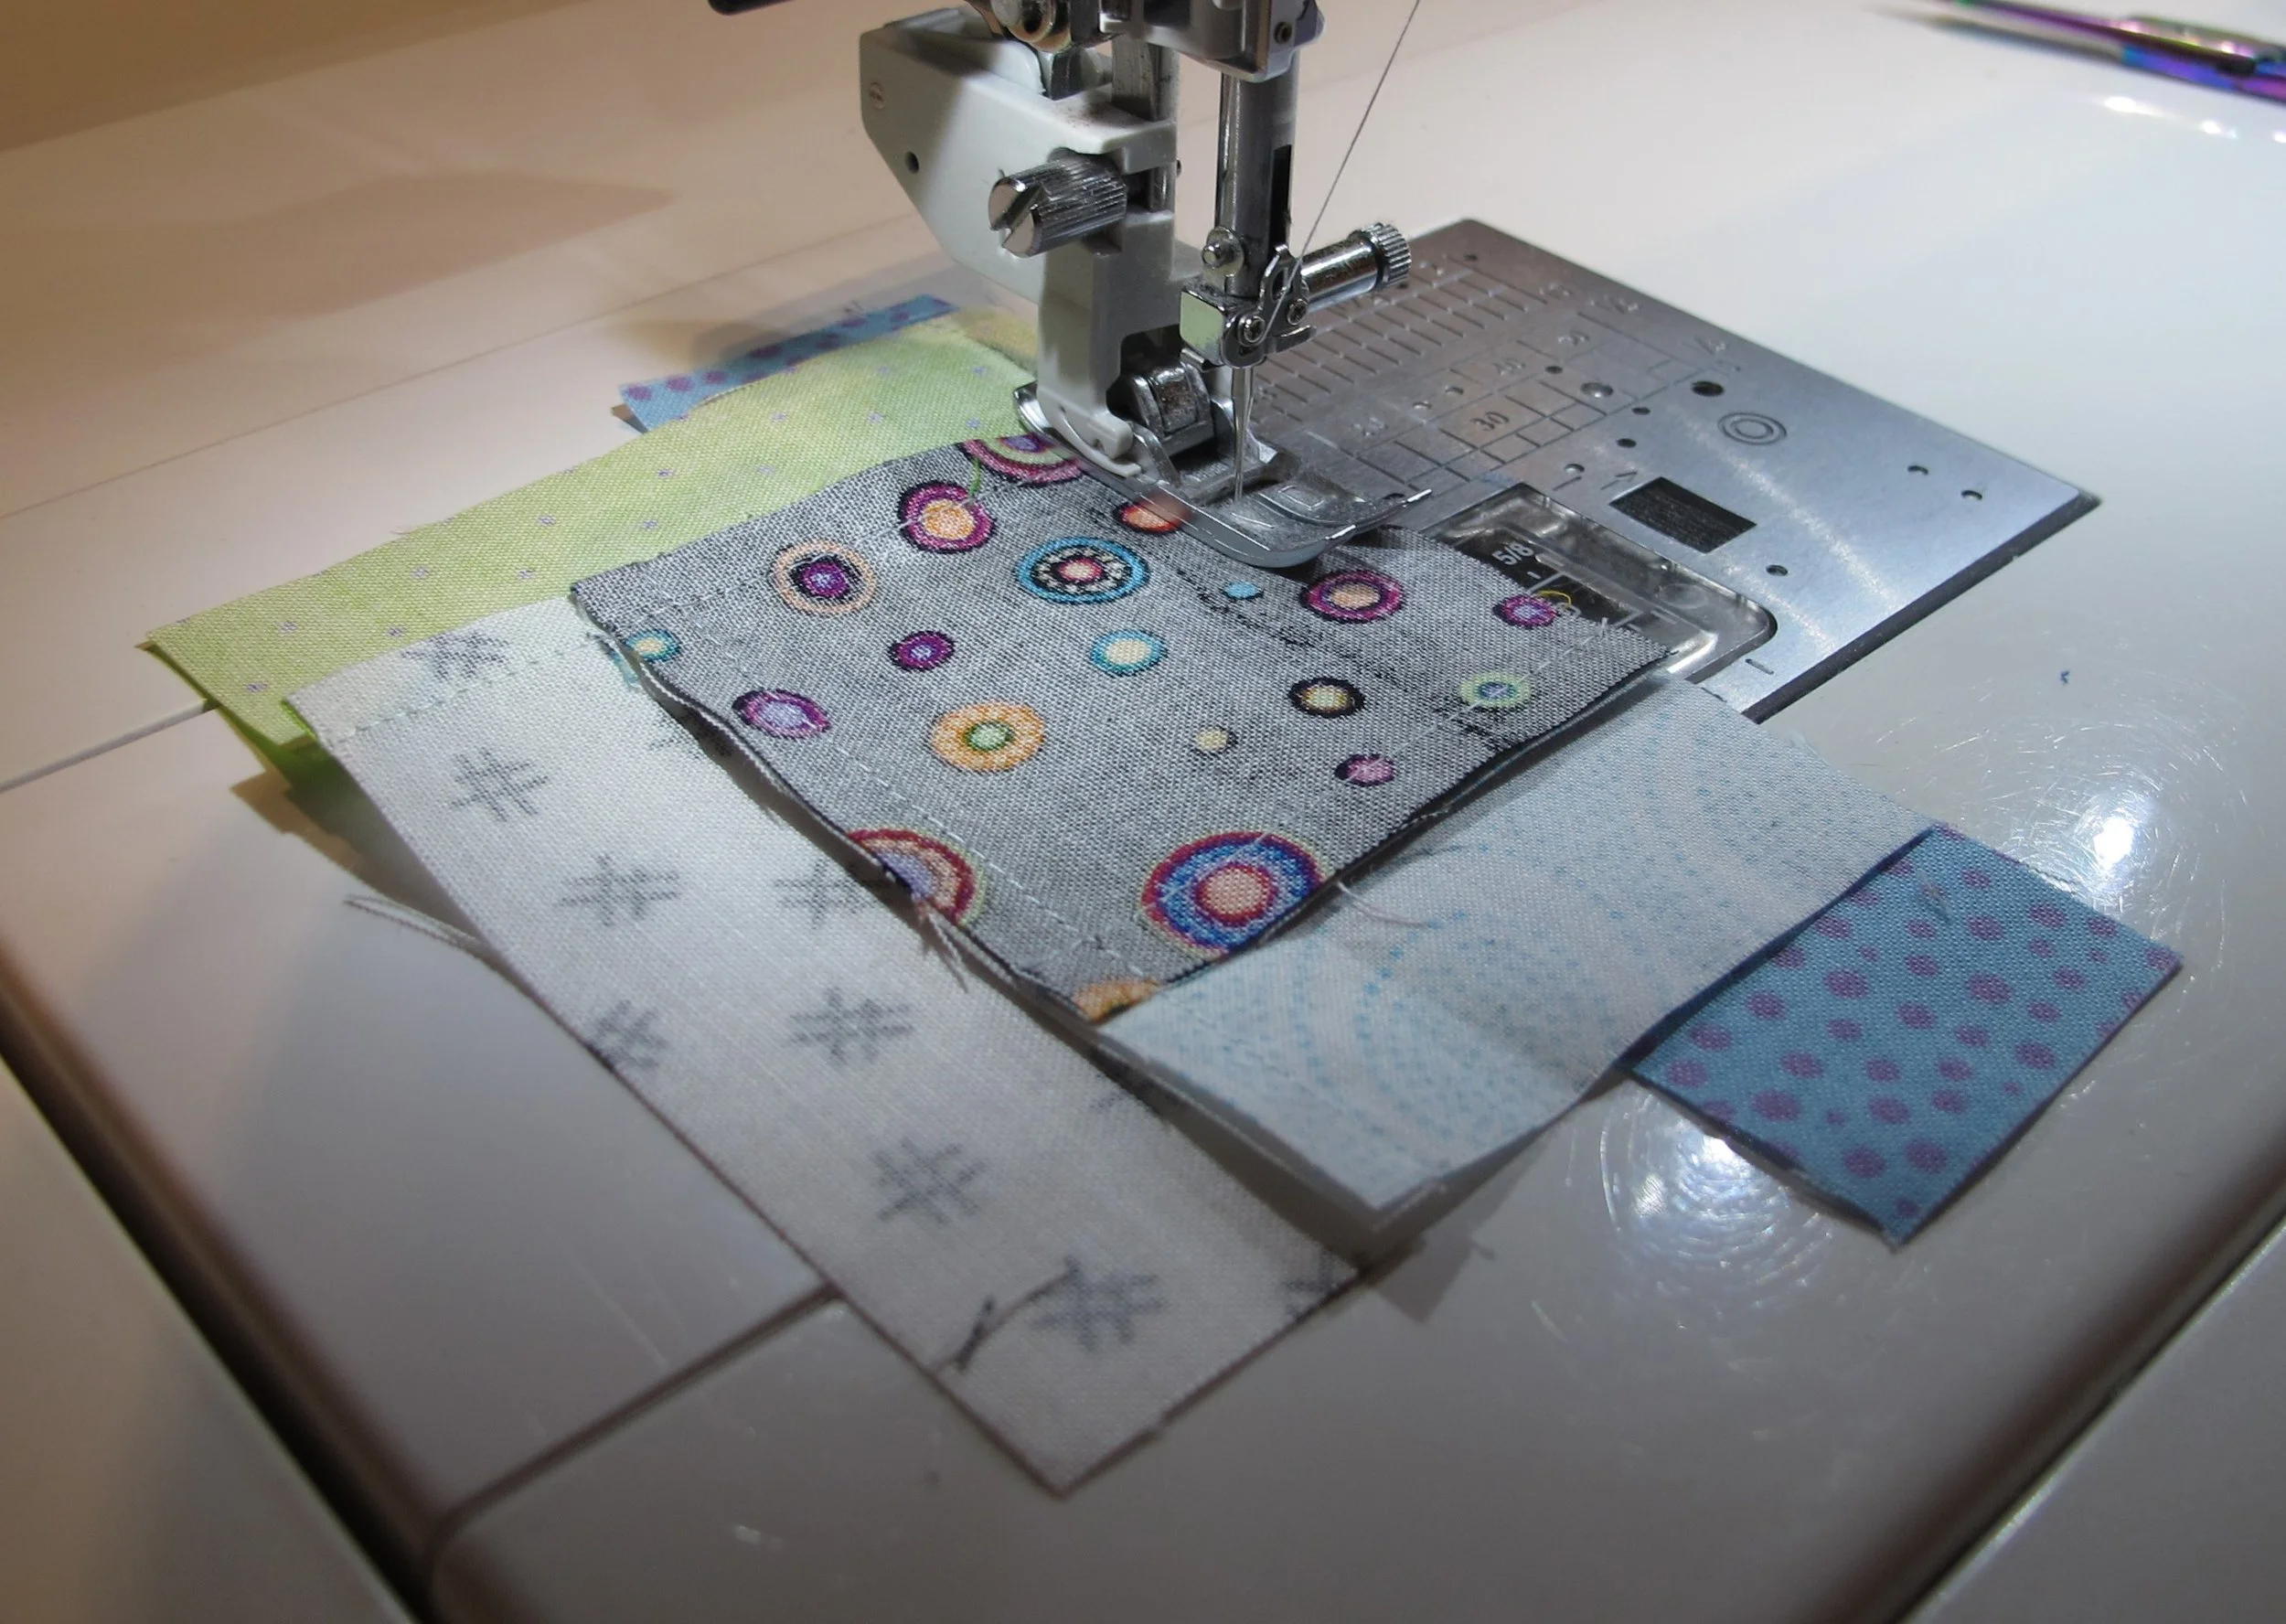
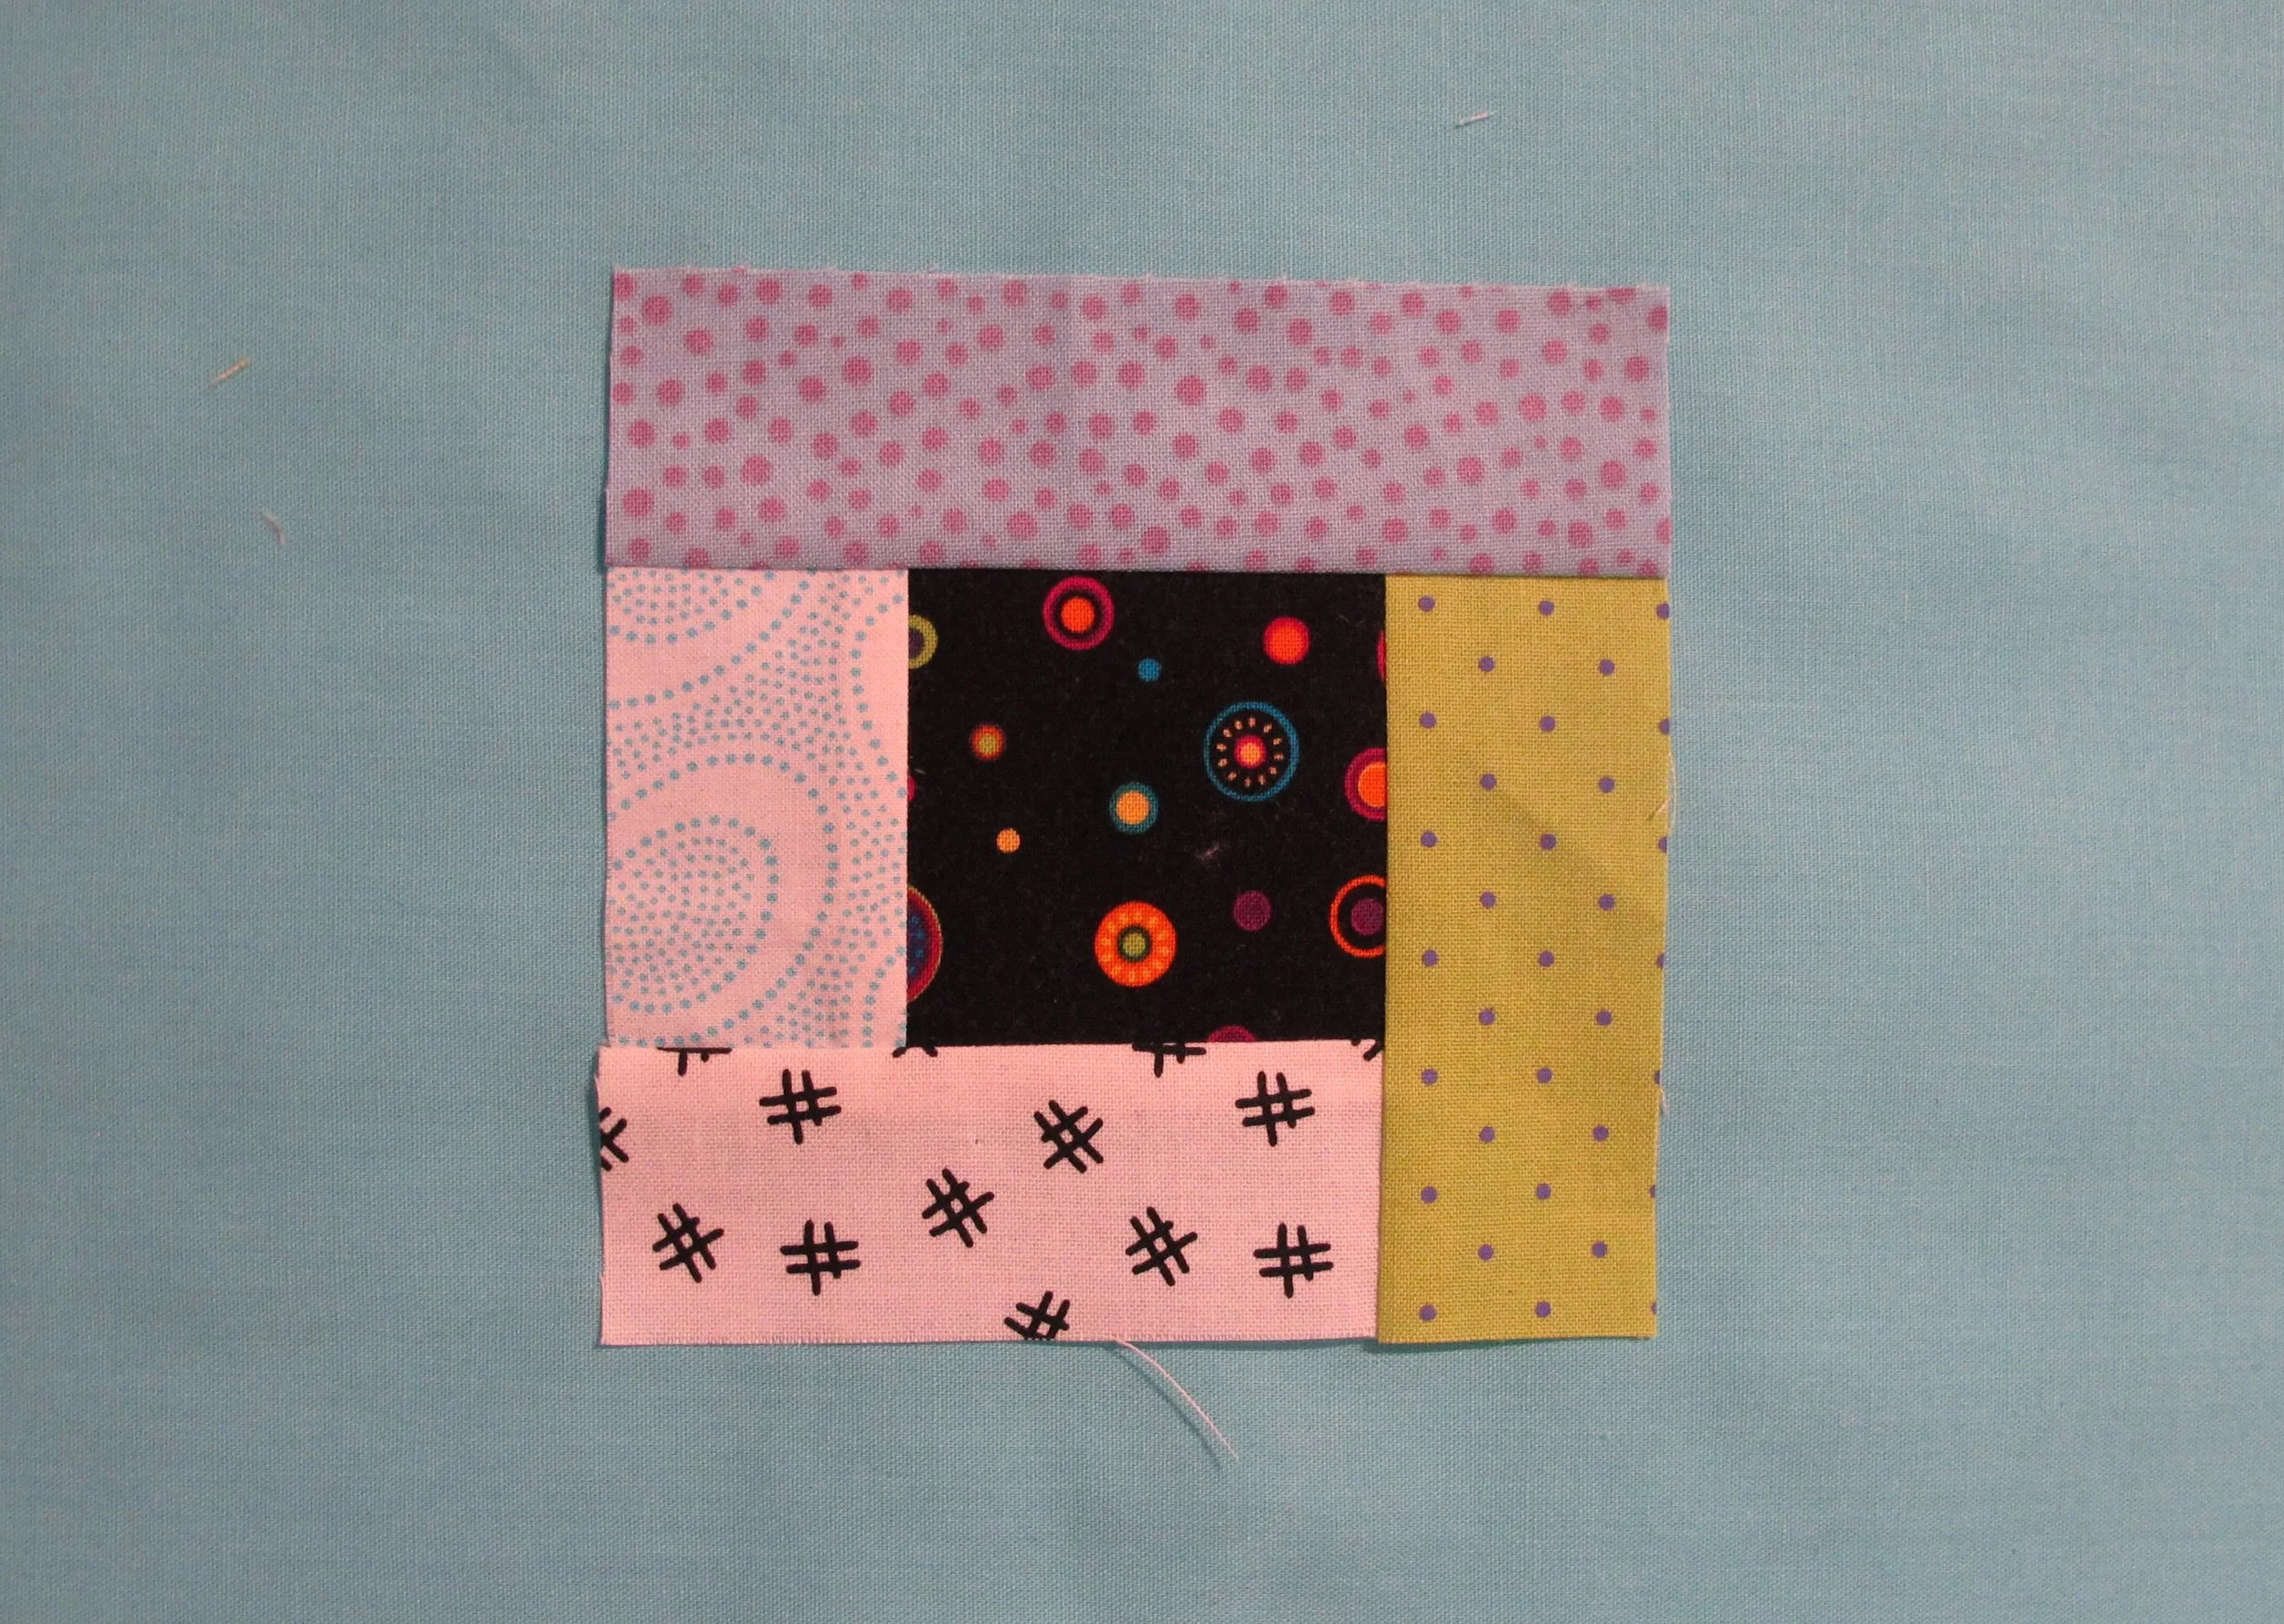
At the top of the page you can see this specific block with one more round of strips, and in the photo below this completed block is second one up from the bottom left. And remember, this block is perfect for continuous piecing. Stitch all of step 1 at the same time, then press and trim all of these units before you move on to step 2 and keep repeating the process for each step. Continuous piecing saves a ton of thread…and time.
Below is the completed Log Cabin quilt block with three strips on each side of the centre square and the lights and darks diagonally on either side of the block. The blocks have been put together in the Straight Furrows design which is representative of settlers plowing their land for planting crops. You can also see how having a true contrast between the sides really makes the design stand out and is more graphic. But, believe it or not, this design is also very beautiful when there is very little contrast and with a much softer palette.
This quilting staple is a perfect design to add to your own quilting repertoire, and I hope you love the Log Cabin quilt as much as I do. Have fun!
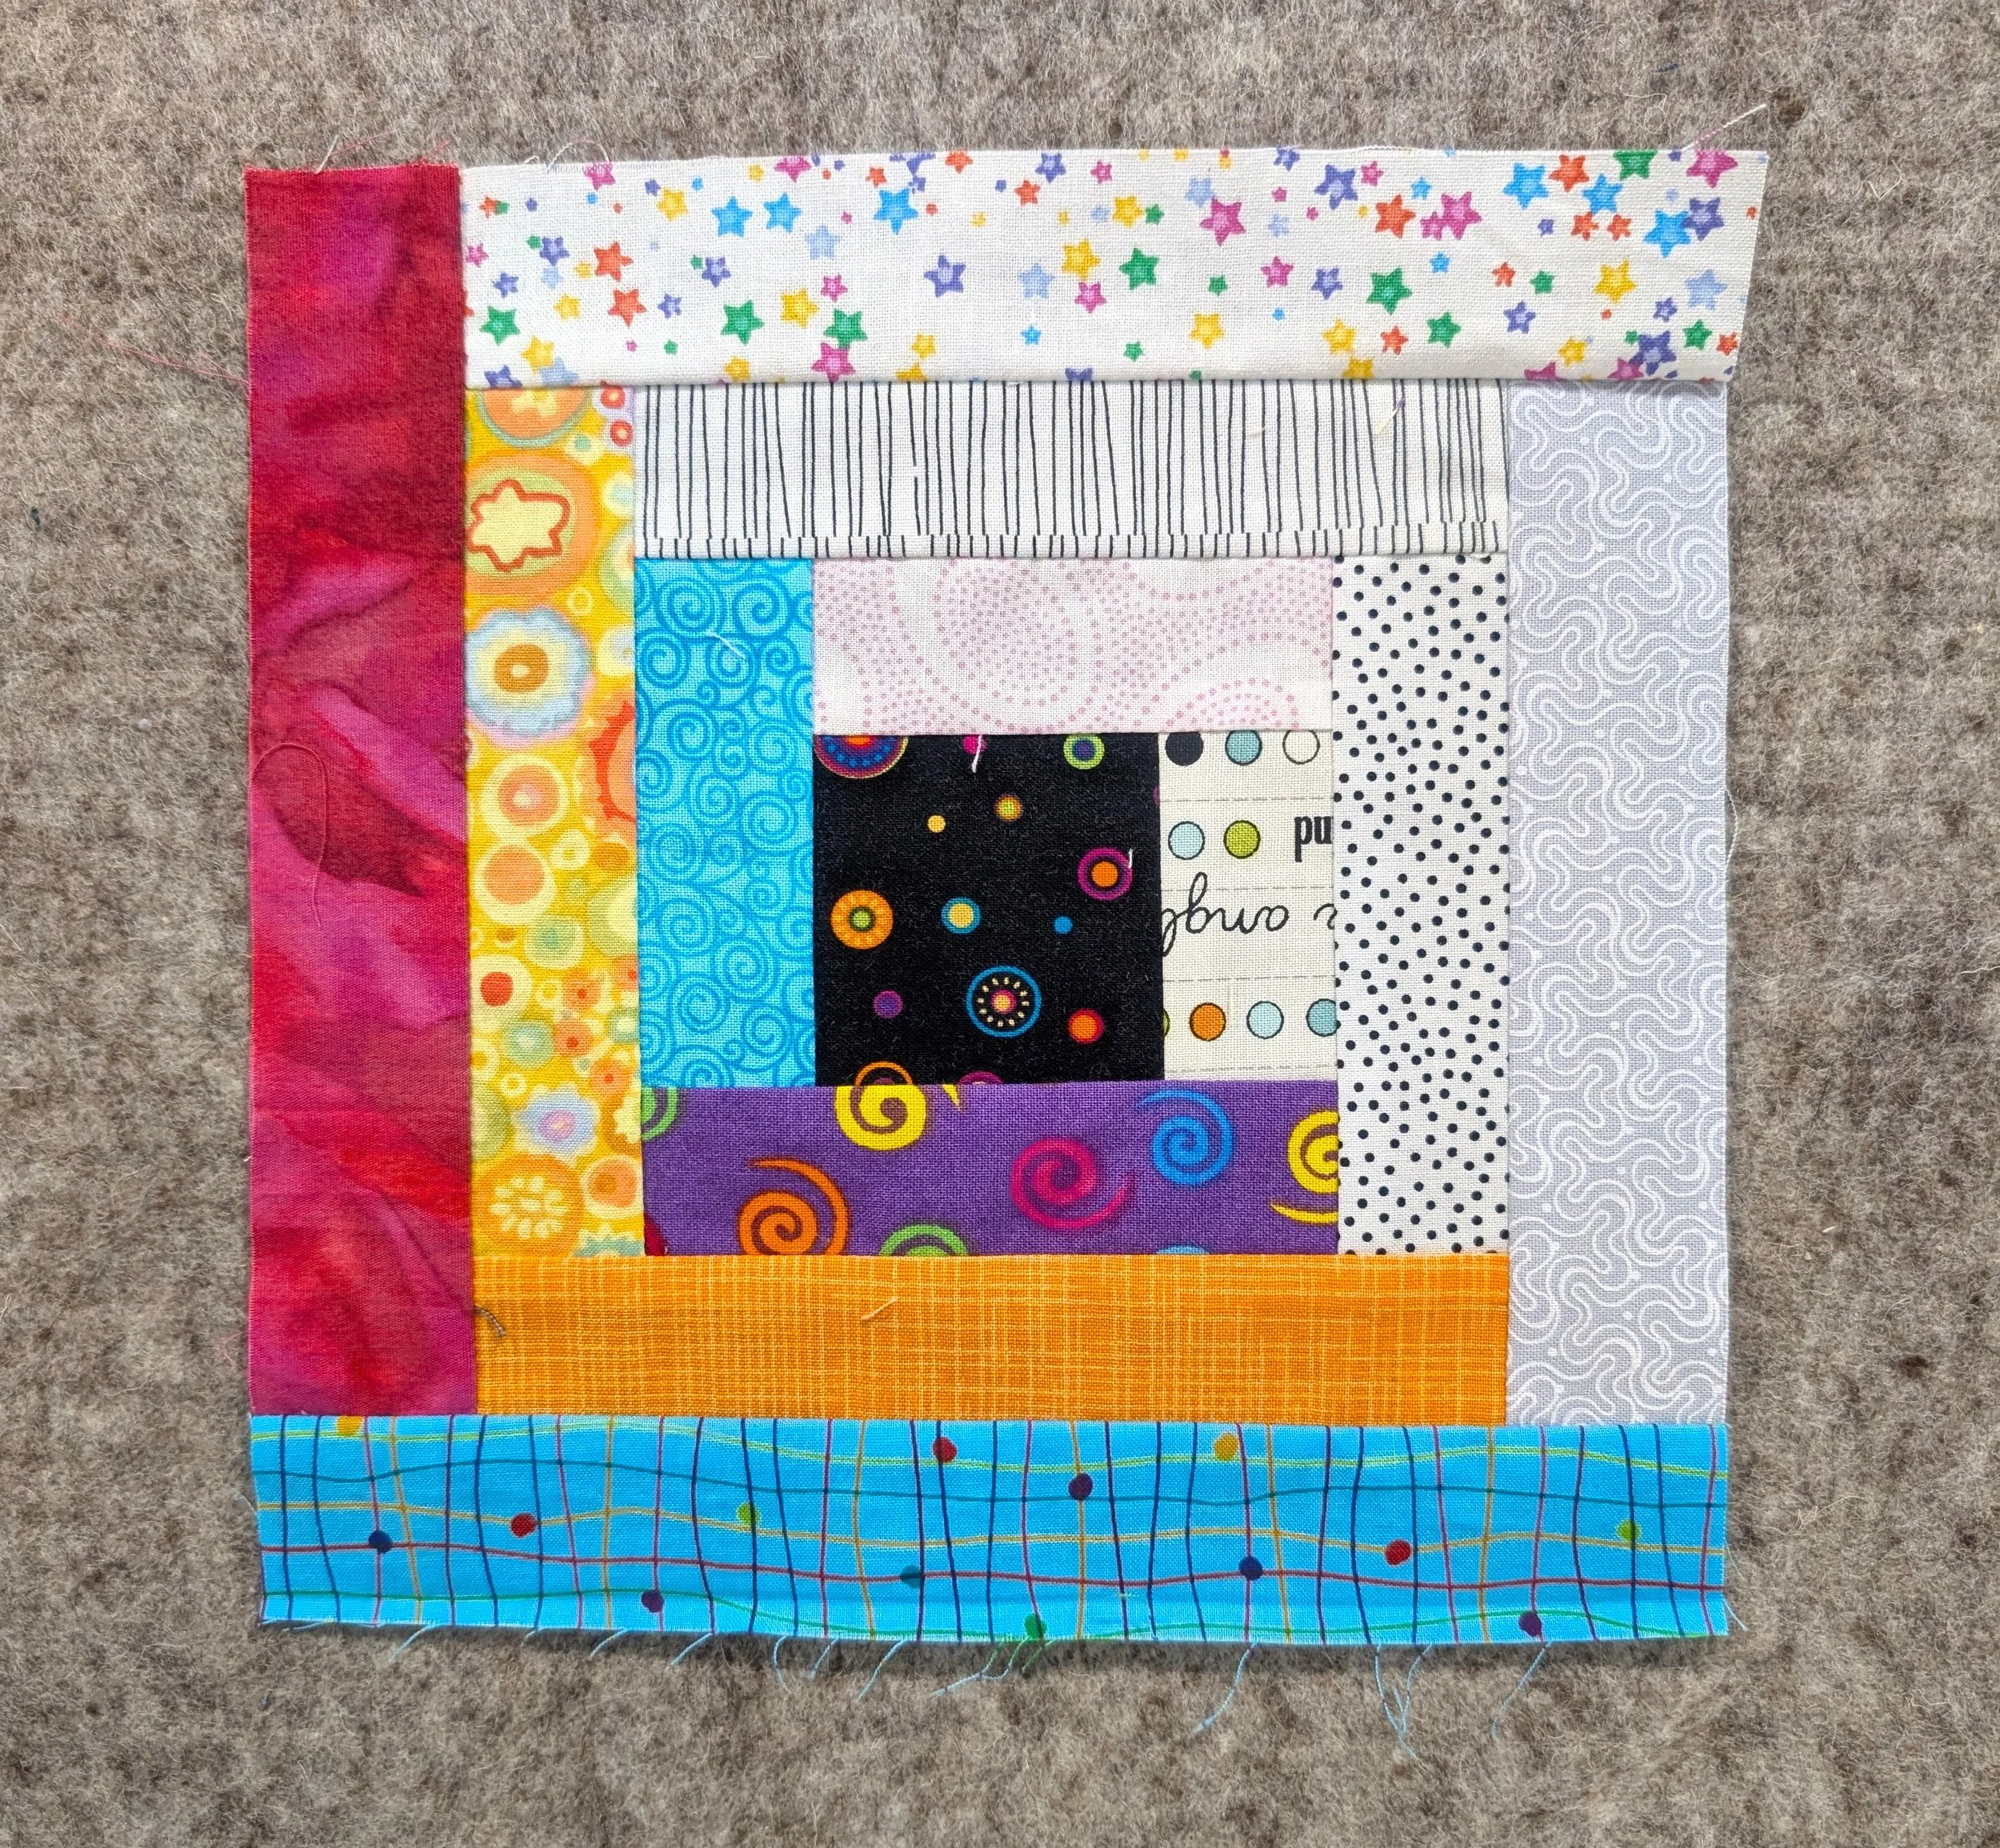
my completed block
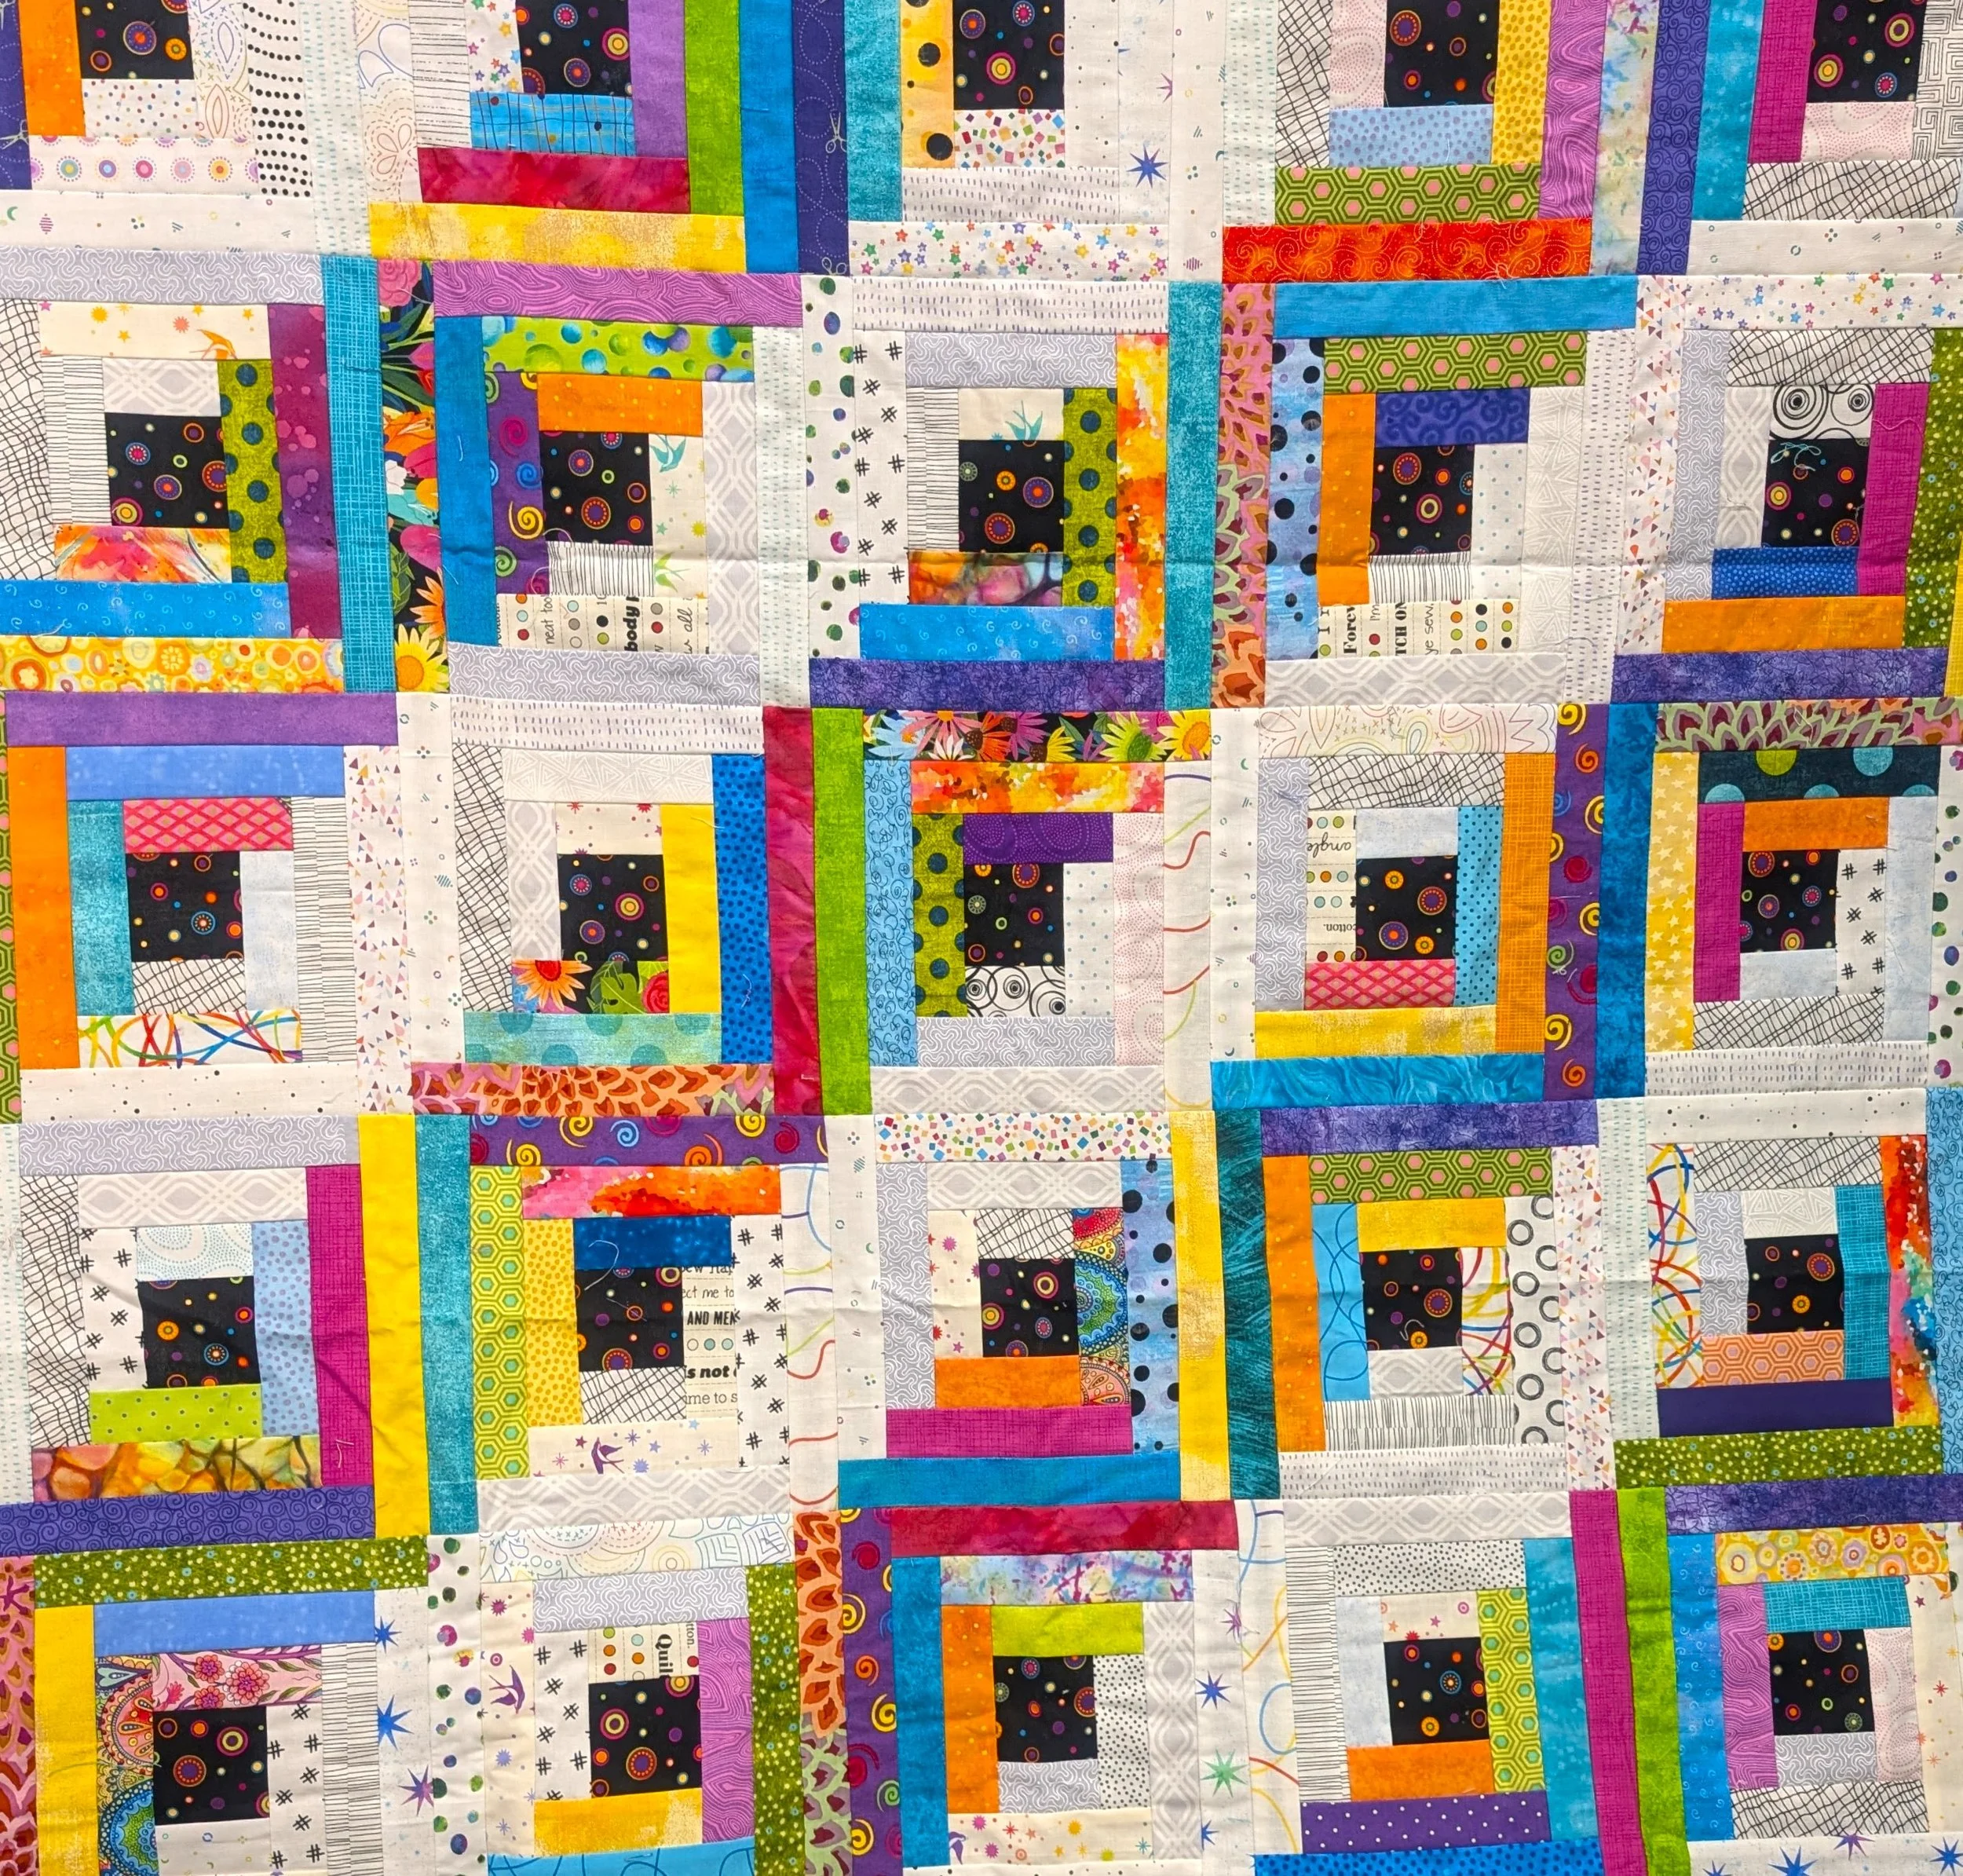
the quilt top