
January Block- Snowman
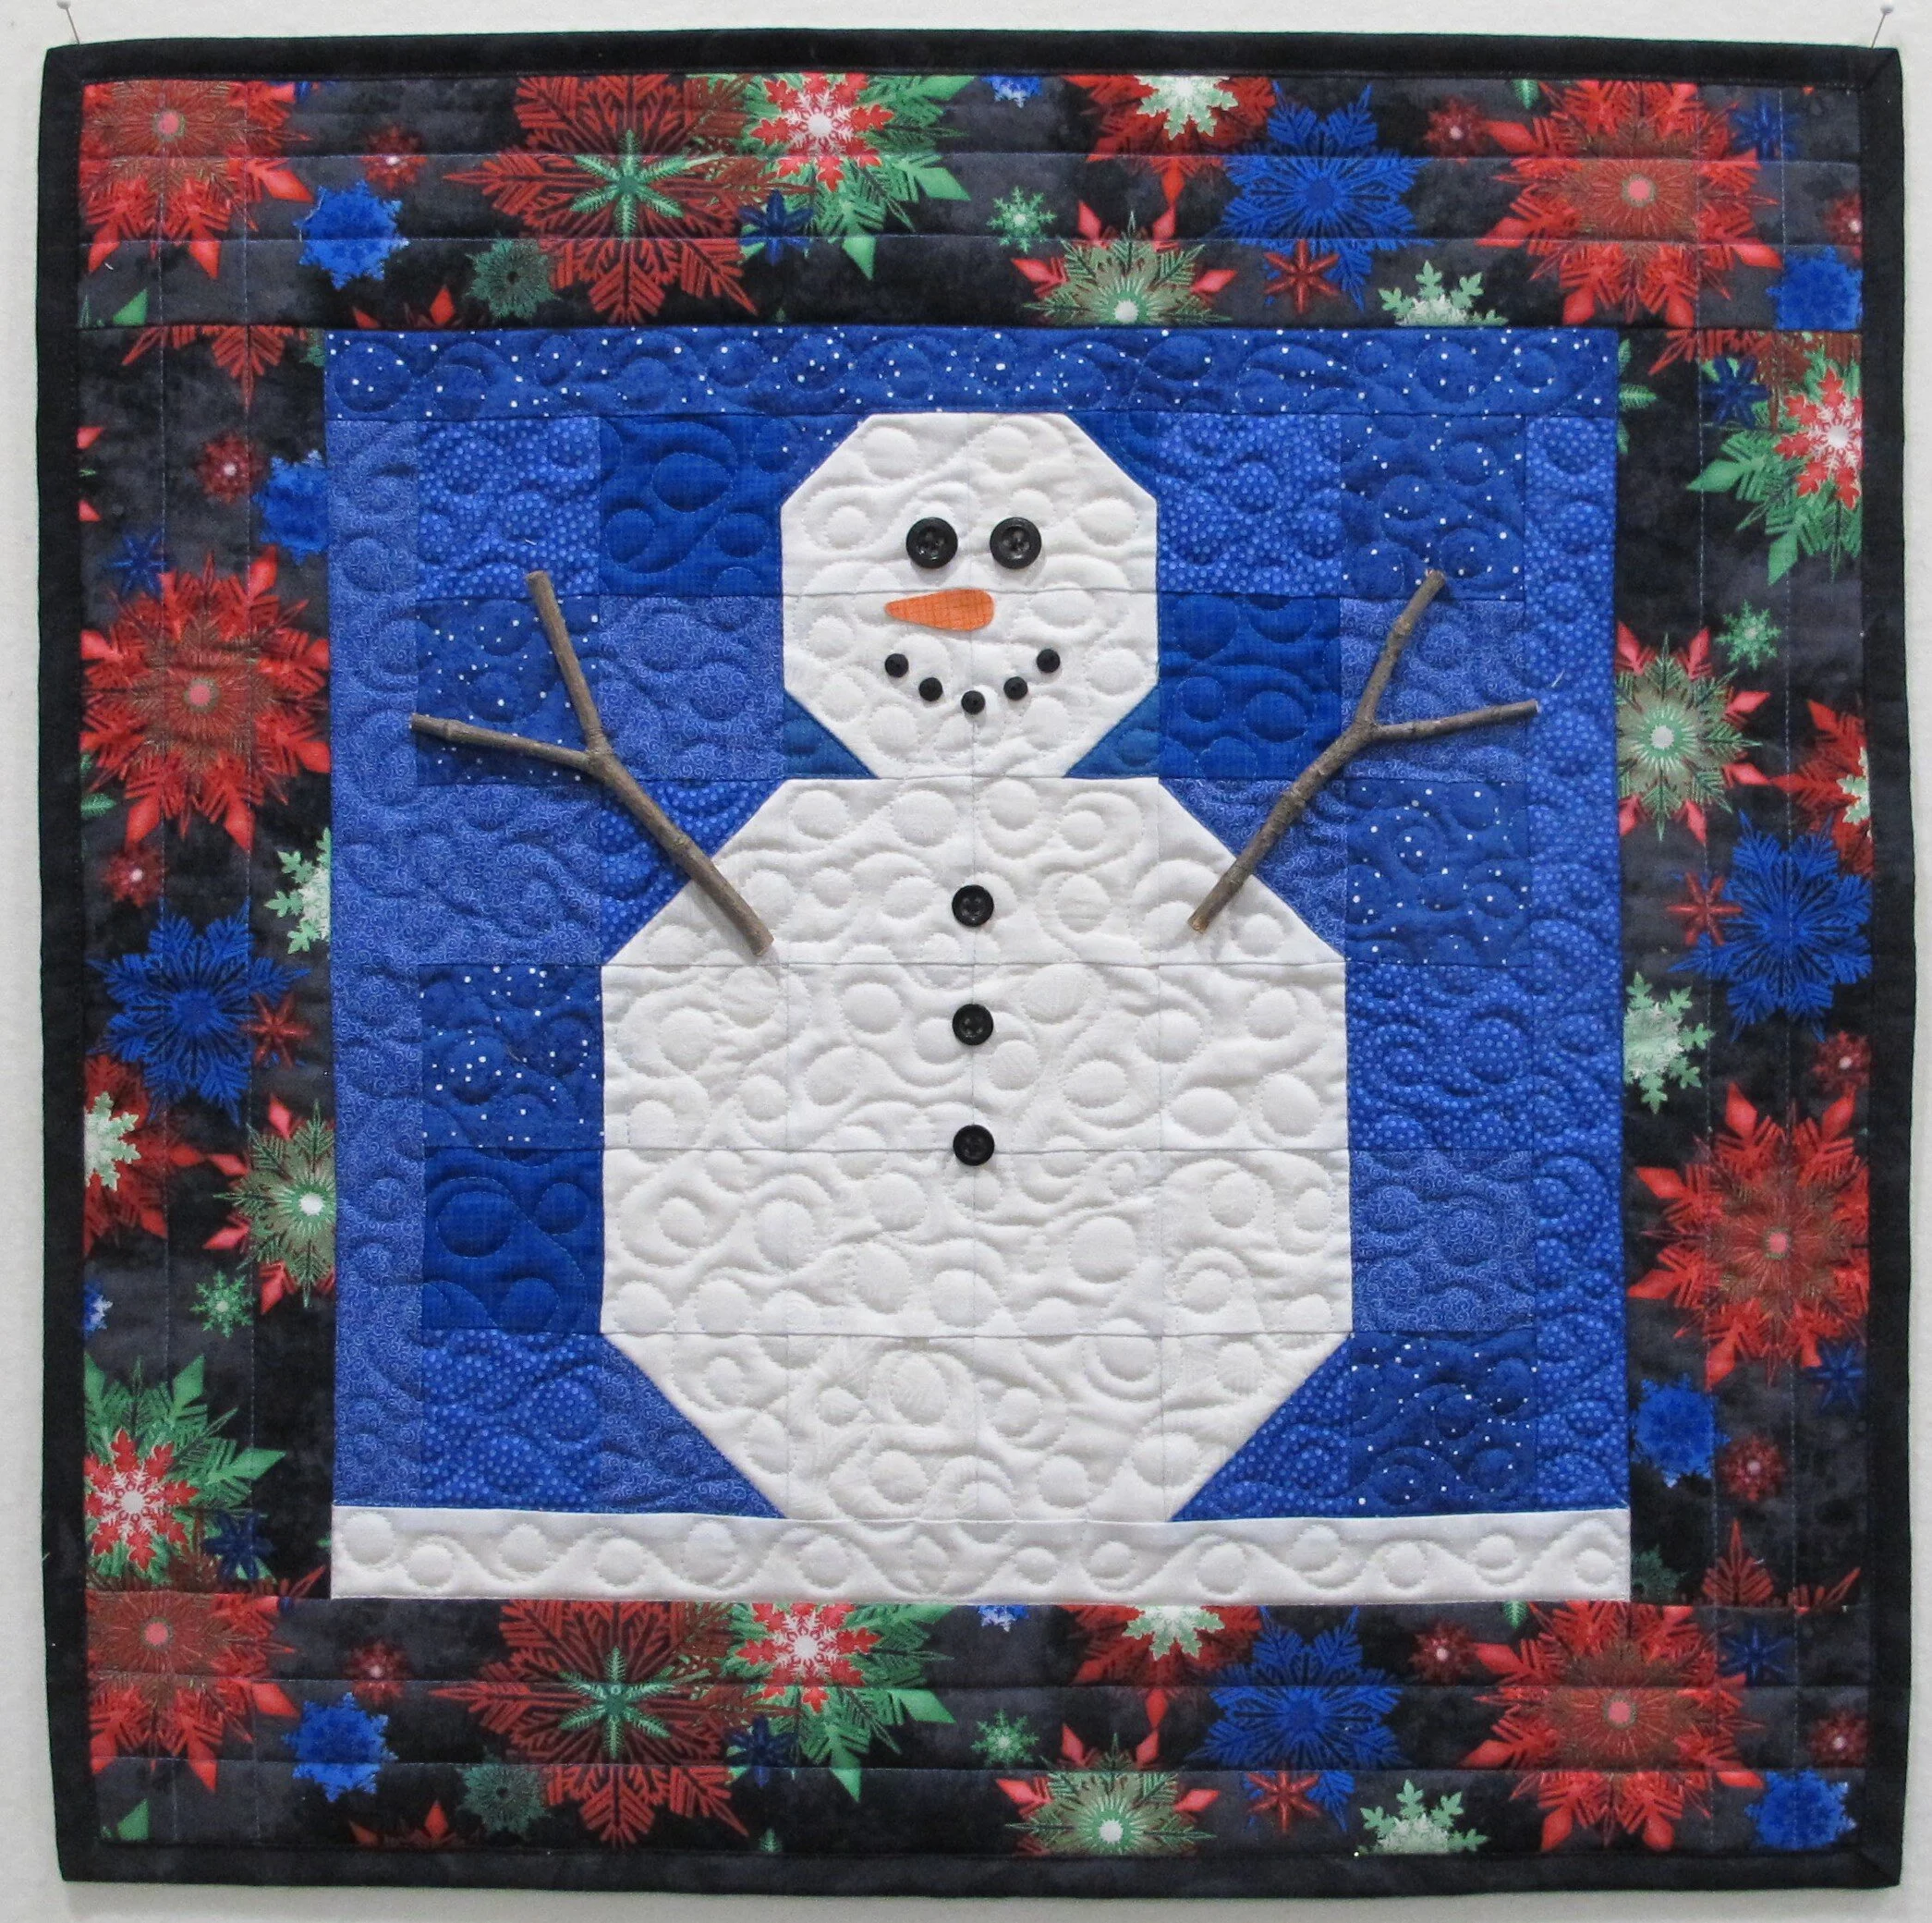
January’s Snowman is a shout out to our cold Canadian winters when we couldn’t wait for “packing” snow. Who else remembers hours and hours as a child building snowmen and snowforts and having snowball fights? Bring back those memories, and share them with someone else, with this fun snowman block.
(***scroll to the bottom of the page for a printable PDF version of this pattern)
Cutting Instructions (for one 12” finished block- it will be 12 ½” before sewing on 1 ½” strips):
Outer border fabric (.25 m / ¼ yd): *** you might not want to cut the outer border lengths until your block is completed with narrow background borders in case seam allowances are not consistent
cut two 3 ½” WOF (width of fabric) strips (cut one 14 ½” and one 20 ½” length from each strip)
Binding: three 2 ½” strips (.25 m / ¼ yd)
Backing: one piece 23” square
Batting: one piece 23” square
Hanging sleeve: one piece 5” x 20 ½”
From a variety of white on white scraps:
cut sixteen 2 ½” squares
cut two 3” squares
cut one 1 ½” x 14 ½” strip
From a variety of blue scraps:
cut sixteen 2 ½” squares
cut two 3” squares
cut four 1 ½” squares
cut 2 strips 1 ½” x 12 ½”
cut 1 strip 1 ½” x 14 ½”
Sewing instructions:
*** ¼” seam allowances are used throughout. Refer to my Scant Quarter Inch tutorial for your own perfect ¼” seam.
Half Square Triangles (HST's): gather up the 3” squares from above (*** the following HST's are in different colours...the prepping is the same)
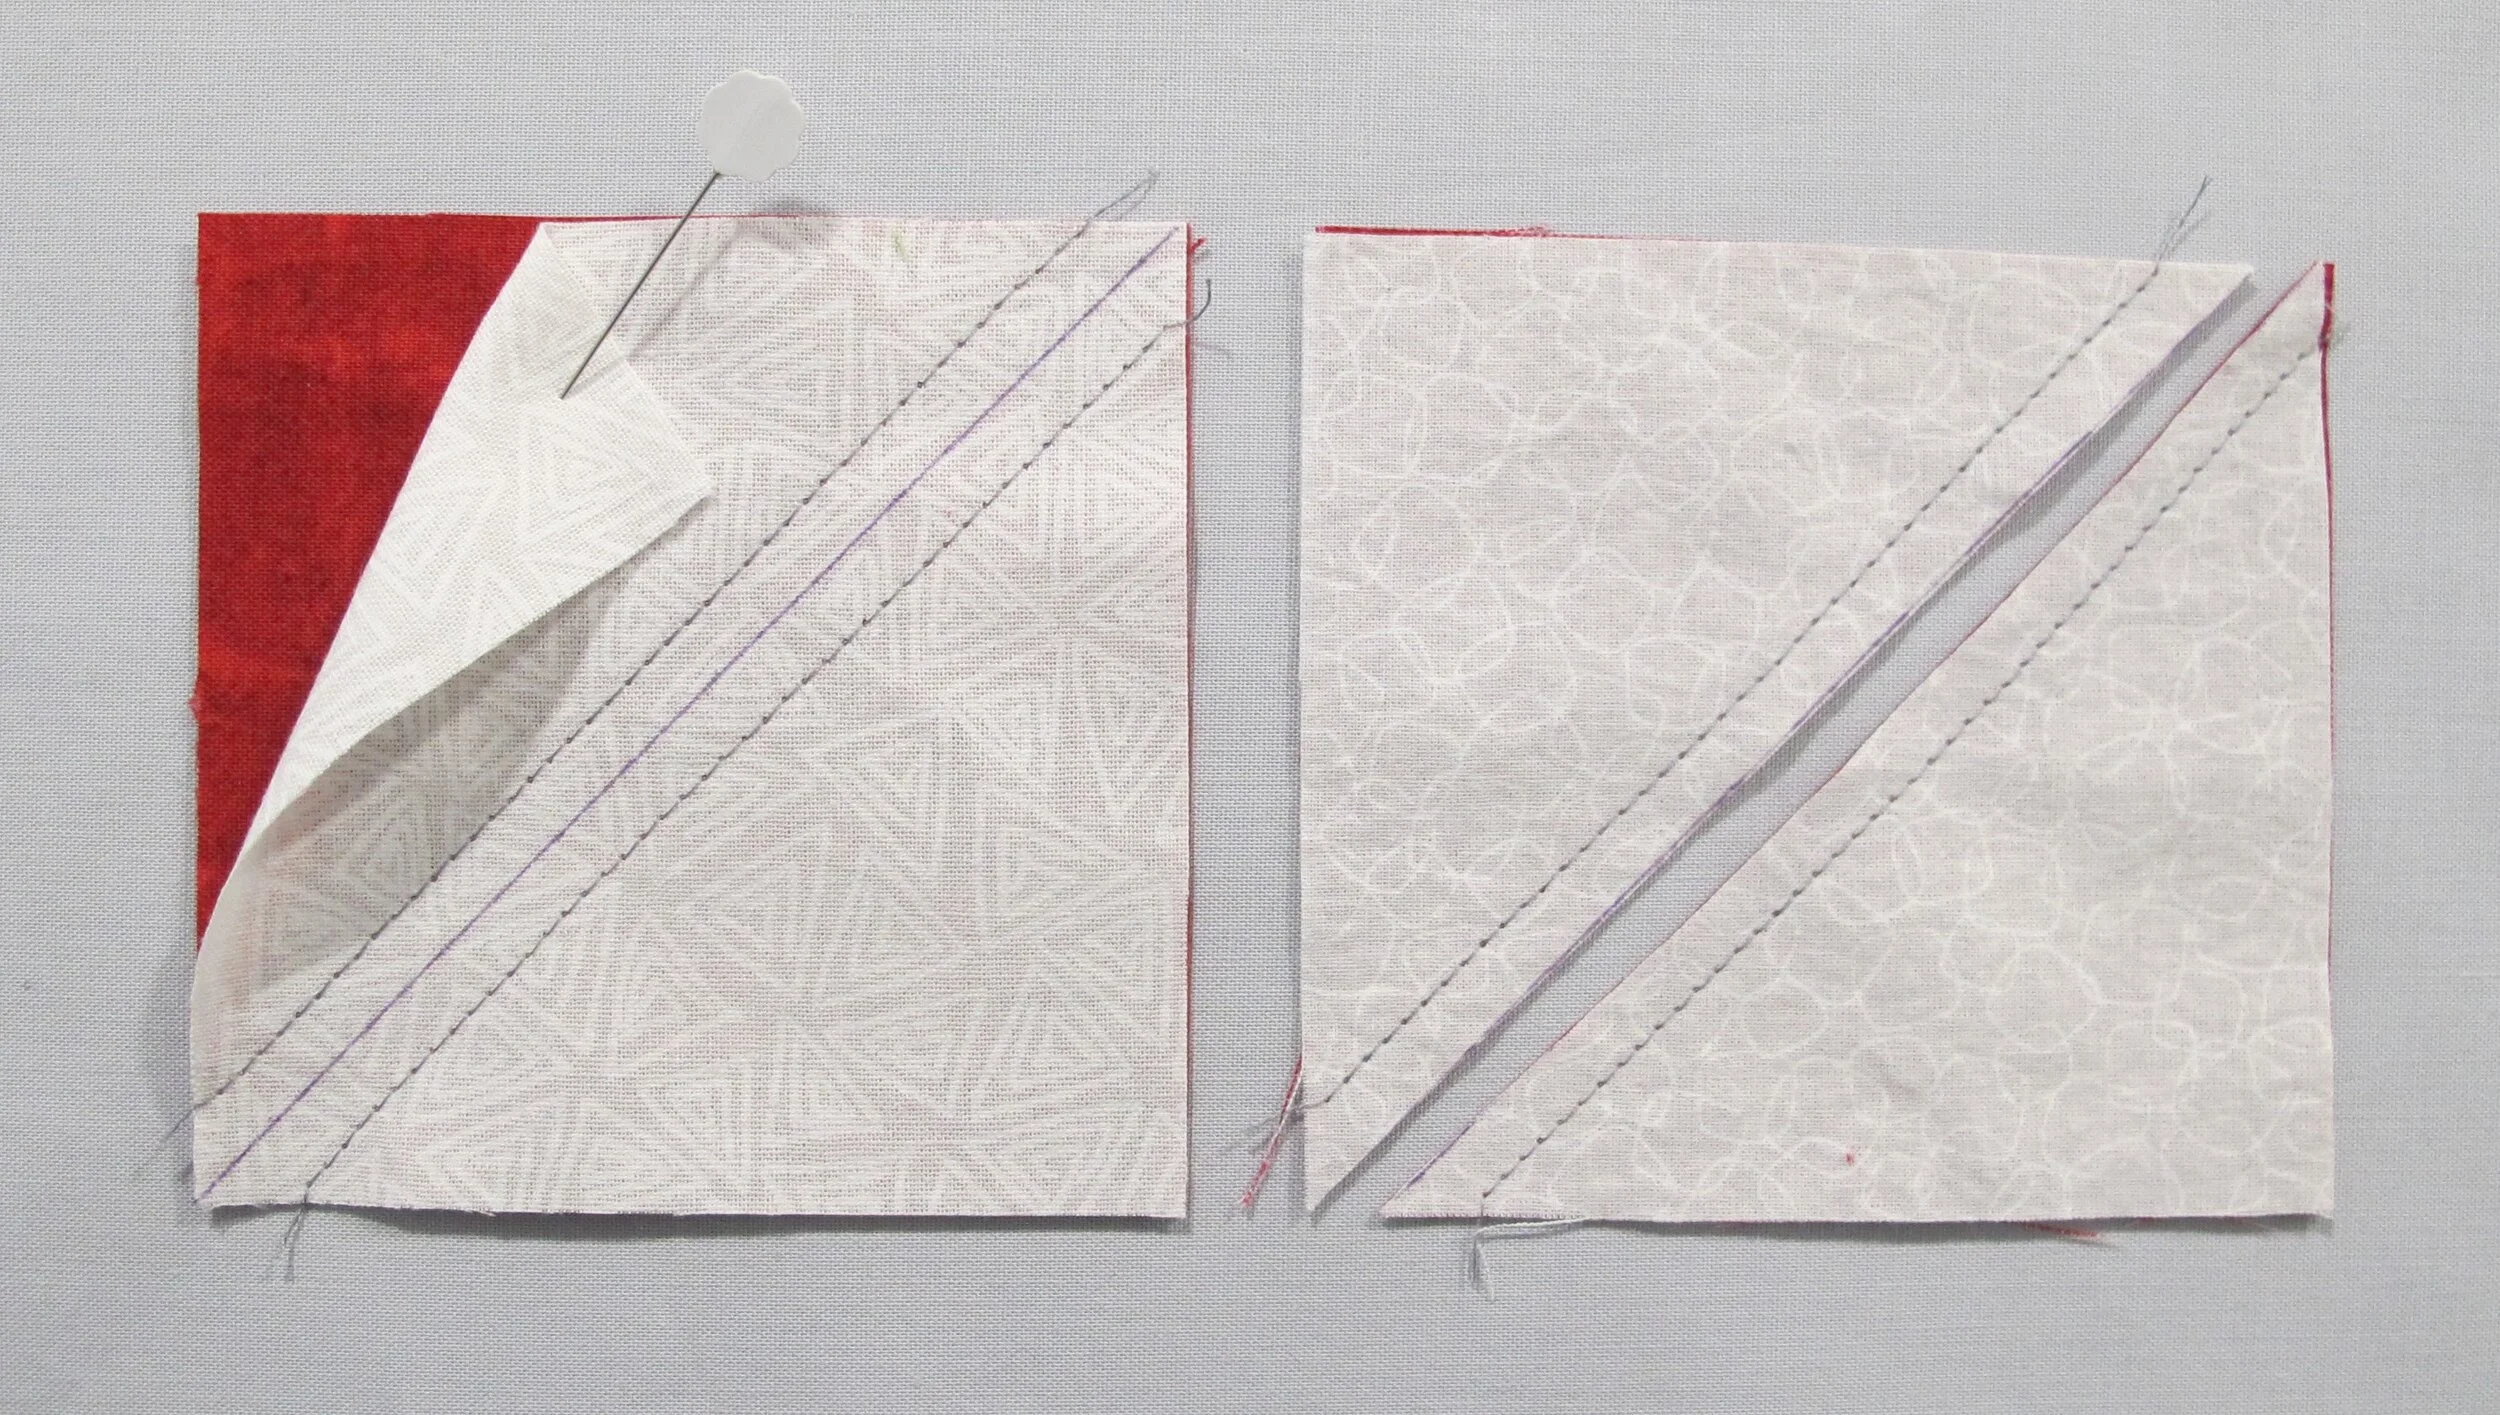
figure 1
draw a diagonal line on the back of the 3” white squares
with right sides together place a white square with a blue square and stitch ¼” from both sides of the drawn line (repeat for remaining set)
cut them apart along the drawn line and press towards the blue (figure 1)
Trimming HST's: (*** the following HST's are in different colours...the trimming is the same)
line up the diagonal line from the ruler on top of the seam line making sure that the entire 2 ½” area of the ruler is on top of the HST and trim the excess from the right and top of the square (figures 2 & 3)
turn the HST around and place the 2 ½” markings from the ruler on the already trimmed corner and trim the final 2 sides (figures 4 & 5)...repeat with all HST's
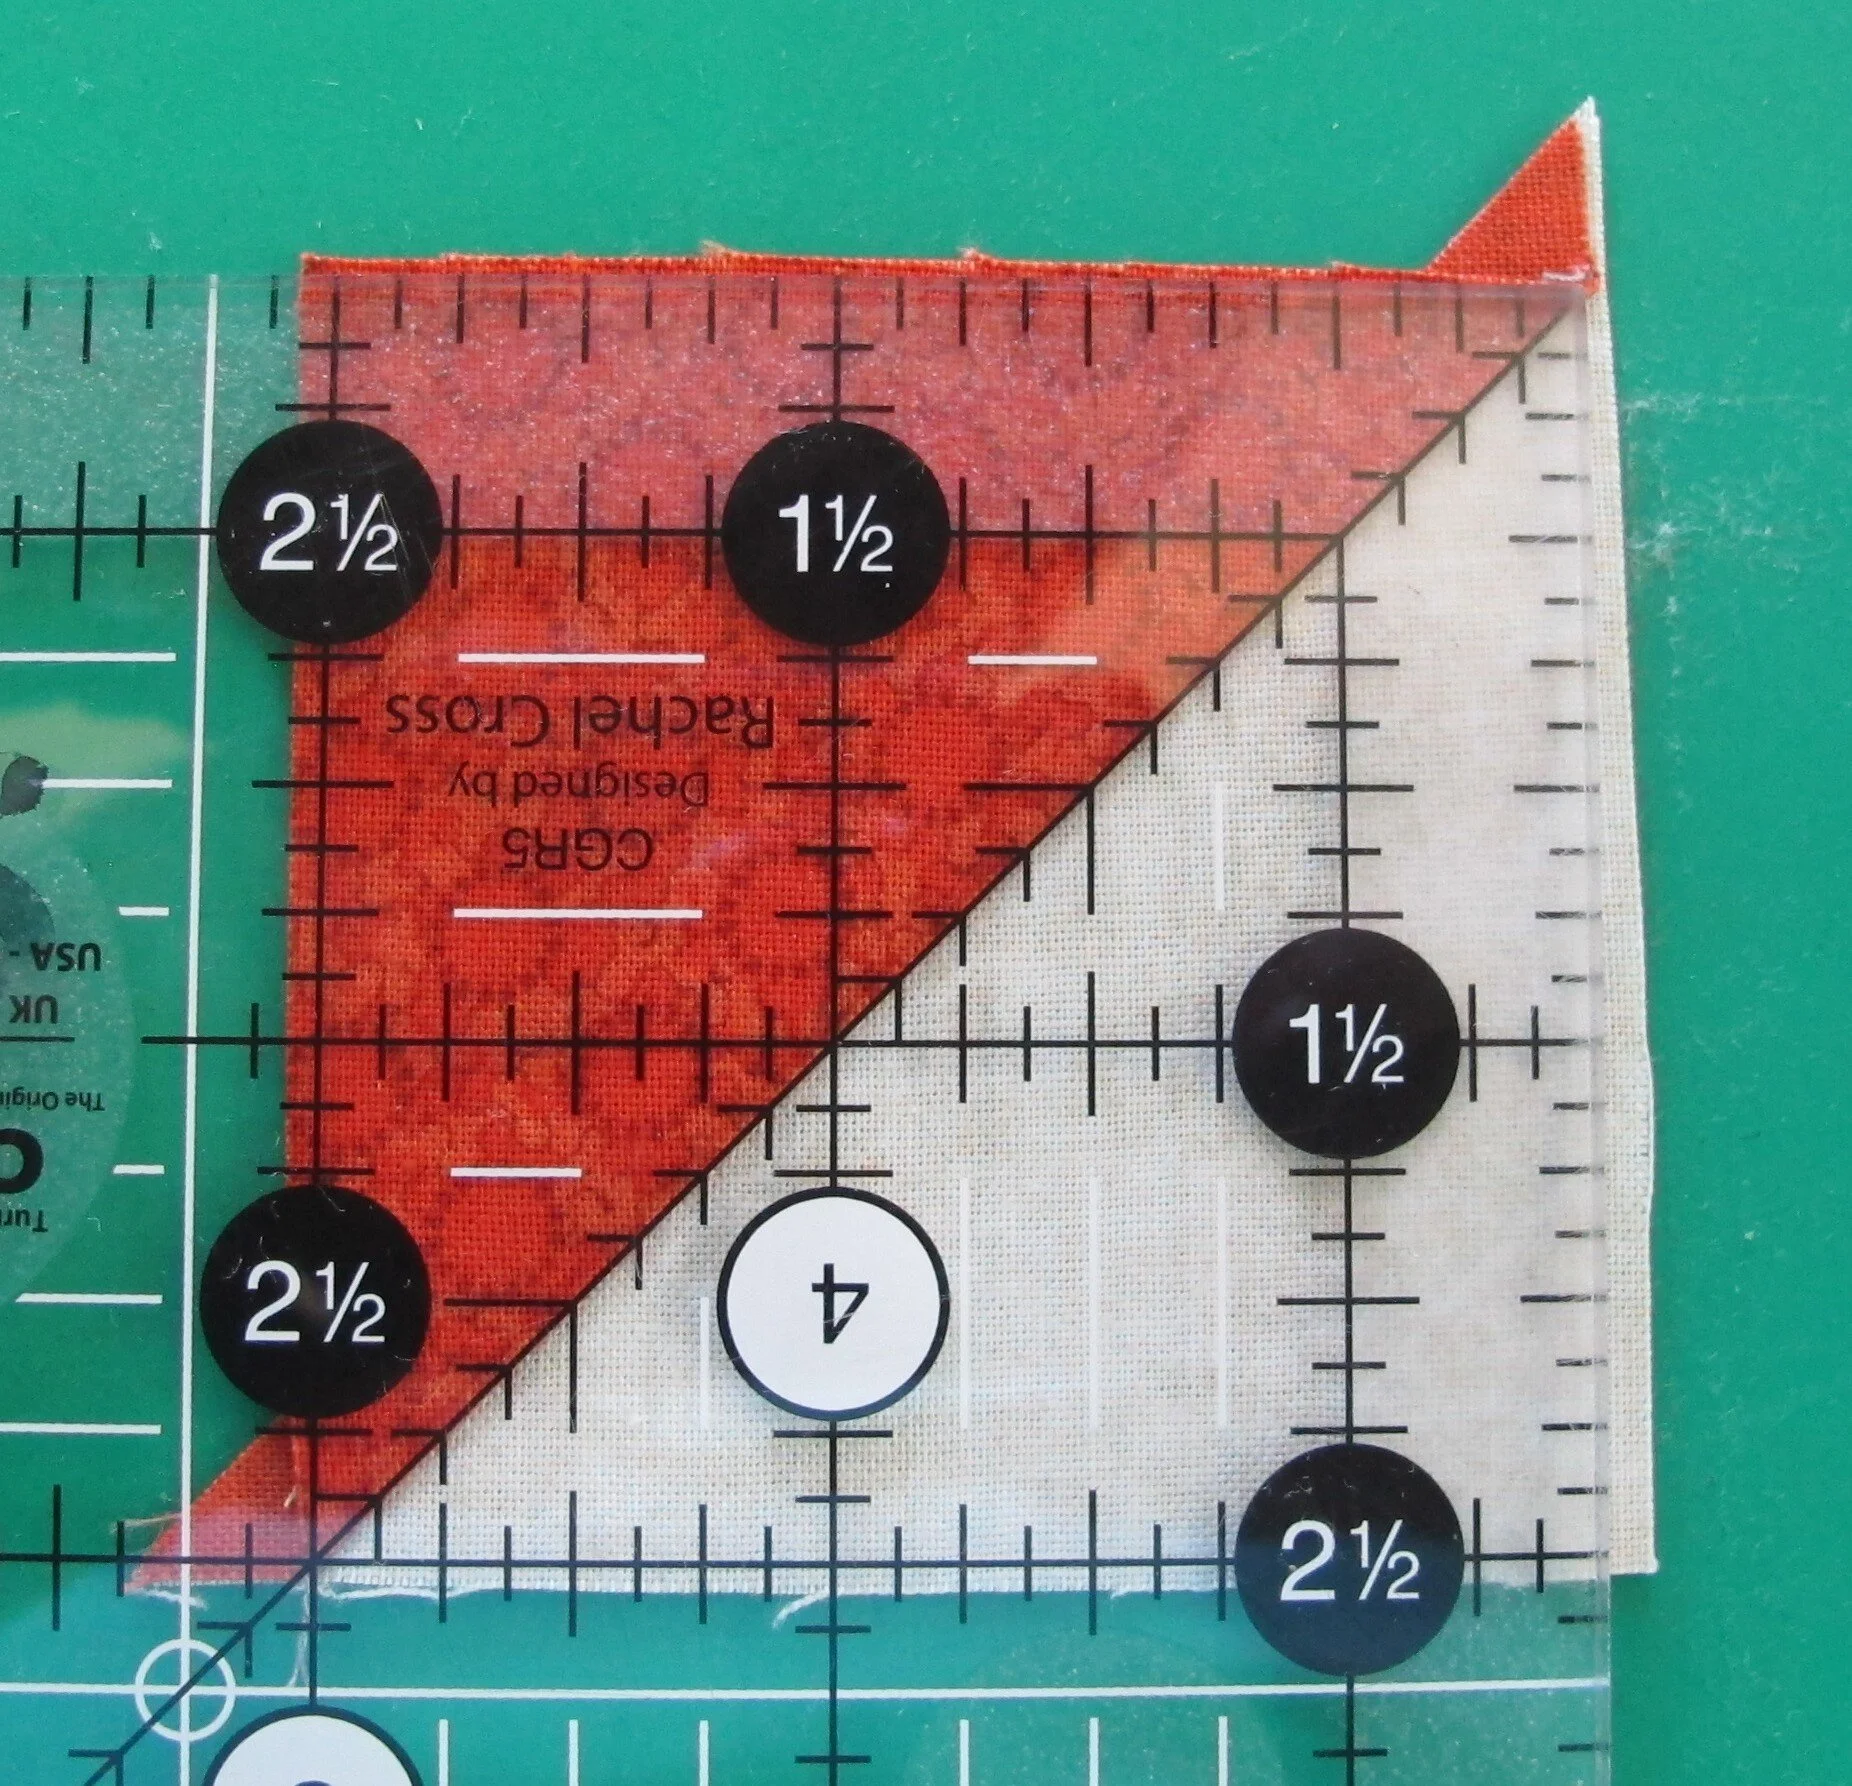
figure 2
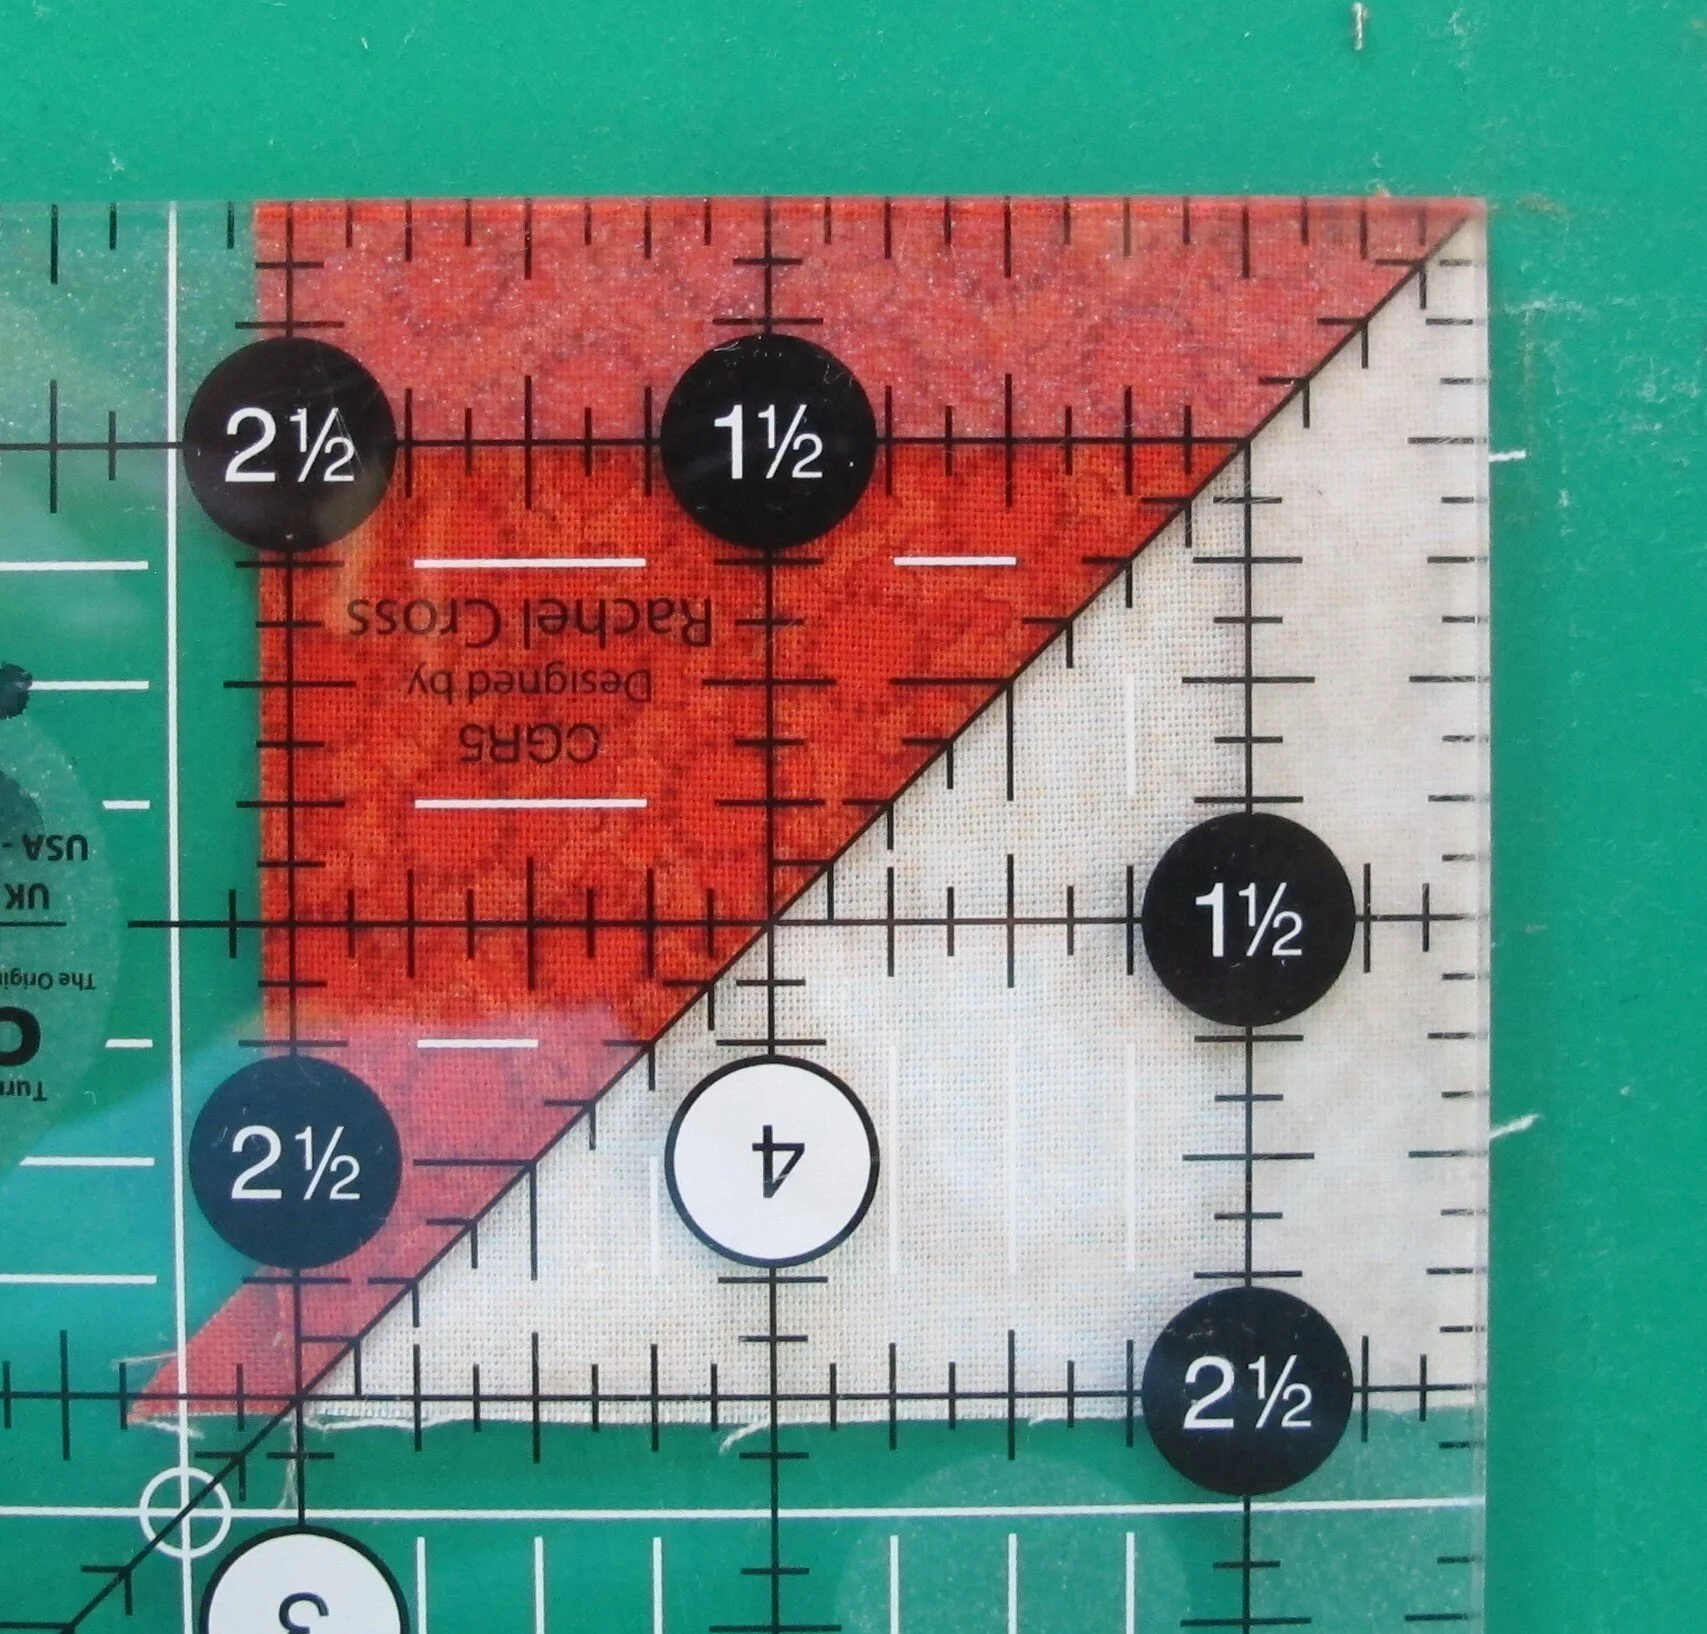
figure 3
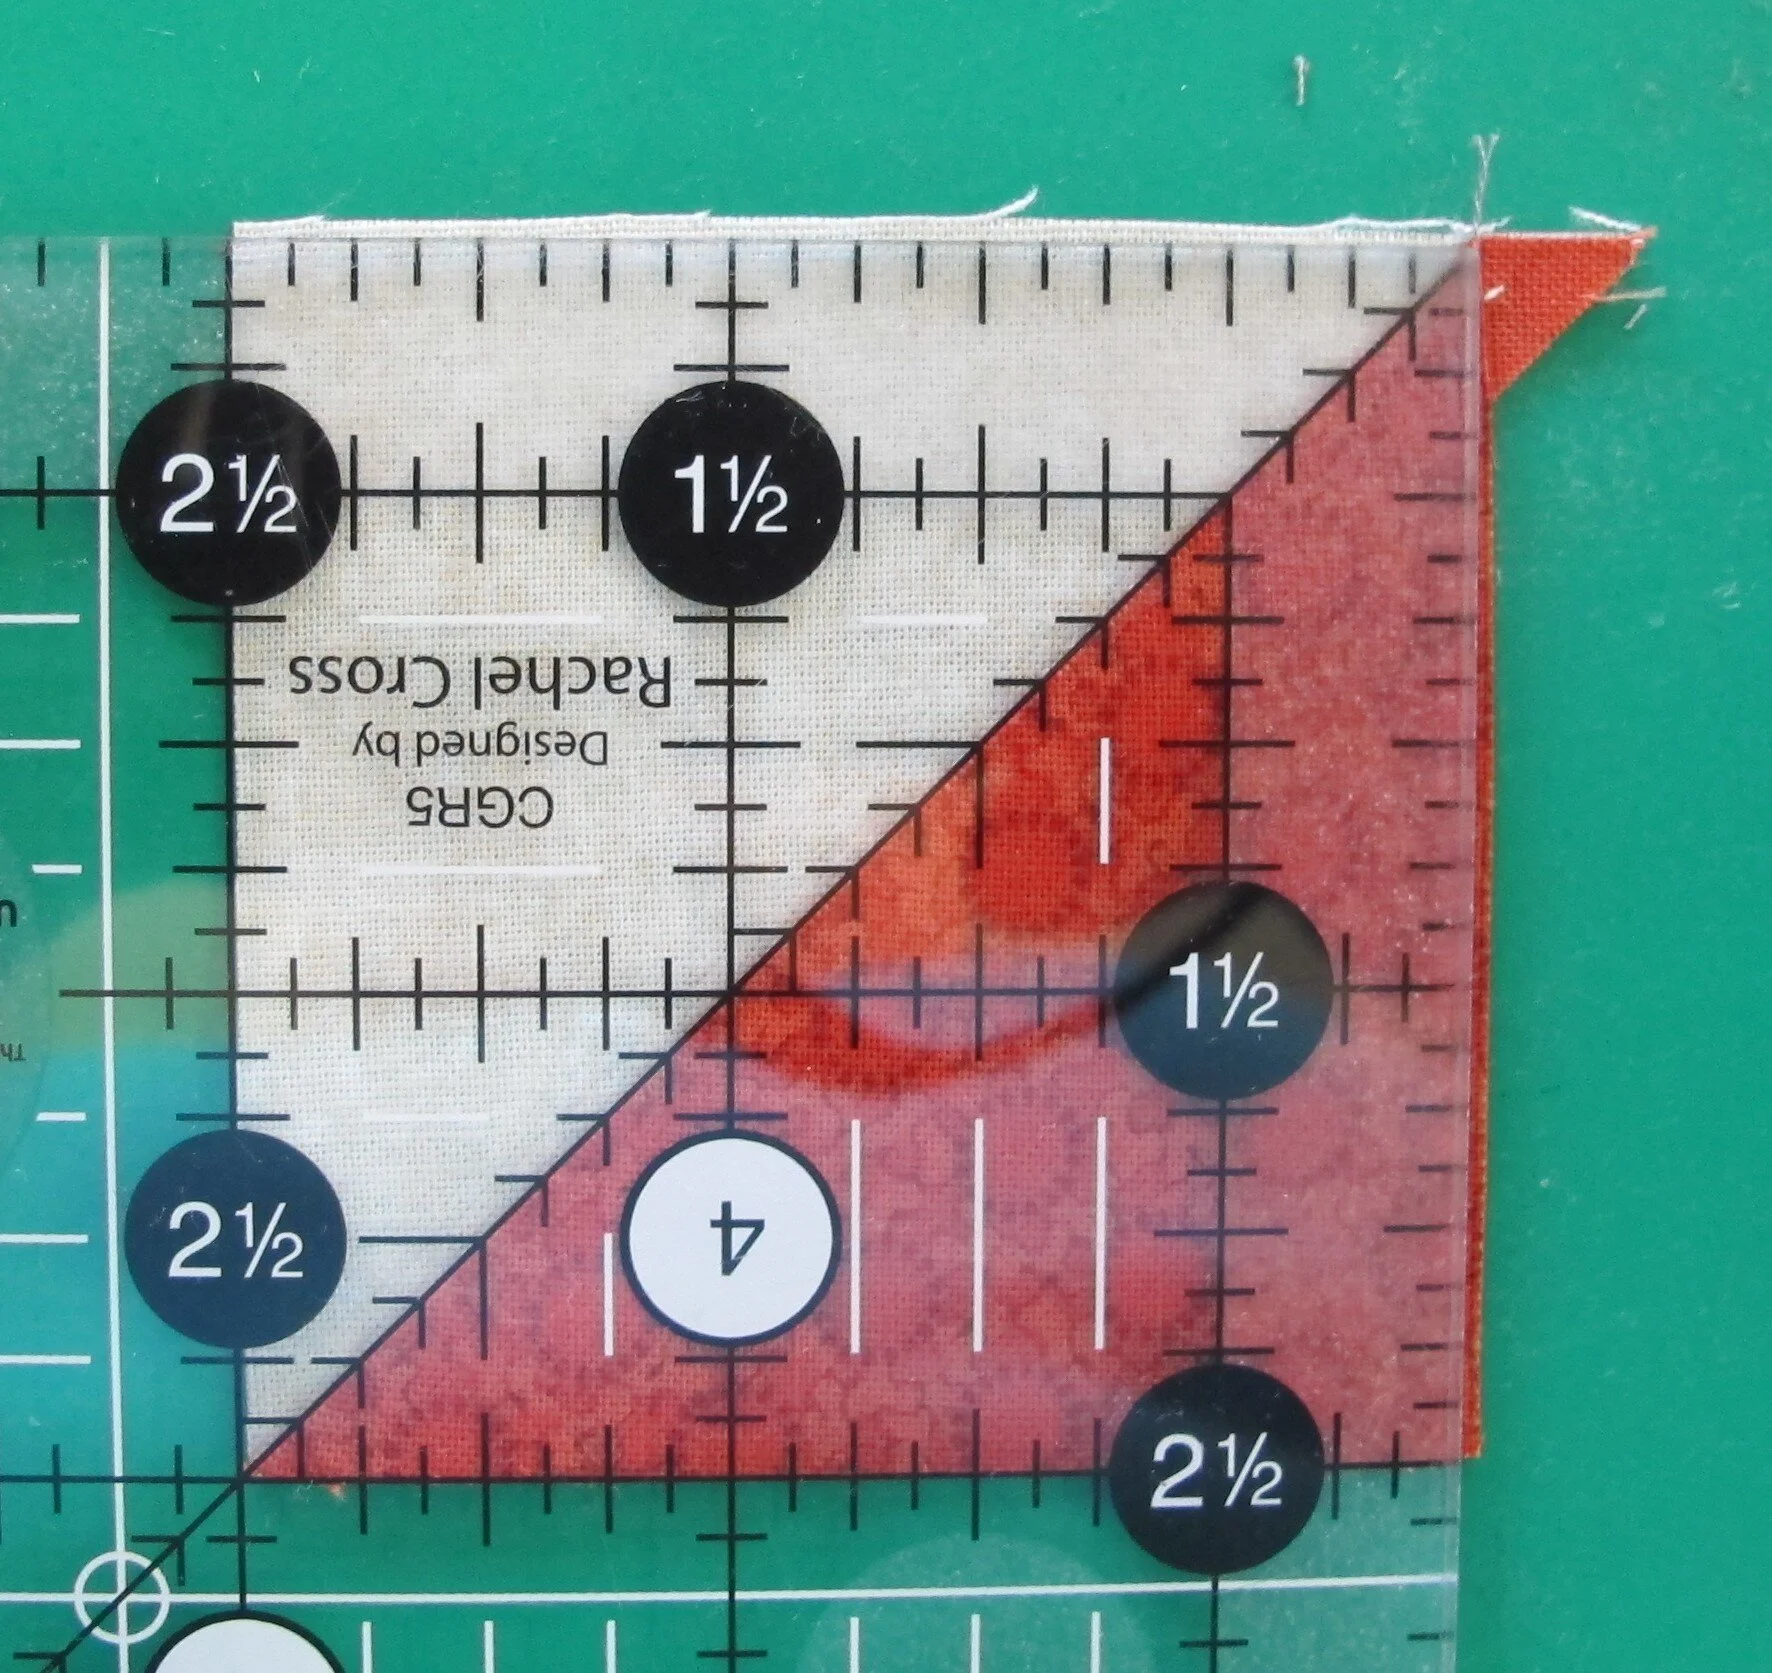
figure 4
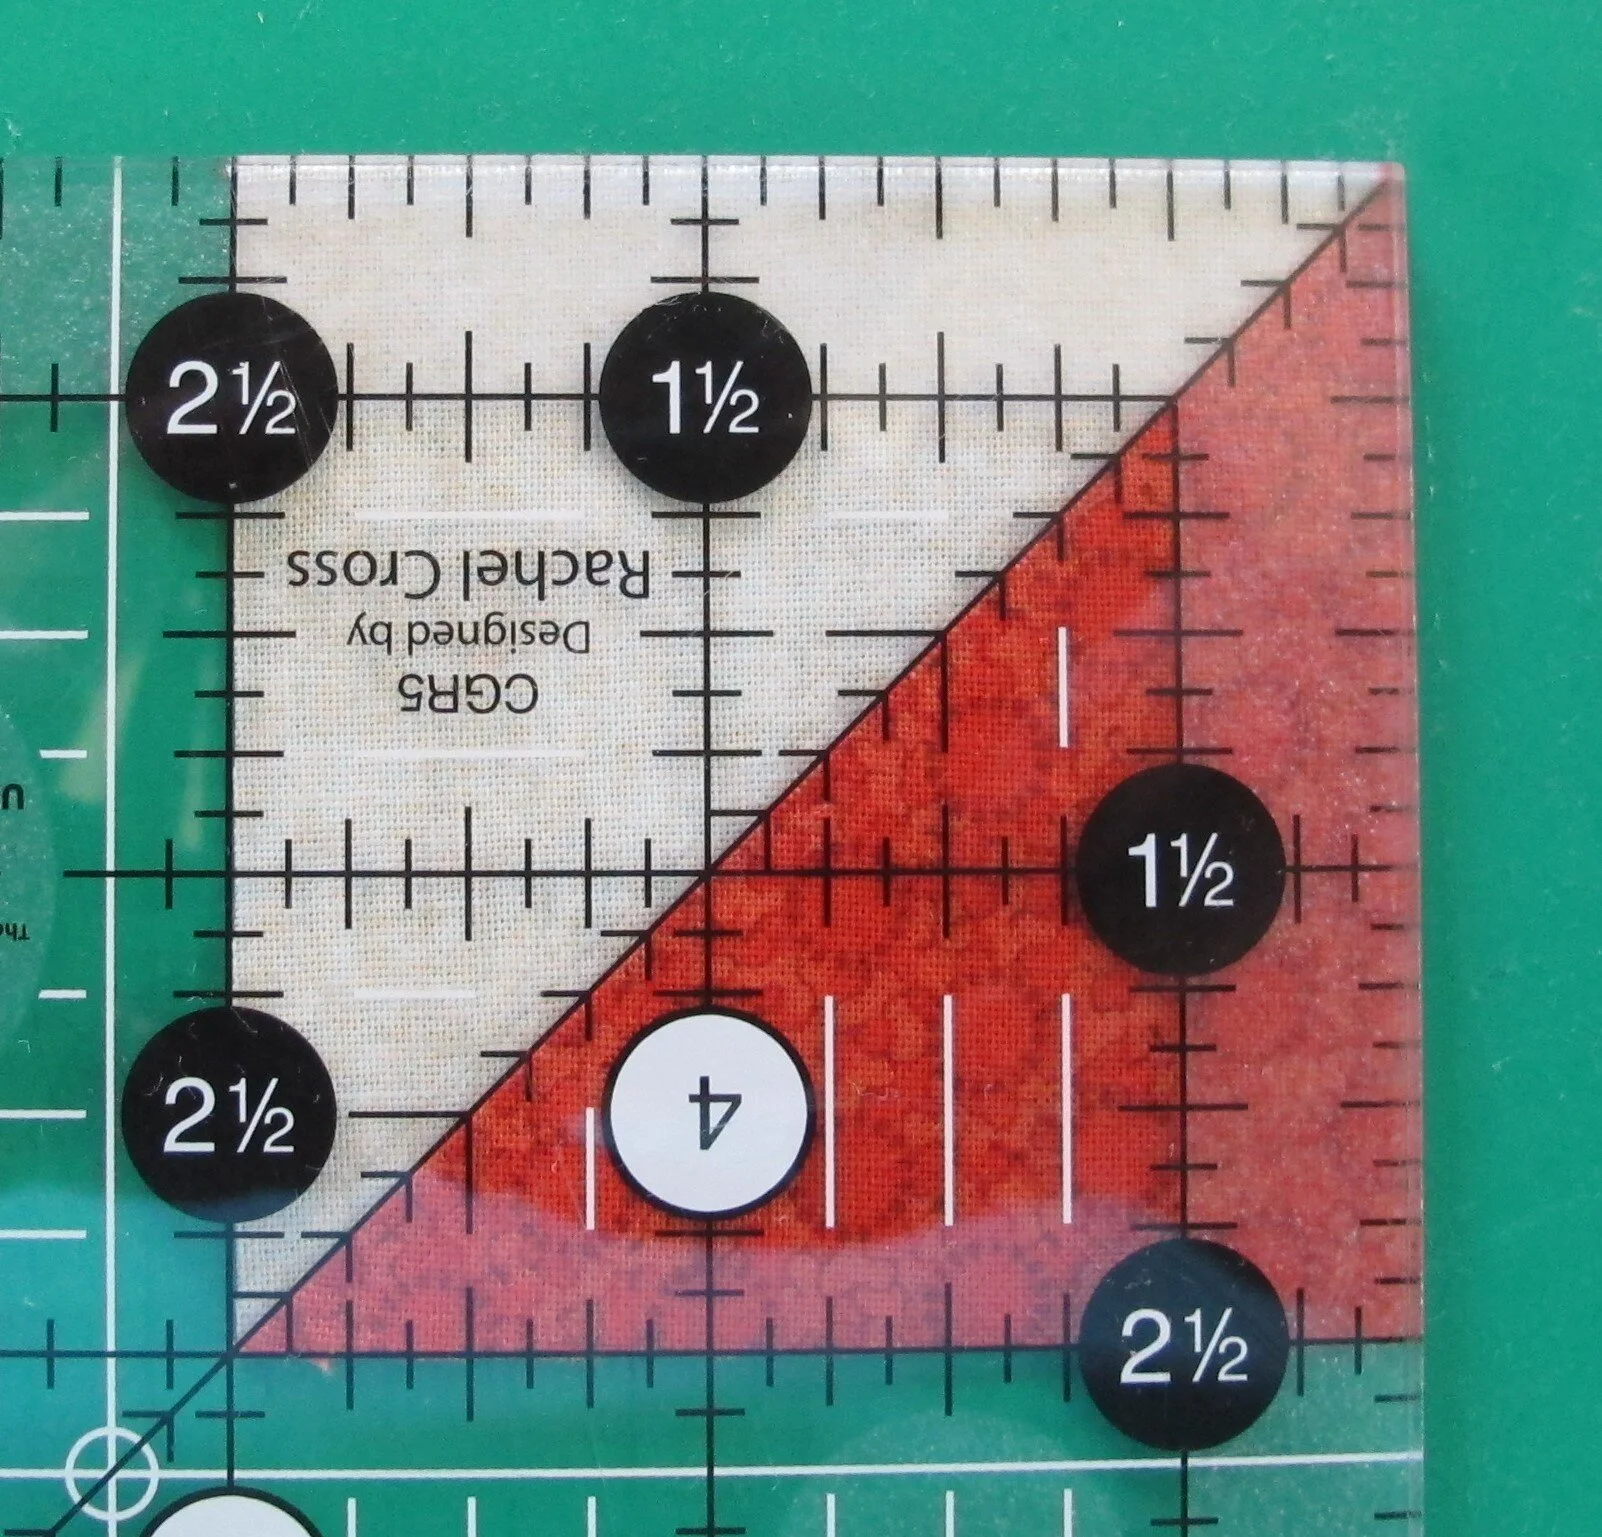
figure 5
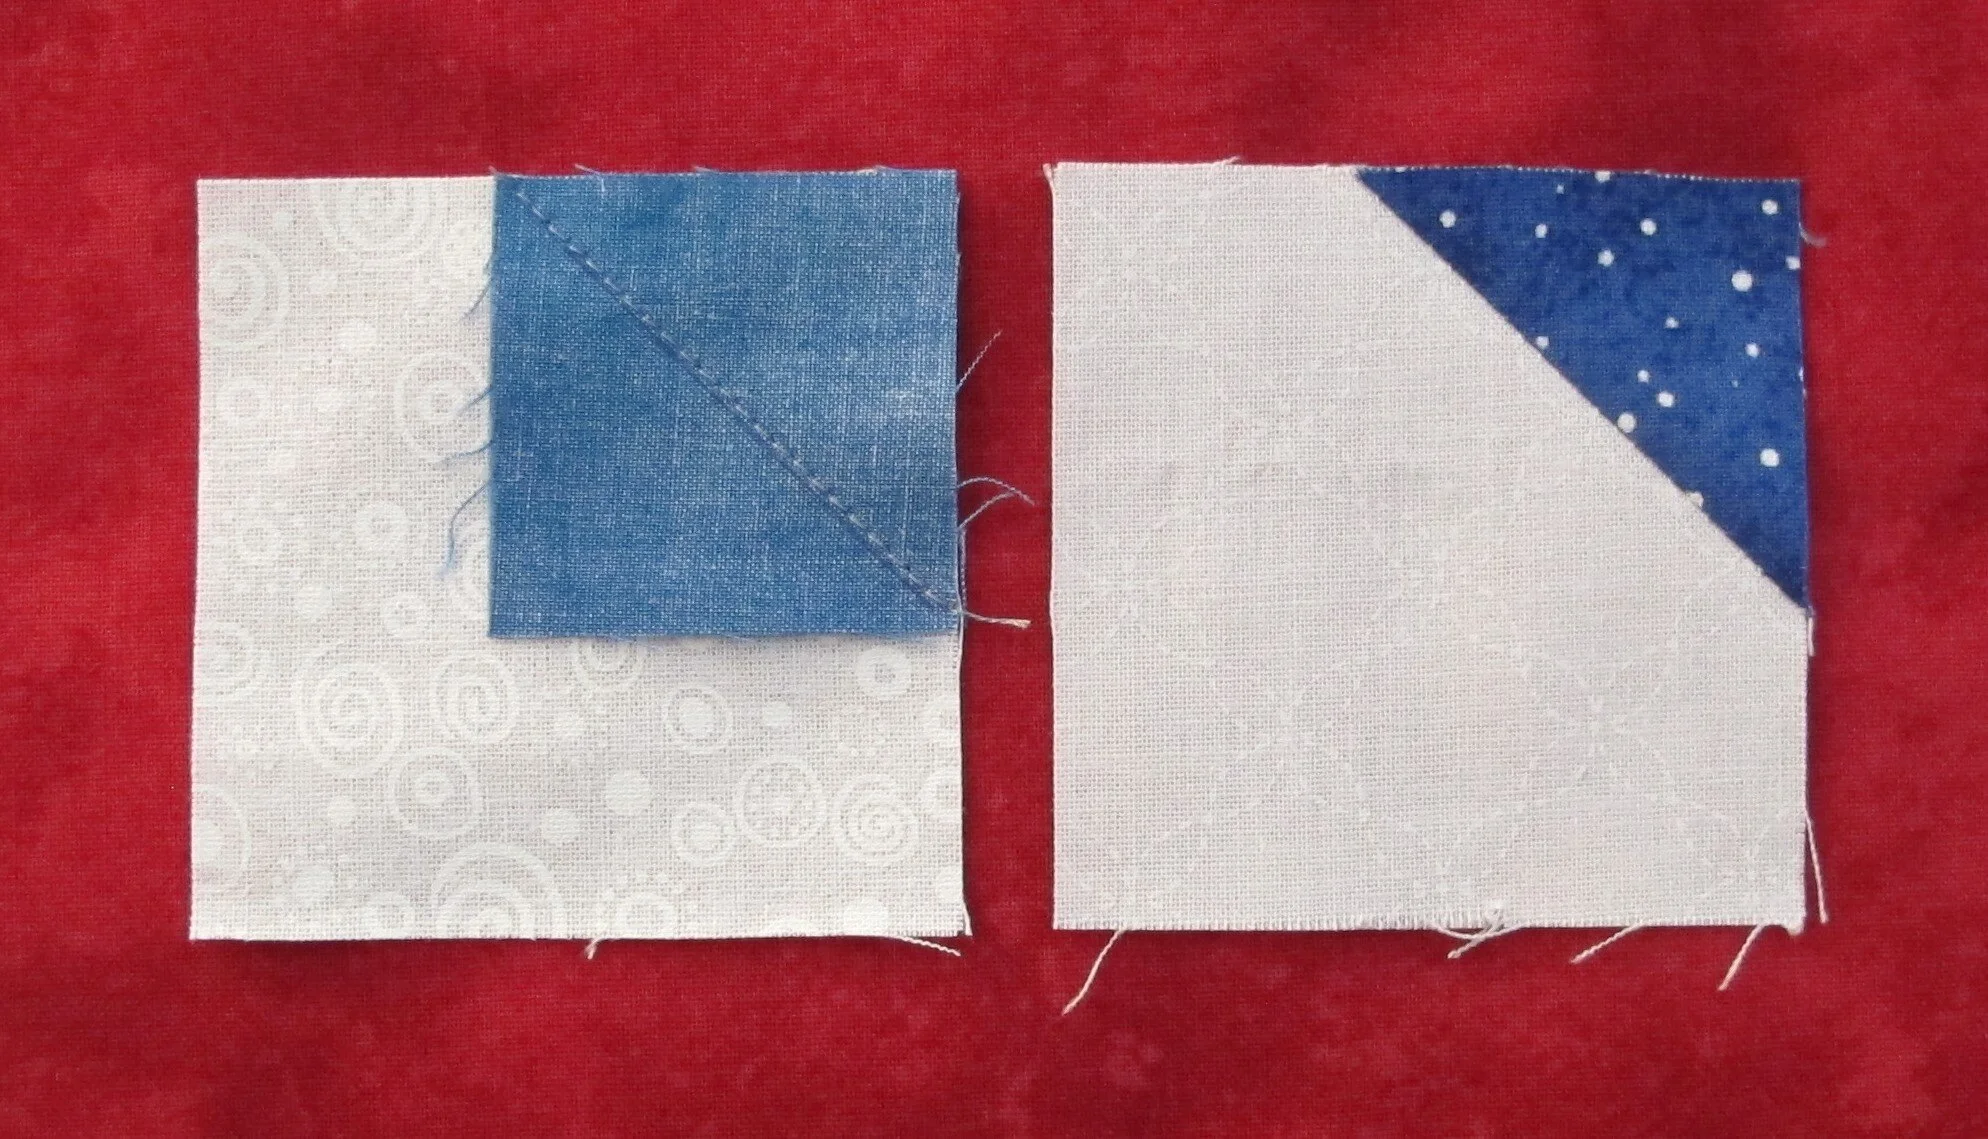
figure 6
Snowman head: four 2 ½ white squares and four 1 ½” blue squares
draw a diagonal line on the back of all the 1 ½” blue squares
with right sides together place a blue square on one corner of a white square and stitch along the drawn line, repeat for the other 3 squares
trim the seam allowance to ¼” and press to the corner (figure 6)
Block layout:
lay out the squares, snowman head pieces and HST's by following the photograph below for placement (figure 7)
stitch squares in each row together and press seams in each row in the opposite direction to the one before it (figure 8)
stitch all rows together lining up seam lines (figure 9)
press seams in one direction
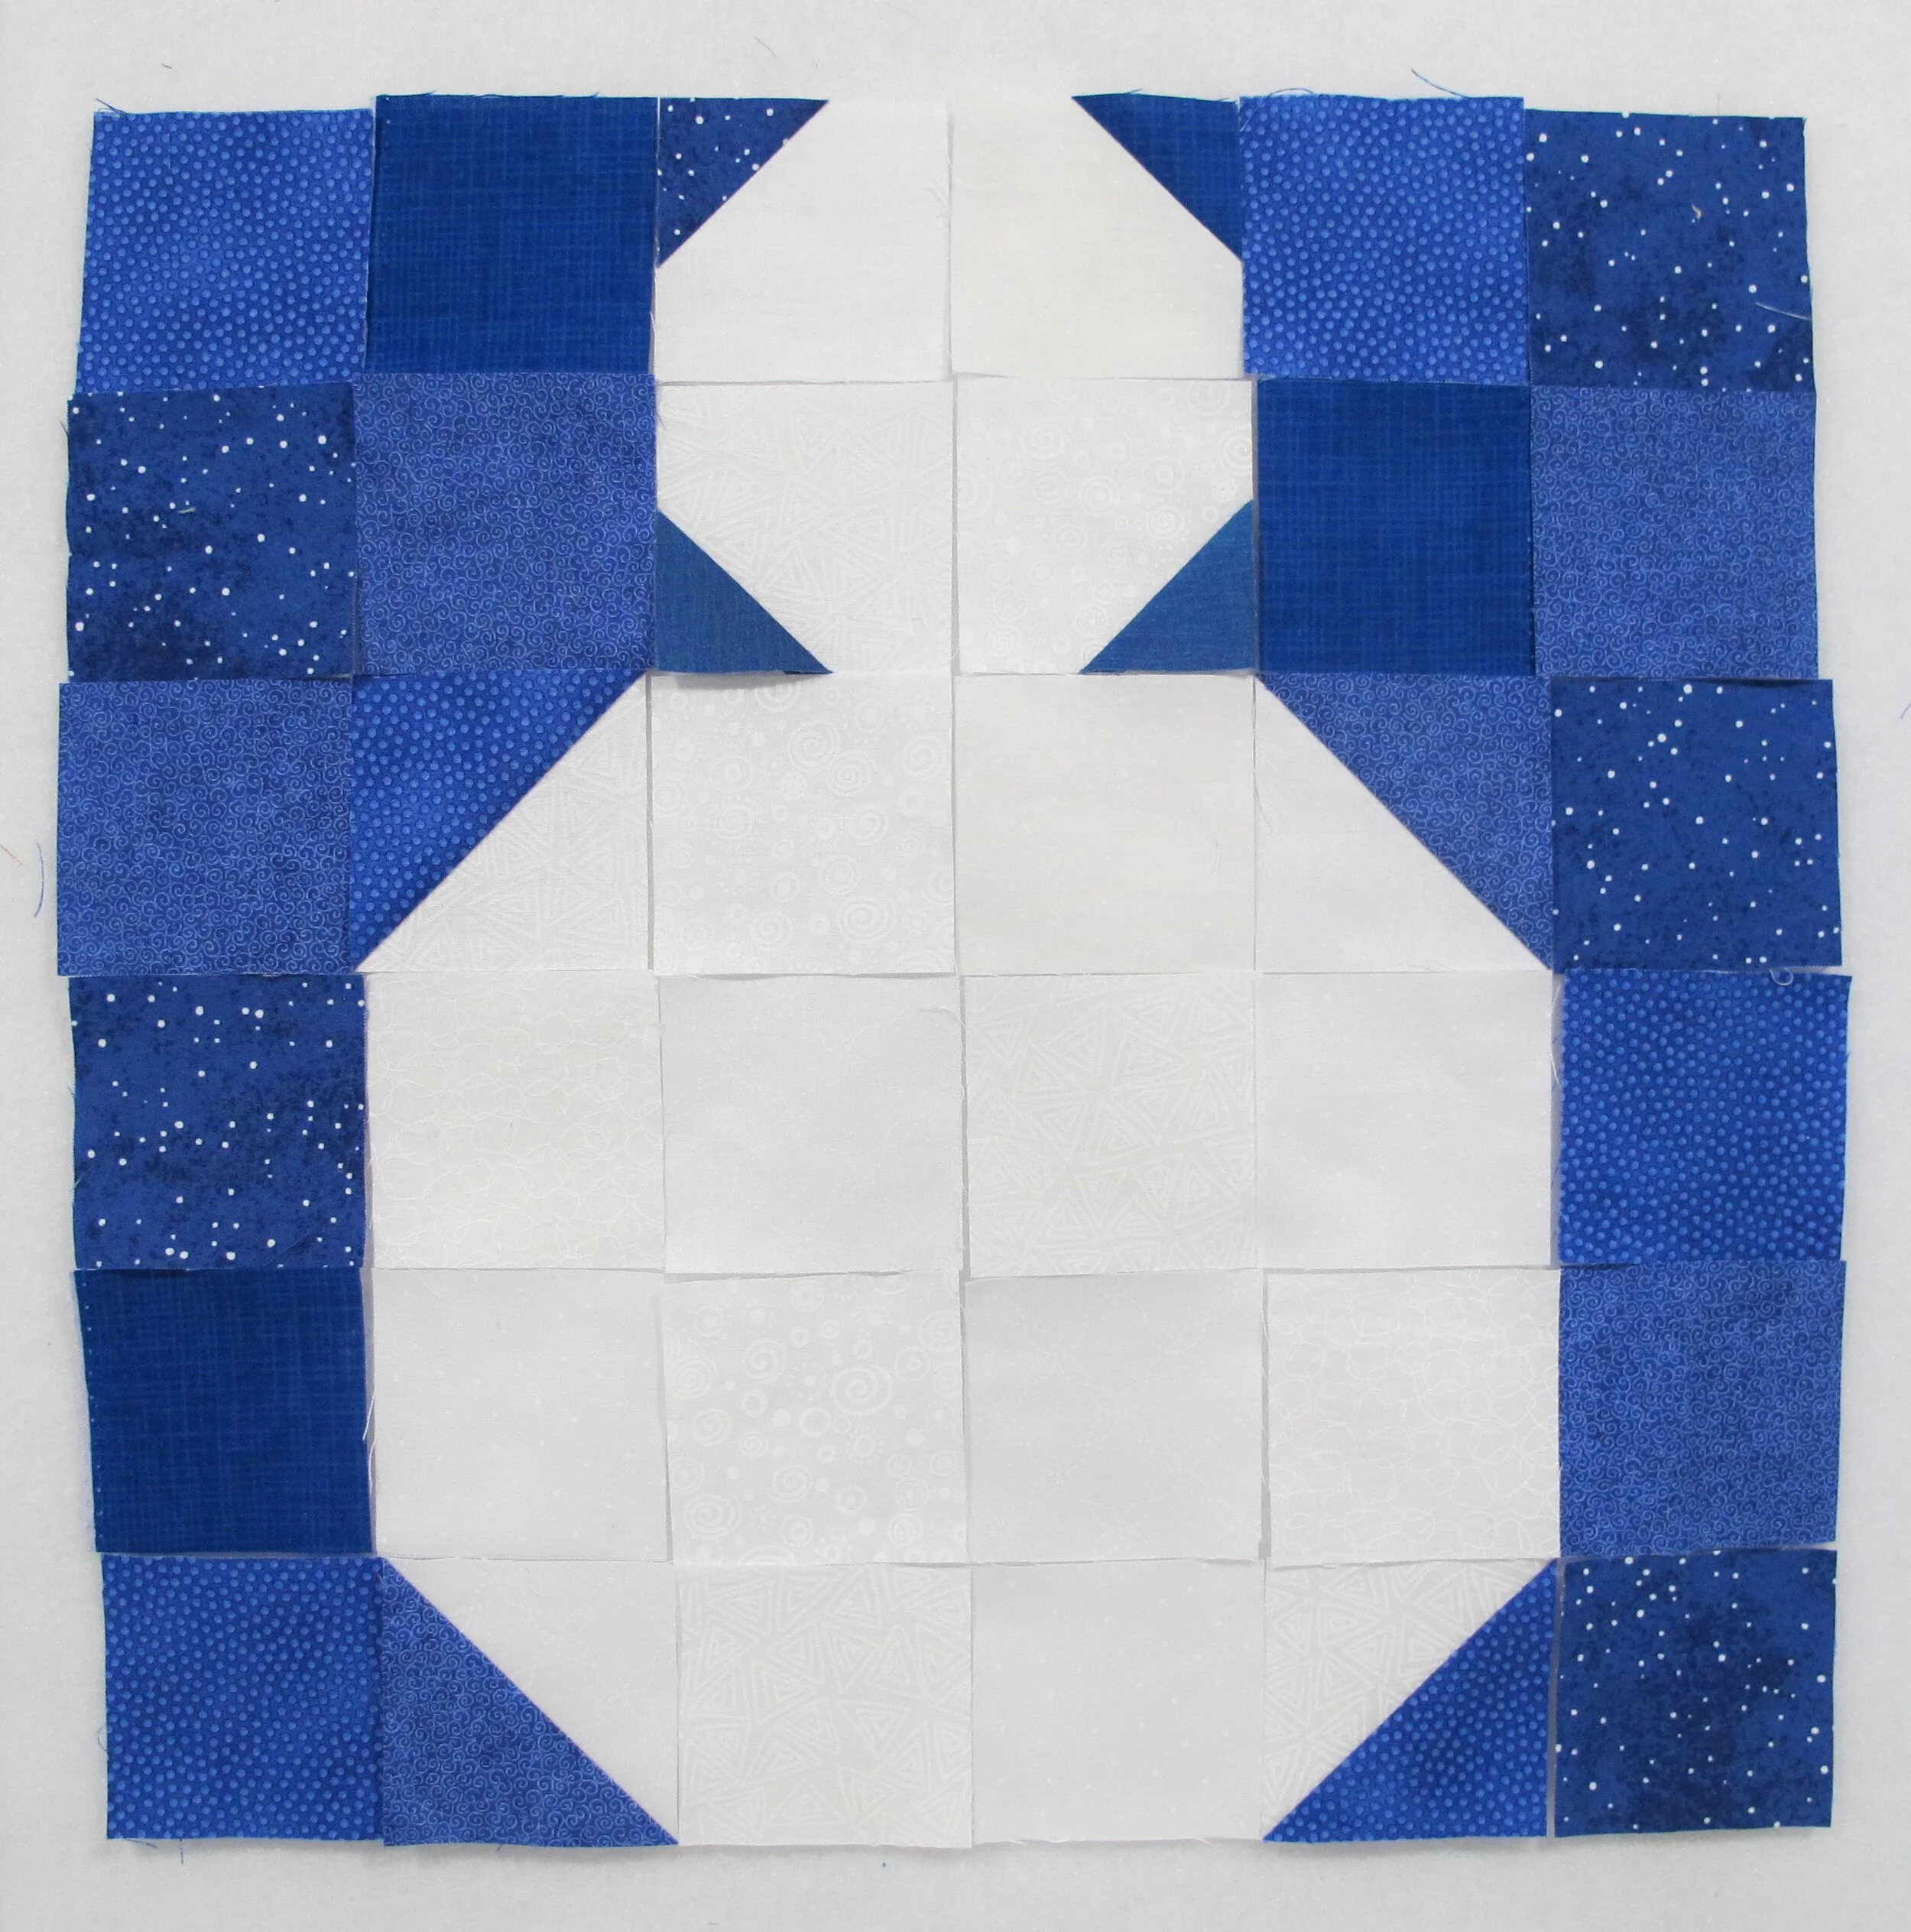
figure 7
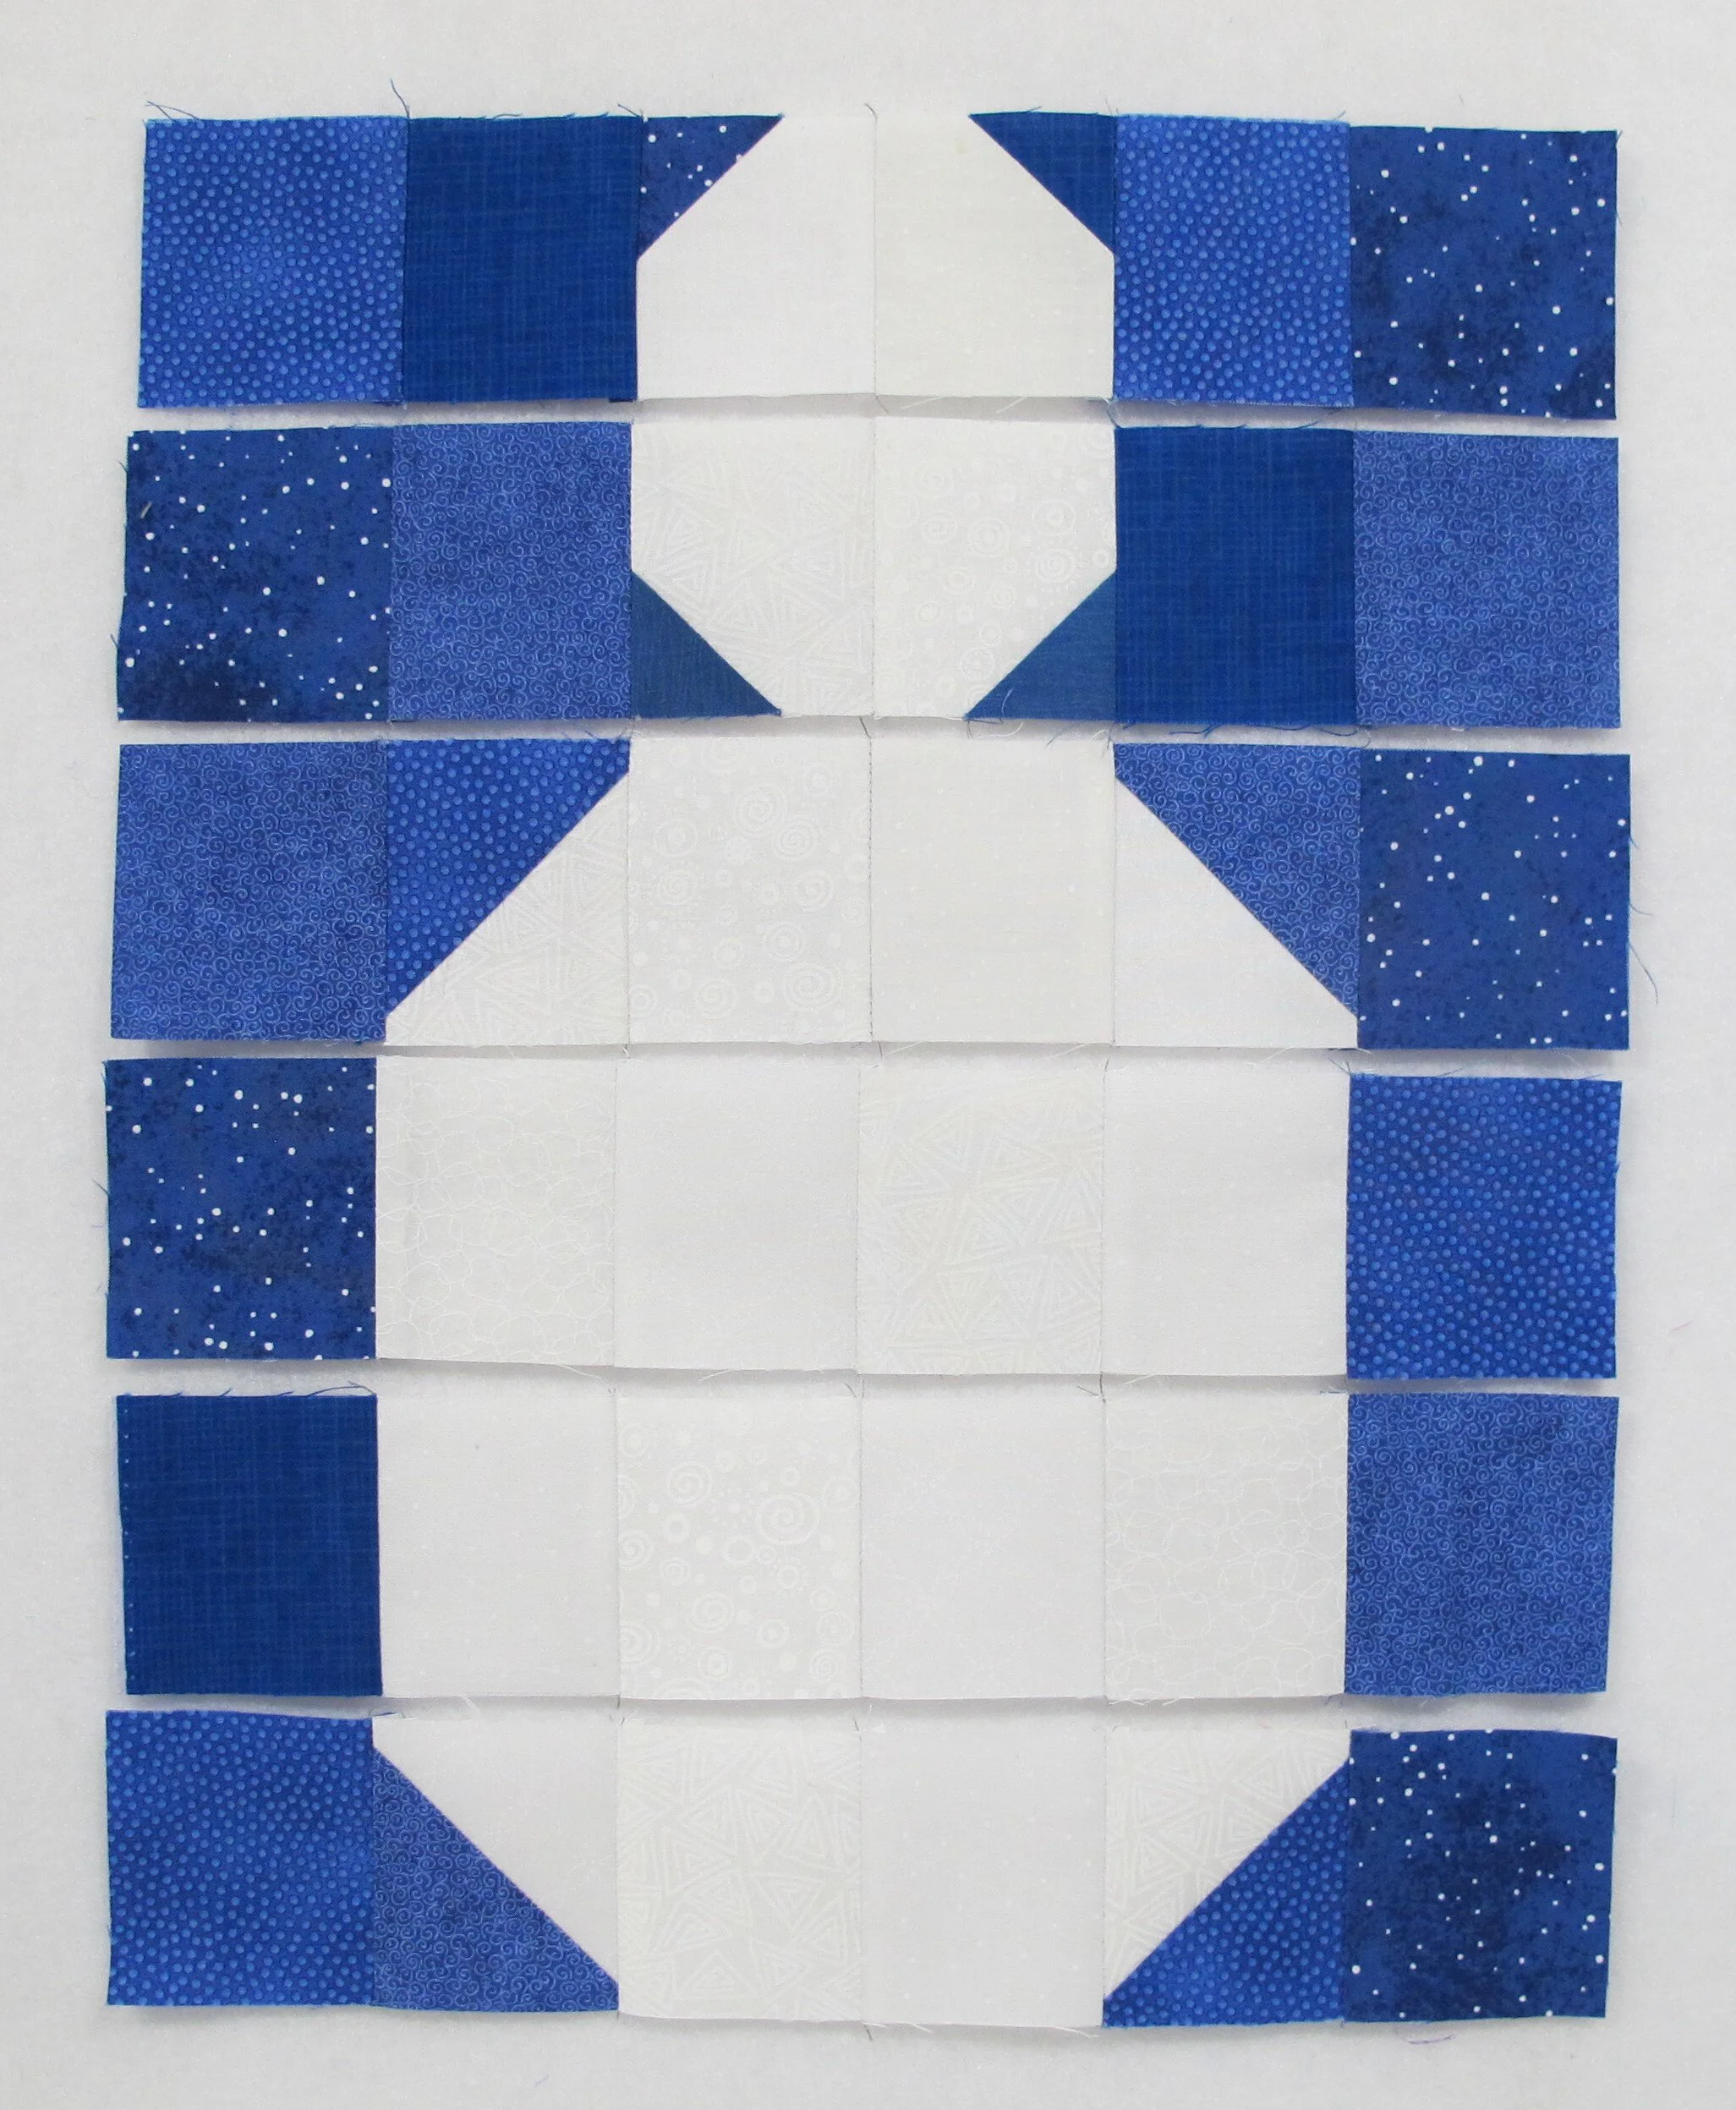
figure 8
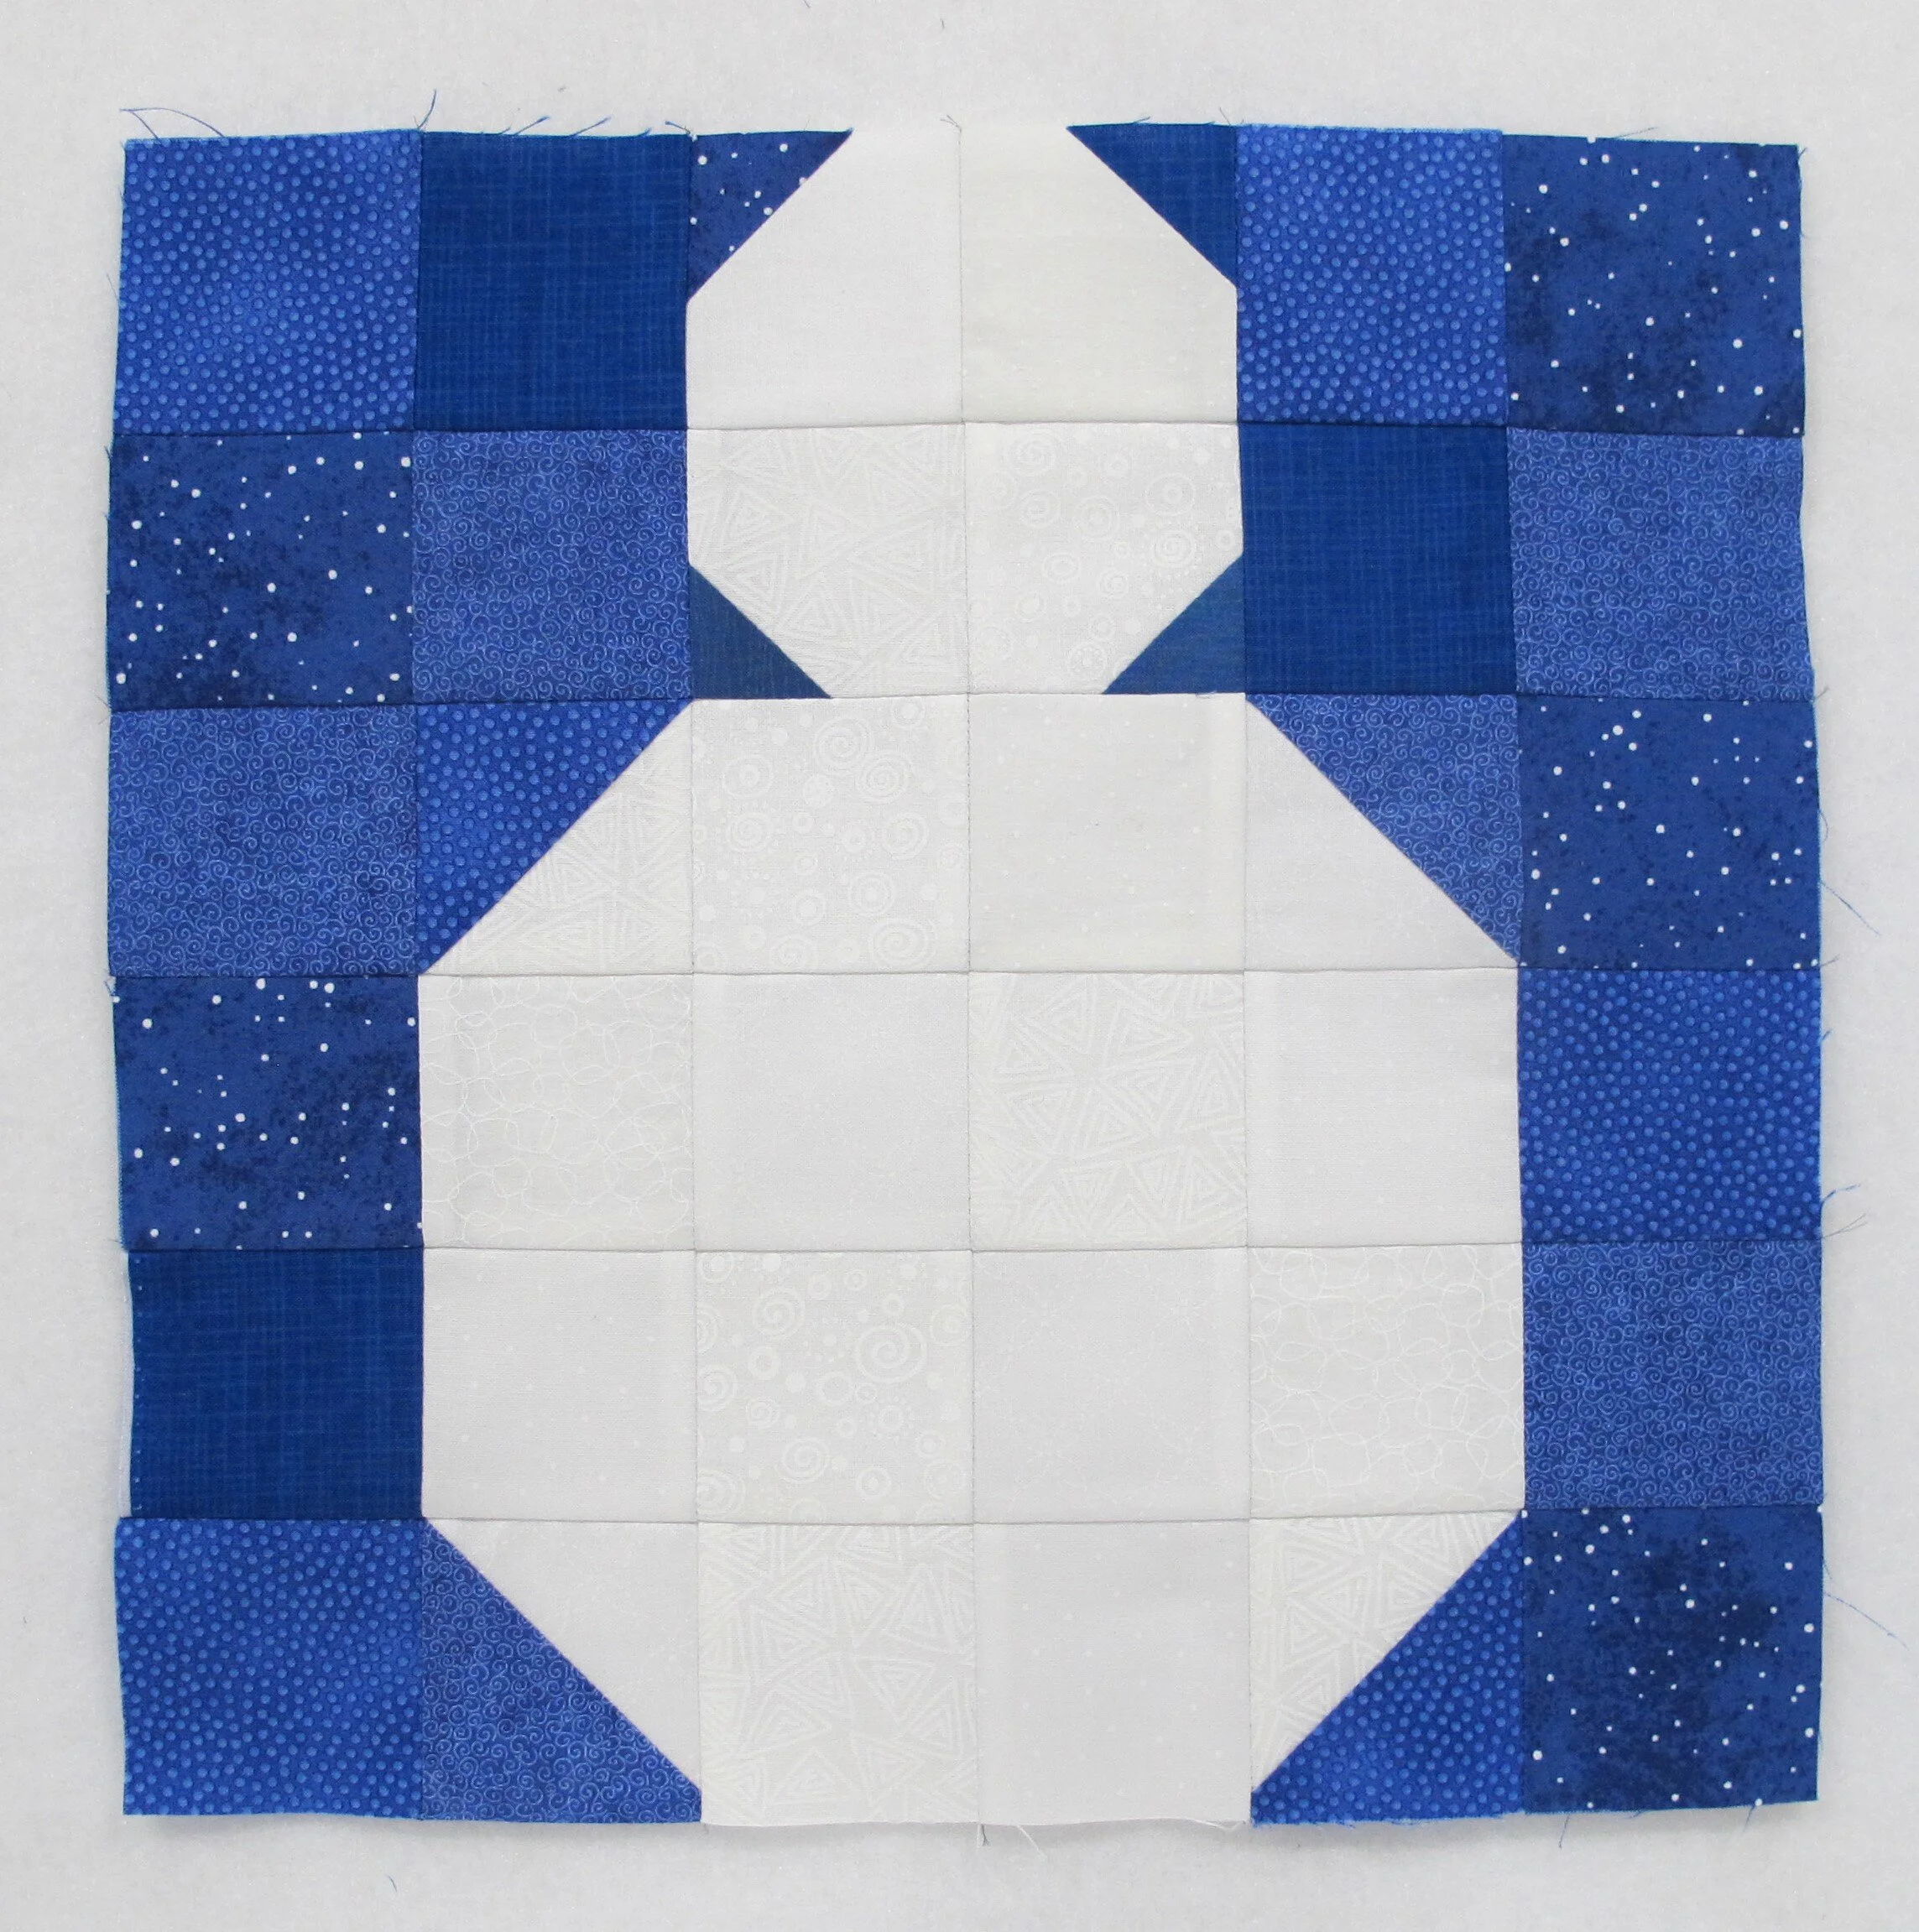
figure 9
Narrow borders (figure 10):
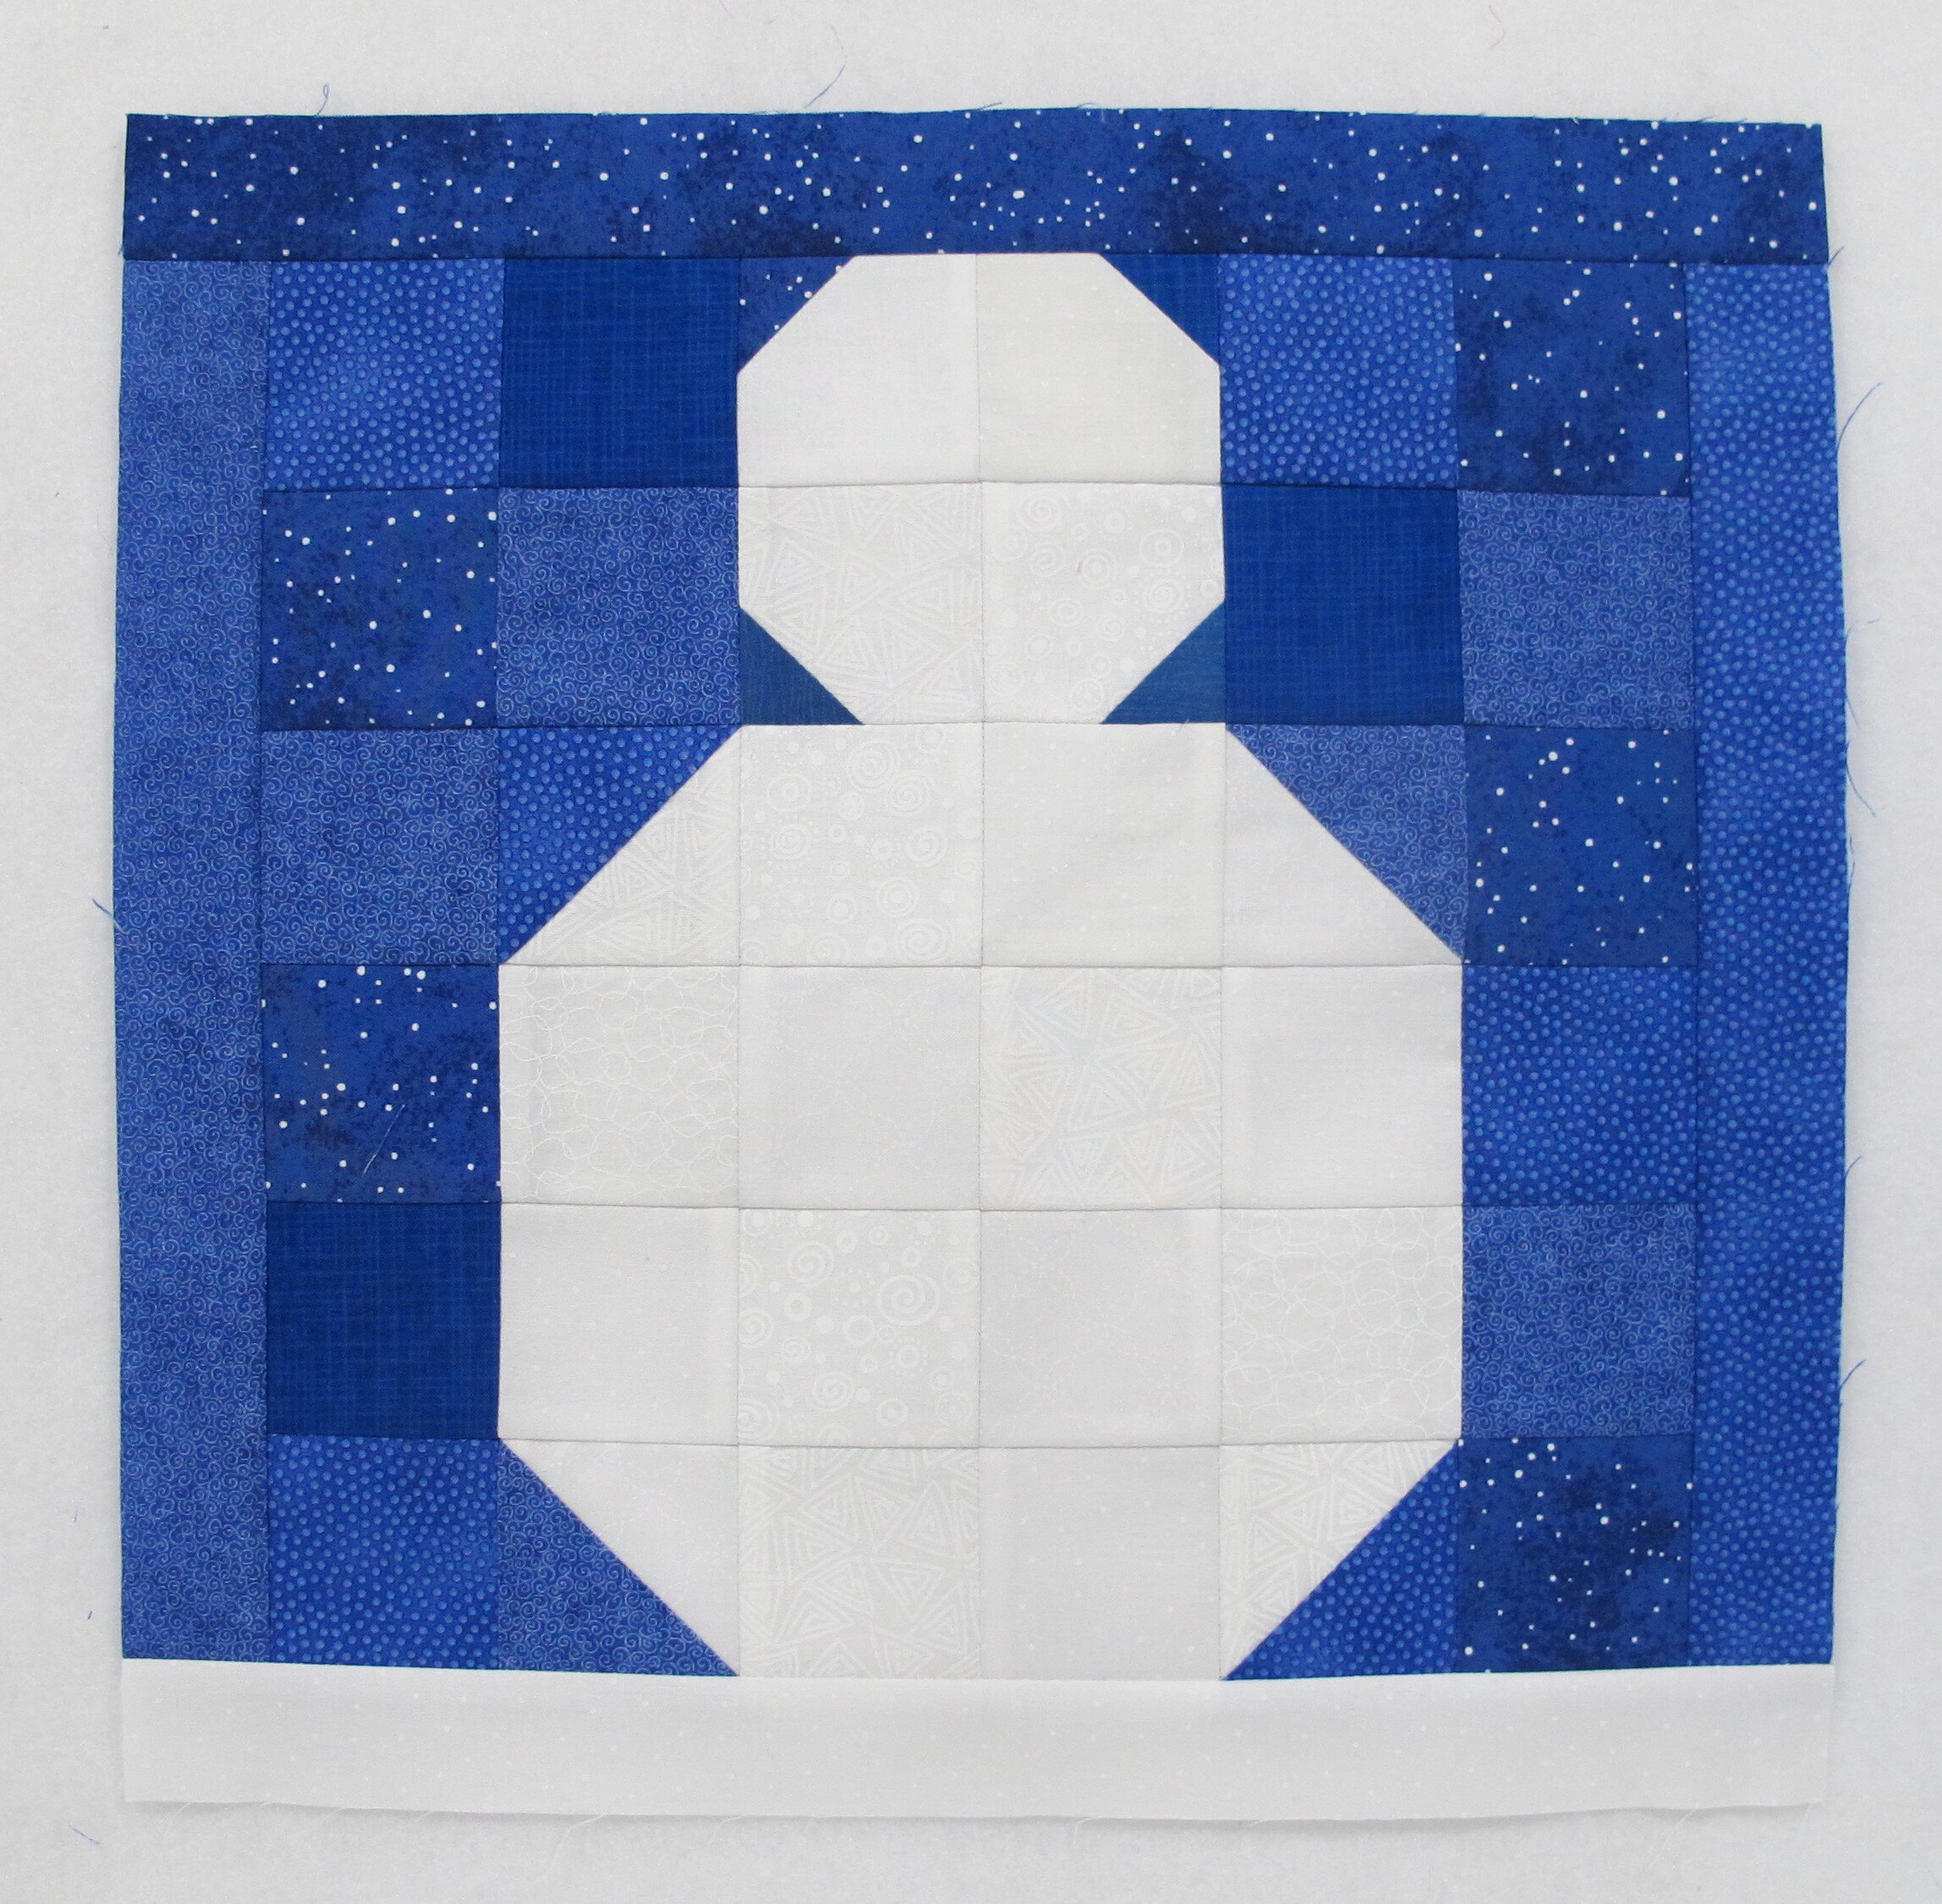
figure 10
stitch the 1 ½” x 12 ½” blue strips to the sides of the block and press seams toward the strips
stitch the 1 ½” x 14 ½” blue strip to the top of the block and press seam toward the strip
stitch the 1 ½” x 14 ½” white strip to the bottom of the block and press seam toward the strip
*** If you plan on making a calendar quilt, just stop with this completed block. If you want to make a wallhanging follow the instructions below.
Outer border:
stitch 3 ½” x 14 ½” outer borders to the sides of the block and press seams toward the borders (figure 11)
stitch 3 ½” x 20 ½” outer borders to the top and bottom of the block and press seams toward the borders (figure 12)
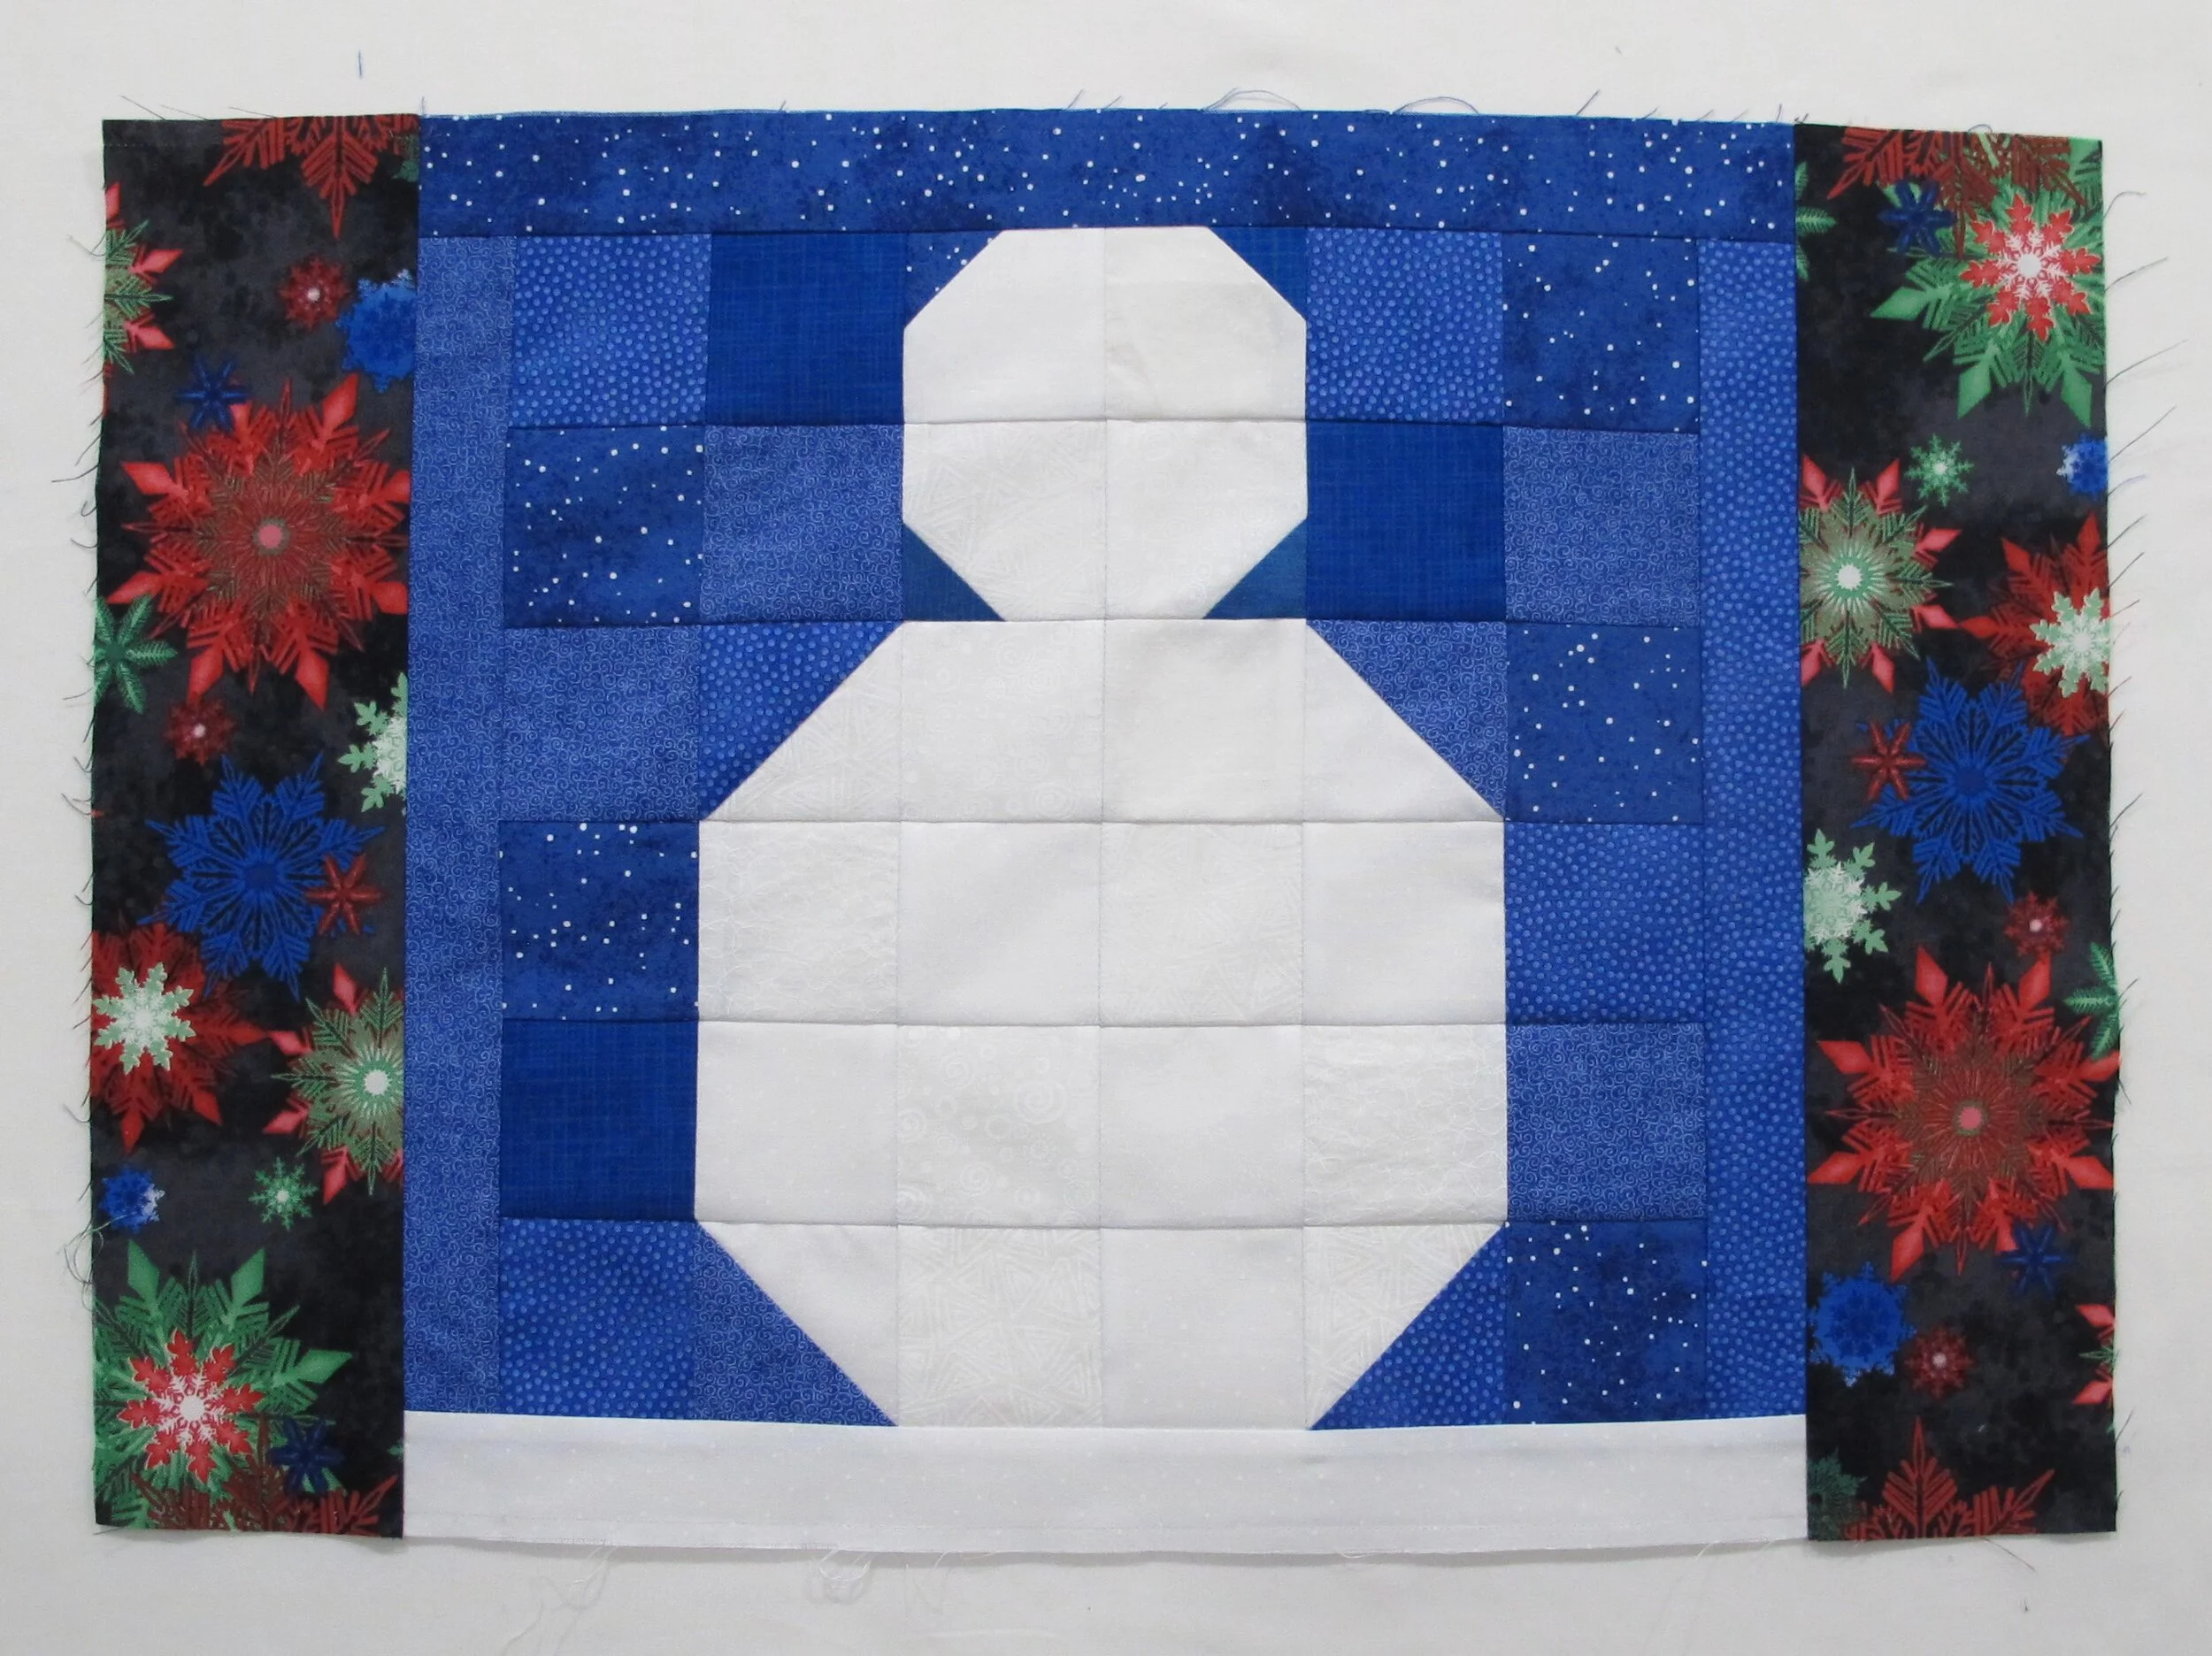
figure 11
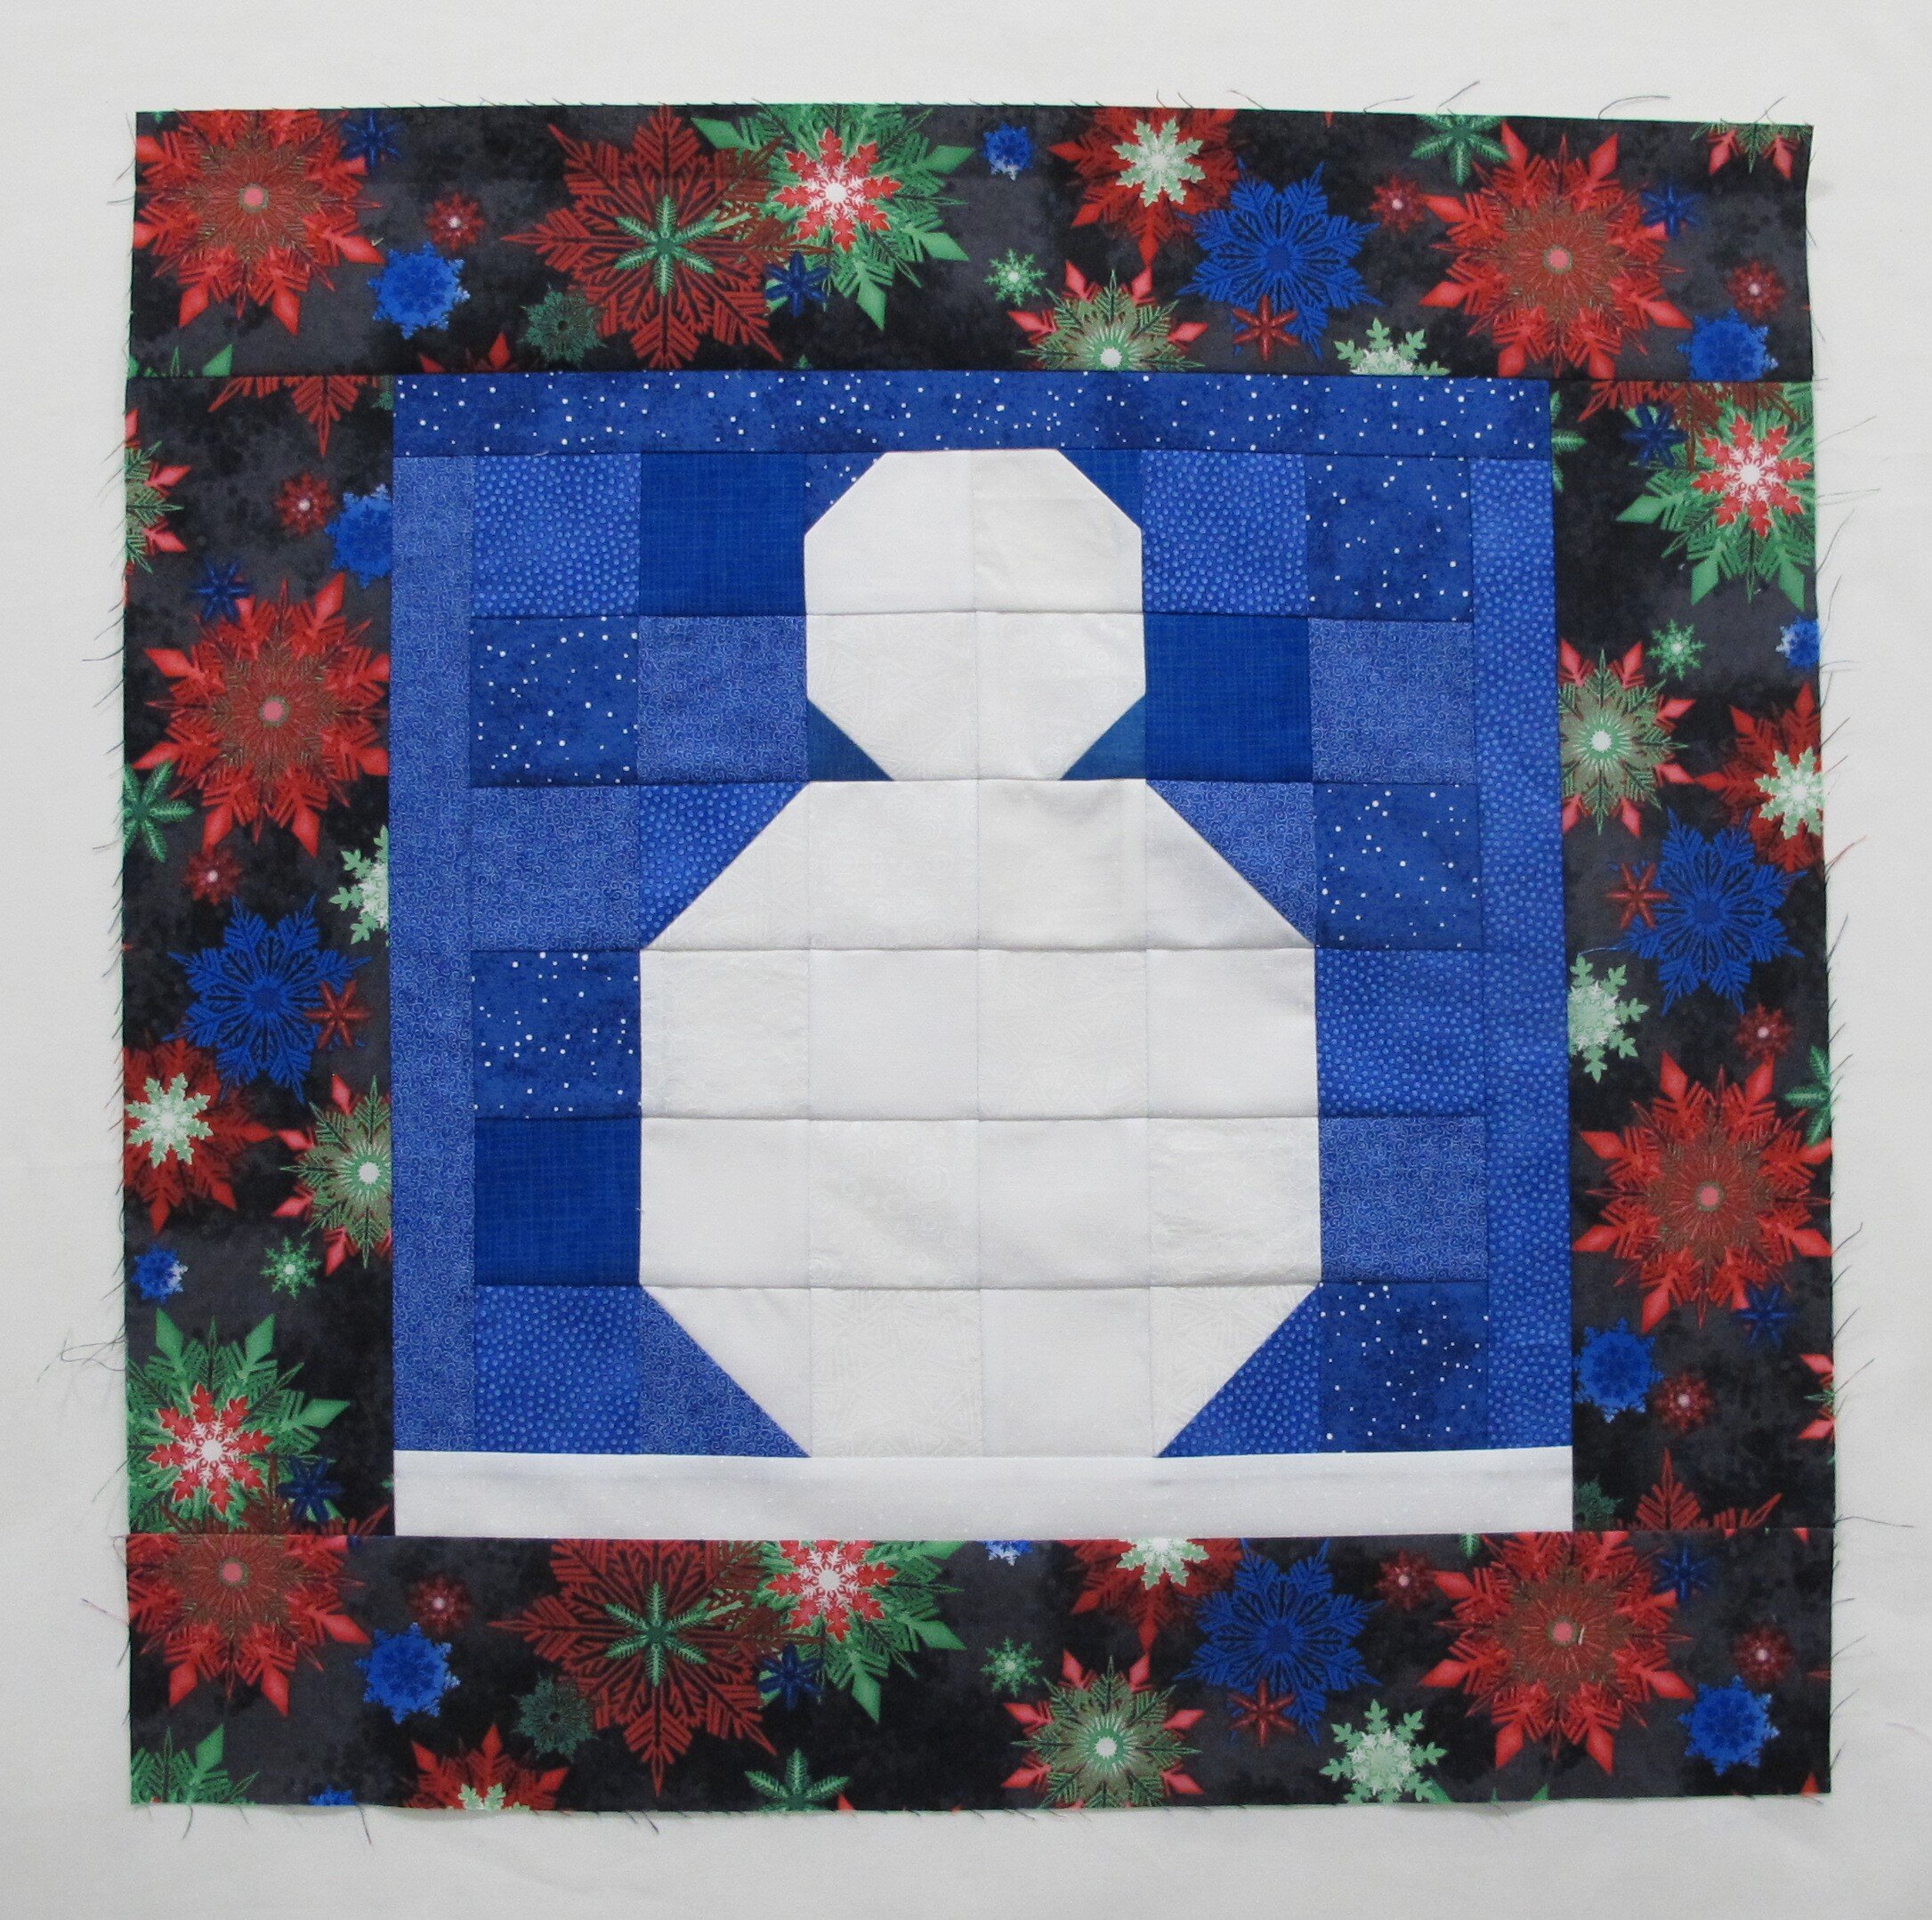
figure 12
Finishing:
layer the backing, batting and top together and either spray-baste or pin-baste the layers together
quilt as desired, also run a straight stitch within the seam allowance all around the outer edge...this stabilizes the edge for applying the binding
trim backing and batting even with the quilt top
follow my Hanging Sleeve tutorial coming soon!
apply the binding using your preferred method (the hanging sleeve will be stitched in place as the binding is sewn on) or follow my Best Ever Binding tutorial
Embellishments: have fun embellishing your snowman to suit your style!
buttons: 2 for eyes, 5 mini ones for mouth, 3 for front buttons
add a carrot nose…I used fusible web, but there are also buttons in the shape of carrots!
arms: use actual sticks like I did for the sample OR hand embroider stick arms OR thread paint stick arms OR design your own from fabric scraps and attach with fusible web
optional: sew snowflake buttons or sequins onto the background, add a scarf or hat
Enjoy the compliments!