
Quarter Square Triangles (QSTs)

the traditional Ohio Star quilt block
Just like Half Square Triangles (HSTs), Quarter Square Triangles (QSTs) are also a staple in quilting. These, too, are used within many traditional quilt blocks and are invaluable to creating many designs. They add a little extra movement and flair.
***scroll to the bottom of the page for a printable PDF
The same techniques used for Half Square Triangles (HSTs) are also used for Quarter Square Triangles (QSTs)...there's just one more step involved.
In order to make QSTs you need to know what the finished size of the square will be. Technically, all that's needed is to add 1 ¼” to the finished size of square required, but accuracy here is critical or the finished squares will be too small. I prefer to add 1 ½” to make them slightly larger (4 ½” in this case) and then trim them down. Try doing it both ways and see which you prefer.
For a 9” finished block: finished size 3” + 1 ¼” = 4 ¼” OR 3” + 1 ½” = 4 ½”
For a 12” finished block: finished size 4” + 1 ¼” = 5 ¼” OR 4” + 1 ½” = 5 ½”
The Ohio Star quilt block is a very traditional pattern that incorporates QSTs. For demonstration purposes (because this block finishes at 9” square) we'll be making 3” finished QSTs using the second measurement so they can be trimmed.

Cutting instructions for one block:
background (white on sample): cut four 3 ½” squares, cut one 4 ½” square
star centre (multi print on sample): cut one 3 ½” square
star points (purple on sample): cut two 4 ½” squares
centre contrast (turquoise on sample): cut one 4 ½” square
Draw a diagonal line on the wrong side of both star point squares (purple). With right sides together pair these with the 4 ½” background (white) and contrast (turquoise) squares. Stitch ¼” from each side of the line, cut along the drawn line, and press seams toward the star points (purple) (figures 1 & 2).
Pair the 2 different sets together as shown, nesting the seams together. Draw a line perpendicular to the seam line (line up the ruler with the seam line so everything's nice and straight) and stitch ¼” from each side of the line. Cut along the drawn line and press seams away from the background (figures 3 & 4).

figure 1

figure 2

figure 3

figure 4
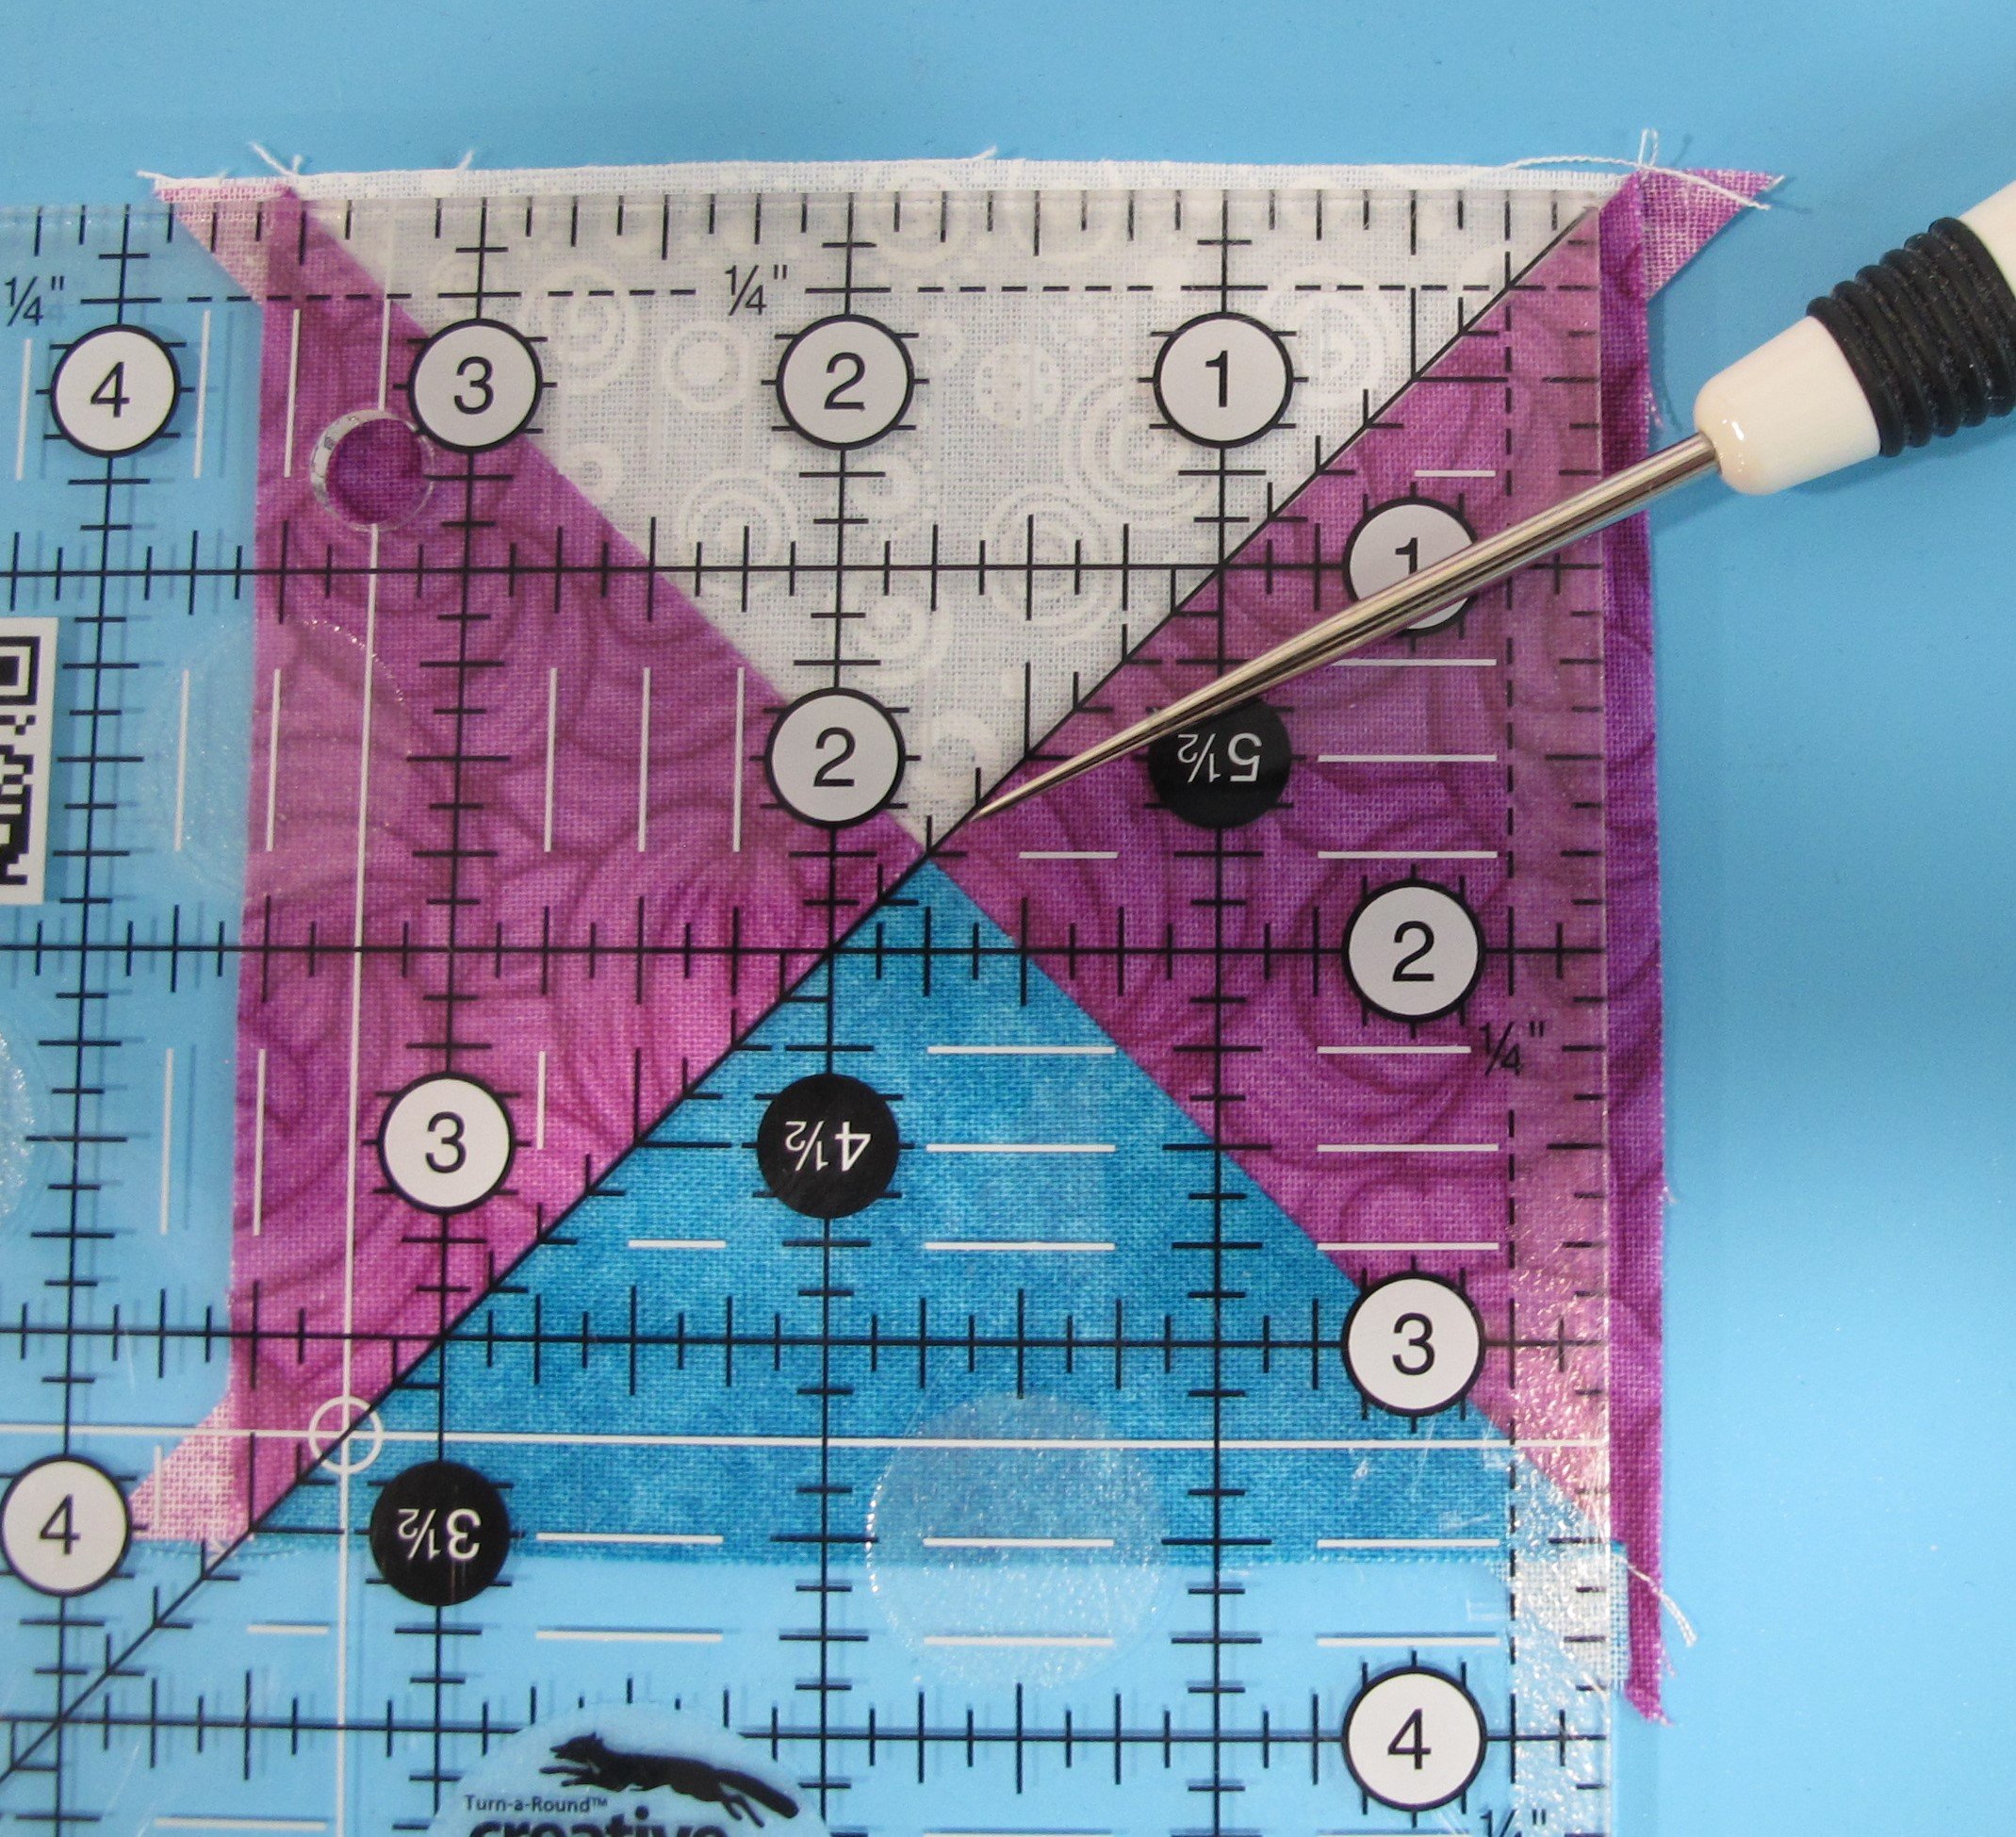
The units now need to be trimmed to 3½”...that includes the necessary ¼” seam allowance...so the actual QST will finish at 3”. All four sides need to be trimmed equally or the seam intersection will not be centred. Half of 3½” is 1¾” so the 1 ¾” mark on the ruler needs to be right on the seam intersection (where the awl is pointing).
Take advantage of the diagonal line on the ruler, line it up on the seam to trim the first corner square. Turn the square around, place the 3½” mark from the ruler on the previously trimmed corner and trim the opposite corner. Repeat with the other three units. Perfectly square QSTs!


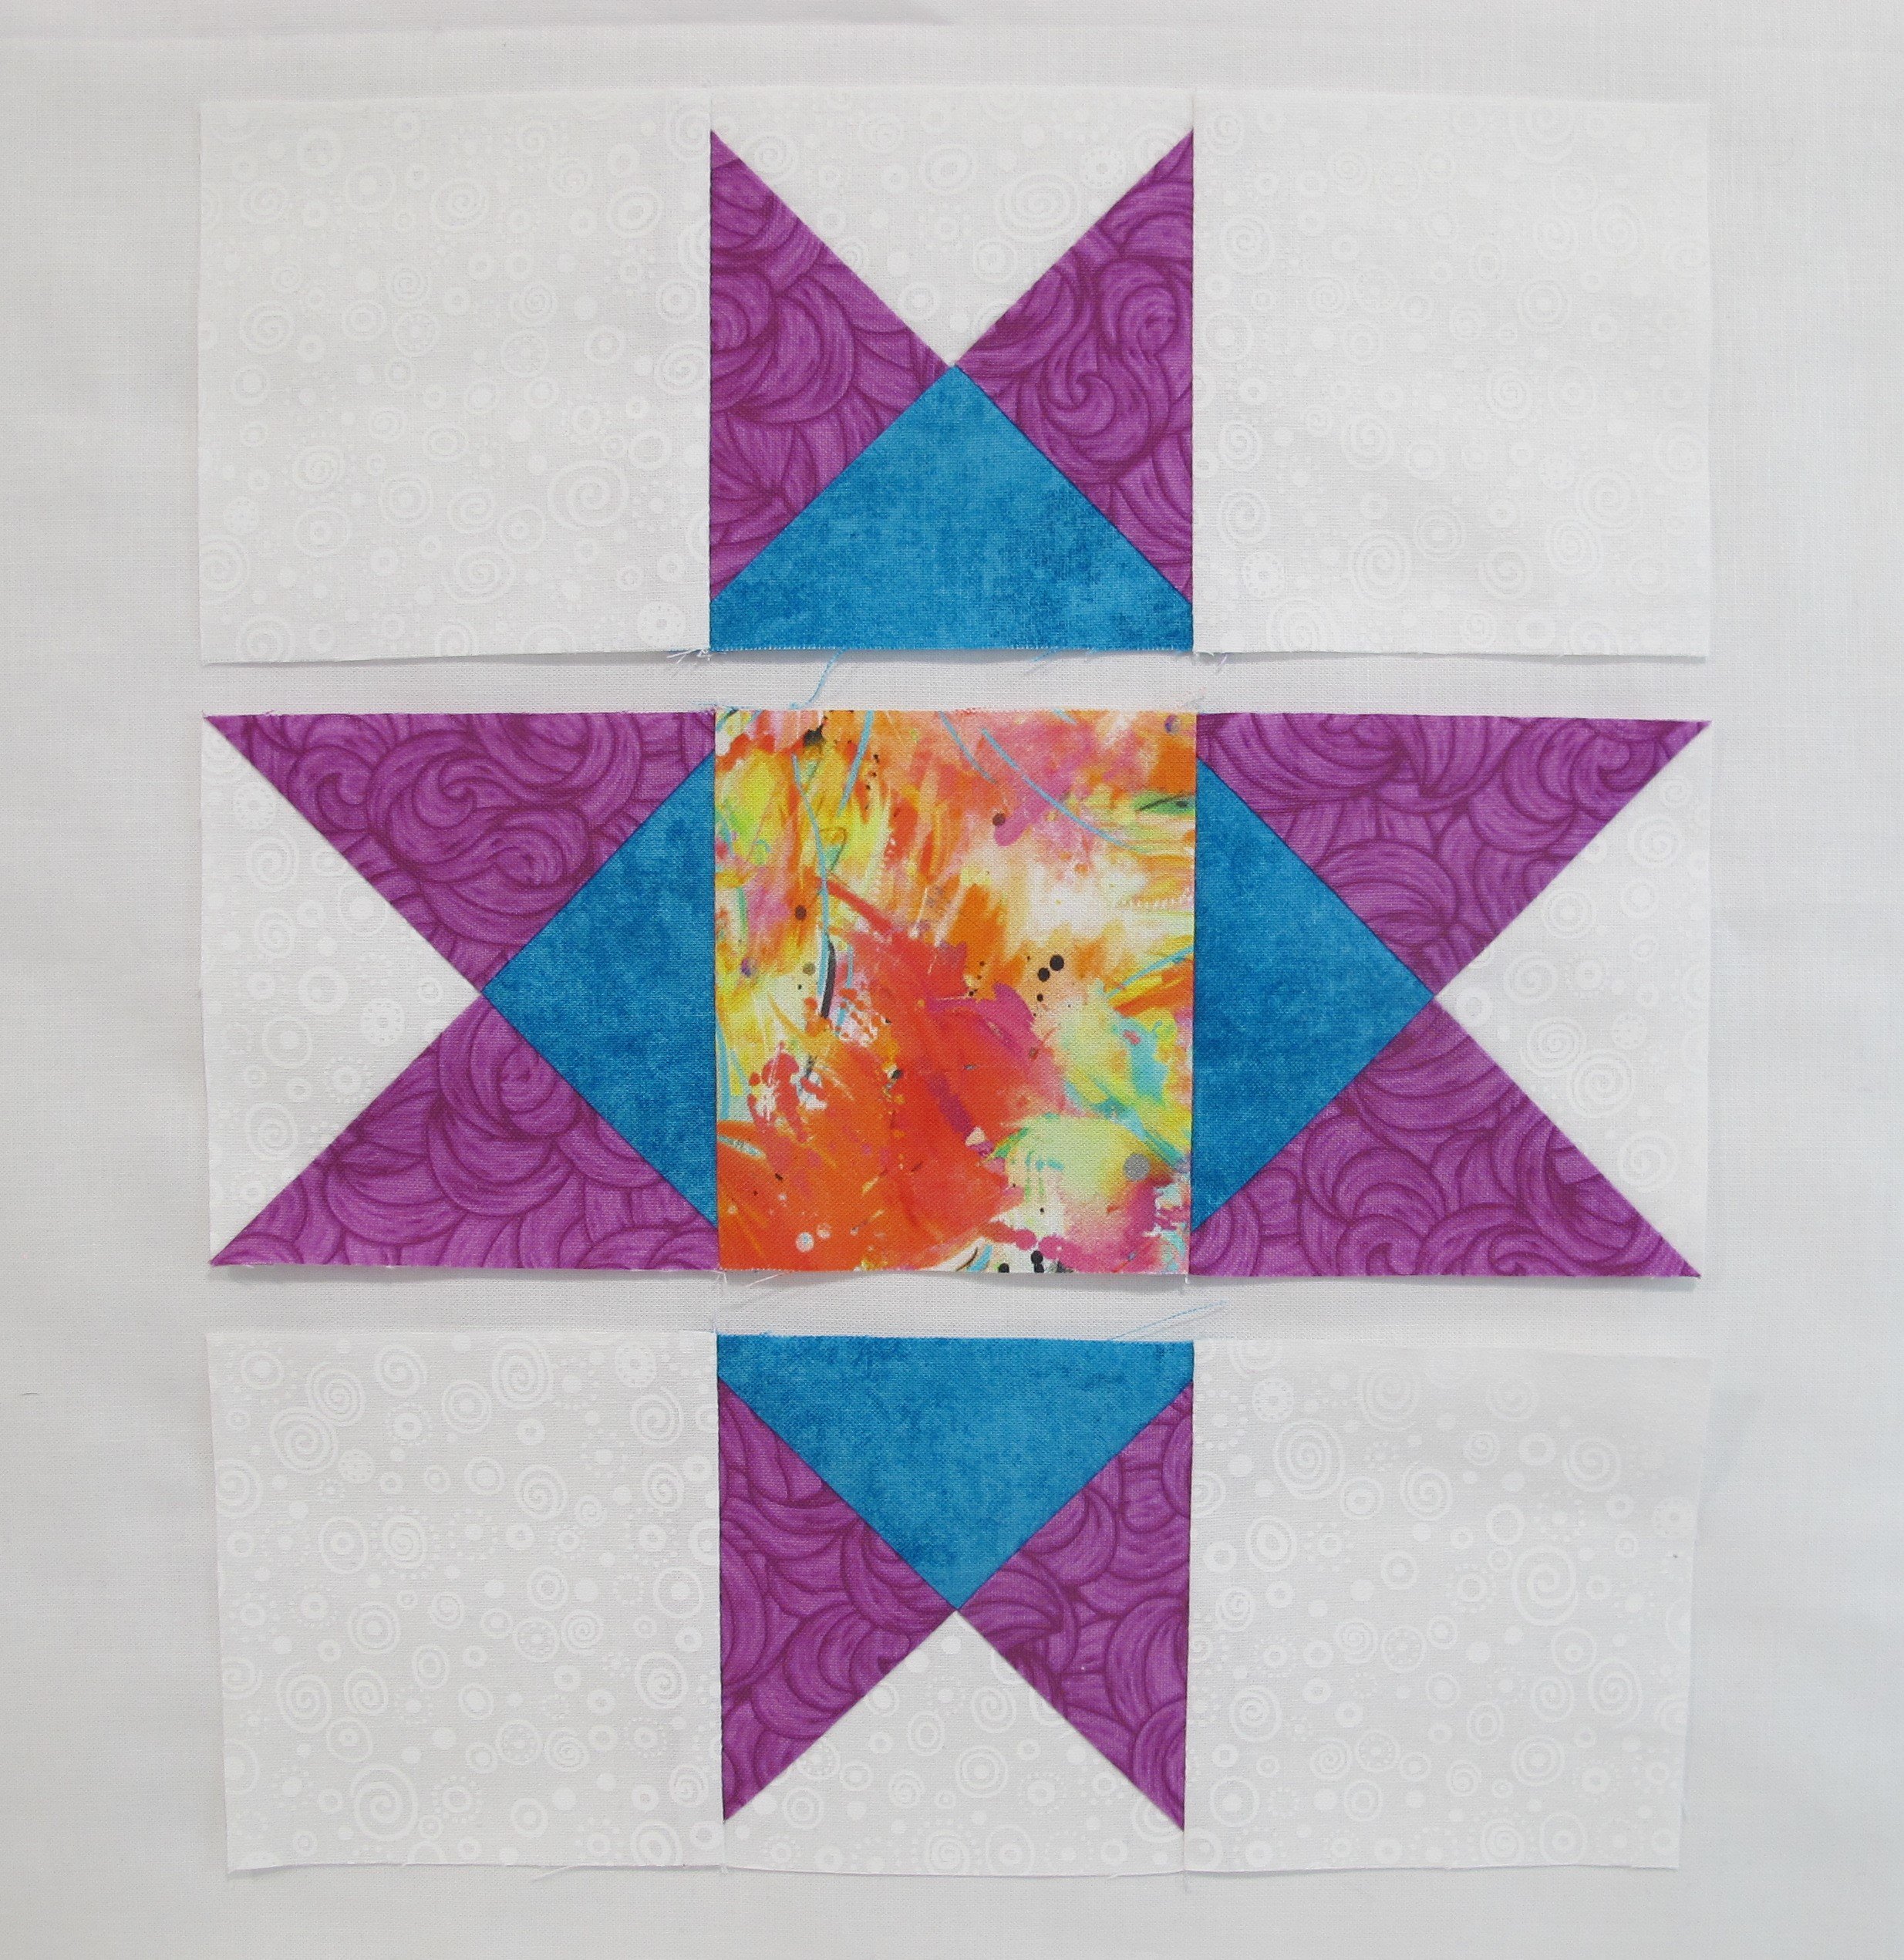
Lay the units on the table in front of you as shown. Using a scant quarter inch seam allowance stitch each row together. Centre row press seams to the centre and outer rows press seams to the background.
Stitch the three rows together and press seams either open or to one side...personal preference here. I usually press away from the light background so there's less shadowing, but there are exceptions to every rule.


Here are some other quilts that use QSTs. The Exploding Heart quilt by Slice of Pi has been very popular over the last couple of years and includes both HSTs and QSTS. Gail is making one right now in wild, happy pinks and reds. This other quilt by Leila Gardunia makes me happy because of the bright, clear colours, and this quilt pattern, sometimes called Hourglass, demonstrates the use of only two fabrics per unit instead of three.
This is just one more technique to add to your growing skill set. Give it a try!