
It's a Mystery! Part 3
Now things are getting exciting…more time to sew! Take it one clue at a time, look for my hints, and most importantly have fun and enjoy the process!
*** scroll to the bottom of the page for a printable PDF

Sharon's Hint:
The flying geese units finish at 2” x 4” so they have to be trimmed at 2 ½” x 4 ½” to include the seam allowances.
Sharon's Hint:
Do not use a scant ¼” (use a regular ¼”) when making the flying geese units (using either method) or a little raw edge of seam allowance will appear at the point of the “goose” (where the pin is pointing in the photo). Ask me how I know!
***If you need visuals to help you out please visit the Flying Geese Part 1 tutorial (Heart Method), or the Flying Geese Part 2 tutorial for using the Ultimate Flying Geese Tool…just remember that your finished size of “goose” is different than that of the tutorials.

Clue 12: Gather up all the 5 ¾” background squares from Clue 2 and the 3 ¼” coordinate squares from Clues 3, 4, 5 and 6. You will follow the directions that came with the Ultimate Flying Geese Tool (or the Heart Method in tutorials) in order to create 2” x 4” finished flying geese units (trimmed at 2 ½” x 4 ½”) (L-48, T-96, Q-168). ***This size is shown by the dashed black and white line on the ruler and the letter D.
Clue 13: Gather up all the 5 ¾” coordinate squares from Clues 3, 4, 5 and 6 and the 3 ¼” background squares from Clue 2. You will follow the directions that came with the Ultimate Flying Geese Tool (or the Heart Method in tutorials) in order to create 2” x 4” finished flying geese units (trimmed at 2 ½” x 4 ½”) (L-48, T-96, Q-168). ***These will look like the ones in the photo above except the background and coordinates are in the opposite positions.
*** A scant ¼” should now be used for stitching units together. Don’t know what that is? Check out the tutorial.

Clue 14: Gather up all the flying geese units from Clues 12 and 13. Work with each coordinate colour separately. Lay a dark “goose” on the table in front of you as if it's flying north. Lay a light “goose” below the dark one as if it's flying north too. Together they create an upside down “V” shape. Stitch the 2 units together and press the seam towards the dark goose. With the exception of Queen size you should have the same number of units per colour (L-48, T-96, Q-168). *** The Queen size will have one extra set each of 2 colours because it has an odd number of blocks in the quilt.
Clue 15: Gather up all the 2 ½” segments from Clue 9 and sort them into their individual colours.
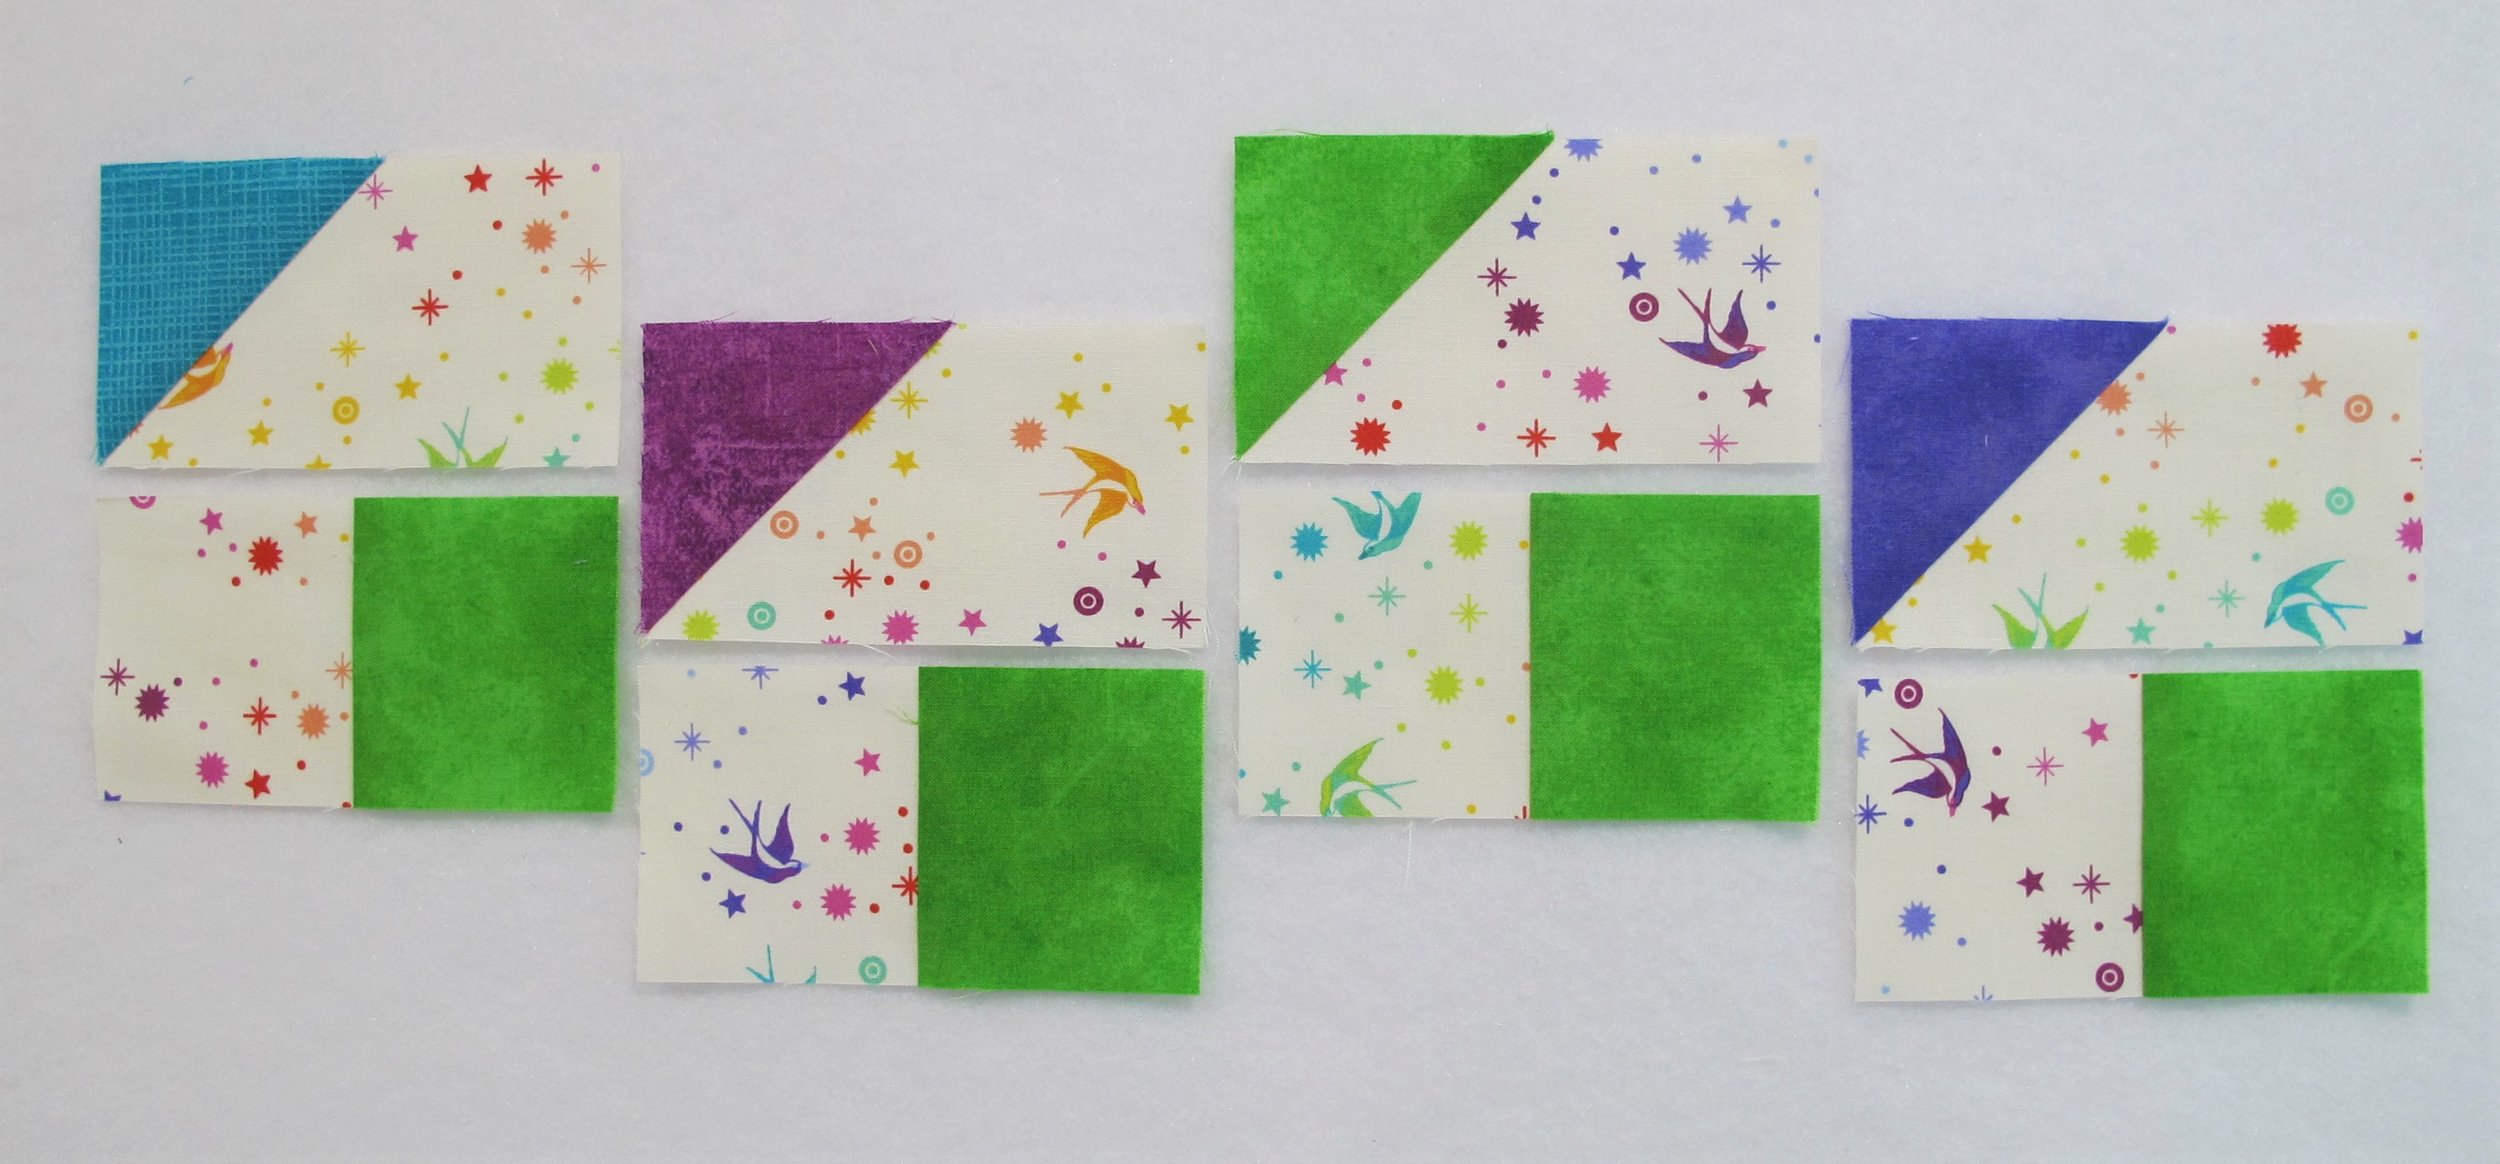
Clue 16: Gather up the segments from Clue 11 and divide them into sets of 4 with one of each coordinate in every set (they do not need to be bagged into individual sets, just stacked in sets).
Clue 17: This clue is a little tricky, but necessary to the design. Gather up all the segments from Clues 15 and 16. Place four Clue 15 units (of the same colour) on the table in front of you with the coordinate square on the right. Grab a set of 4 of the Clue 16 units (remember that these are one of each colour of the coordinates). Place one of each above the Clue 15 units with the coordinate triangle on the top left and stitch the individual units together pressing seams toward the squares. Repeat with all sets (L-3, T-6 sets of each colour grouping, Q-10 sets each of 2 colour groupings, 11 sets each of 2 colour groupings ).

Are you sick of making flying geese yet?…maybe I’m biased, but I think they’re so much fun to make! Get ready for next month when the blocks start coming together.