
Flying Geese Part 2
Flying Geese Part 1 explained how to make basic flying geese units using rulers that you, as a quilter, probably already own. In Flying Geese Part 2 I'll demonstrate how to use a couple of specialty rulers on the market that were designed specifically for trimming flying geese blocks.
The wonderful thing about this hobby is that there are many ways to achieve the same results using a variety of tools that work with the learning styles of different people. From my many years of teaching I've had to learn different methods for different techniques. This way, when I see the blank stare of a student who isn't “getting it” with one method, I can dig into my repertoire, demonstrate another method until I see the “lightbulb moment” from that same student. Everyone's brain processes information differently.
I originally used the Quilt in a Day small flying geese ruler for a class sample and found it extremely user friendly. The instructions that come with it have detailed diagrams and were very easy to understand. The only negative I found with these rulers is that they didn't grip the fabric very well so I added TrueGrips non-slip dots to the back and that solved the problem.
What became my personal favourite was the Ultimate Flying Geese Tool by Creative Grids. I'm enamoured by all Creative Grids rulers so I was excited to try it out and it didn't disappoint. This one also came with very detailed instructions and has built in grippers on the back.
My quilt buds usually use the Wing Clipper Ruler from Deb Tucker's Studio 180 Designs, but I have not used it myself. There are many other brands on the market (Bloc-Loc, Marti Michell, Fons & Porter, etc) so you will be sure to find one that works well with your learning style.
***scroll to the bottom of the page for a printable PDF
OK...let's get started...
Quilt in a Day:
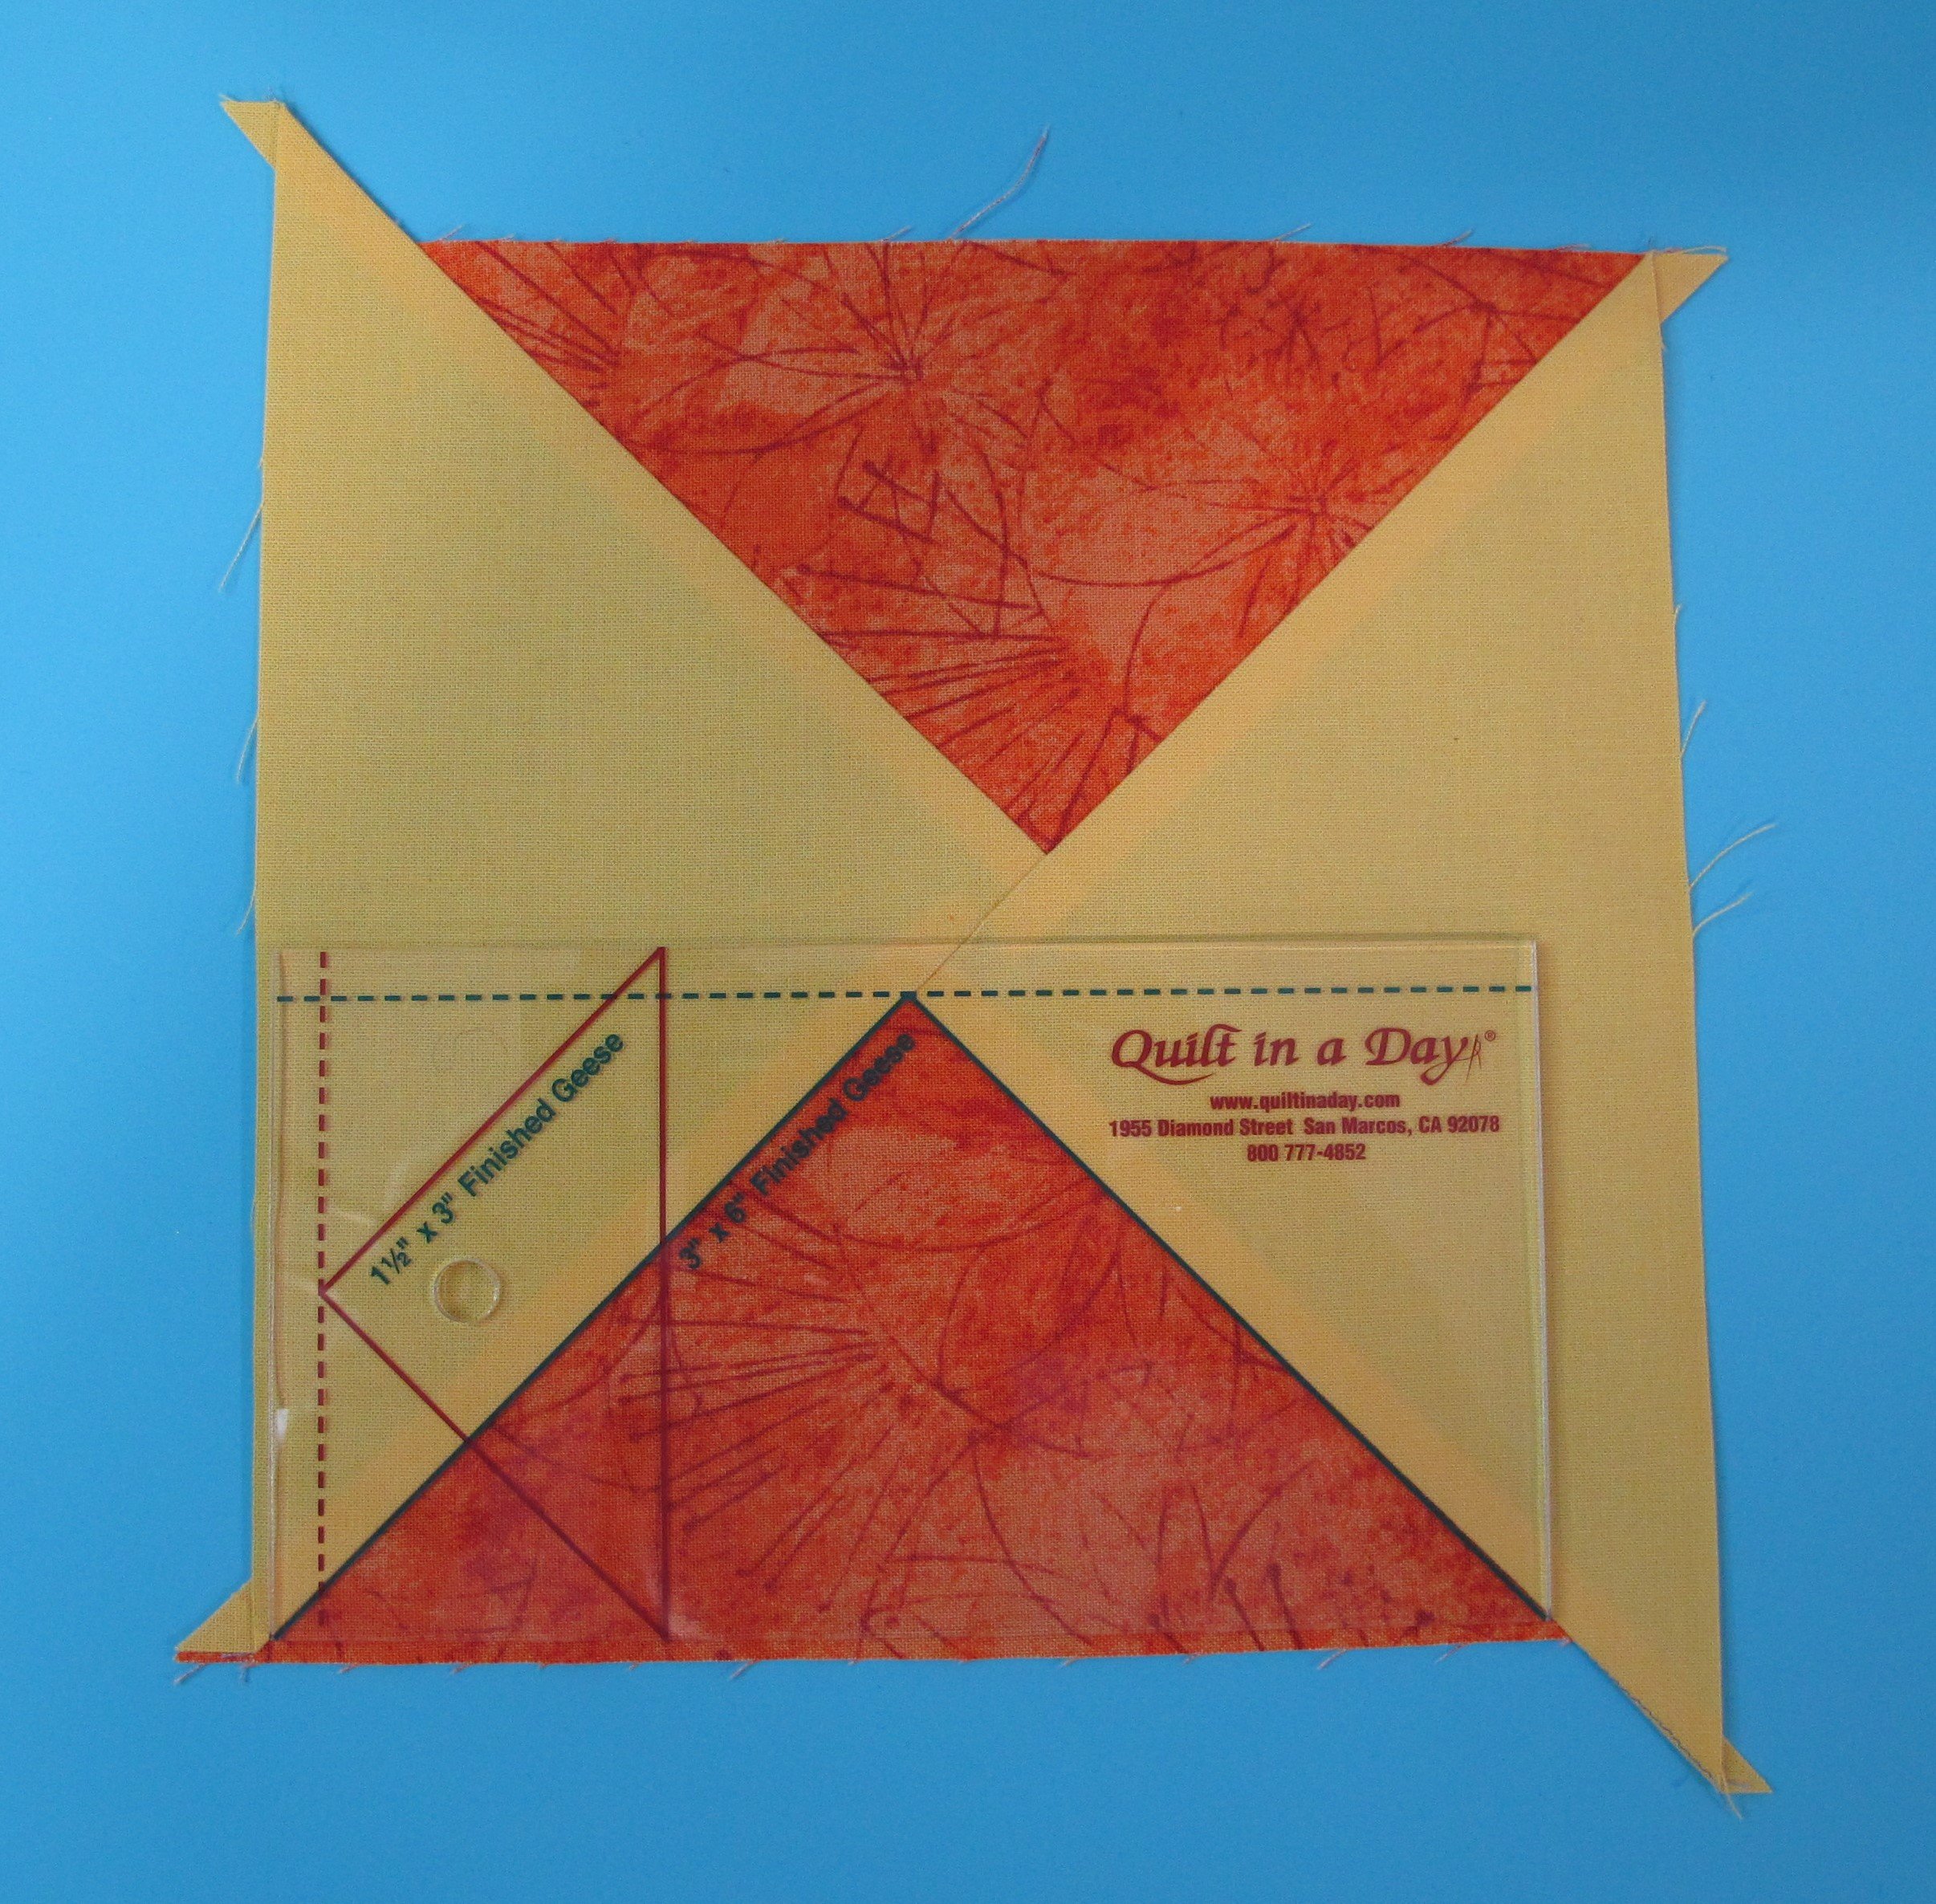
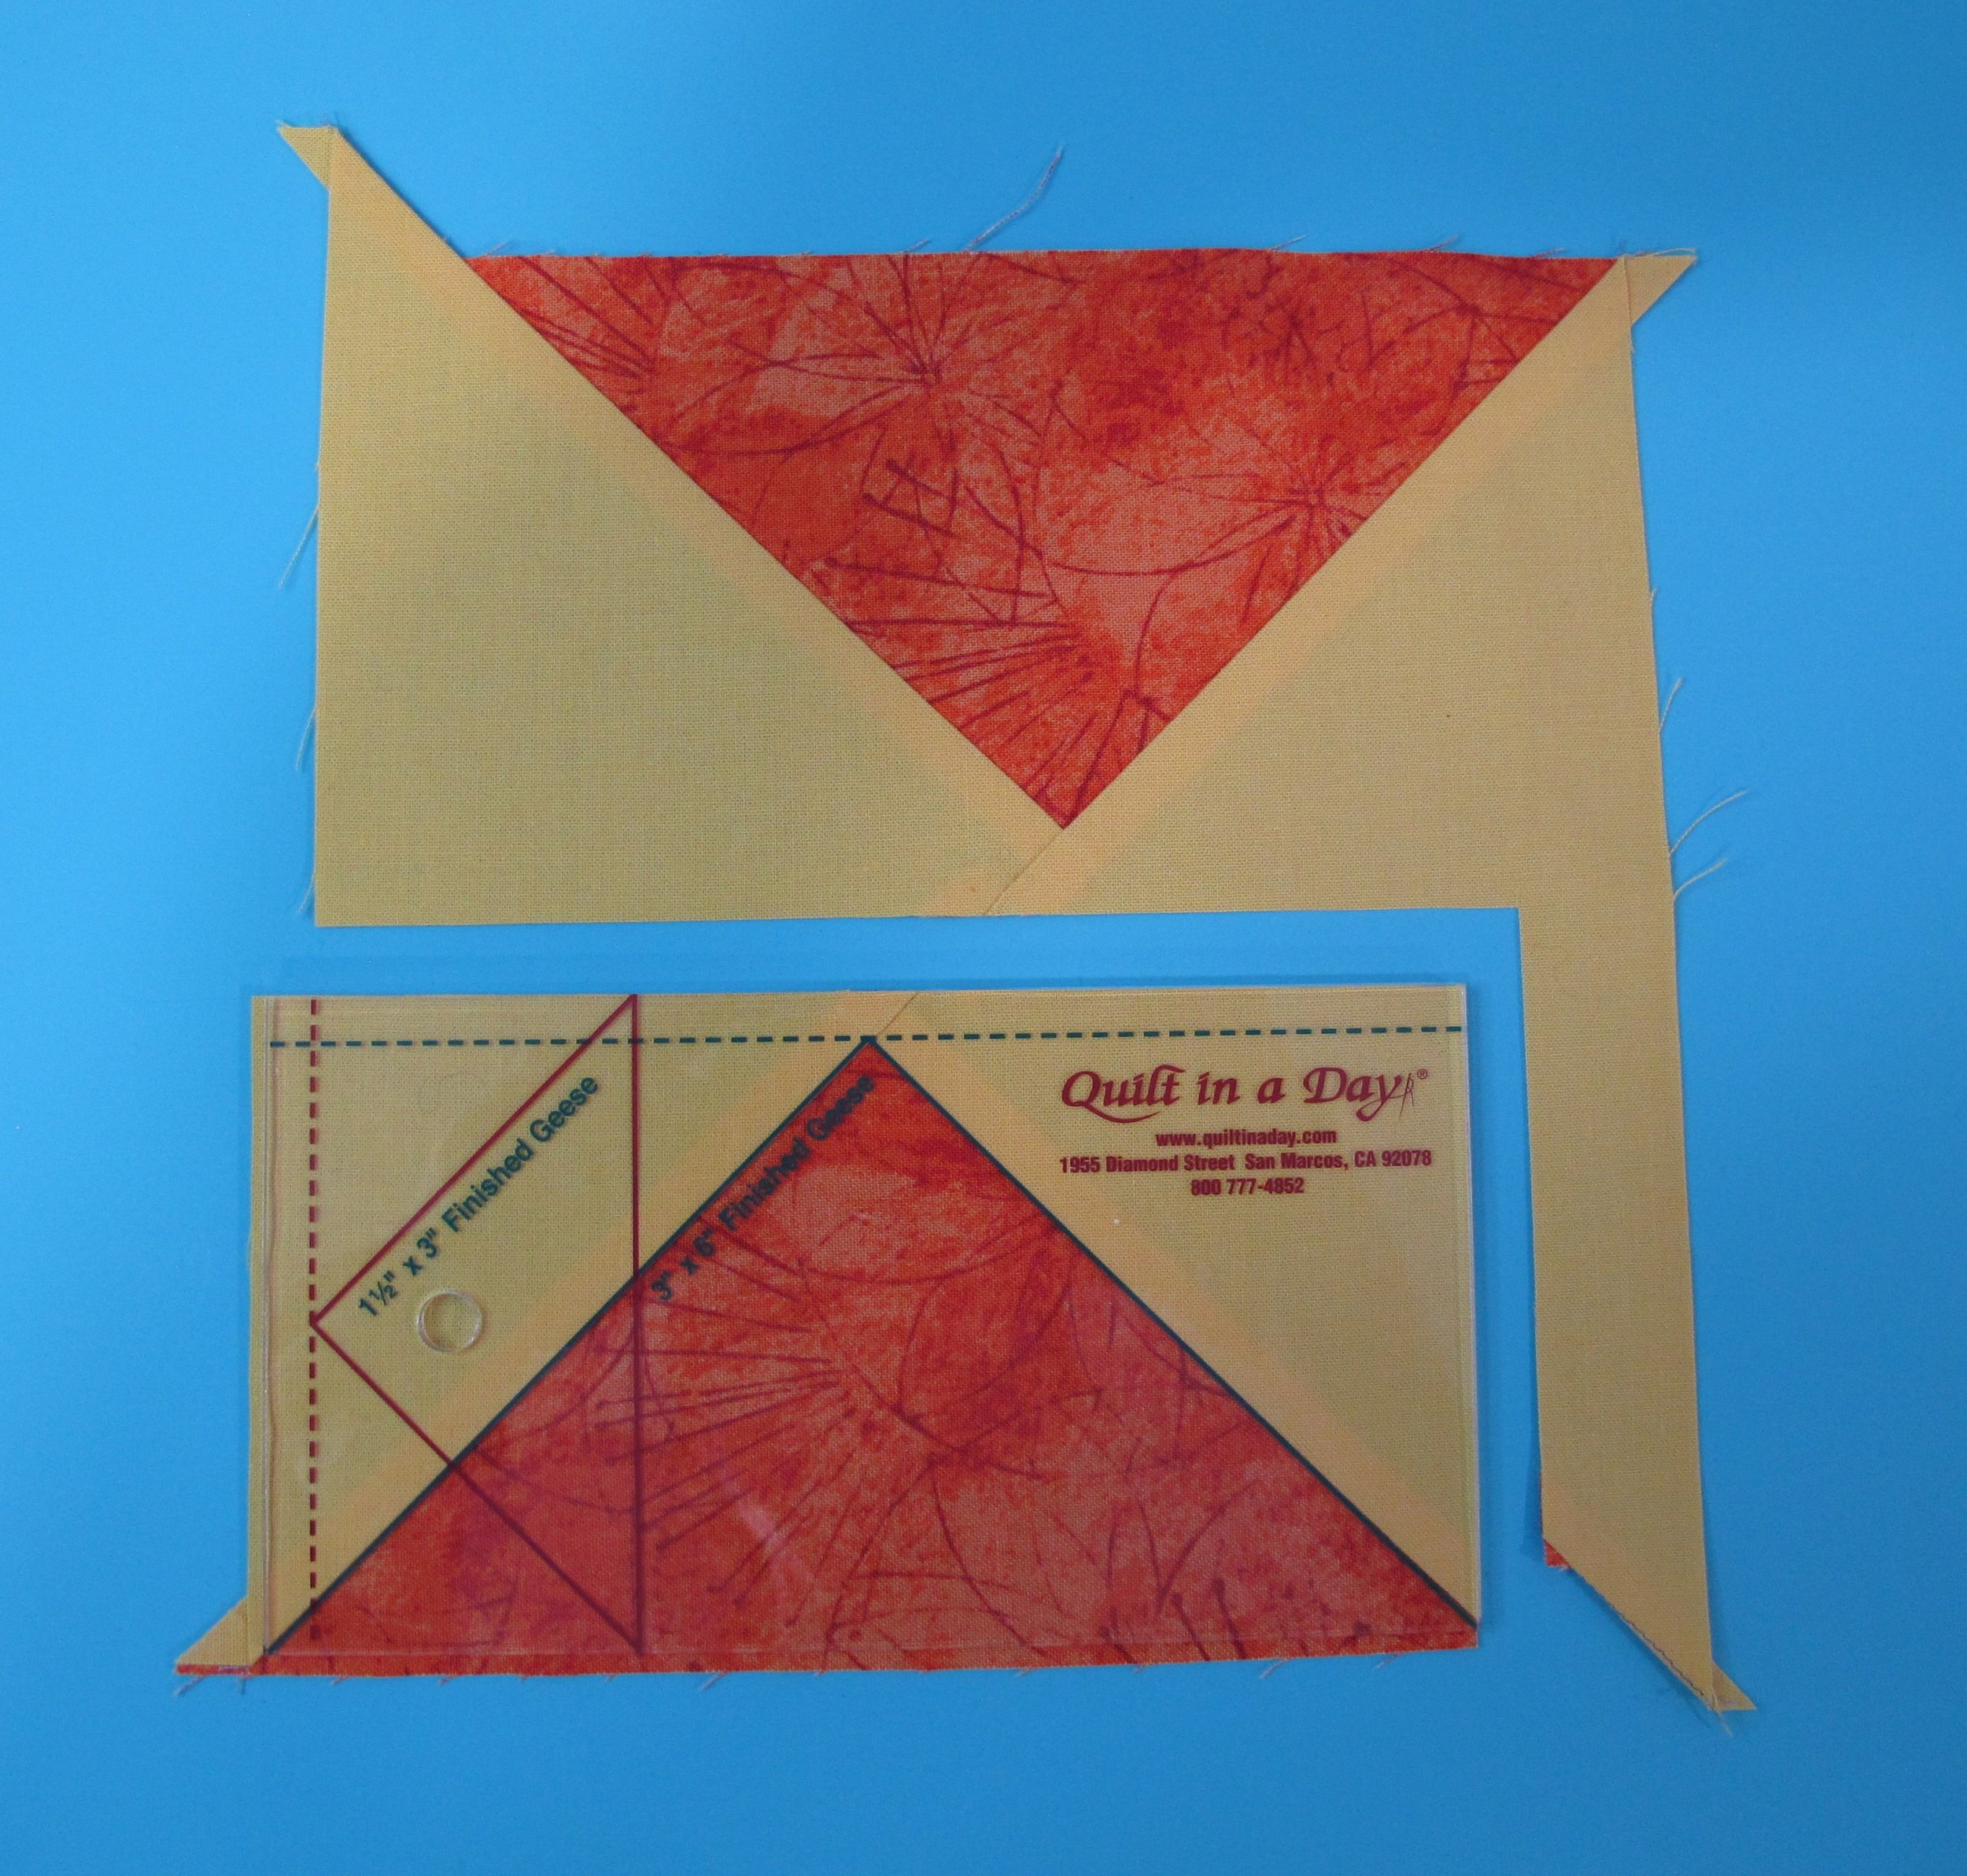
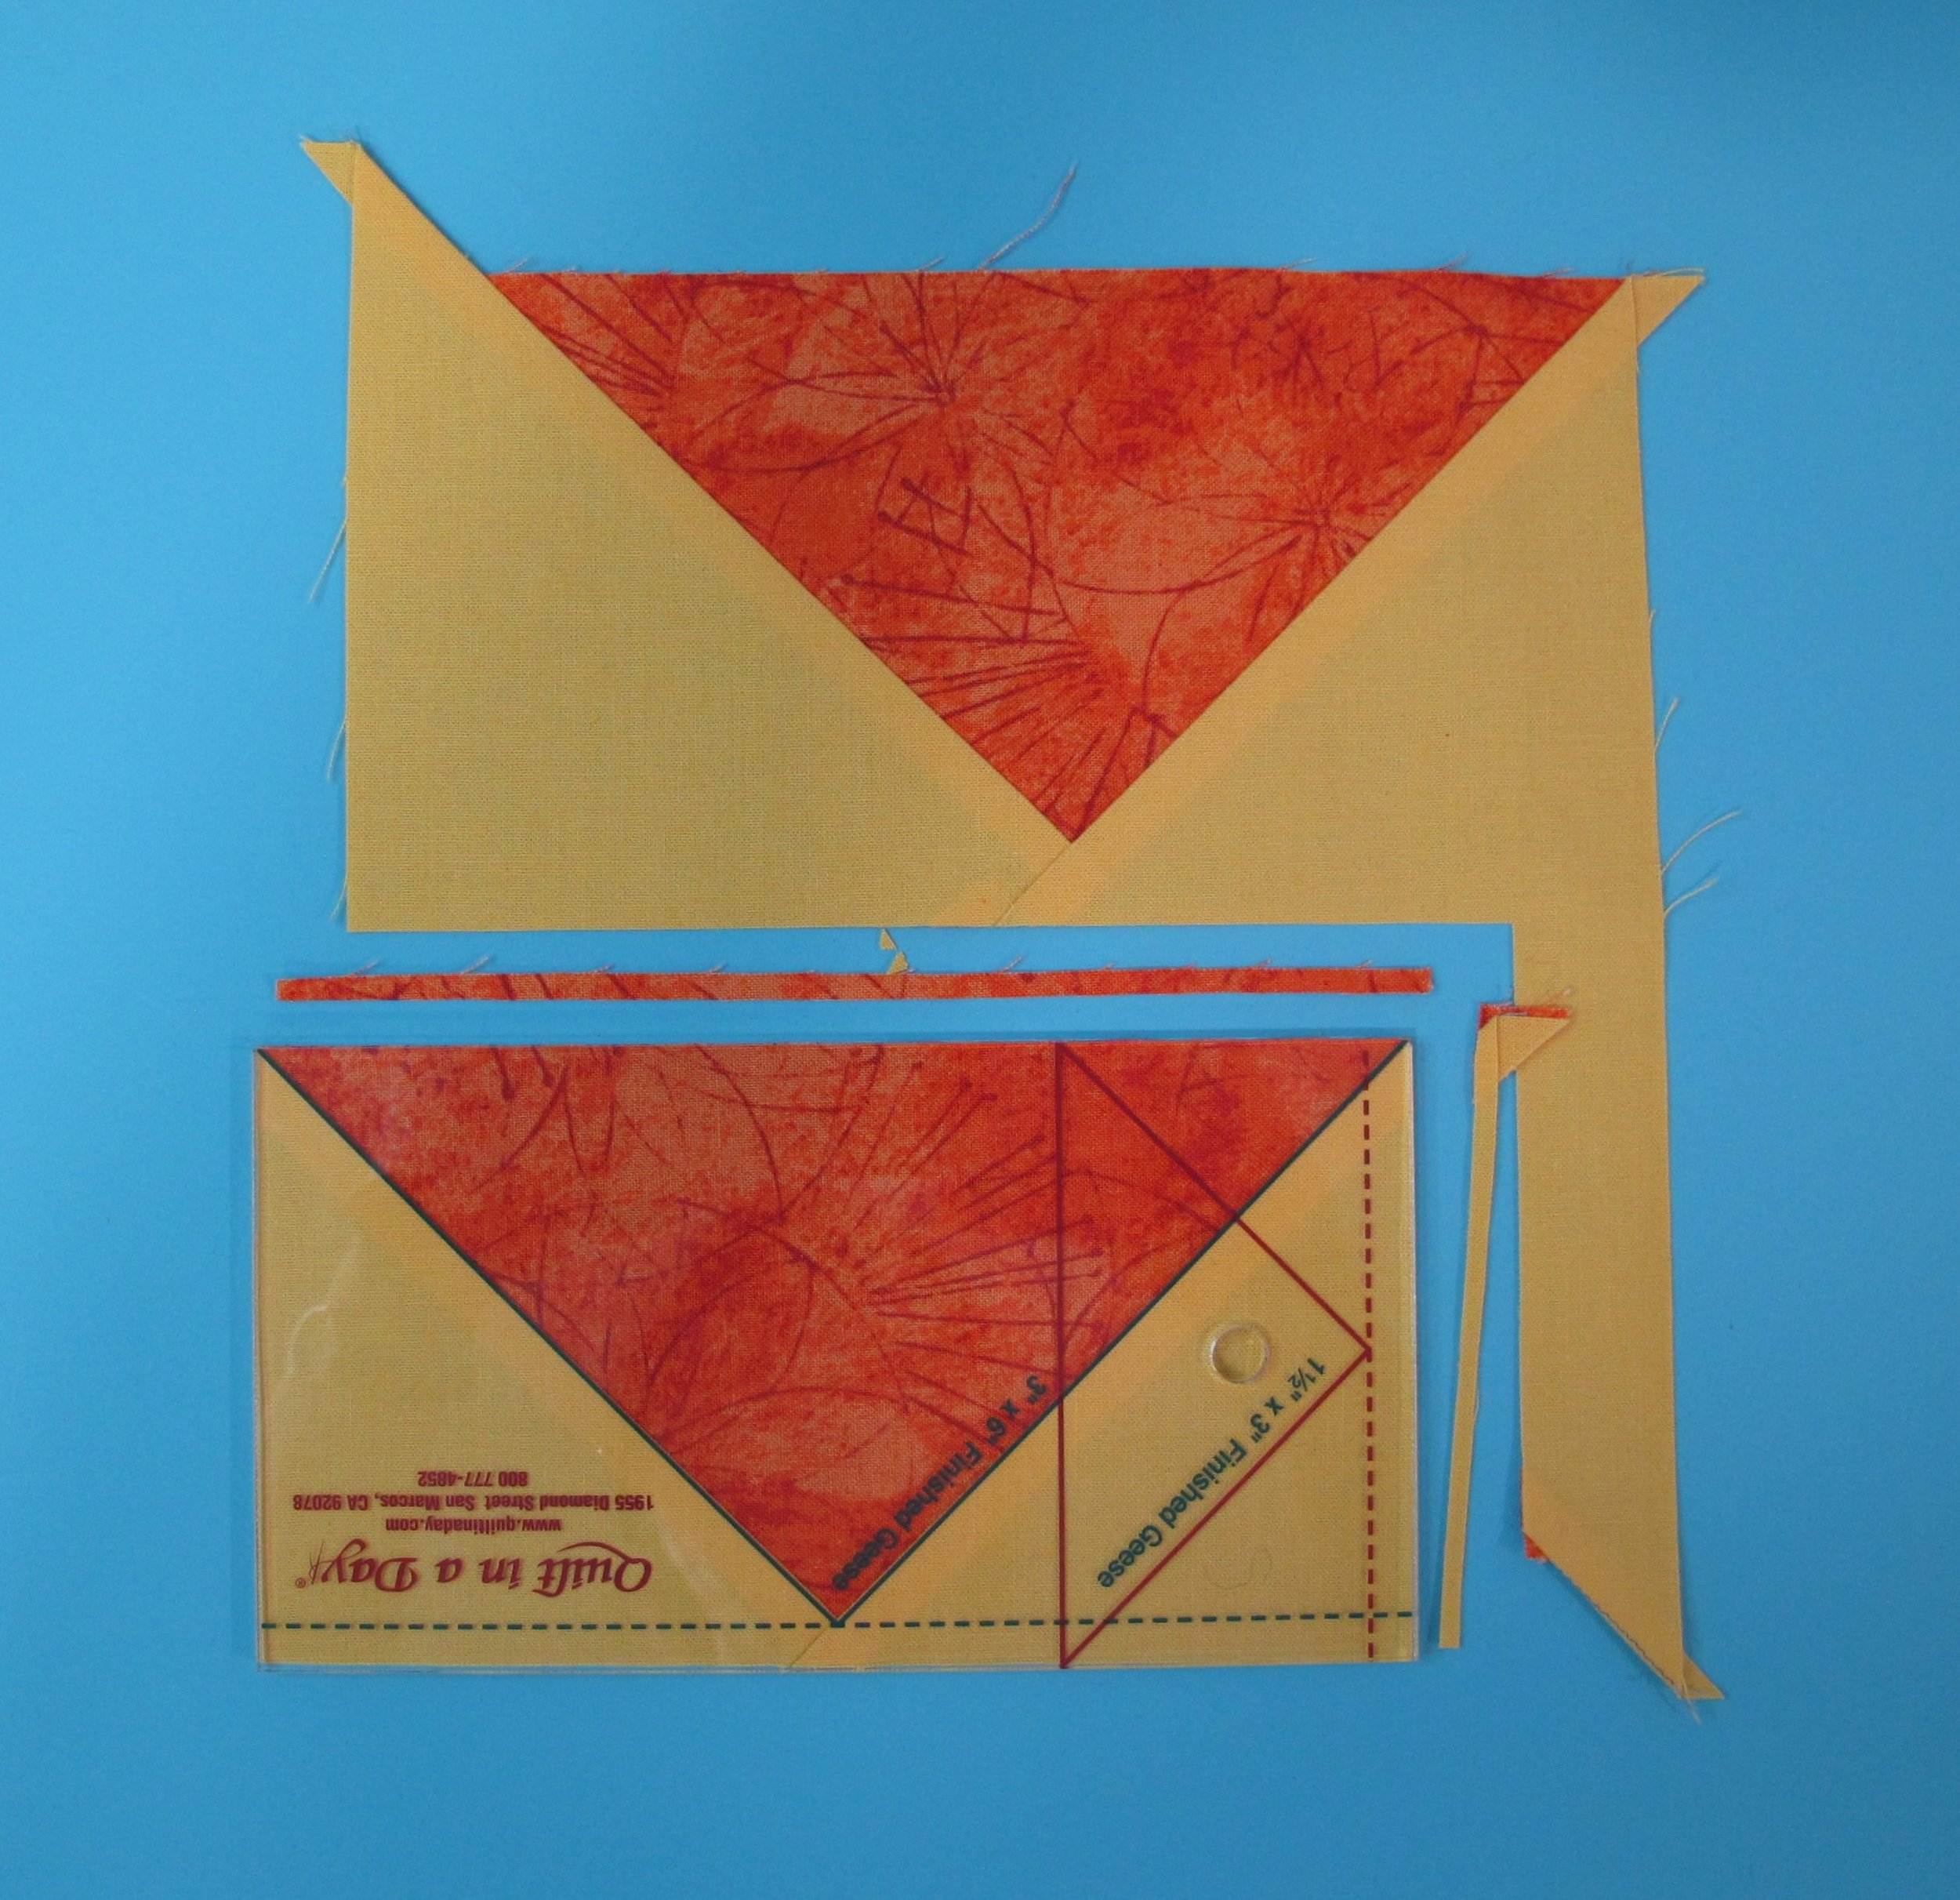
This flying geese technique starts with one larger and one smaller square to create four complete flying geese units. The smaller square creates the “goose” and the larger square creates the “sky”. Before you start your project you will need to know what finished size goose you require for your project as the rulers are sold according to the finished size. Typically each ruler makes 2 sizes so check your pattern.
With right sides together, centre the smaller square on top of the larger one. This does not need to be measured...just eyeball it...the goose will be trimmed later anyway so there's a little extra fabric for insurance. Pin them together, draw a diagonal line, stitch 1/4” from both sides of the line, cut along the line and press seams toward the large square (the “sky”).
***Pay close attention to this next step...
With right sides together match the “sky” corners (yellow on the sample) with the “geese” corners (orange on the sample). Notice that the seams in the middle do not match up with each other, but are offset. Pin the 2 units together, draw a line as shown, stitch 1/4” from both sides of the line and cut along the line.
The seam allowance will be snipped in the centre so that the seam allowance can be pressed in 2 different directions toward the “sky” fabric. You might be able to notice the shadowing/slight puckering at the seam area to show this step.
Trimming:
Line up the marked triangle on the ruler with the shape of the “goose” and trim along the right side and along the top (lefties…do it on the left side and along the top). Turn the “goose” around and trim the remaining 2 sides. Repeat with the other 3 units and you have 4 complete geese. Notice that this ruler has 2 sizes included with a different coloured registration line for each size.
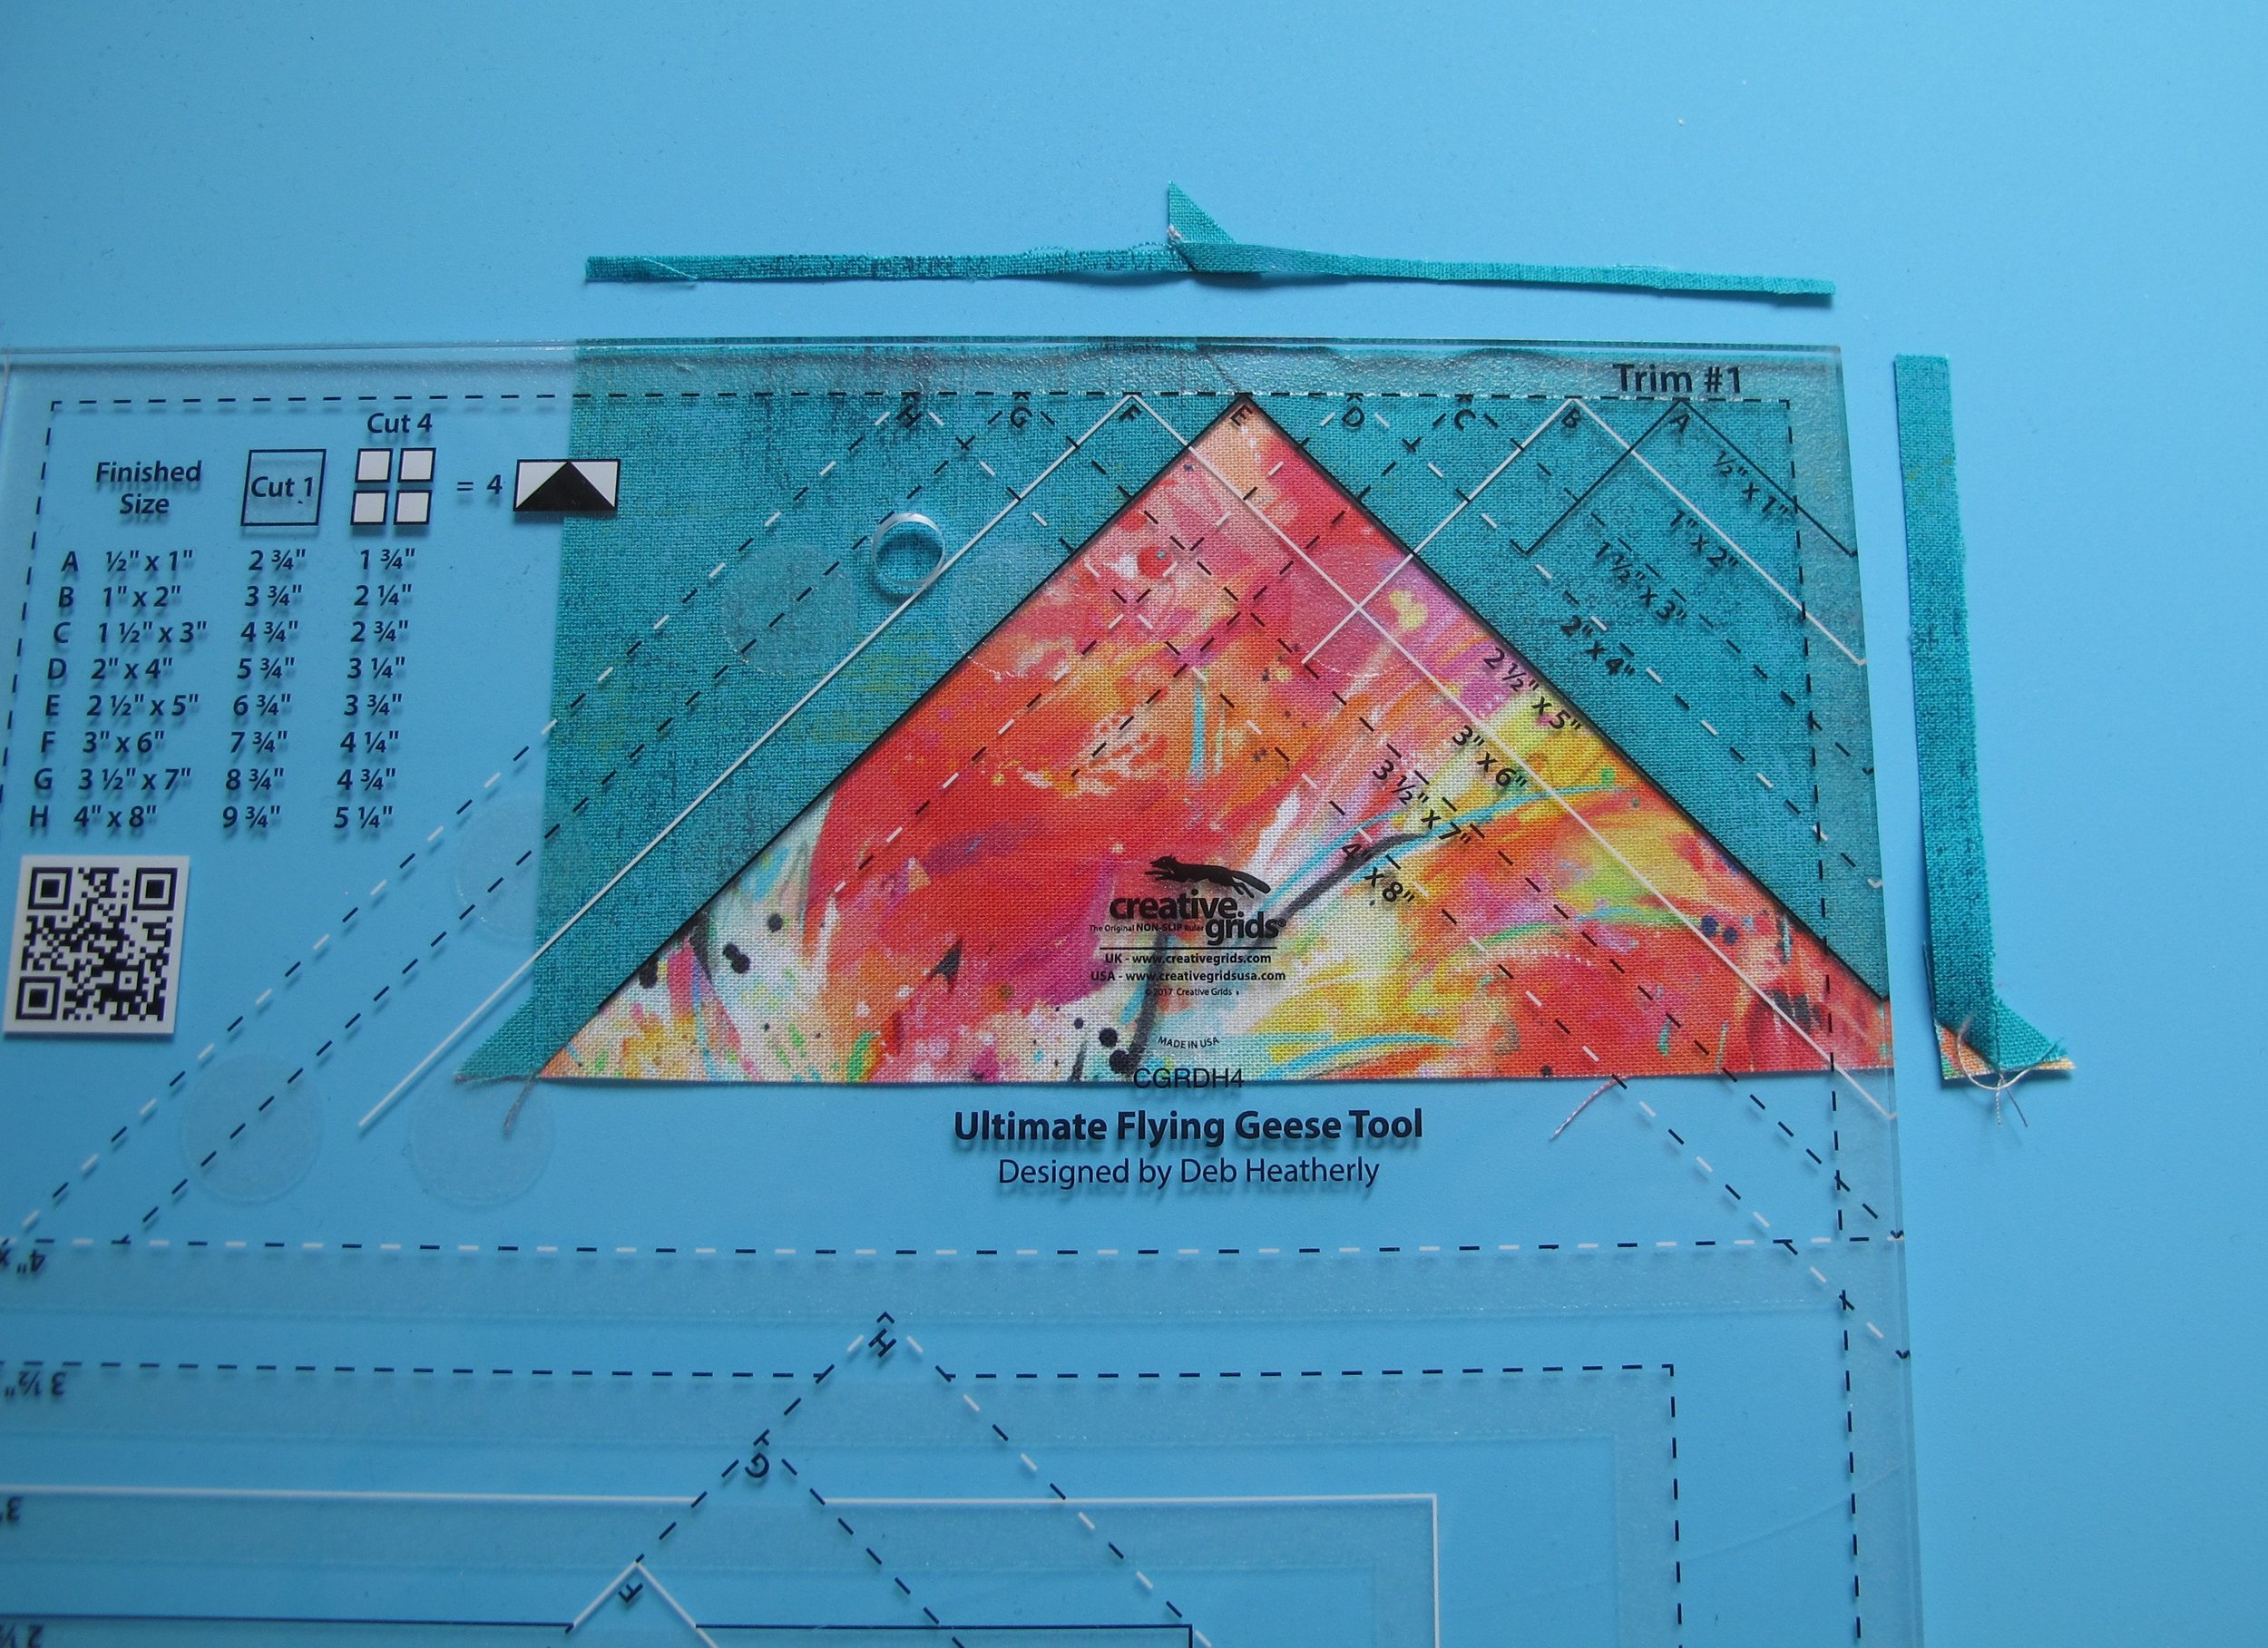
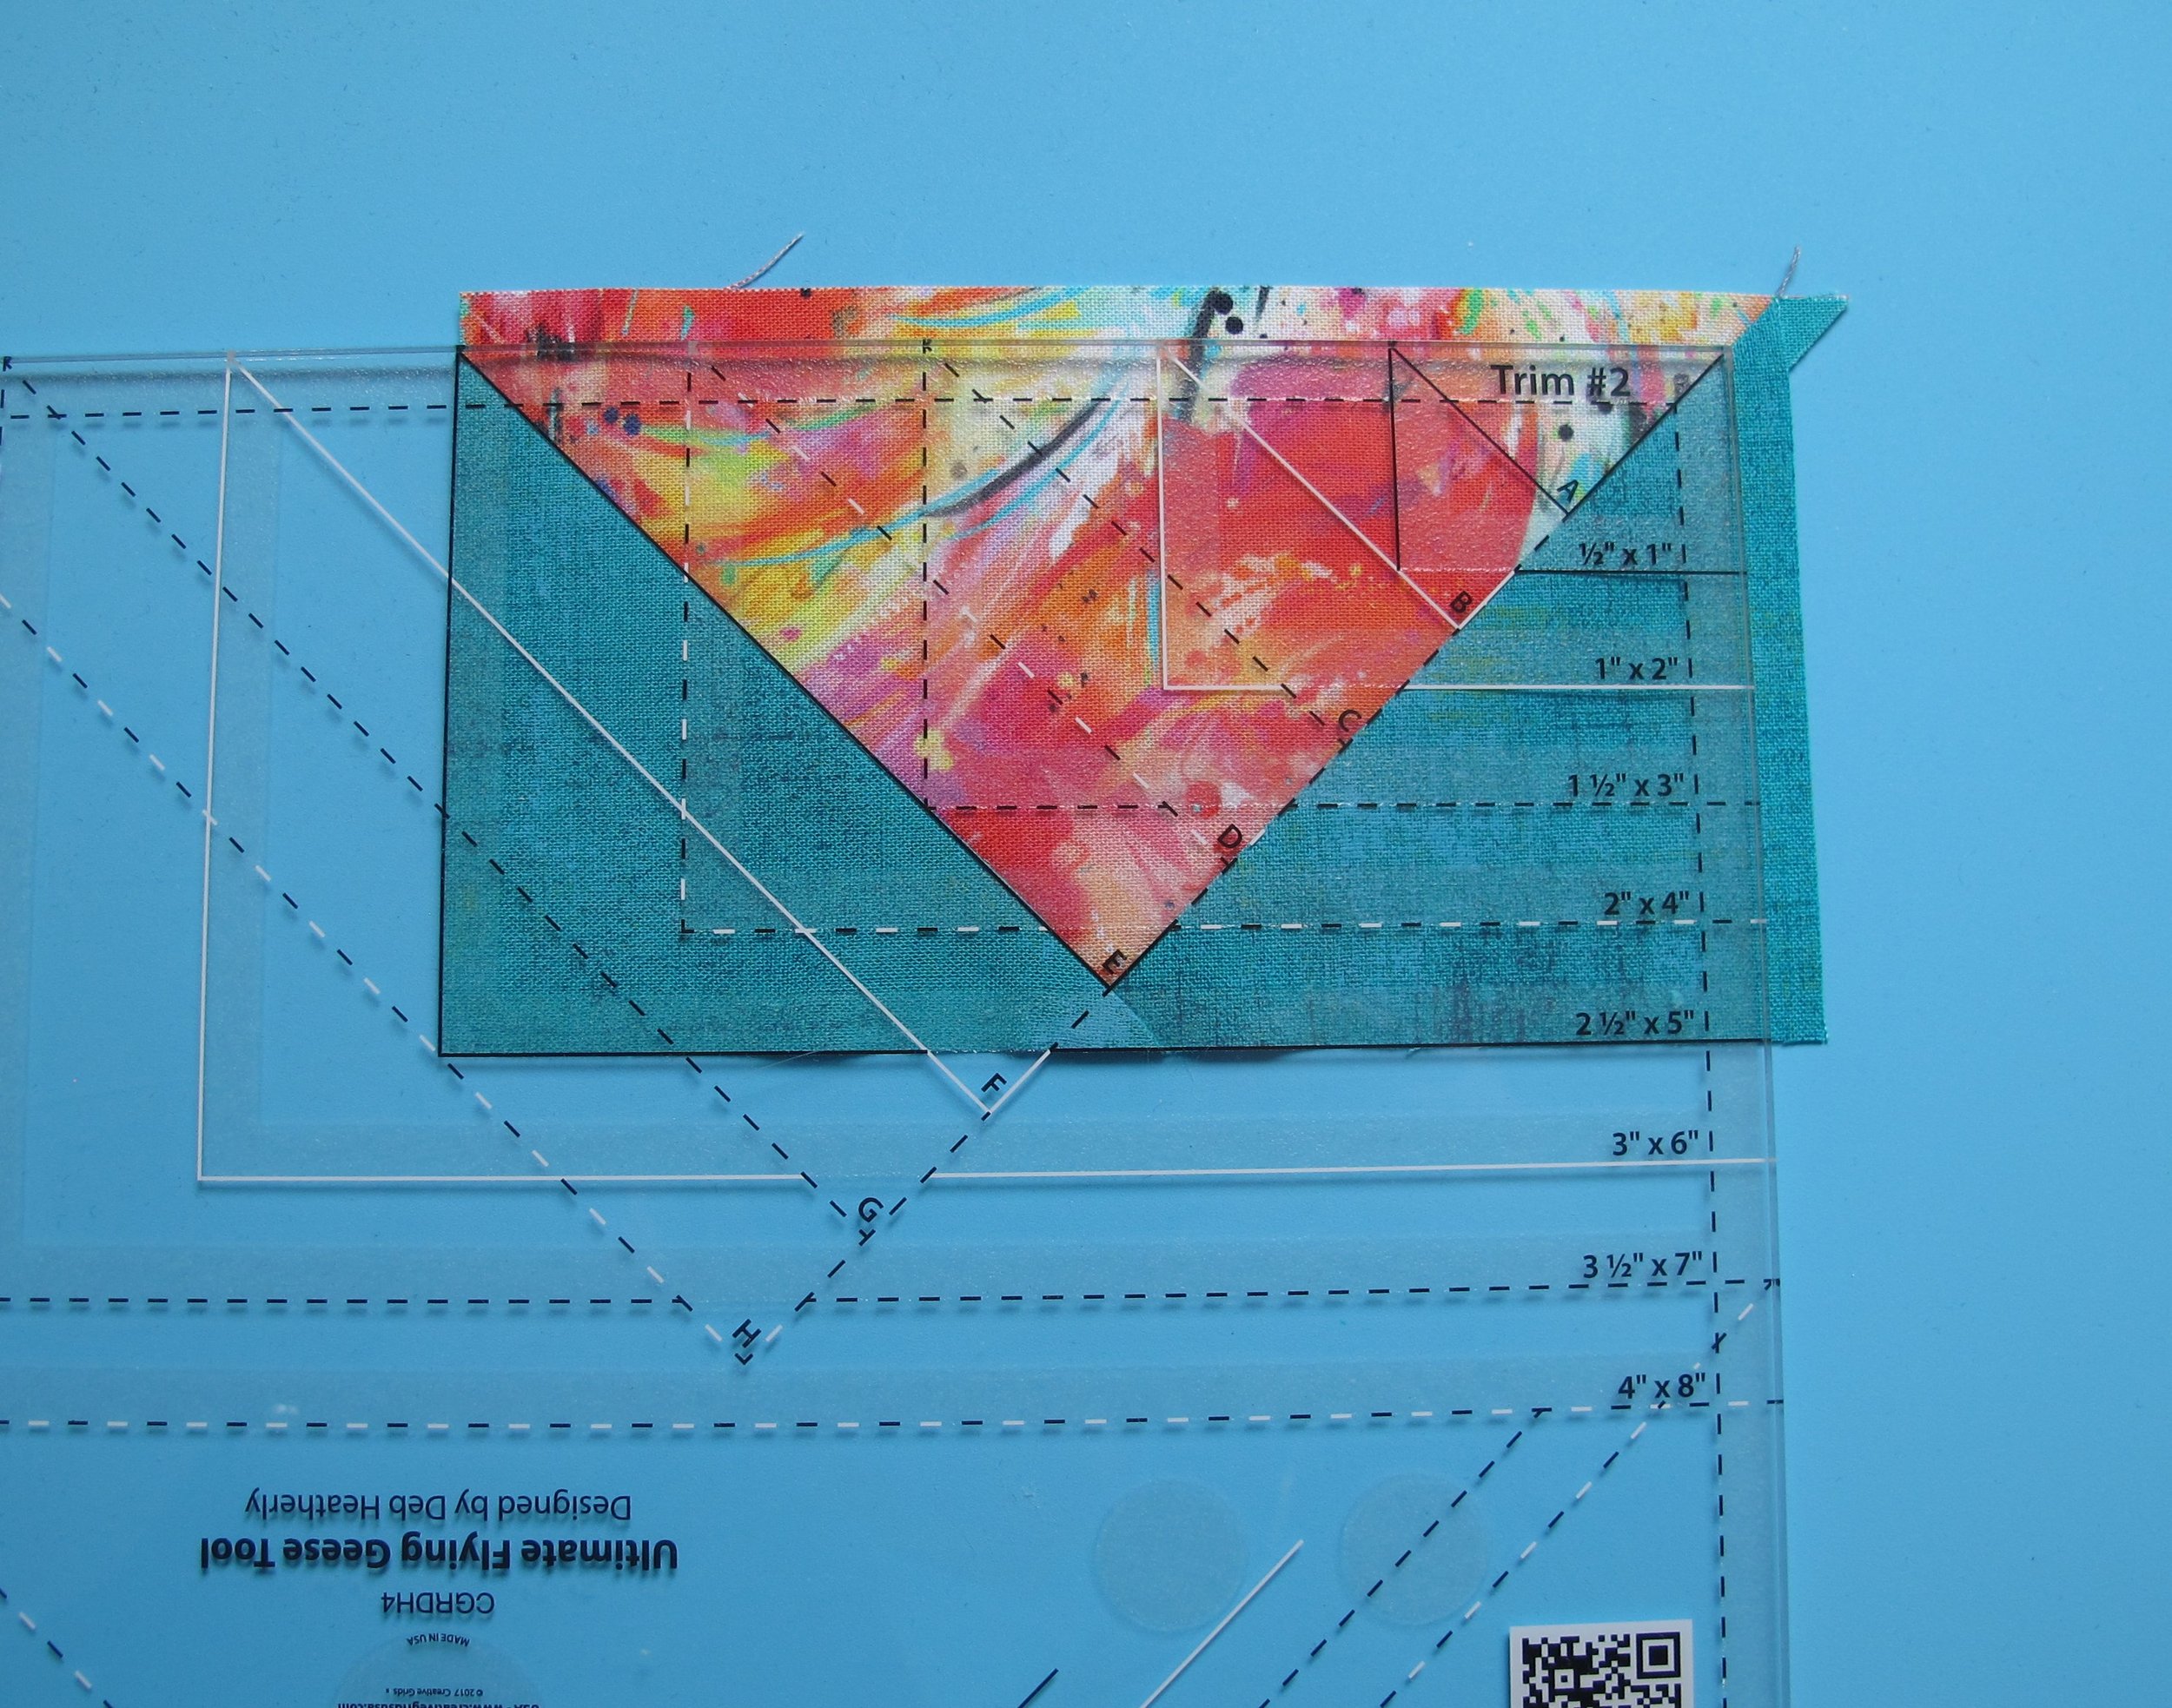
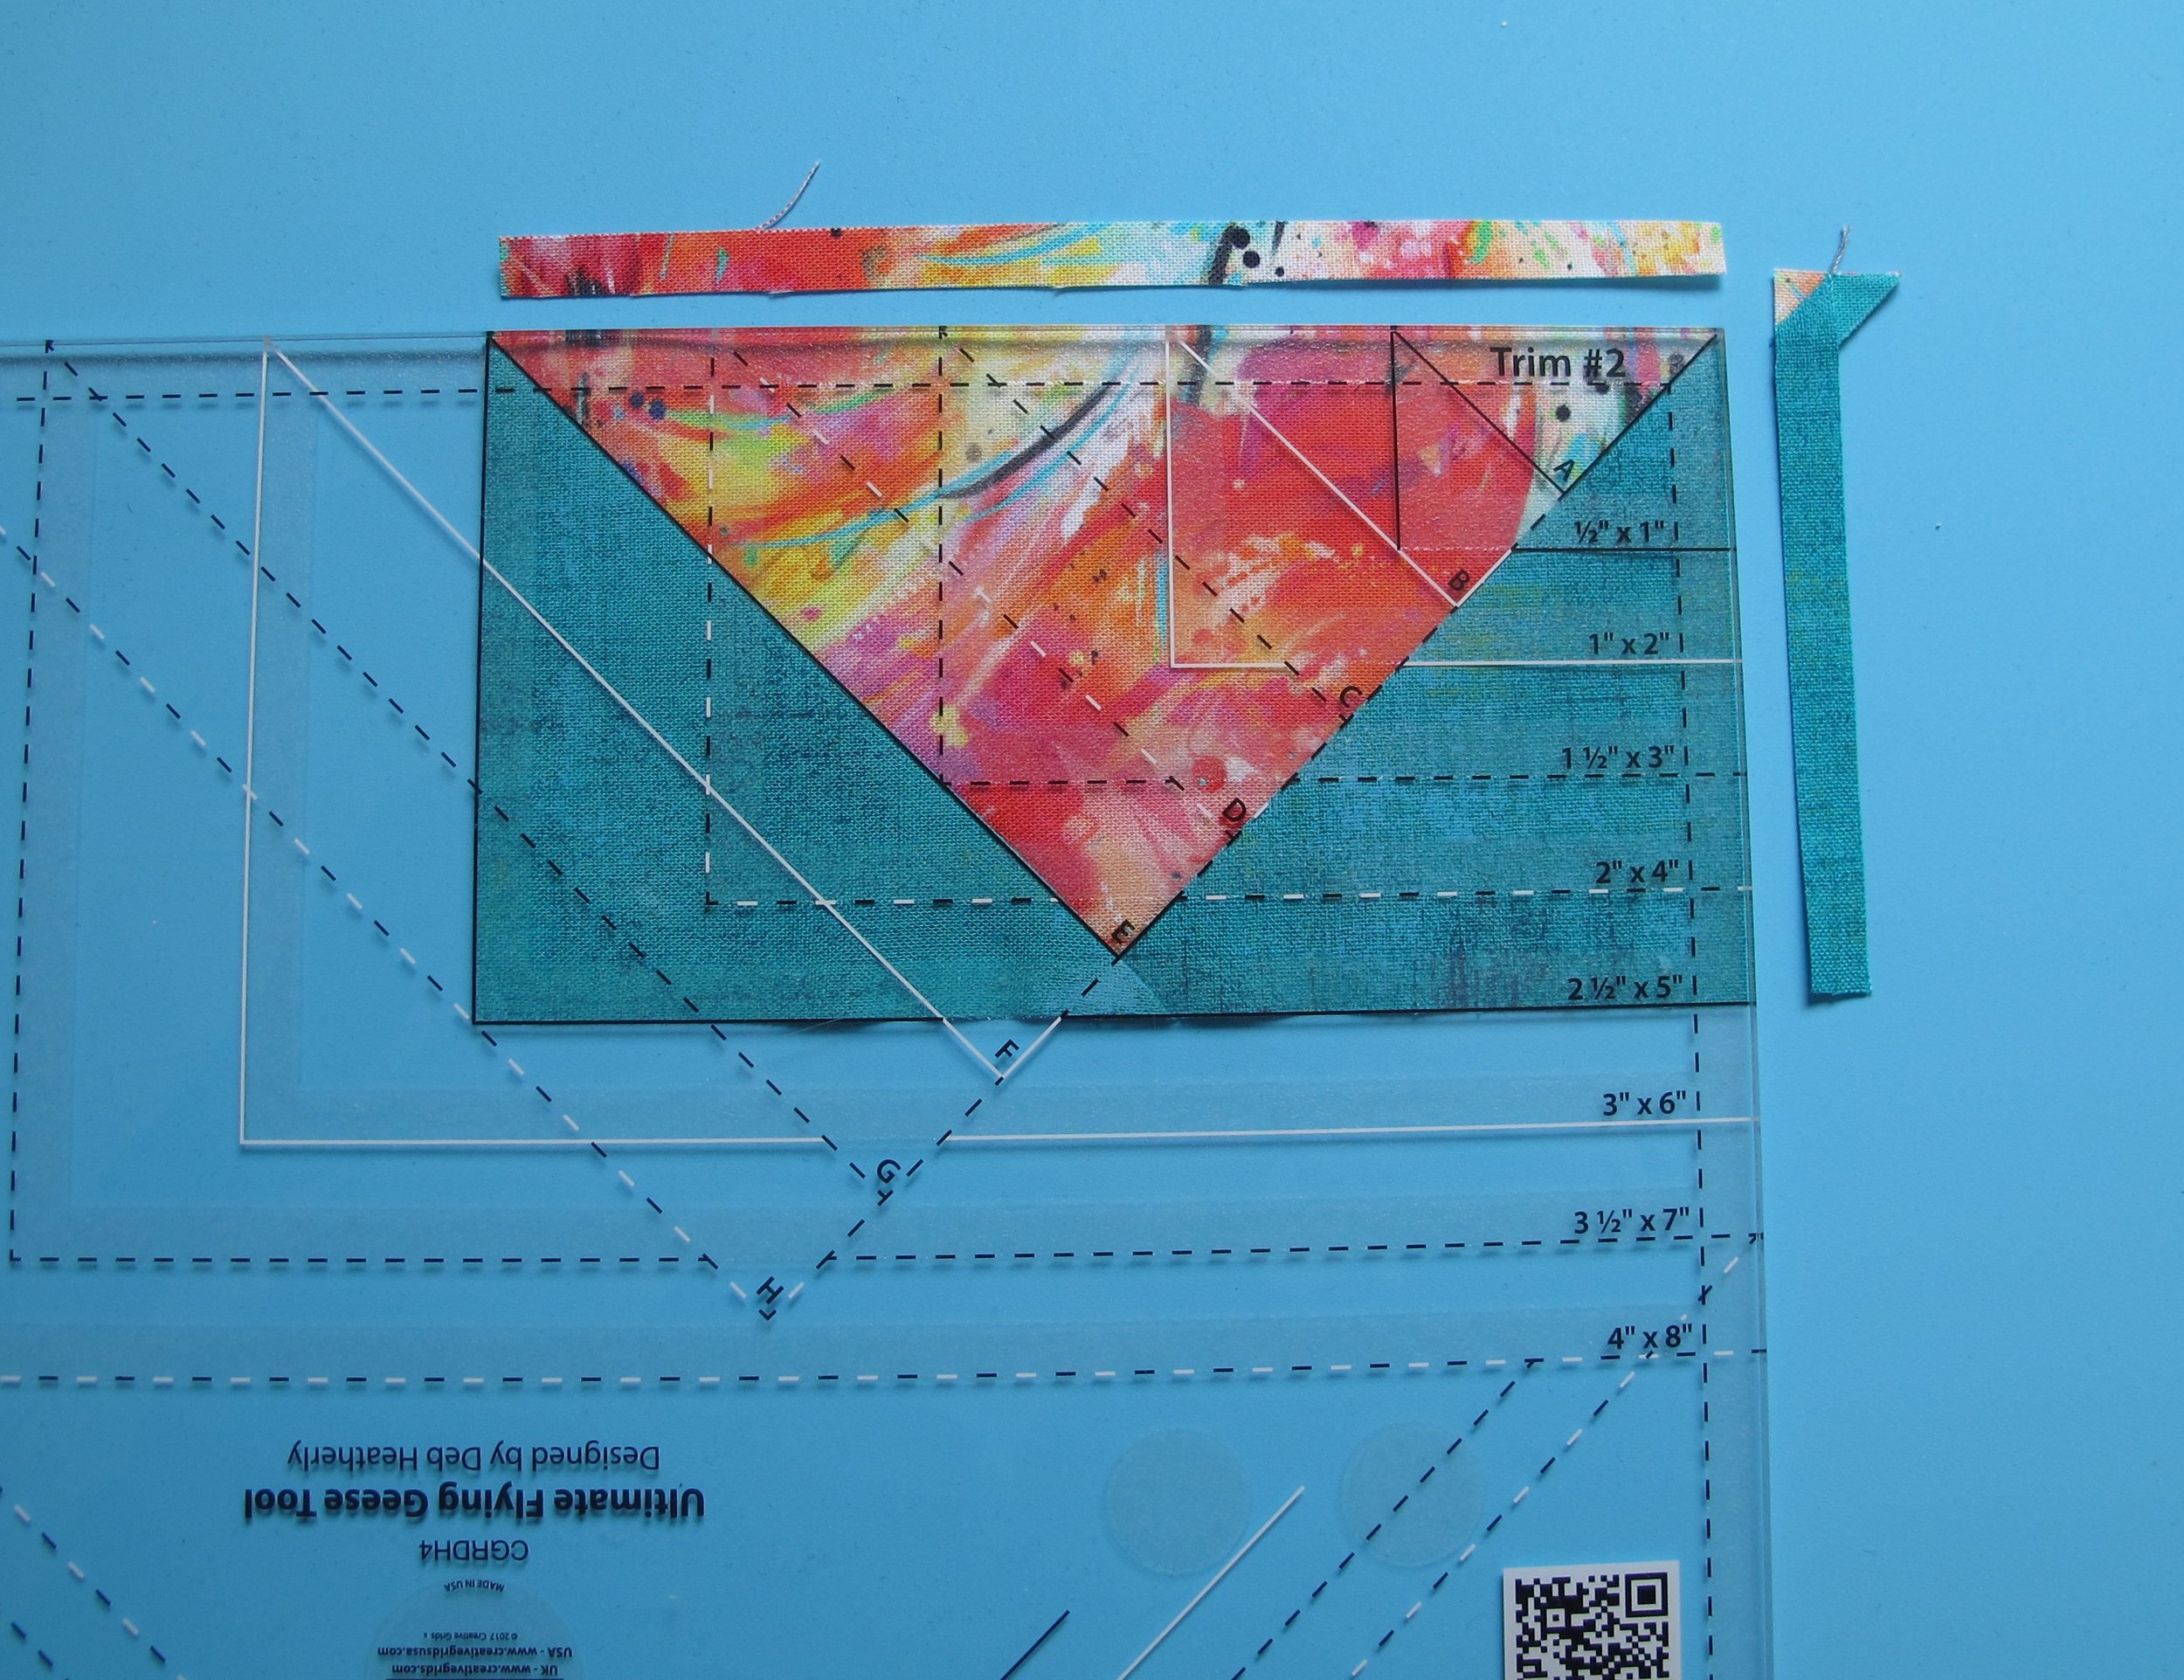
Ultimate Flying Geese Tool:
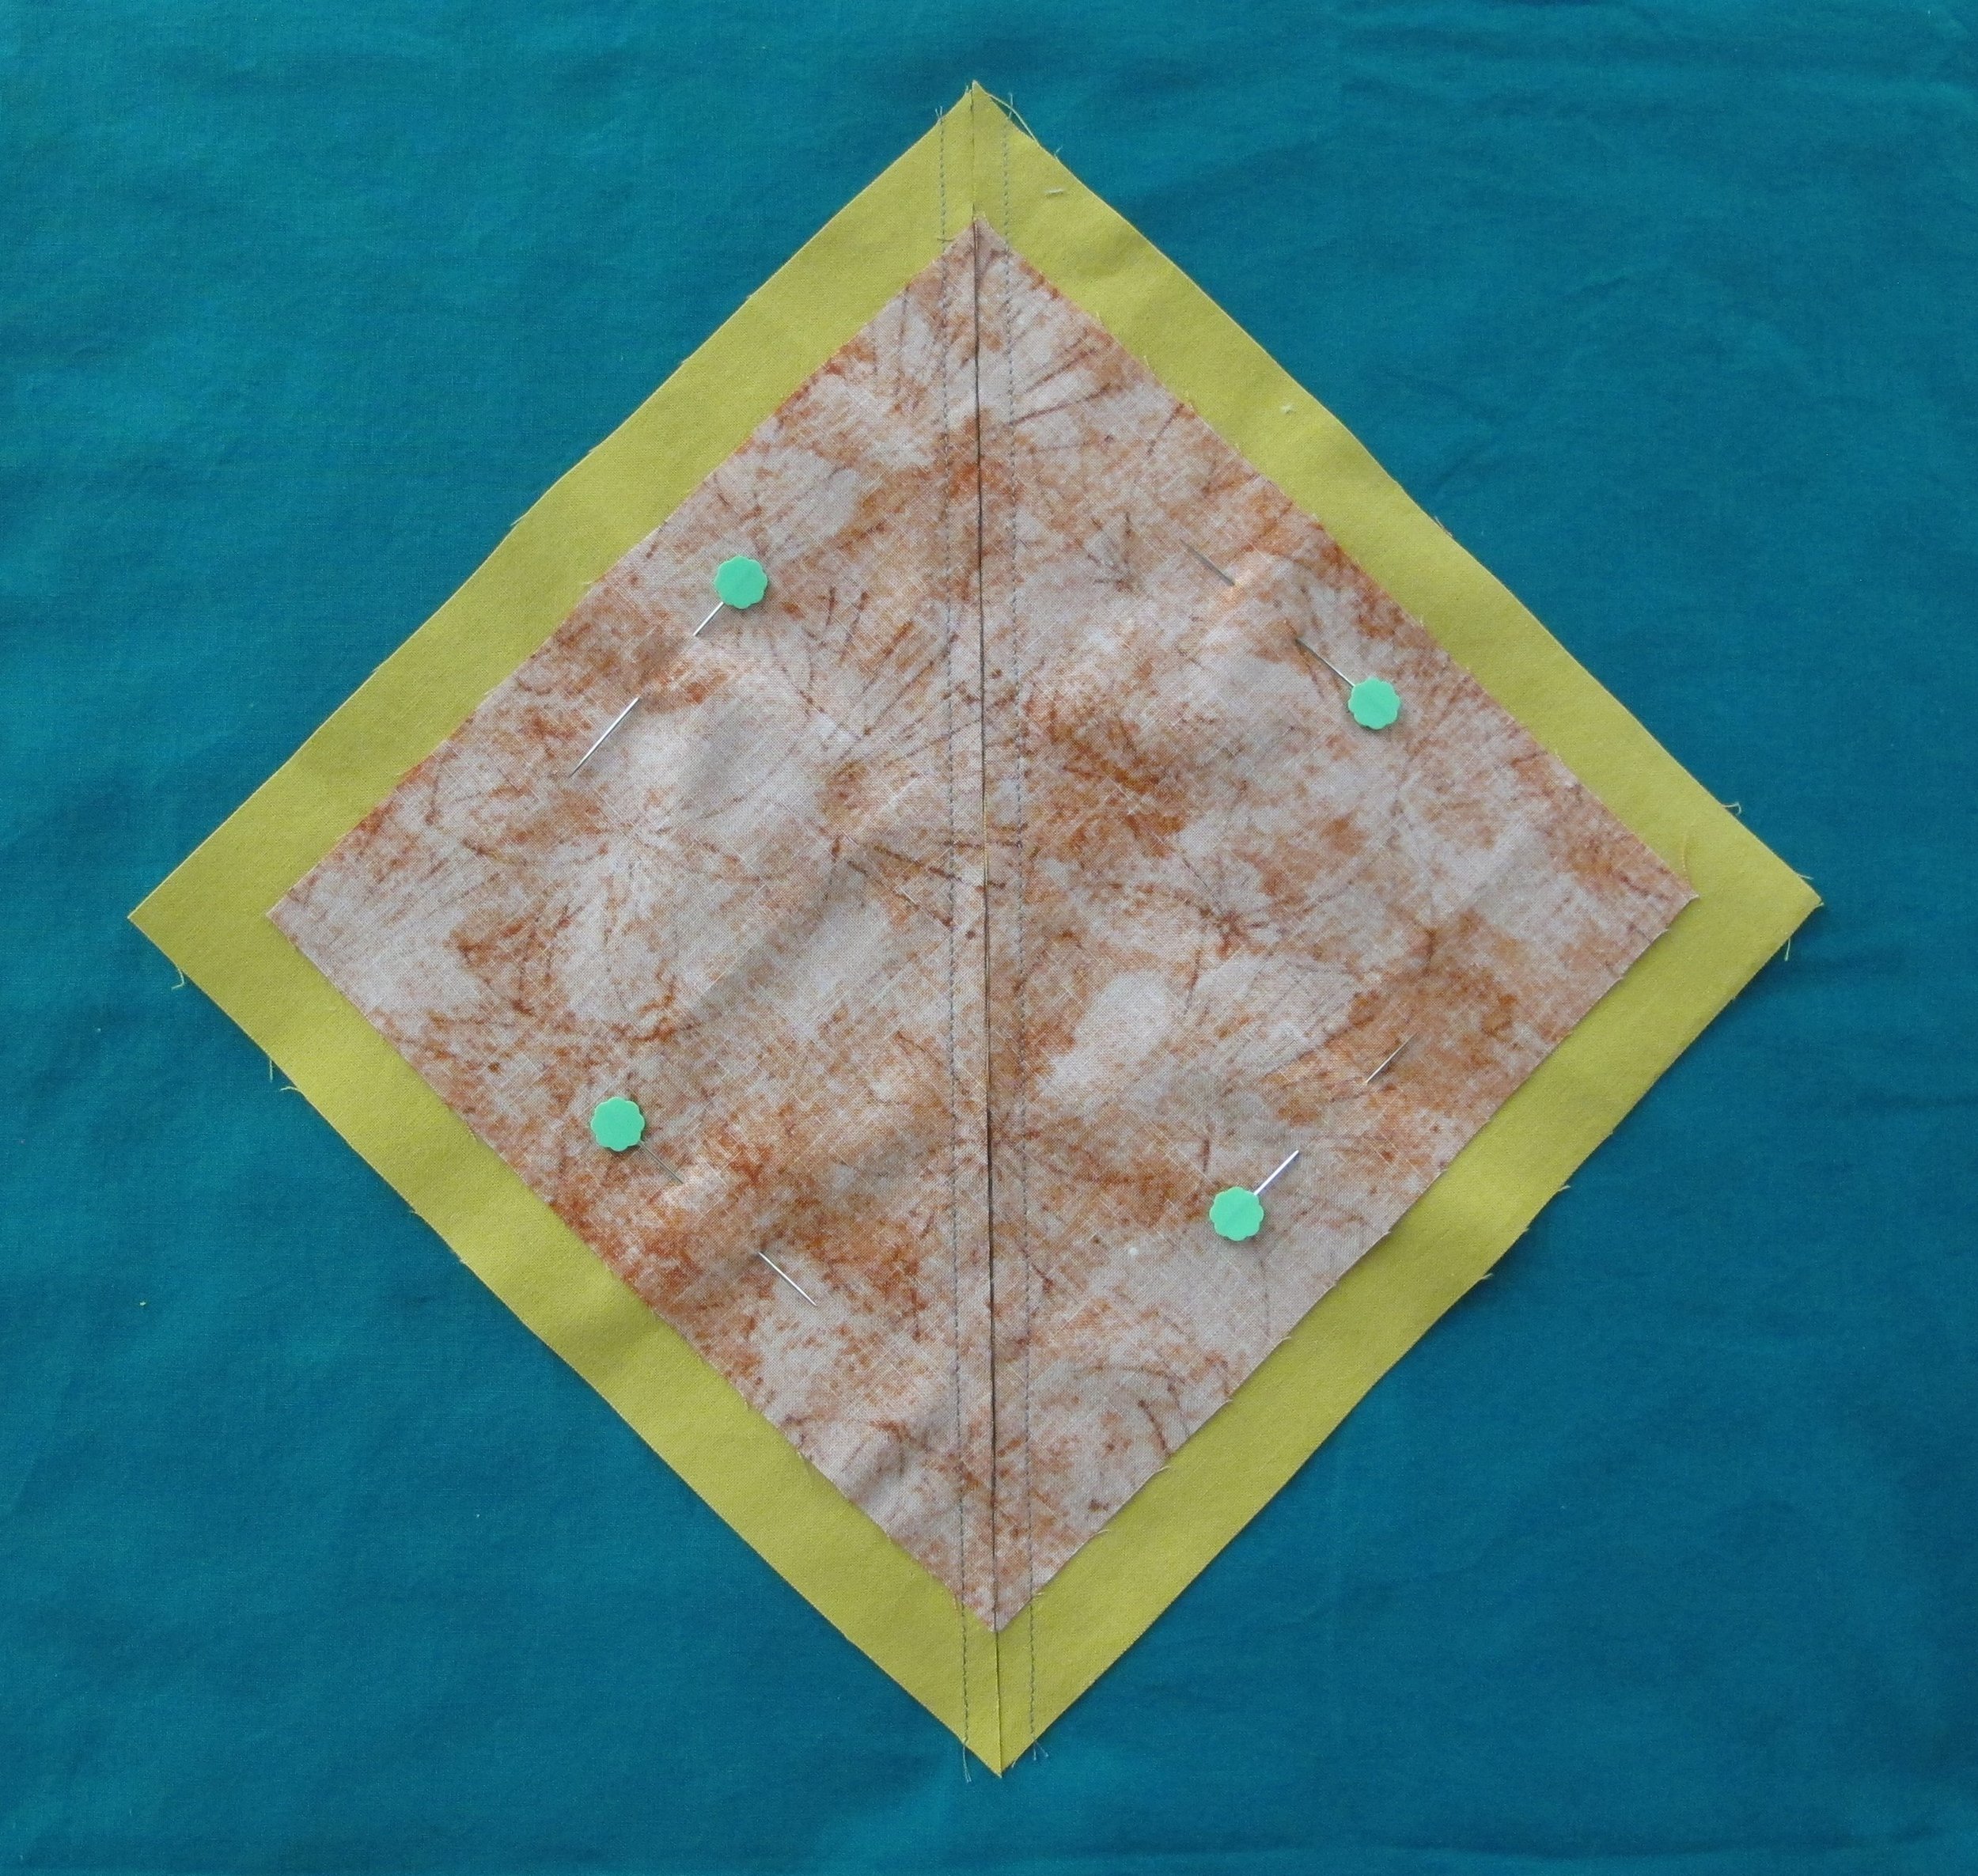
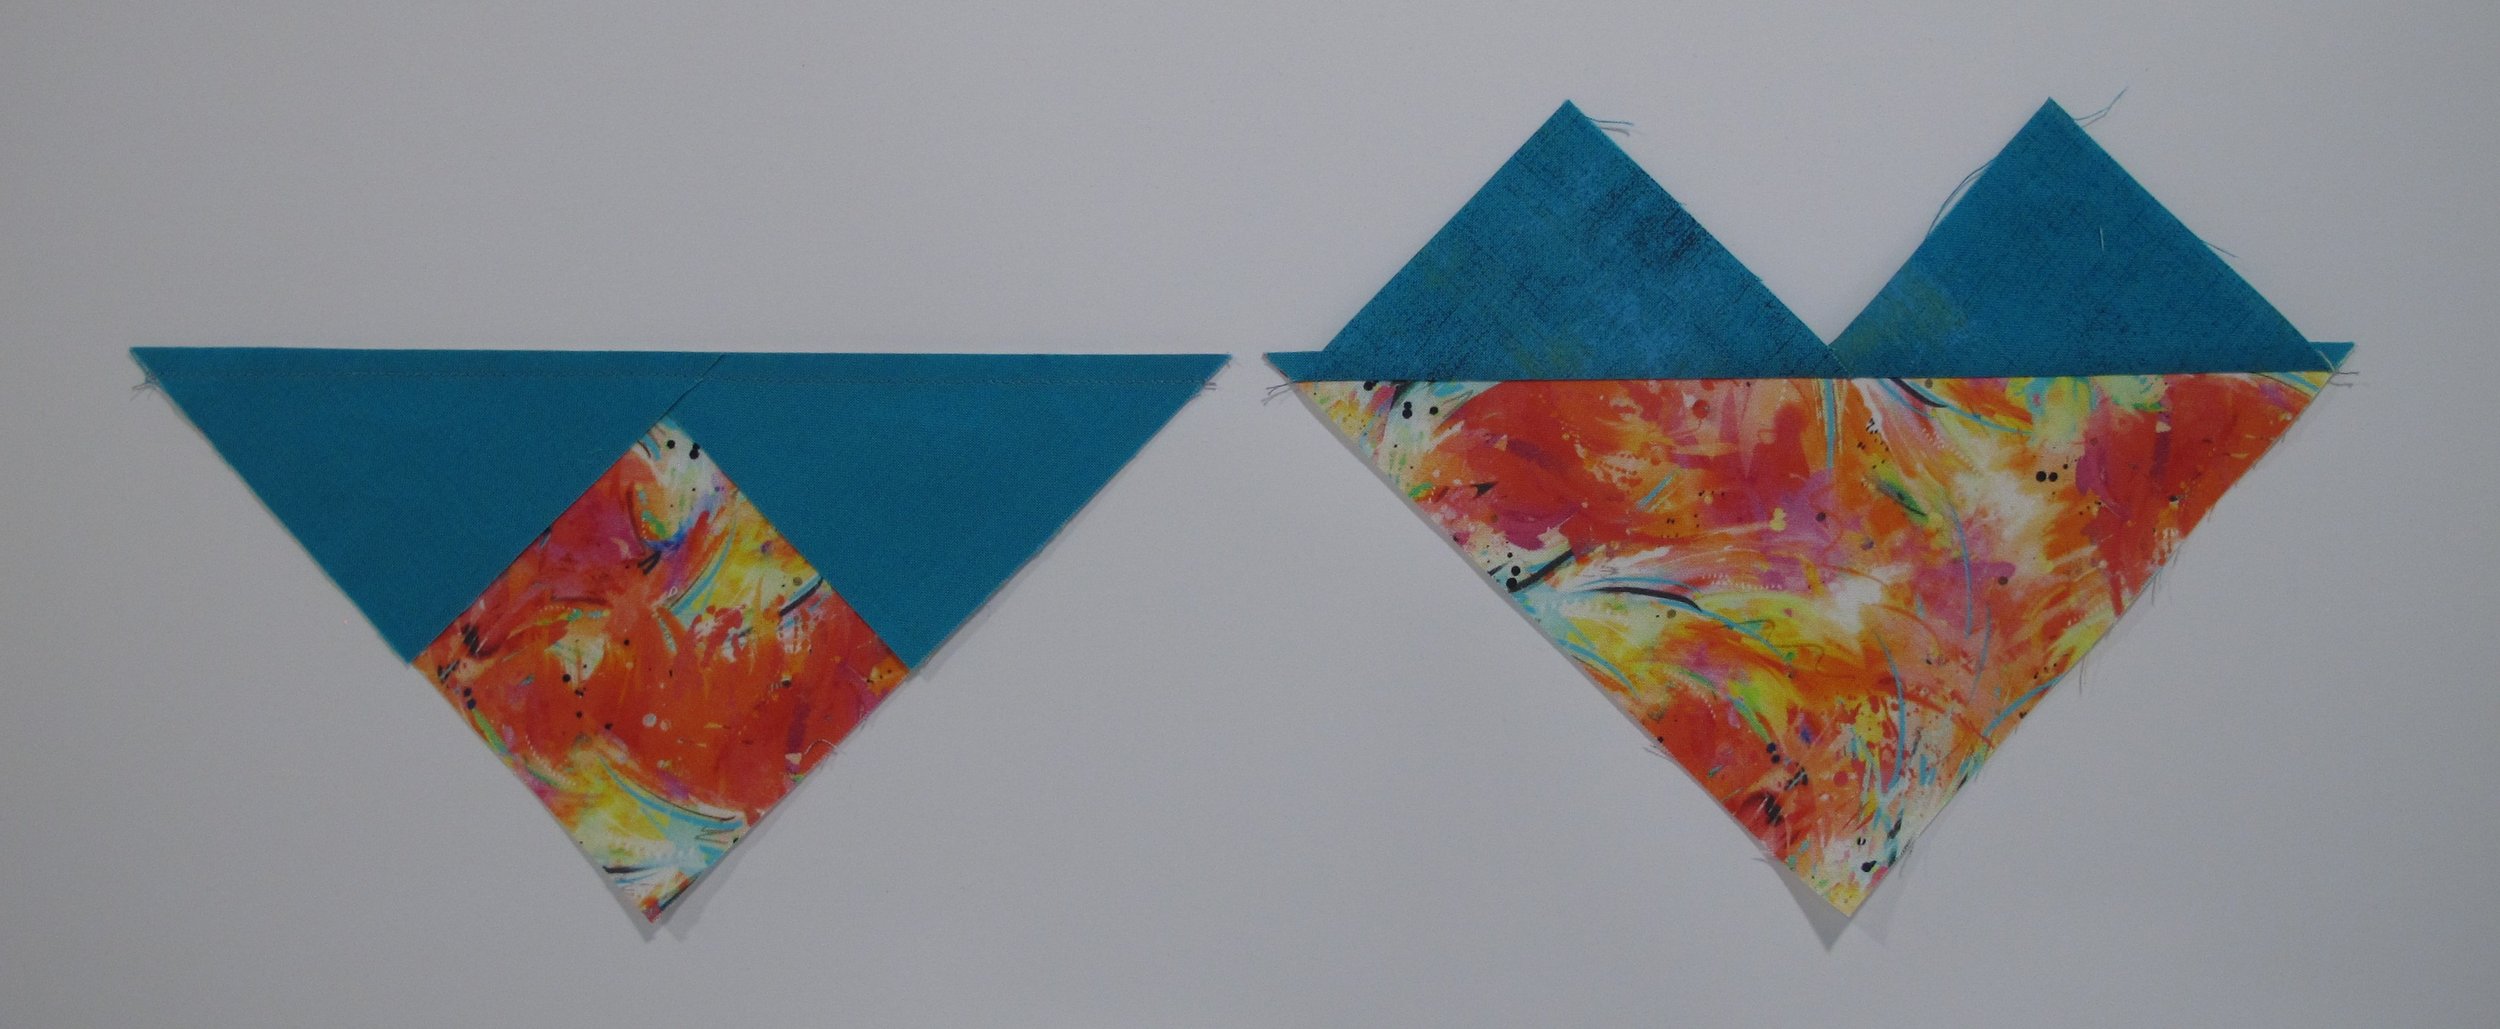
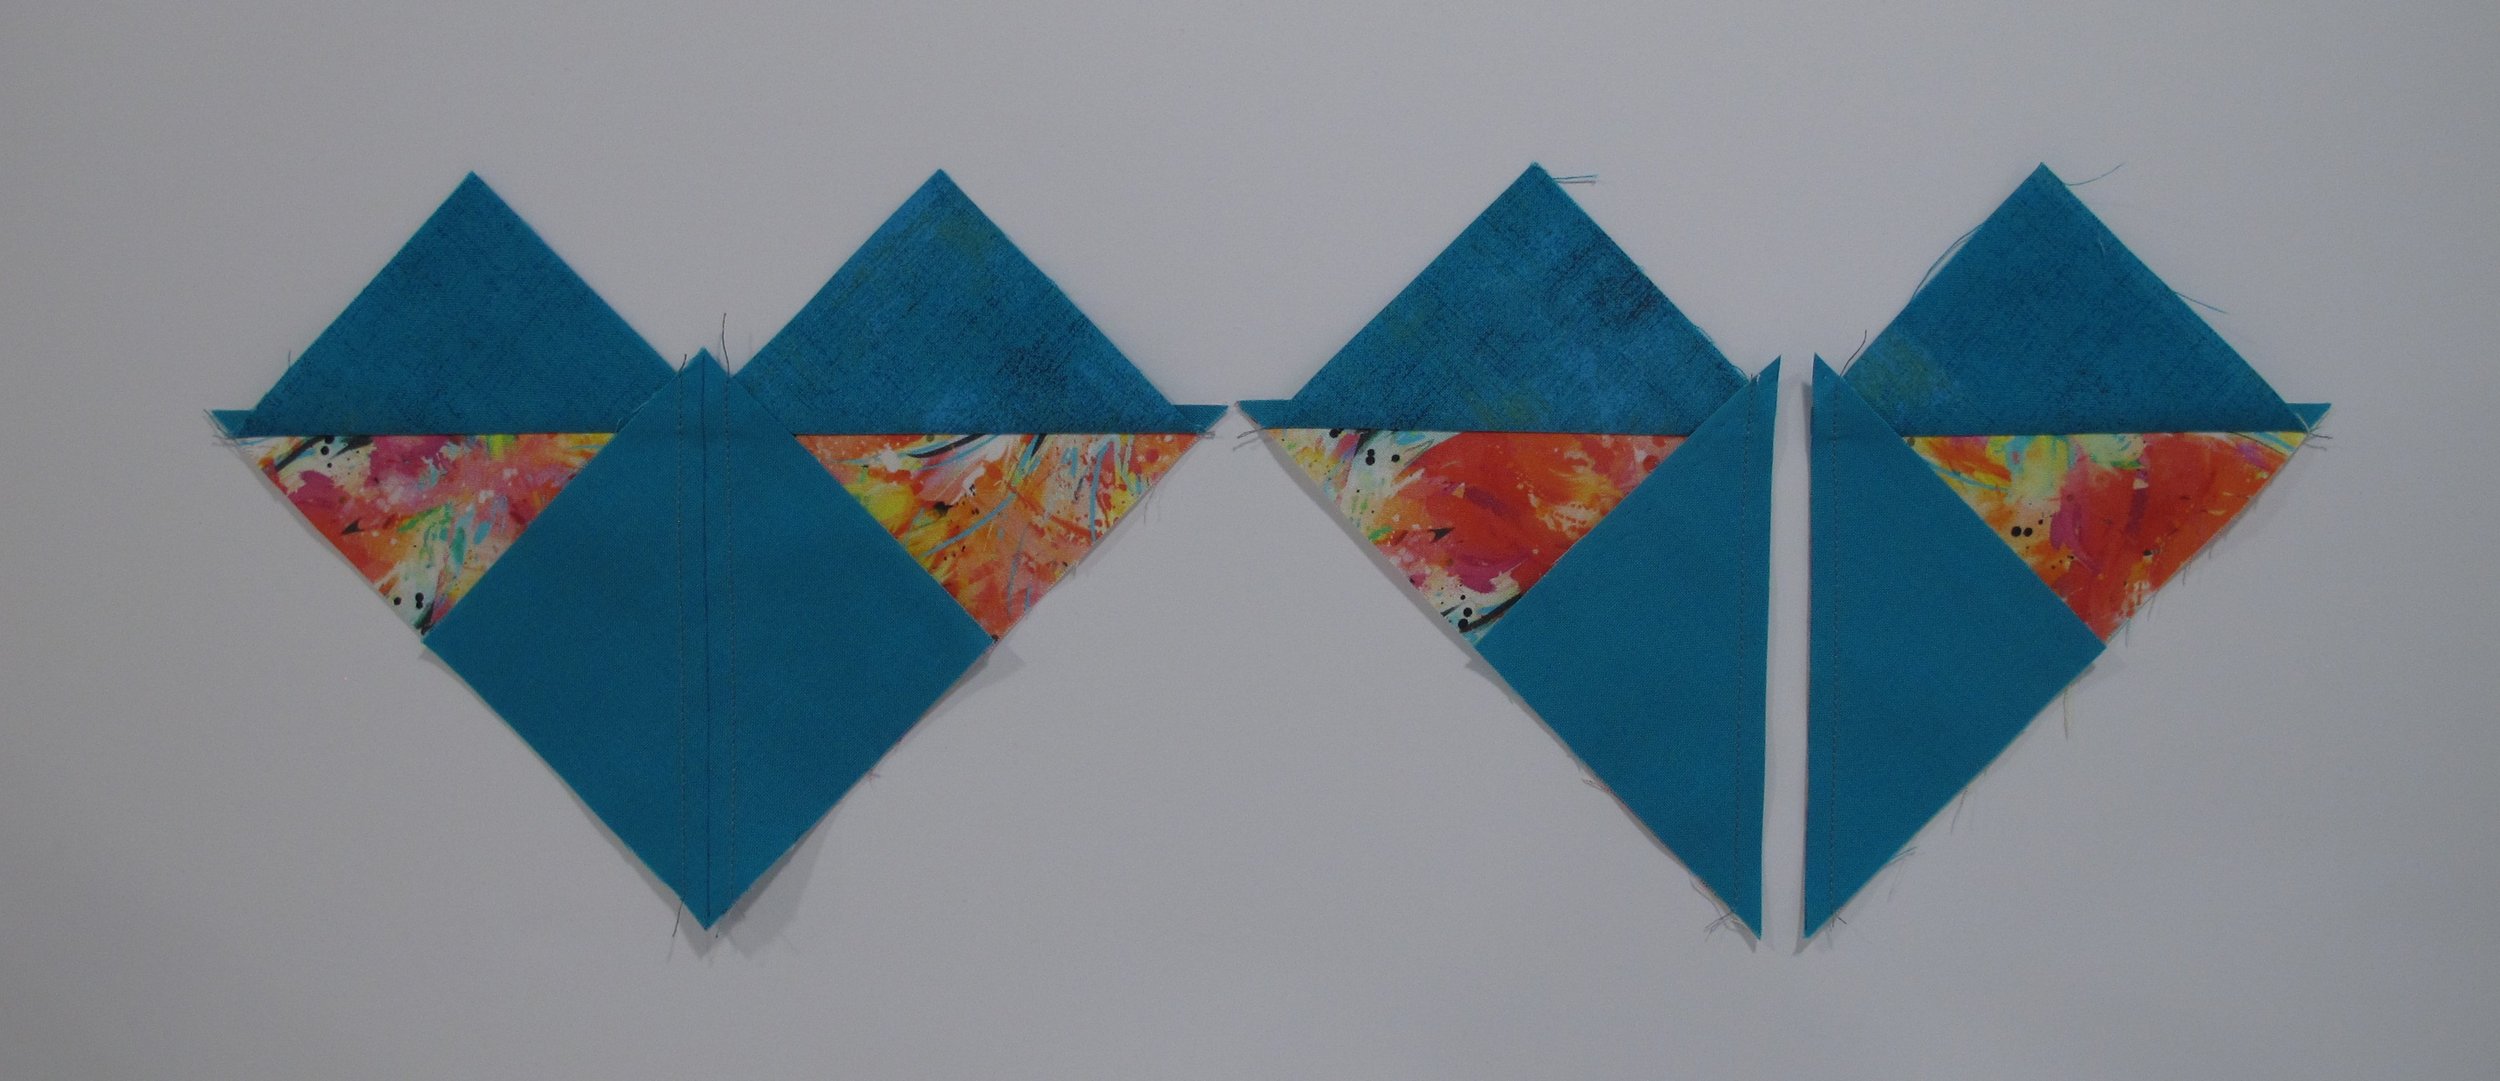
This particular tool starts with the “heart” method shown in Flying Geese Part 1, using one large square and 4 smaller squares.
Draw a diagonal line on the wrong side of each small square. With right sides together place them one above the other diagonally on the larger square as shown. Yes, the small squares will overlap at the centre. Stitch ¼” away on both sides of the line. Cut along the line and press seam allowances toward the “sky”.
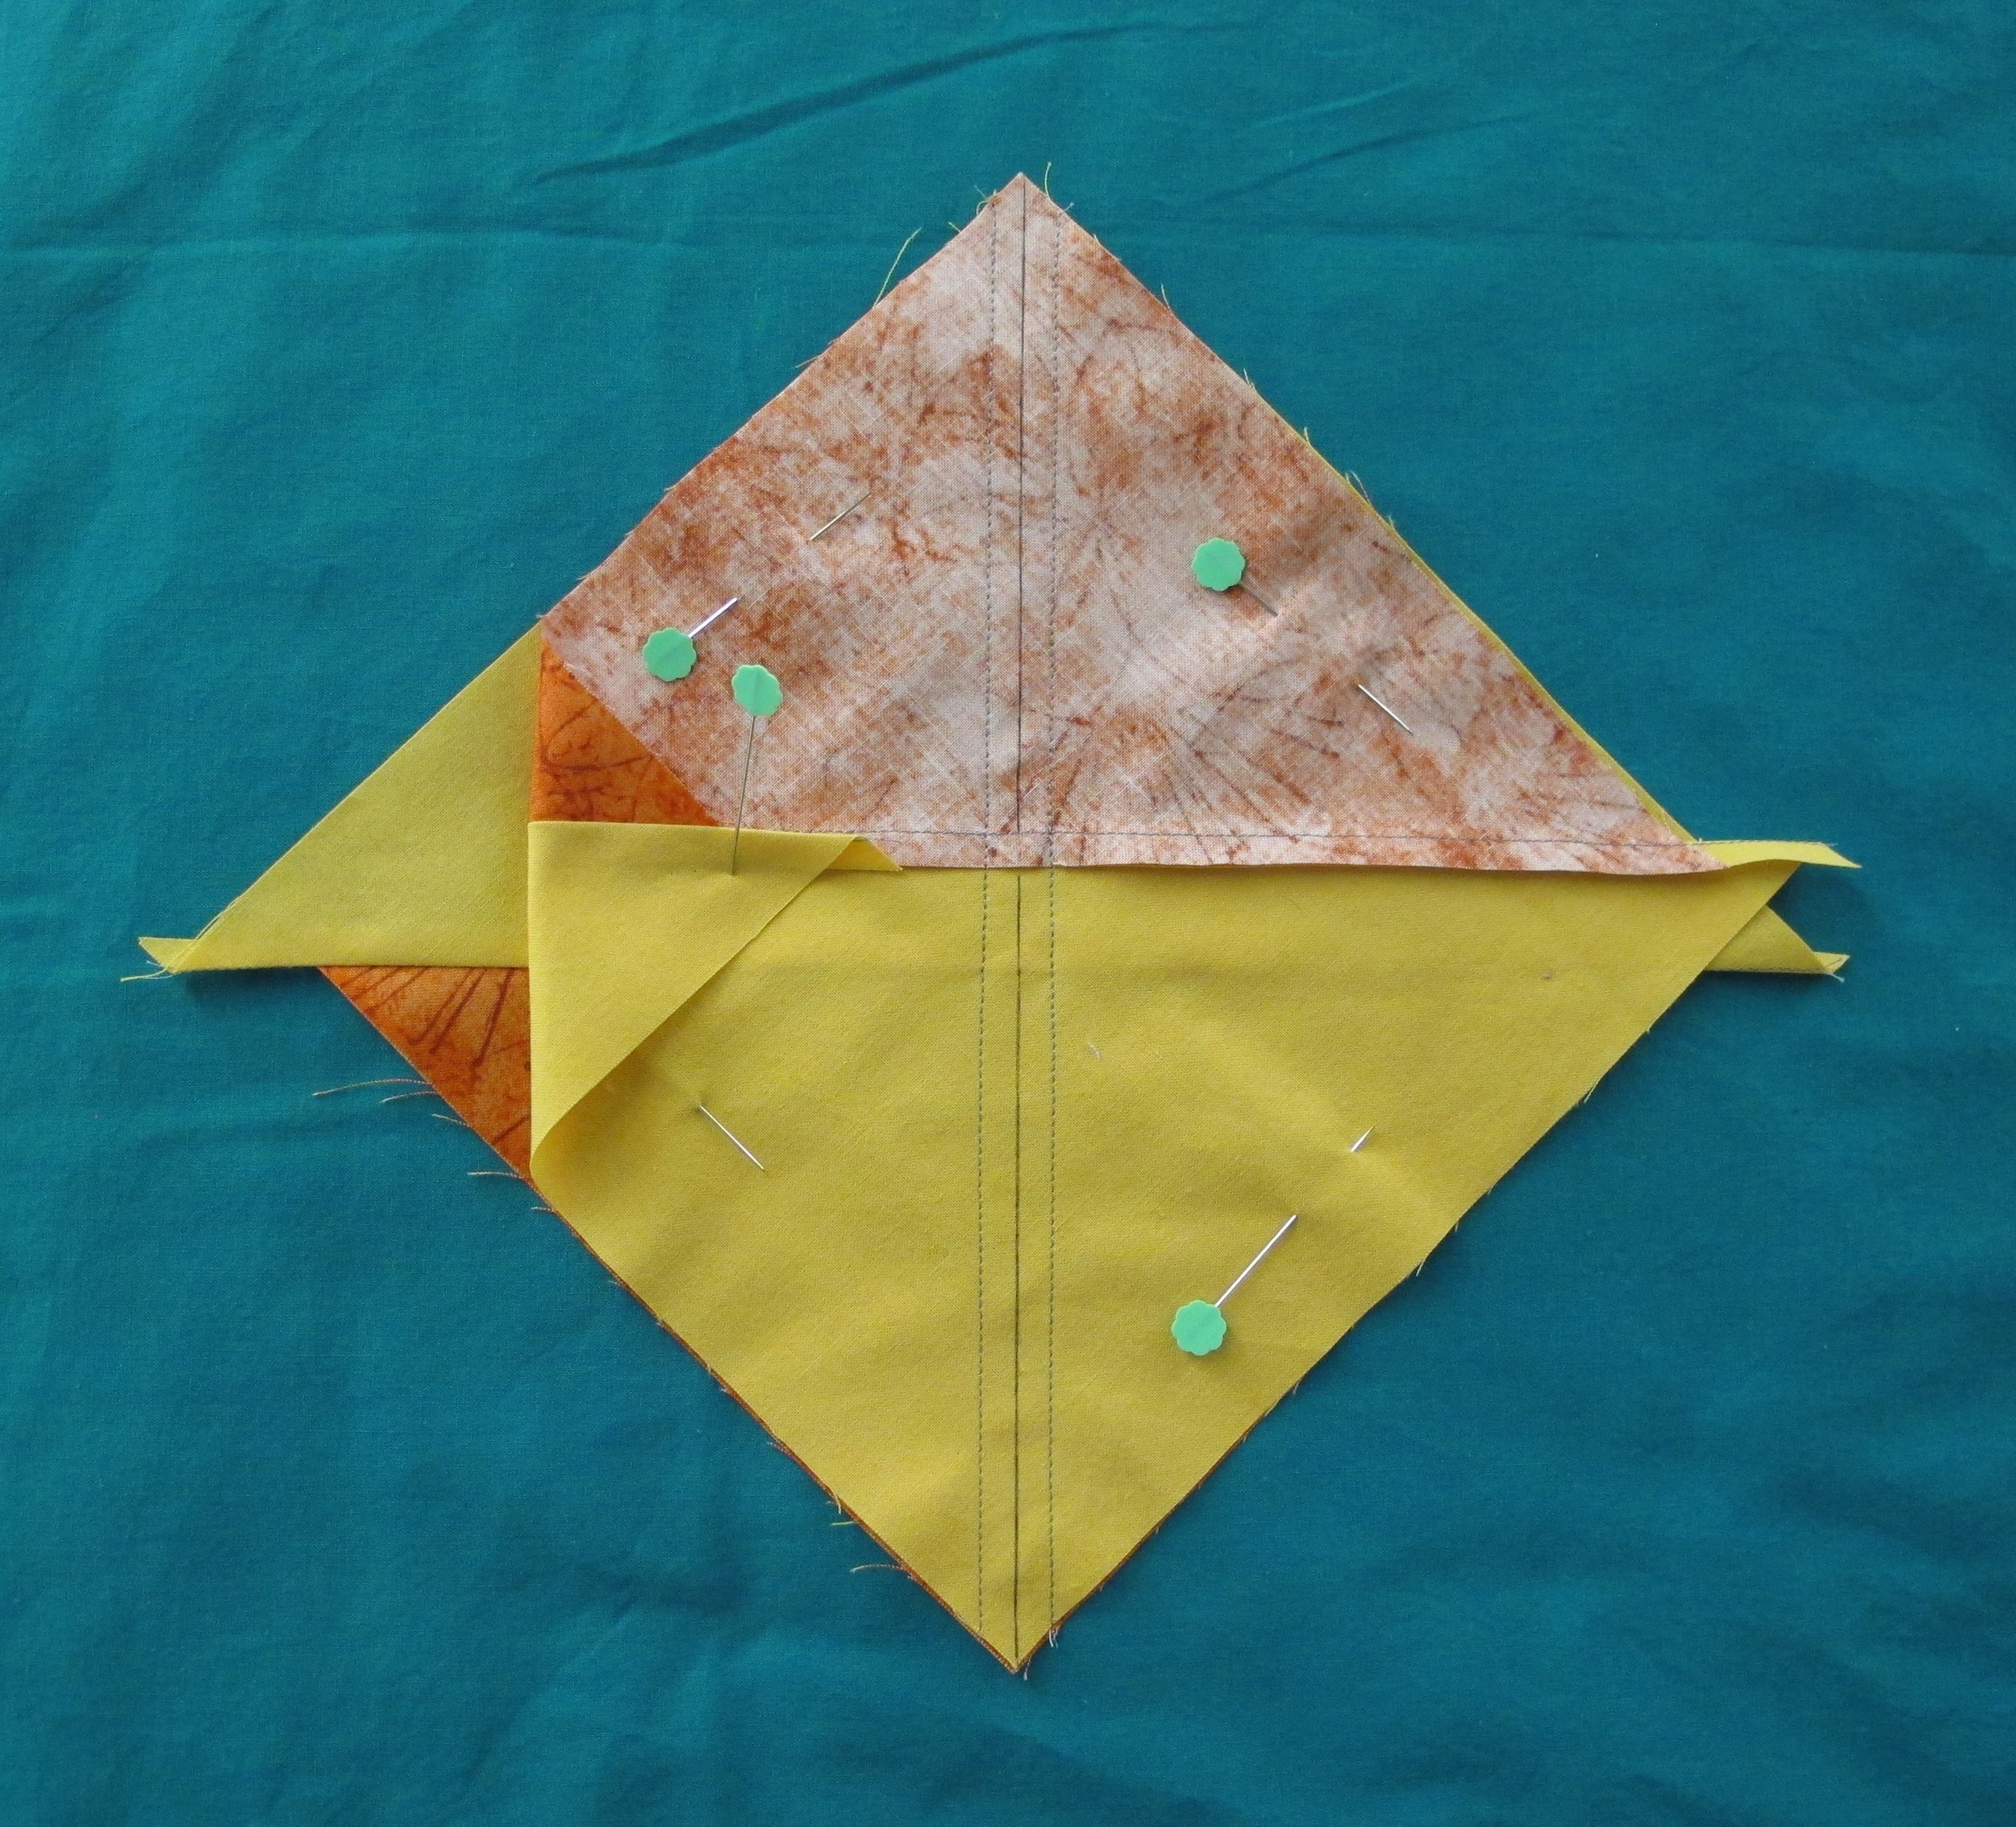
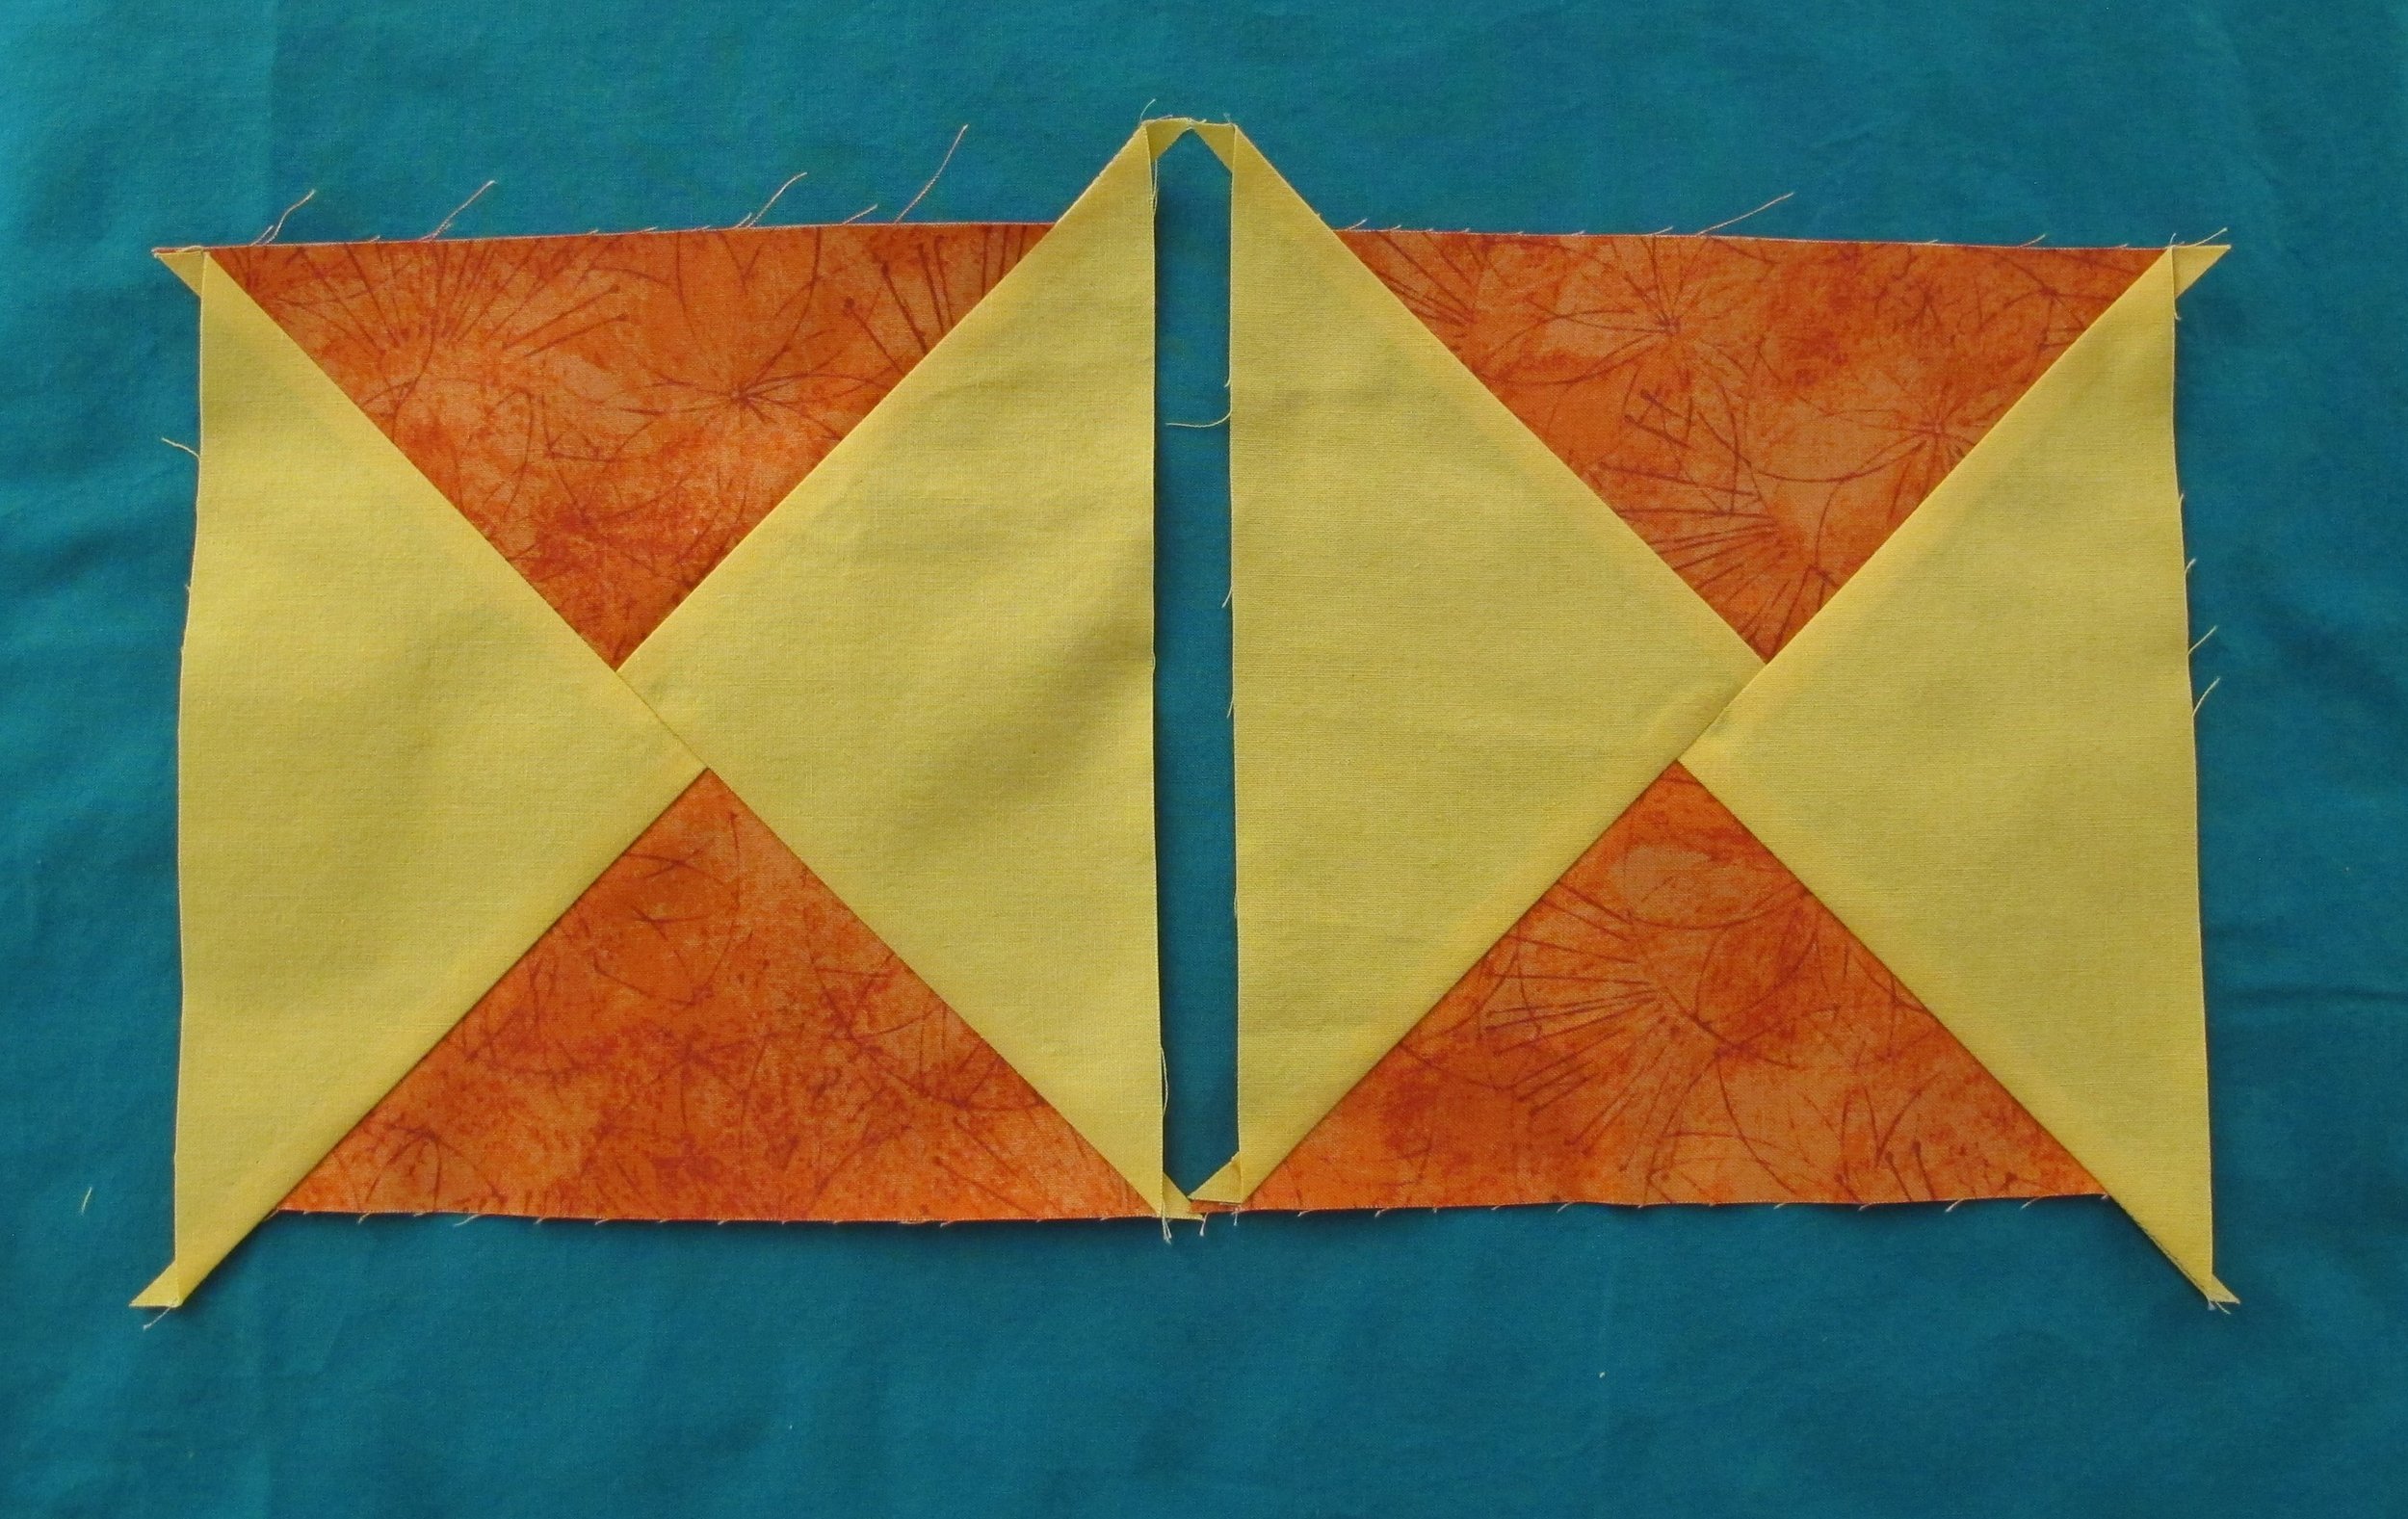
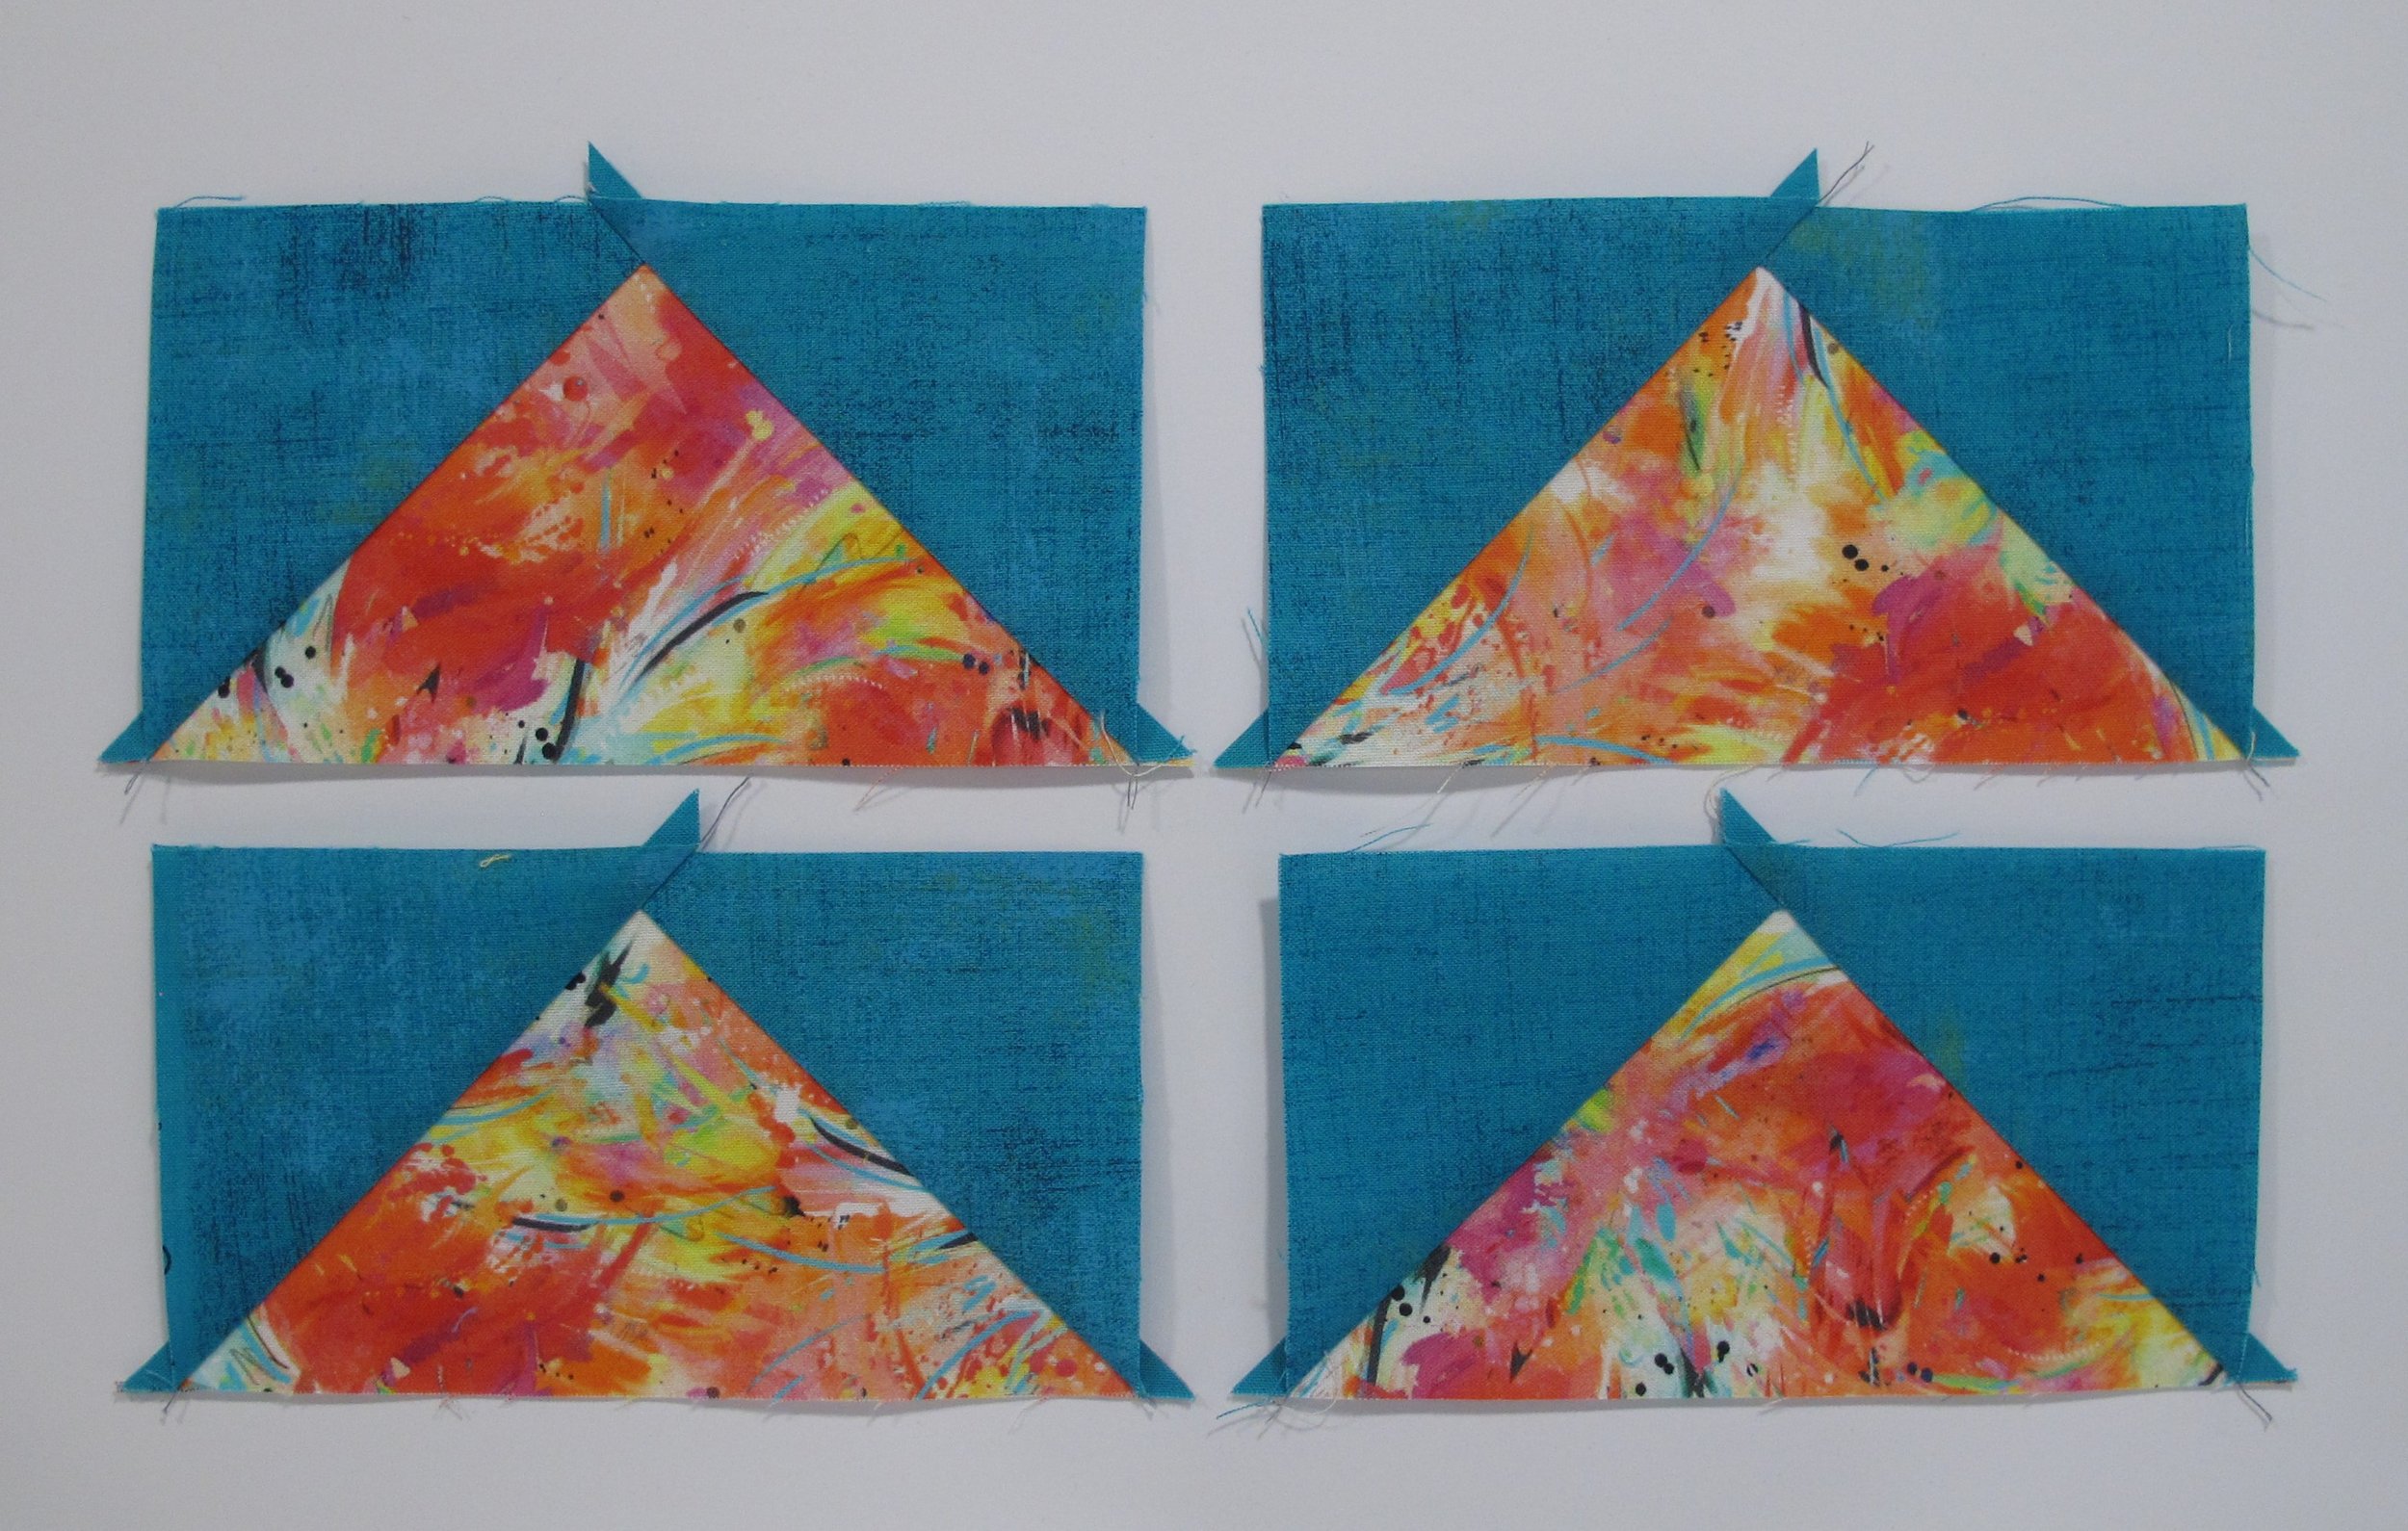
With right sides together place the 2 remaining small squares on top of the heart units as shown, stitch ¼” away on both sides of the line, cut along the line and press seams toward the “sky”. This yields 4 geese.
Trimming:
***Notice that this ruler has multiple cutting sizes and each size has a different set of registration lines as well as a corresponding letter. It also has a handy fabric cutting chart right on the ruler in case you misplace the written instructions.
The sample is for a finished unit measuring 2 ½” x 5”. The corresponding letter for this size is “E” and the line is solid black. Place the registration line on the goose and trim along the right side and across the top. Notice that “Trim # 1” is written on the ruler in that corner so you know you're on the right track.
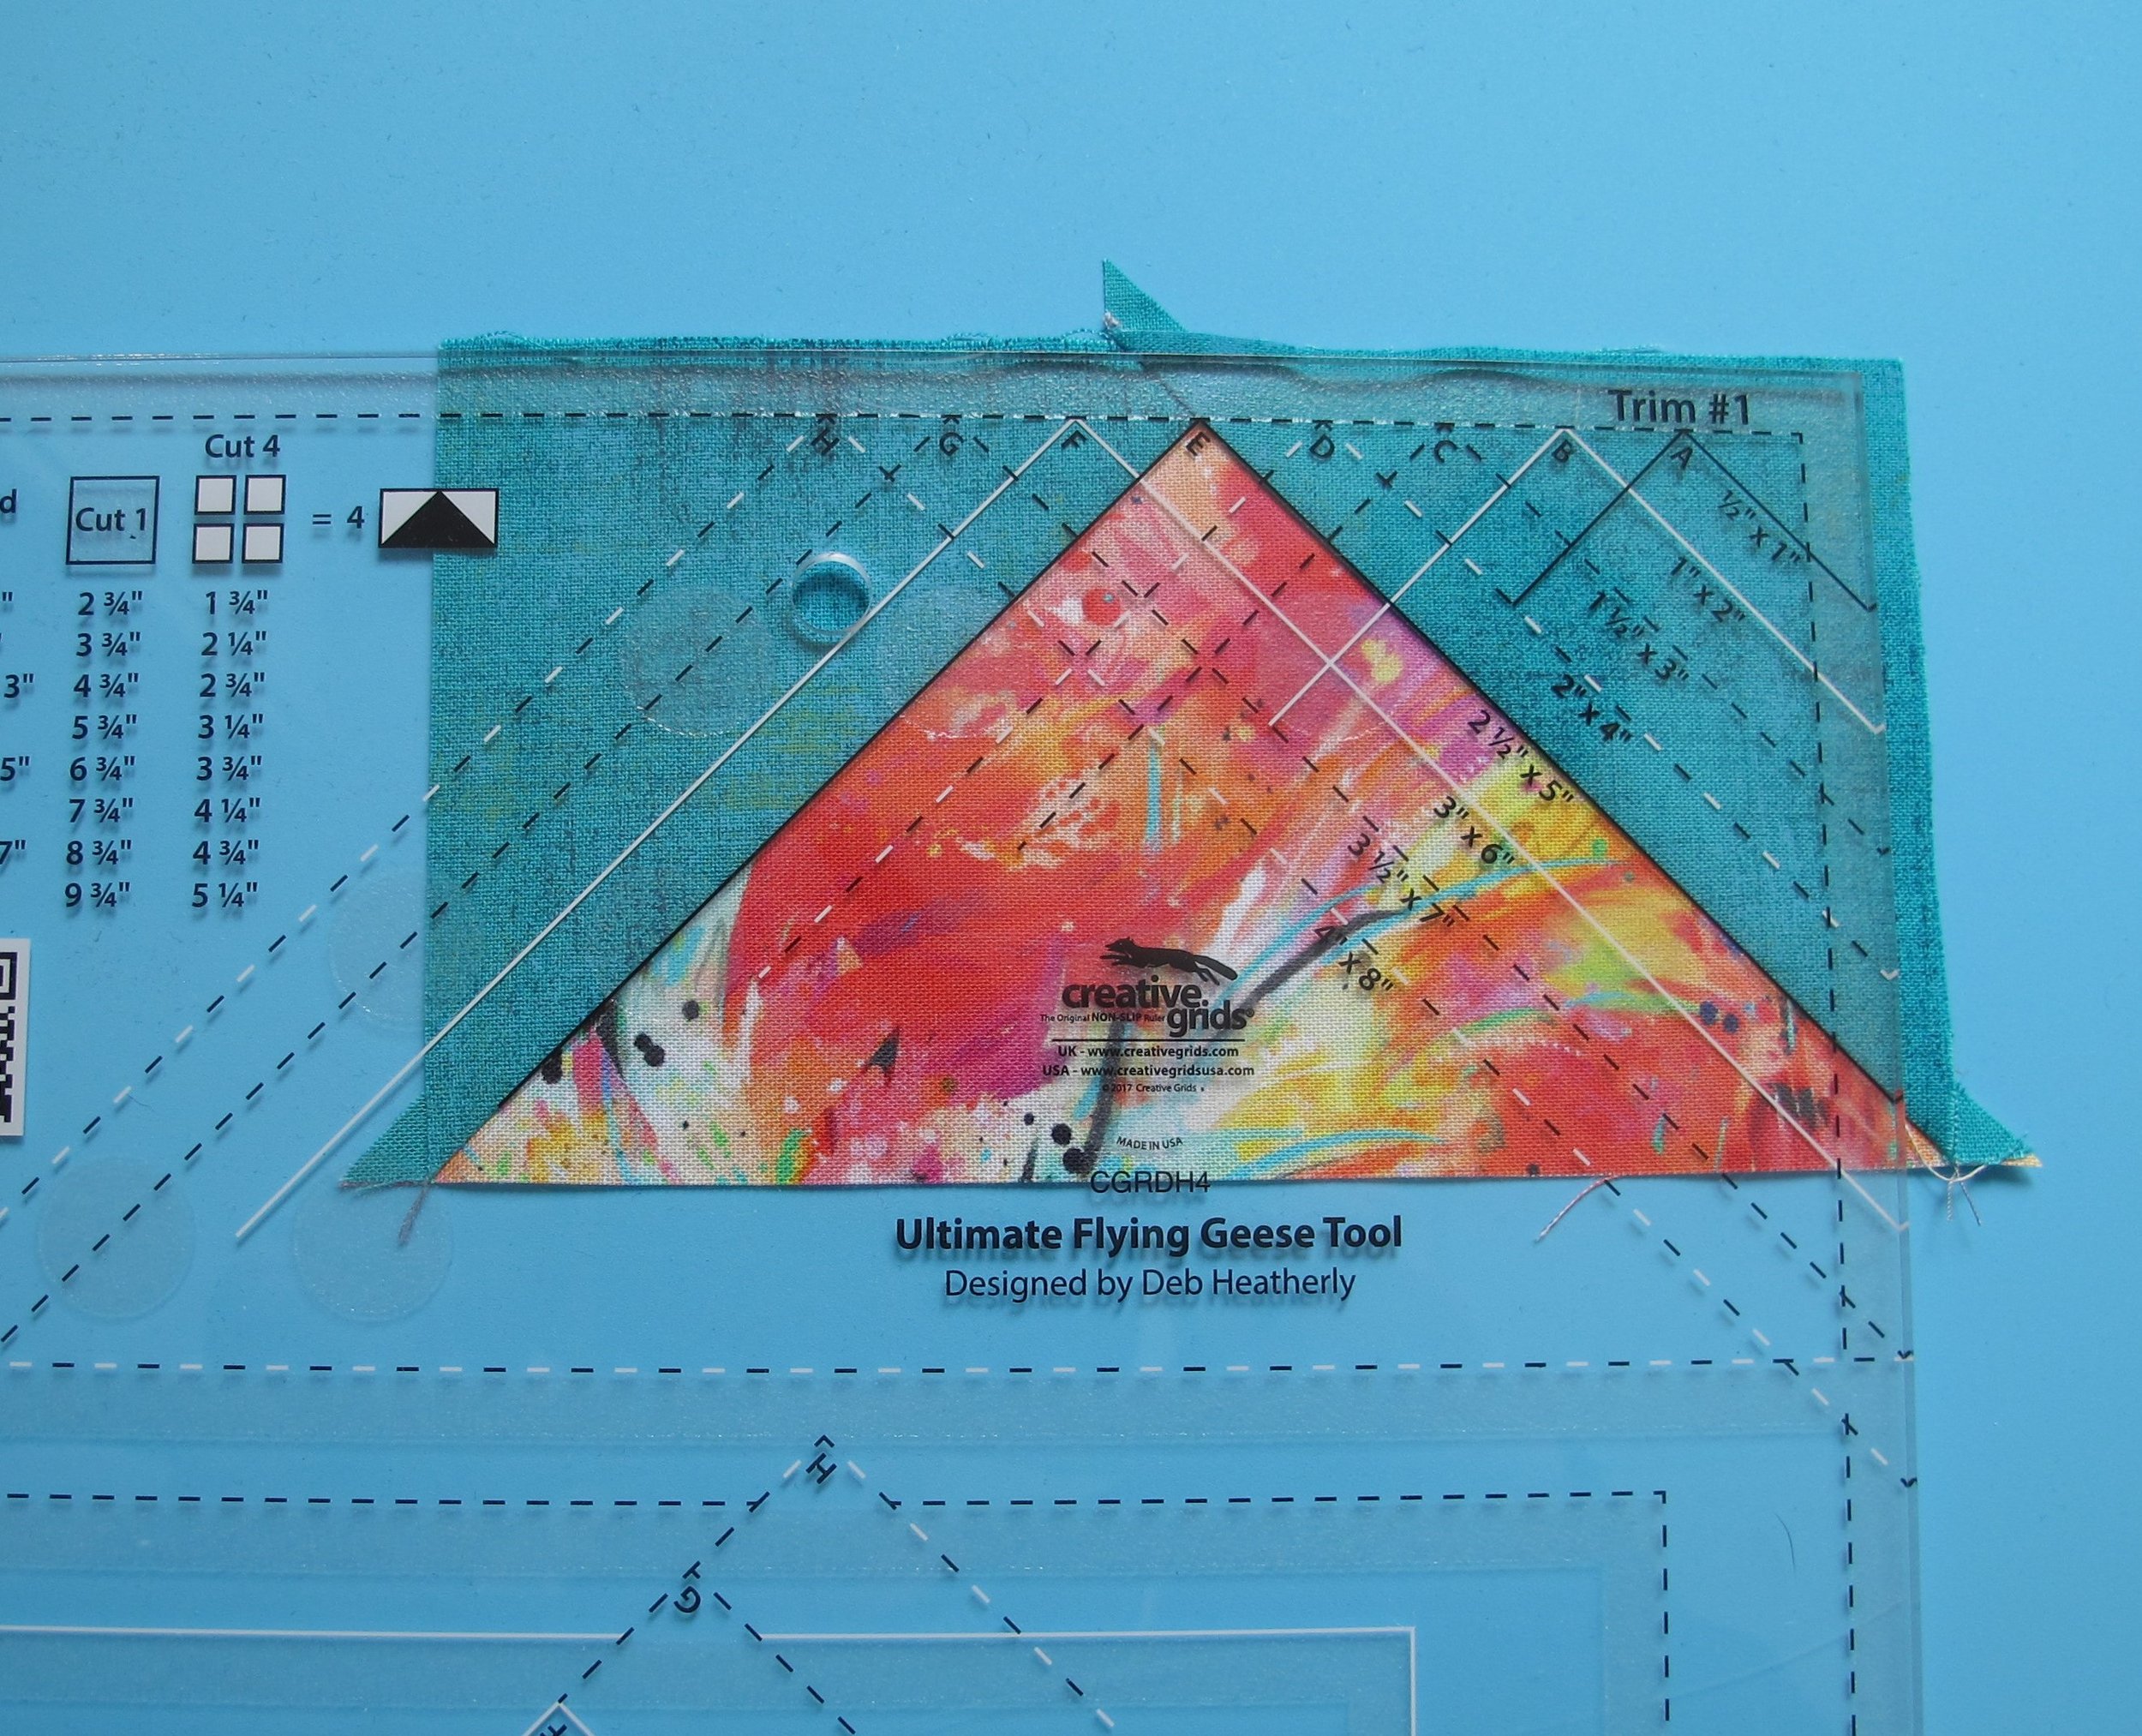
Turn the goose unit around and prepare to use the other side of the ruler. Place the solid black line on the previously trimmed corner and trim the 2 remaining sides. Notice that “Trim # 2” is written on the ruler in that corner.
***If you already own a turntable cutting mat it will come in handy for all the trimming. This is the one I own by Olfa and Gail loves hers by Sue Daley.
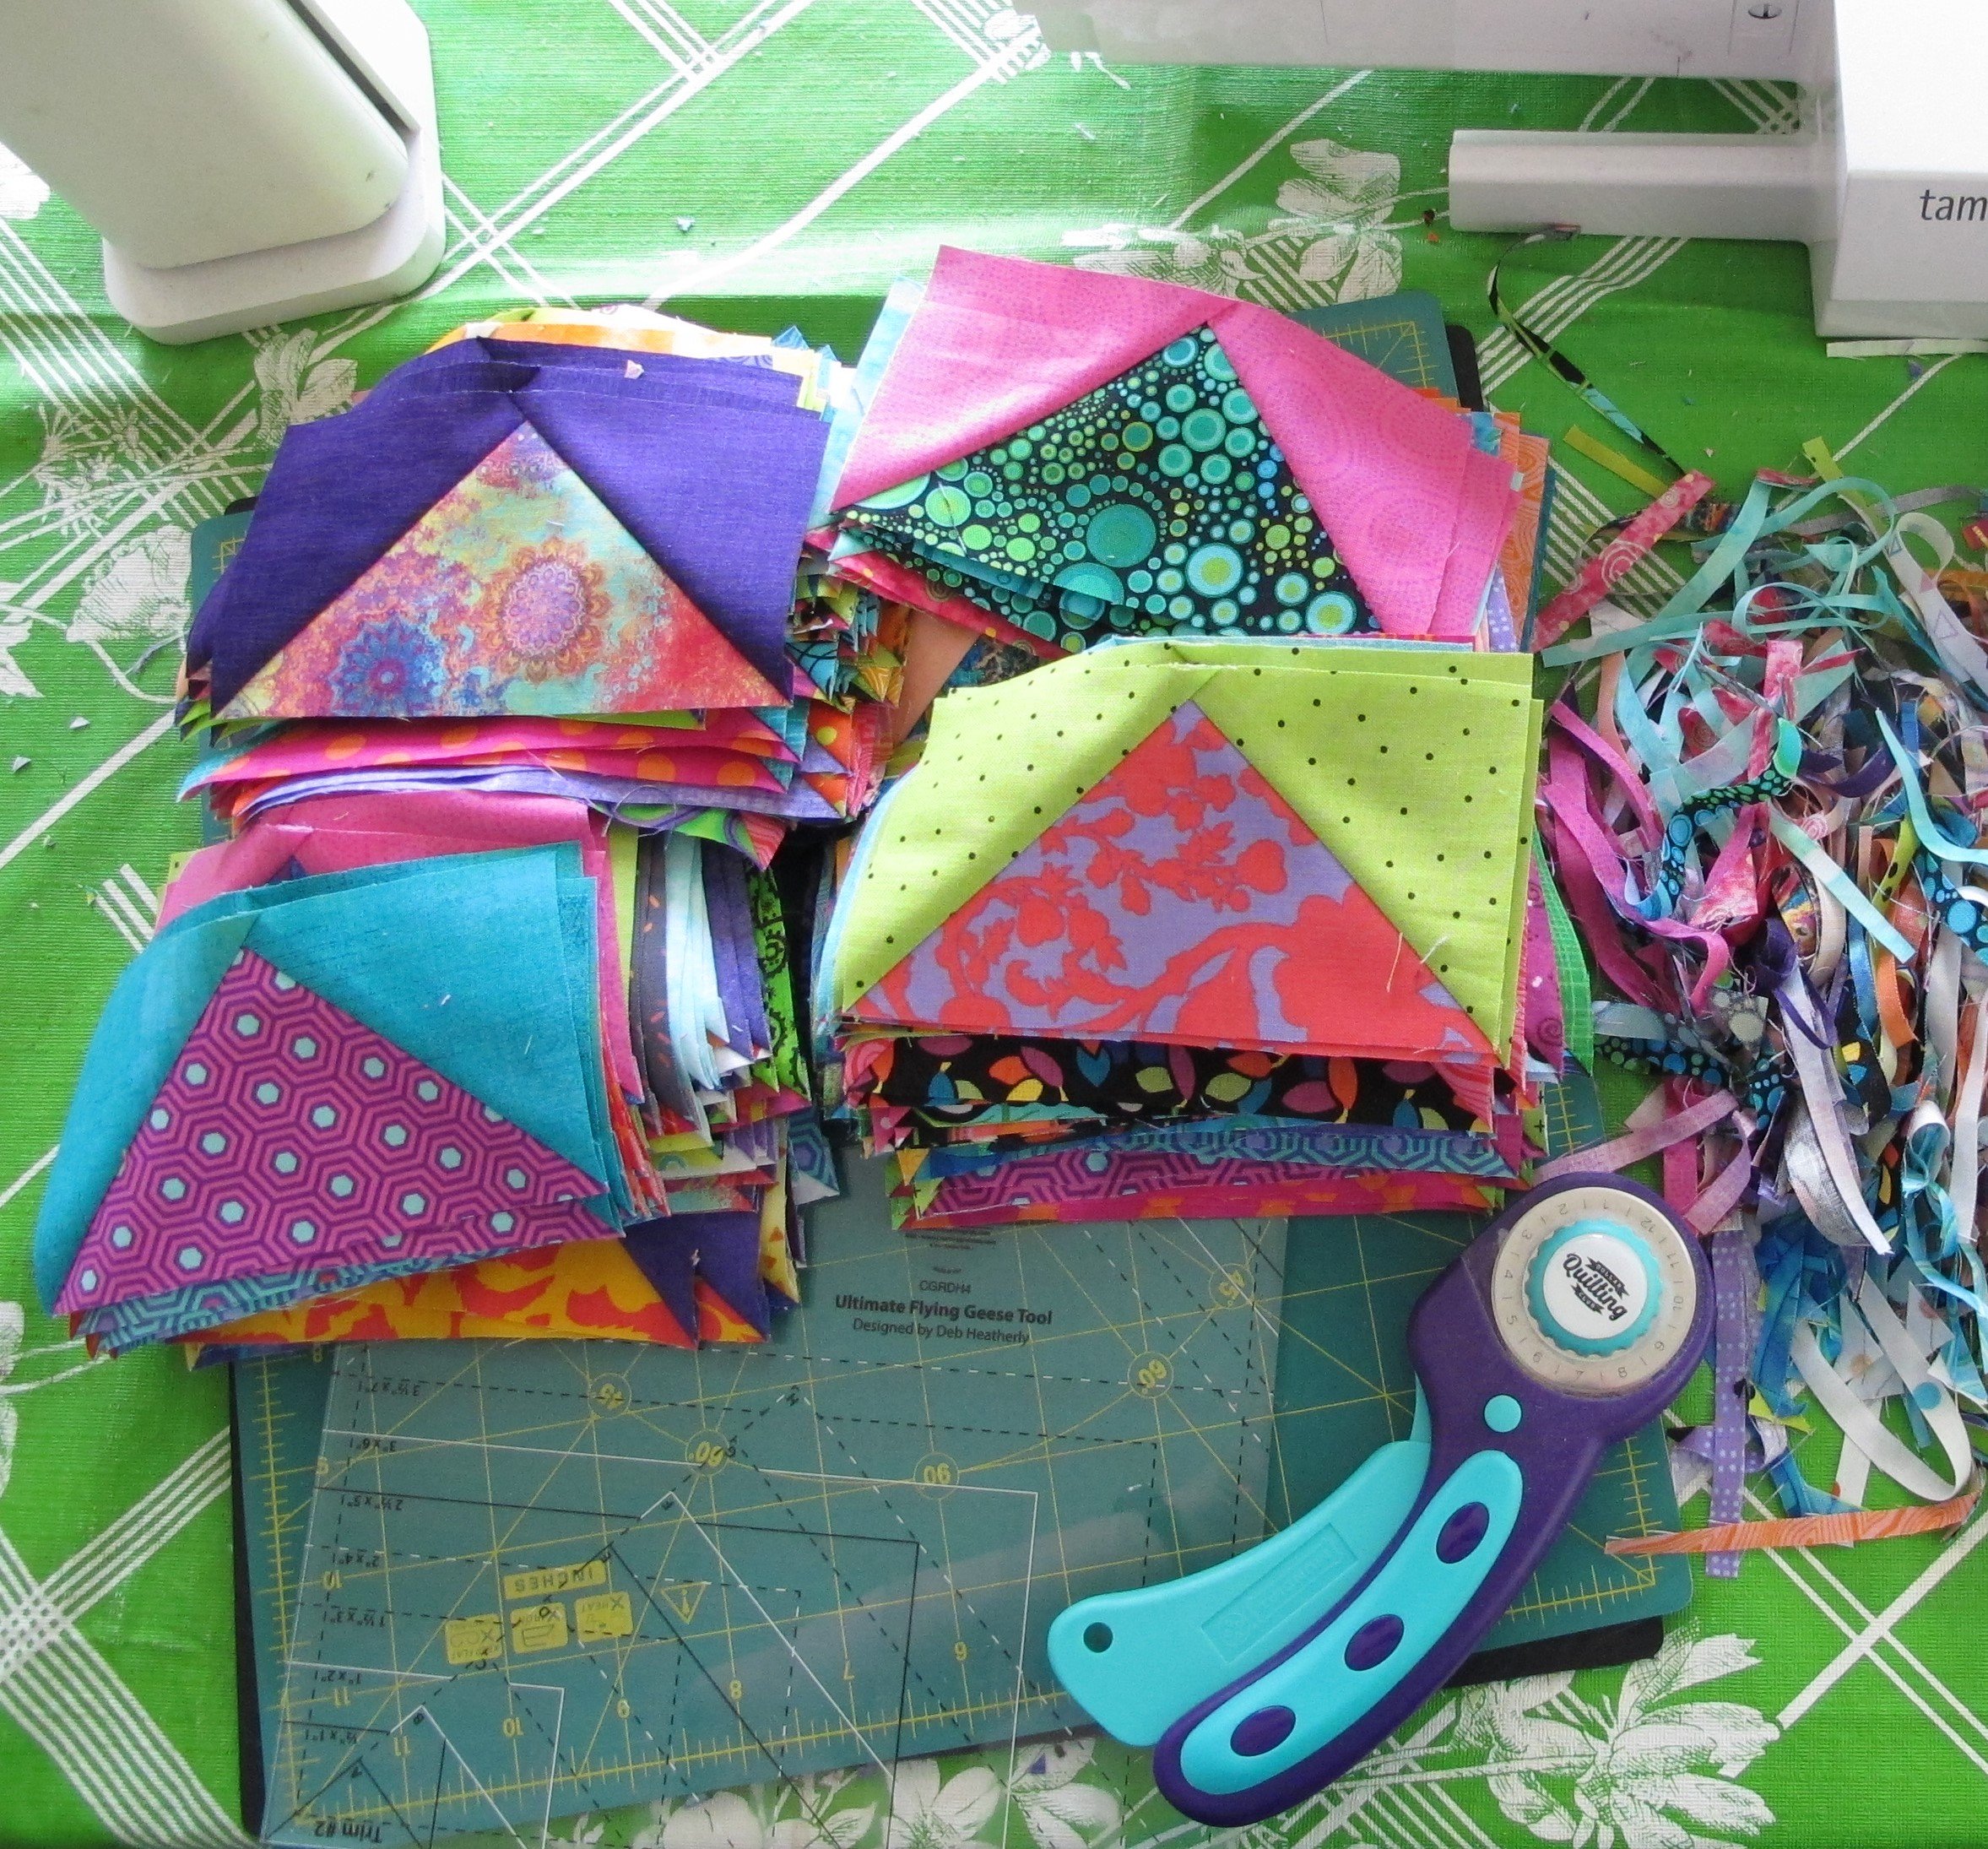
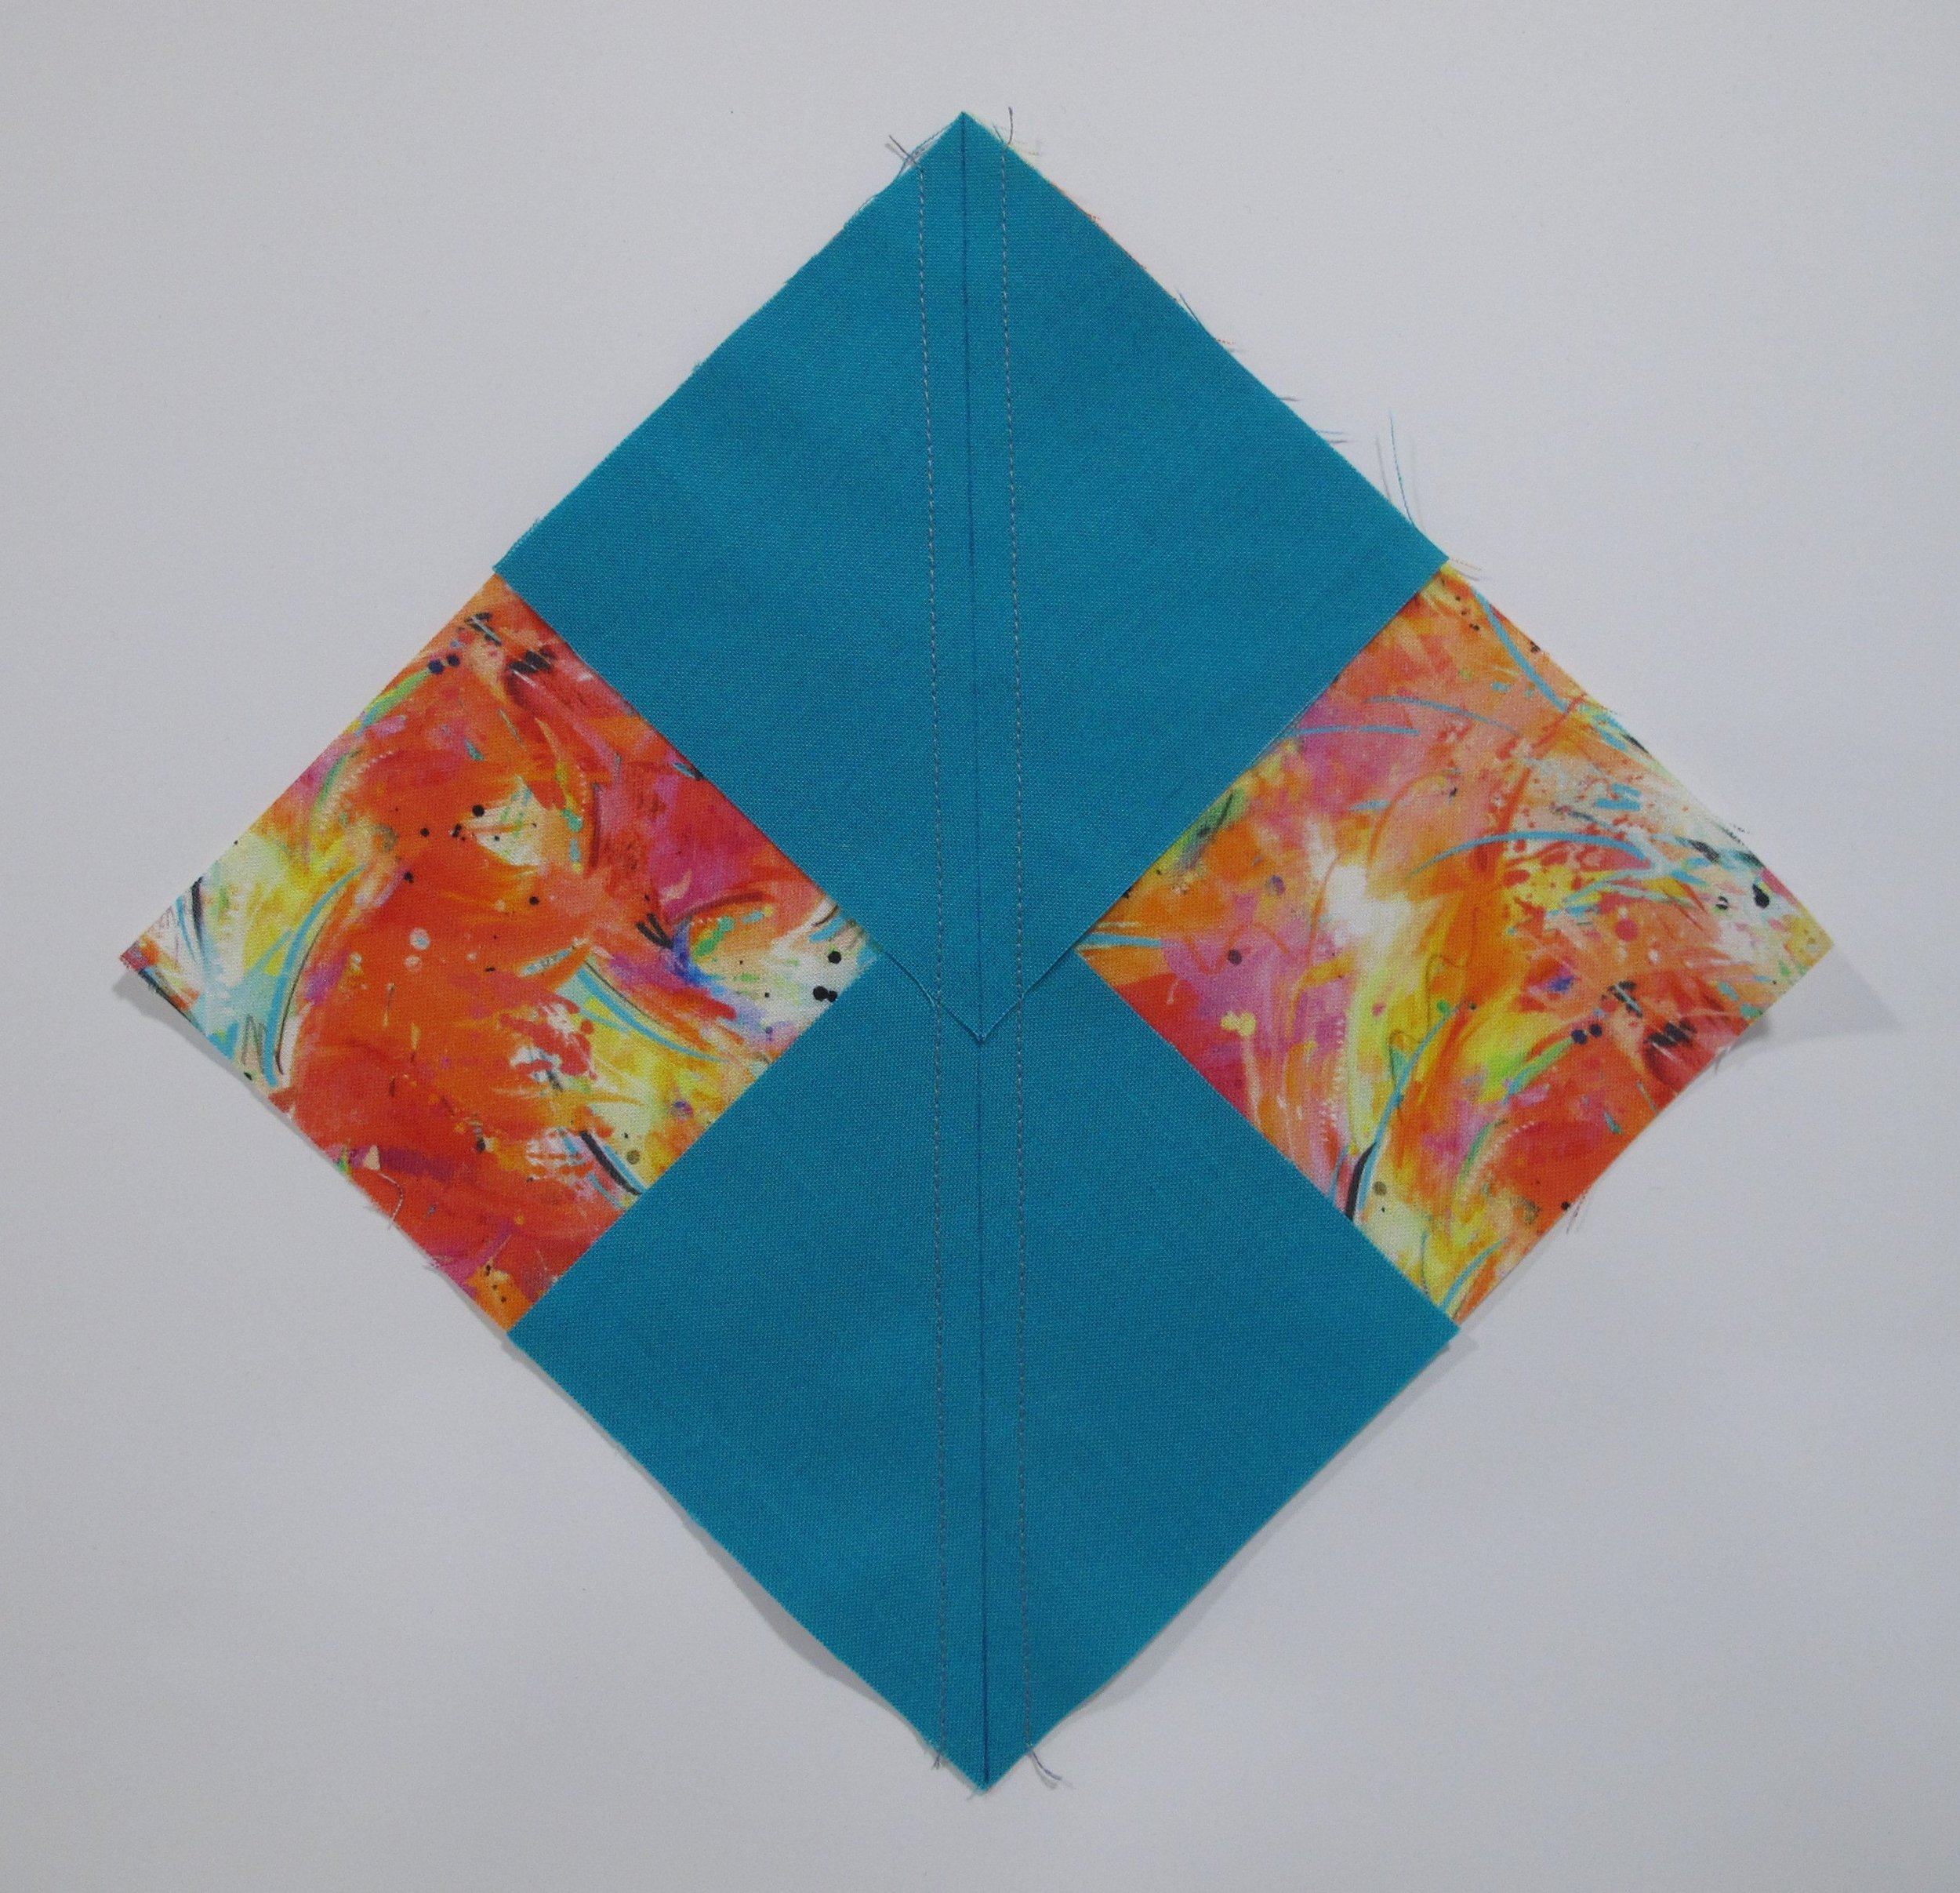
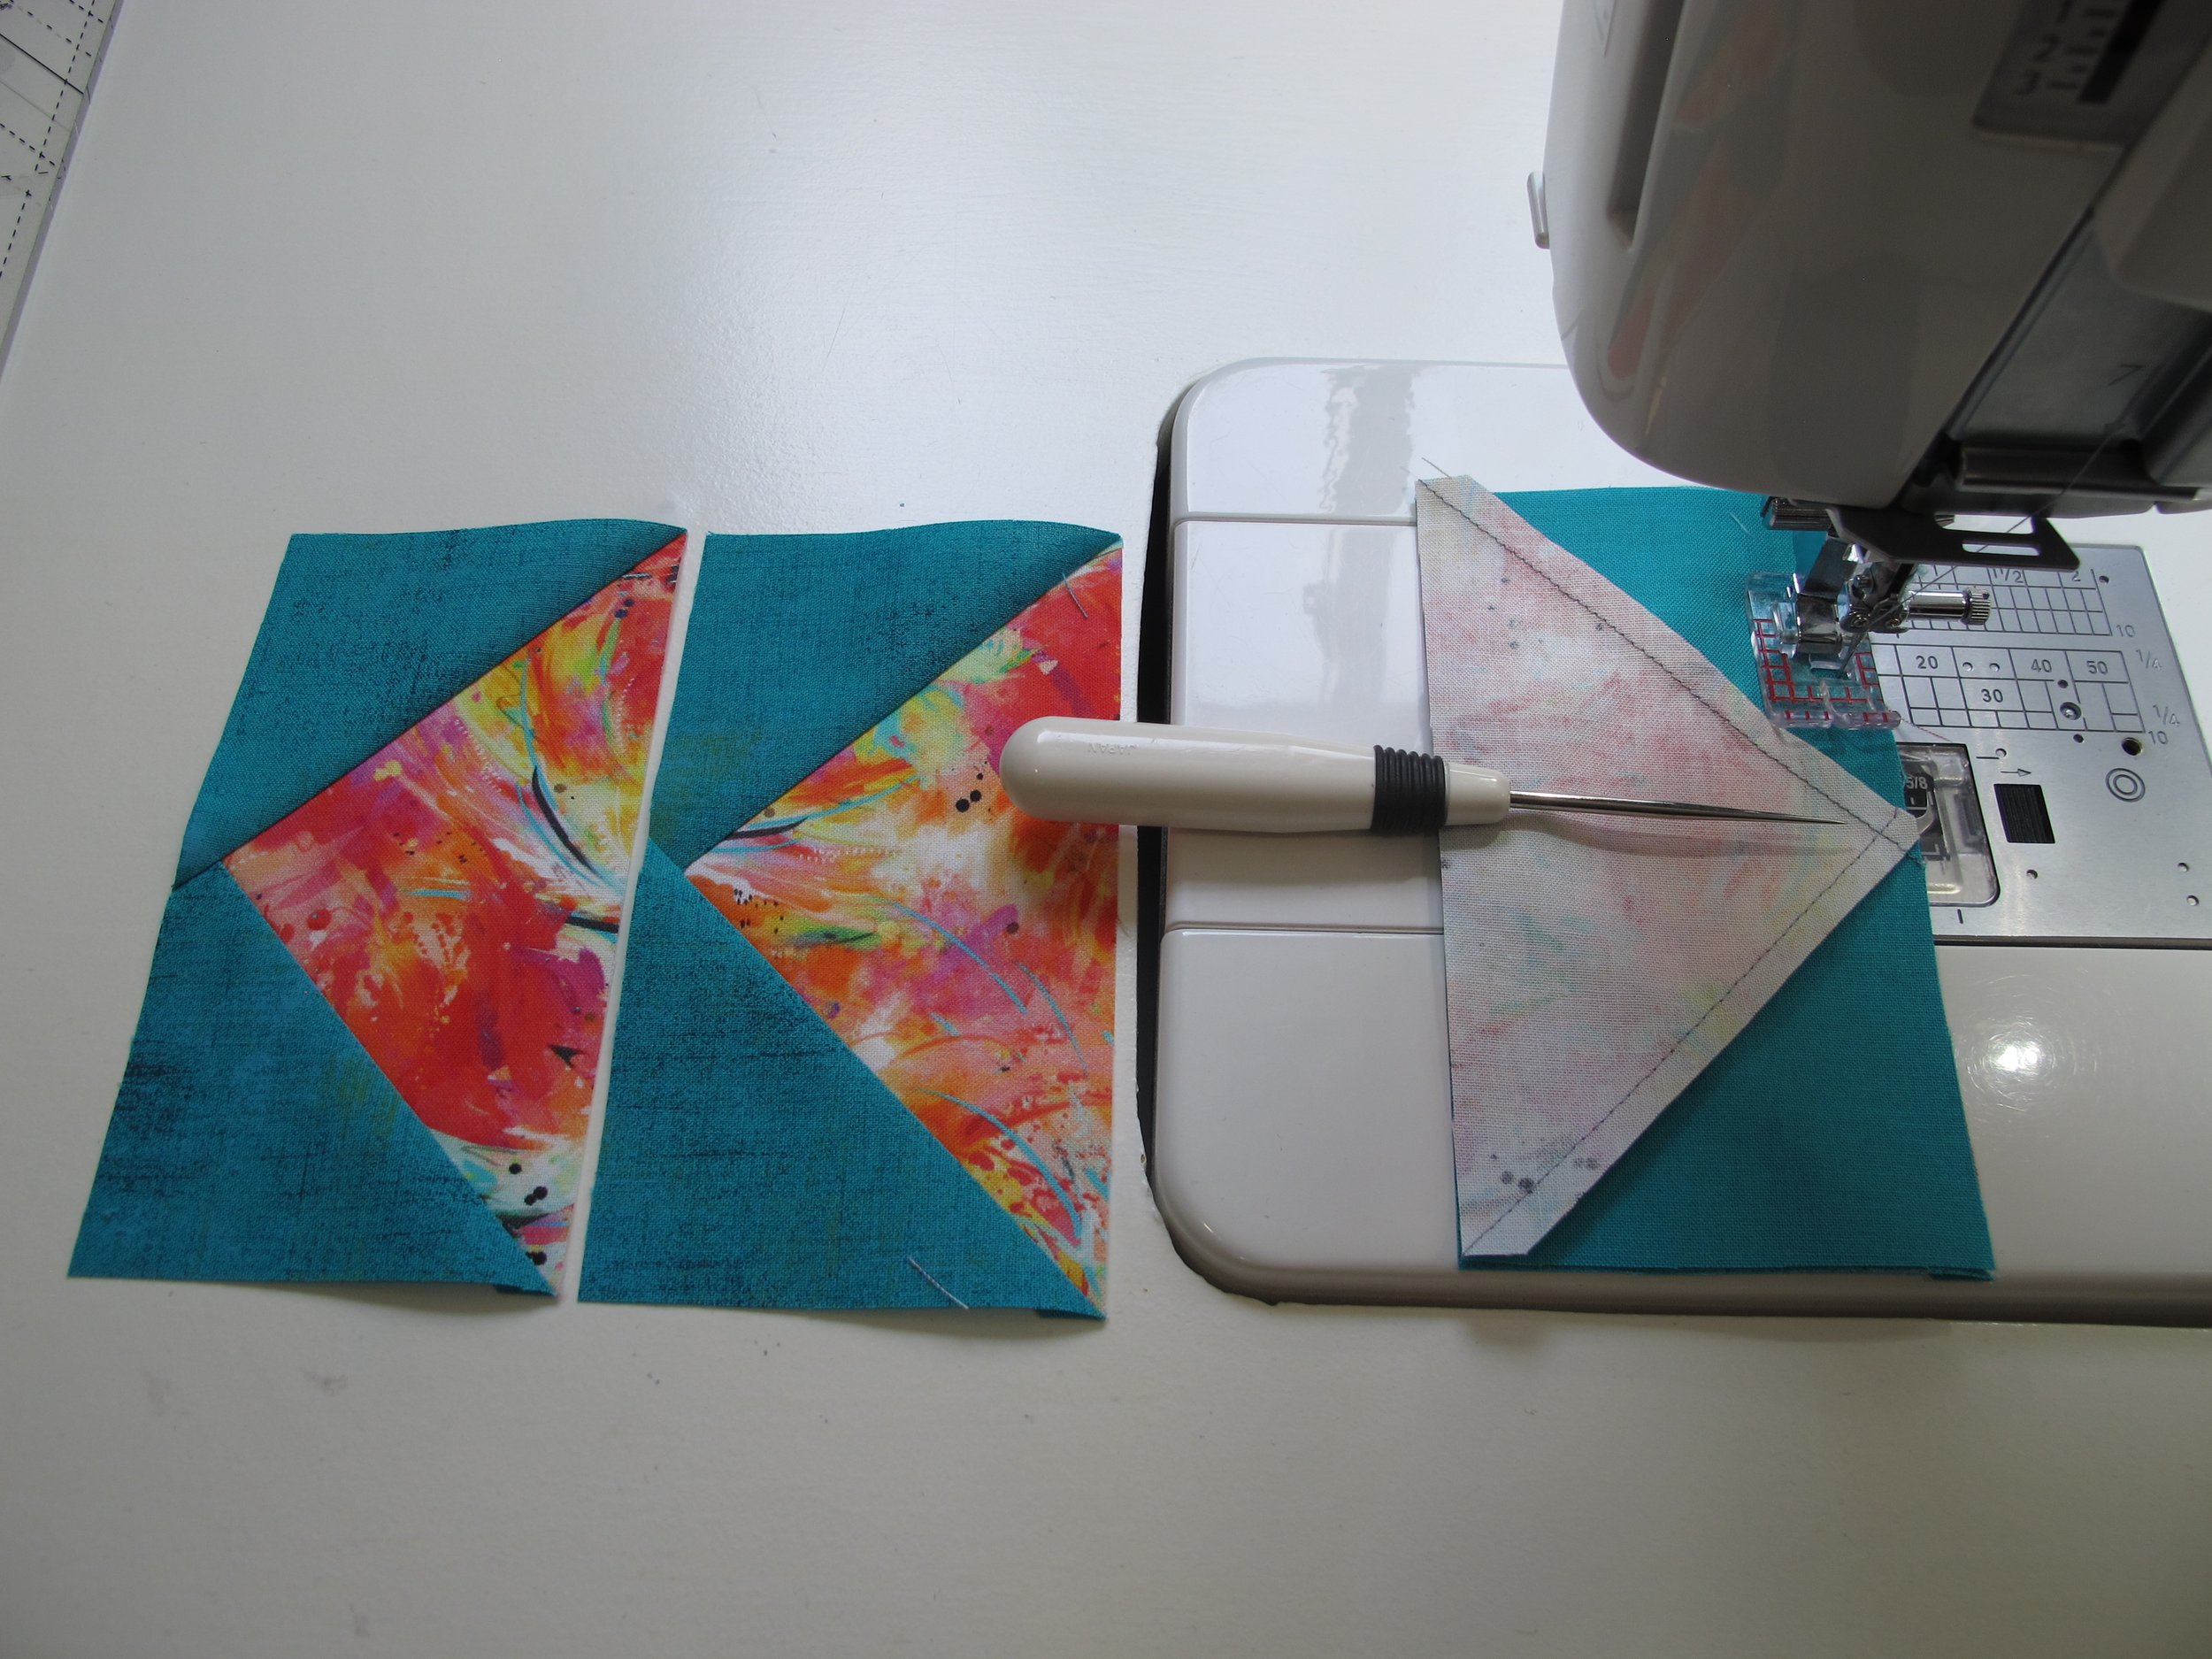
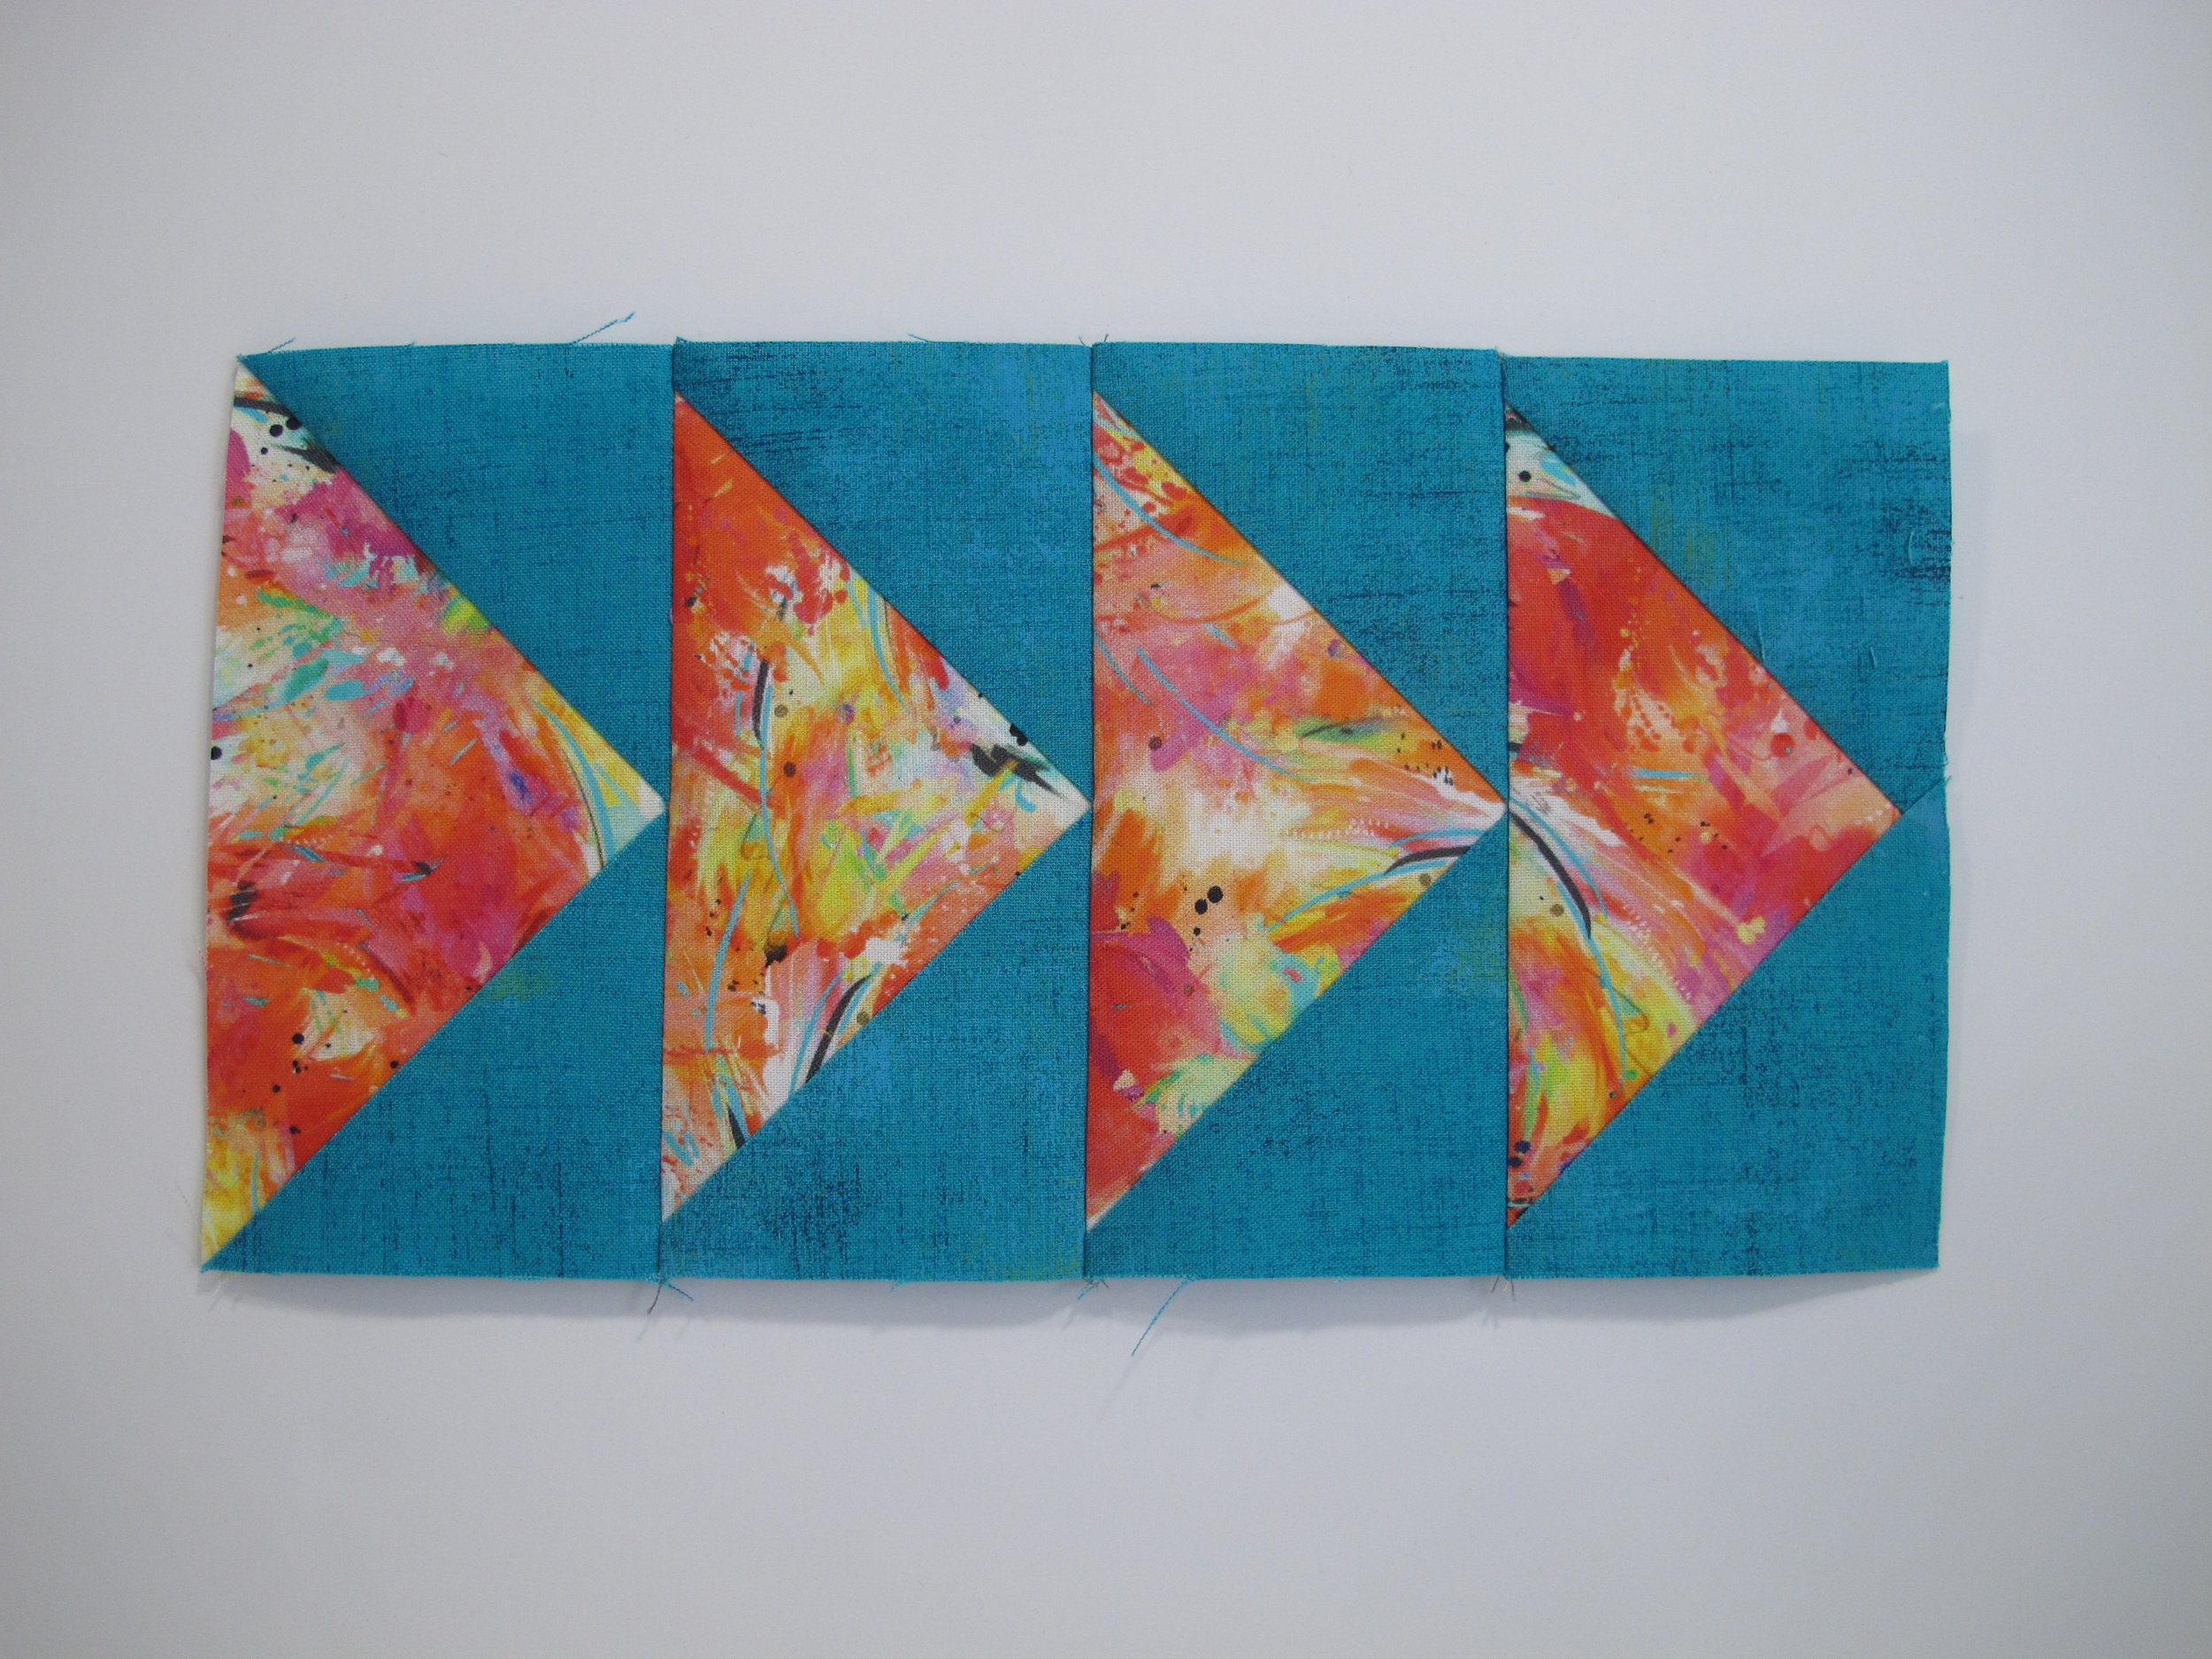
I recently made a quilt top using an abundance of scrappy geese. Since they were all made using this technique, and there were 4 of each colour grouping, all 4 were stitched together into one unit. When stitching them together, be sure to place the seam at the point of the goose on top (where the awl is pointing) so an accurate seam is sewn and there is no chance of the seam allowance shifting. You will get more accurate results…and no more cut off triangle points!
I hope you found this helpful and I know you will find the method that works for you. I am warning you that making flying geese can sometimes become addictive. Have fun!