
It's a Mystery! Part 1
Hello Everyone! I hope you'll step out of your comfort zone and join me for a mystery quilt. If you haven't done one before I know it can be a little scary...especially for those of you who have to have everything well organized ahead of time. Don't worry...I'll take good care of you and give you hints along the way to make your project a successful one.
This project is perfect for a confident beginner (you've made a few things already, but want a challenge) or for an intermediate quilter who likes surprises.
How does a mystery quilt work, you ask? Well, each monthly post will give you a new set of clues with instructions to be completed by the time the next set of clues come around the following month. Photographs will be included so you can easily follow along. When all the clues have been completed you will be so proud of the beautiful quilt top you created.
Each set of instructions will be in PDF form so if your life is crazy busy and you have to take a break, no biggie, just print them off and get to them when you can. Just know that the big reveal at the end won't wait for you!
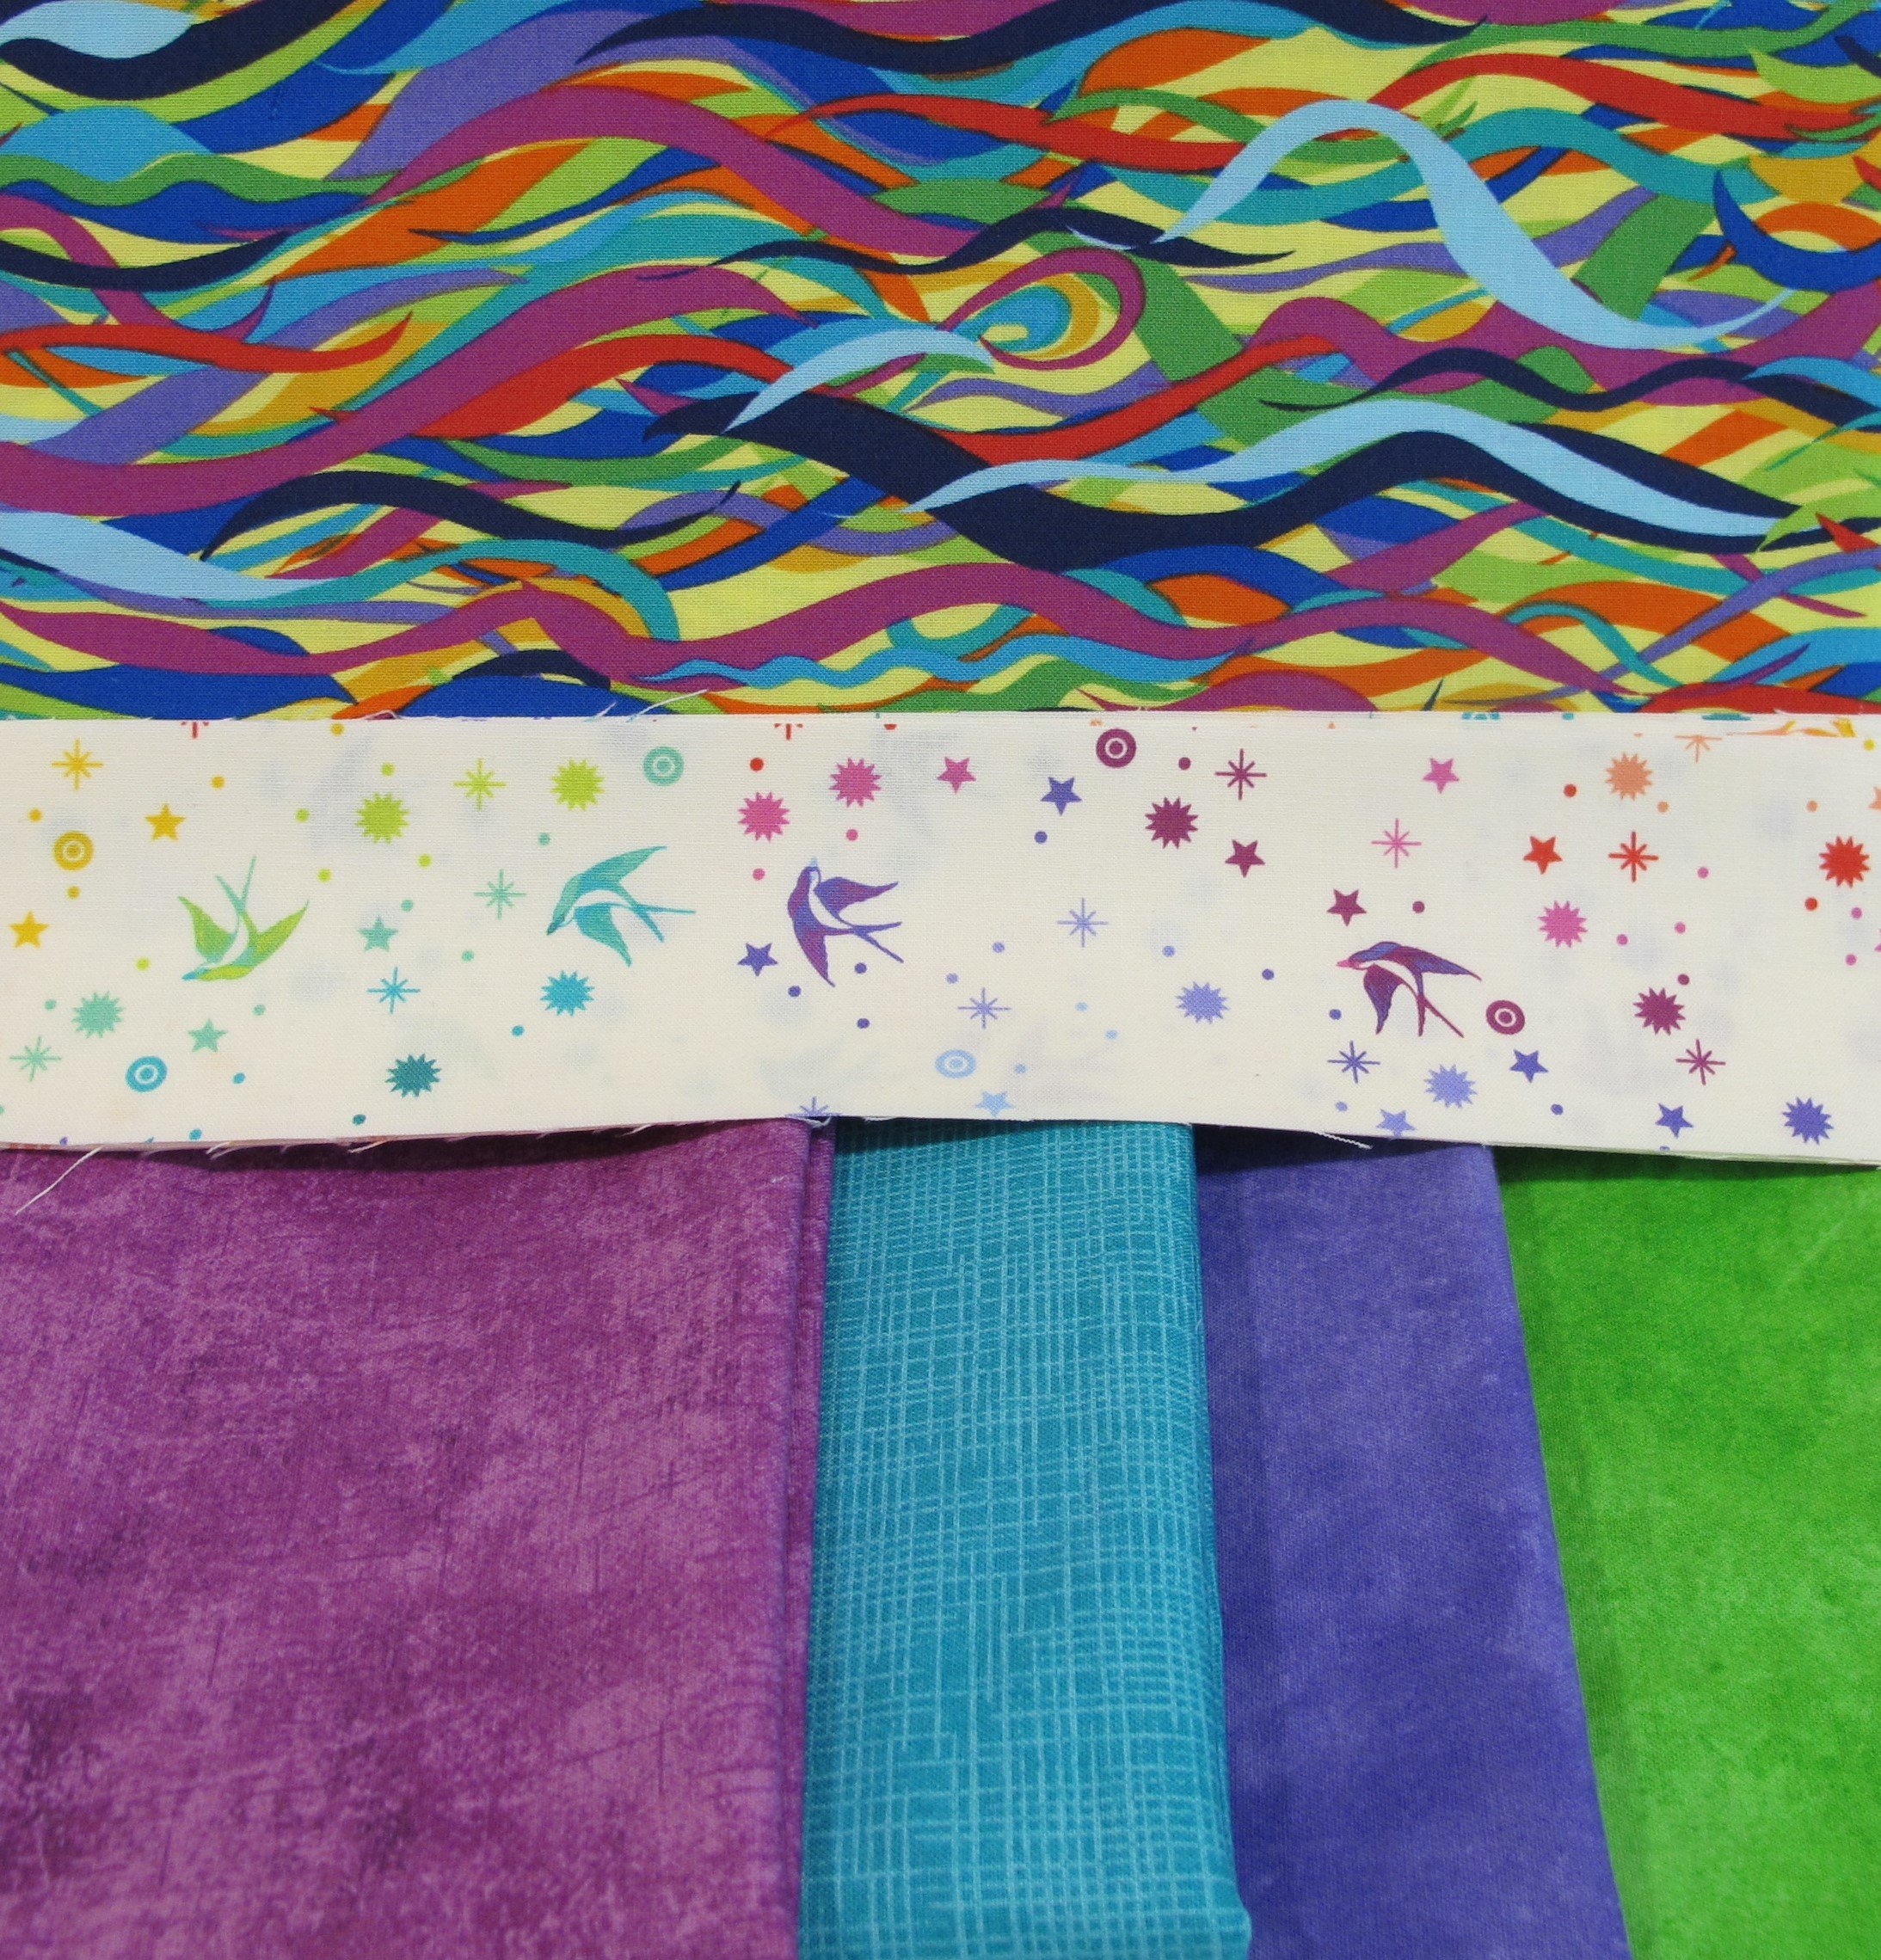
The first step, of course, is to choose which of the three sizes you'd like to make and to select fabrics. Choose a focus fabric with a medium to large scale print (with at least 4 colours) from which to pull four coordinating fabrics. Finish the fabric selection with a light coloured background that will contrast well with the others. ***Stripes are not suitable for the four coordinates in this design (unless you have no problem with them going in all directions).
*** scroll to the bottom of the page for a printable PDF
Let's get started!
QC Mystery Supply List
Finished sizes: Lap- 49” x 61”, Twin- 64” x 88”, Queen- 88” x 100”
Supplies:
matching or neutral 100% cotton thread for piecing
Ultimate Flying Geese Tool by Creative Grids or follow along with the Heart Method in the Flying Geese Part 1 tutorial on the Quiltish Corner website
revolving cutting mat if you own one
baggies from the dollar store for sorting fabric
highlighter marker
Post-It notes or a black marker can be helpful for marking baggies
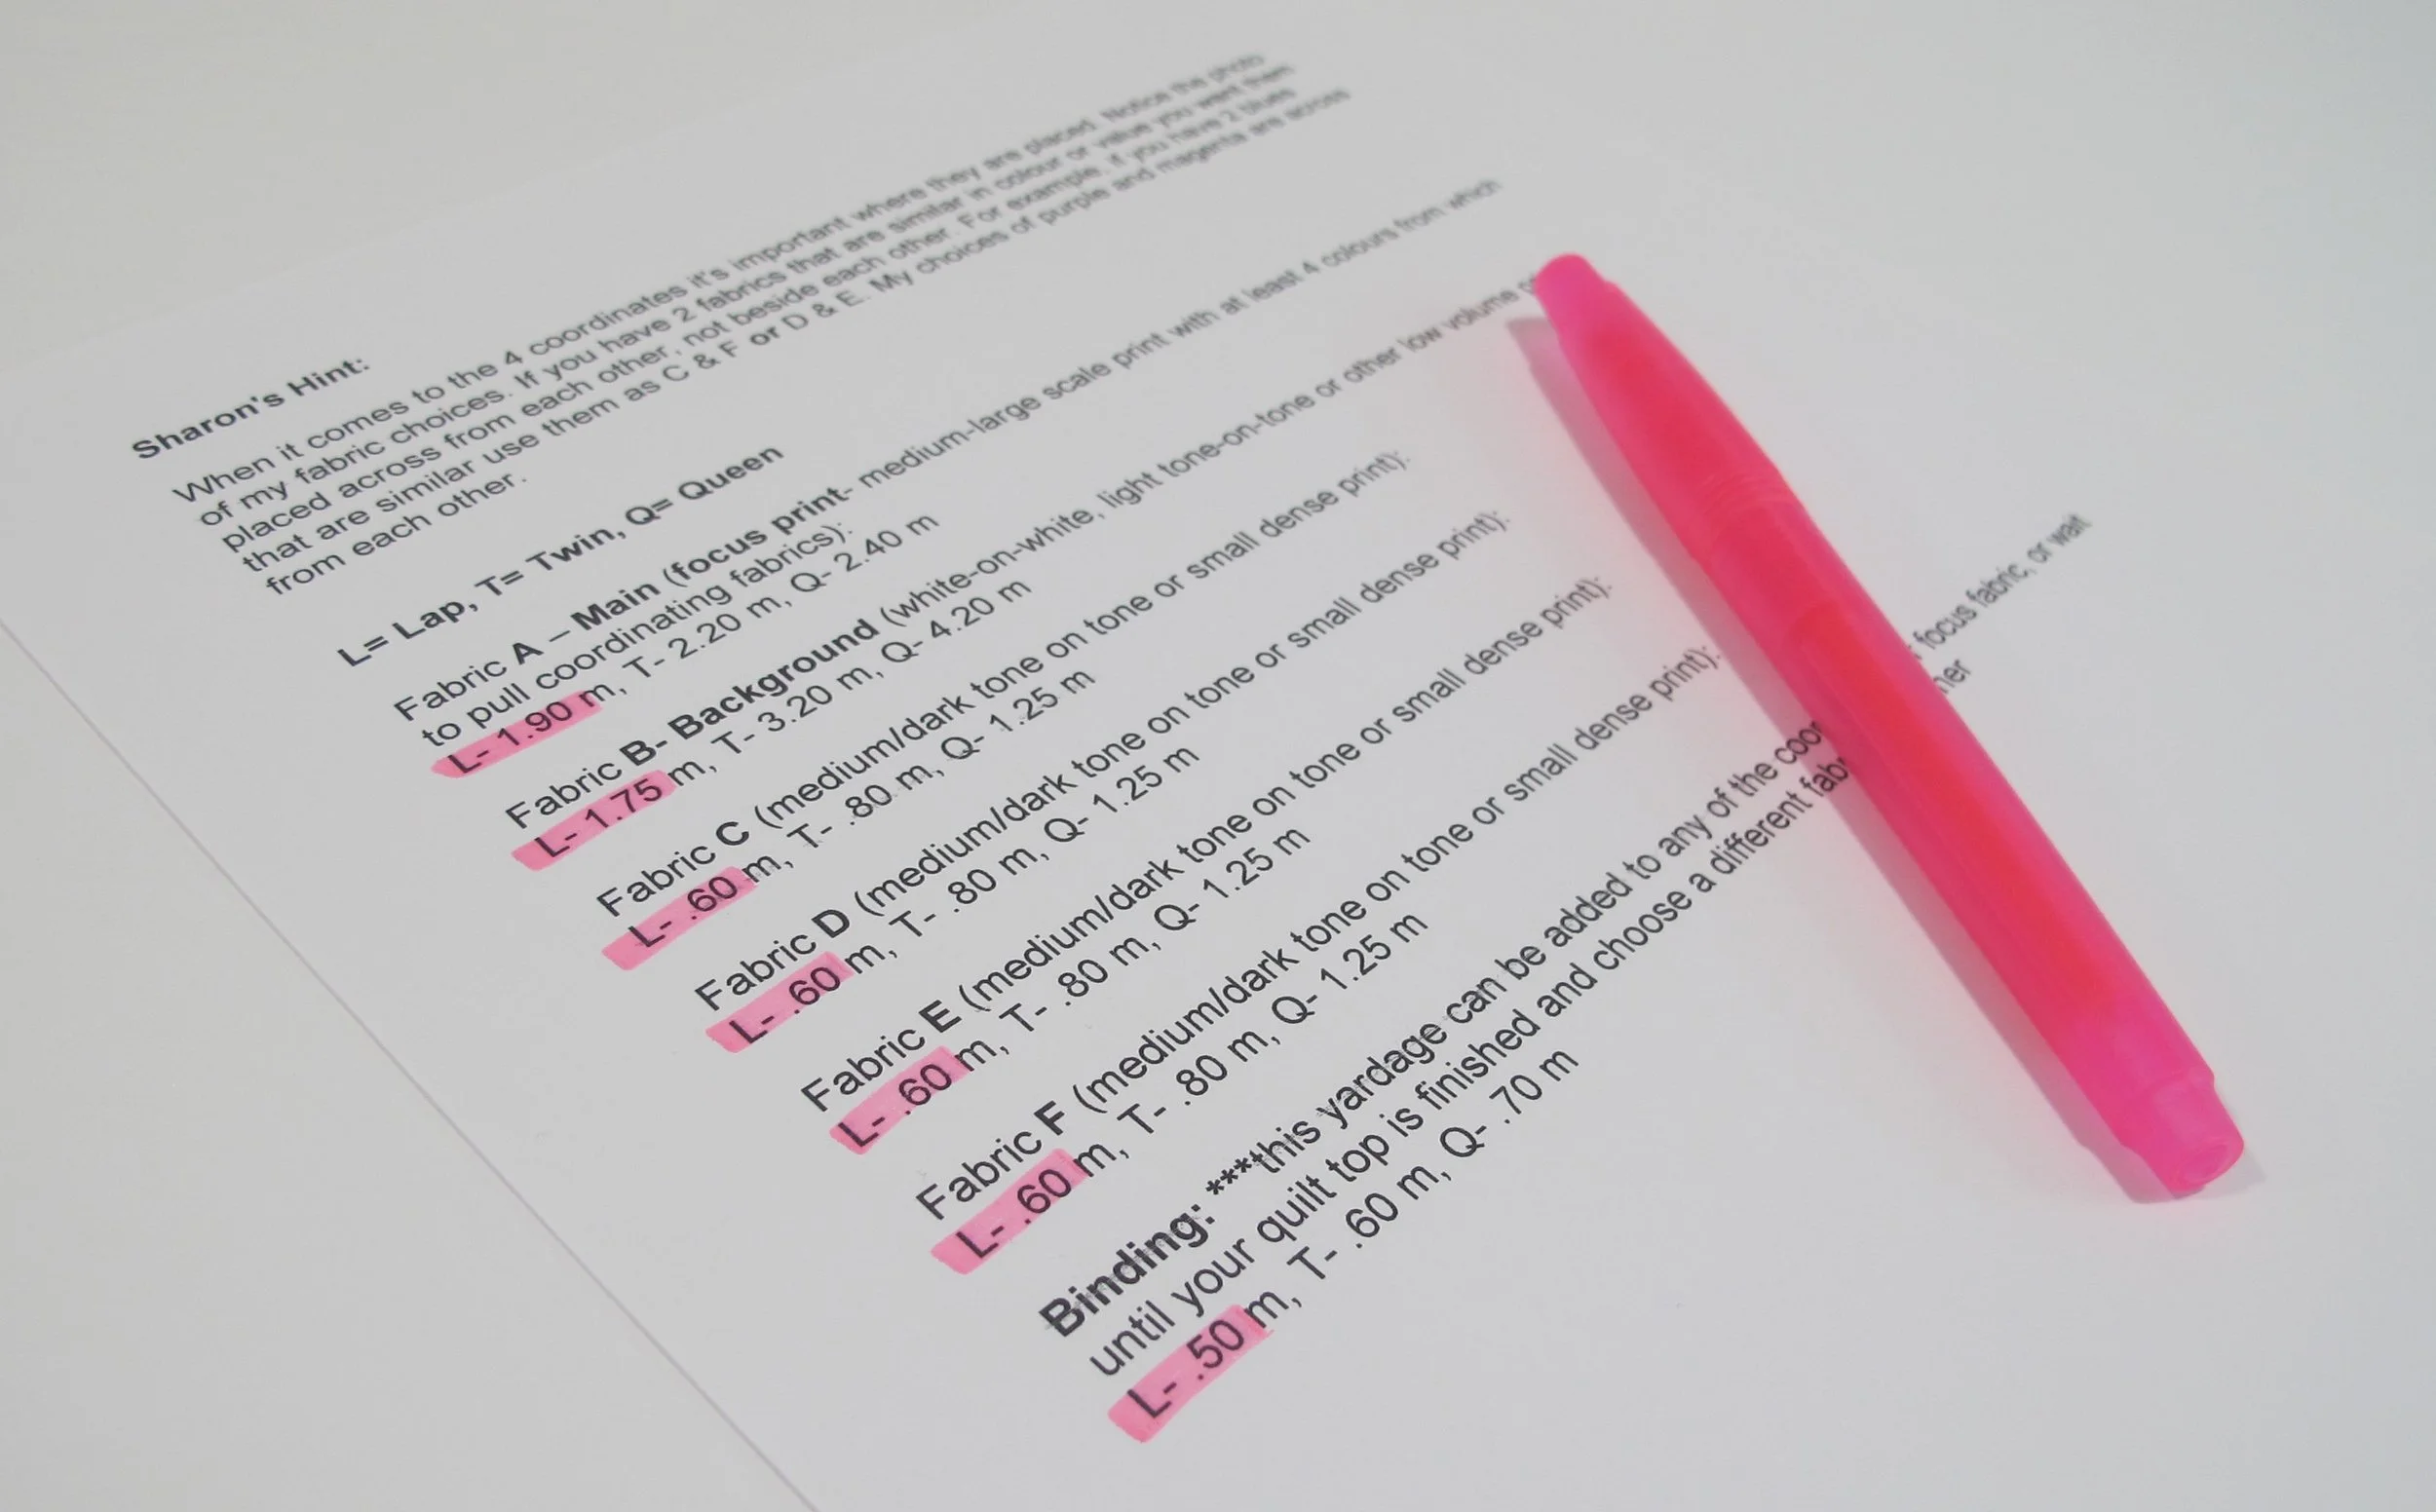
The highlighter marker will be used right away. Whatever size you are making, highlight the yardage for that size. I'm making the lap size so you can see the highlighted spots on my page.
***Sharon's Hint:
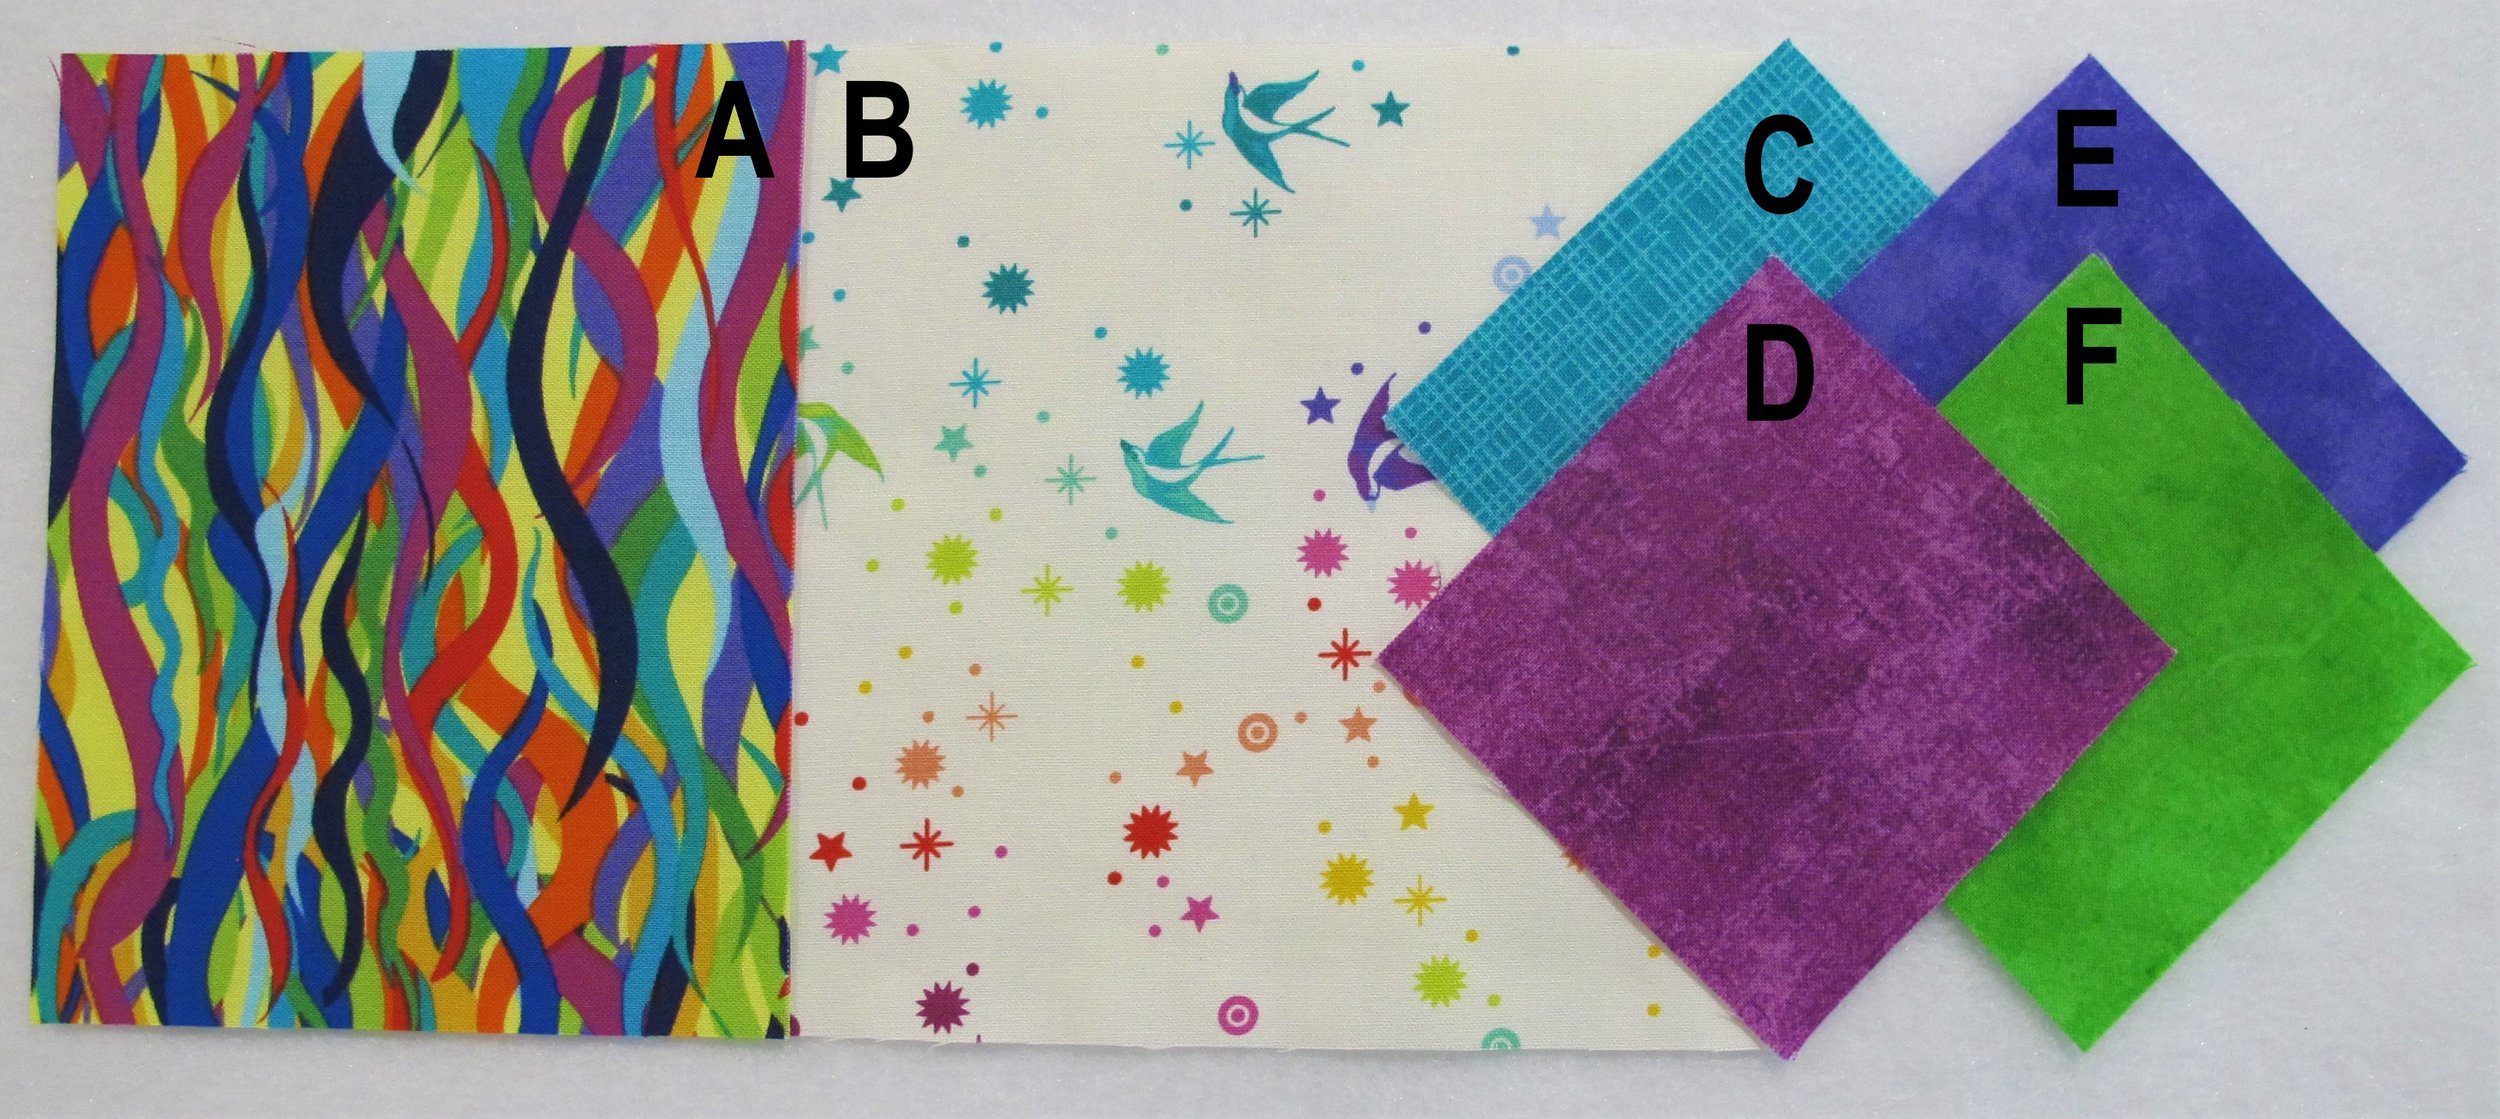
When it comes to the 4 coordinates it's important where they are placed in the design. Notice the photo of my fabric choices. If you have 2 fabrics that are similar in colour or value you want them placed across from each other, not beside each other. For example, if you have 2 blues that are similar use them as C & F or D & E. My choices of magenta (D) and purple (E) are across from each other because they are similar in colour and value.
L= Lap, T= Twin, Q= Queen
Fabric A – Main (focus print- medium-large scale print with at least 4 colours from which to pull coordinating fabrics):
If cutting Lengthwise borders: L- 1.40 m, T- 2.20 m, Q- 2.40 m
If cutting Width of Fabric borders: L- 1.10 m, T- 1.80 m, Q- 2.25 m
Fabric B- Background (white-on-white, light tone-on-tone or other low volume print):
L- 1.75 m, T- 3.20 m, Q- 4.60 m
Fabric C coordinate (medium/dark tone on tone or small dense print):
L- .60 m, T- .80 m, Q- 1.25 m
Fabric D coordinate (medium/dark tone on tone or small dense print):
L- .60 m, T- .80 m, Q- 1.25 m
Fabric E coordinate (medium/dark tone on tone or small dense print):
L- .60 m, T- .80 m, Q- 1.25 m
Fabric F coordinate (medium/dark tone on tone or small dense print):
L- .60 m, T- .80 m, Q- 1.25 m
Binding: ***this yardage can be added to any of the coordinates or focus fabric, or wait until your quilt top is finished and choose a different fabric altogether
L- .50 m, T- .60 m, Q- .70 m
*** I’ll give you 2 weeks to select your fabrics and then we’ll get together again at the beginning of March for your first set of clues. Isn’t this exciting?!