
Fussy Cutting For EPP

OK…grab a cup of coffee (or glass of wine)…this is a long one! LOL
As all of you know by now, I’ve been pretty obsessed with English paper piecing (EPP) over the last couple of years. During my EPP journey I’ve also gotten a lot of satisfaction from fussy cutting many sections of blocks to get more interesting designs. Not every block contains fussy cutting, but many have some aspect of it. This technique does require a bit of extra time and effort (not to mention fabric), but I think the results are well worth it.
First of all, for those of you who are not familiar with the term fussy cutting, just what the heck is it?! Fussy cutting is selecting a specific design (or motif) in a piece of fabric and centering it within the boundaries of a template or quilt block section. This time I will discuss fussy cutting specifically for EPP, but don’t worry, I will have another post about fussy cutting for regular quilt blocks in a future post soon.
Acrylic templates are ideal for this technique as they already have the seam allowance marked on them. 1/4” and 3/8” seam allowance templates are available so you need to decide what seam allowance you prefer. Mine are all 1/4”. A small rotary cutter is necessary in order to cut next to the template edge…the larger ones are too cumbersome and cut too far into the remaining fabric knocking off bits that can probably be used for more fussy cutting later. I use the 28 mm Olfa cutter for this step, but there are other brands of small cutters on the market that will do the job just as well.
The first shape we’ll discuss is the hexagon because it’s one of the most often used shapes in EPP and is widely available in many different sizes. For demonstration purposes I’m using the 1” hexagon with 1/4” seam allowances. The 1” refers to the length of each side of the hexie and not the diameter. I had this adorable monster fabric left over in my stash from a baby quilt I made a couple of years ago that would be perfect to show this technique. Notice that because the seam allowance is marked on the template I was able to leave out the purple monster’s hand in the first photo by moving the template over slightly to the right still centering the blue monster. The photo above right shows many of the 1” hexagon centres that are fussy cut in my Happy Hexies tablerunner.
I cut directly into the fabric by holding the template in place, but many people like to mark the outside edges of the templates with a Frixion marker (or other heat erase marker) or pencil and then cut freehand. If you find the template shifting as you are cutting, adding some True Grips (or other ruler grips) to the back can really help. A rotating cutting mat can also be helpful using this technique because the template stays on the fabric in the right position and stops you from becoming a contortionist…turn the cutting mat instead of throwing your elbow out! This obviously only works well with smaller pieces of fabric and not larger amounts of yardage.


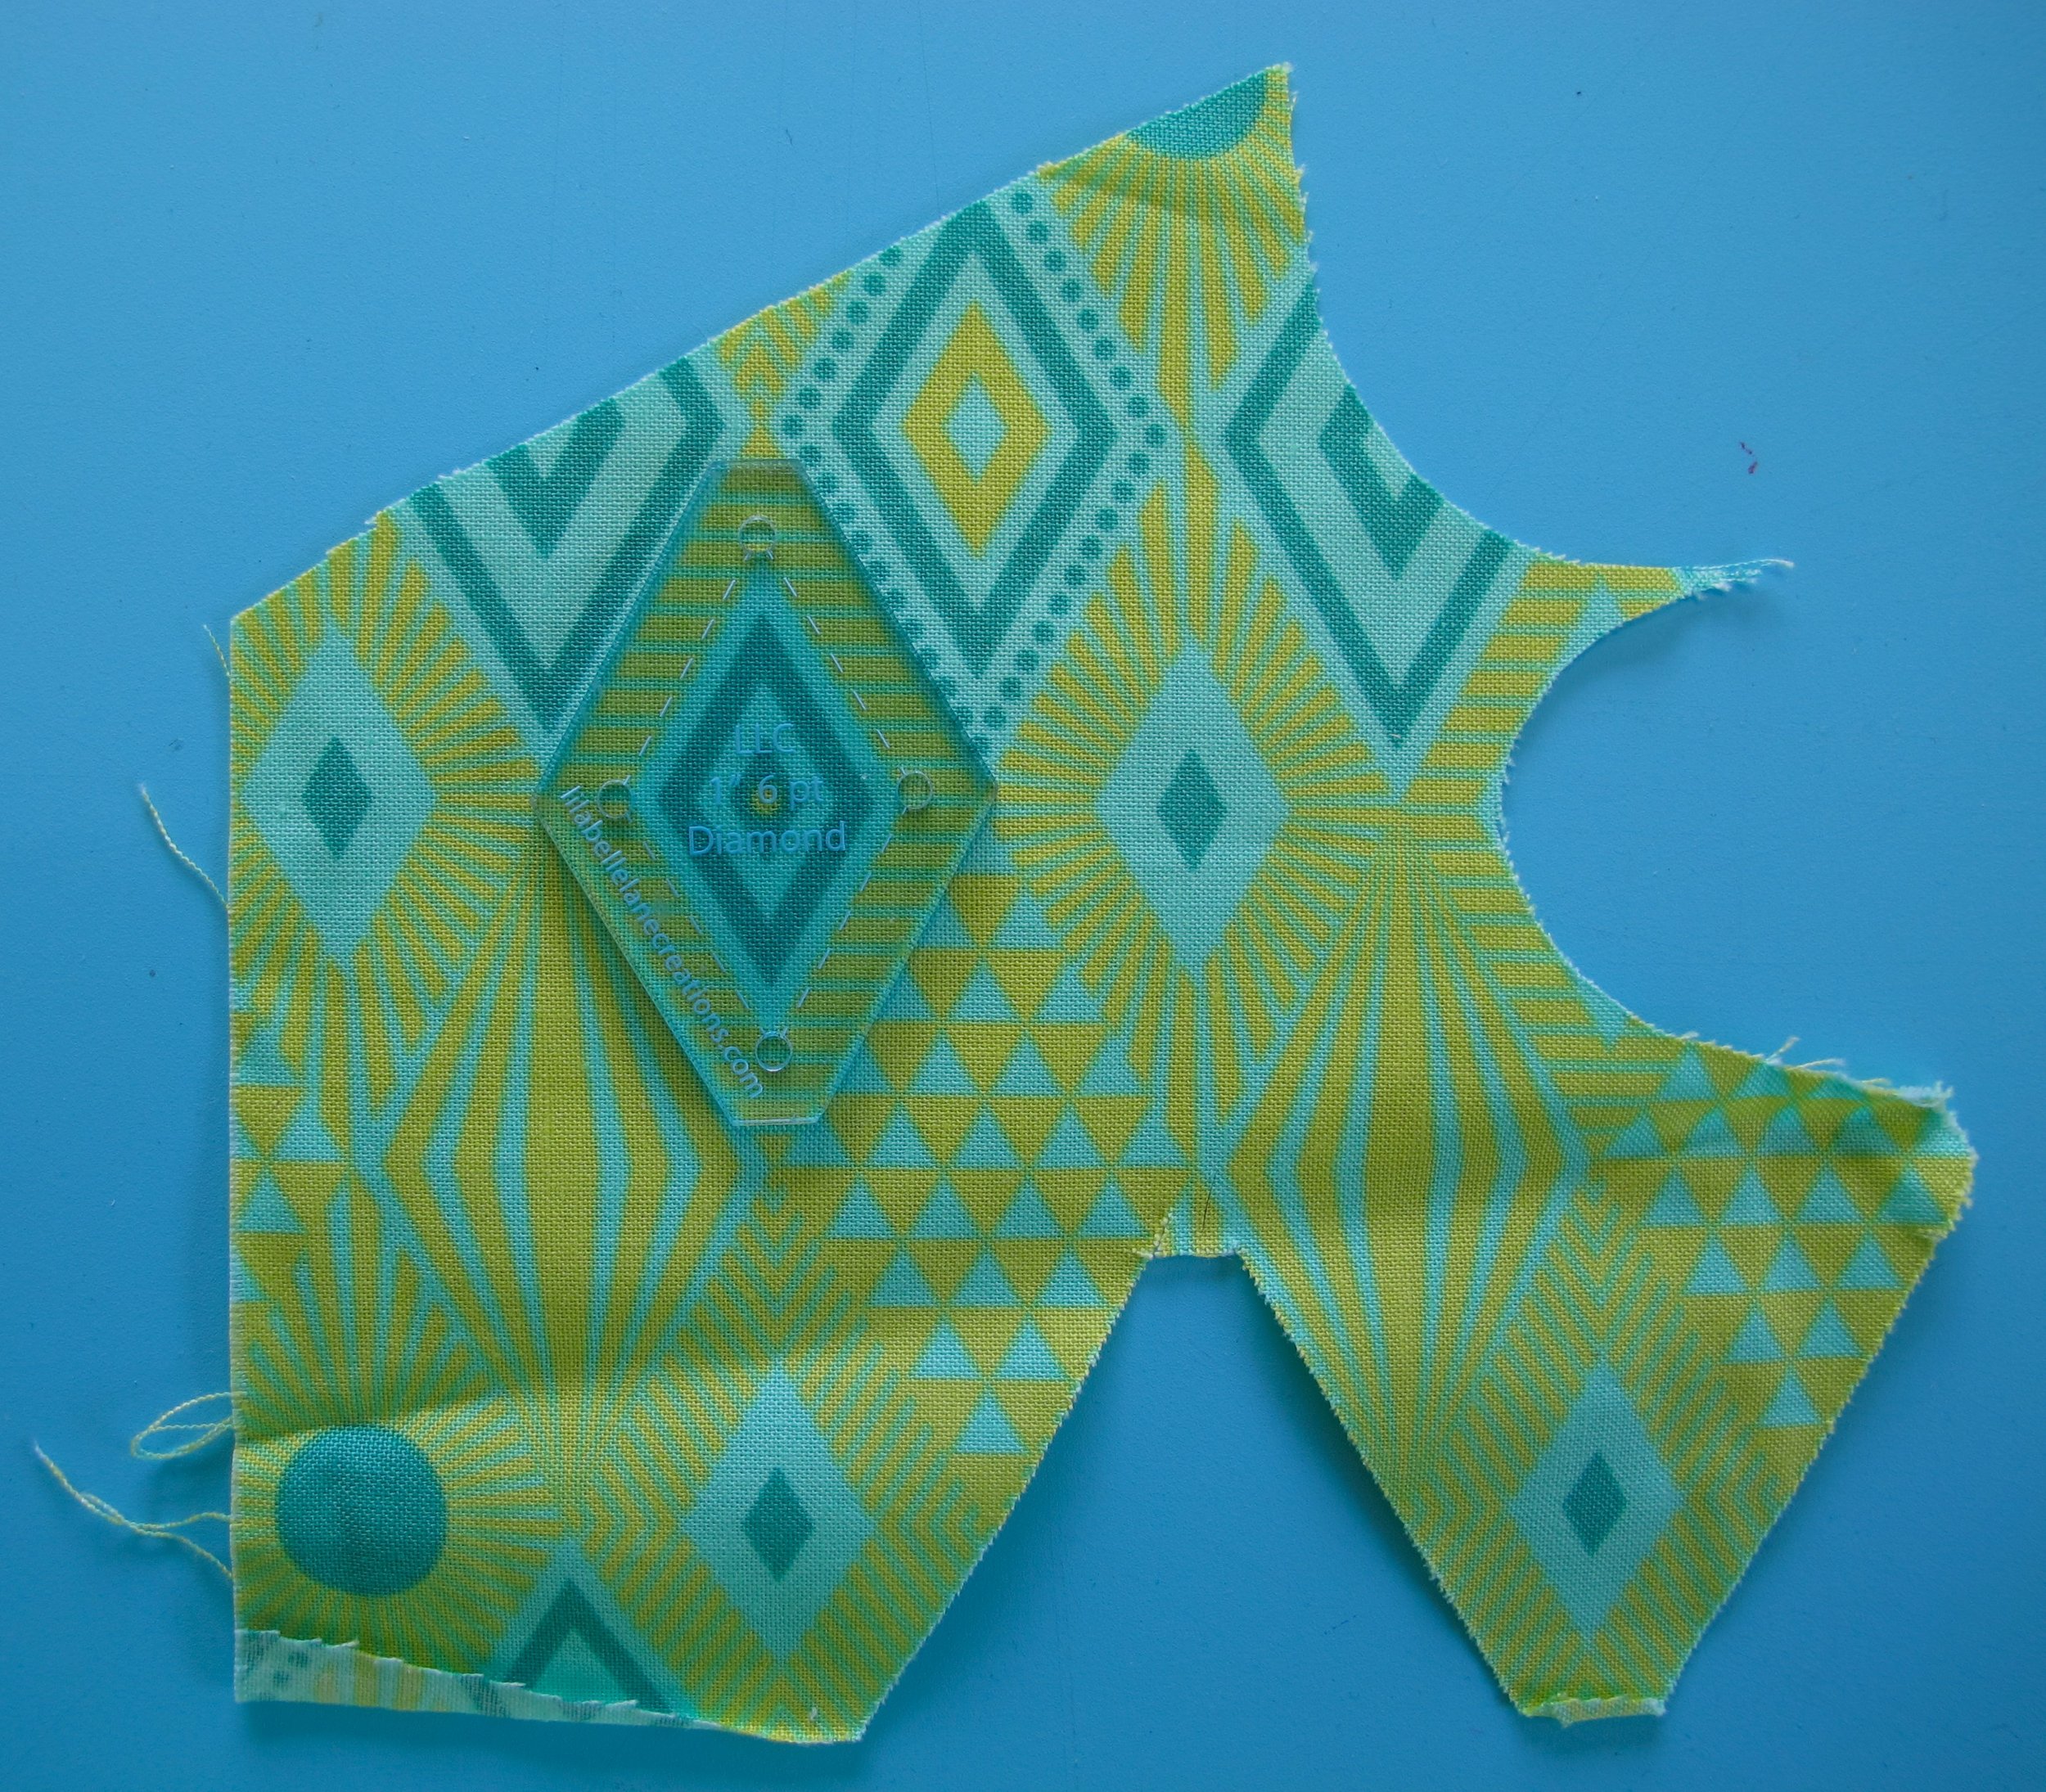
My Cherish quilt had a lot of small diamond shapes and half hexagons that really stood out when they were fussy cut. Even though they did not create secondary designs when included in the blocks, they added lots of interest just the same. This great Tula Pink fabric below already had diamond motifs within the print and they just happened to be exactly the right size as the diamond template I already had…isn’t that awesome?! Not only that, but I was able to fussy cut the birds from the Fairy Dust fabric (2 of each colour, opposite each other in the block) to add a little more interest. The block to the right incorporates both prints.


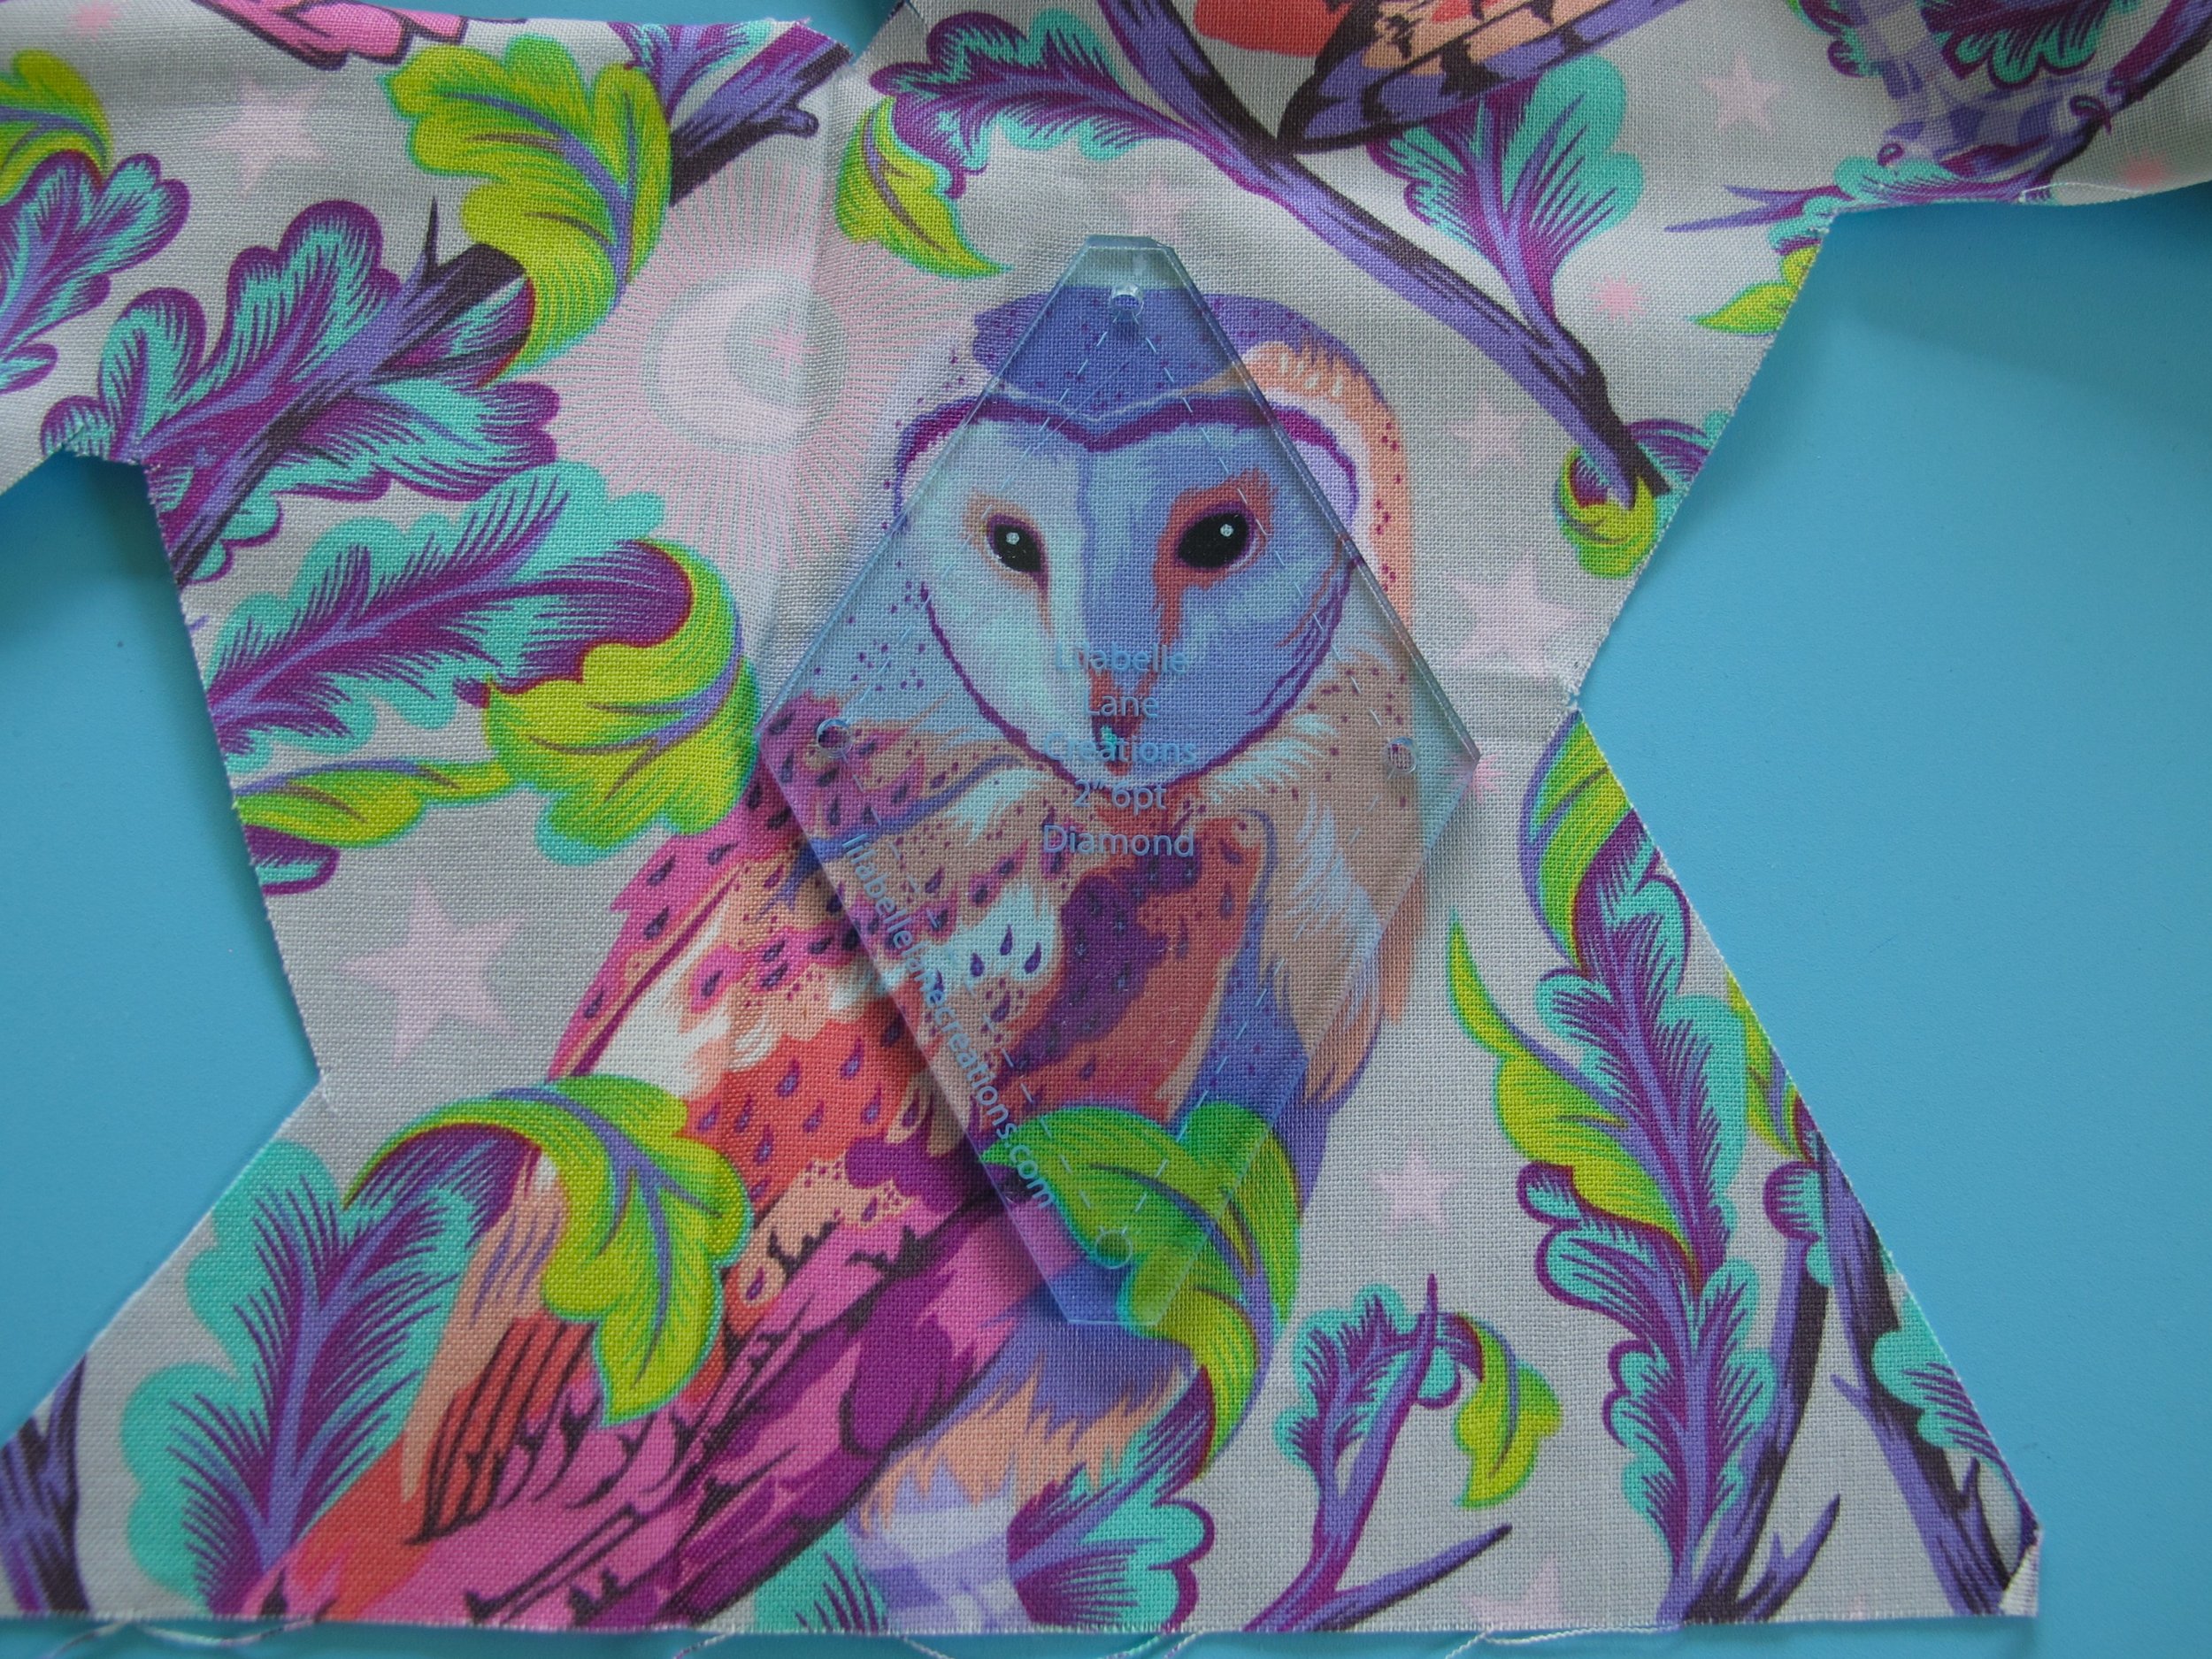
While making the EPP 6 pointed star quilt I did manage to fussy cut a majority of the large diamond shapes to create more interesting secondary designs. Below I will show the steps I used to “audition” the motifs within each fabric by using only one piece of yardage, Tula Pink’s Moon Garden Night Owl. If you are able to get your hands on a mirror set like the ones by Sue Daley or Marti Michell they are very handy for checking out secondary designs. Keep in mind that when viewed through the mirrors the designs are mirror image and NOT six identical cut outs…they give an idea of what it will look like, but not an exact replica.
First, place the template on top of a motif in the fabric keeping in mind where the seam allowances fall. Cover up the bottom outer sections of the fabric with a couple of pieces of paper or plain fabric then place the mirrors on the remaining stitching lines of the template. This will give an approximation of what the design will look like. Below you will see 3 different designs all from the same fabric. It’s really amazing how one large interesting print that has a lot going on in it can be perfect for fussy cutting.


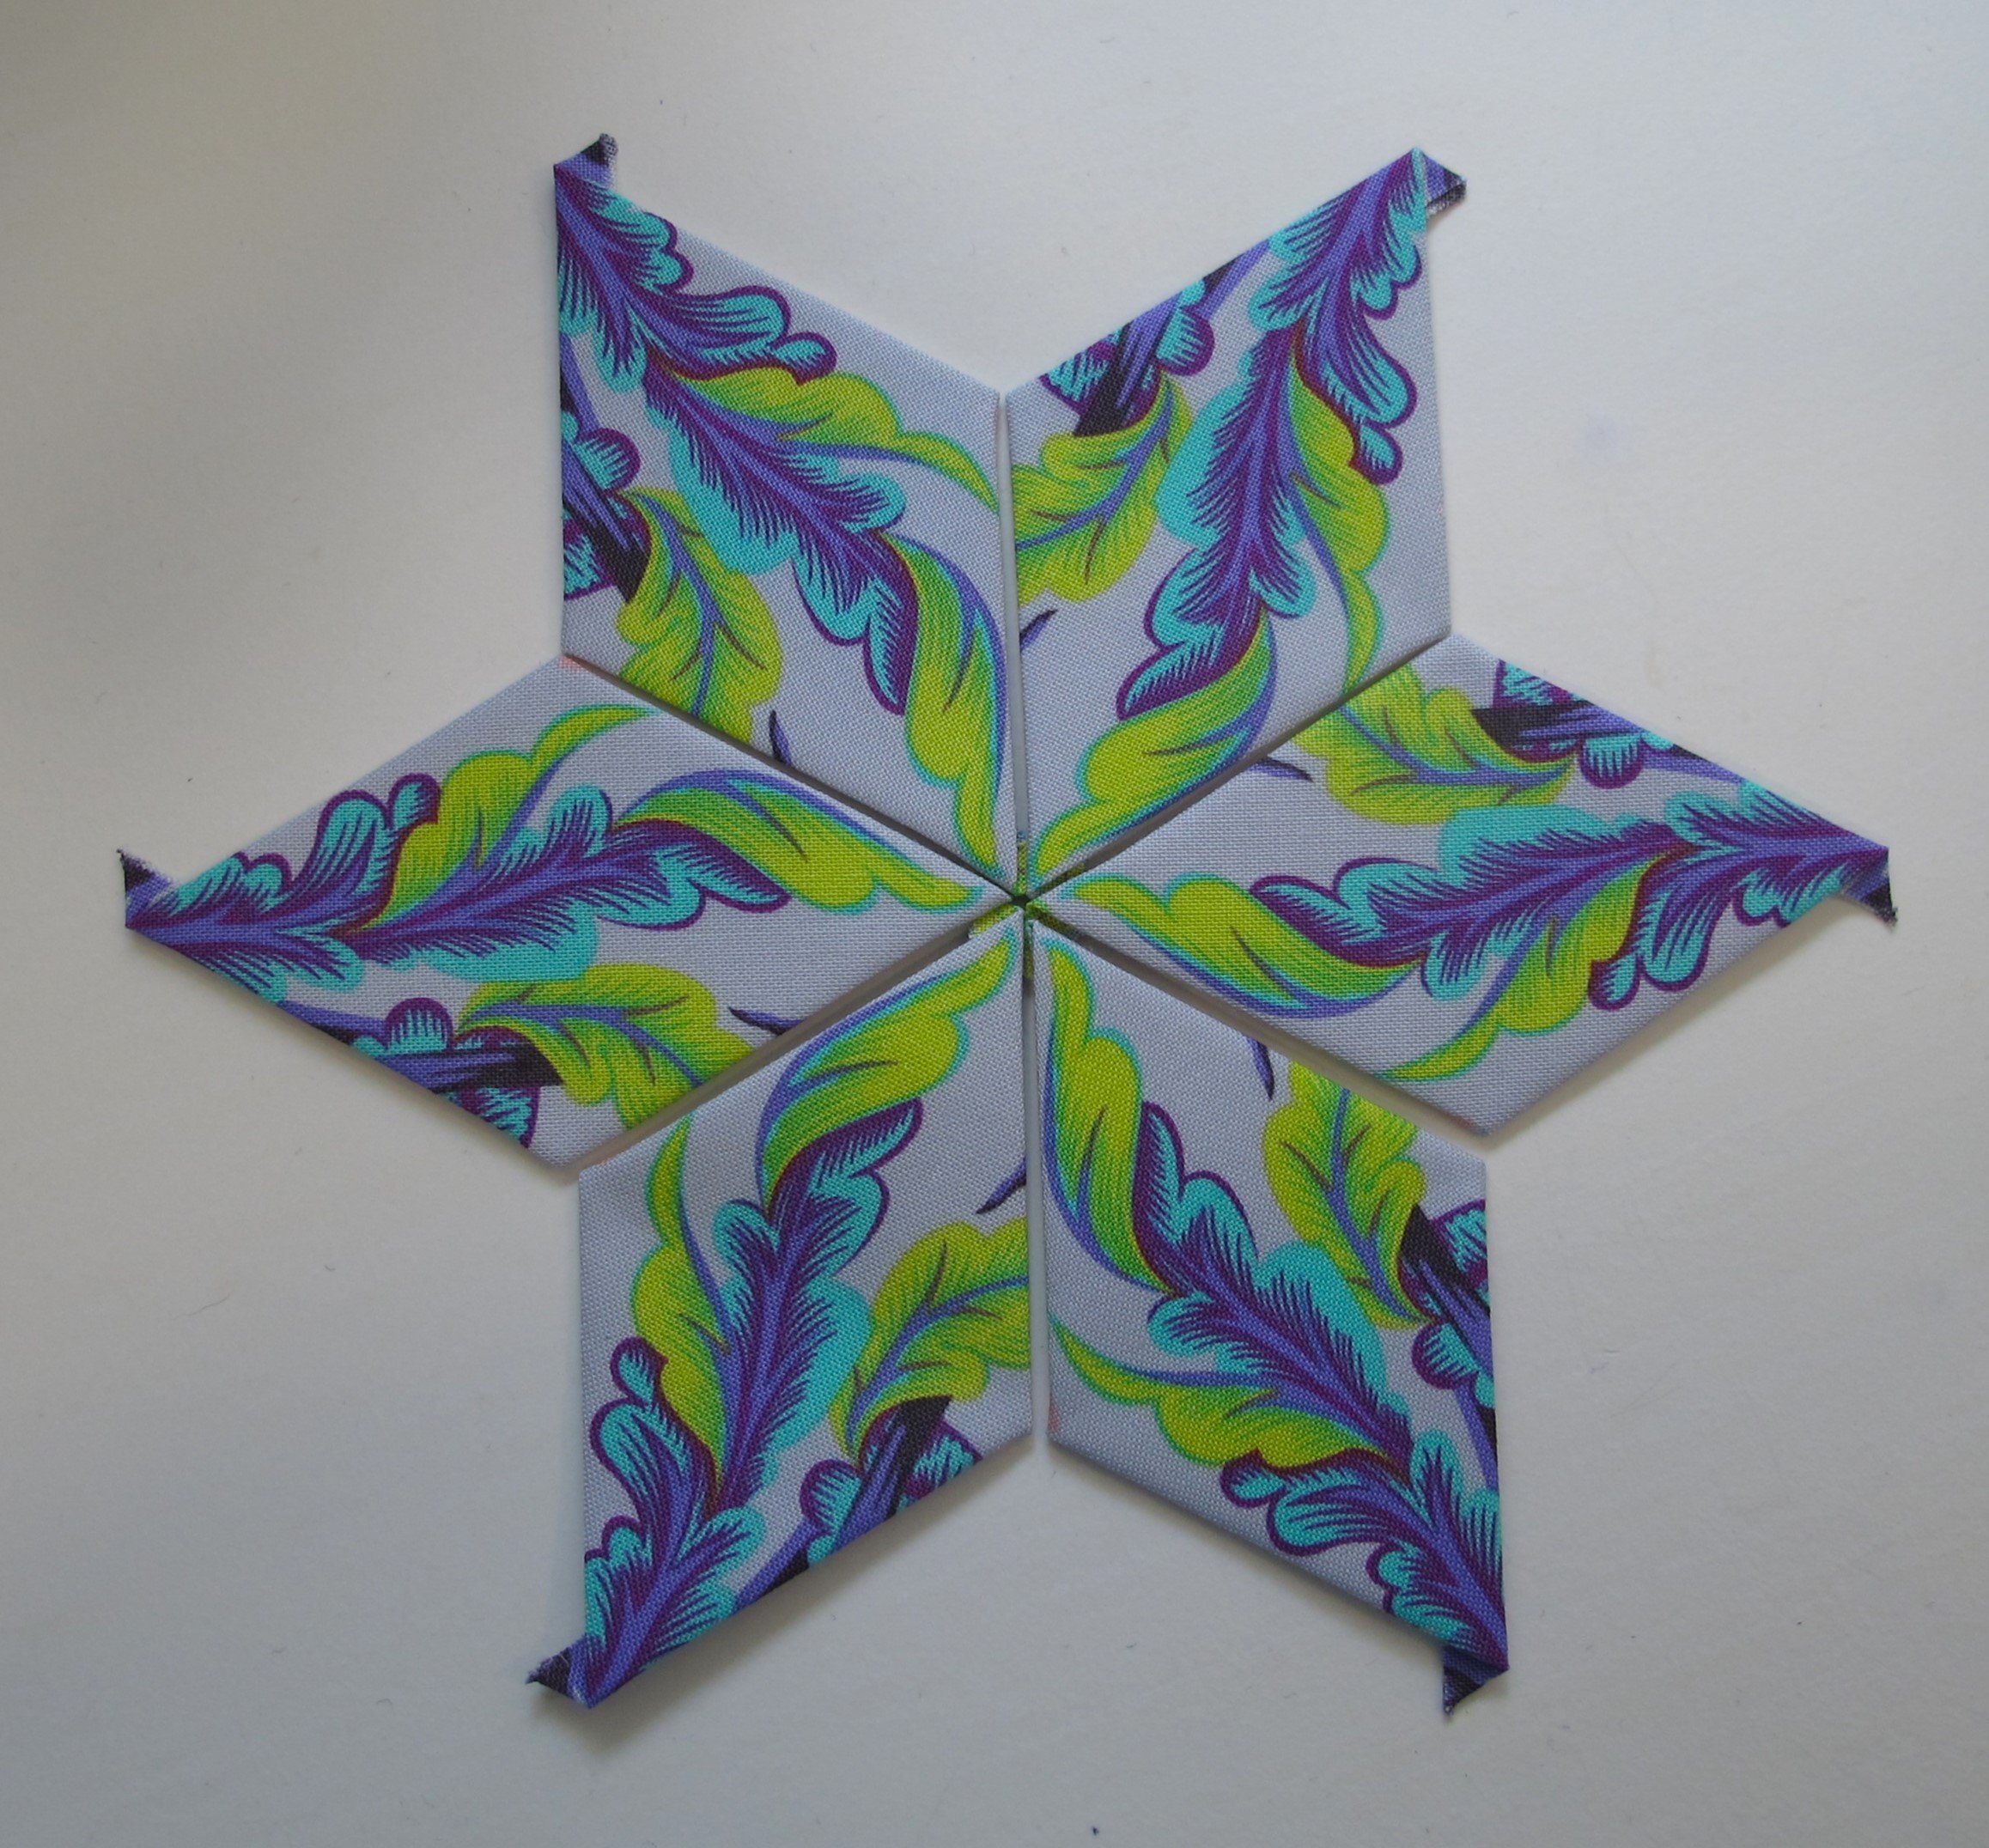
Also, keep in mind that each large diamond has 2 ends so there are 2 design options using the same motif. Below there are 6 identical diamond shapes. I did not want to include the peachy colour in this particular block so I made sure to line up the template so that they would be in the seam allowance and not in the final design. When laying out the diamond shapes you are now able to choose which of the 2 designs you prefer or cut out 12 identical motifs and use both sets.


There have been times that I have actually drawn certain parts of the fabric design I see through the template onto the template itself with a fine point Sharpie marker. This is to ensure that the design is lined up perfectly every time. Even though it says it’s permanent I have found that the marker rubs away from the template quite easily when finished.
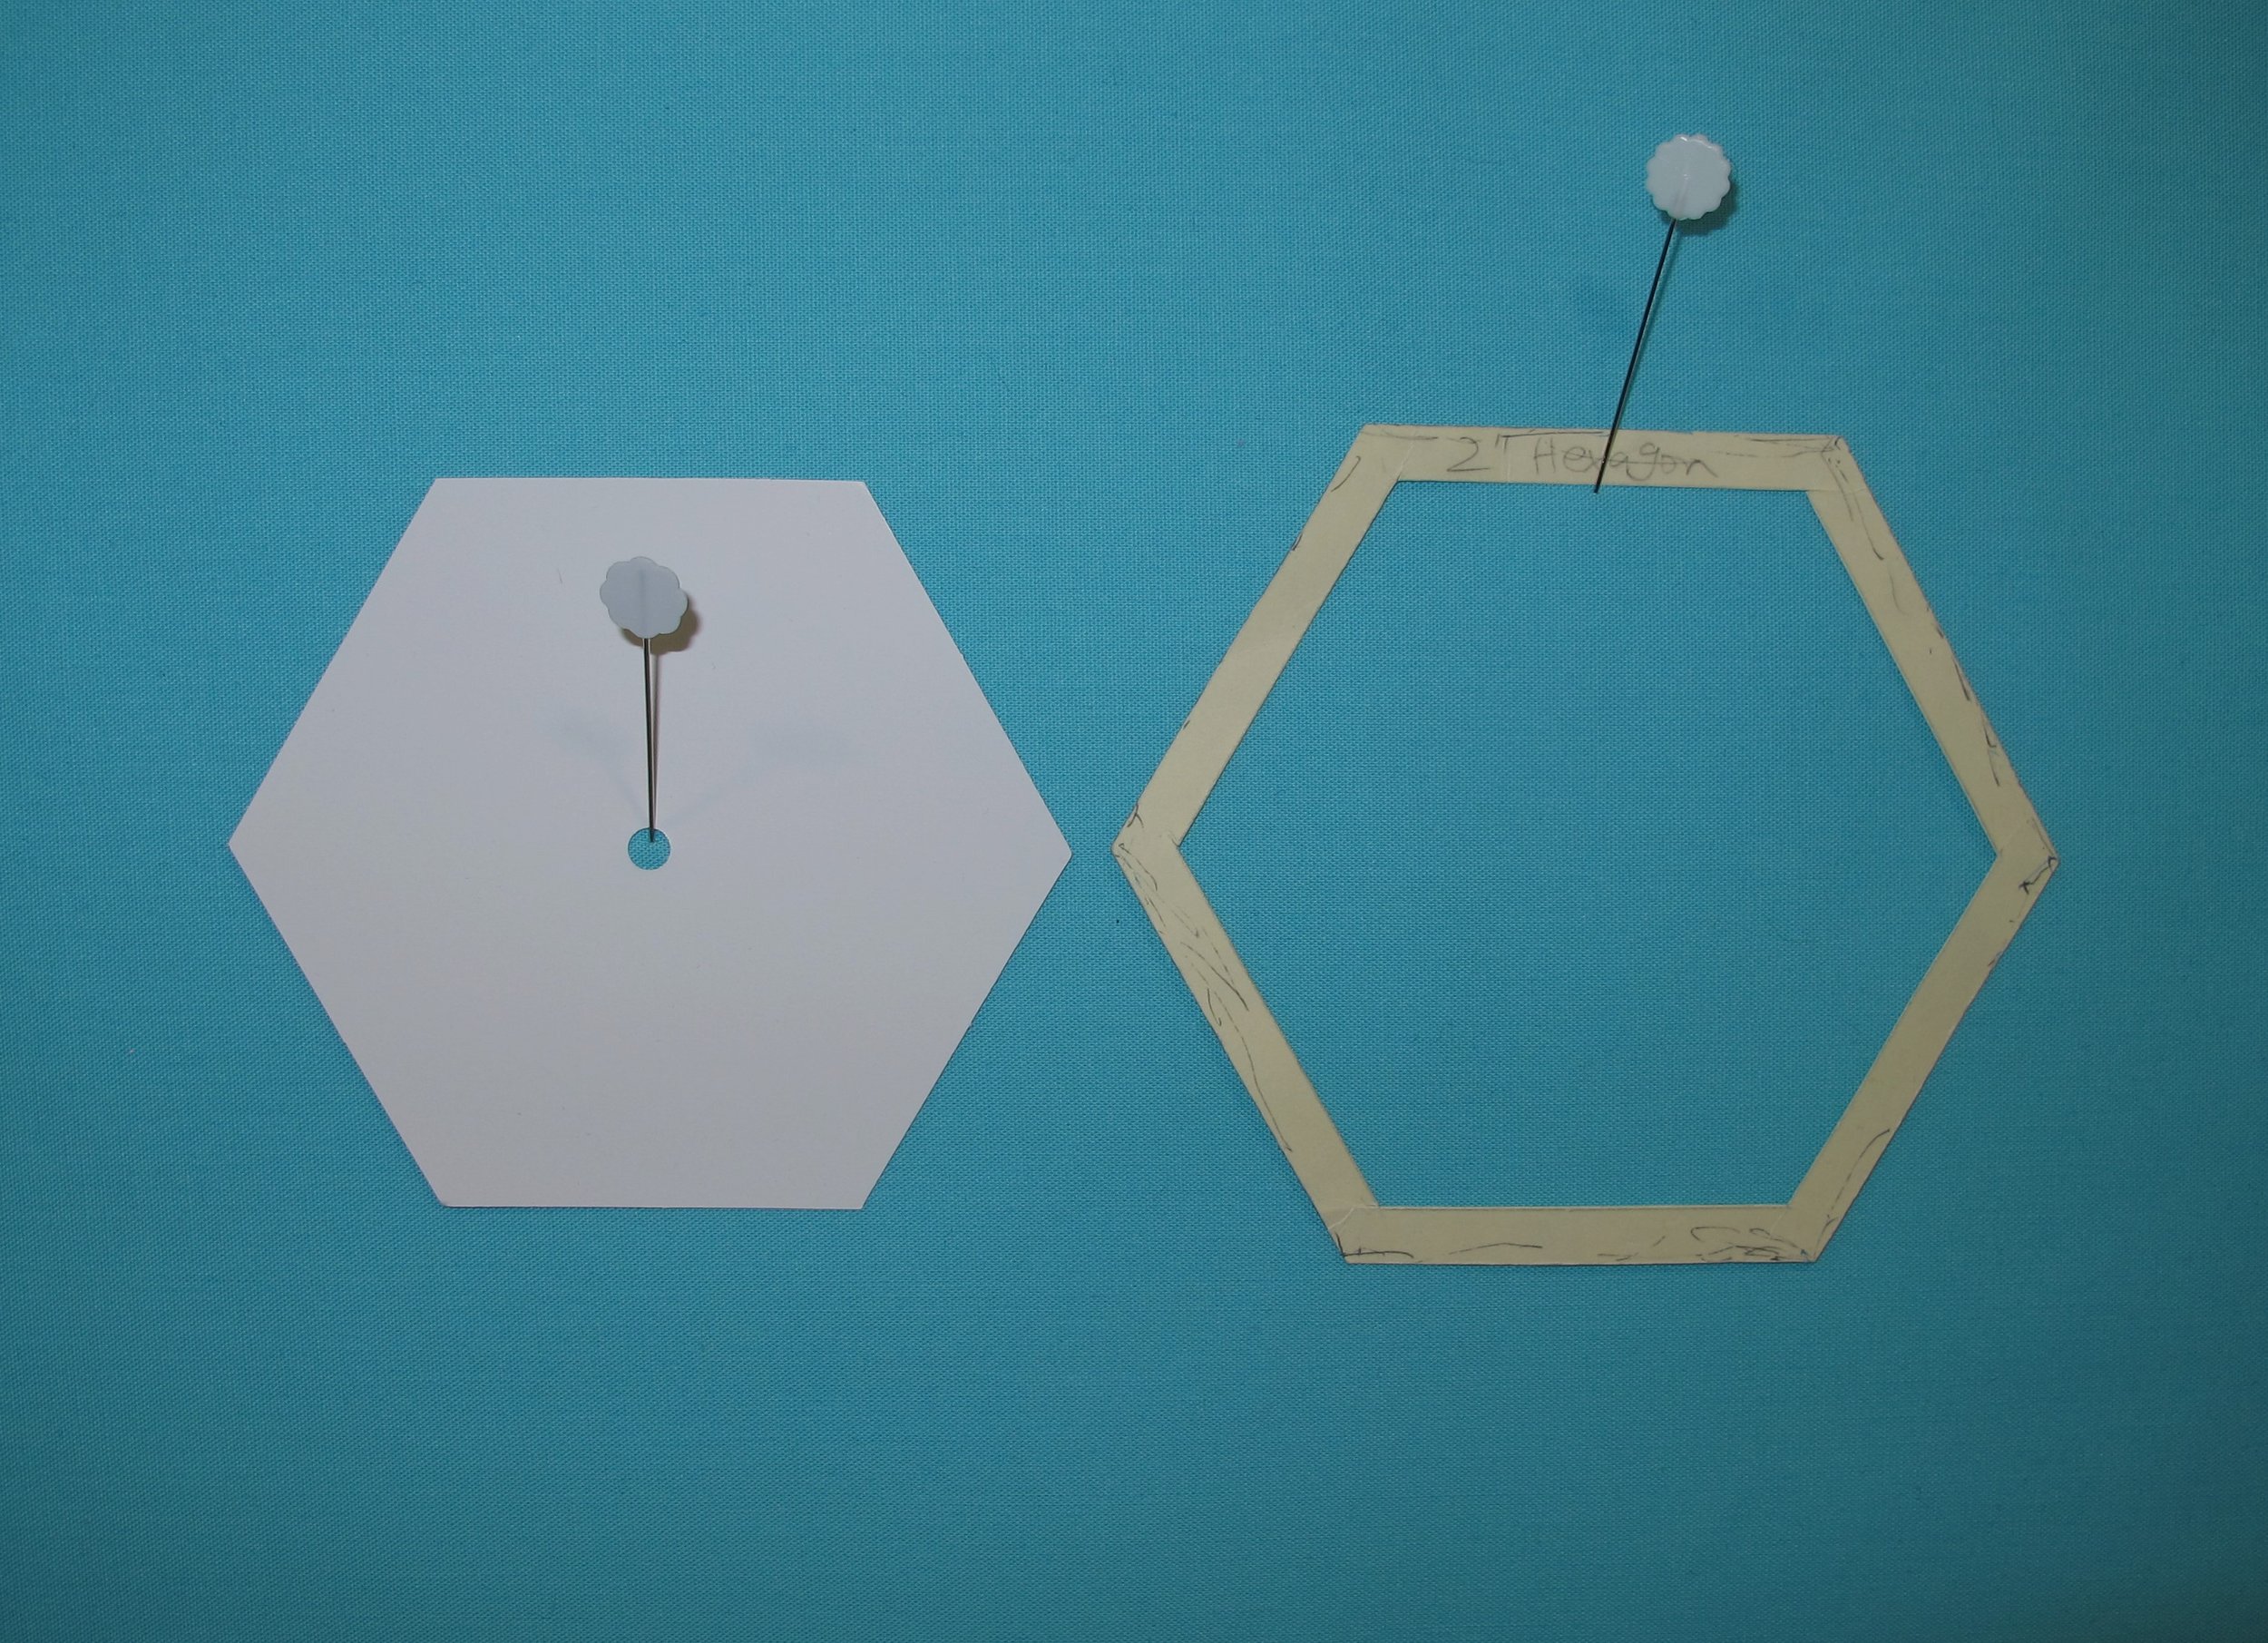
Occasionally I also make a window template if I only have the EPP papers for a project and no corresponding acrylic template. Such is the case with the Cherish quilt where I used a 2” hexagon. A window template is easy to make out of cardstock or template plastic (I used an old file folder). Trace the EPP paper on to the cardstock, add seam allowances around the perimeter (you choose your favourite width of either 1/4” or 3/8”) and then cut the cardstock around the outside edge and the inside edge leaving just the seam allowance. This allows you the ability to centre a motif within the confines of the window template, trace around the outside of the template and then cut the shape. The EPP paper shape is then centred on the wrong side of the cut fabric shape and either glue-basted or hand-basted in place. Sets of a mix of regular and window templates can sometimes be found, like this one, but they don’t often have all sizes listed.
*** Sharon’s hint: Do not use a rotary cutter next to a cardstock (or plastic template material) window template. The blade will shave off little bits of the cardstock/plastic eventually making it smaller.

The hexagon shape can be placed on the fabric in 2 ways as shown above right (faint turquoise lines highlighting this adorable sloth fabric) so it’s necessary to know what the orientation of the block will be in your own quilt. When I was working on my Cherish quilt the blocks were oriented with the hexagon in the direction as shown in the above left photo. This made for a more horizontal linear look rather than vertical. Two fussy cut centres are shown below, along with the smaller diamond shapes being fussy cut as well.


Hopefully you’ve found this information to be helpful while enjoying your own EPP. And maybe, just maybe, it might encourage you to experiment with fussy cutting if you’ve previously been hesitant to do so. Most of all, have fun!