Fusible Appliqué- Part 2
Hopefully Part 1 answered any questions you had about using fusible web and that you were able to follow along successfully, either making the provided Funky Flowers design or a design of your choice. Now comes the next step...actually sewing down the shapes. I'll send a few tips and tricks your way that were found out through lots of trial and error on my part.
Do the edges of the appliqués actually need to be stitched down?
That depends...
If the appliqué is on a garment or on a quilt that will be frequently laundered then the answer is a hard yes. Even though the fusible web holds extremely well it will wear away from the garment or quilt with repeated use and washing. The edges will fray and the appliqué will eventually fall away from the background.
If the appliqué is on a wallhanging that will not be handled or only displayed seasonally often it's not necessary to stitch down the edges, but stitching does add another layer of interest, so it then becomes a personal or design decision.
What type of stitch should be used on the edges of the appliqués?
Again, that depends...
My personal go-to stitch is the blanket stitch. The thread can either match the actual appliqué shape to blend with it or it can be a contrasting colour in order to stand out. There really is no right or wrong...again it's a personal/design decision.
Many people have great results with the dependable zig-zag stitch. This is perfect for those of you who own very basic machines that don't offer decorative stitches. Have you ever heard of the term “satin stitch”? A satin stitch is only a zig-zag stitch that is made with a very small stitch length so the stitches are laying right next to each other to create a satiny ribbon look.
Some makers also like to incorporate the many decorative stitches they have on their machines to anchor appliqué shapes, but some practice and trial and error is required...more on that later.
You may have heard of the term “appliquilting”. Often, in the case of a design that incorporates very small pieces and lots of them, I prefer to use an invisible thread and quilt and appliqué the whole thing in one go once all three layers are stacked together. The appliqué shapes can be anchored and the quilting done at the same time...win, win! My Elton John quilt was completed this way.
What type of needle should I use?
When doing fusible appliqué I tend to use a Schmetz embroidery needle in either a size 11 or 14, but I understand that the microtex needle works very well too. If you plan on using thicker thread a topstitch needle might be better because of the large eye to accommodate the thicker thread.
Practicing Stitches
One thing I like to teach my beginner students is to get to know the different stitches on their own personal machine. Learn how to adjust the different stitch lengths and stitch widths for each stitch pattern. Some people own very basic machines, but they are still able to create beautiful quilts. Knowing what your machine is capable of is half the battle.
The following stitched samples have a stabilizer on the back, but it's not always necessary. Occasionally the stitches will distort the fabric or make it pucker if a stabilizer is not used. For these samples I used Stacey Shape-Flex (Pellon SF101) which is a thin, woven fusible interfacing because it’s what I had on hand. This product is also great for you garment makers out there. I do recommend a tear-away or wash-away stabilizer since it adds less bulk once the appliqué is completed. Buy a small amount of each and test them out to find your favourite.
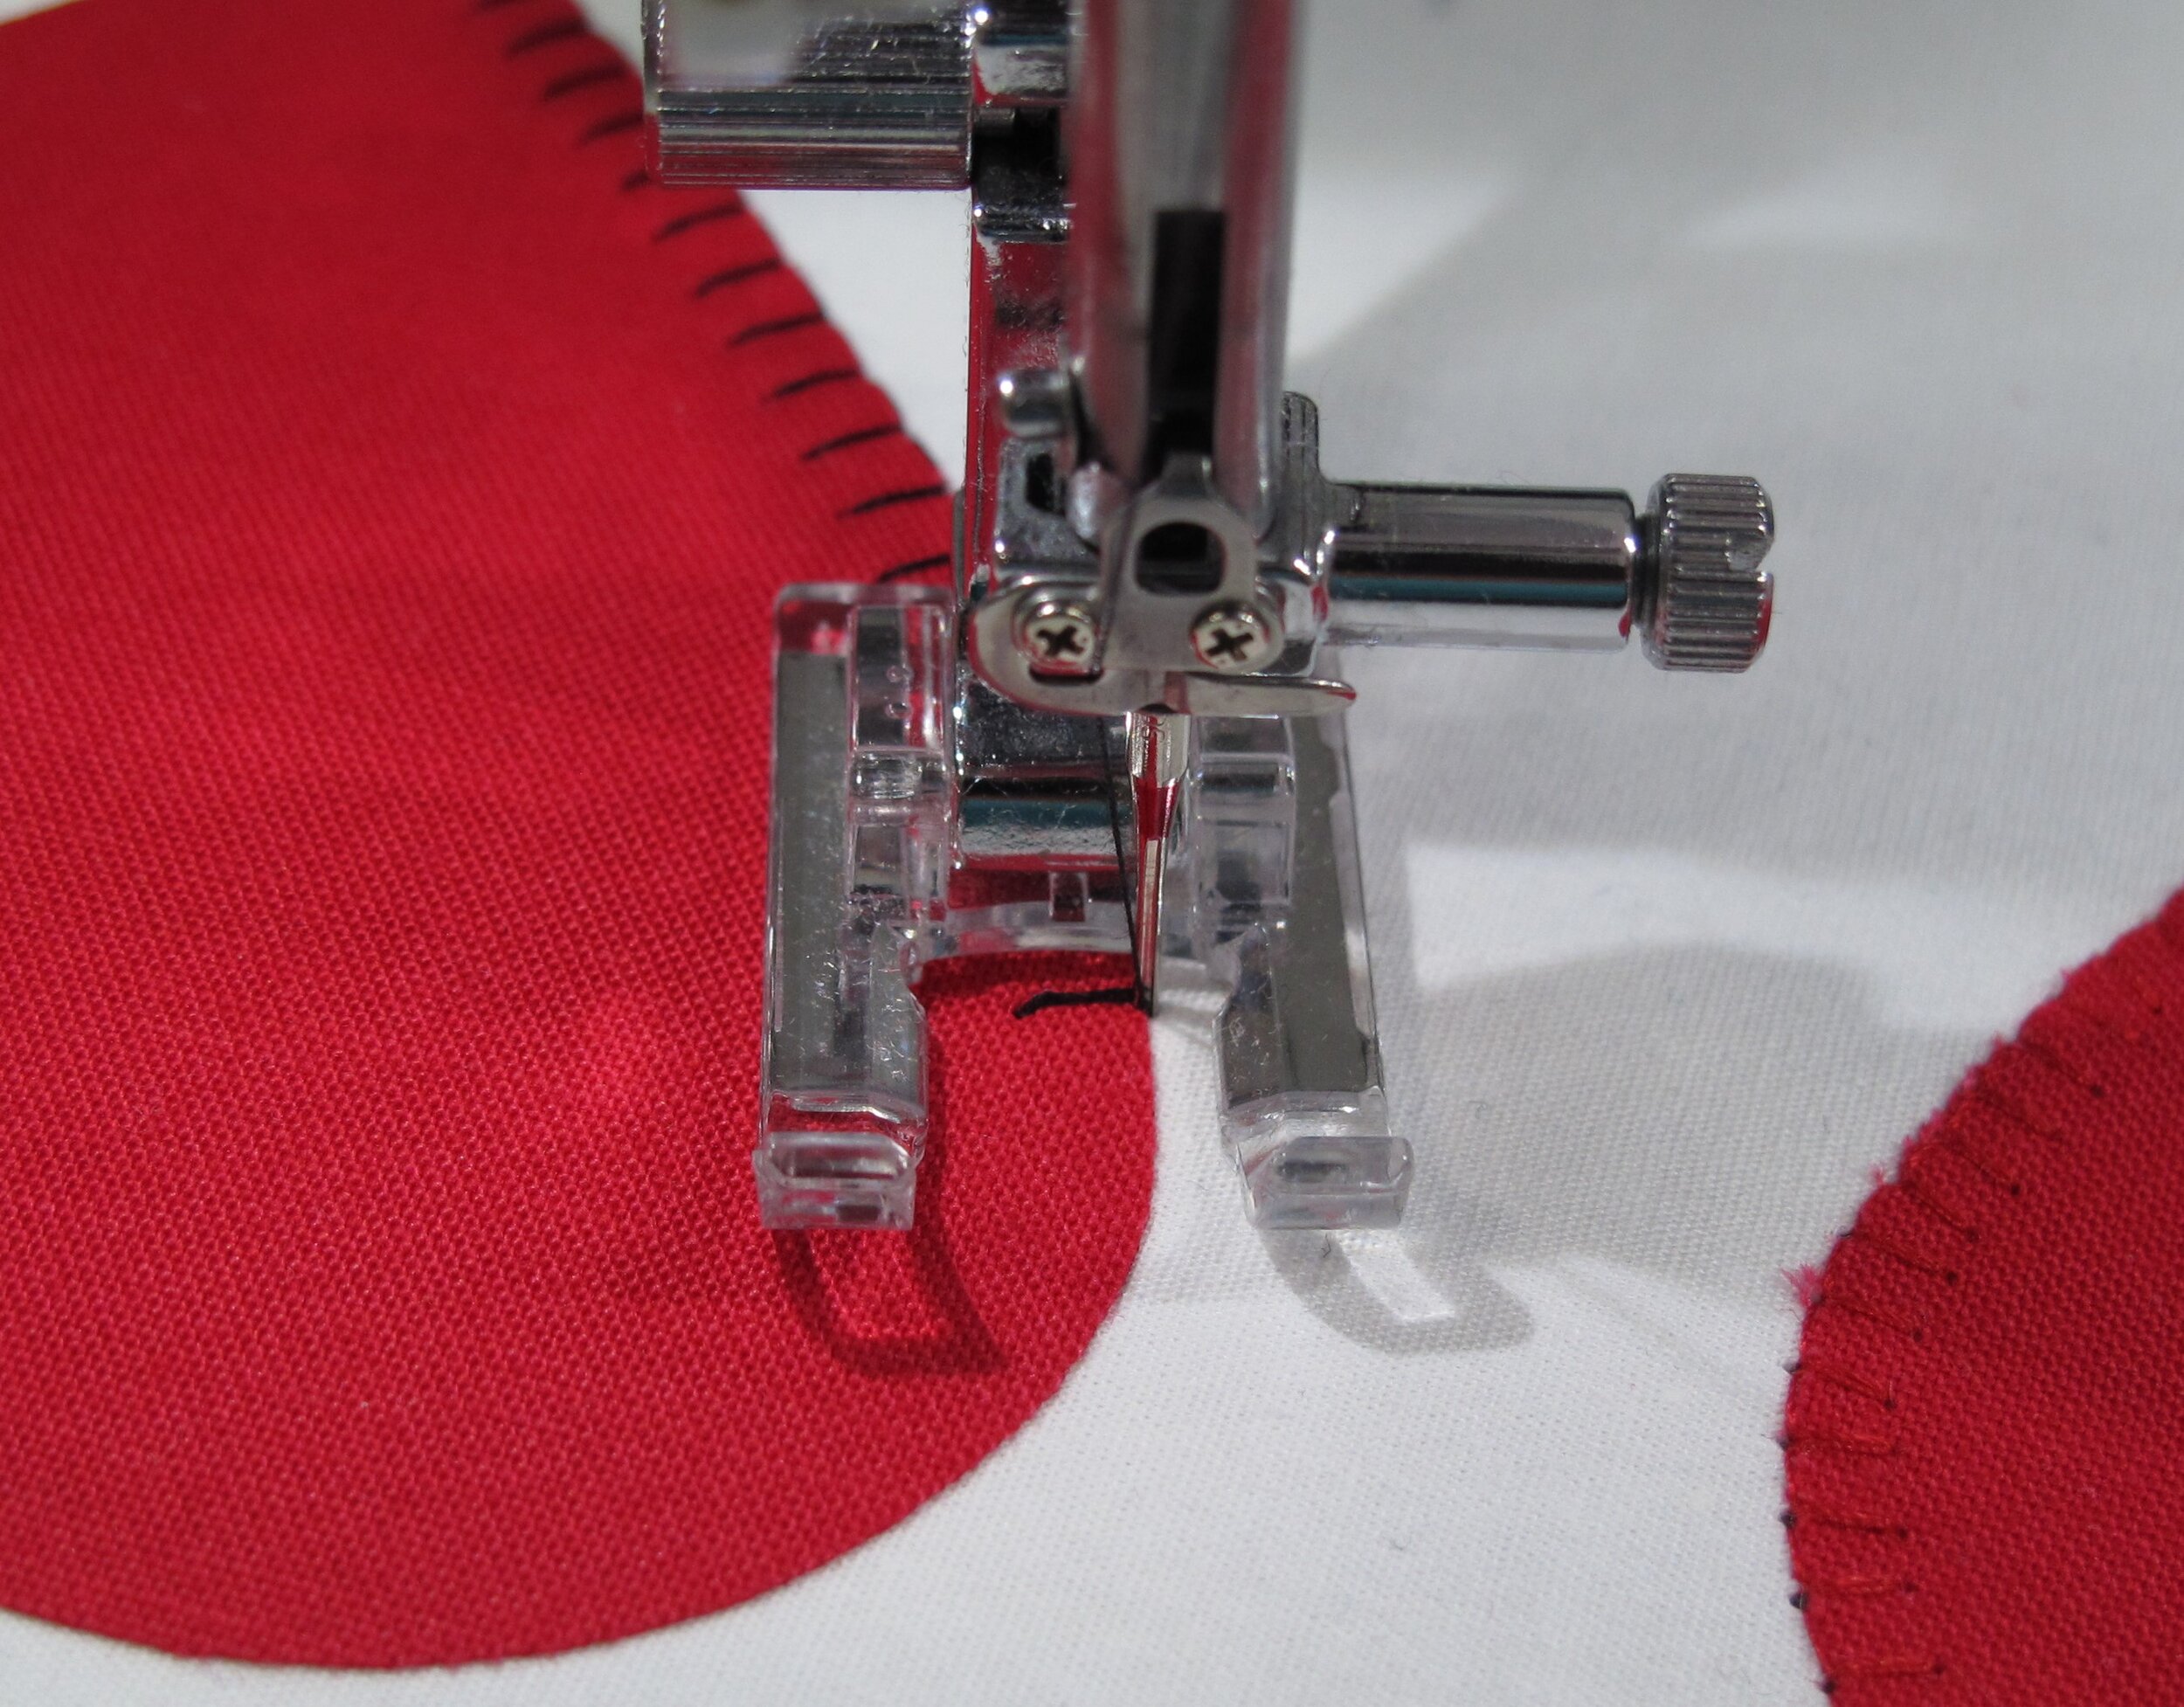
I work with a Janome Memory Craft 6700 Professional so any of the stitches listed below are for this particular machine. I prefer to use an open-toe “F” foot so I can easily follow the edge of the appliqué and see the stitches as they are being made. There is a handy mark in the centre of the foot to keep the stitching lined up properly on the line or the edge of the appliqué. In the photo the awl is pointing to it, but it doesn't show up too well because it's clear. Some of my friends have marked their centre with a black Sharpie marker. There is also a channel on the bottom of this foot to accommodate the extra thread that builds up when doing satin stitch or other decorative stitches.
On this sample lines were drawn an inch apart so I could test the different stitches. From right to left the stitches are as follows: zig-zag, blanket stitch, snowflake, feather stitch.
Zig-Zag: Starting with the default setting for this stitch at the top, the stitch length was made shorter and shorter until it became what's called a “satin stitch”. I also show it wider than the default width near the bottom. I centred this line of stitching on the line, but when working on an appliqué I would have the “swing” of the needle land on the outside edge of the appliqué...more on that later.
Blanket stitch: I started with my own personal favourite stitch width and length and then increased both below. The outside edge of the blanket stitch follows along the right side edge of the appliqué.
Snowflake: Many decorative stitches give a really interesting look to appliqués. This particular snowflake design is half on and half off the line.
Feather stitch: Another decorative stitch centred on the line.
What is the “swing” of the needle?
One thing you have to get used to when working with your sample stitches is where does the “swing” of the needle end up? Do you want/need the needle to start or finish on the right or left? This comes with practice and getting to know your machine and its stitches better. I'm afraid that this will mean some trial and error and experimentation on your part with your own personal machine.
The heart is a great shape to practice on...it has an inside point, an outside point, curved edges and straight edges. I usually start on the first straight edge with the point of the heart away from me and the appliqué shape on the left so the swing of the needle lands along the outside edge on the right.
Once the curve starts you will notice that only 2 or 3 complete stitches can be made before it's necessary to leave the needle down on the right, pivot, do 2 or 3 more stitches, pivot and repeat. If you pivot while the needle is on the left hand side (on the appliqué shape itself) there will be a gap along the outside edge.
Try to get the needle to stop at the inside point of the heart. Sometimes you have to “fudge” this spot by turning the hand wheel and manipulating your machine to get the stitch there. Stop with the needle at the inside point, pivot sideways and take a stitch directly into the heart, continue around the second curve and finish the second straight edge.
When you reach the outside point at the bottom of the heart stop with the needle at the point...again, you may have to manipulate it to get the stitch right there....pivot sideways, take a stitch directly into the heart, pivot again and complete the stitches along the first straight edge. It will be a happy accident if the stitches line up perfectly, but that's usually not the case. If the thread matches the appliqué it doesn't bother me in the least if the stitches overlap, but if a contrasting thread colour is used I prefer to pull the threads to the back and tie them off so it looks seamless. I left the extra stitch there in the sample on the right so you can see how noticeable it is.
If it's a folk-art style you're after I would recommend a thicker, contrasting thread, possibly a 28 wt or 40 wt thread. Again, test different threads to find your favourite.
Occasionally the stitch width needs to decrease when approaching sharp, skinny points on an appliqué design or a large part of the stitch will land in the background and make the design appear messy.
More Testing
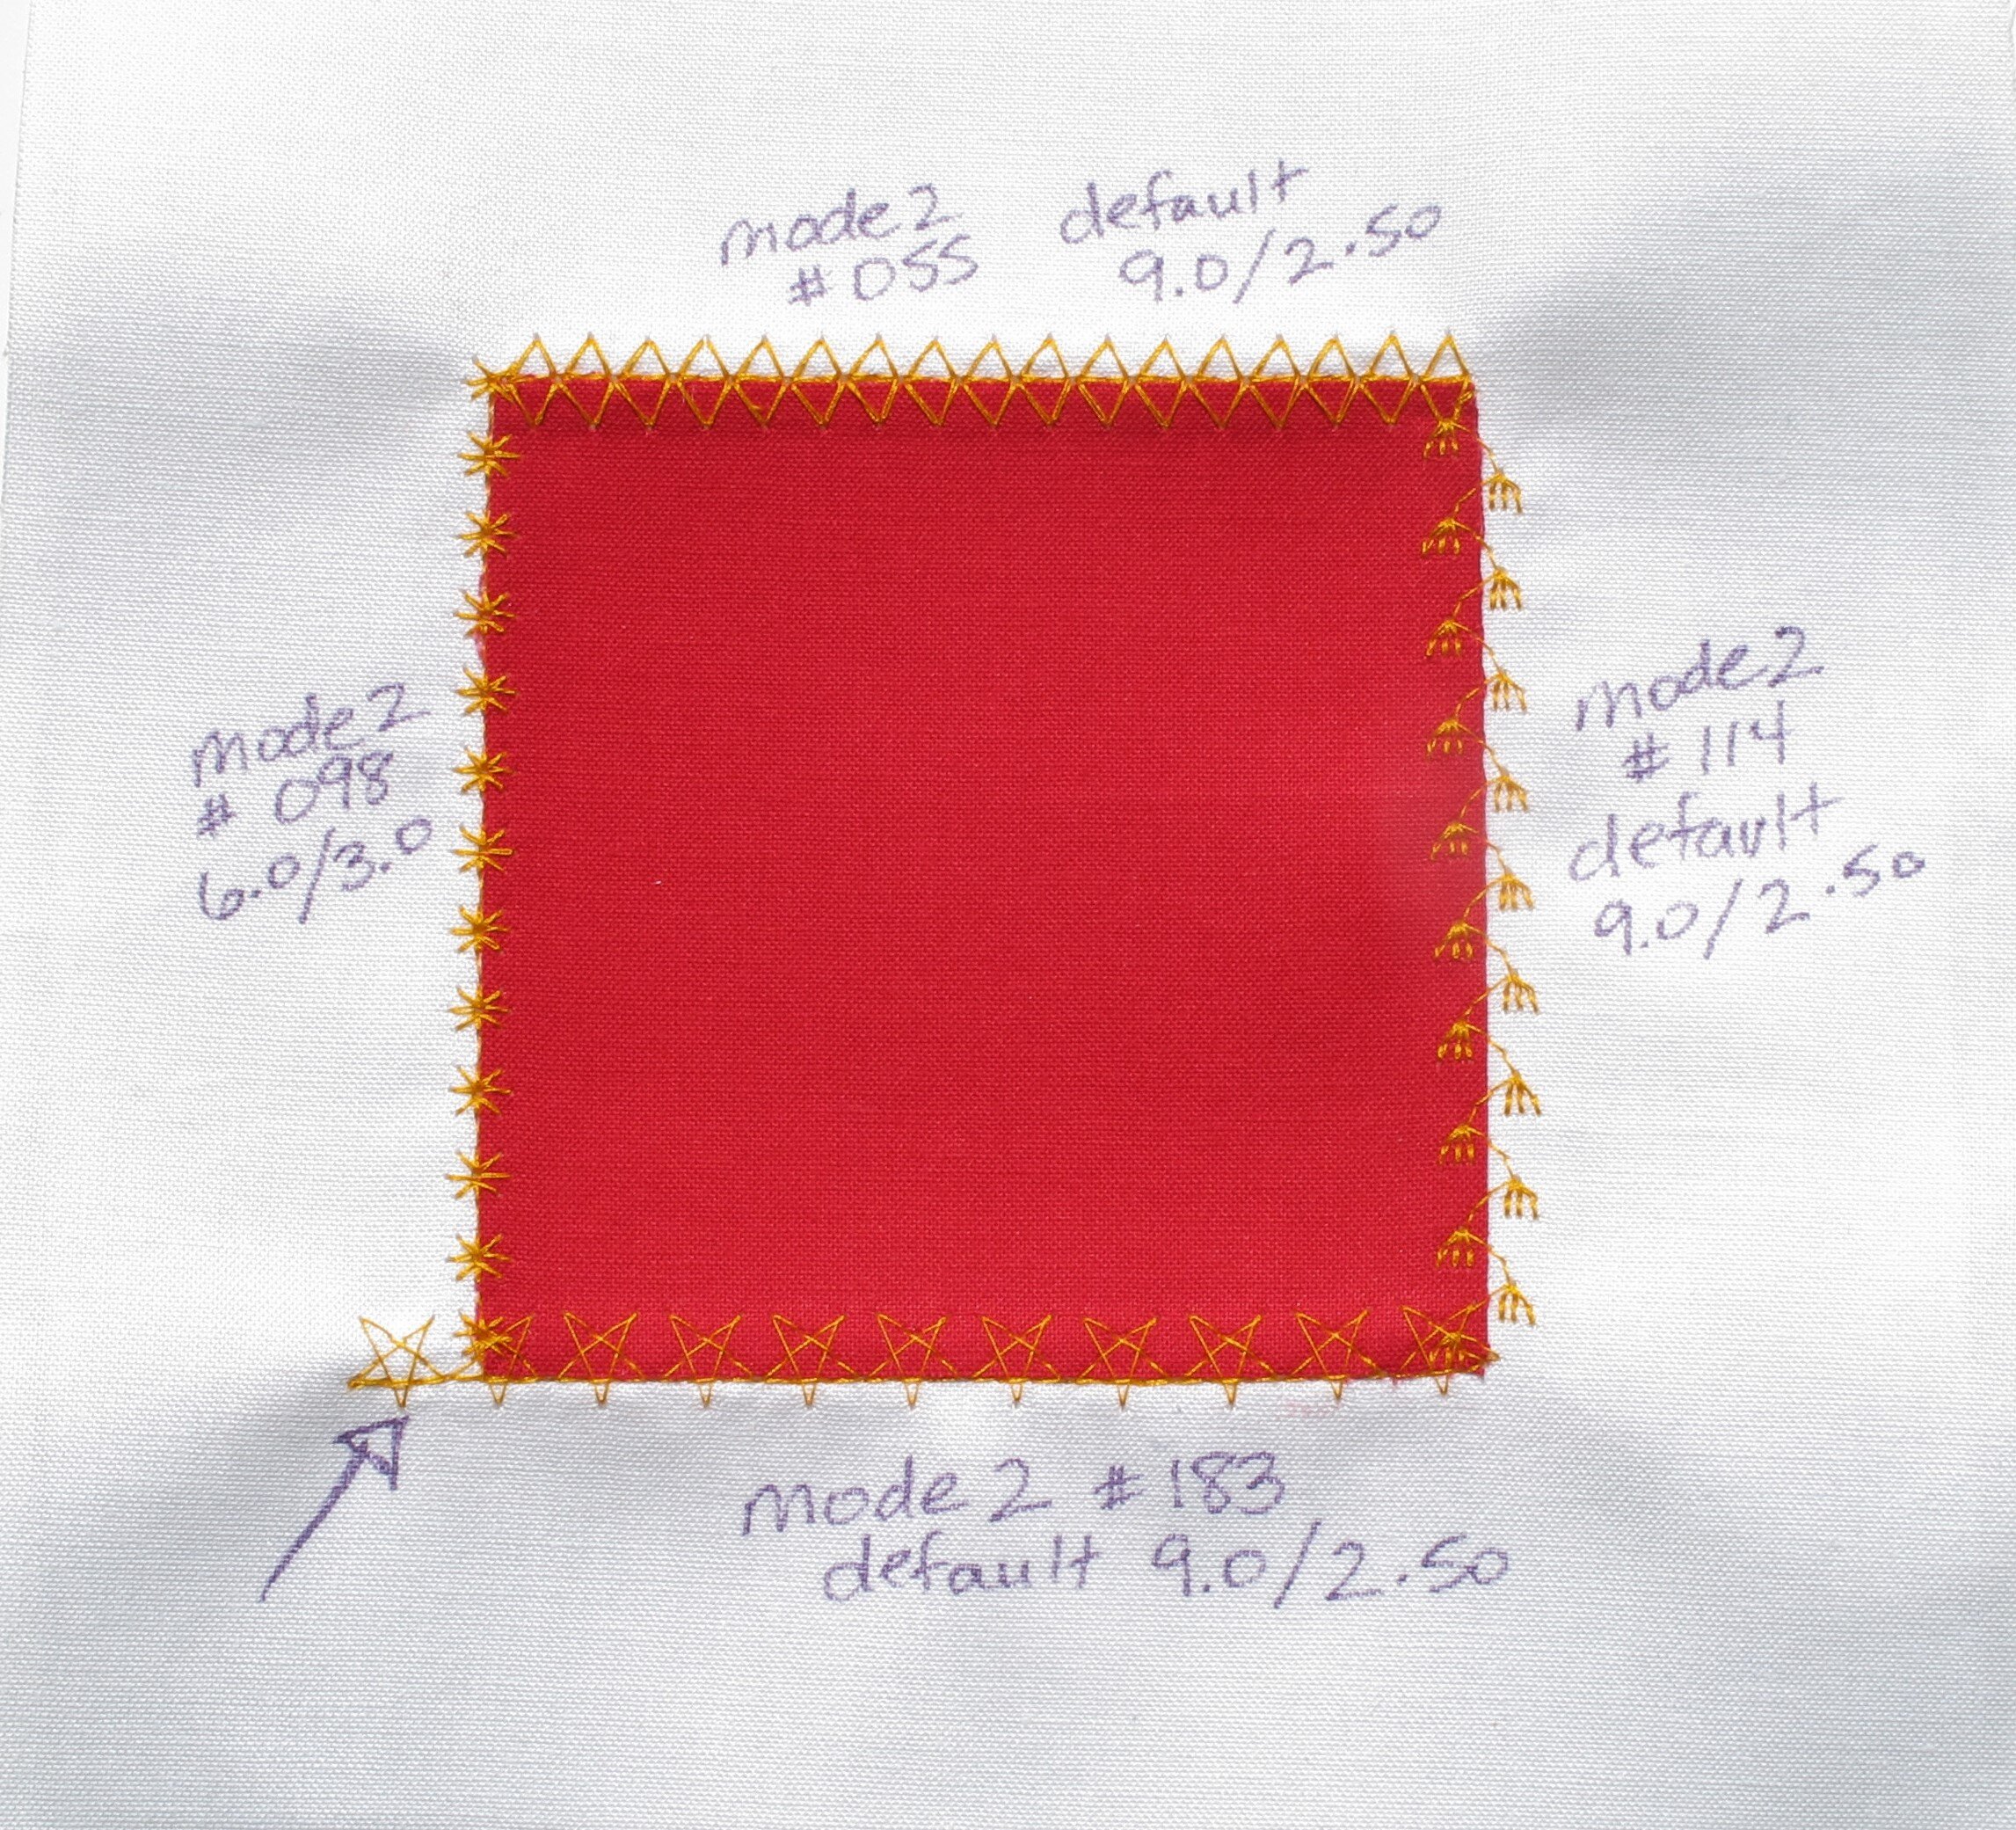
One assignment I give my students is to fuse a 4” square to a piece of stabilized fabric and test out decorative stitches around the square. This is a great opportunity to try out different stitches and practice pivoting at corners.
I started on the bottom left corner with the snowflakes, pivoted at the corner, changed to the triangle design, pivoted at the next corner, changed to the flower drop design, pivoted at the corner again, and completed the final side with the stars. I forgot to press the locking stitch on my machine before the final star was complete so it made an extra star and then locked the stitch...I should know better by now!
*** Remember that when you finish the pivot at each corner, raise the needle out of the fabric before changing the stitch design because the needle changes position depending on the decorative stitch.
“Appliquilting”
Quite frankly, I was lazy and didn't feel like blanket stitching around all these small shapes so I decided to “appliquilt” this piece...appliqué-ing and quilting all in one go by dropping the feed dogs and using the darning foot. I used YLI's Wonder Invisible nylon thread in Clear (it also comes in “Smoke” for use with dark colours) on the top and Wonderfil Deco-Bob in the bobbin, but any bobbin thread will work. I forgot to decrease the top tension so you can see that the bobbin thread comes to the top occasionally. There’s also a photo showing the back…not my best work, but it gives you an idea of the process.
What do I do if I get a gummy residue on my needle from the fusible?
This is normal. This happens often when using either fusible web, fusible batting or putting the layers together with spray baste. When sewing at high speed the friction of the needle going through the fusible causes it to heat up and the needle gets gummed up with a combination of fusible residue and thread/fabric fibres.
My friend, Becky, who does a lot of fusible web appliqué, keeps a container of make-up remover pads in her sewing kit for regularly cleaning the needle. I have a can of DK5 that I use occasionally. I spray a very small amount of it onto a scrap of cotton and use that to get the gummy residue off of the needle then I dry the needle off with another piece of cotton.
Finishing
This was made into a small wall hanging, but the design would also work on the front of a throw cushion, a block in a quilt or the individual flowers can be added along the hem of a little girl's dress. Use your imagination and make it your own.
Free motion quilting, a hanging sleeve and my preferred method of binding completes this piece.
I hope you found this to be helpful and will give fusible web appliqué a try…you may have just find your new favourite technique. Have fun!


