Cutting Multiple Strip Sets
As a seasoned quilter you will love this time-saving technique. You now have a lot more experience under your belt and a lot more confidence to tackle new things. Why not try cutting multiple strip sets...at the same time?!
We've all come across patterns that can be monotonous because of the repetitious cutting. I'll show you how you can save a lot of time with a couple of quickie cutting techniques. My first bit of advice when doing this is put a fresh blade in your rotary cutter! No more hacking and chopping with a dull one...you know I'm talking to you! (blade changing tutorial here)
Strip Sets:
Make sure that the strip sets are well pressed and straight. Place the first strip on the cutting mat right side up and straighten it on the cutting mat. Feel free to use the lines on the mat to do this (in the photos I've chosen to use the backside of the cutting mat so the lines aren't confusing with the ruler).
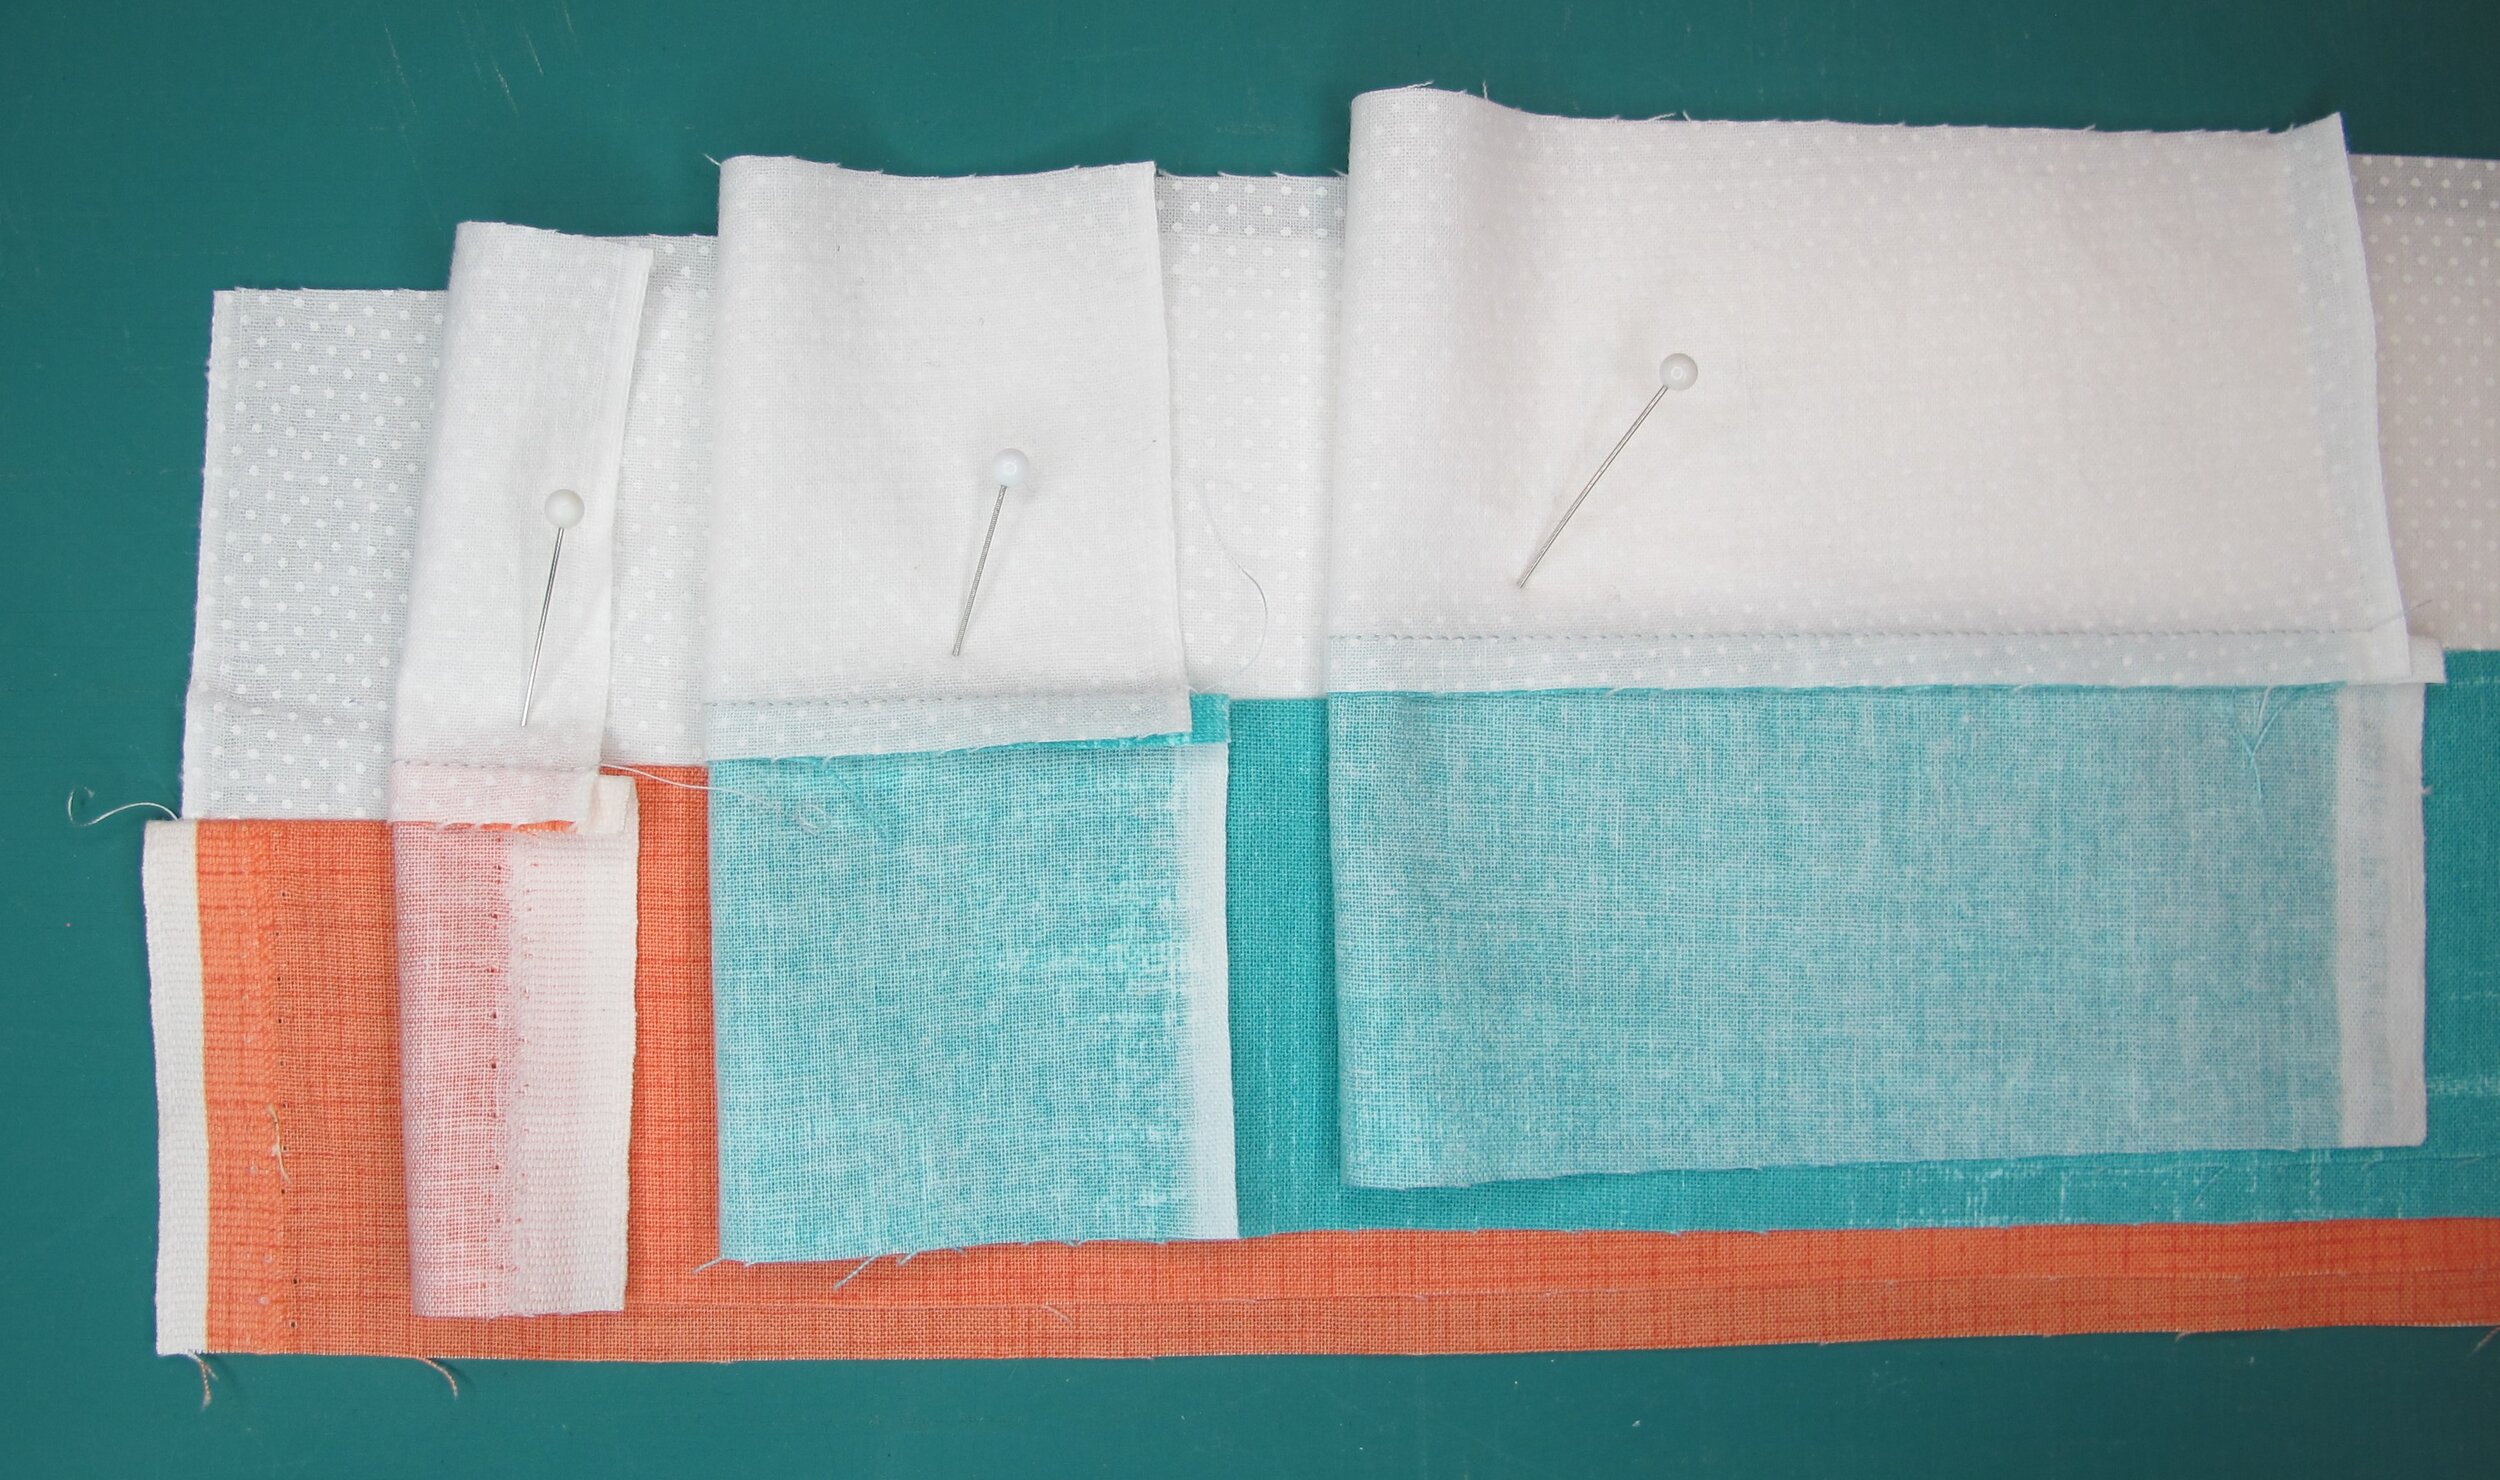
Place the second strip set on top with selvedge edges lined up but the strip set itself off-set by the seam allowance. Continue in this manner and add a couple more strip sets always off-setting them by the seam allowance. The reason the seam allowances are off-set is so the ruler stays relatively flat and doesn't “rock” when you're cutting. I don't recommend doing more than 4 strip sets at a time for the same reason. Each strip set is pulled back in the photo so you can see how they are lined up (figure 1).
Figure 1
Start cutting the strip sets into units (figure 2). These units are cut 4 ½” because they are made using 2 ½” strips. You will also notice that one of the lines on the ruler is lined up with the seam line to keep things straight. These will become 4” finished squares taking into account the seam allowances.
Figure 2
Continue cutting the stacked units as long as they are still straight and square (figure 3). I highly recommend realigning everything after about every 4 - 6 cuts. No matter how careful we are there's always a bit of shifting.
Figure 3
4 Patches:
The first set of 4 patches that we'll tackle are those made with just 2 fabrics. There are many commercial and traditional patterns out there where only a couple of colours are used in the whole quilt and this technique will make it super quick.
The difference from the strip sets above is that these are lined up with right sides together and seam allowances are snugged up against each other (figure 4). With this technique they are only cut 2 layers at a time. That's so you can take the cut units right to the machine and start sewing since they are now placed together the way they need to be sewn. Isn't that awesome?! Of course, if you feel really confident you can stack more layers...just be sure each set is right sides together.
Figure 4
Again, make sure that the strip sets are well pressed and straight. These strips are also 2 ½” wide so the unit sets need to be cut 2 ½” as well (figure 5). The completed sewn unit will measure 4 ½”, which will finish at 4”.
Figure 5
Sometimes it's nice to have just one background fabric and scrappy fabrics to go with it (figure 6). In this case all the colours are put with one background (sorry...forgot to take a photo of the teal strip underneath). We all have leftover strips from past projects as well as leftover binding strips that can be put to use for a project like this.
Figure 6
And in other instances we have tons of strips leftover in a variety of colours. Sew the mix of strips together in sets of two...or 3, or 4, etc. (figure 7) and put them all together in one wonderfully scrappy quilt. Just remember to press seams in opposing directions so they snug up against one another for easier cutting and sewing.
Figure 7
Because they've all been cut in such a way that they're ready for sewing it cuts down on a lot of time and you can get right to the machine. Chain piecing makes quick work of stitching the units together (figure 8). Press seams to one side.
Figure 8
Check out the great results of cutting out strips sets together at one time (figure 9). Give it a try and let me know how you made out. Have fun!
Figure 9


