
Working With Unruly Threads
So many quilters/sewers refuse to work with metallic threads because they can be very frustrating to work with. A little more knowledge about how they perform may just be the thing to encourage you to try them again.
The thing I heard most often from my students about why they refuse to use metallics is because of the massive amounts of thread breakage while sewing. I used to have these problems too until I learned more about why it was happening.
Earlier this month I promised to give you more information on working with pesky, “spinny” threads. I'll get to that, but first I want to talk about toilet paper. Yes, toilet paper. Yeah...my students give me that look when I talk about it in class too!
When you replace the toilet paper onto the holder in the bathroom it comes off in one nice long strand, but when your husband or kids are too lazy to replace it they put it on the back of the toilet or the counter. Am I right?! Then when you get your toilet paper it spins off the end into a big messy lump. Well, metallic and other “spinny” threads work exactly the same way as our toilet paper.
When I work with my favourite Floriani metallic or Wonderfil Silco thread I want it to come off the side of the spool not the top. There are a couple of ways of making this happen and it all has to do with how the thread feeds off our machines. First I'm going to show how it doesn't work.
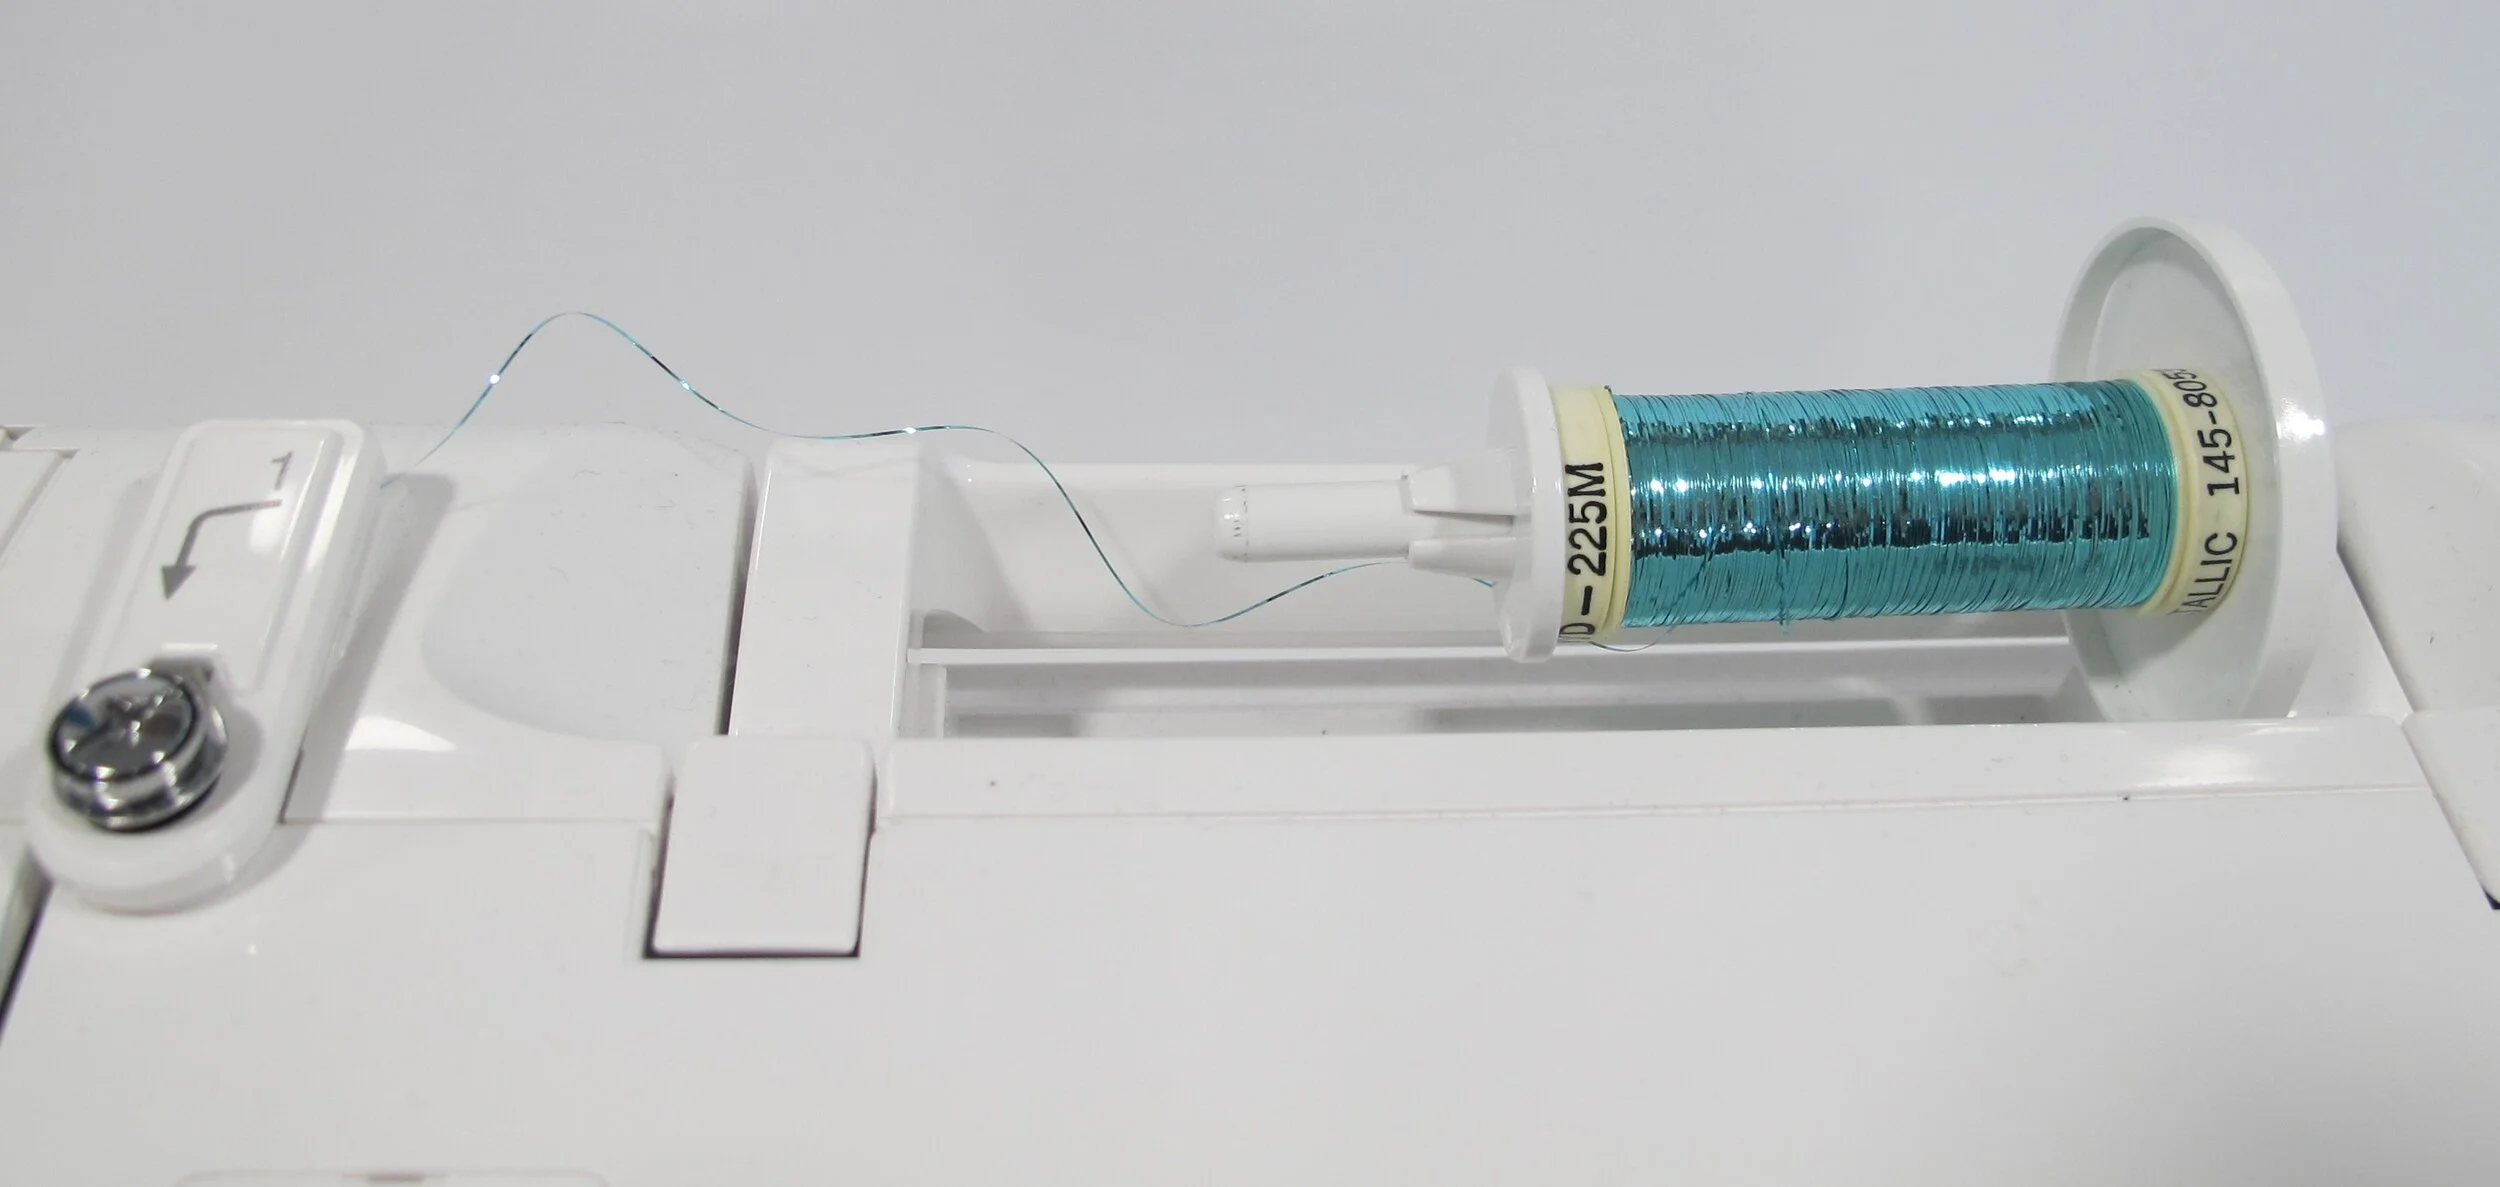
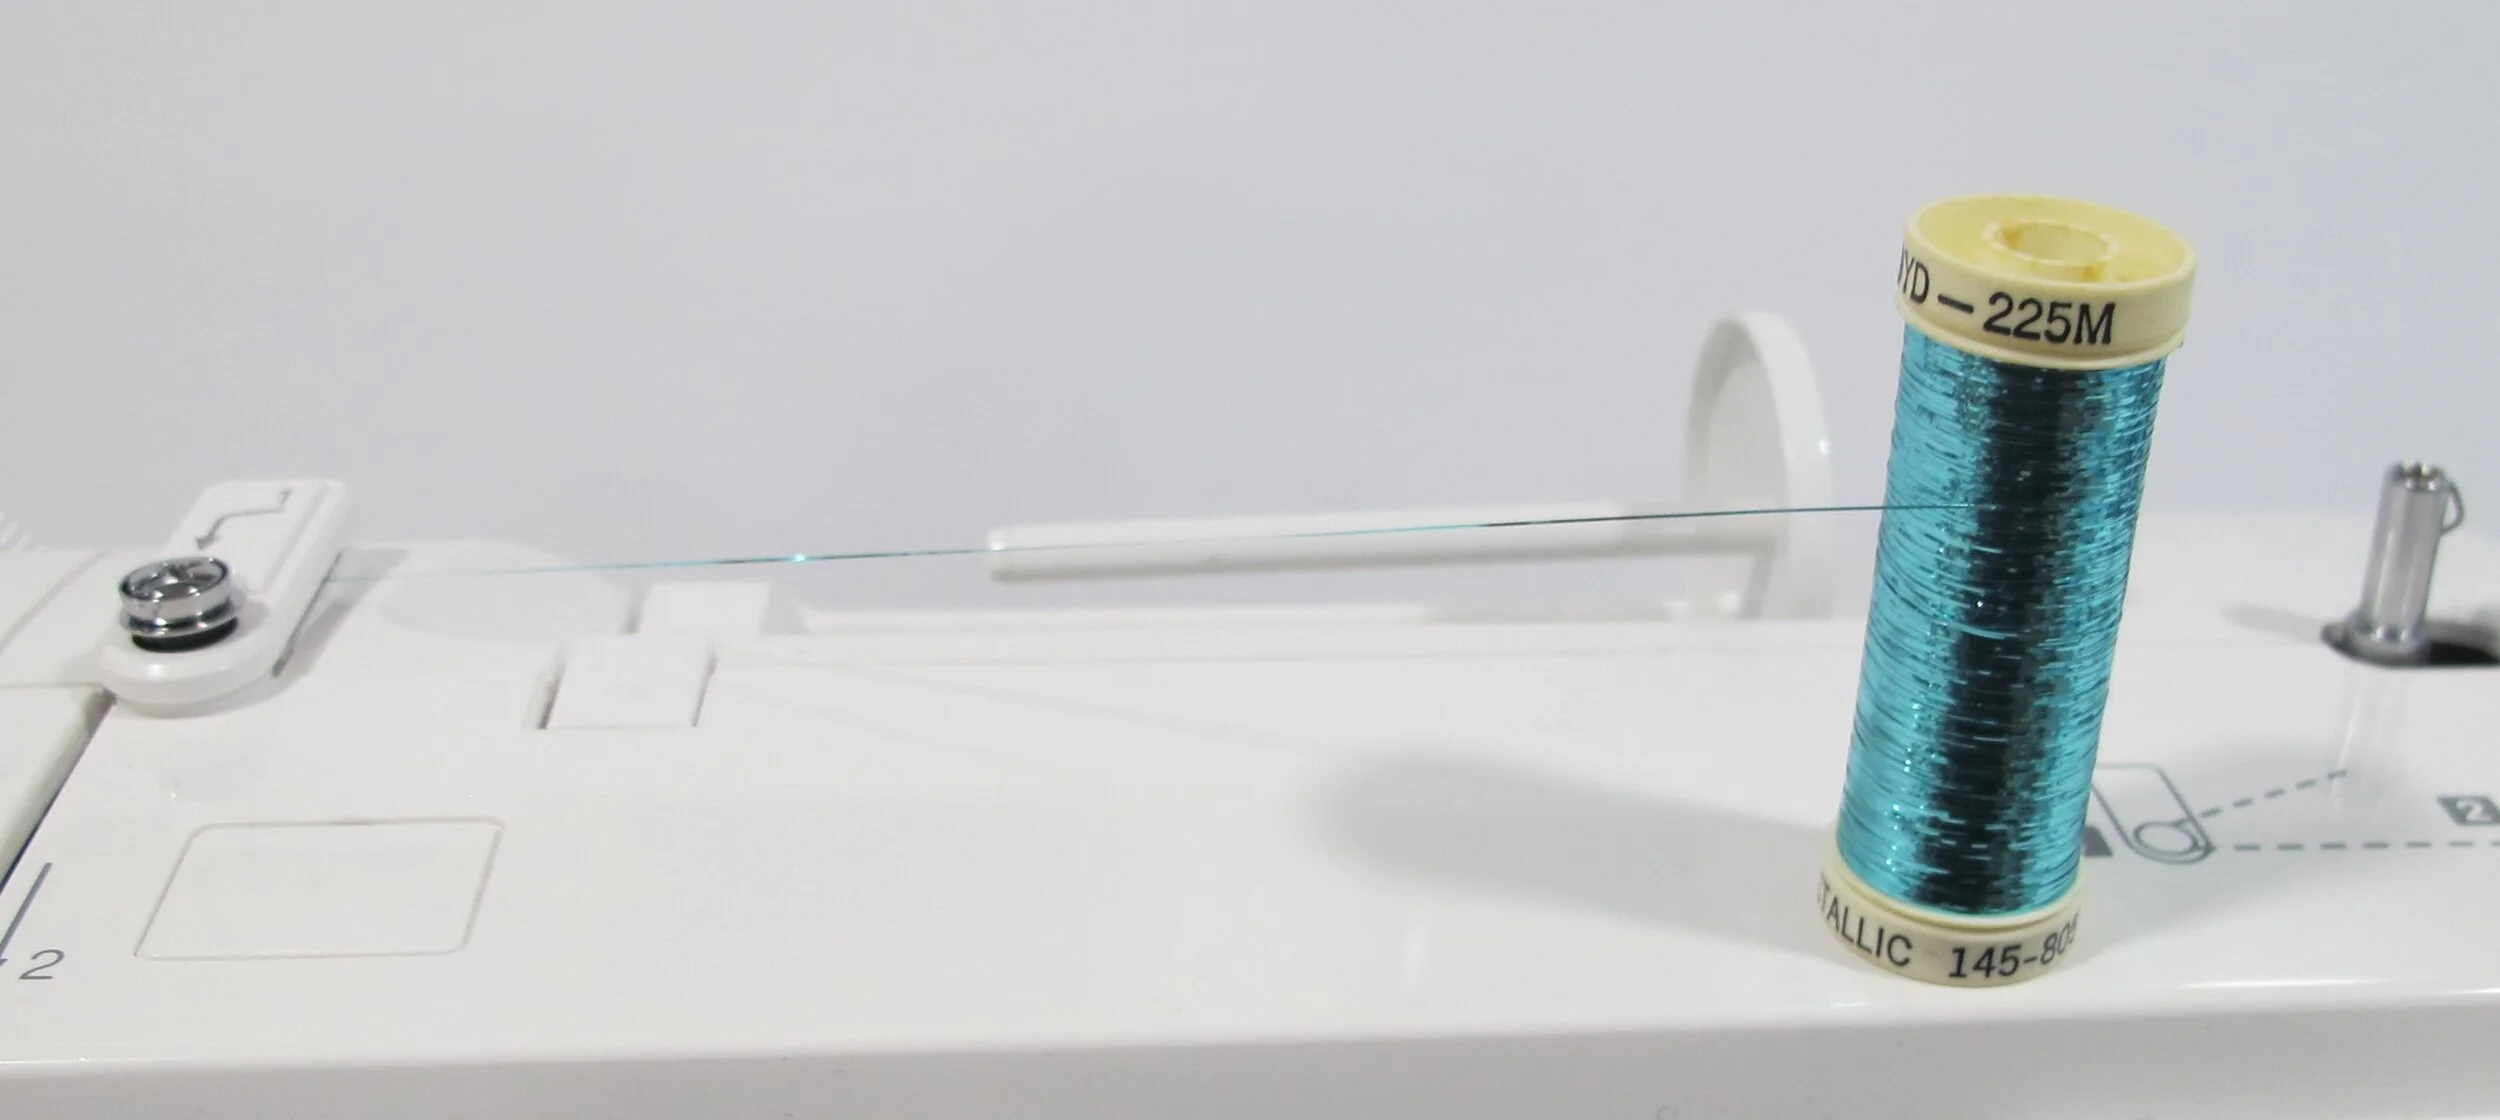
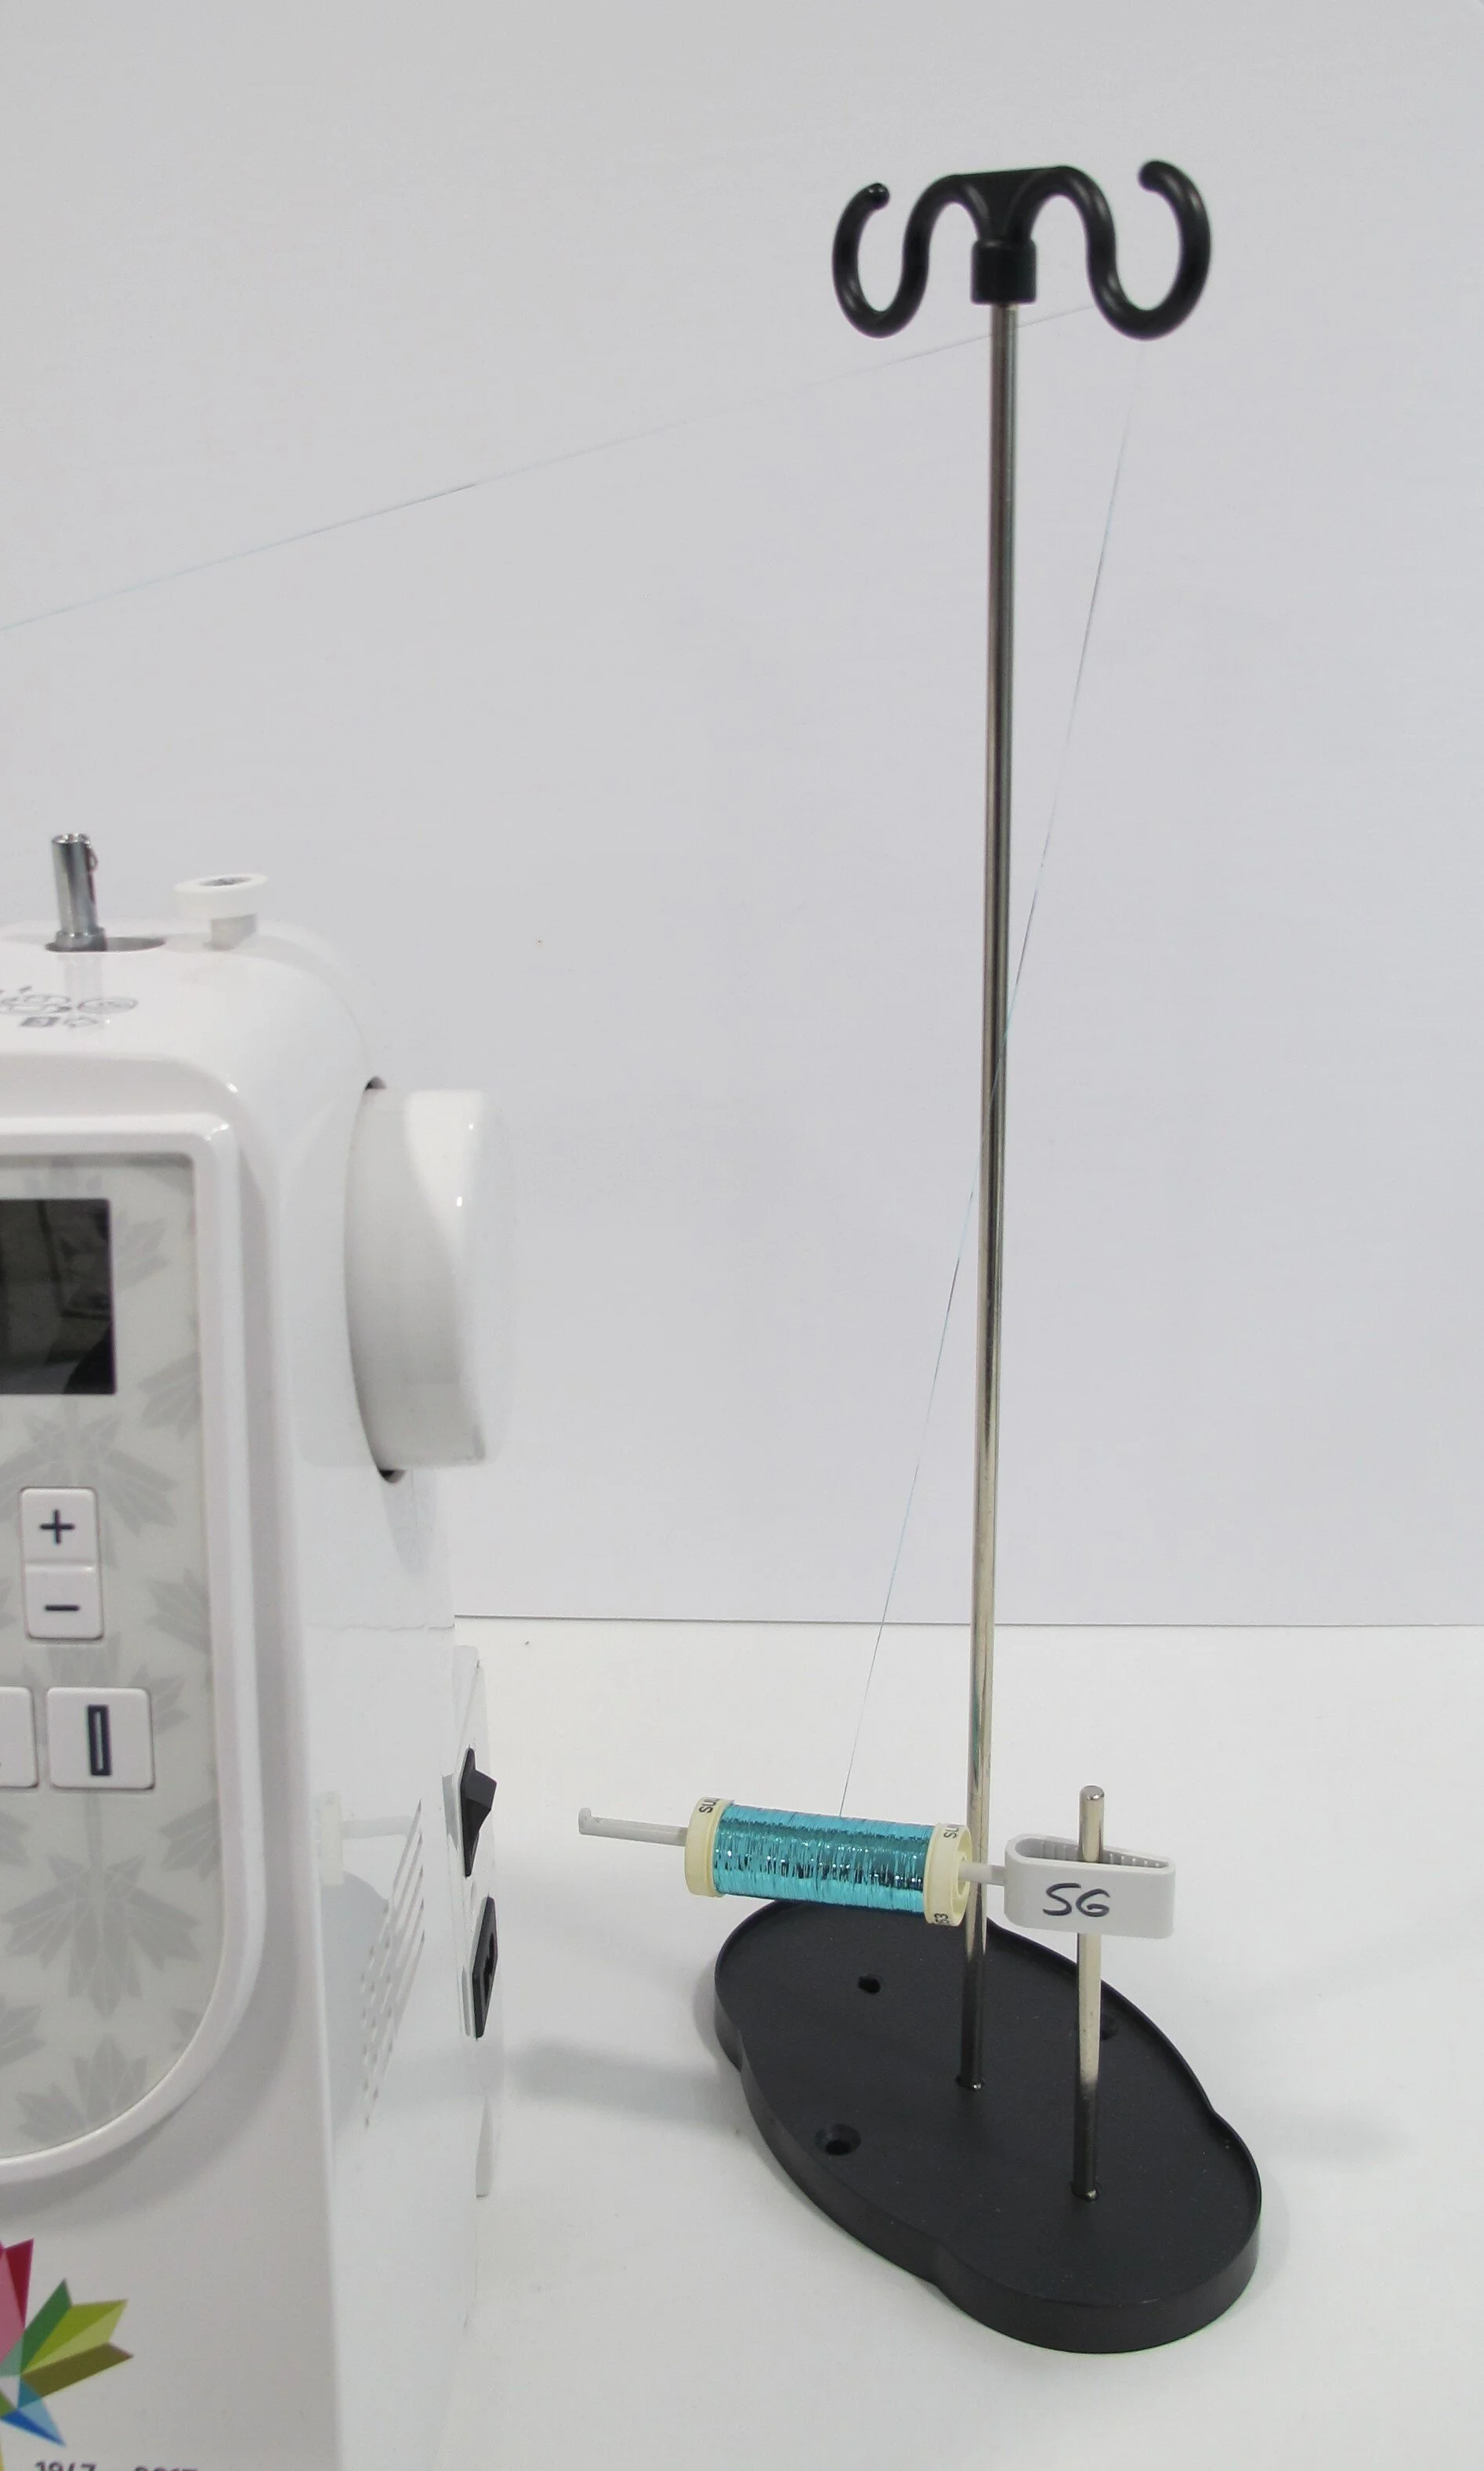
You'll notice below that my 2 different machines feed the thread differently, one horizontally and one vertically, but they both are feeding the thread off the top of the spool. You'll also notice that the thread is already beginning to spiral as it comes off and by the time it gets to the needle it's starting to pull and drag and will probably break soon. Not very promising.
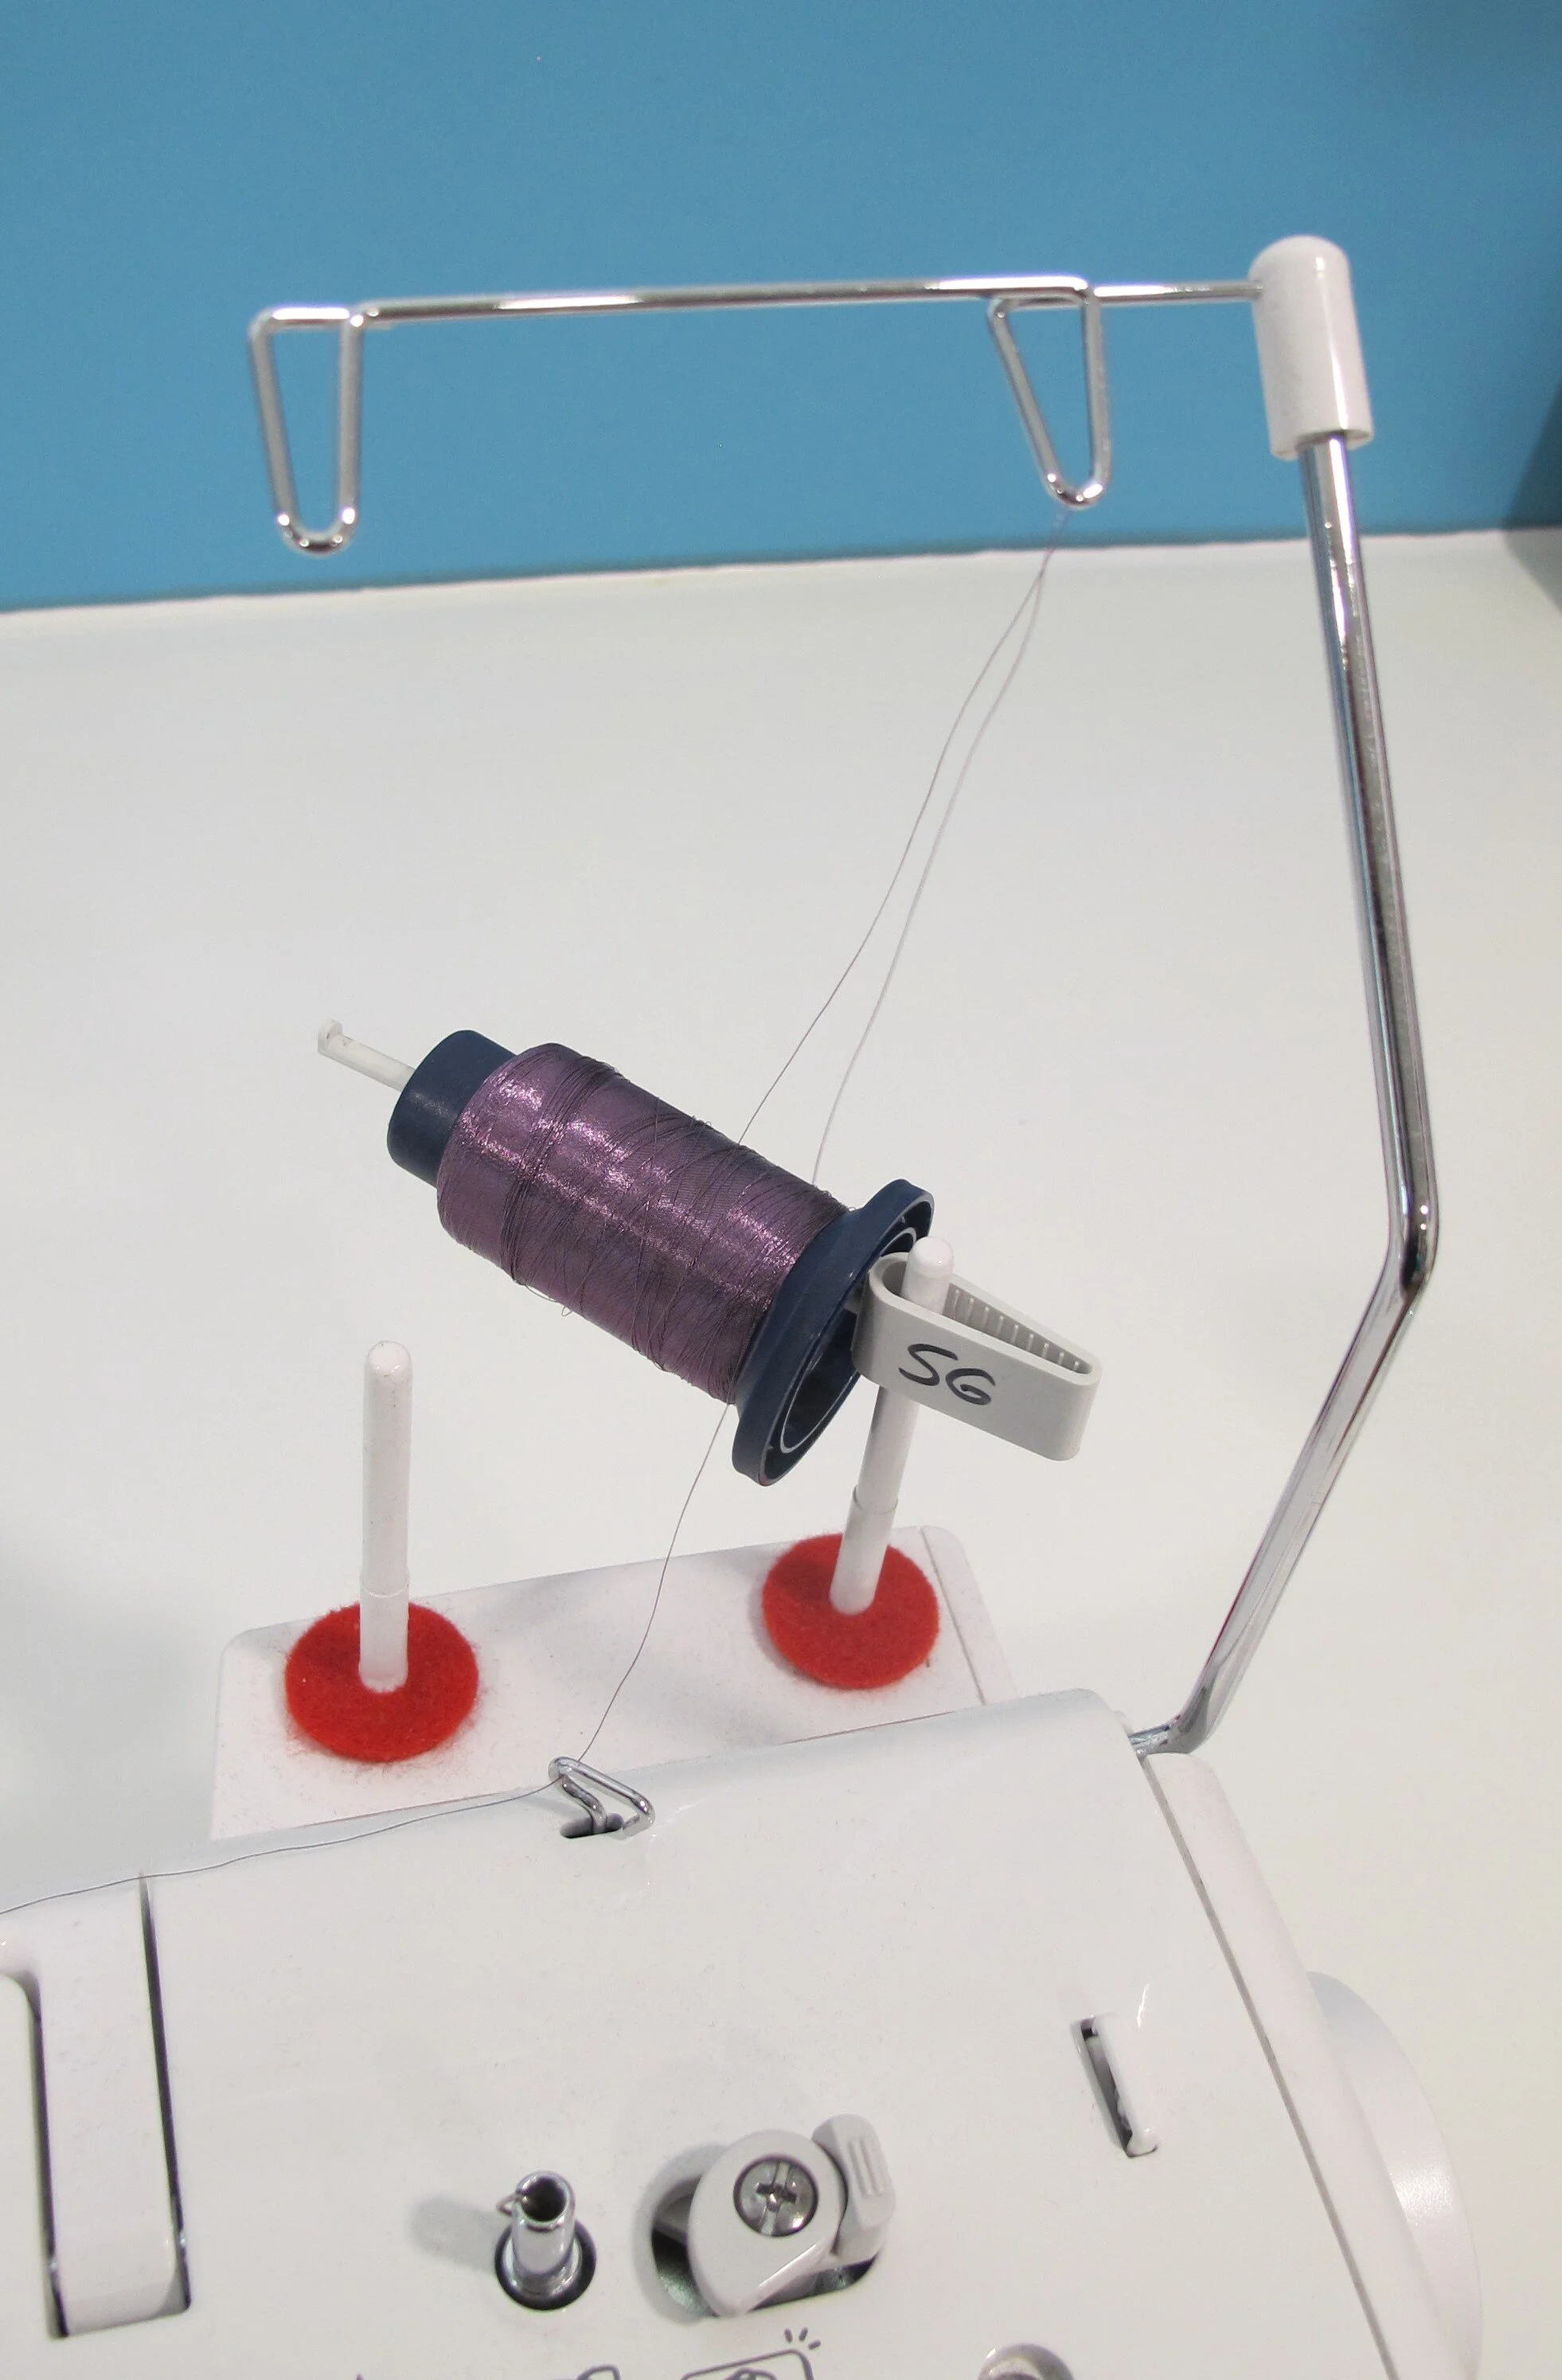
A thread net (below left) does help a lot, but in my own experience I find it still doesn't fully stop the thread from spiraling as it gets to the needle. Some sewers have had great luck with them though so it's worth a try. You may have found a thread net with your machine's accessories, but didn't know what it was for...now you do. If you didn't get one you can purchase one from your local sewing/quilt store.
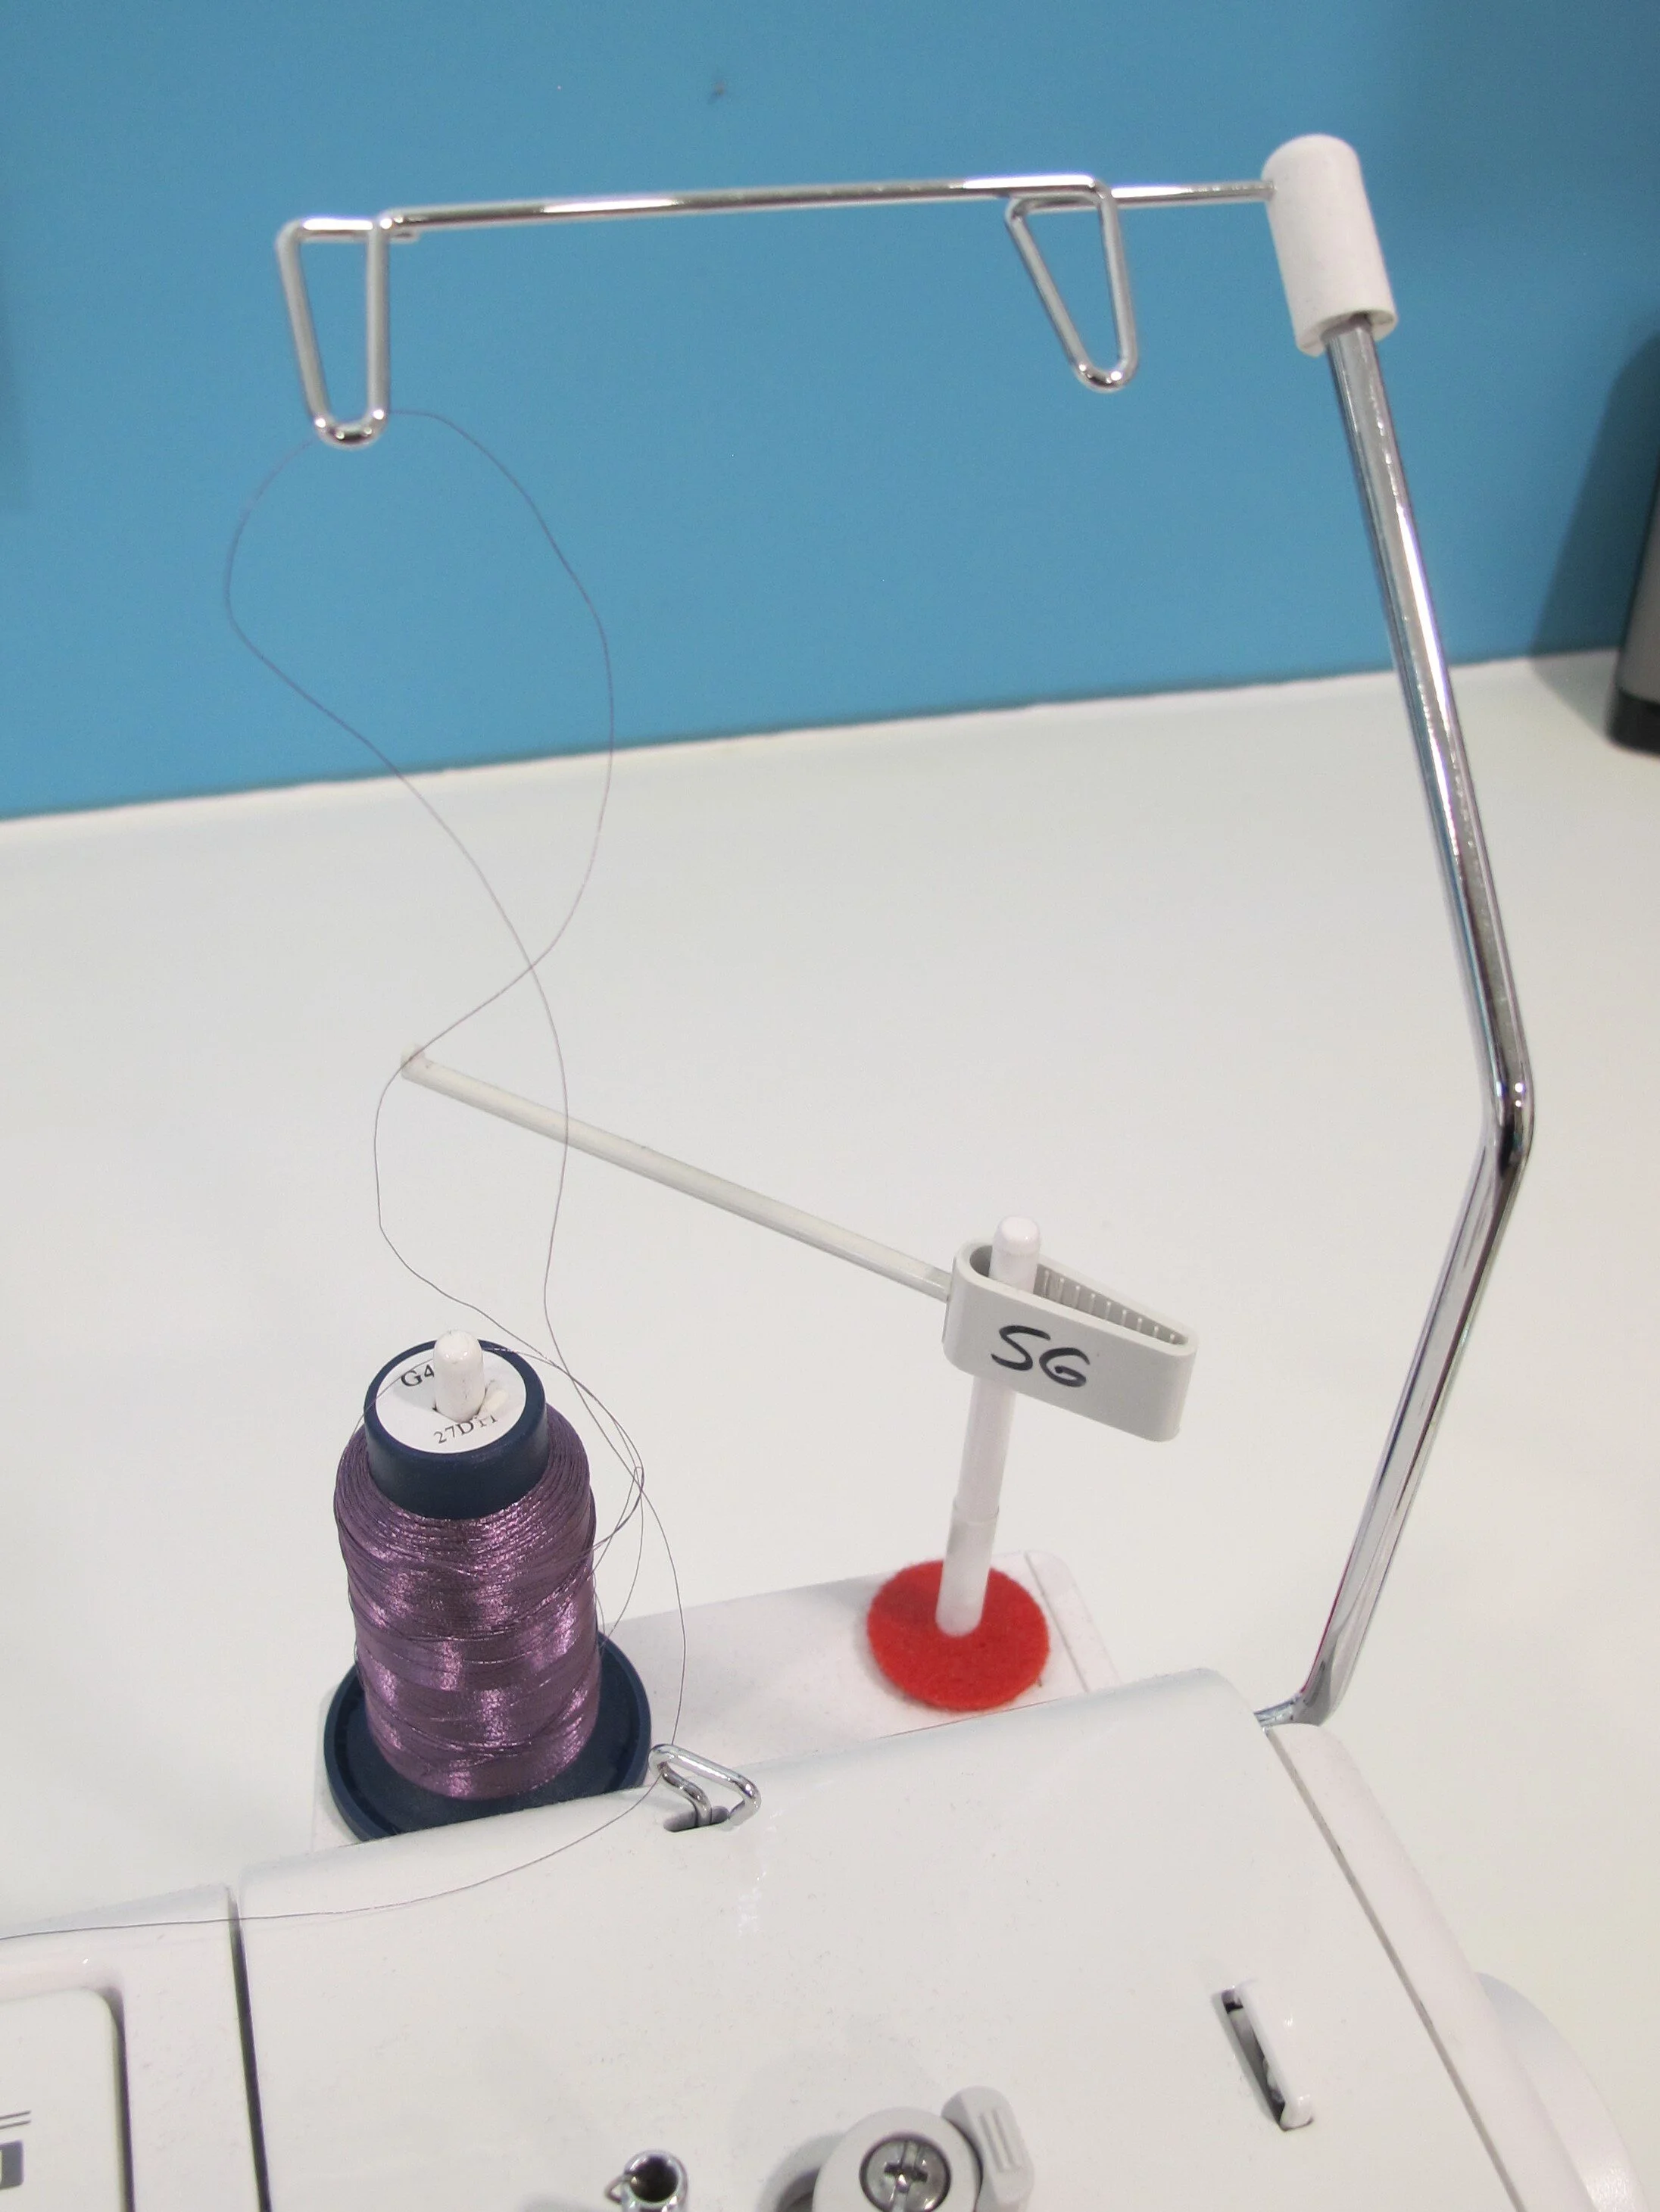
The trick to working successfully with pesky threads is to get the thread to feed off the side of the spool. Some of the smaller machines have a hole at the top of the machine where a vertical spool pin can be inserted (below right). This allows the thread to be fed off the side of the spool
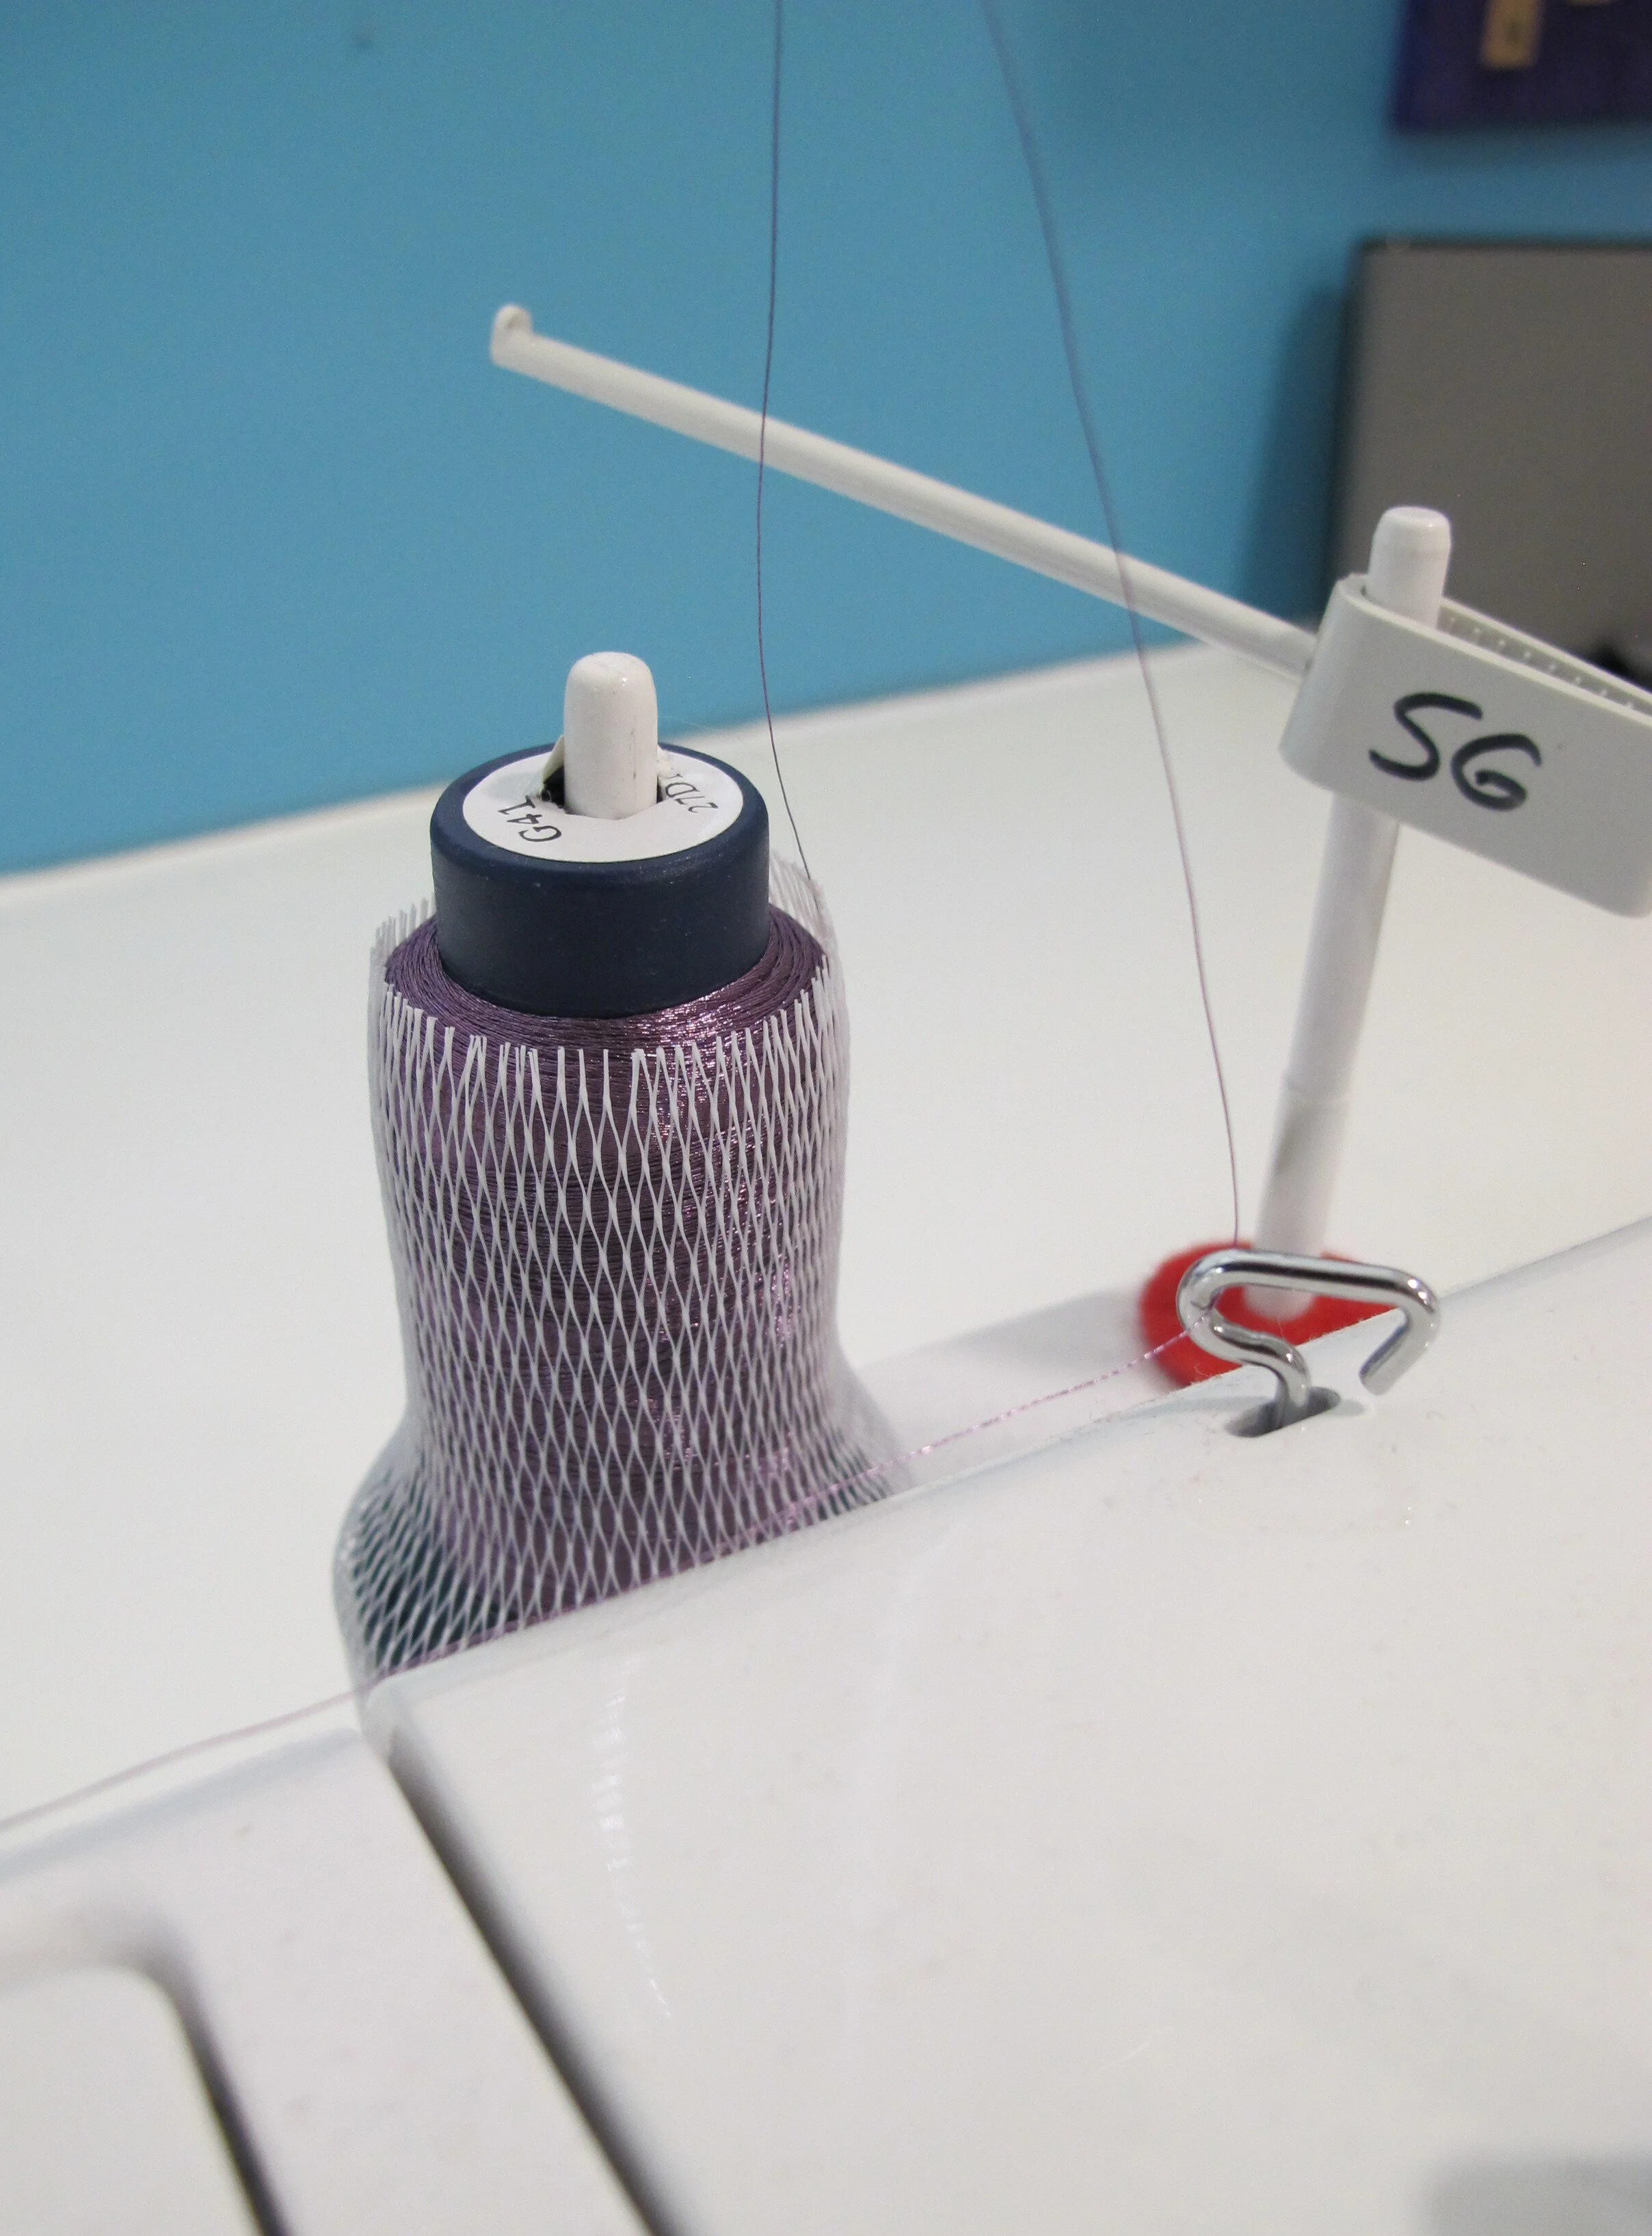
If your machine does not have a spot for a vertical spool pin there are inexpensive stand-style thread holders that you can purchase (inexpensive thread stand here). If you do get one of these you'll still need an adaptor like the one in the photo to allow the thread to feed properly (mine is from Janome)...or you can “MacGyver” one to the top of your machine with Velcro or glue...or you can spend more money to get the fancy thread stand that offers both thread path options (fancy thread stand here). My Janome 6700 already has the vertical spool pins at the back so I just needed the adaptor for my machine.
OK, so we've handled the problem of the thread path, but there are a few other things to go over to be successful when working with unruly threads.
The proper needle: I personally use either a size 12 or 14 Topstitch needle. It has an elongated eye that allows extra room for the thread to pass through without shredding. Many sewers like the true metallic needle for the same reason. Metallic needles have a polished eye and some are even Teflon coated.
Lower the thread tension: My machine is usually set at a thread tension of 4 for regular sewing, but when I've worked with metallics the tension can be anywhere from 0-3. What you have in the bobbin can also affect the tension so test it out on a small sample before you start working on your project.
Longer stitch length: Not only is this helpful for minimizing thread breakage, but it highlights the beauty of the thread. Experiment with different stitch lengths on a sample until you like the look of it for your project. Of course, if you’re free-motion quilting you are responsible for the stitch length as you sew…the machine stitch length settings don’t mean anything once the feed-dogs are down.
Use a similar coloured bobbin thread: If there does happen to be some breakage, starts and stops will not be as noticeable if the bobbin thread matches. Also, if you have some, use bobbin thread...it's a little thinner and probably made of polyester so it will “play” better with the metallic.
Slow down: No pedal to the metal when sewing with pesky threads. If you usually sew at a breakneck speed this is not the time to do it. Some machines have a speed control slider on the front of the machine...use it to force yourself to slow down.
Breathe: This sounds like a silly thing to say, but I can't tell you how many of my students held their breath as they were stitching on something that scared them. If you hold your breath it tightens up your body and makes things worse, so breathe!
Are you still afraid? Or are you ready for some experimentation? I think if you follow my tips you'll find some success when using pesky threads. Keep me posted.