
All About Sashing
You have my student, Maritta, to thank for this post. Just last fall when I told my students that I was planning on writing a blog she was the first one to give me an idea of what she would like to see as a topic for a future post. Here you go, Maritta...thanks for the idea.
First of all, what is sashing?
The easy answer is that sashing is strips of fabric sewn between individual blocks. Sashing can be plain or print fabric, it can have cornerstones, or it can be pieced and be its own design feature in the quilt. All of these types of sashing will be explained.
Why would you want to add sashing to a quilt?

Modern Sampler
Sometimes separation between blocks is necessary for the quilt's design. If each block is very different from the one next to it the block's design will not be noticeable if they are just lined up next to each other. Such is the case for a sampler quilt. A sampler quilt is one where different blocks are showcased in the same quilt. Samplers are a way for beginner quilters to learn different traditional quilt blocks and techniques on small units (blocks). Because all the blocks are quite varied the sashing is a way to unify the entire quilt. Even though the stripe I’ve used here incorporates all the colours included in this quilt, I find it looks a bit too busy and I should have chosen something a little more sedate and slightly darker. Oh well.
Sometimes you don't have enough fabric to make your quilt larger. Instead of going from quilt shop to quilt shop or buying extra matching fabric online to make it larger, sashing can solve your problem. Find a great coordinate that will work with all your blocks and it can add inches to the width and length of your quilt to make it the size you need.
Occasionally you may just simply want to highlight a specific block to make it seem more important. Even though this sample doesn’t have traditional sashing it achieves the same results. In my family photo quilt I used black sashing to create an actual “frame” around the photos. It was also important for me to use my grandfathers' neckties, shirts and pyjamas so they also became secondary sashing around the black frames even though they were of varied sizes. This piece is called “The Ties That Bind”…get it?!

What are the different types of sashing?
Plain sashing
Sashing with cornerstones
pieced sashing
Plain sashing is pretty self explanatory...only one fabric (print or solid) is used to separate the blocks. This happy, super simple design is made up with eight 4-patches and a centre square for each block surrounded by the sashing that matches the centre square…one of our guild’s donation quilts. You’ll notice that blocks in horizontal rows are separated by sashing strips equal to the width of the blocks. Then full sashing strips are sewn between rows. These strips often need to be sewn together to span the width of the quilt,

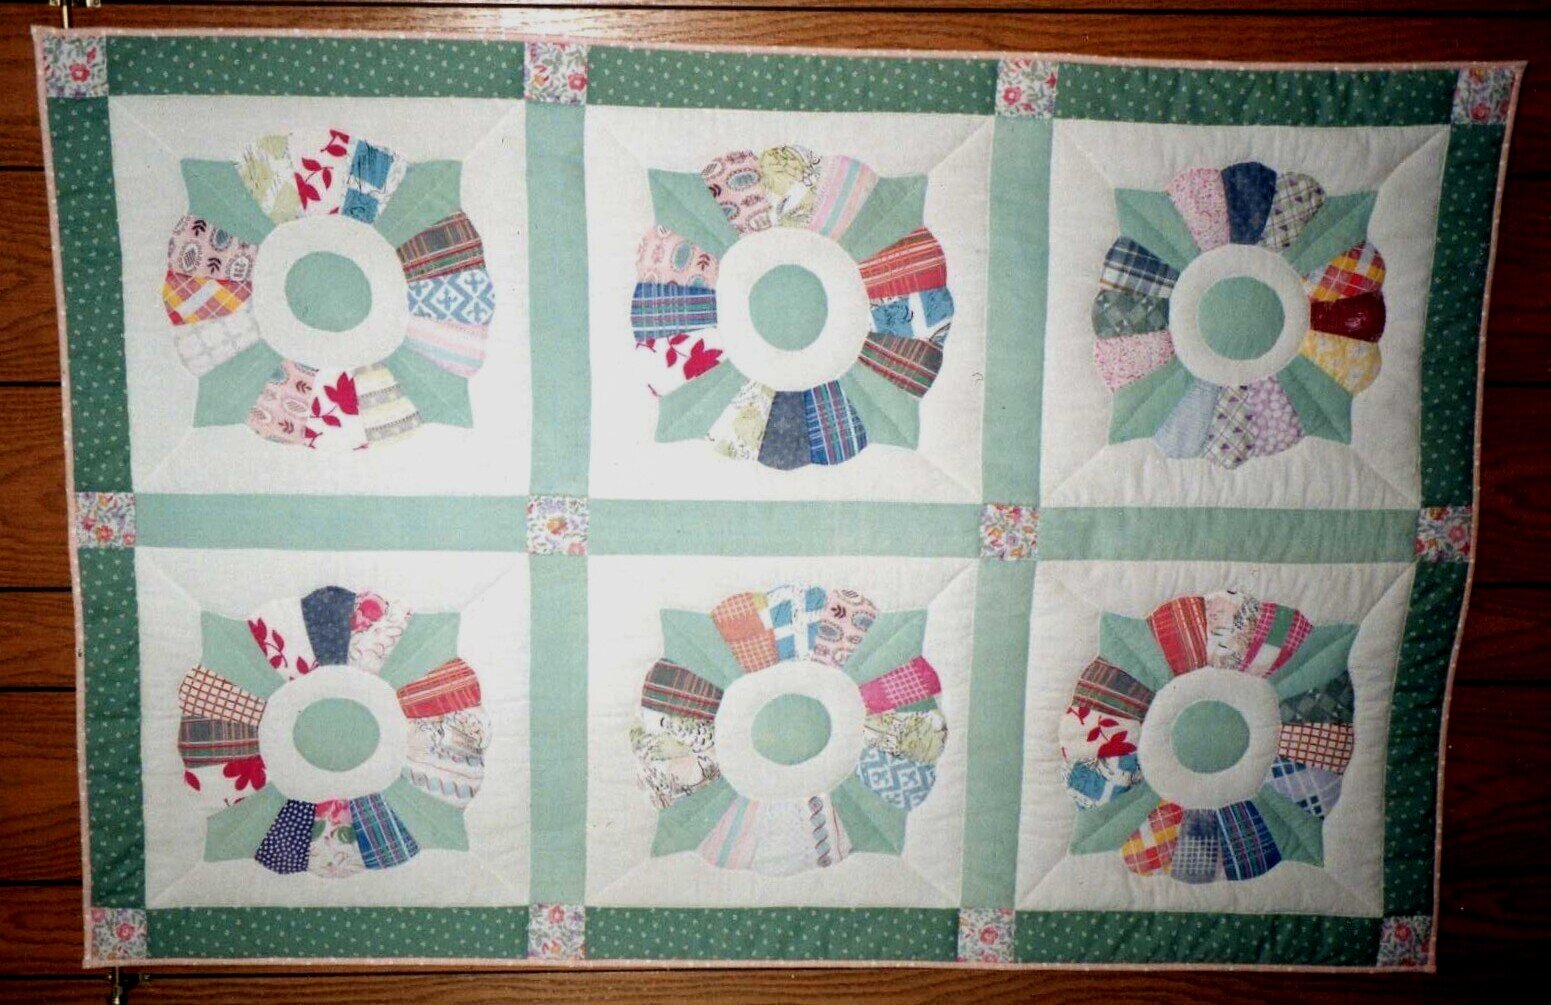
Sashing with cornerstones means that there is a square at the corners of each block along with the sashing next to the sides of each block. This old Dresden Plate has 2 sashings of different values with the outer sashings darker to frame the wallhanging and the inner sashings to match the pointed “spokes” in the plate. As in the quilt above sashing strips are sewn between blocks in individual rows, but when it comes to putting the corner stones in they are sewn to the sashing strips that go between rows.

Pieced sashing means just that...the sashing is pieced with another design element to add interest to the quilt and to highlight the blocks. Here stars are added into the sashing for a secondary design using a simple cornerstone and triangles sewn onto the ends of the sashing pieces to create star points. In this example the sashing is made using background fabric so the stars seem to “float” in the background. The sashing strips are most noticeable on the left hand side because I ran out of my original fabric and had to find something similar which was slightly darker. I used those sashing strips around the perimeter so it looked intentional…now you know my secret!
Whatever sashing design you've chosen, it's really important that each row line up with the next row so everything is still square and not off-set. You'll notice in the photo below (left) that I have put registration marks within the corresponding seam allowance (across from the seam line of one sashing strip) using a ruler so that everything remains straight. This way the sashing strip can be lined up with the corresponding seams across from it and all seams remain straight. The very first quilt I made with sashing strips were not lined up properly and a couple were off by over 1/4”. Needless to say, the zig-zag look across the entire quilt was not pleasing to the eye!


Maritta, I hope that answered all your questions. Have fun trying it out.