
Disappearing Nine Patch
There are some quilt designs that tend to be super simple when it comes to execution, but still end up being strikingly beautiful in their simplicity. One such pattern is the Disappearing Nine Patch. Most of us know that a 9 patch block is made up of 9 equally sized squares. The Disappearing Nine Patch takes it one step further. This block is sliced through in both directions and then rearranged to create another design. From now on I’m going to refer to the Disappearing Nine Patch as DNP.
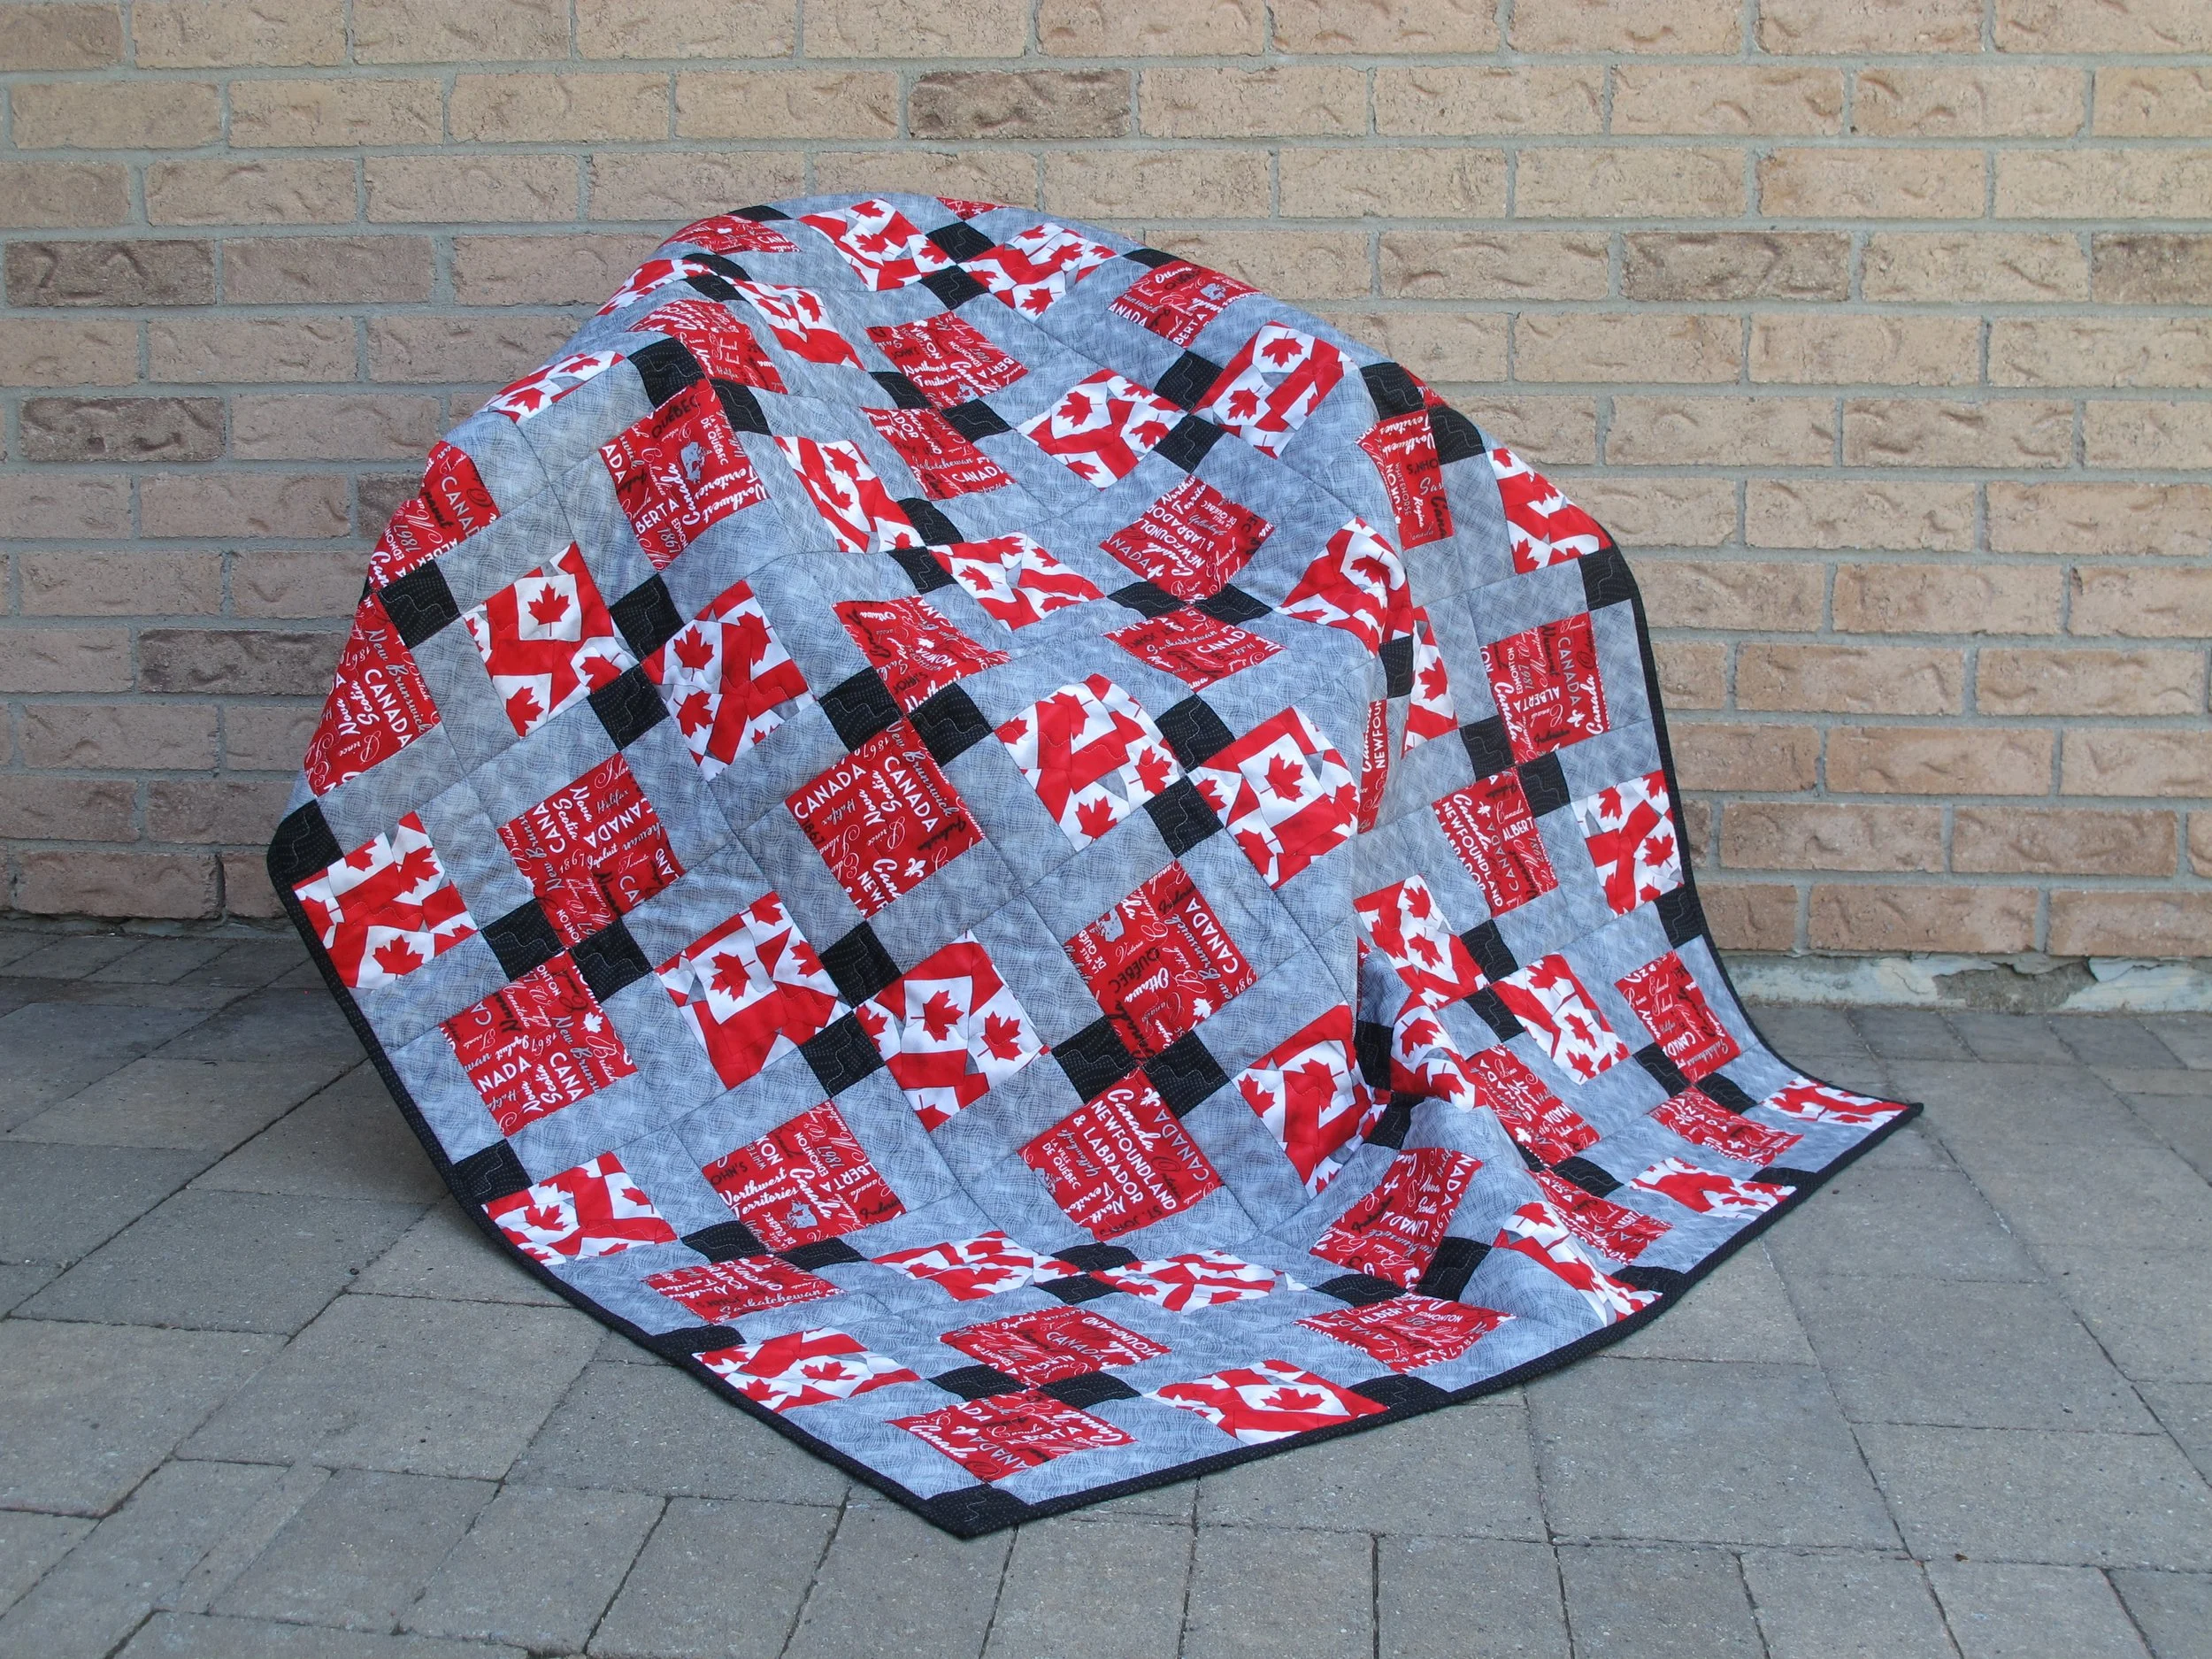
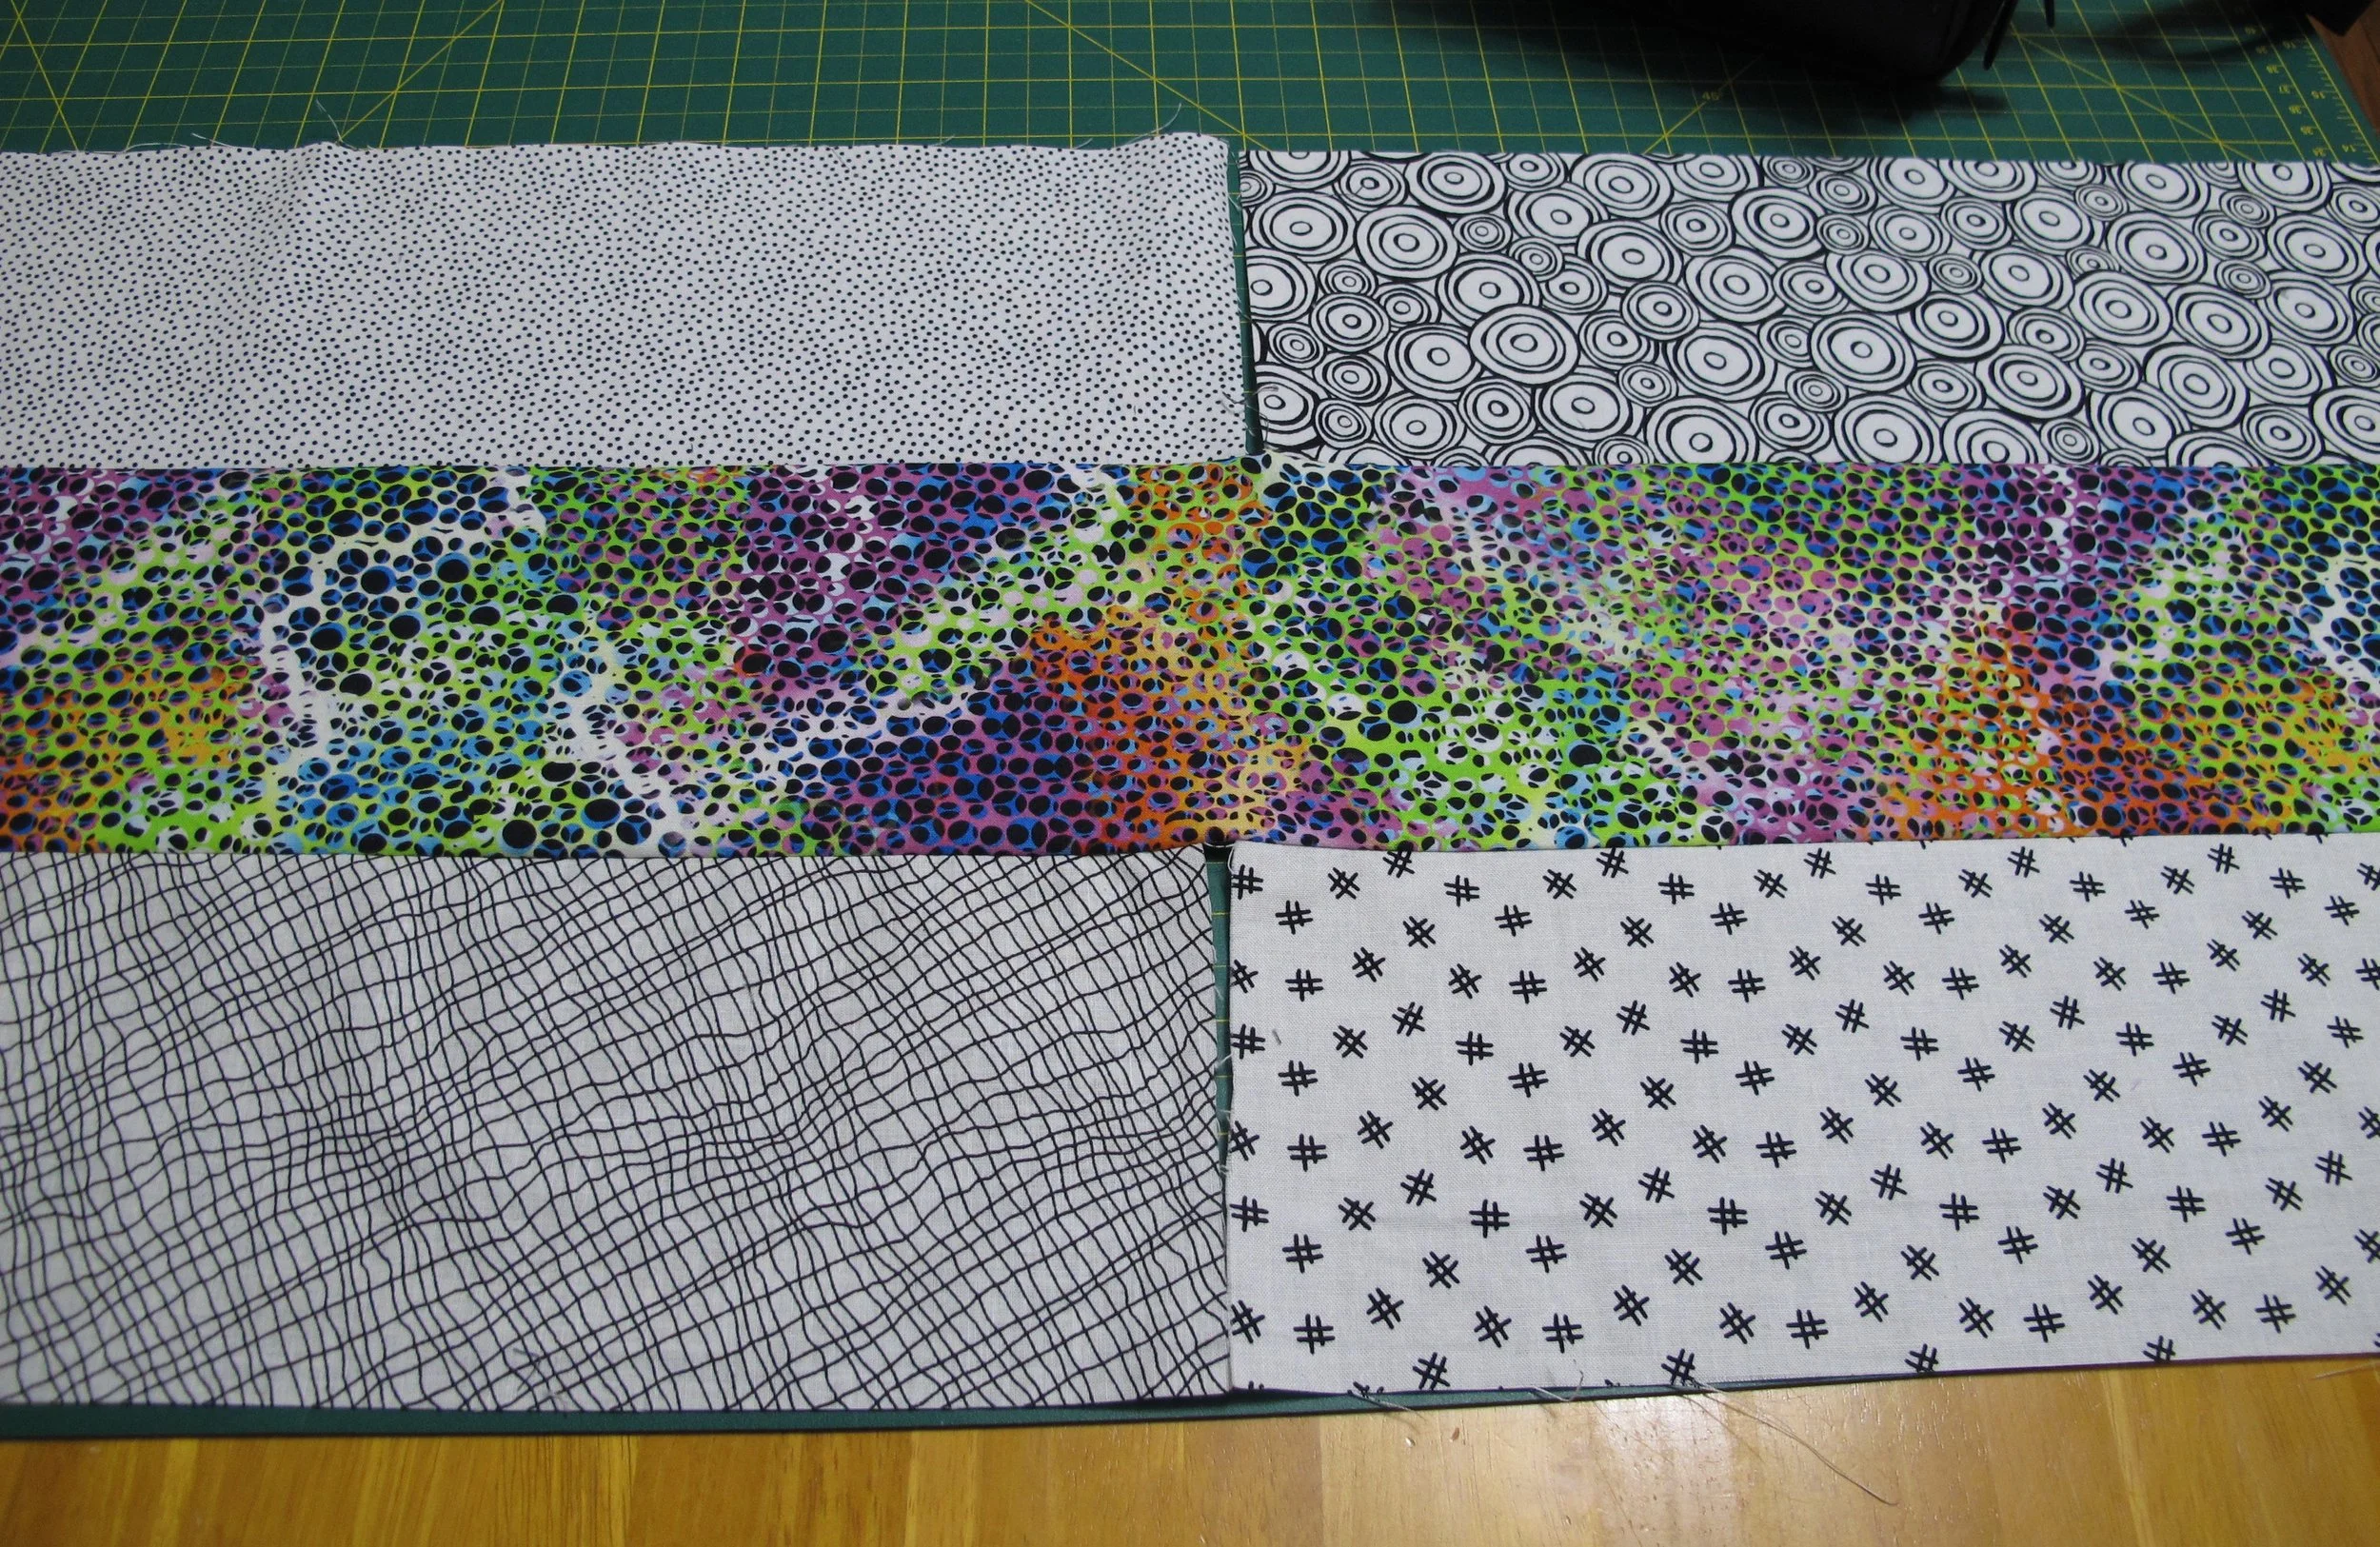
Instructions are for a lap sized DNP quilt (52” x 65”) with 13” finished blocks. There are 4 blocks across and 5 down for a total of 20 blocks. I have shown 2 examples (and one single block to show fabric placement)…the Canada Day quilt has the same four fabrics used throughout the entire quilt, and with the second example I have gone through my scrap bins and used a mix of black with white and white with black fabrics with one colourful print for the centre square.
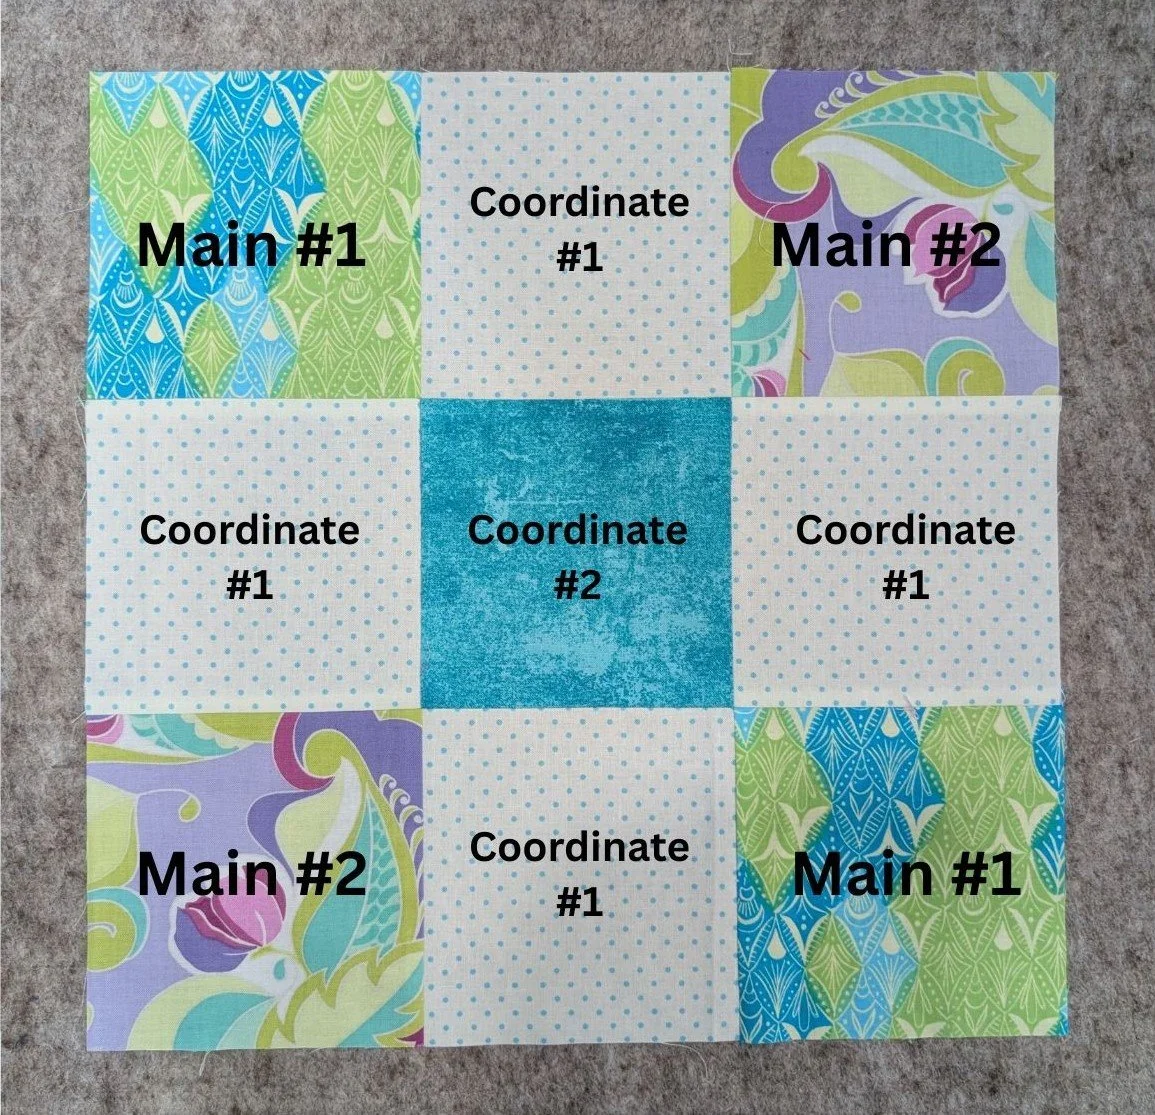
The “Canada Day” DNP uses only 4 fabrics and is the most straightforward way to make this quilt. It requires two “main” prints and two coordinates. Because this particular quilt was made a few years ago (and I no longer have these scraps to make a separate block), I am going to show another block in a different set of fabrics to explain the set up.
*** scroll to the bottom of the page for a printable PDF
*** Sharon’s usual way of making this quilt: I like the 2 Main Prints to be from medium to large scale prints with lots of movement (or stuff going on), Coordinate #1 to be a small, light to medium print or tone-on-tone, and Coordinate #2 to be a dark tone-on-tone. I like the way the dark squares meet on the diagonal in both directions, as shown in the Canada Day quilt at the top right of this page.
Yardage requirements and cutting instructions: for a 52” x 65” lap quilt
Main print #1 (flag print on Canada quilt): .70 m (3/4 yd)- cut five 5” strips
Main print #2 (red word print on Canada quilt): .70 m (3/4 yd)- cut five 5” strips
Coordinate #1 (medium grey on Canada quilt): 1.50 m (1 2/3 yd)- cut eleven 5” strips
Coordinate #2 (black on Canada quilt): 1 m (1 yd)- cut three 5” strips, cut seven 2 1/2” strips (binding)
Sewing Instructions: 1/4” seam allowances
*** No need to cut individual squares (“5 squares) for this project (unless you want to from scraps)…cut strips as above, then sew strips together into strip sets, as explained below, before cutting units.
Set 1: stitch Main print #1, Main print #2, and Coordinate #1 together, with Coordinate #1 in between Main #1 and Main #2
make 5 strip sets, press seams away from centre strip (toward both Main prints)
Set 2: stitch one Coordinate #2 in between two Coordinate #1's
make 3 strip sets, press seams toward centre strip (Coordinate #2)
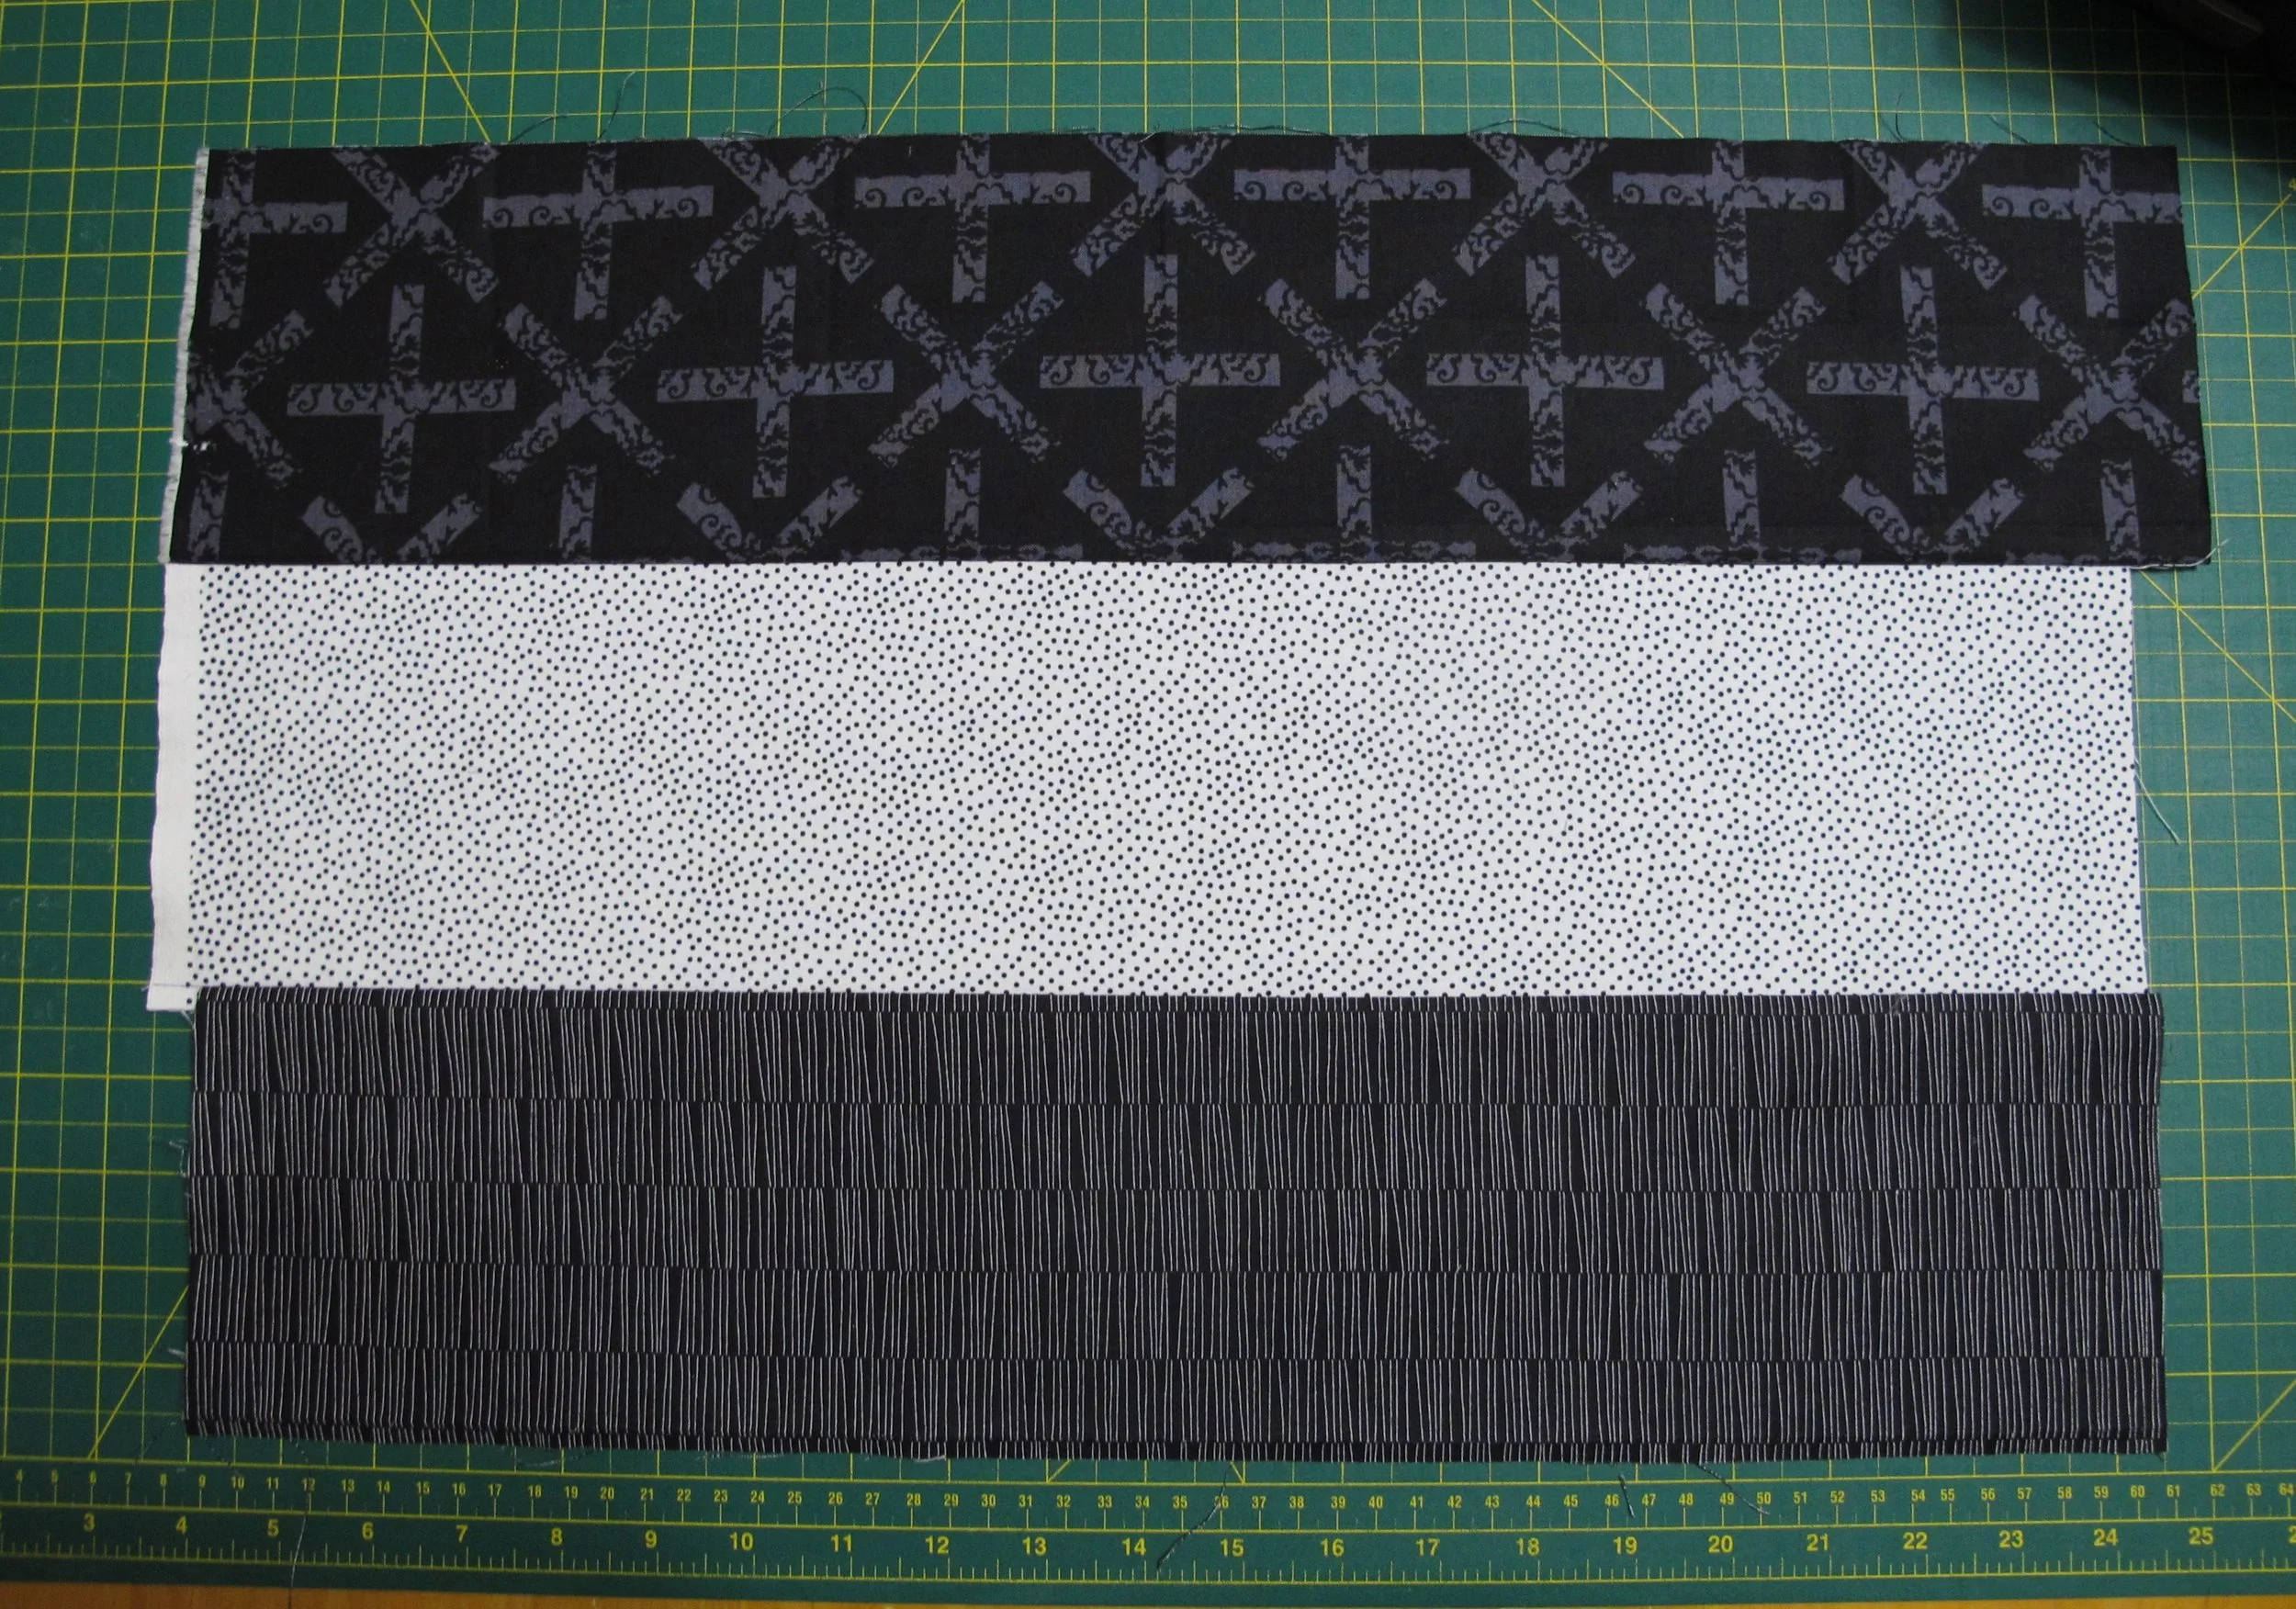
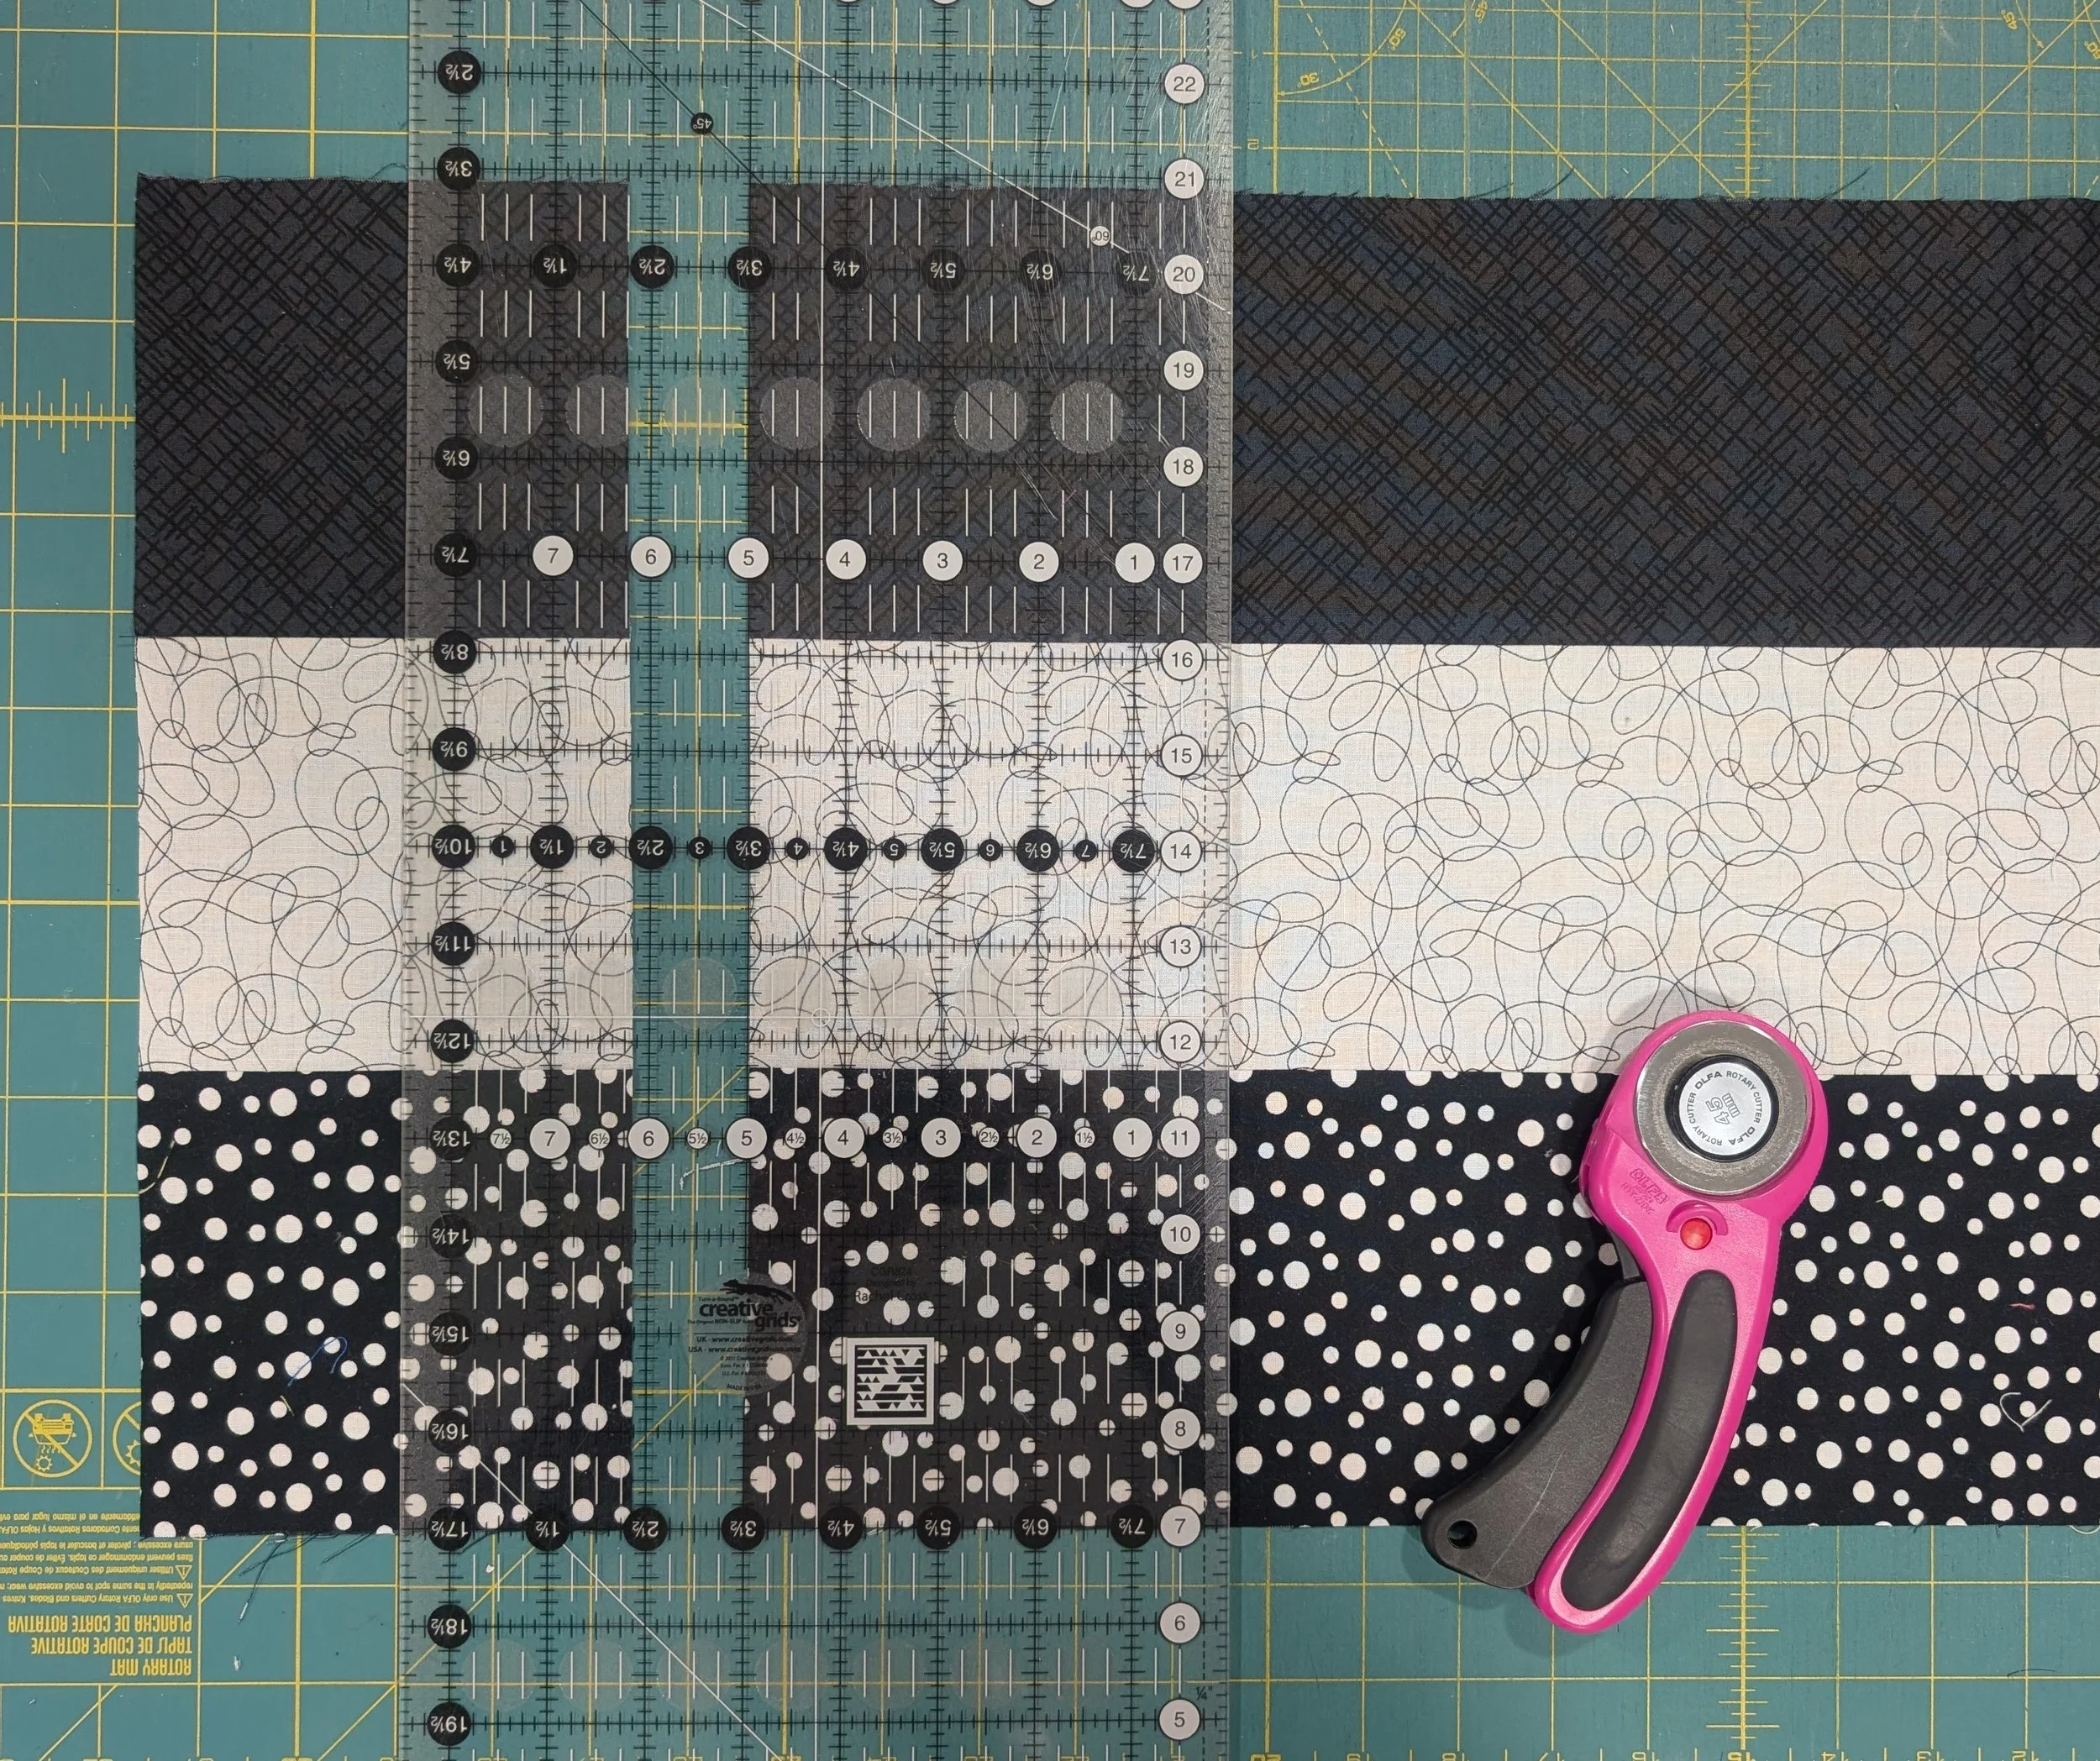
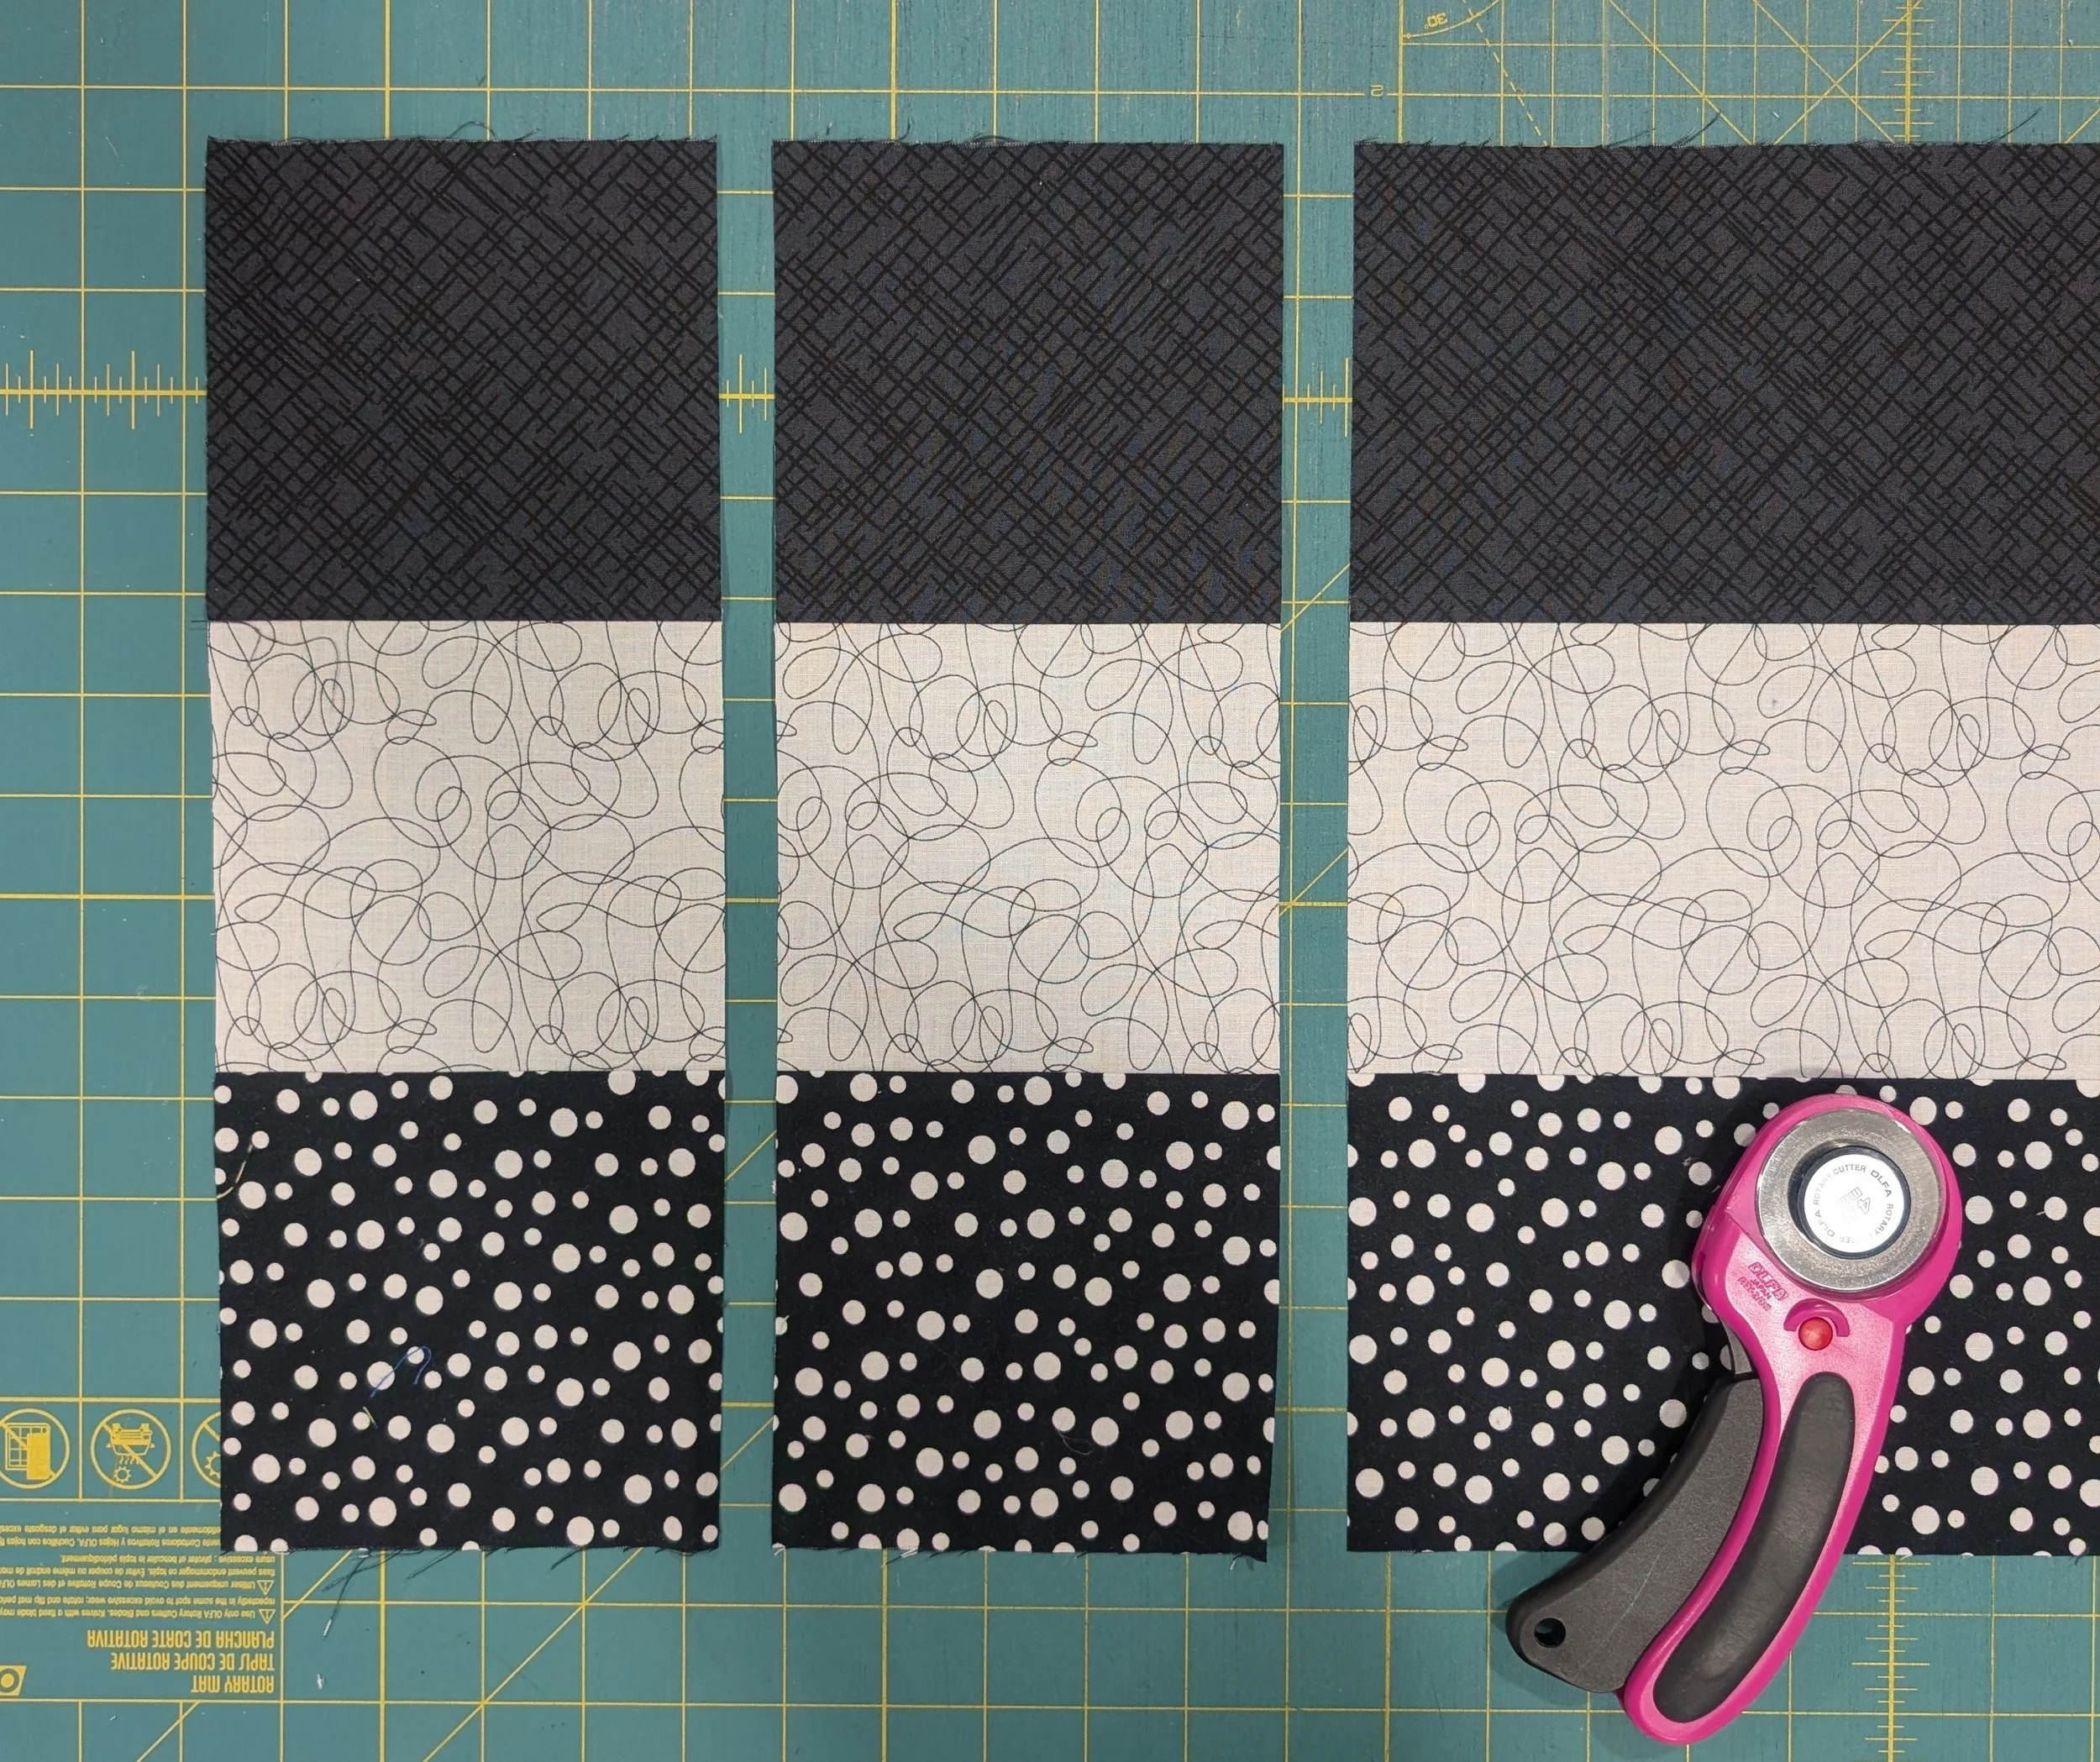
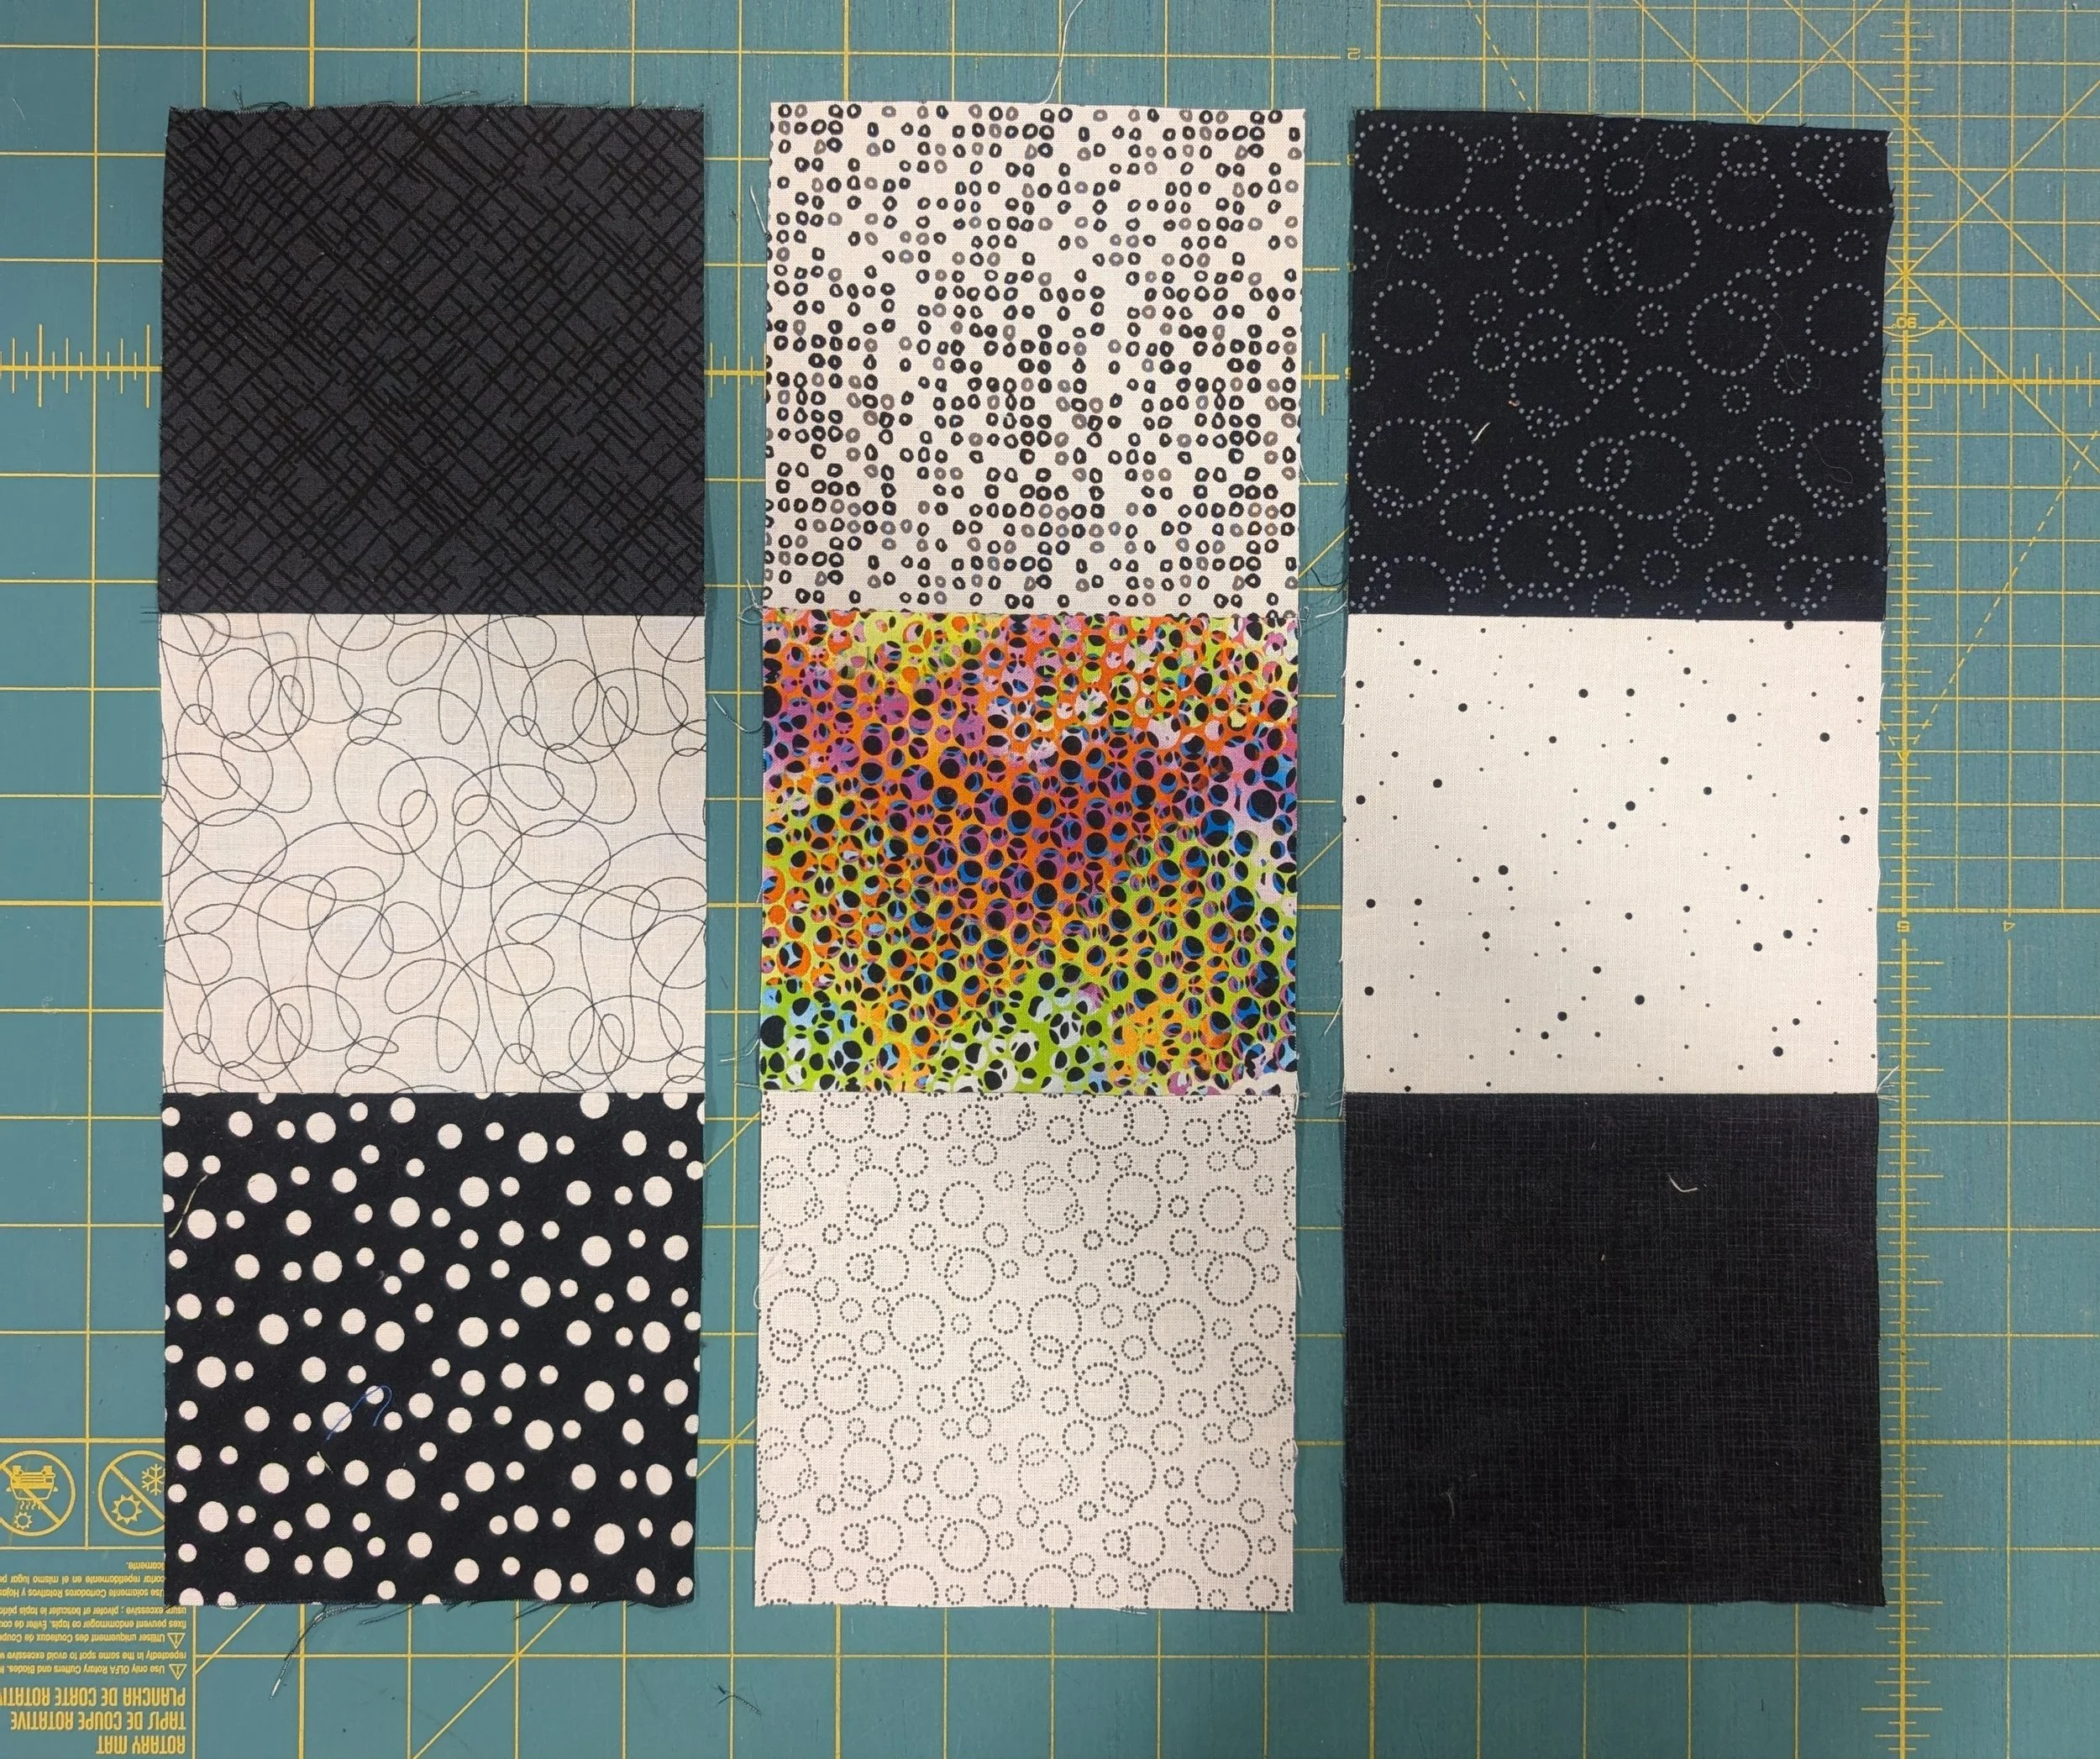
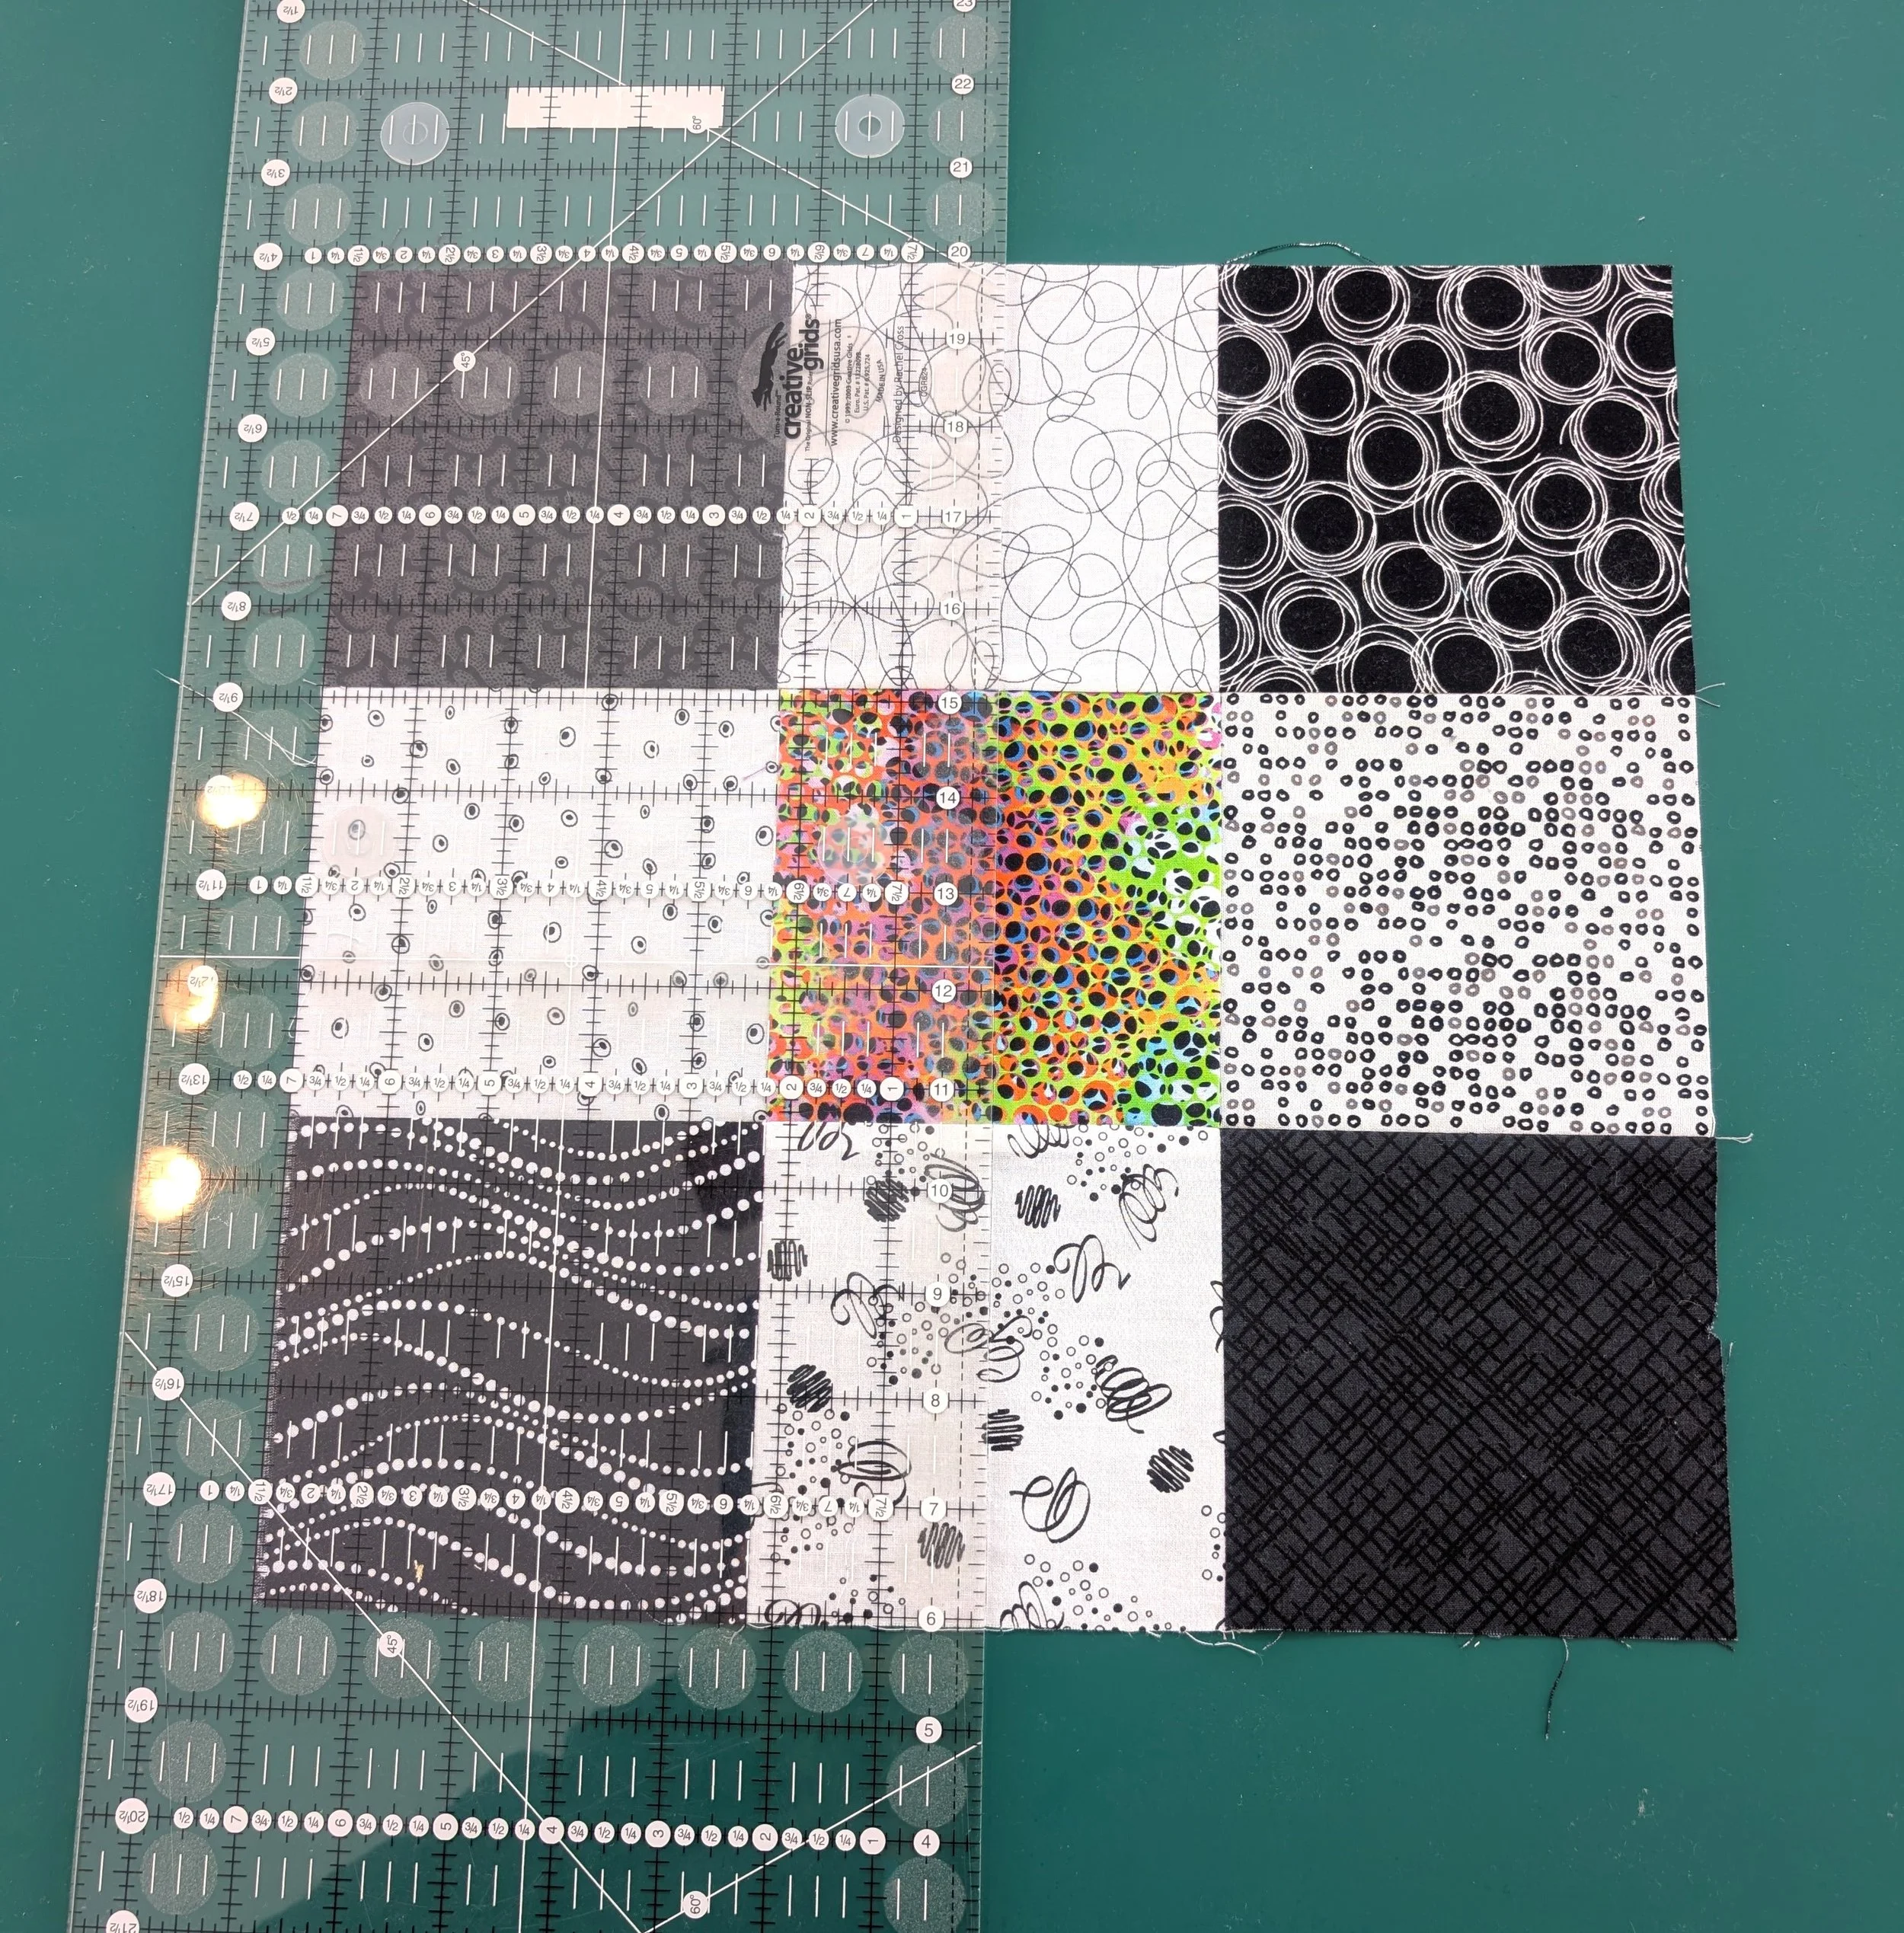
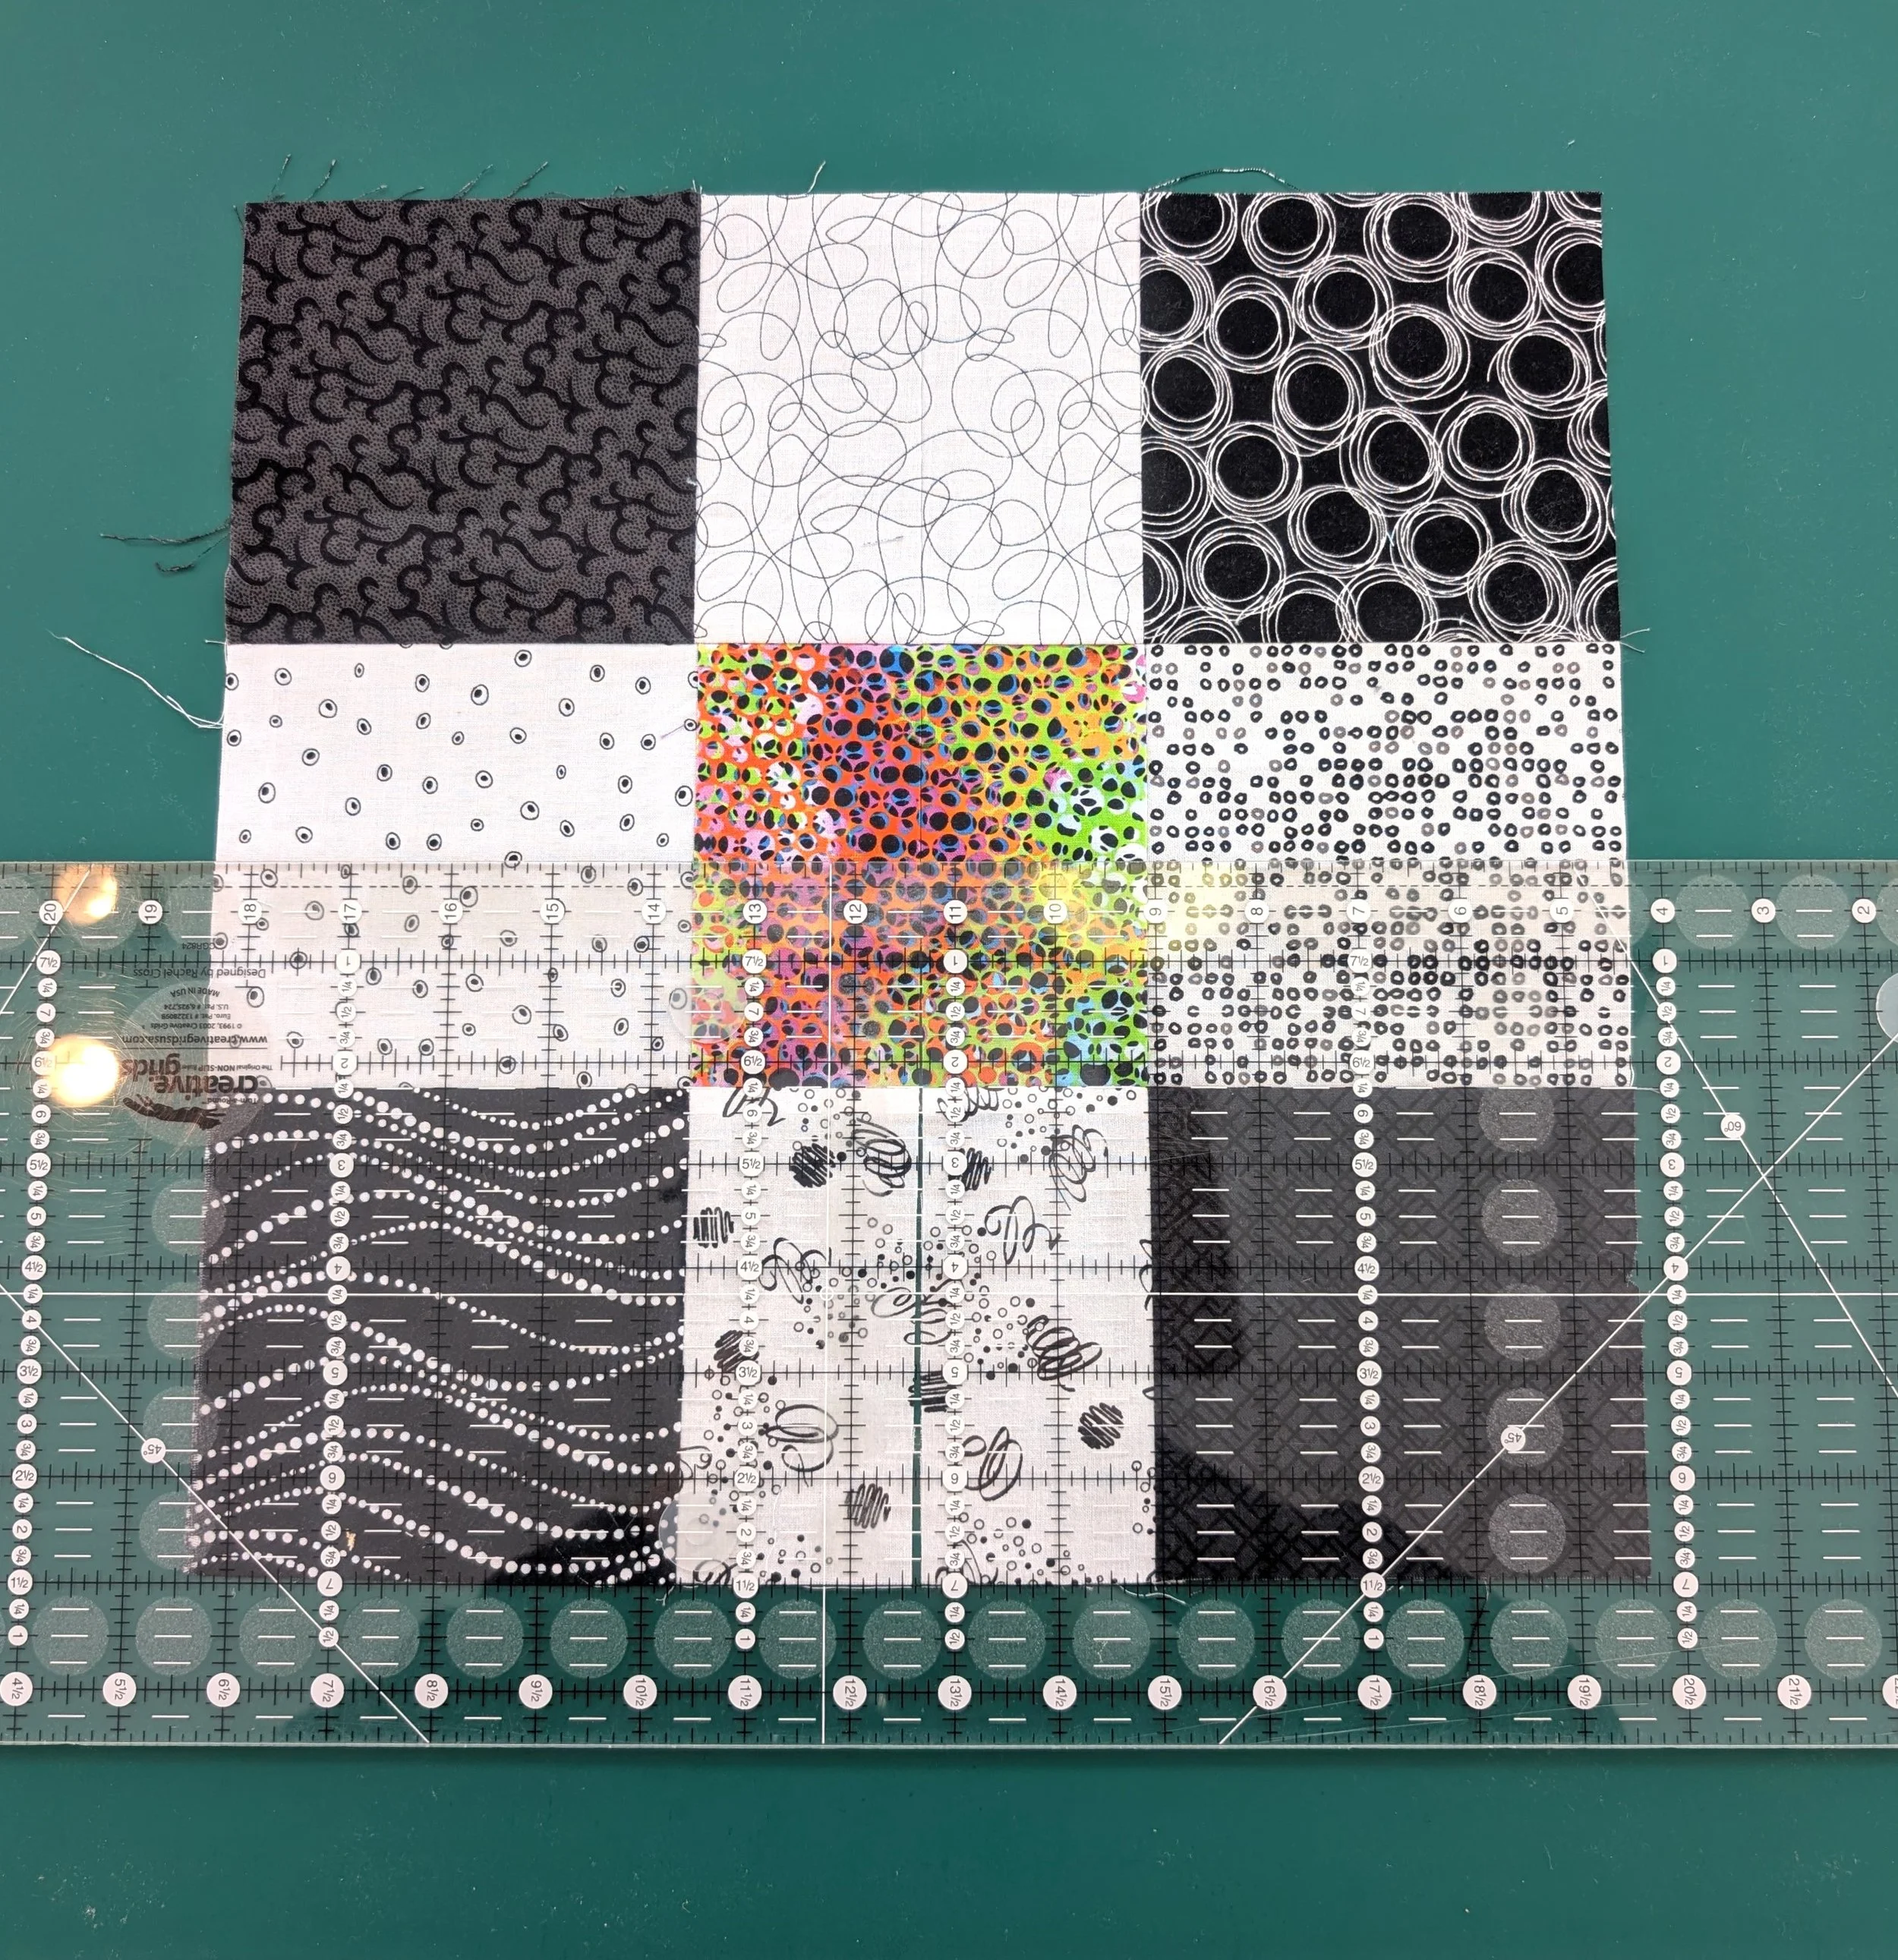
Below, even though I have used a variety of fabrics for each strip set, the black print fabrics are considered Main #1 and Main #2, the white print fabrics are all considered as Coordinate #1, and the colourful print is Coordinate #2. Each of these strip sets are cut into 5” segments that are then stitched together into 9 patch units.
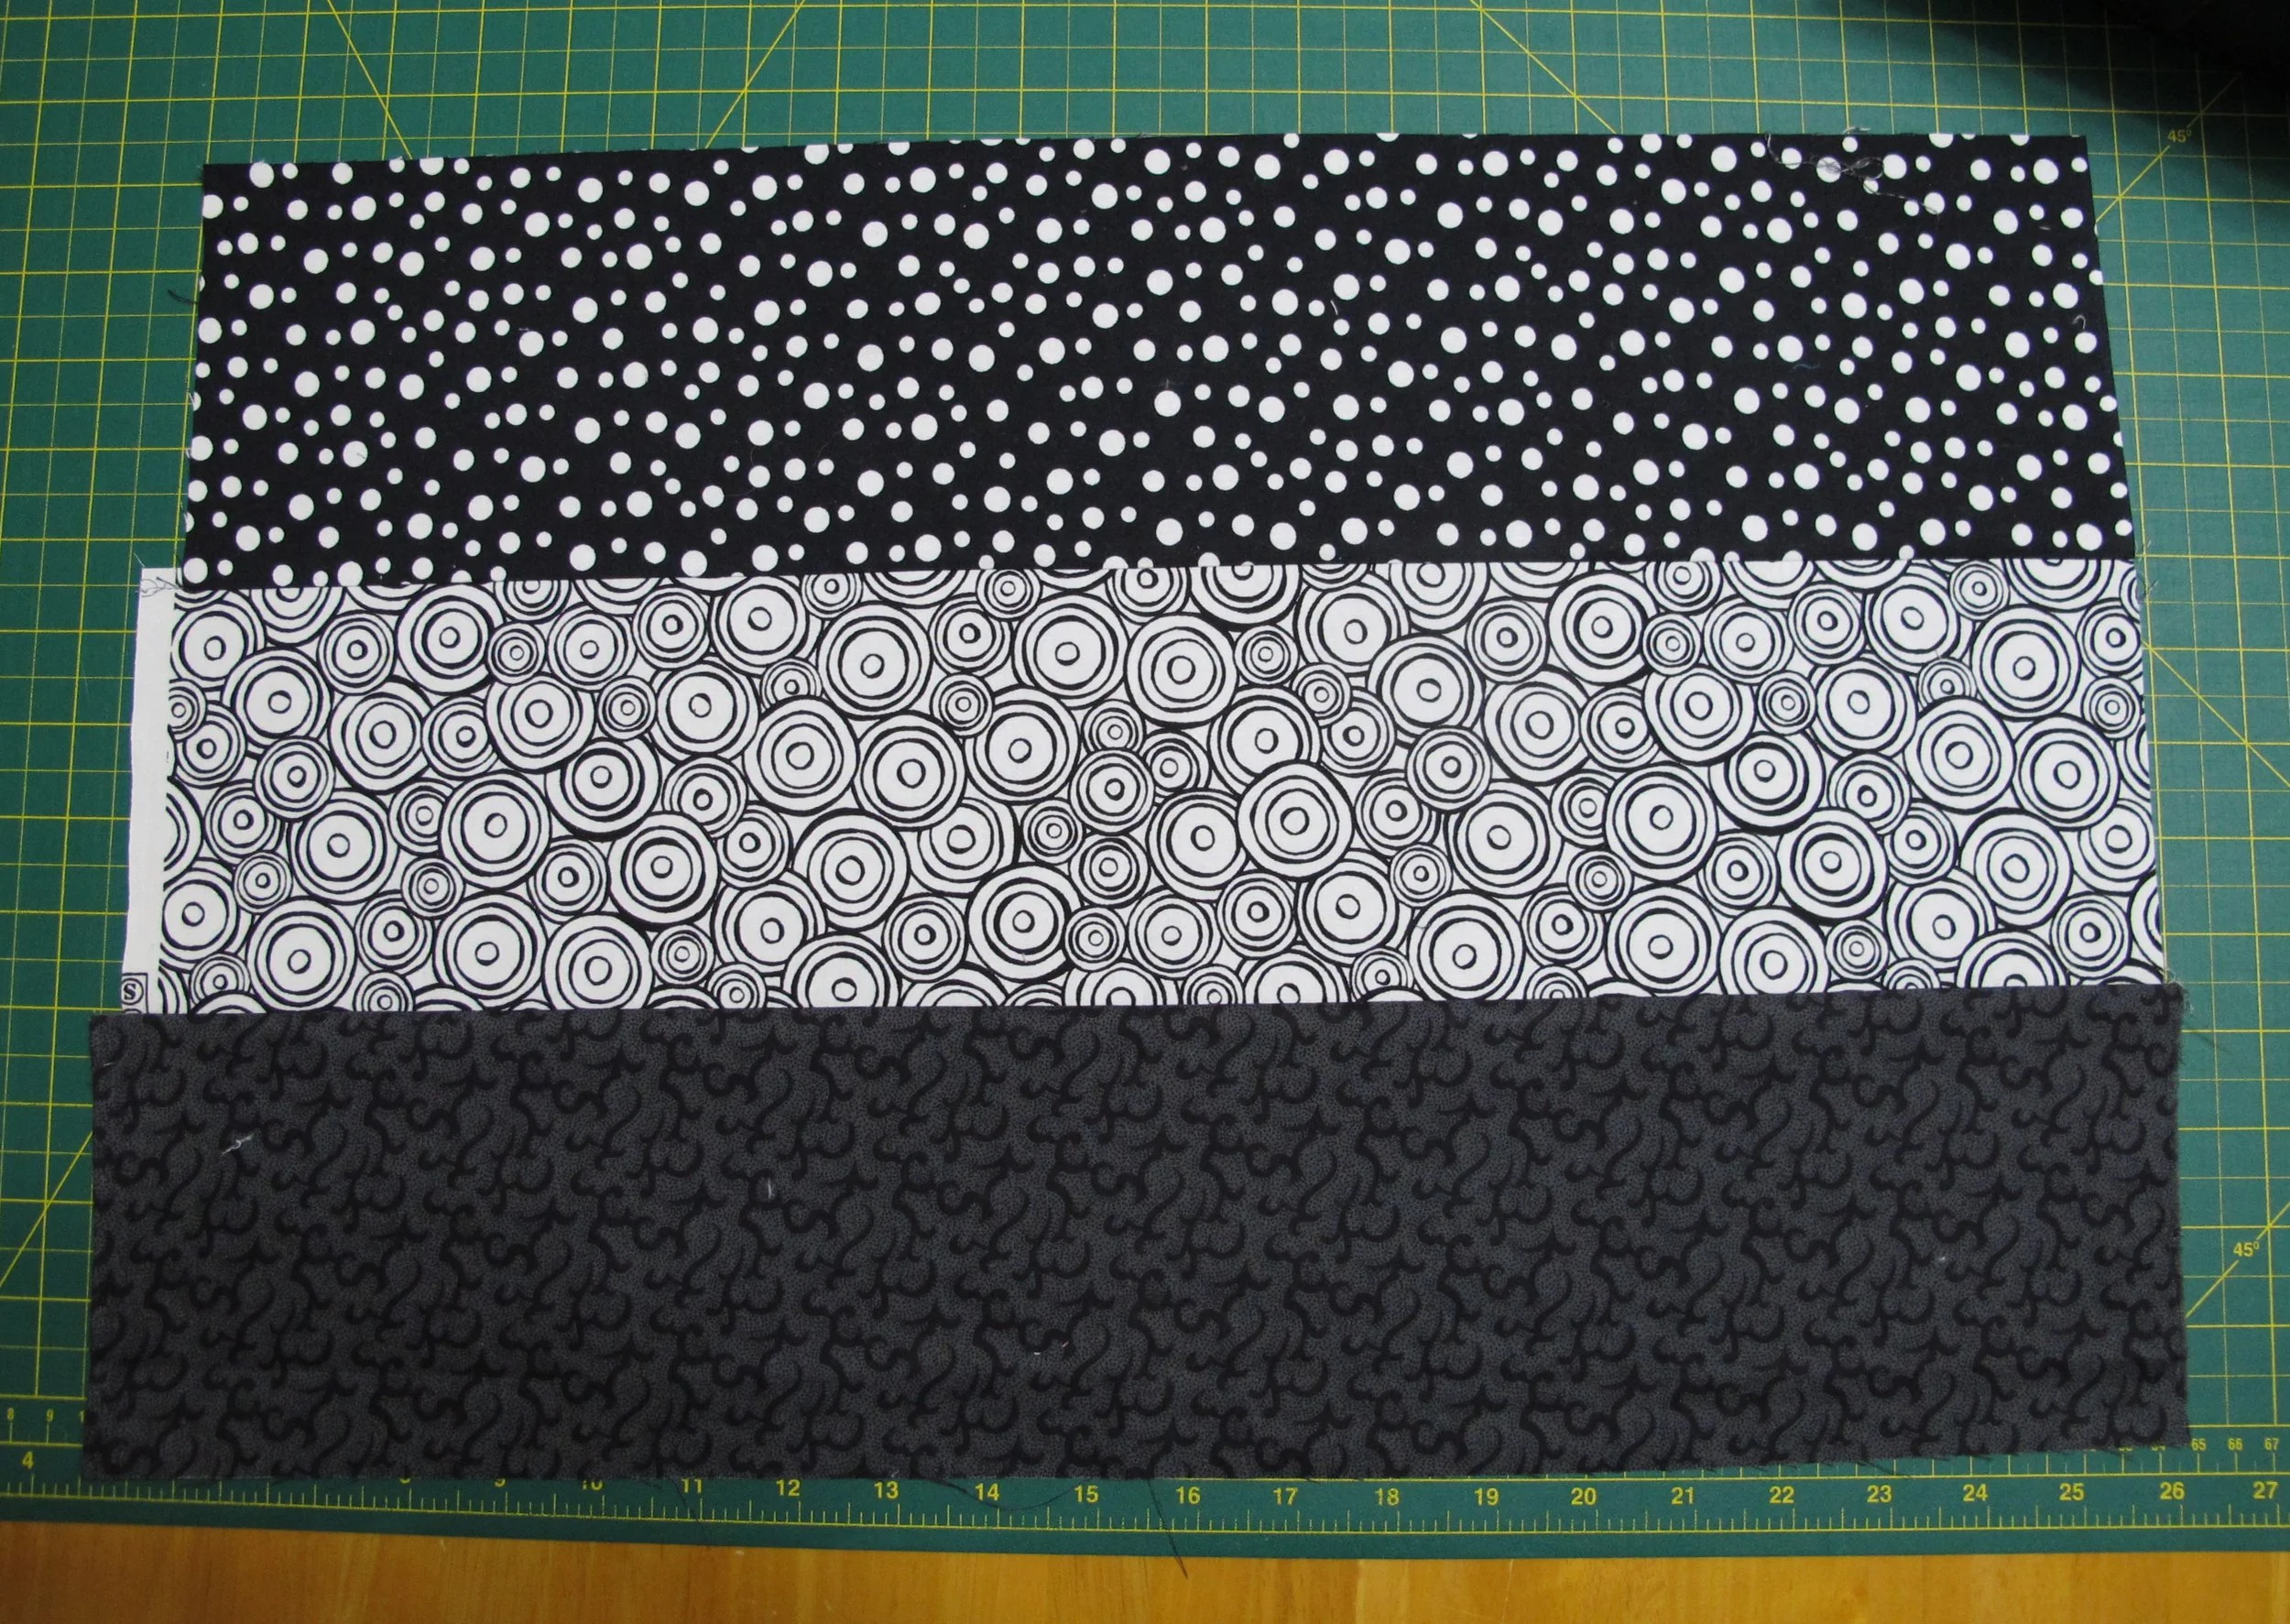
Strip Set #1
Strip Set #1
Strip Set #2
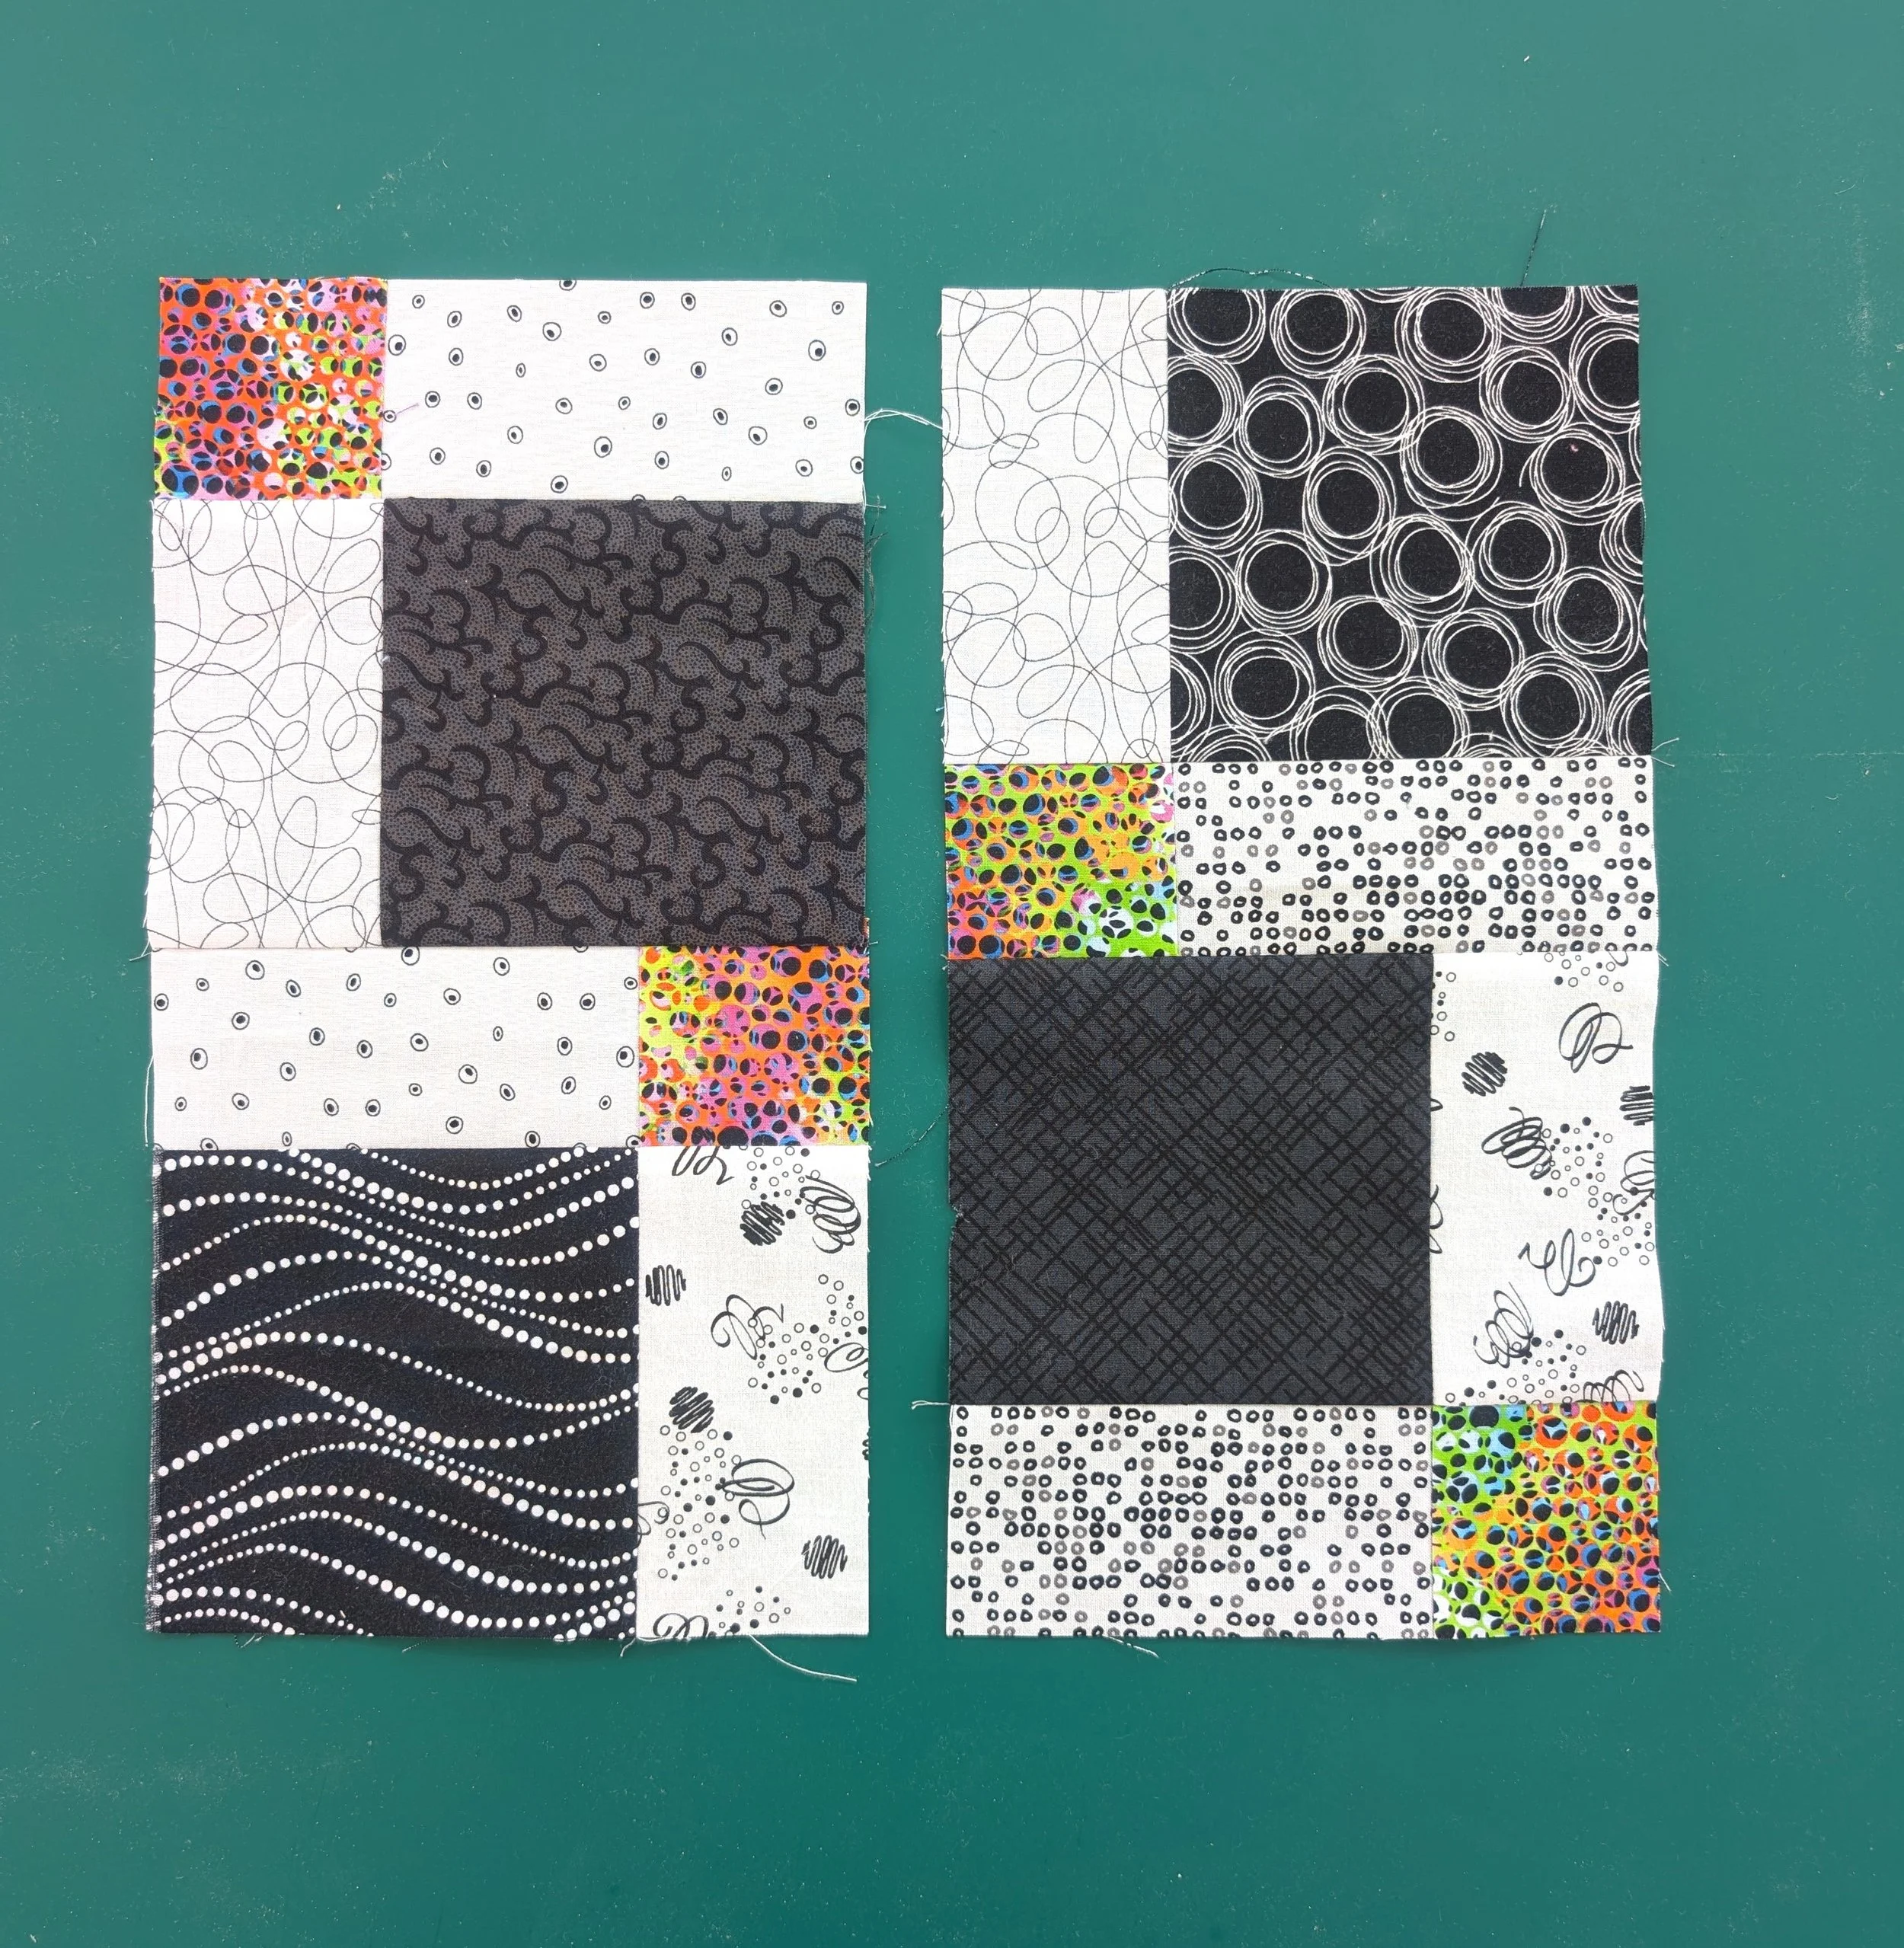
Below you can see the strip sets cut into 5” segments. From Set 1 cut 40 segments and from Set 2 cut 20 segments.
Set #1 units
Set #1 units
one Set #2 in between two Set #1’s
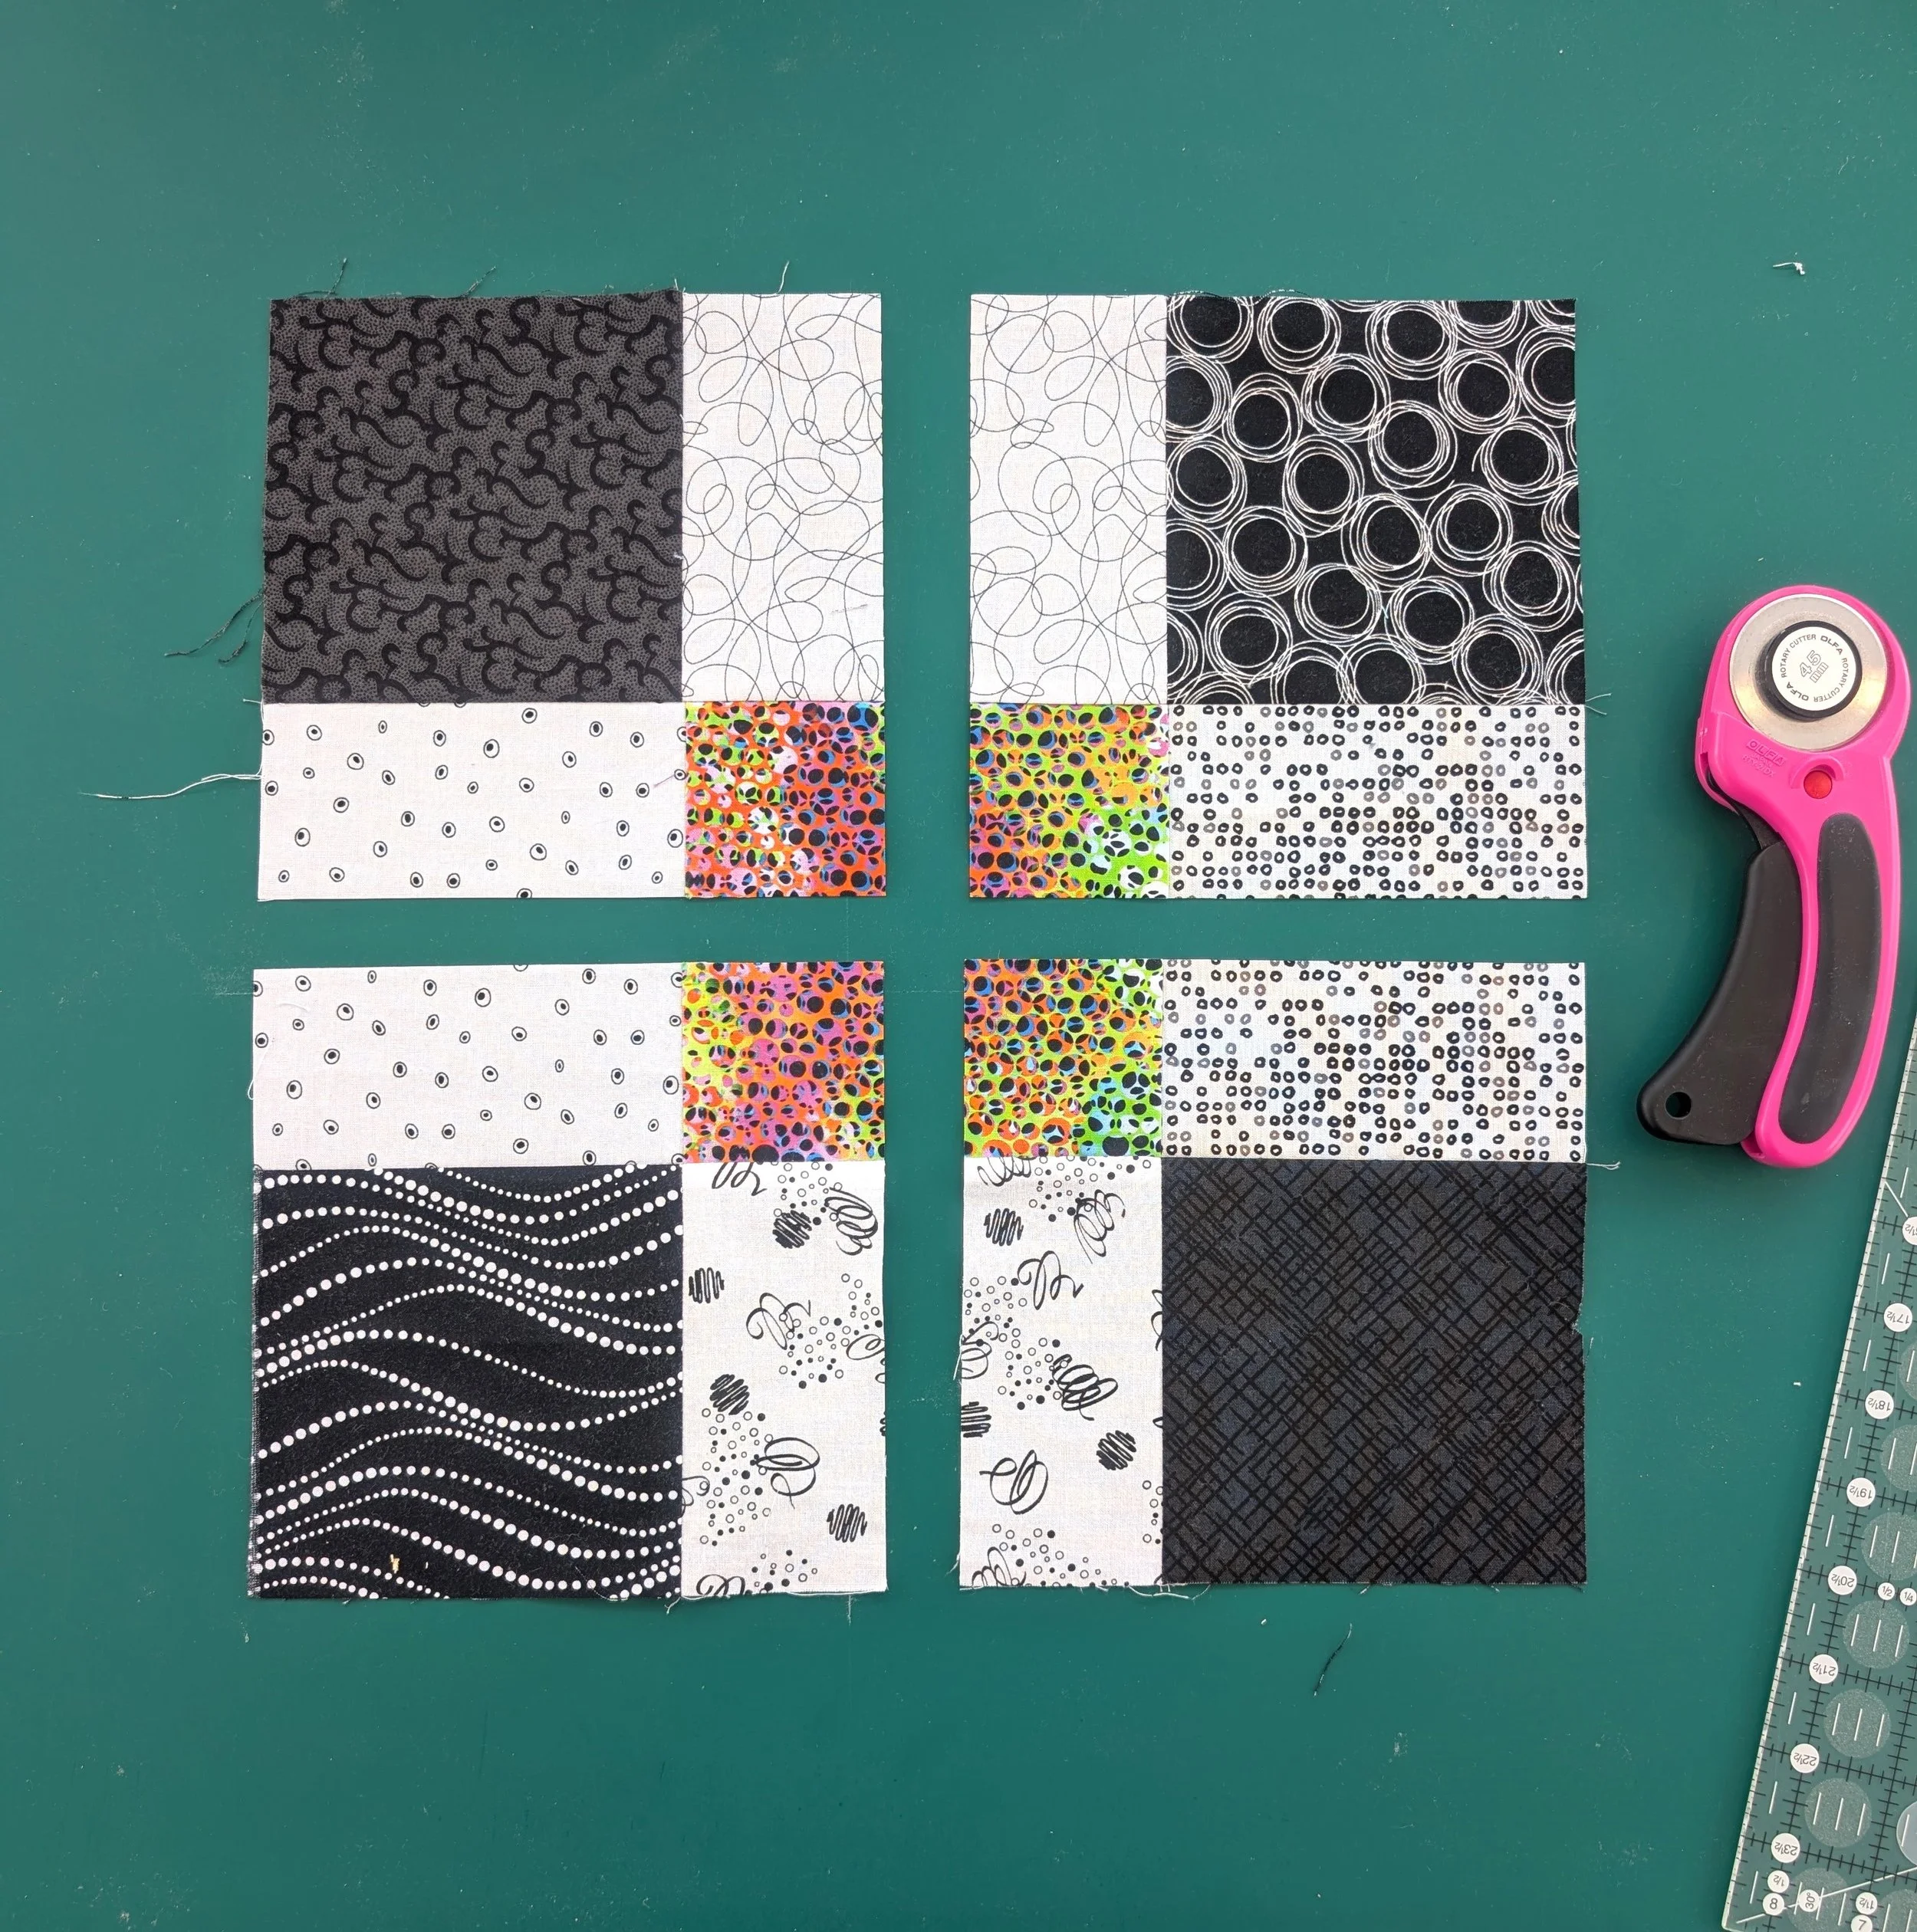
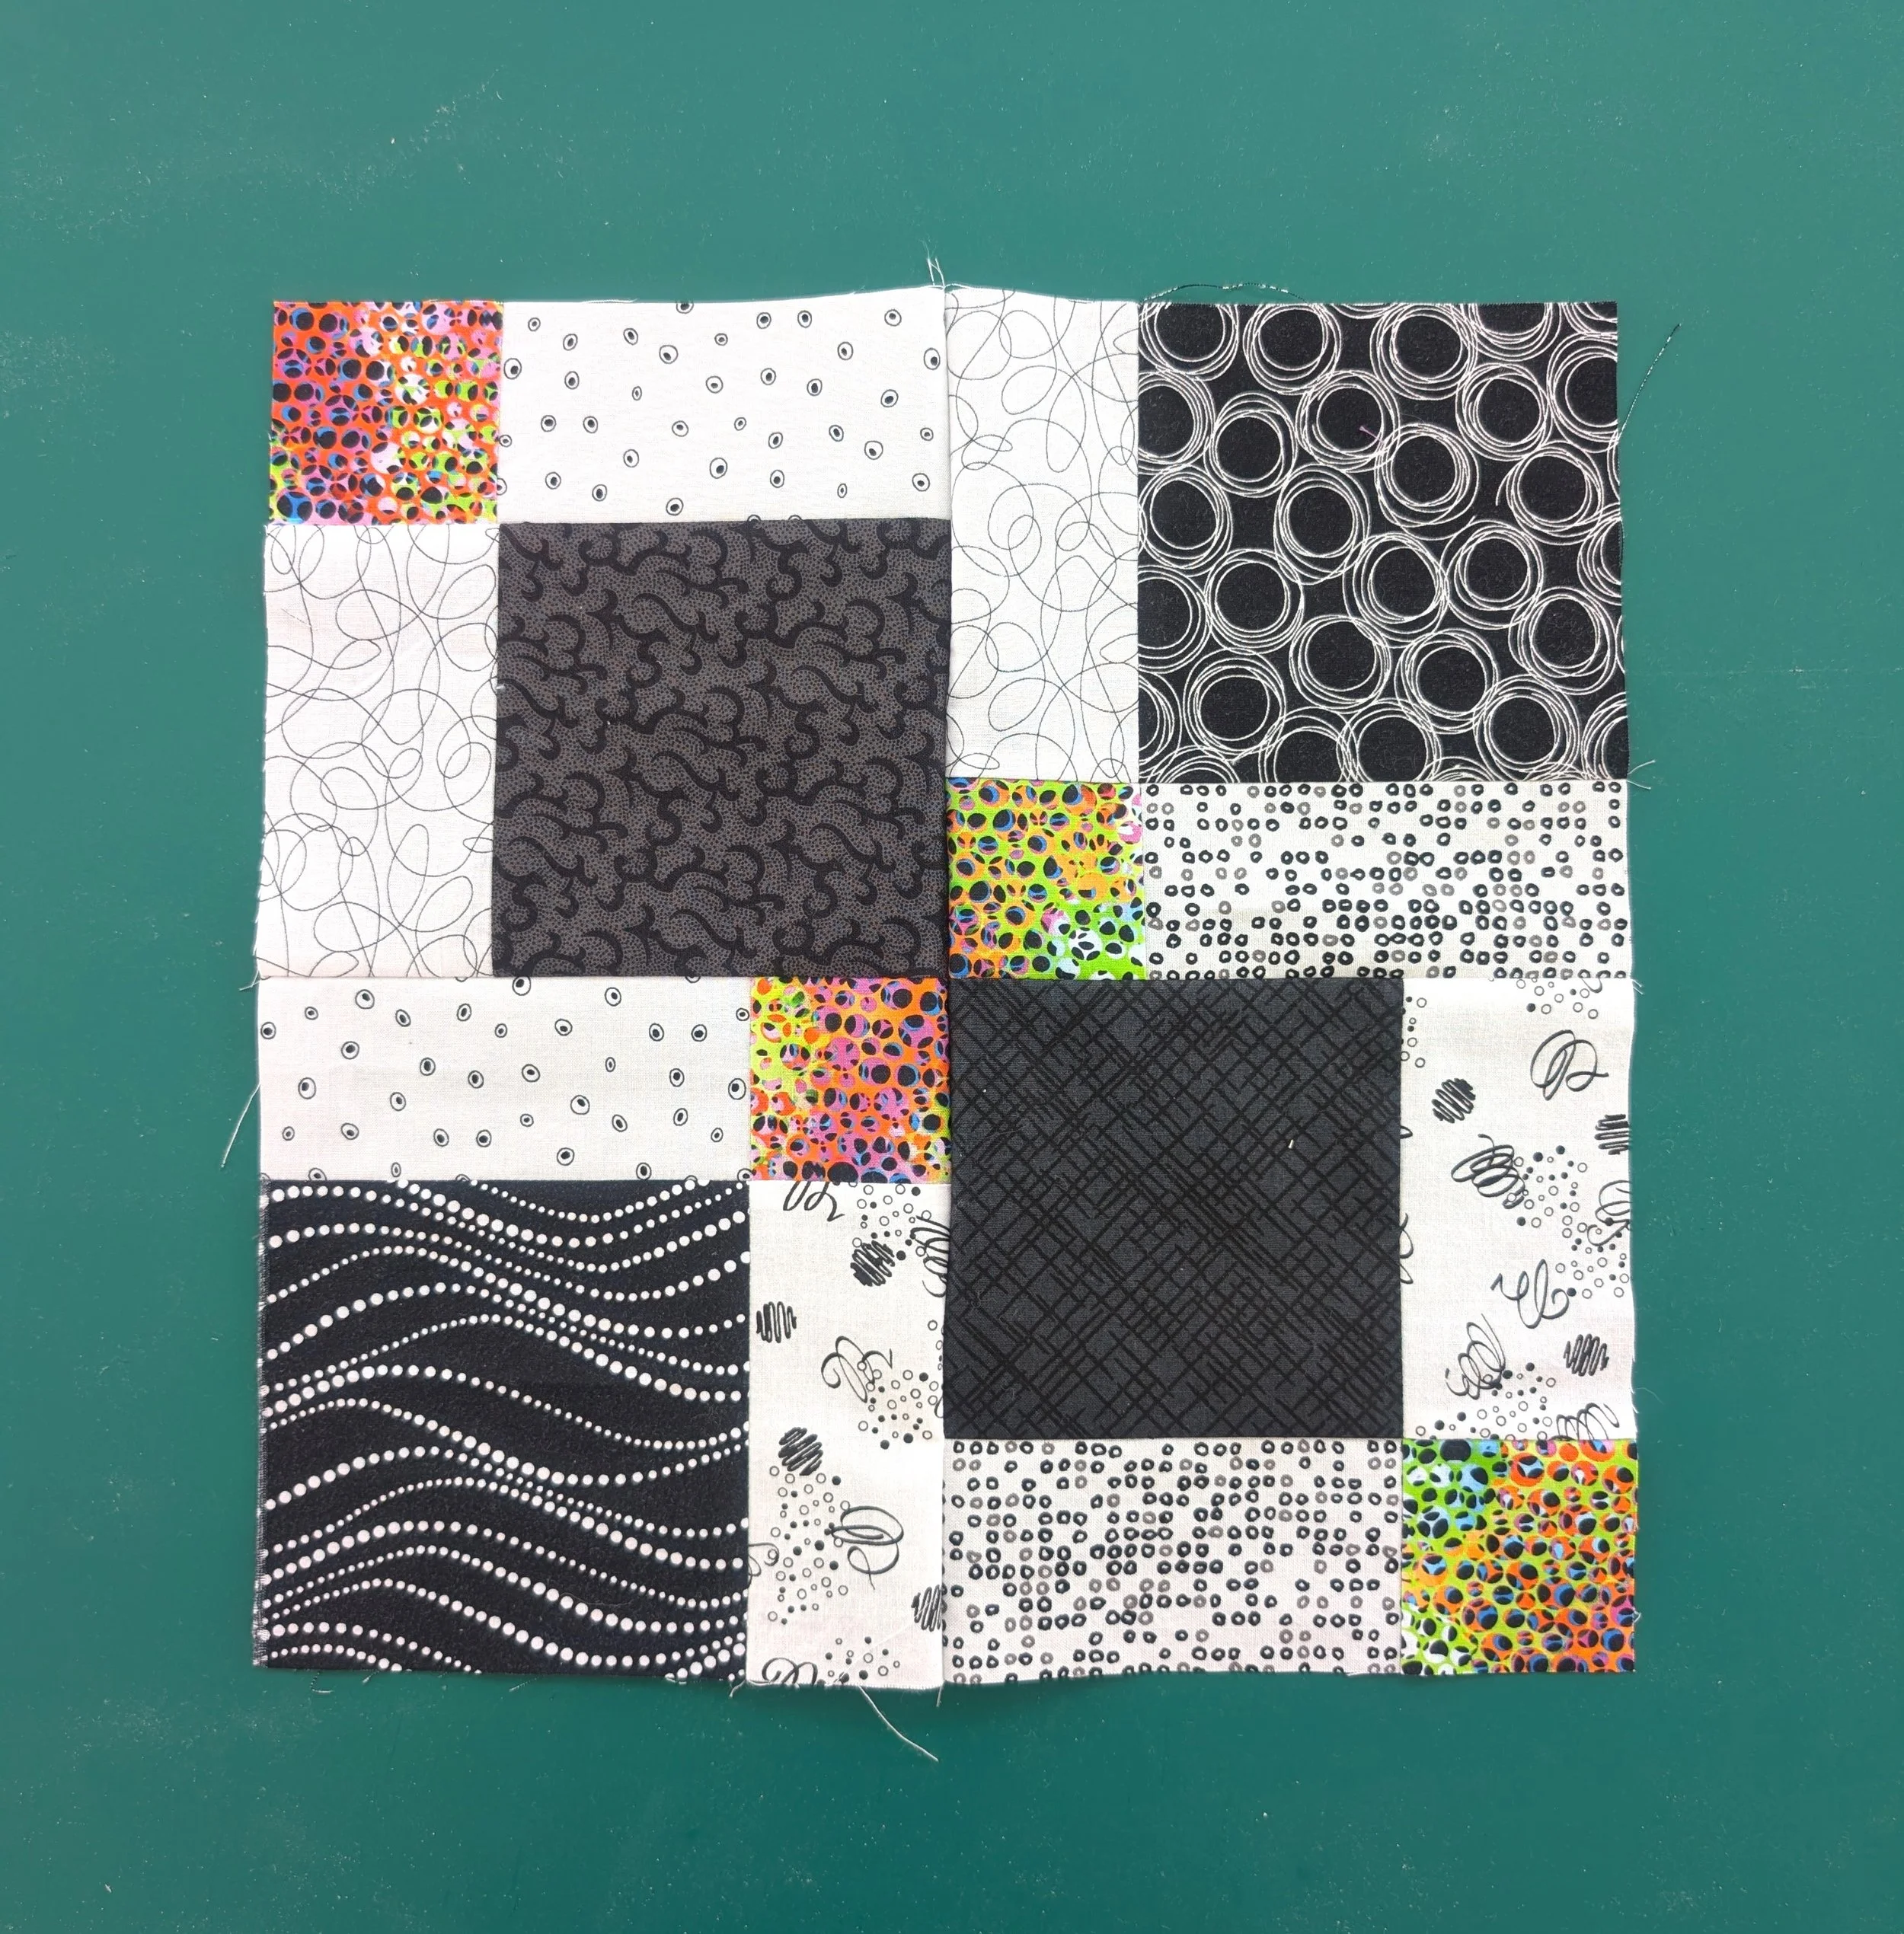
Stitch one Set 2 in between two Set 1’s (as shown above right) and press seams away from the centre segment. Make 20 9-Patch blocks. Now it’s time to slice the block into 4 sections. *** When doing this step, be sure to have Main #1 in the top left corner each and every time before the block is sliced. If you mix them up, the design will not be apparent. If the quilt is scrappy, this doesn’t matter…just have any of the fabrics that are assigned as Mains # 1 and 2 in the top left position.
Cut vertically 2 1/4” from the left seam (which is half the size of the sewn square). ***Do not move the fabric. Very carefully lift the ruler so the fabric is not disturbed and place it horizontally 2 1/4” from the bottom seam and cut again. There are now 4 sections.
cut vertically
cut horizontally
4 sections
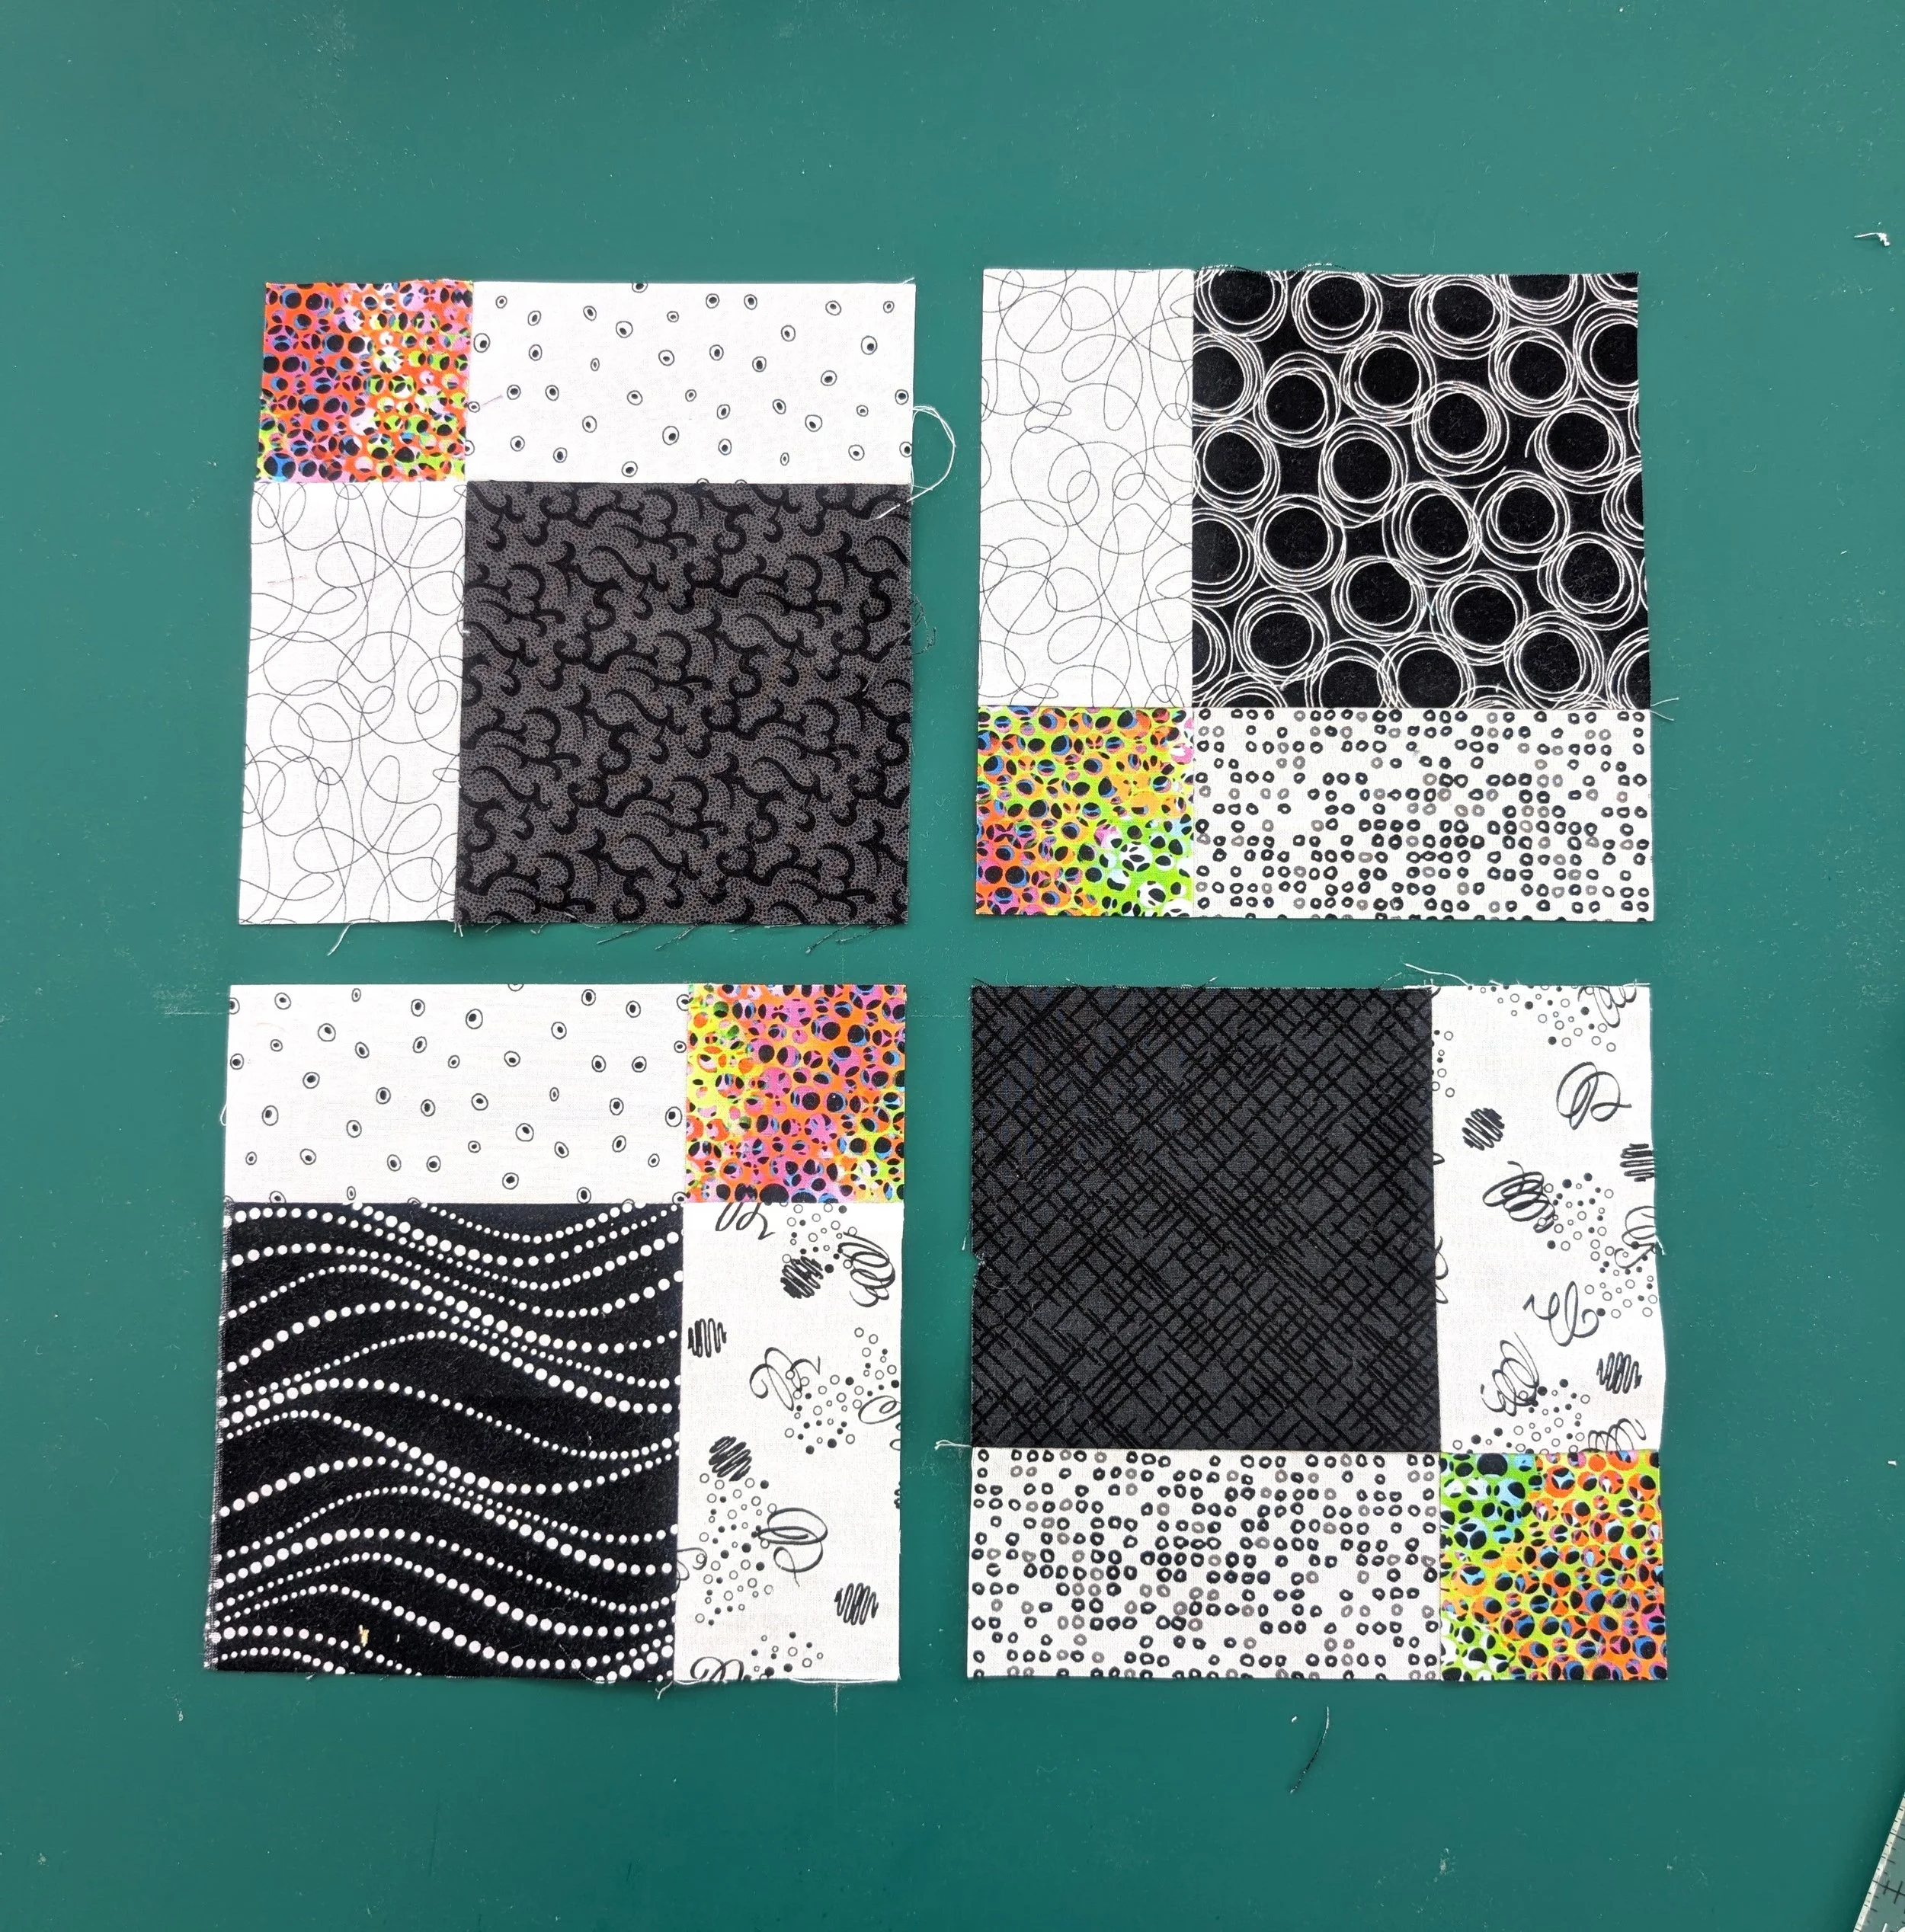
Take Main #1 at the top left and bottom right corners and rotate them until they are in the centre of the block. Now you can see why this is called the Disappearing Nine Patch. Stitch the left side together and stitch the right side together, pressing seams toward Main #1. Stitch the two segments together, but do not press this seam. It will be done later when rows are put together.
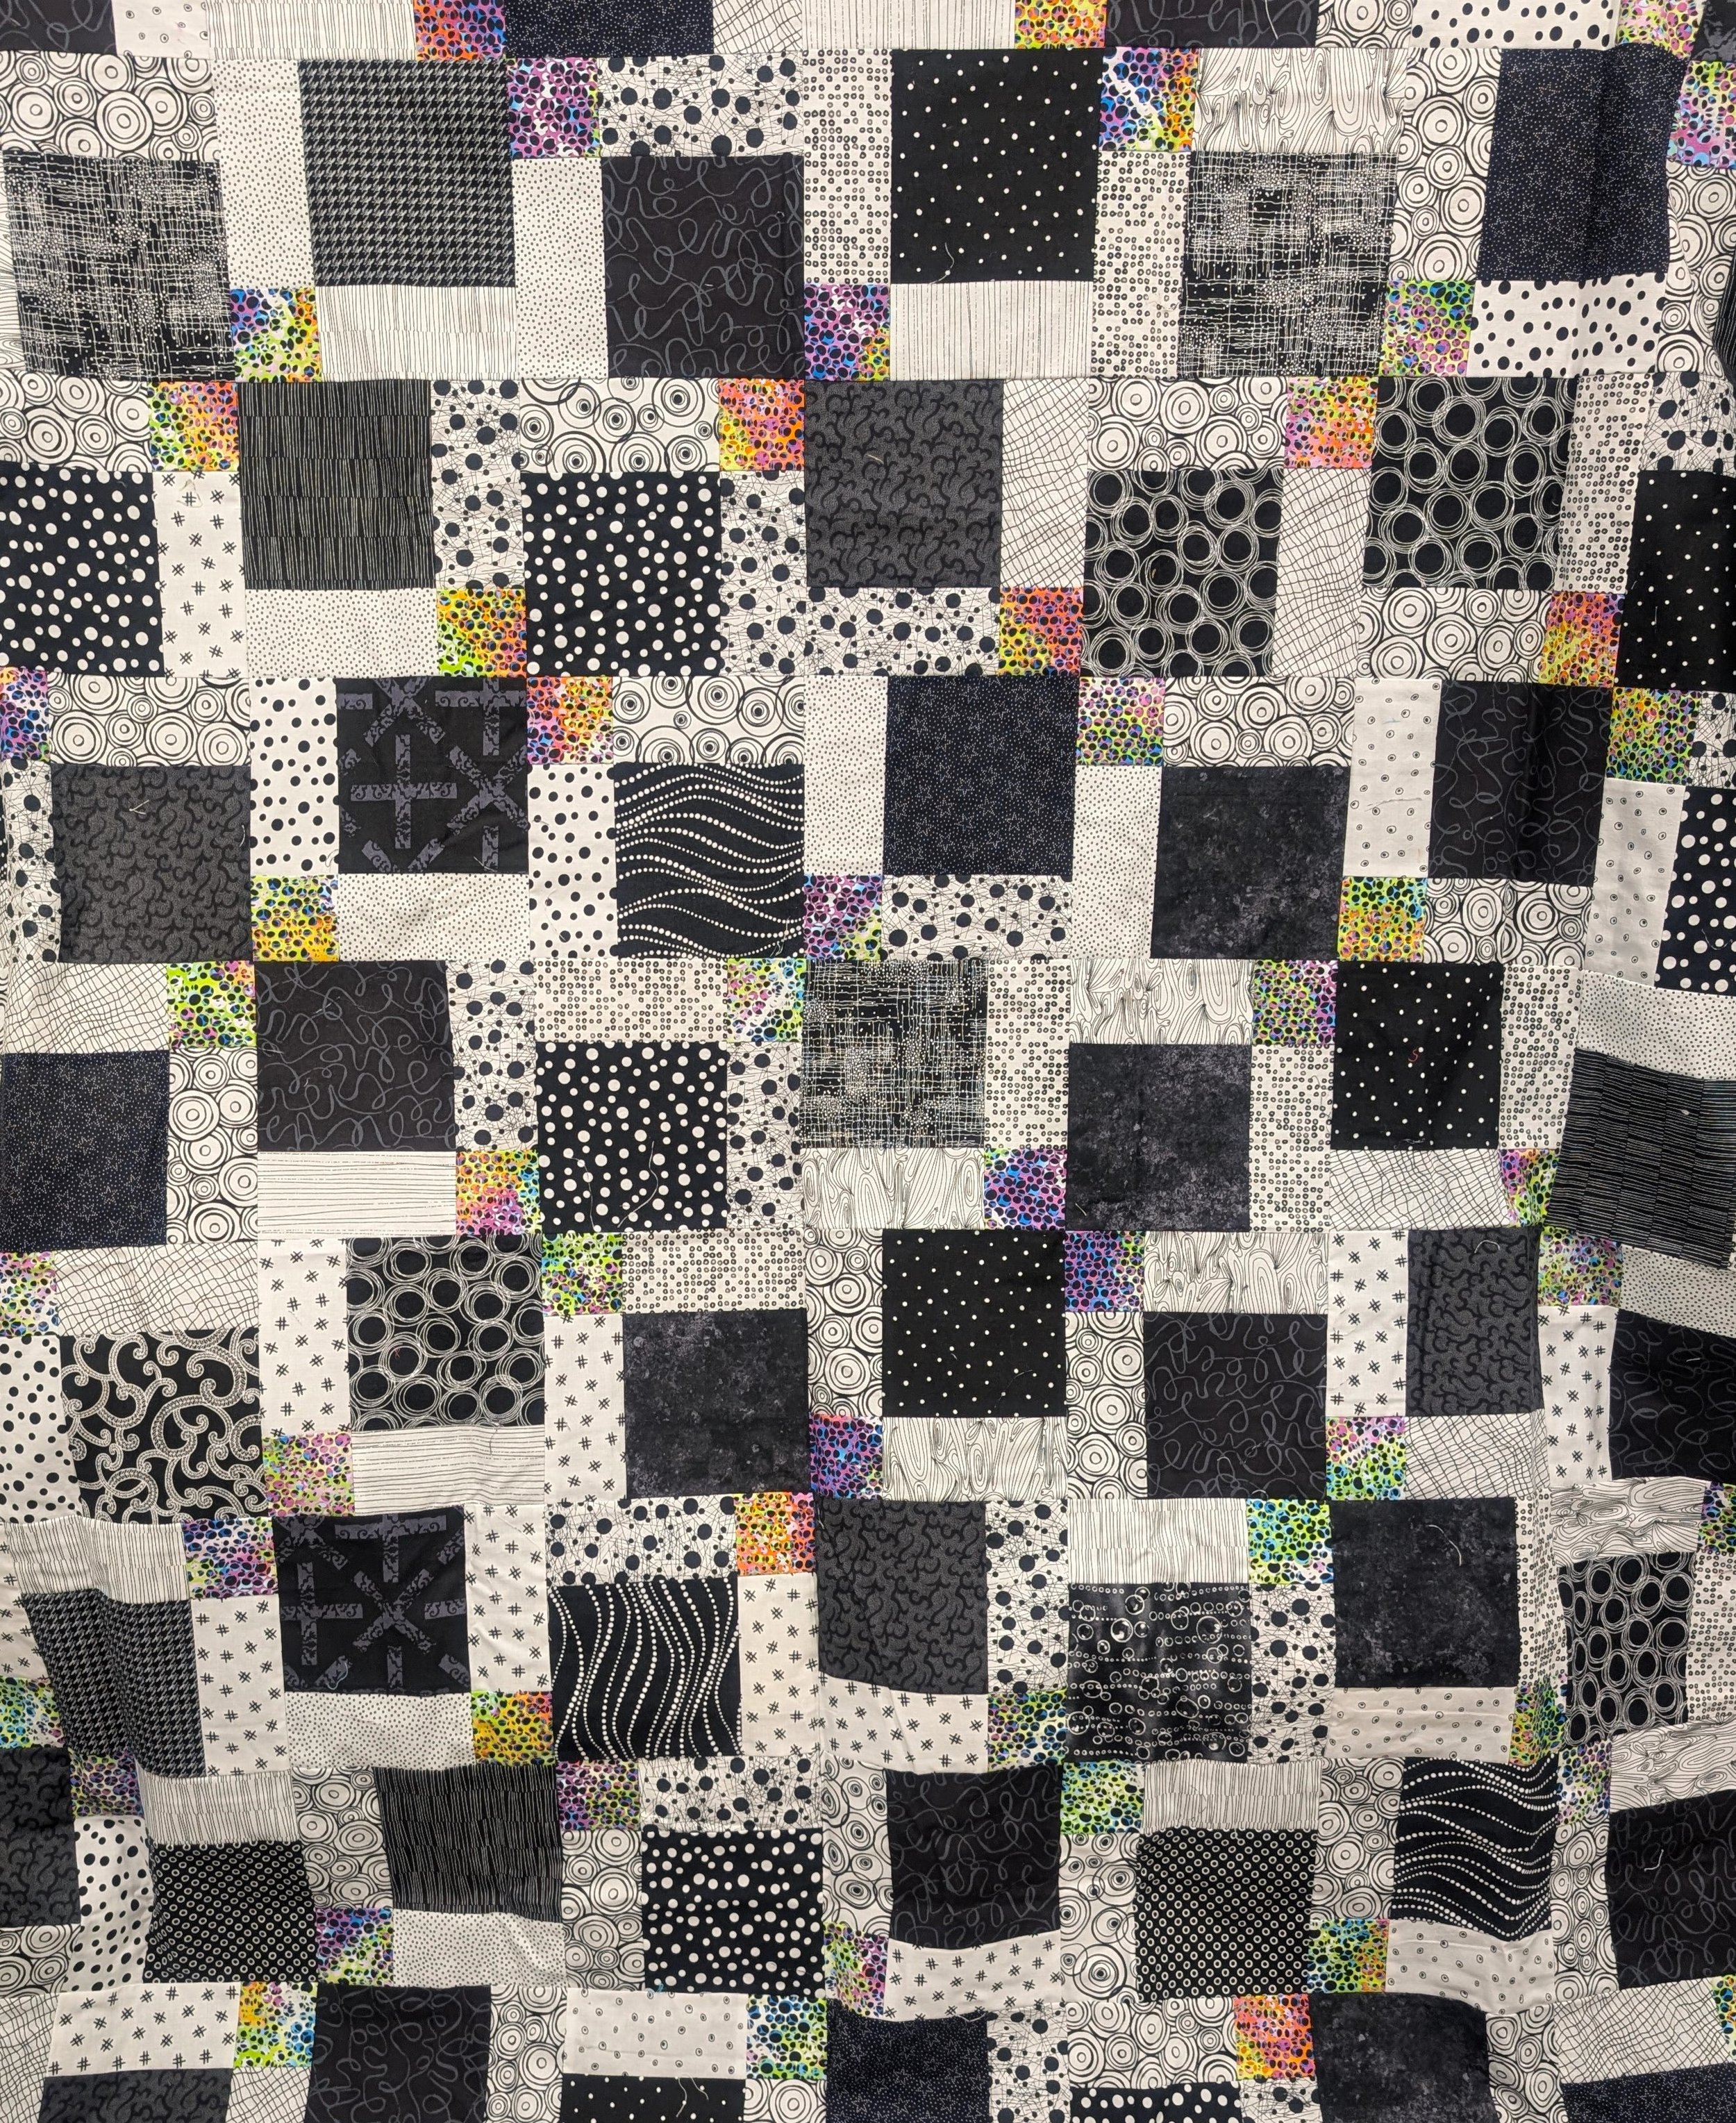
a completed DNP quilt top
Lay the quilt blocks on the floor or design wall into five rows with four blocks each with the centre seam placed vertically. Stitch all blocks in each row together, but don’t press seams just yet. Rows 1, 3 and 5 will all be pressed to the right, and rows 2 and 4 will be pressed to the left. Now you know why the centre seam of each block was not pressed before. This way all the seams are nesting from one row to the other for easier sewing. Then stitch the rows together. It is your choice to press seams in one direction or open.
Experiment with the placement of the units once the block is sliced into 4… you might come up with an interesting design. Also, I have made this quilt using 3 1/2” strips for baby quilts or lap quilts for seniors. I know this will become a go-to design for future quilts. Have fun!