
Captain Fantastic- The Elton John Quilt Part 1

photo by Greg Gorman
In July of 2018 I “semi-retired” from my full-time job at Ultimate Sewing Centre in Oshawa, Ontario. After teaching hundreds of classes over my 14 years there, and making countless samples for those classes, it was time to design and make something just for me.
For about 4 years the idea of making a quilt inspired by one of my favourite photos of Elton John (my favourite musical artist) had been rattling around in my brain. This was the time to actually put it on paper and then bring it to fruition in fabric. After all, I had been designing this quilt in my head for that long so I knew what I wanted to accomplish...and hoping that what I had in there could translate to fabric.
From the minute I started designing this quilt in my head it was already named. I was 14 years old in 1975 when Elton's album Captain Fantastic and the Brown Dirt Cowboy was released. To this day it remains my favourite album of all time so I decided to call this piece Captain Fantastic in honour of Elton and the album.
The first order of business (which actually started about 2 months before retirement) was to find out who the photographer was so I could give credit for the source of inspiration. I planned on including the quilt in our guild's quilt show that November, and had also hoped to be accepted into the Canadian Quilters Association National Juried Show, so I wanted to give credit to the original artist. Searching online kept taking me to spots where all it said was “image subject to copyright” with no source given so it took almost the full 2 months to track down celebrity photographer Greg Gorman. He was kind enough to grant permission to use his image.
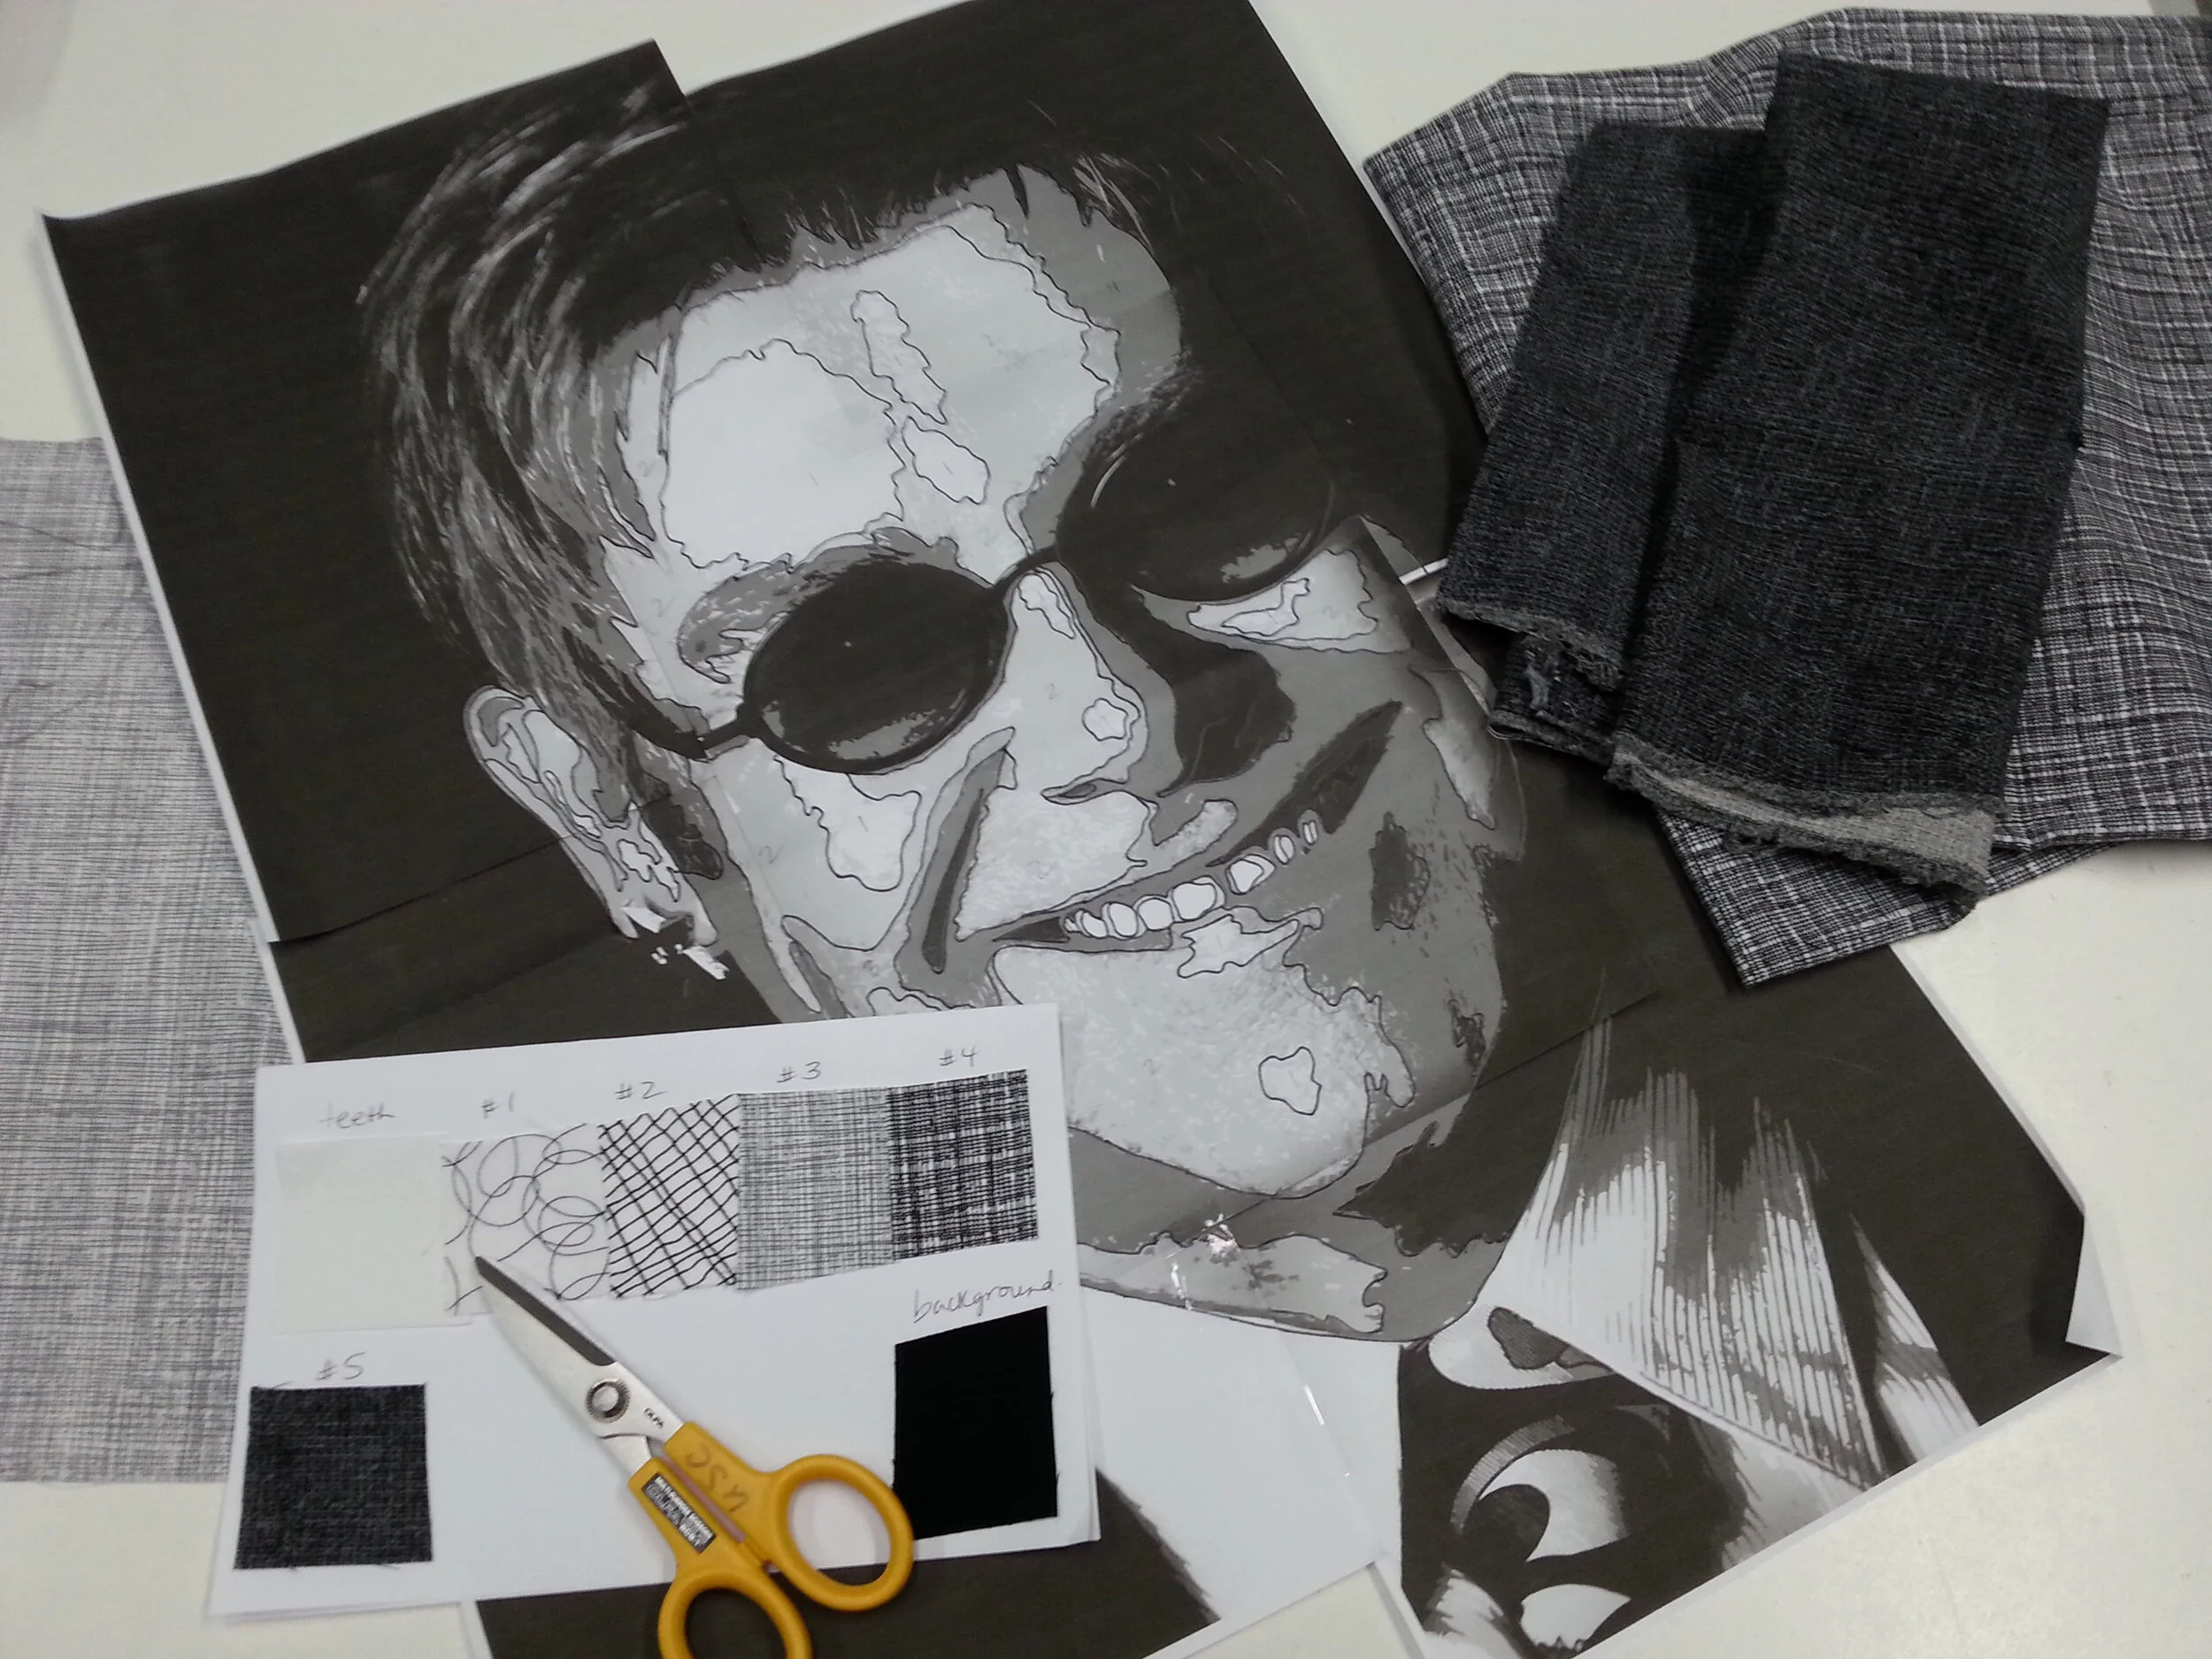
figure 1
I usually work with extremely bright colours, but this time I wanted to work in a grey scale to make it more graphic and I have no idea why...just intuition I guess. The photograph was “posterized” in black and white (thank you, Drew!), which separated the different values from each other, to more easily make a paper pattern from which to follow. With a fine black marker the first few sections were outlined and numbered from 1 to 5, with 1 being the lightest (figure 1).
When choosing fabrics I actually photocopied fabric samples that were taped next to each other on a piece of paper until I found a value combination I was happy with. The fabrics selected were then glued to a master sheet for reference (figure 1).

figure 2
Because there were going to be multiple layers of fabric appliquéd one on top of the other I needed to use a very fine fusible web. Misty Fuse, in both black and white, was perfect for this project because it allowed the fabric to remain soft and supple even with multiple layers fused together, and from previous experience I also knew that the needle wouldn't gum up very much when free-motion quilting using this great product.
For those of you who do a lot of fusible appliqué you know that it usually builds from the bottom up. Because I didn't want any of the dark fabrics to shadow through the lighter ones I had to do a bit of reverse appliqué for the first 2 layers. You will notice on the nose, chin, cheeks and forehead that holes were cut out of fabric 2 and a piece of fabric 1 (the lightest) was placed underneath (figure 2). This way none of the grid lines from fabric 2 would shadow through fabric 1. After that all the other fabrics were added in the usual way one on top of the other because each additional layer was darker than the previous one. I absolutely love my Olfa scissors (shown in figure 1) for all my work done with fusible web. The serrated edges are super sharp and grip the fabric well so there's no slippage when cutting out the shapes.
Black on black print fabrics were “auditioned” to make sure that the value was right for fabric # 6 (hair) between the head and the plain black background (figures 3 & 4). And you can't believe how many blacks there are with blue, green, brown and even purple undertones. The jacket fabric was chosen the same way (figure 5).
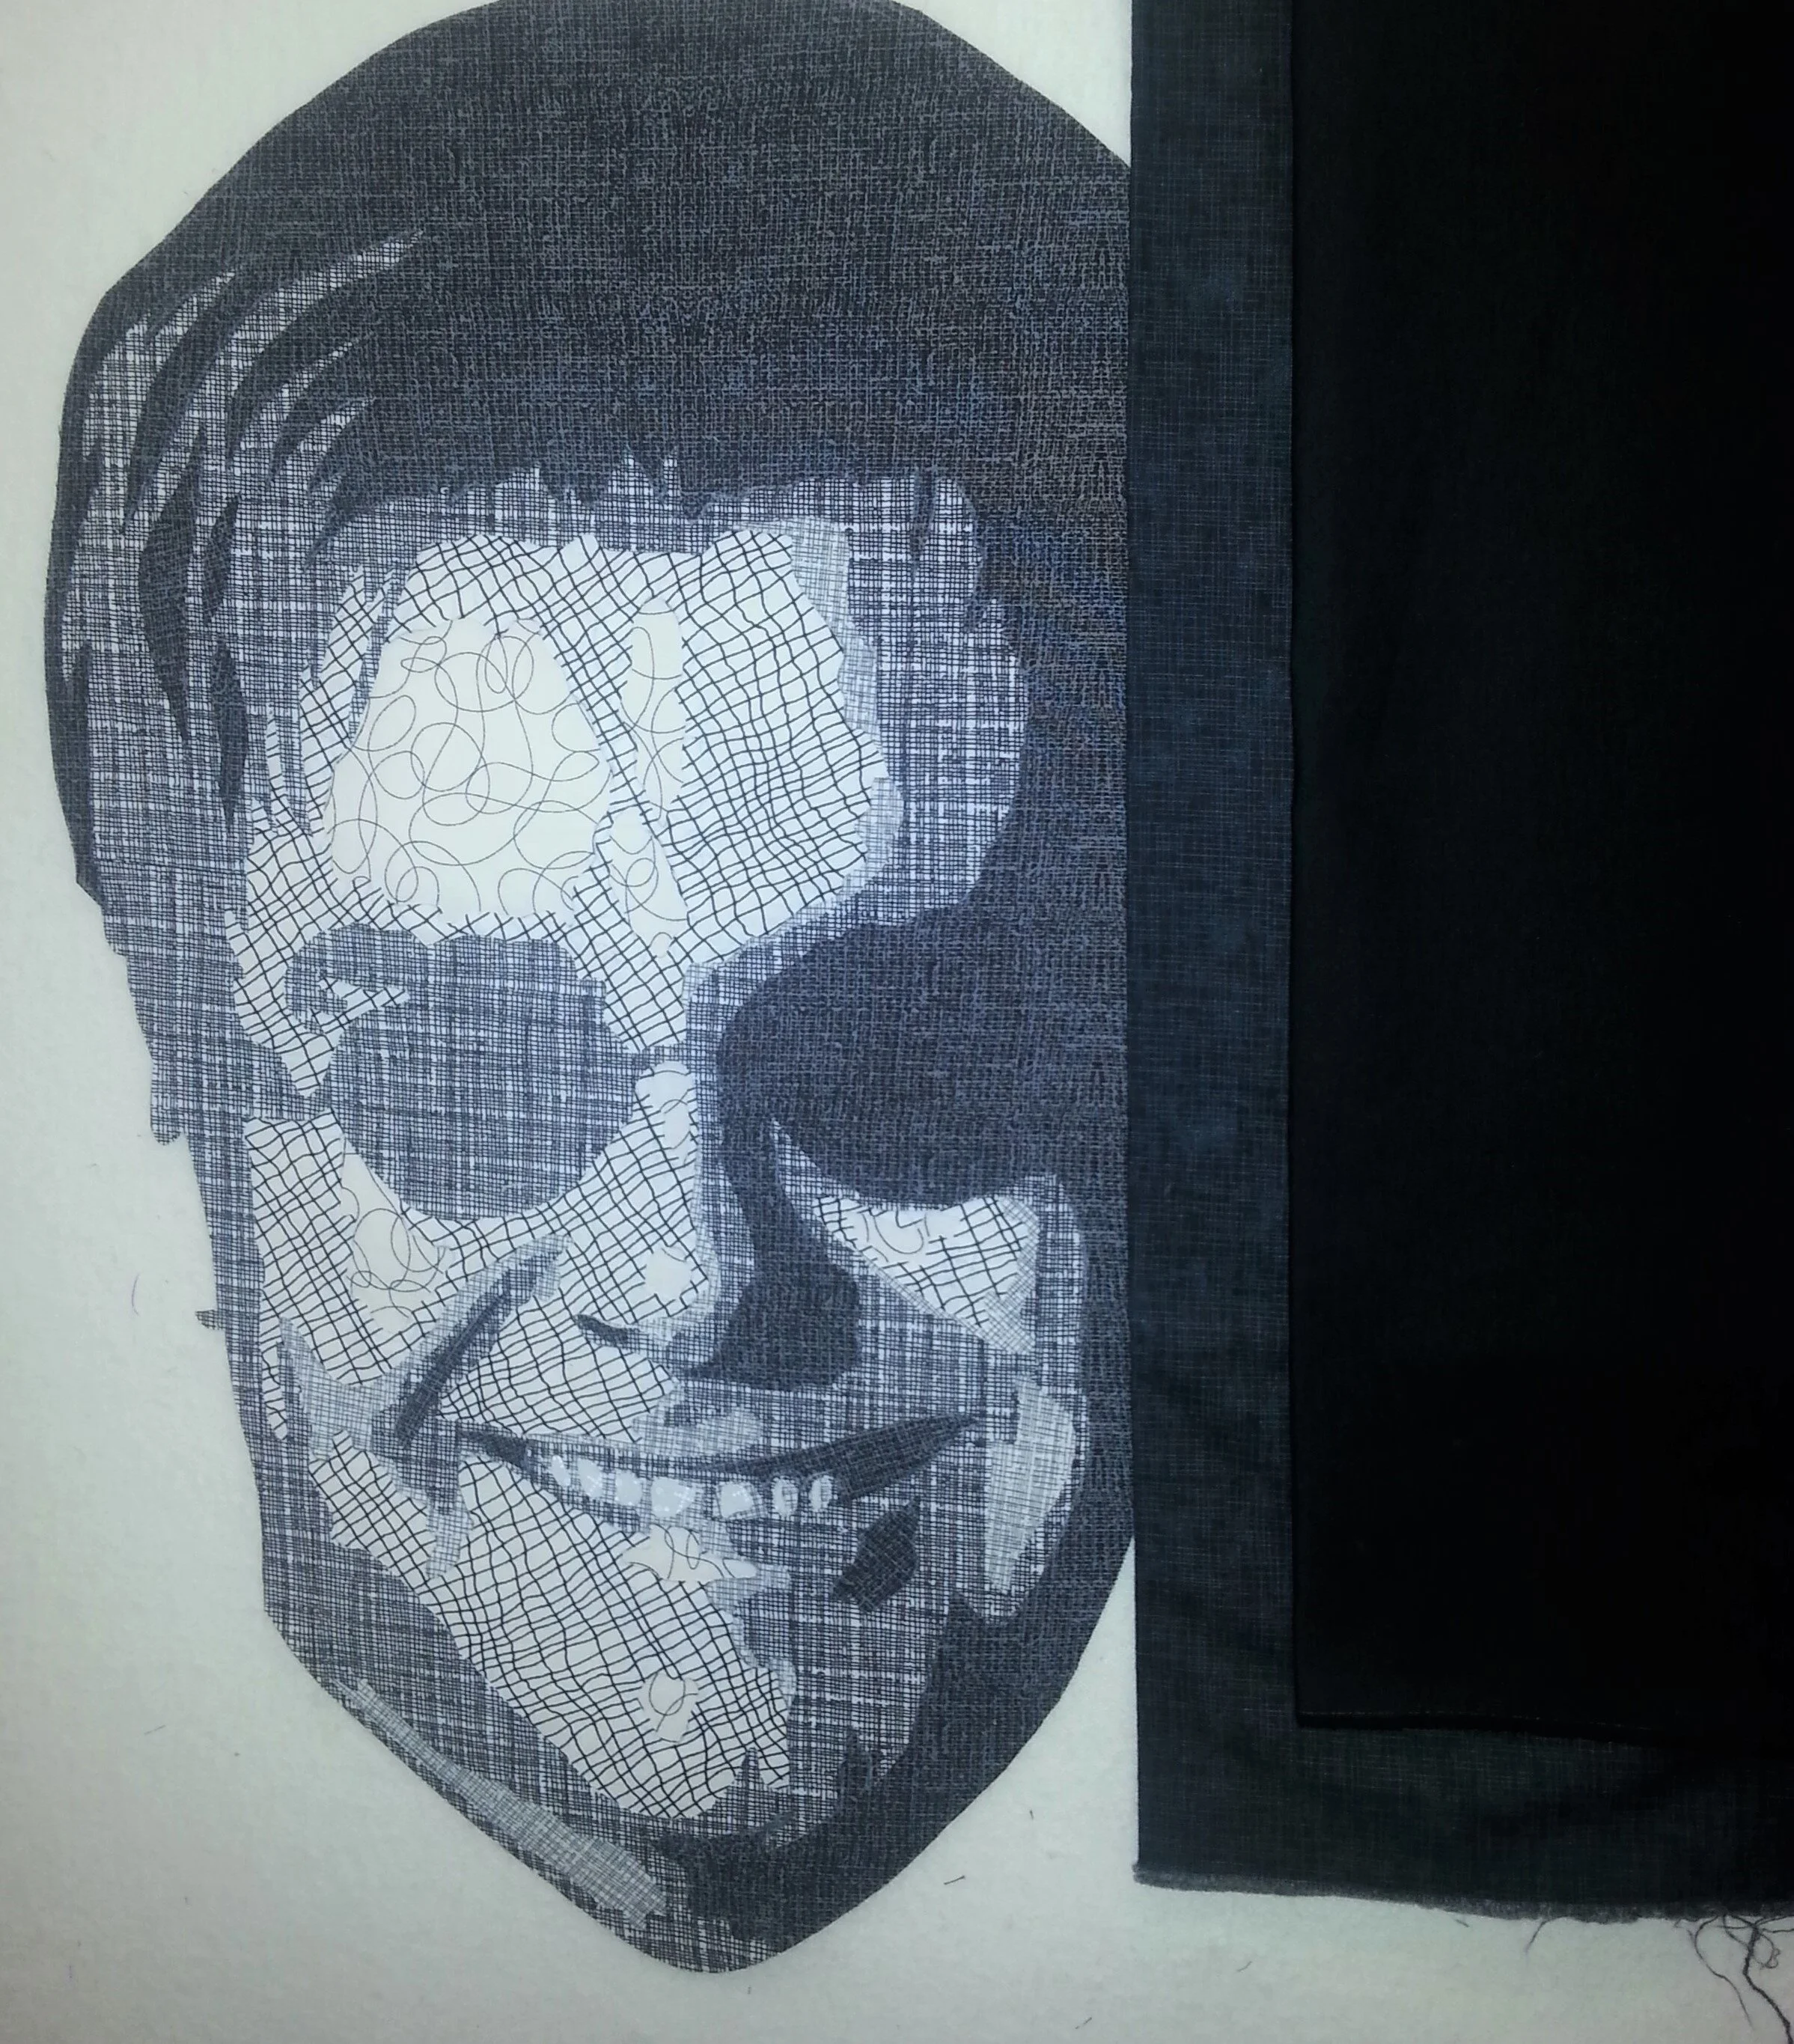
figure 3

figure 4

figure 5
The one spot where I wanted a more graphic print was for Elton's tie. Even though I really liked the one with the circles because the tone was right, my daughter, Kate, said it looked like fish eyeballs, so of course that's all I could see after that. I chose a different fabric and I have to admit that it looks much better than the eyeballs! (figures 6 & 7)
Once all the appliqué was completed the quilt was layered, pin-basted and ready for quilting. I knew that I did not want the quilting itself to stand out, but to just add texture to highlight the design. My thread choice for free motion machine quilting was Wonderfil Invisafil because it is super fine (100 wt), stitches beautifully and offers wonderful texture.

figure 6

figure 7
As with all of my special projects a quilting sample piece was made that incorporated the actual fabrics, batting and backing that were to be used in the quilt to select different threads (types and colours) and to check thread tension. You will notice that I've also written on the fabric the colour numbers of each of the Invisafil threads that I planned on using. This way I could tell if the thread colour blended or stood out depending on the effect I was looking for (figure 8).
Free motion quilting was the next step, and aside from doing all-over loops and swirls in the background for texture, and quilting to show the folds of fabric on his suit, a treble clef and staff were quilted behind his head since the music comes from Elton’s genius brain. The hanging sleeve and binding were done in my usual way.
Elton John is known not only for his incredible music, but for his extravagant costumes and love of glitz and glamour. Approximately 450 small jet black crystals were added every 1/4” around the perimeter next to the binding to add the necessary Elton sparkle without overwhelming the design (figure 9). Unfortunately, after doing all that work, they're not very noticeable in any of the photos. I used the Decorative Touch applicator and Swarovski crystals that I purchased at Ultimate Sewing Centre, but here is another similar brand.

figure 8- choosing threads

figure 9- crystalizer and crystals
I'm incredibly happy that my mind's vision had come to life exactly as planned 4 years before. Join me for part 2 to see the complete Captain Fantastic quilt and hear about its incredible, unbelievable story.