
Borders for Prudence
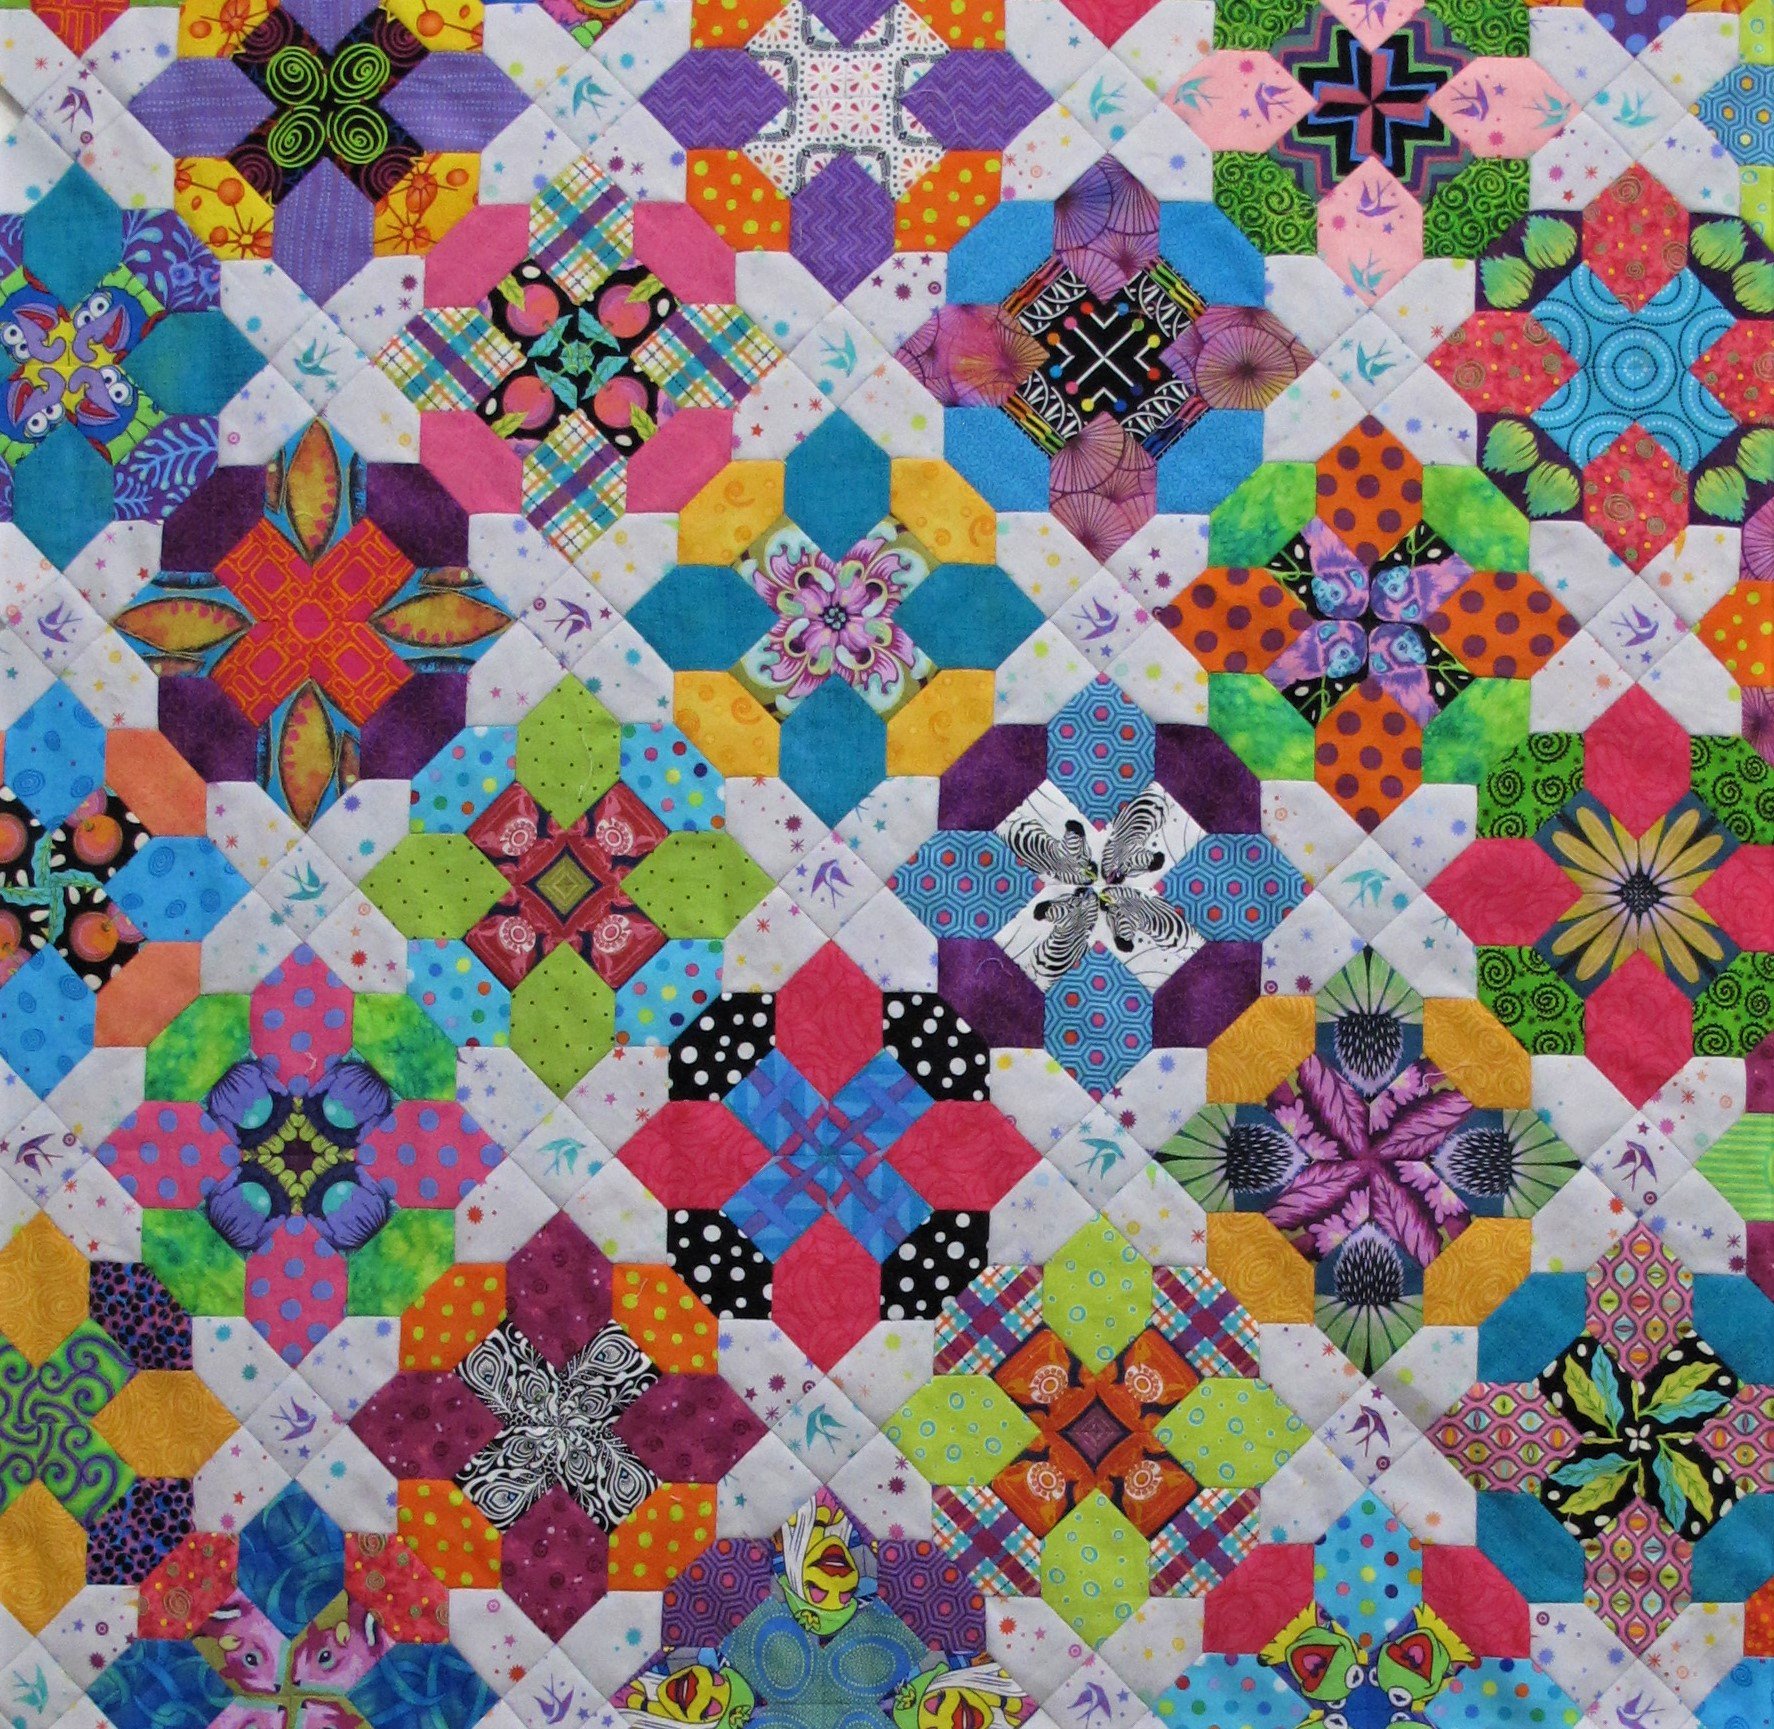
Well, I finally figured out how I wanted to finish off the edges of my Prudence quilt by Lilabelle Lane Creations! I finished all the English paper piecing (EPP) for this project ages ago, but didn't know how I wanted to finish the edges. After all that work hand-piecing the individual blocks, and then all the hand work to put the blocks together, I wasn't willing to just lop off all the edges by making them straight. I still wanted a border...just not done the traditional way.
Choosing a border colour was a bit of a job in itself. Of course I wanted to use one of my favourite colours, but purple just didn't cut it for some reason, black was too stark, and a warm yellow-orange didn't have the effect I was looking for. But my trusty teal was the one that I thought looked best and also highlighted the individual blocks really well.
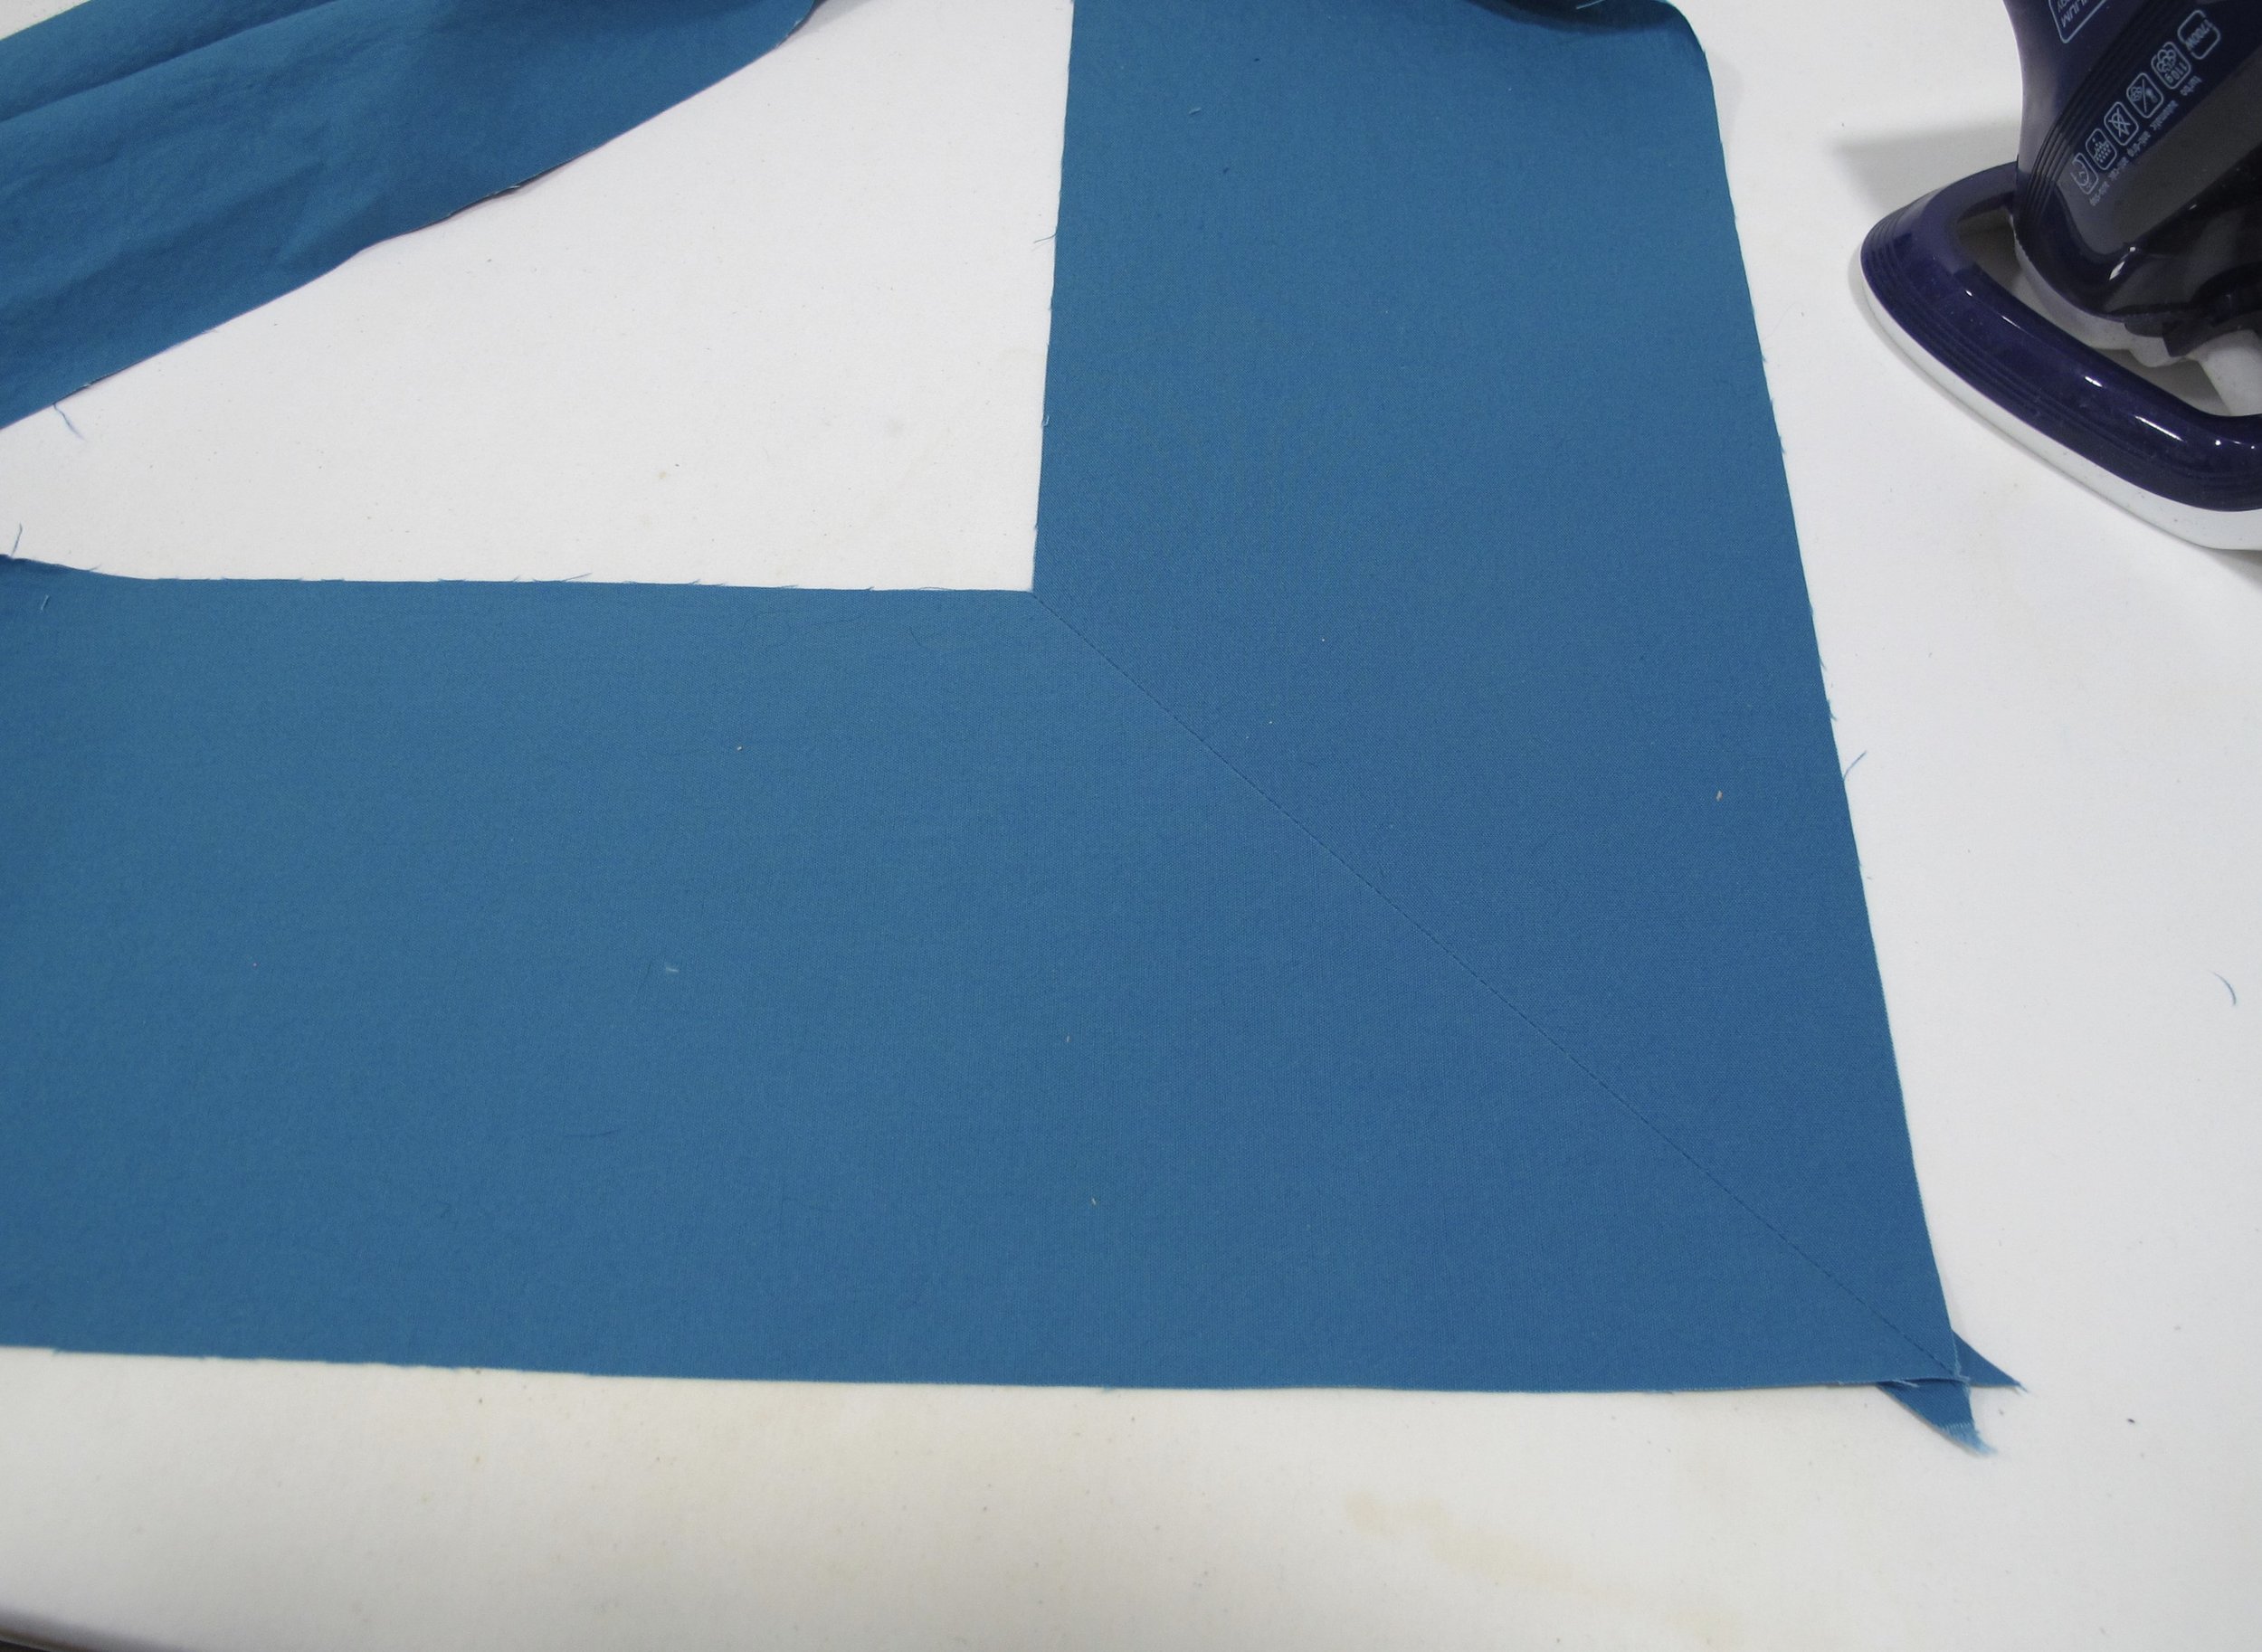
I decided that I wanted to appliqué the quilt top to mitred borders. That meant that I had to make mitred borders that weren’t attached to a quilt. I know...it sounds weird, but that's the way I think! For the width of the border I measured from the outside point of the quilt top to the inside point around the edges, and added 4” so there would be a substantial amount of fabric around the outer edges along with a proper amount needed behind the appliqué section to stabilize it.
Usually I do a ¼” seam allowance on mitred borders, but this time I made them ½”. This allowed them to lay flatter as I was doing the appliqué across the seam. The photo shows the white 45º line on the ruler sitting along the edge of the 2 border strips that are right sides together to demonstrate how the line is drawn for sewing. Next to that is the stitched line. Once the seam was stitched the seam allowance was trimmed to ½” and then pressed open. (Yes, that is the same fabric in all photos…clearly I’m not a great photographer or they’d all look the same!)


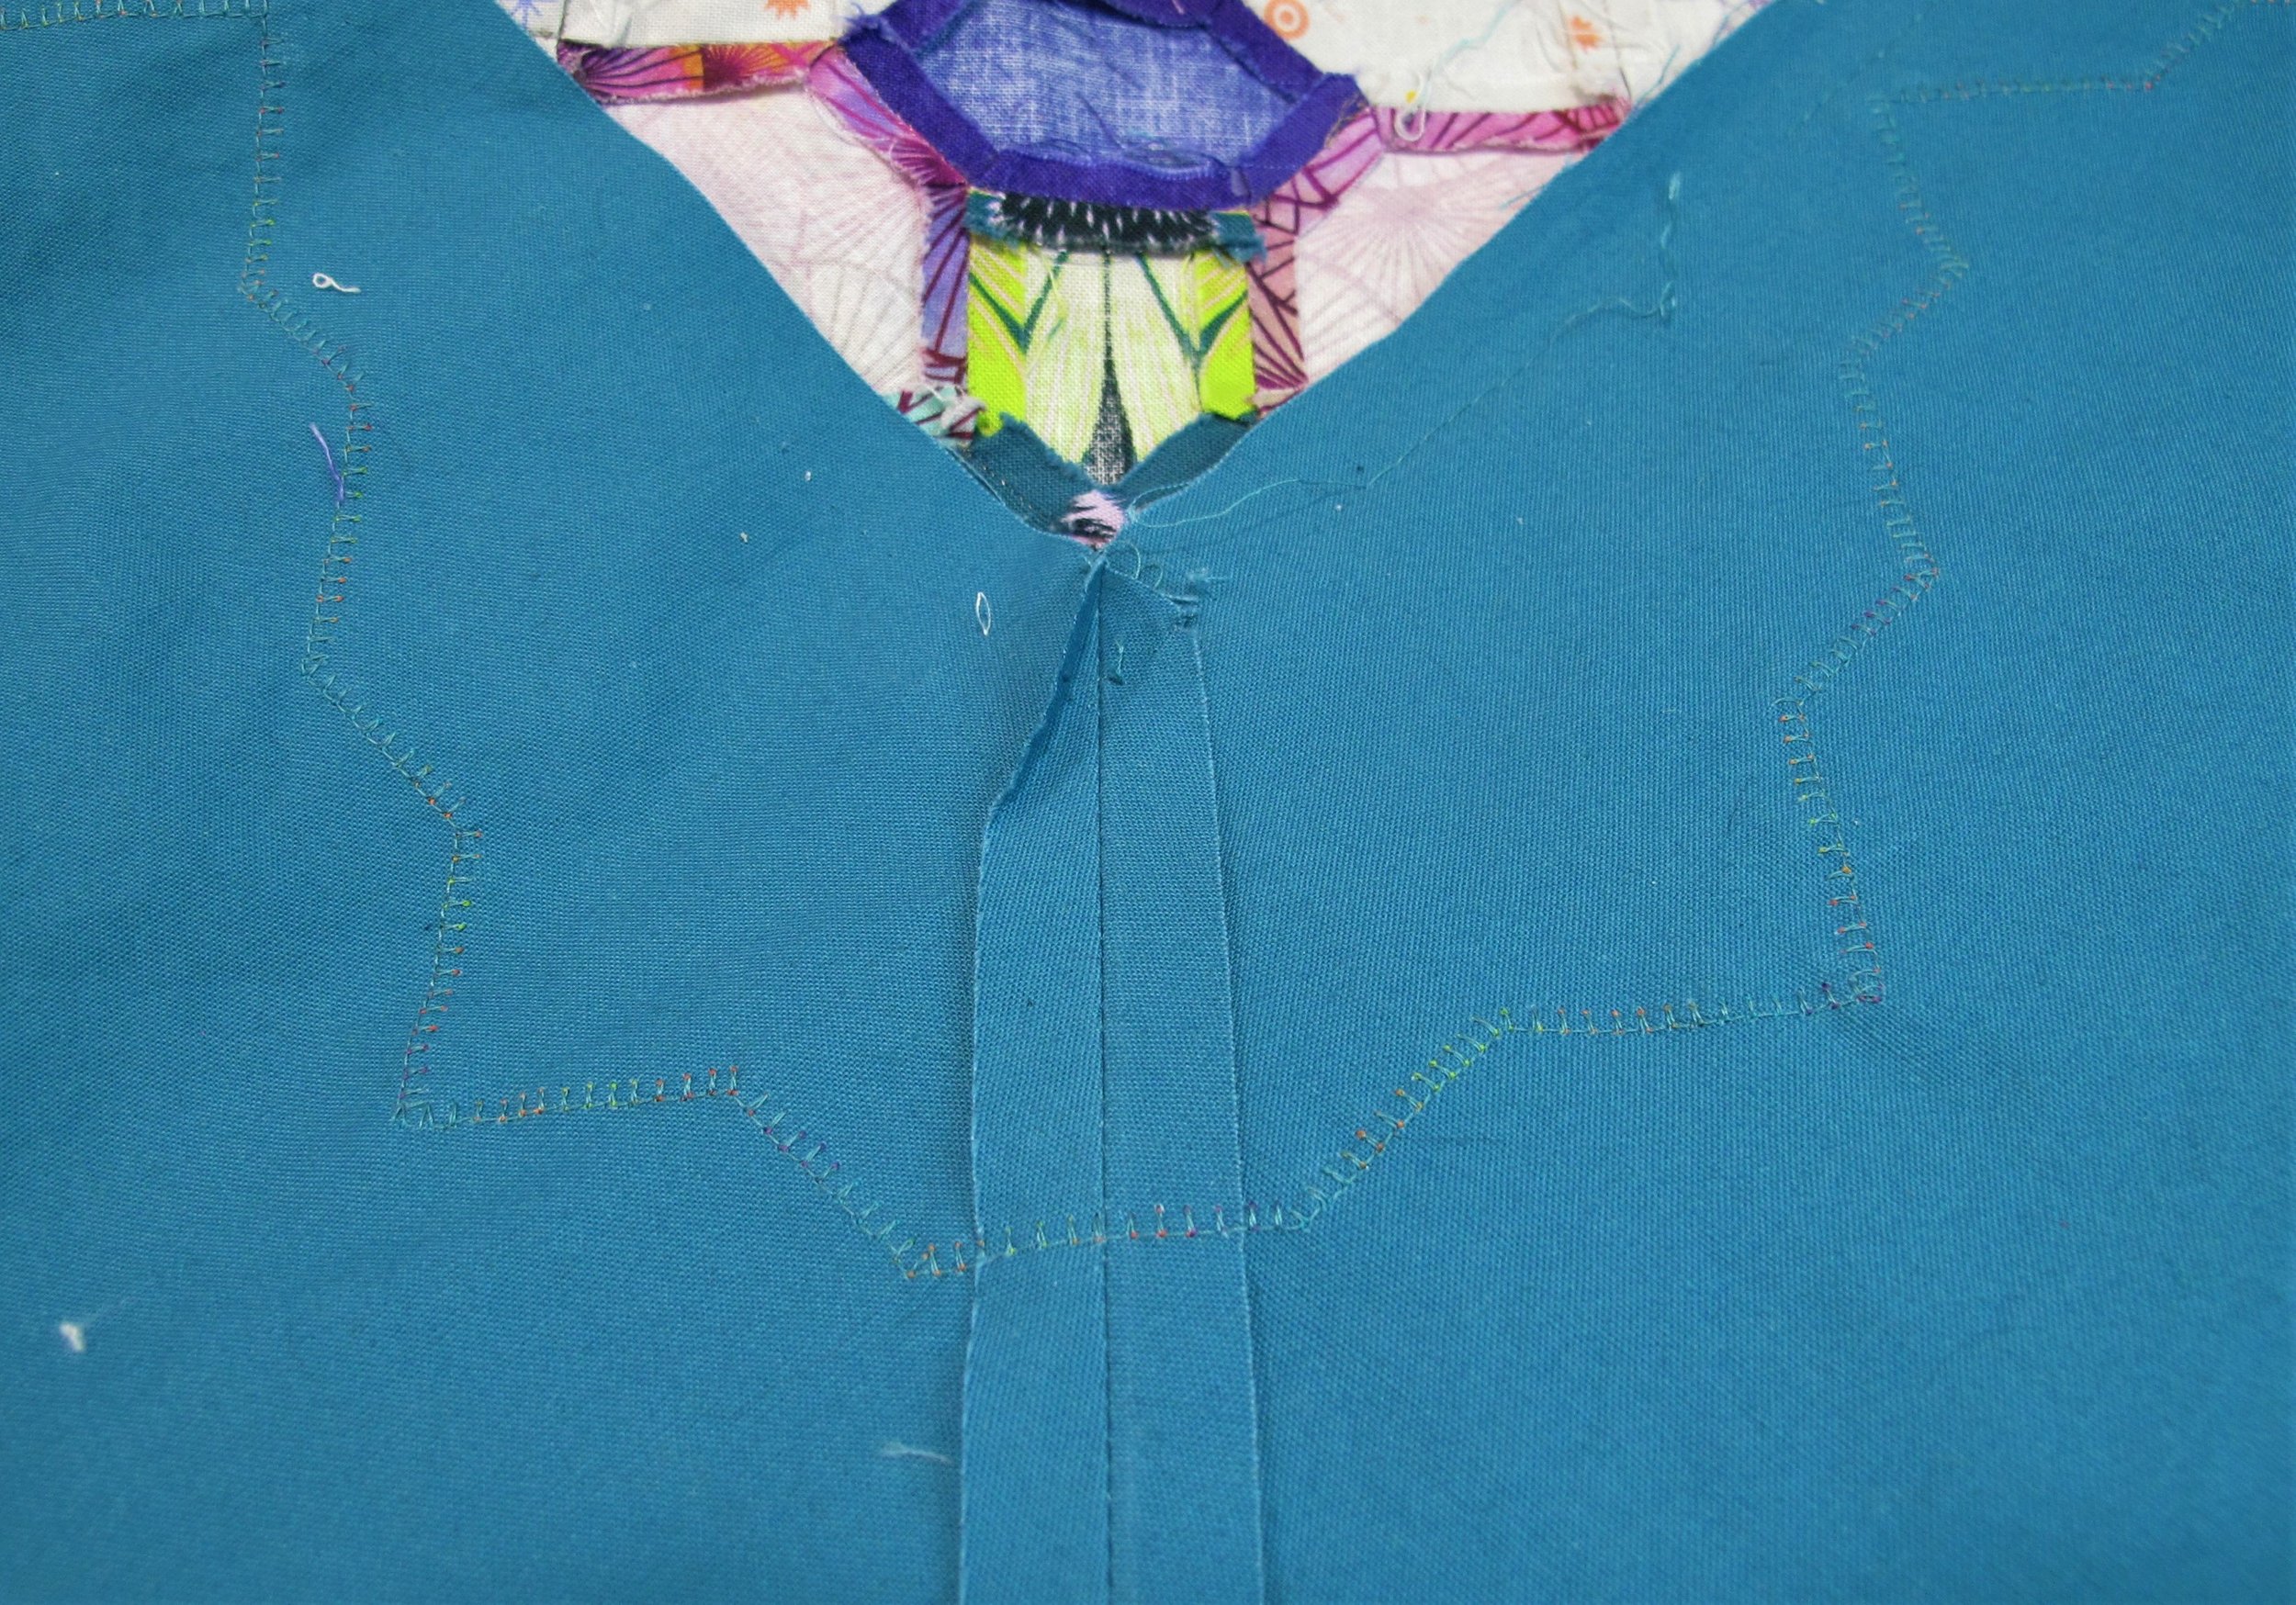
A chalk line was drawn 3” in from the outside edge using a Chaco Liner, the outside points of the quilt top edges were placed right next to the line and then the quilt top was pinned to the borders. Once the entire quilt was pinned I used an extra long basting stitch on my machine to anchor the quilt to the border for doing the appliqué without having any pins in the way. The outside edges were then glued in place temporarily using a glue-pen by Sewline so none of the fabric shifted while sewing.


There are a couple of spots where teal in blocks meet up with the teal border. It was important to me that there was a demarcation line between the blocks and the border and this was achieved by using my favourite variegated thread, Silco #SCM27 (Sunset) by Wonderfil Threads. For those of you interested in the size and type of stitch used, I have a Janome 6700P and used the blanket stitch in Mode 1 Stitch 7 with a 2.5 stitch width and 3 stitch length. Check out a previous post about successfully working with Silco and other more challenging threads.


Once the appliqué was completed the basting thread was removed and the excess border fabric was trimmed from behind. Duck-billed scissors, like the Floriani ones shown in the photo, are helpful. The duck-bill sits on top of the seam allowances of the blocks so they, and the quilt top, won't be accidentally cut into as the border edge is trimmed. My friends who do a lot of machine embroidery find them really useful as well.

Now all that's left to do is quilt it! I've chosen to use Fireside in a beautiful turquoise colour. This is MY quilt (yes, I'm being selfish!)...and I want it to be cozy and comfy for snuggling under while watching TV or reading. Once it's finally finished I'll share it with all of you.