
Fidget Quilts

Have you ever made a “fidget quilt”? Our guild charity coordinator, Wendy, was approached by the Ajax/Pickering Hospital to see if our guild would be interested in making some for their dementia patients. These small quilts measure only about 18-20” square, but they are jam-packed with items that help stimulate the dementia patients and also help with their dexterity. I was intrigued so I decided to make one.
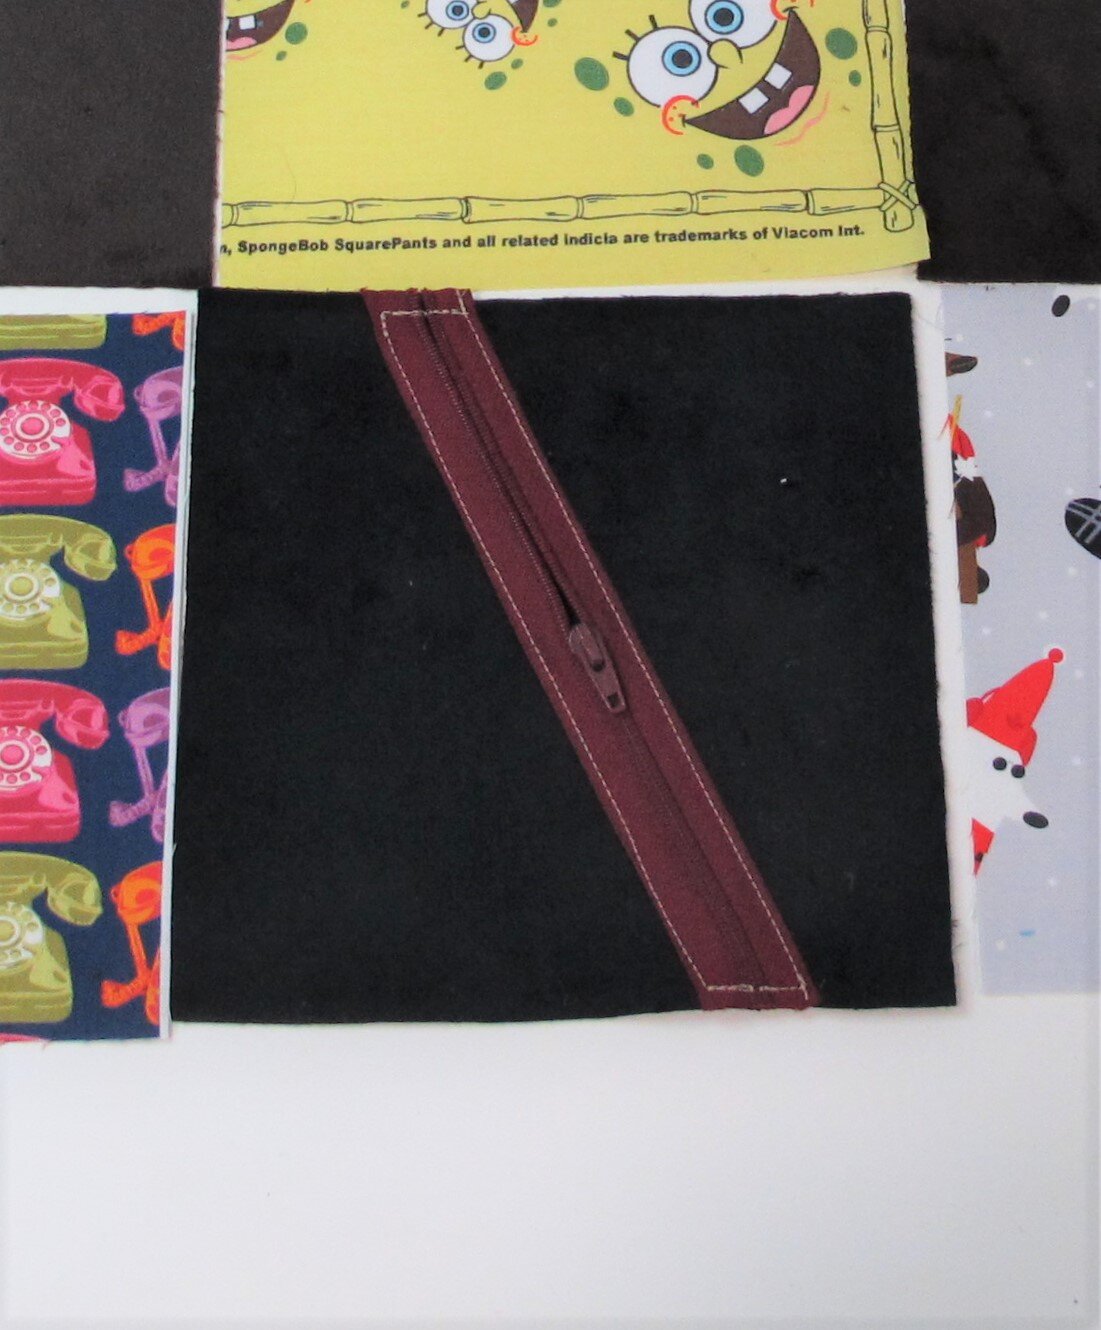
We were given some basic instructions and some ideas for incorporating different items into our little quilts. Ribbon tags, empty thread spools, zippers, buttons, differently textured fabrics as well as fabrics with pictures of recognizable things were recommended to keep the patients' minds busy.
There's a bunch of “stuff” in the drawers in my sewing room of things I kept not knowing what I would ever do with them. Well, I finally had a reason and a purpose for using these items. There were empty thread spools, leftover ribbons and trims from old projects, an elastic dollar store headband that I never wore, buttons and zippers taken off of well-worn garments, and even a couple of clasps taken off an old duffle bag that was falling apart.
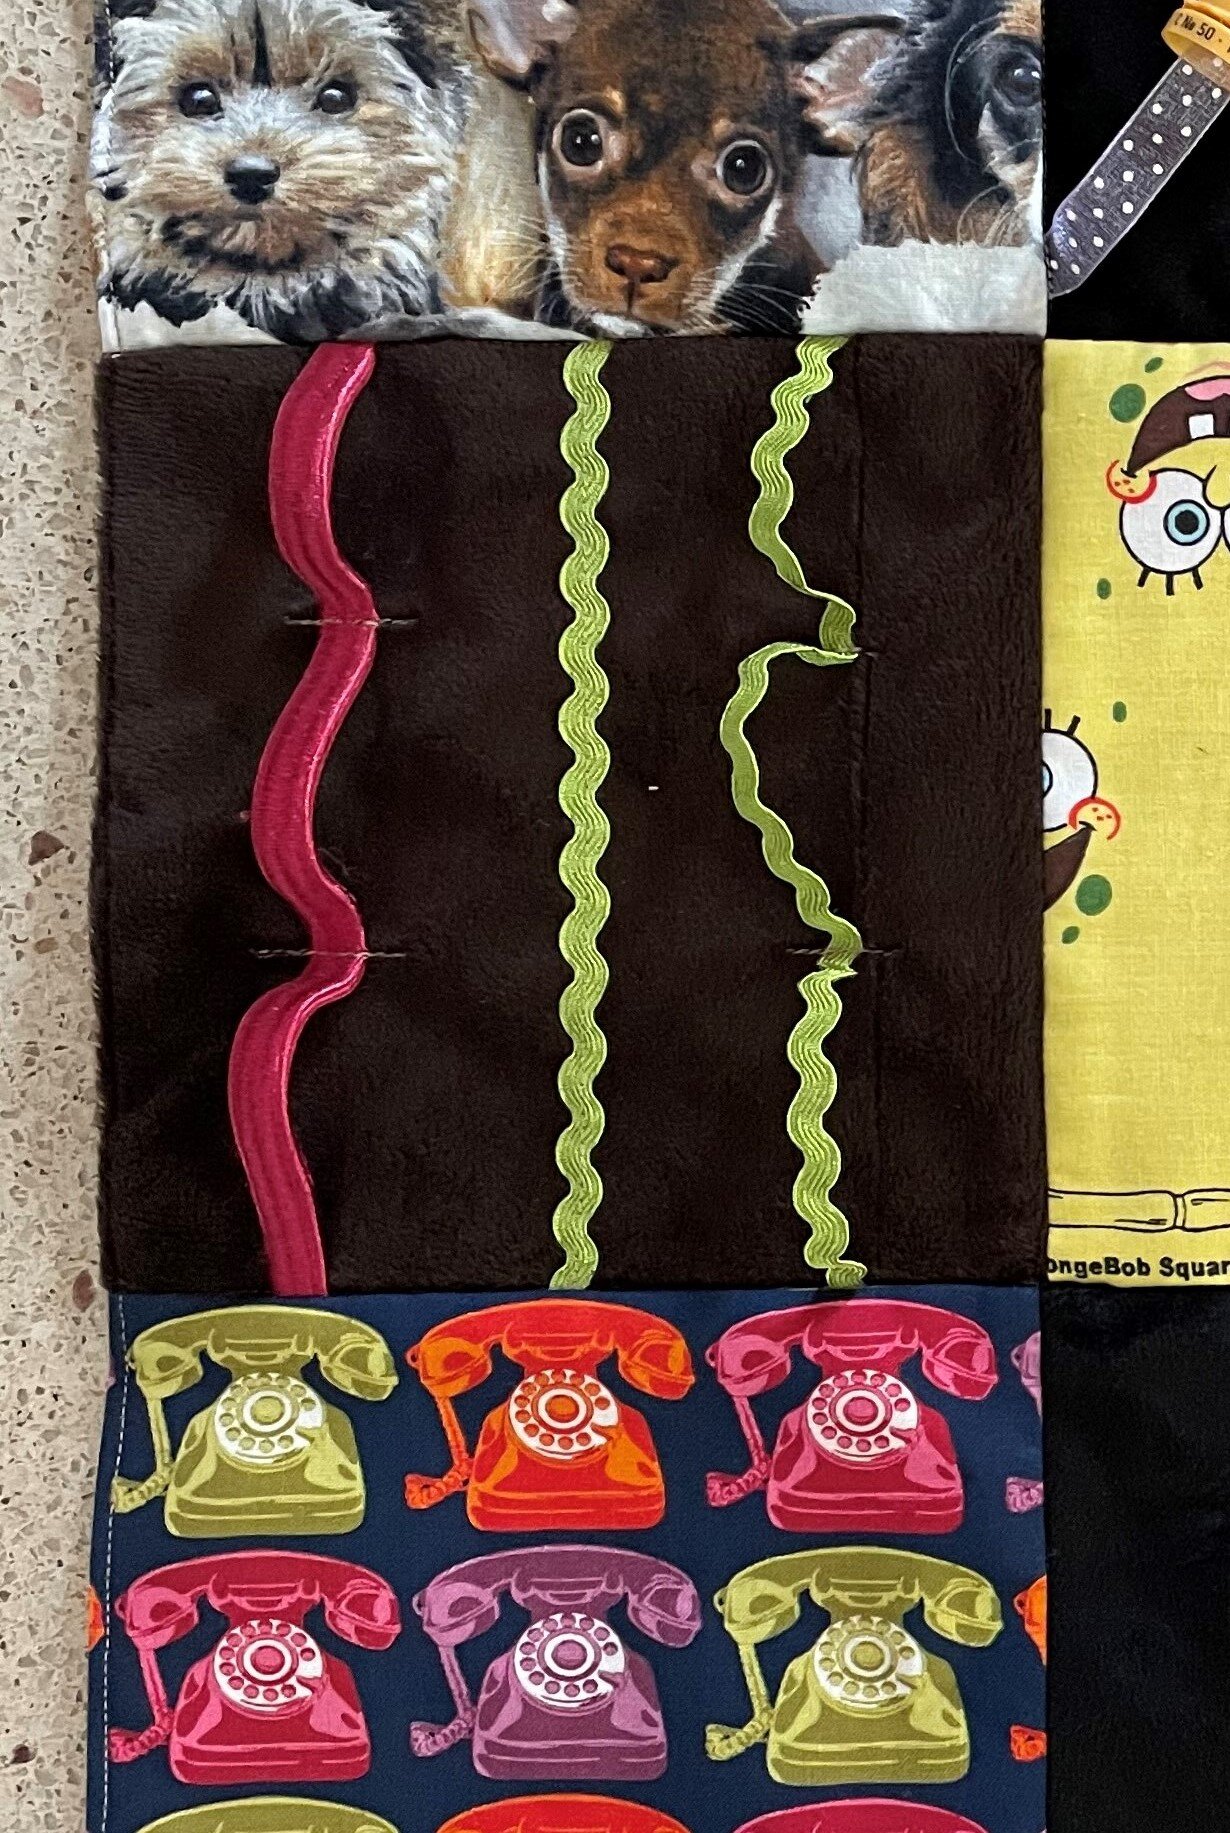
First, I cut 6 ½” squares from my chosen fabrics. I had some black and brown plush Minky fabric left over from a couple of t-shirt quilt backings, some great printed cottons (puppies, sewing machines, rotary dial phones and a hockey playing moose), and even an old Spongebob Squarepants bandana.
The plain Minky was great for showcasing the fidget items and its fuzzy texture was perfect because it was so tactile. On one square a zipper was edge-stitched diagonally across the square. On another square a piece of rick-rack was stitched flat in the centre, another piece of rick-rack was looped and stitched down between the loops, and an elastic headband was stitched the same way. On the third piece of Minky a ribbon was threaded through a couple of empty plastic thread spools and stitched to the edges and a couple of pieces of leftover ribbons with felt dots on them for texture were stitched down. The fourth plain square remained empty until the little quilt was put together for another recycled addition.
I had some leftover polyester webbing from an old project and a couple of black plastic snap hooks and triangle rings from an old duffle bag. They were stitched together to create a clasp so the fidget quilt could be easily attached to the arm rest of a wheelchair or walker.


The squares were then sewn together to create the little “quilt top”, the webbing units were sewn into one corner and the backing fabric (red flannelette) was cut to the same size as the top. With right sides together the top and backing were sewn together leaving a space large enough for turning. Corners were trimmed, it was turned right side out, pressed and the opening was stitched closed while edge-stitching around the perimeter. Then the layers were stitched together on the horizontal and vertical seams to hold them together. I did not use batting or any other stabilizer, but many people do.

I had a piece of faux-leather with tiny metal studs all over it that I saved from an old small purse of Kate’s so that was stitched down on an angle so it wouldn't interfere with the design of the moose and sewing machine fabrics. Then 3 large buttons were machine stitched to the same block as the zipper. ***Sharon's hint: place a dab of clear glue on the back and front stitches of the buttons so they can't easily be removed.
It was surprising how quickly this fidget quilt came together and I loved that it incorporated things that would normally be tossed out...recycling at its best! Check with your guild to see about providing your own local hospital or long term care home with some of these great items to keep the seniors “busy”. If you need some more guidance just check out “fidget quilts” and you'll find all kinds of sources for ideas. Have fun!